Transcripts
1. Welcome to the Pattern Party!: Hi, friends. Are you ready to celebrate all the birthdays
that happen in your life? I'm just getting over our biggest birthday
season in my family. Lots of birthdays. I decided
to do a class based on celebration and fun and parties because I love
to throw a good party. But I also love making
designs for these parties. Welcome to H Patty half
drop pattern party in Affinity Designer
two for Spoonflower. Today, we're going
to be working on half drop patterns and celebrating those in
your design work. Imagine your pattern as a
really fun dance party. But instead of people, you've got your squares, and in a regular pattern and all your squares are
lined up perfectly. But in this dance party, we want to shimmy things
a little and move them just off to the left or off to the right,
down a little bit. It's a little party. Instead of those
straight perfect lines, you have a little bit of a
zigzag added to your design. That's what a half drop
pattern looks like, and it can add that extra flare to your
dance party or pattern, and I have people saying, Wow. Today, I'm going to walk
you through downloading your perch handmade template
through affine designer, and I'm going to show
you how to create your own template for
future reference. You know just how
to do it just in case you accidentally
lose that template. Because I know for me, sometimes I actually work in it and Now I don't have it anymore. So I'm going to
help you with that. We're going to look at
inspiration on my Unsplash page. You know how much I love splash
for finding inspiration, and I have a new collection
all party related. Okay get those disco balls out, get those umbrellas going, find the inspiration
because it's okay to have that inspiration instead of trying to
think it up on your own. We're also going to work together to upload our
designs to spoon flower. Spoonflower is that
great fabric website where you can upload
your designs and have them shipped off and printed for any occasion and whether
it's wallpaper or fabric, your designs come to life. With your own collection of fabric ready to sell
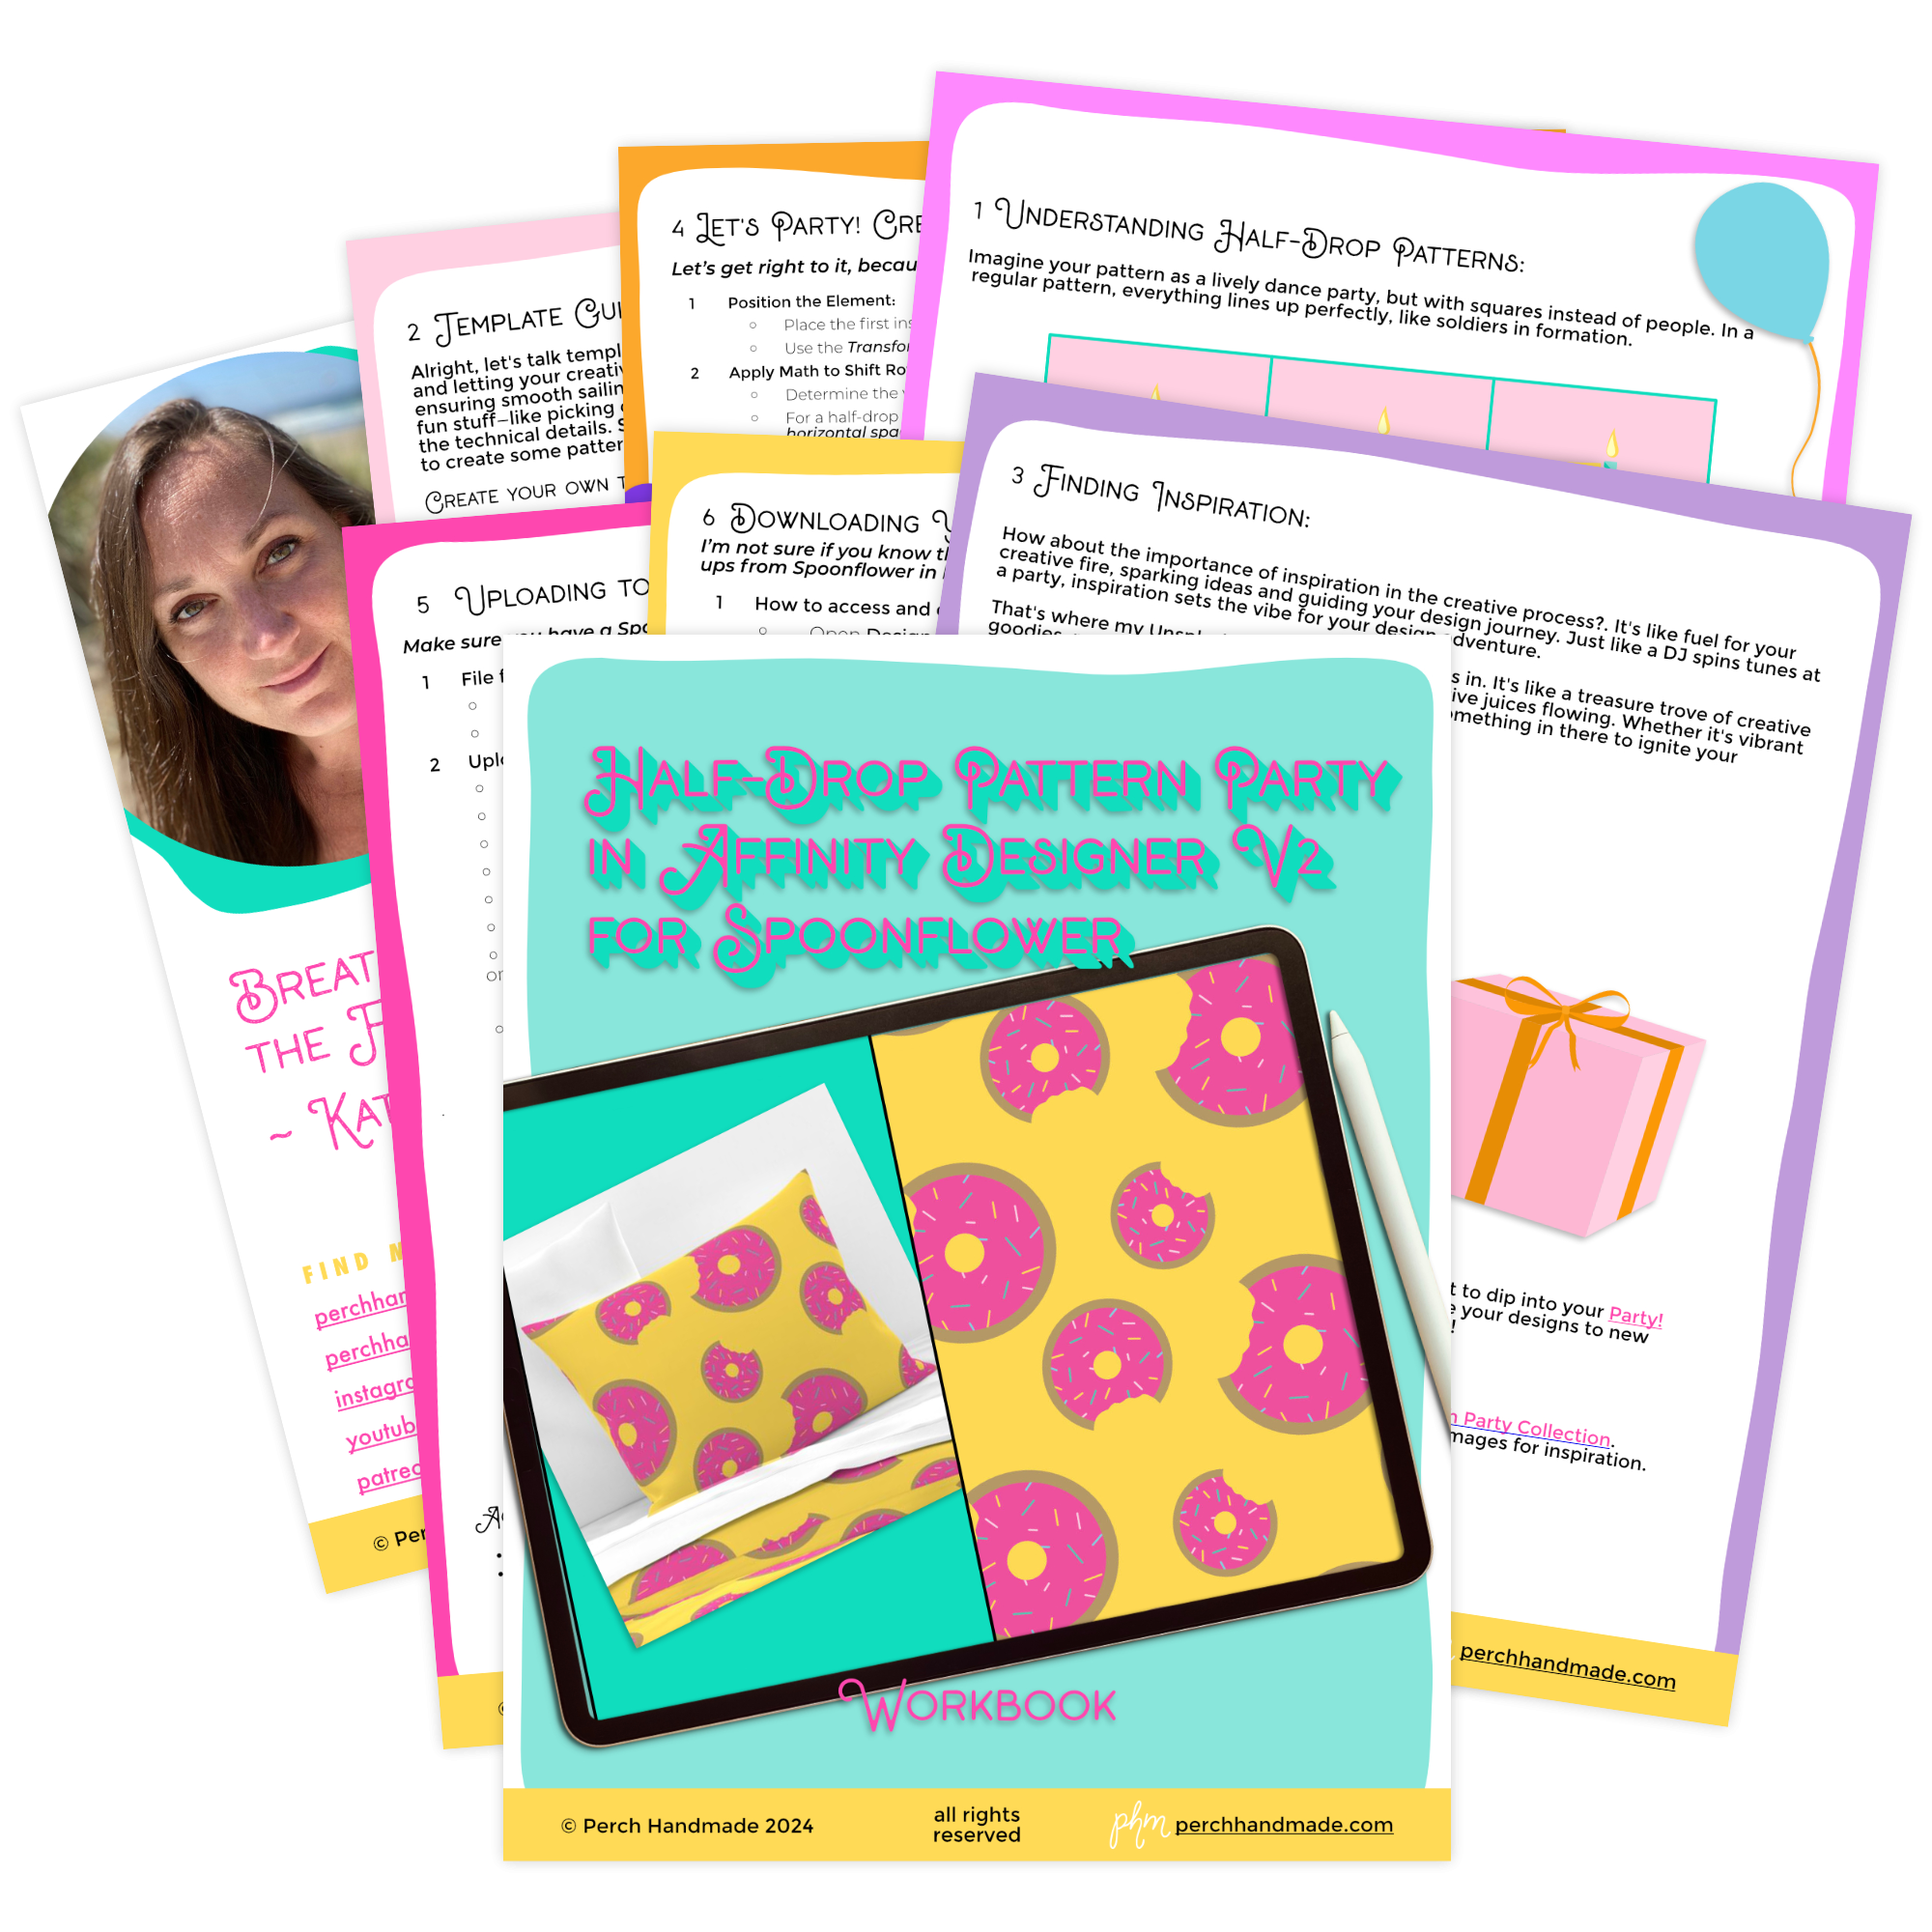
or use on your own. Check out this great workbook that comes with the
class today and all the actionable steps for moving forward
with today's class. I'm also going to
include how to download those high resolution photos and mock ups from spoonflower
to use on your own website. Okay. Don't be afraid to get funky with your patterns and embrace the hat embrace the half
drop in your designs. Let's get ready to
celebrate and have fun and make some really
fun magical patterns. I'm Katie from Perch handmade. Welcome to this
intermediate class in surface pattern design on Affinity Designer
using your iPad. You are going to need
some basic knowledge of how to create designs within Affinity Designer
for this class. But sit tight. I'll walk you
through everything, and we're going to just
have some fun today. So let's get started.
2. Understanding Half-Drop Patterns: Are you ready to start
understanding what exactly a half drop pattern
is in surface design? Sit back and I'll
walk you through exactly what a half drop pattern is and why they're so useful. Like I mentioned before in
this fun dance party scenario. You've got your patterns and they're laid out in
square blocks usually. A regular pattern, they're going side to side, like
a square dance, but we want to shake things
up a bit and we want to add that shimmy and
shake to our designs. A half drop pattern is where every other column is
shifted halfway down. Take a look at these blocks
and let me show you how they create this staggered
or zigzag effect. They totally enhance your visual interest
in your pattern. Here are some more examples of the fun half drop patterns. See how they go over and slide
down a bit in your design. Setting things off
just a little bit. In the next lesson,
we're going to go over your template and how to create one for yourself. Follow along.
3. Template Guide Creation Adventure: Are you ready to
get started with our template guide
creation adventure. Is it an adventure? Maybe it's a dance party, whatever it is. Let's get started, and
I'll first show you how to upload your template
in AffinB designer. Make sure that you have it
downloaded into a file on your computer or on your
iPad. Let's get going. I have my Affinity Designer
app opened already. I like to keep my designs and projects set up in
more orderly fashion. I'm going to open my
patterns project first so that when I open
my new template, it will go straight
into my patterns file. Let's open your
imported document. What we will do is
I'm going to go to my templates and I'm going to find my four by 2000
and open that one up. Okay. And that instantly opens
into your project, and you're all set to go. If you've If you'd like to just sit back
and watch right now, feel free to use the imported
document for today's class. But let's now walk through actually creating your own
template for yourself, and I'll show you how to save
it as a template as well. First, let's create a new document within
Affinity Designer. Click on New and
hit new document. I'm going to go up to
my 2000 square preset. But if you need to
change it on your own, go to pixels in document units. Click on the 2000 by 2000. Click. Make sure
you set as 300 DPI. I'm going to create
this in CYM K because Print companies love CYM
K by using CYM K. First, I can share it later as an RGB. I'm also going to
make sure create artboard is set and
then I'll click. I have my first
artboard already set. I'm going to come over to my
layers panel and rename it right now by clicking on the layers and then clicking
on the three dots here. This one, I'm going
to rename pattern. I like caps on mine, but that's my personal
preference, and I'm going to hit. Now, this Rard is going to be called patterns,
so you can see it there. Now, I'm going to create
another art board by going to the hamburger up at the top here and clicking on artboard. I'm just going to take it
so my snapping tool is on, so you can see the red line, and I'm going to
just bring a box. It doesn't matter what
size because I'm going to make sure to use
transform tool and resize it to double the other size other
artboard size, 4,000 4,000. And that one is all set. Now I'm going to rename this
one by going back to layers, hitting the three dots. When you tap on
the name up here, then you can rename it. Again, I like the cap locks, and I'm going to write preview. That way, I know
which one is which. I have pattern and
I have preview. Let me show you how to create the pattern preview
within this document. So first off, I'm going to go
back to my patterns layer. Make sure I'm tapped on that. And I'm going to create
a square within that. Make sure my snapping
is turned on, and I'm going to come over here, see how I have the x to the
green and the red lines. That means I can fill
it in perfectly. So it's still 2000 by 2000. If I need to check
that, I can go to transform tool and
check it 2000 by 2000. And I'm going to set
the background color. I'm just going to give it a little bit of a pink background so you guys can see that better. Actually, let's go for F Balu. I'm realizing I'm
on my HSL sliders. Let's go to CYM K
sliders just to be sure. And I want to make sure I have this perfect color for
the outside the stroke. So first, I'm going to hit the eye dropper and
pick up that color. I'm going to go to the
stroke and tap on that because I want those the fill and the stroke
have to be the same. I always bring that
up to about a 0.5. So you can tap if you If you tap on the stroke and the
tap on this number here, I can hit 0.5, and that way, it gives it a
little bit of edge. I know it doesn't seem
like anything right now, but it helps later
in the preview. Now, I'm going to hit that rectangle button and
see this little guy here. First off, if you need help knowing where
your things are, hit the question
mark in the bottom, and we're going to find symbols. This symbol, I'm going to tap on this and hit the sandwich, make sure my rectangle is chosen and hit a
symbol from selection. That puts my rectangle
right there. Now, I also grouped it and
gave it a orange line. What we are going
to do is now use that group to copy into our
preview because later on, we will add all of our pattern designs
into this sync symbol. But for now for the template, we can just pop it in here. Now we're going to take this because if we want to
drop it into the preview, we can just drop it in
from your synced symbols. Let's go to the preview. And we can go back to
sync and insert this one. We want this up in the corner. The easiest way to do
this is we want to make sure we have
this set to zero. That's your x axis. X is your horizontal access. Y is your vertical access. We want the horizontal and
the vertical to be at zero, and that gets it perfectly
into the corner. And no overlapping. The next one we're going to do. We're going to add that
again, go back to sink. We're going to add, we're
going to insert it. But this one, we need it to
go to the bottom corner. Let's go to our transform tool. It's still going to
be on this side wall, so that's still
going to be zero. But it's going down the page exactly to 2000 because
our square here is 2000. And that gets it perfectly
in line right here. What I'm going to do now
because it works best to have columns is I'm
going to first off, I like to keep
them in the order. This one, I'm going to hold it till it covers
and move it below. I know that this is the top
and this is the bottom. I'm going to slide both to
the right and hit group. And that gives me one
group right here. Next, we're going to
work on this column. The columns work best
in the pattern design, setting it up for later, and your pattern details
overlap properly. That's why I like to set
up it in the columns. So let's jump back in and I'll show you how to build
the second column. So now we have to add the second column and
go back to our sink or the symbols and insert
this one. This one, For the half drop, it needs to be in
between the two. So first of all, our x needs to be at 2000 because we're moving
over to this line. We don't want it in the corner. Let me clear this out
completely and hit negative 1,000 Because we want it
exactly halfway from the 2000, half of two is 1,000 or one, half of 2000 is 1,000, but we want it to move up, so it's negative 1,000. And then we're going to
add in the second one. Insert, we're going to go to the 2000 rate here for your x. This one because it's dropped
down halfway through, we're going to go to 1,000. Let me show you. We
have our top one here. And then our middle one. I'm going to move that. It's top middle. You can see there's no space. It's lined up perfectly. If you keep coming here, it's 2000 is negative 1,000. Then we have 1,000 because that's halfway between this one. The bottom one,
1,000 plus the 2000, it's going to be about 3,000. Our last one, we're
going to add in Still, we want the x at 2000
and the y at 3,000. I'm going to move that one
slide it to the bottom, so we have one, two, three, and I'm going to slide those all to
right and group them. I'm going to move this down and it doesn't matter you could name them or you
could not name them, but I'm going to keep it same. You want to know what
I'm going to also do. I'm going to take
this pattern layer so you can see a
little bit better. But let's say, let
me go like this. Point let me actually do three. Three, and I'm going to change the color just so you
guys can see the color. You can see the design is that zigzag pattern and
this will be your preview. You'll work on this one, or you can work on this one, and you'll see the pattern happening live while
you're working on it. I've included all the
math for this and the block positions in the
download workbook for you. So you have reference to look at while you're working on your project and
building your own. Have fun making this template. Oh, I almost forgot. Let's show you how to export this template. Let's
go back to it. I'm going to go back
and change this out. I'm going to change
the size to 0.5, and I'm going to
change the color, it's the same color. I'm going to keep it as
the blue for myself. Actually, you know what
I'm going to change it to white because I know I like to work on
all white background. This is my template, so I
want to start with a white. Remember, we have our
pattern with our sync block, and then you have all of your groups. And
they're all set. You've got them named,
you've got your preview, you've got your pattern, and then you have your
preview, right? I'm going to move this
to the top as well. So it is the same order pattern pattern
preview left, right. Okay. Now to save
this as a template, go to your hamburger up top, and we want to export
as a template. I'm going to rename
mine as 2000, underscore half drop,
underscore arch and made. Actually, I'm going to call this half drop original as well. That way, I know this is
my original template, and I will change I will
change this later on, but when I'm saving
each document. Then I can hit save, and I already have
mine in my templates, my pattern originals,
and I'm going to save it to my pattern templates. I love to keep a file
just of templates. So I know exactly
where to find them. I also keep it in my
favorites on my file things, so it's all set to go. All right. Okay. Now we've got that part done and we'll be ready to move
into the next lesson. Our next lesson, we're going
to be looking at inspiration on my unsplash account and look for that in your downloads in
the notion file that I've given you and it's a fun link and full of fun It's called clavation Let's look for that
in the next lesson.
4. Finding Inspiration: Let's Party! : Are you ready to find inspiration
for your design today. Let's party. I've given you in your downloads the inspiration
file or URRL sorry, for my unsplash account. So let's take a look
at that now and find all the inspiration you need
for creating your designs today because you don't have to come up with
it on your own. I like to give you guys the inspiration files or
pictures in Unsplash. Unsplash is great because you can use the photos to gather the inspiration and as long as you're not
using unsplash plus, you can use them license free, and just give credit to the artist who gave
you that inspiration, especially if you're
sharing on social media. But let's take a
look at that now, and here are my collections, here's my party file. I'm going to click on that. There it is. First off, I love to dance. I
love to have party. Why not add little
dancers to your mix. Maybe it's disco balls. Maybe it's neon. There are so many
design elements here to create fun birthday, dancing, celebrations
and use any of these. I love a good watermelon. Actually. Unpopular opinion, I don't love a godadovala but they look great in pictures. Ice cream cones, pinatas. I have a bunch of boys, so dinosaurs have
definitely been in the mix. So have fun using splash
to gather inspiration. And Explore all the collection to choose what
resonates with you. In the next lesson,
we are going to start designing your
patterns together. I'm going to show
you how to make some really simple
patterns just to get the foundations of creating your patterns and the
mathematics down. Follow me in the next lesson
and we'll get started.
5. UPDATE: RGB Color for Spoonflower: Hey, friends. So it's come to my attention that spoon flower, unlike other printing companies, actually prints in RGB. So everything I told you
or I'm about to tell you about printing in CYM K. It's true for a lot of
printing companies, but not for Spoonflower. If you go to their website and you can go to their
Spoonflower health, that's where you can
find save as an RGB. Also, it does mention saving as 150 DPI for the best
resolution for Spoonflower. But from what I know is, I always still do 300 DPI. Because if I want to
send it somewhere else, a lot of companies
request 300 DPI. And that way, if I want one pattern on two
different companies, then I don't have to
remake the pattern. It also mentions
how to convert to an RGB if you are
using photoshop. But I'm going to
show you how to do it using A FNB Designer. First, I want to show you how to convert your document that we might have already made
from CY MK to RGB. And you can do that
in affinity designer by going to the hamburger top, hitting convert, and it gives
your options right here. So I'm going to tap on CYM K
and slide it to RGB eight. And that's perfect. And then I hit the
check mark over here, and that converts it. And you can kind of see
right off the bat it the colors changed because
RGB is a little bit brighter. If you want to create
your own new document, come to new document, and you can use your template or let me just show you
just in new documents. So color format. This is where you can change it. CYM K, RGB, keep it
at R GB right here. It's pretty much
always default as RGB, and then you create your
art board and so on. But if you're making
a new document, that's how it can come in. If you open a new template, Let's find that template from before my
pattern original 200. And I might have given you that in the CYM K. So let's see. Yes, it is. So your template. I'm going to put a
new template with the RGB into the system, but come up and change it
to RGB like we did before, with the hamburger convert off, and then change it to RGB. And then you can keep
going from there and create your document
and your pattern. Again, I just want to reiterate
that with Spoonflower, I've come to learn that they use RGB instead of CYM
K footprinting. So create all of your patterns in RGB if you're posting them or putting them
onto Spoon flower. All right, thank you. Bye.
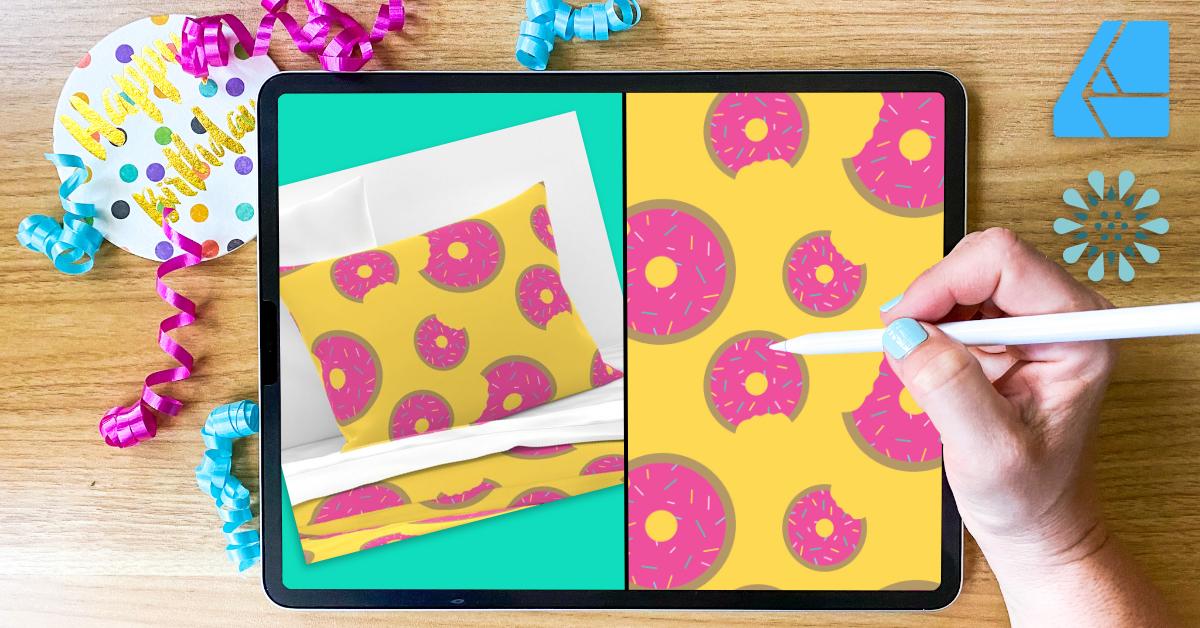
6. Create Your Party-themed Design Element: Are you ready to get started? For today's project,
we're going to create our very own party themed half drop pattern in Affinity Designer
to on your iPad. It's really simple, follow
along and let's get started. Okay. So we just created
our pattern and preview. We opened this document
and created it together. You can work on
this one directly since we've already
saved the template. If you haven't saved the
template yet, do so, follow along and your
first big lesson and save that template. Okay. So we're going to start off by just working in
the pattern design here. I'm going to work
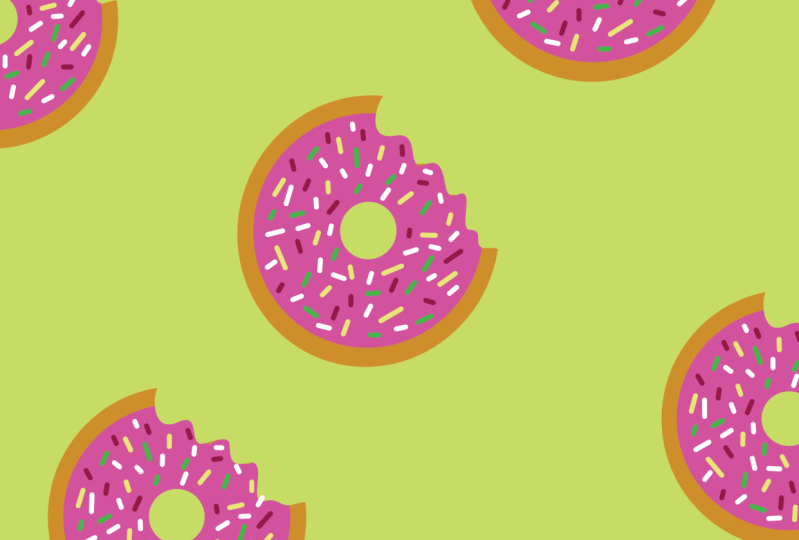
directly in the center, and I'm going to look at my party themes and
make a decision. I think today, I am going to go for doughnuts because
they're easy. And like I said, I'm going to show you a simple design to create
for this class today. So that you can follow along and really get to know
the mathematics behind it. But I will show you
some fun tips and tricks for creating
your designs, okay? Okay. Let's get
started today first by downloading the sorry
importing the color palette. From your color swatch here, go over to swatches and
use the hamburger at the top and import palette. I always use an
application palette rather than a document palette, because in an
application palette, I can use it for every project and every document
that I create. Hit as application palette, and I've given it to
you in your resources. Hit party party. I already have mine, so I'm not going to
download mine now, but when you hit this button, it'll go right into
your swatches. To bring that up, tap on the swatch name and
find party party in your file. We have this fun set
of colors here and I'm going to pick just a hot
pink maybe for my doughnut. And I'm going to come down
here and go to my shape tool. Remember, you can find out your tools by hitting
the question mark over here. If you want to hand draw, you can draw with a pencil, or if you're comfortable with the pen tool, go
ahead and use that. But since I'm just
making a dout today, I'm going to use the donut tool actually and it'll
make a perfect tout. If you want to use an ellipse, you can use an ellipse. But I'll use a donut
today because how easy is that right? And from here, if I don't
know if you could see that, but I hit the red circle and I can bring the center
to be smaller. I want a nice big doughnut.
That's what I want. I'm going to hit the move
tool here and I'm going to work on just how my dougut
design is going to look today. You know what I also want? I want to add a little
bite mark to my doughnut. Let me actually hold off. I'm going to duplicate
this I'm going to make sure my dout is
connected or is chosen. I'm going to have three dots here and I'm going
to hit duplicate. And the top dout I'm going
to make a tiny bit smaller. And I can move it
from the center by holding two fingers down. And bringing that in the
bottom piece, you know what? I want it to be brown, like the color of
a doughnut, right? And I'm going to turn off
my outer layer color, and it looks like I have
a color on that one. So I'm going to turn
that off as well. There I have my doughnut. And we're all set. But I want to add that bite
mark into my doughnut. First off, let me show
you how I do that. First off, I'm going
to select both of them by sliding to the right. I'm going to hit the
three dots up here. I'm going to hit
convert to curves because I want to be able
to cut into my circle, and I can't cut into
it unless I have it turned into curves rather than the doughnut
or ellipse tool. Then I'm going to
come over here to my knife tool. Remember, Okay. Question mark, there's
my knife tool. I'm going to come
into that, make sure those are both
selected still, and make sure I don't
have it on straight line. Let's think of
that. There we go. I've cut through all
four of those layers, and let's see what happens
when I turn those two off. Is that the look that I want? Maybe maybe not.
I'm going to use two fingers to go back
and recut my design. Still on the knife tool, cut through those
layers, turn those off. I think it's about there, but I want to I'll
fiddle with it. I'm going to now get
rid of both of those. Slide both of them and
hit the garbage can. While I still have I'm going to make sure both of
them are chosen here. I'm going to hit my nodes
tool and I'm going to bring these in a little bit. I hit my nodes
tool and then just slide over on those to grab
all those center nodes, and I'm going to bring
it in just a little bit. There we go. There's my sheep. I like it better there. And we're all set.
But guess what? I think my doughnut
needs sprinkles. I'm going to go
back to my colors. I'm going to now just
use my pen tool and set pen and then come
up here and you can change if you want to use
it like a normal pen tool, or if you just want to make little lines that don't
connect afterwards, just hit it on
line and make sure your stroke is the color you
want and your fill is empty. And I'm going to
change the width. Let's see. I'm going
to come up here and hit three and let's
see how wide that is. That's a good size. And just start making fun little colored designs
for your sprinkles. So here are all my sprinkles. I'm going to see how this is getting to be
kind of large here. I'm going to put
all my sprinkles into one layer or one group. So I'm going to Okay. Click on the top one, scroll
to the bottom, two fingers. That gets all my sprinkles
and then I'm going to hit the file button
and hit group. That puts them all
into one place here. Same with the
doughnut. I'm going to slide to the right since
there's only two of them. I'm going to hit
group on that one. I'm then going to rename them. I have sprinkles then
I have my doughnut. I want to take my
sprinkles and I want to put it onto
just the pink layer. What I'm going to do is
open this up and it's going to be masked clipping. It's going to be a
clipping mask by sliding it until the
whole line turns blue, and then I don't have it on
the outside extra pieces, and it's all set
and it's inside. Our whole doughnut
is right here. Now, What I can also do
is remember that sync. If I add that to the symbols, I can take my doughnut,
hit the symbols, and then I can add it
from the selection. Then later on, I can pop that in and have it fill the
space, how I want it to. First, I'll explain that a
little bit better in a minute. But first, I also need to pull this doughnut down
into my block symbol. And so if I pull
it over the top, it pops right in
and look already. We have a half drop
pattern working for us.
7. Design a Party-themed Half-Drop Pattern: Let's get started. I'm
going to walk you through all the steps and show
you the mathematics to it because vectors are mathematical designs and it
creates your perfect repeat. Don't be scared.
It's really easy. If you need to follow
along in the workbook, follow along with the workbook. Why don't we get started? Let me get my readers on so
I can see what I'm doing. Let's work on creating
the math of it, so we can get more
than just one. If you want to keep it
like this, feel free. But I want more than
one donut on my page. Let's walk through and show you how to position them
on to your document, so it matches up perfectly. I'm going to make this
dout a little smaller, go to my move tool and
bring the size down. The first thing I'm going to
do is fill in the borders. Let's start with the
border over here. Now, let me show you something. I have it off the edge here, but see how it
creates over here. You can't see the other half, and that's where
this math comes in. I'm going to fill
in the left side, but I'm going to duplicate
it to get to the right side. First off, I want to
hit duplicate and then I'm going to come to my transform tool and I'm
working on the x axis. This side to this
side is the x axis. I can tap with one finger. It's always a little
bit better to tap with your finger on
this one rather than your apple pencil
because the apple pencil can accidentally change
this number a little bit. And we don't want that
number to change yet. But what I can do because
I'm moving from this side, the left side to the right side, I'm going to add the width of my pattern block,
which is 2000. So this number is still here
and I'm going to hit plus, and then I'm going
to hit 2000 hit, and it immediately sends
it to the other side. Okay. I like to group my pieces
that are on each side. And so I'm going to hit group. See how it's not lining up. I added the 2000, but because I need to move
it down on the y axis. Remember, the y axis is
only 1,000 instead of 2000, I'm going to add
this number 1,000. Now it adds and
lines up perfectly. Okay. And this group is here, if I take it away,
watch what happens? Watch what happens if
I try to move one. The other piece isn't moving. So you have to make
sure that if I have them in a group like this, I can't rotate or I can't
say I want to rotate one. I can't rotate and the
two fingers to go back. I can't rotate my group either because watch
what happens over here. You can't rotate. But I can move it left or right for up or down as long as I'm not going
into those corners. Is a second I go
into those corners, see how this piece
is not connected. We'll show you how
to use the corners or show you a corner
piece in a minute. Okay. That one's all set. I'm going to offset
it a little bit more. I don't want it
perfect on my lines, and I'm going to lock this
group so I don't touch it. Now I can come back over
to the symbols button, find by doughnut and insert it. Now, see how it's not
showing over here because it's not
within this symbol. I'm going to rename that so I just know that that
one's pattern. So that's my doughnut. I'm going to I'm going to keep this doughnut a
little bit bigger. I am. I am going to let me
lock that pattern. I am going to rotate it. I can flip it, and I'm going to make it
a little bit smaller. Let's see. Let's have
this one facing down. And I am putting this
one in the corner. Let me show you, we're
going to have to first, I'm working on the
top and bottom. Actually, this one might
not work that way. Let's keep it lower because
this bottom piece is here. I'm going to have to get
it to come over here. Let's make it a
tiny bit smaller, little bit bigger than this one. Here we go. Remember, I
need to duplicate it. Duplicate I'm going to
take the bottom one because I want to move
the bottom one down and hit my x axis, and this one is just
going to be plus 2000 because I want it to
go top and bottom, right? But I also need one to
be on this side and down because let me
show you those two. Let's that one. Let's rename this group two. This one, I'm going
to rename group one. Okay. So group two, I'm going to move it
into my pattern symbol. So see on this, I still need to get
it over to the side. It's not quite lining up here, but it's not lining up
on this side at all, so I need to get it over here. So let's duplicate
this one again. This one, I'm going
to move over. But because I'm going
from right to left, I need to subtract
on the x axis. Subtract 2000 and I
want to bring it down. So I'm going to add 1,000. And that's still part
of this group here. So if I show you,
I've got one, two, three, I can move it all along. I only need three pieces to make it work because I don't need anything on the corners
on all four corners. I just need one, two, and then three
in the center. Let's see if I can
move this around just a tiny bit to offset it. I'm going to turn off my magnetics just for a
minute so I can get it. I see how it's got the
little corners here, but it's offset it
just a little bit. I'm going to turn my
magnetics back on because my last piece I'm going to add into the center maybe
on the top and bottom. I'll show you how that
will work as well. Let's go back to our symbols. Add my donut in and insert. This one moved into
preview because I was working and showing the
preview, but that's okay. I can move it and move it
into pattern right here. And I'm going to move this right into my pattern
now so we can see didn't go. Ove it and hold it
into the pattern. So I can see where
I want to place it. If I want to rotate
it a little bit, That one's already going
in that direction. It's I like to have them
in different directions. Turn off my magnetics tool so I can move it
around a little bit. Okay. Now over here, I
have an extra piece. Did you see that?
I just saw that that line was there and it's not on this side, so
I know it's here. I'm going to tap on
it. I'm going to hit the button
there to delete it. I go back to my doughnut. I think that's where
I want to keep it. I'm going to pop it here, because it's not on the x axis, I only need to move it to
the top on the y axis. Again, let's duplicate it, the three dots, duplicate. Actually, you can also Click on it and hold
one finger down and duplicate and tap on the y axis and I need to bring it up so I have
to subtract 2000. Again, I'm going to slide
to the right and group. I'm going to rename right now that it's group three. Okay. All right. So I have my doughnuts. I have my different sizes. I can see in my preview
that it's working right. Remember, we don't want
to rotate it at all. So 22 fingers back to get
back to that position. And this is where you can
also come in here and rotate. You can rotate If you
can get to pieces, you can click on it here, but you got to make sure
you're on the right section. Fight. Yeah. You've got to make sure you're on the
right selection. See how I just move
the one out of the three and then
there's an extra piece. So two fingers to get back. Okay. I really just like
to not work in my preview, and I like to lock that one, so I don't accidentally
move something over here. I like to work in my pattern. That's my personal
preference. Okay. And I think the different sizes and everything
works great there. Let's give it a fun
background color. So I have my pink donut. Do I want to go blue? Do I want to go purple, kind of like that purple? How about yellow? Yellow.
Yellow is for me. So remember, we've got to
get both of the pieces, the fill and the
stroke, the same color. And you're all set to go. Look at that fun pattern, we just created using the math, remember to use the
book, the workbook, and just remember to adjust and work on the borders and then work on
your center design. And if you're working here, remember to step back and look at the whole
pattern and see how it is lining
up in your design. There is something I've
noticed sometimes and I didn't notice it today in this pattern because we made
it pretty simple. But sometimes the elements in the pattern if
they're overlapped, let's see if I can
make it happen. Okay. Sometimes if they're
overlapped, yeah. So I overlapped here, but in the preview, it didn't line up
quite correctly. And that's because
your patterns and your previews and your layers are they have to go in order. And just remember your preview is just for you to see
where things actually are. So bring your pattern back. Two, and this is the
piece that you'll share with the world, right? This is the piece
that we'll share to spoon flower, especially. You can share this one I
guess you can share this one, but it won't show
properly sometimes, and I don't exactly
know why that happens, but it's just your preview. Don't get alarmed if you see it doing weird
things like that. By applying the mathematics
on the x and the y access, you can create the precise visually appealing
half drop patterns, but it is really
all about the math, and it doesn't have to be scary. Again, look at the workbook for your clues and as you
get more the hang of it, it'll get easier and easier and you'll be creating
patterns so fast. Okay. In the next lesson,
we're going to upload your fun pattern
into spoon flour, and I'll show you
just how to do that. Okay. So follow me over there. Okay.
8. Exporting Your Files: Let's get our files
ready to share with the world and share
into spoon flour. Follow along, and let's look how we do that
right now, okay? First off, we need to
save our pattern as a JPEG and high resolution with the CYM K for
printing and spoon flour. To do that, we need to hit the hamburger
top and hit port, and make sure it's set to JPEG and make sure you rename it. I'm going to come over
and I'm going to say party doughnuts And I always have a underscore
with my brand name. That way, when I put it into
spoon flour. You know what? I might even say, go back
to the beginning and say pink pink party doughnuts. The file name is
really important for the SEO and saving and finding
things in anything online. So I have the name. I'm going to go like
this and copy it. So I know it for later if I
need to switch anything up, which I just realize I might need to do it right
now because I need to change it to
the area to pattern, and my pixel format, I'm using the format for the
document, which is CYM K. But like I said, can you can
make sure it's CYM K or you can change it to RGB
if you're saving it and sharing it for
social media. Okay. But again, we want CYM K.
We want it 2000 by 2000. That's the size I
want to share it as and make sure the
quality is 100%. If you're saving it for RGB
for social media and web, make sure your quality
and size are smaller. I always change the quality
to about high quality. Usually, let's go 75%. That's my go to, and if it's
social media like 1080. That's for social media. But we're not doing
social media today. We're doing our spoon flour. Again, oops. I want to C YM K, right? And then I have the name. It's all set and then I hit. And I have a spot. It's I save all my patterns
into my pattern file. These are my vectors, and then this is my pattern. And so I know that
they're all 2000. Sometimes I put the year on. So I'm actually going
to do that right now. Okay. So that's 52024. That way, I know that
way I know when I created this pattern
in case I putting it in a collection or saving
it somewhere else. Okay. So that one's
saved, right? Find a good spot where you're always going to know
where your patterns are. You can put it by year, or you can whatever
works best for you. Organization is key for me, and when you get to creating so many patterns,
it's super helpful.
9. Uploading to Spoonflower: Are you ready to get your patterns uploaded
into spoon flower? So here is our
spoonflower website. It's great for creating your designs and
uploading your artwork. First off, I'm going to click log in because I
have an account, and I want to make sure
I can get mine going. If you need to sign up for spoonflower now is
a great time or you can watch me and you can set
yours up in a little bit. I'm going to make sure, I'm not a robot and hit log in, and the website takes a little bit to run,
but that's okay. One thing You'll see up in
the corner in just a minute. I need to put my glasses on
so I can see this better. I don't know about
you, but I'm a little bit getting to that age
where I need readers. You'll see always
this little guy likes to pop up all the time. When it's your own account, you'll see the little
person up here and mine is percham I'm going to go
straight to upload a design. This is the old version here, but I'm going to show
you the new version because if you're
new to spoonflower, this is the new Beta version, and The literally
just got this one going recently since I
started planning this class. Bear with me what
you're going to do is hit choose your files. Here they'll tell you, upload
your design, art or photo. JPEG and PNG are accepted 40 megabytes max
it says 150 DPI, but I always work in 300. That way, I can size down
or I can change the sizes. Okay. So you can
choose your files. Here's my pink party doughnuts. I'm going to click on
this one and upload. If you need to if you
have a whole collection and you want to upload
more, you can do that. And I believe it used to
be up to eight at a time. You do want to confirm
that you created this. You own the rights and Make
sure you read through this. You can't have any trademark or talk about any other
sports teams or TV shows, films, or what have you. That's all licensed material. You can't use that on spring
flower or anywhere else. But make sure you agree to
their terms and continue. Give it a minute. Here we go. And as you can see, it says you're using the
Beta version of this page. This is the newer version. If you want to go to
the older version, you can hit it Beta. But we're going to
use the new version. And first thing
we're going to do, see how it's set as private. After you go through the system, you will see you can
set it for sale. It does show in the new one that you are using a
2000 by 2000 size. This is your file, and also your title. For now. So first, we're going to edit that title. I'm going to, you know, go through and Click all of that out of there
because I don't need it. I do like to click through and always have
my name in the title. It helps with the search
if people need to find me. Then this is where
you'll come through and write a
description, keywords, have fun with the pink donuts, perch and and you can
completely add more to that. You really should
add more to that, use up the space because this helps with people
finding your pattern. Let's go through and we can add tags to your design,
which again, will this one's kind of a
novelty because it's you know, because it's the doughnuts. And these all help you to
add tags to your design. You get 13 tags total, and this is where
you can just come through and type in some
other things about it. I'm also going to always add
into this my design name. I have per handmade, I have let's say yellow because I am using the yellow
color, I'm using pink. I'm writing
doughnuts. And party. And I have celebration. And I have a couple more. Anyway, I can fill those
in in a little bit. You can add it to a collection. So I have collections here
that I could add it to. One collection I
might add it to is my sampler collection because I like to print the samples. An additional instructions
you can add here. Again, this is another place to help define your pattern, right? Especially if it's going
into a collection, you can add that collection
into your additional. Then I'm going to hit save. The sampler, I'll show
you in a little bit. You can create full
fabric designs. So as you can see right here, there is it's not matching up. So I'm going to have to edit. Okay. And I'm going to come
over here and change the repeat to half drop, not half brick, and
I'm going to hit save. If I want to, I can
scale it down in size. So if I want it smaller on the page or
bigger on the page. I like the big ones, actually. Yeah. I think I
like the big ones right now. So I'm
going to keep it. The Where did that go? Well, you can see it's
working over here. I'm going to edit the wallpaper. Not that I probably won't
make this a wallpaper, but let's see what happens.
I'm going to hit Save. I'm going to come back up to the top and see this spot here. It says not proofed. If I click on that, you used to have to hold on. Okay. It used to be that in order to proof
your design on spoon flour, you had to order it and see the sample in person and
make sure it all lined up. Now with the with their
new proofing system, you don't have to do that. So let me show you
that again real quick. So I'm going to hit start. What it does, and
I'm going to hit. It tells you how to do it, you click and drag and scroll
to zoom in and zoom out, and I'm going to hit okay. And you can click and drag it. It takes you to the very
closest corner to make sure that you don't have any white lines or anything
or any color coming through. If you turn this
pink spot off here, you can tell that nothing
is on this design anyway, it's all seems to be
working properly. I have found if I used
arrows on my keyboard, I can move it over a little
bit easier and faster, if I use my mouse, I could scroll in
and scroll out. It's it's really about just checking your
design and making sure that it's
lining up perfectly. And we zoom out so you can see you can really
see the pattern. I always brings put
to your pattern in the center that you've
created and you can see the other spaces around. Now, I don't know why, but I don't know if you
can sometimes you can see little pieces that aren't
working right right here. But if I zoom in on that, I know that piece is working. That's just a little
bit of a glitch in their system at the moment, and maybe they'll fix
that in the future. But I don't see an issue really. I'm going to hit looks good. If you do see an issue, Click C N issue and it'll tell you I'll tell you to leave
and make corrections. I'm going to keep looking and then I'm going to
say looks good. Now I can make this ready with one click to set
it to be for sale. I'm not ready to do
that yet because I still want to fill
out all of my tags, make sure all 13 tags are used. It's really crucial. I want to maybe add more
to my details and such. I'm going to hit save to make
sure everything is saved. All of my design
elements were saved. Here's my preview. You can choose how you want
it previewed and the size. I want it as a fat
quarter rather than the yard for that's
my personal preference. And if you want to change
the preview fabric, you can change it for if
you want a 54 inch fabric, you can change the size that
you want it to be previewed. I'm going to keep
it as, you know, the 42 inch, and
then I'll hit save. And let's see what happens. This one is still not working
right, but that's okay. And that hasn't changed. But let's go over, click on my little person and let's view my design library and see what I can find there. Okay. So there it is. It's set as collection
as the sampler. If I want to go
into a collection, let me show you with one
of my old collections. So give it a minute. Here is this newest
collection that I have created and I
just got the sample for. Let me show you the
sample real quick. It's really pretty. Okay. So this is that
collection sample. So like I said, I love to create I love
to get a fabric sample, and this is the sample set of this collection that
I just created. And it's really nice
because you can fill in a yard of fabric for
a very reasonable price. And you can I want
to get that back up there and see how the colors
are printed on the fabric. Again, you don't
have to do it for the new proofing
project anymore, but I love it because I want to make sure my colors
are printing properly. So the way you do that is coming back to this
page and you are using the PA yard and
you can just start designing in the
same collection. But what I do is I click this fill 1 yard
up to 42 designs, which is great and
pick a fabric. Design their project
and you just drag and drop the pieces
into the squares. So with this fabric collection, I wanted to see
the full pattern. So what I did was
filled in four blocks. To make sure they worked right. When you're all done,
you can hit Add to Cart and you can go
through that process. So there you have it, we have created a fun
design and learned how to fill a fill yard a fabric
to proof for yourself. If you do want to
sell on spoon flour, you do have to go
through the process and fill in your tax
information for selling. But we're not going to
go over that today. In the next lesson. I'm going to show you how to use the mockup photos
that Spoonflower creates as downloads for your own website or personal use to share your designs online. You don't have to create
the mock ups yourself, and I'm going to show
you the way to download high resolution photos for
your website from Spoonflower. Met me in the next lesson.
10. Downloading Your Spoonflower Mock-up: Friends, are you ready to start downloading your
spoonflower mockup. I'm not sure if you know this, but you can download any of the mock up photos on spoonflower for your
own collection. You know how you click on
a picture and hit Save? Well, most of the
time, you see it on spoonflower especially,
and they're small. But I have a trick to show you to download those
high resolution, those bigger photos for your website or for
sharing on social media. So let's get started
and I'll show you how. If you need to follow
along in your notes in the workbook because it'll help you visualize it
a little bit better. I know for me, that
works the best. I like to see it and I
like to look at my notes. Follow along and let's
jump right into that. So here we have Okay. Here we have our design library, and you can go to your little guy up here
and go to Design Library, and you can choose your
designs from there. I'm going to click on this guy. You can do this a couple
of different ways. Because I don't have this
one that shop right now. I'm going to go into way into my design library
and choose my file. And I can go to any
of these and let's say I just want to go to let's say I want to
go to this pillow. I'm going to hit by
I'm not buying it yet, but it's getting me to the
page that I need to see. But what I'm going to do is
right click on this one, and I'm going to
open my image in a new tab and I'm going to open that tab
and see how small it is. This is if you right click
and hit download or save, it's going to be this size, and that's much too small. Come up to the URL and click on this and you have
this whole URL here, but right smack in the
middle, there's an x. That's your extra small. If you double click
right in the middle of that, it will change, it will just highlight that
one and using your keyboard, just type in the letter
L and hit return. It makes your file
picture that much bigger. That is just changing it to
your largest size possible. Now you can right click
on it and save image as. This is where you'll save
it to your pattern file, and if you want to change
the name a little bit, but it does show
everything by per made. It shows the name and it
gives it a file number. It might just be easiest
to save it like that. Okay. So there it is. It's saved. If I found it in my files later, I know exactly where to get it. Having your pattern
on a mock up is so important for helping others to visualize your pattern out
there in the world, right? So using the high resolution, larger file mock ups from spoonflower helps you to
promote your brand and helps to have
continuity in all of your spoonflower designs
because you're showcasing it exactly how they're going to purchase
it on spoonflower and It's great because you can use since you're selling
on spoon flower, you can use those anywhere, anytime at any
location on the web to promote yourself and
promote your spoonflower shop. I hope you have fun
learning this quick tip. It's a really good fun one and it's just great for
getting your images out there.
11. BONUS: Quick Tip: Hey, friends. So I want to share a quick tip in affinit
designer with you. Say you have a
project and there's some overlap and
you're not quite sure how to get rid
of the overlap. I have a really quick and
easy method to do this. Let me show you in
my half drop pattern that's all about donuts
and. Let's jump in. So here I have my pattern
and it looks okay. But if you zoom in, you can definitely see there's
this overlap happening, and I want it to work out, so it follows the line with the outside
part of the donut. So let me show you
what we can do. I want my donut topping and my donut
bottom to be selected. If you do a slide to the
right on both of those, then you've selected both
of those layer groups. Then you're going to come down over to your shape builder tool, and if you hover over it, if you've got the right pencil apple pencil, it'll show up. If you need to find it, you can always click the question mark and find
the shape builder tool. Let's click on the
shape builder tool. And as you can see, it's highlighting all of the areas that are a part of this shape. And I don't know if you
can see right here. You've got that extra
line here that is part of this doughnut with a quick
click on the extra piece. It'll show up as
some blue lines, and you come up to the top here and hit the subtract button. You guys. It's that
simple, really easy. This might be one of my
quickest tips yet, have fun, create your patterns and
use that shape builder tool because it really
comes in handy. All right. Bye.
12. Thanks, Friend! : Friends, I hope you
enjoyed celebrating birthday season in my
household with me today. We had a lot of fun
making a simple design. But you can take
that information that you've learned
about the mathematics in half drop patterns and put it into effect with all of your
patterns moving forward. You can make really
fun elaborate designs or keep them simple
like we did today. I hope you had fun learning more about half drop
patterns and walking through the process of creating your own pattern template to use over and over
and over again. We learned the importance of using inspiration for creating your designs because
they don't have to be all in your head, right? And using unsplash makes it
really simple to go through those designs and
pick and choose what elements you want to add for your half drop patterns. Learning how to create
those half drop patterns can be a little overwhelming, and I hope we
simplified that today with learning the
mathematics and it's just adding and subtracting on your x axis and
your y axis to create those half drop
patterns to make those Simo zigzag shapes designs. I can do this. Then I was able to help guide you
through the process of uploading your new fun
exciting design to spoon flower to create
a world of patterns and fabric or
wallpaper that you can use and maybe you
make a fun birthday present for somebody with
the patterns you created. Make sure you share your
project today with everybody, and when you're sharing
on social media, make sure to use my
hashtag creating with PHM There it is. Hey, friends, I'm
Katie from Perchanmd. If you are looking for more classes from me
on pattern design, I have a plethora of classes using Procreate
and Affinity Designer, whether you're making assets
or making Mocanile designs. You can find the perfect
class from me to you. Thanks for joining me today. I'll see you next time. Bye.
 Katie Simmons, Digital Artist | Perch Handmade