Transcripts
1. Introduction: What if I told you
you can create this? This, even this using
artificial intelligence. I'm talking about
product packaging. As a creative professional,
as an entrepreneur, as someone trying to
package any product, whatever it is, you need to make sure that the packaging
is quite presentable. It showcases the brand identity, and it reflects your
own creative vision. However, the process
is very demanding. It's cost intensive,
effort intensive, not to mention the chances
of failure are really high. We've seen this a lot where
you buy packaging for a realize the packaging does
not reflect the brand itself, or the graphics are out of line, and the list of errors is quite endless.
Well, not anymore. In this current powerful class, I'm going to show
you how to harness the power of artificial
intelligence, specifically Chat GPT, to create beautiful professional
packages and packaging for whatever
product that you are dealing. We're talking about
fashion accessories, appaels, whatever it is. I'm going to show
you how to utilize artificial
intelligence to create packages which stand
out. And not just that. I'll show you how to create different variations,
alter the buildup, alter the material of
construction of the packages, the integration of the logos, even the reflections of
sunlight on the logos. I'm going to show you how
to modify these as well. And we're not done yet. I'll
show you how to present those packages and your products within real life settings, whether we're talking
about shelves, shops, certain displays, whatever it is that
you have in mind, to present those packages, I'll teach you exactly how to do it in this current
powerful class.
2. Your Project: Your project for the
class revolves around creating the packaging
for a certain product, whatever it is that
you have in mind. Afterwards, you're going to be displaying the packaging for the product that you have
created across various designs, various concepts, and
showcasing them across various applications in
our day to day lives. That way you have
a clear idea how to showcase and present
these products. Afterwards, you're going to be sharing your design concepts and the packaging for the
product that you're working on with the rest of the
community for feedback.
3. Setting Up ChatGPT For Powerful Designs: Now, the first thing that
we need to do is we need to set up HATGPT and primate. If you're new to HATGPT, simply navigate to
chtgpt.com or open AI. Whatever I'm going
to be teaching you is going to be
working perfectly fine as part of the free
account or the paid account. All of these tactics I'm going to be sharing
with you are applicable. So feel free to
experiment with these as you go about
utilizing HATGPT. So once you land on hat GPT, the first thing you're going
to see is the prompt window. And what we need to do
at this current stage is that we need to
prime CHAT GPT and set up in a way to help us create the packaging
for our products. And this is what we call from
a prompt engineering point of view as prompt priming, in which we assign
a certain role for hATGPT to apply the processes
based on that role. So I'm going to say, act as a professional
graphics designer, and I'm going to combine
it with another wall. And a product packaging
expert in order to help me create the
packaging for my product. Now, this prompt will
provoke Chat GPT to respond in a way which
will confirm if it actually understood what
you're trying to do or not. And based on my experience, the response would
be some key insights related to the roles as well as we ask you about the product that you're trying to get the
packaging done for. So click Enter. Now let's take a look at the feedback
from HAGPT. Got it. I'll approach this
as a professional, both graphic designer and
product packaging expert. So we can create packaging which is visually appealing,
functional, cost effective, and aligned
with your brand positioning. This statement by
itself confirms that CHADGPT
understood the role, and to confirm it even further, take a look at the
fonw statement. Before I present the
packaging concepts, I'll need more detail so I
can tailor the designs that truly fit your product
and target audience. At this current stage, let's assume you're
working within an organization or
you are creative, trying to build
your own product. You need to get the branding, the marketing, the design, the packaging into place. You should be having some
sort of branding elements. Let's say, the color palettes, you do have a logo in place, which will help you get your product packaging finished
in the best way possible. However, to keep things
generic for all of the creatives and the entrepreneurs and
the professionals, watching the current a course, going through the current class, we're going to keep
things quite generic, where we're going to be
having the general approach, which will be customized based on your own unique
circumstances. So before I present the
packaging concepts, I'll need some details
to tailor the designs. At this current
stage, you'll find that HAGPT will ask you
about the product name. Description, what it is, what makes it unique
product category, food, beverage, supplement, beauty,
electronics, et cetera. This is very important
because this will dictate the type of the packaging as I'm going to be teaching you. Key selling points,
target audience, packaging requirements,
type of packaging, box, pouch, jar, material
preferences, paperboard, corrugated
glass, aluminum, plastic. Take a look how powerful
these options are. The dimensions if possible, the primary function, the
brand style, the logo, the color palettes, and the
style guide, if you have one, the tone of the design, the market positioning,
and the list goes on. So all of these are details that you should
be having, well, not fully, but to
a certain extent, related to your own
brand, your own product. You don't have to input every single one of
them on the contrary, get as much details as possible. And the whole purpose
of this is to confirm that at
this current stage, we are good to go in terms of building our packaging
for our product.
4. Generic Packaging Arrangement: Welcome back. So at
this current stage, we have successfully set up Chat GPT in a way to help us with the packaging
for our products. Take a look at the
final end from the prompt we have
previously generated. Do you want me to
start by creating the packaging concepts
proposal first? Or we should go through these questions,
the previous ones. So I can tailor the design
perfectly to your product. What I'm going to be following
from this point onwards, I'm going to go with
the general approach first because at a later stage, if you do have your own
unique requirements, this will help you map them to your own unique case rather than using my
own, for example, color palettes, my own logo, which will make it customized specifically to my
own application. We needed to keep
it quite generic in order to fit in
your application. So what I'm going
to do is right now, I'm going to have Chat
GPT move in a direction, which is to create general packaging
approaches such that we're going to leave the place for the logo as blank, and we're going to
use, let's say, the bare minimum packaging
style in order for you to get inspired in terms of how could this fit within your
own brand or product? What we are going to do
is we are going to create the packaging options
for a product where the place of the logo
will be marked as logo for future integration with my confirmed logo design, the packaging concepts and
design will be generic in terms of colors such that when my color
palette is ready, we are able to customize
it on the spot. This prompt will allow you to have general packaging options for you to see which one fits based on your own
unique requirements. Let's say you're selling
an electronics product, or you run a coffee shop, or you have your own
secret beverage or sauces that you're trying
to promote whatever it is. We're going to keep
it generic that way. Fits for all of
the applications. Now let's click Entry. Take a look at this. Let's
take a look at the response. So we will be creating generic unbranded packaging
concepts with the logo placeholder
marked as logo and keeping the colors in
neutral and adaptable. So when we brand
palette is ready, we can instantly apply it. For me, personally, I prefer this approach because
think about it this way. We're using the
packaging as a canvas. We are trying to add our unique product packaging to a canvas instead of having a
ready made option. So let's take a
look at the steps. Step number one,
define the product and the packaging scope in
which we're going to. If we have some
colors, we can use them, shape, structure, style. The type of the product
is liquid, powder, solid, capsule, packaging styles box, pouch, bottle jar, size, intended sales channel
marketing position, the concept range, what are the different
types we're going to go for the placeholder colors, the labeling of the logo space, the generic text placeholders
for the product name. These are very, very powerful
customization options. The deliverables,
the three D mockups, the flat dial line views, notes on materials and finishes. These are very
powerful over here. To outputs that we're
going to be generating the packaging in
realistic setting, a flat dialine views. We can hand them directly to the packaging manufacturer
and the list goes on. Now, take a look at
the final two prompts from CHAD GPT as a response. If you want, I can also
prepare them so you can drag and drop your final
logo and colors later. With that we designing
from scratch, this is very powerful
if you would like to have some variations
in the design. If you're working in a
company, for example, you're trying to submit a proposal to your
line management. This is very powerful. Do you want me to start by suggesting the best three to five
packaging structure options for your product first or should I jump straight to the
mockup creation. So at this current stage, we have actually primed Chat GPT for the setup
for the packaging, where we have confirmed
that we're not going to be adding a certain logo or
a certain color palette. However, we're going
to be creating a series of packaging
options where we have the ability and
the flexibility to modify them based on
our unique preferences.
5. First Packaging Design Option: And welcome back to a
very powerful lesson that will definitely ignite your creative journey and will get you in so
at this current stage, we have properly
set up hat GPT to create the general buildup
for our packaging. Now, before we start creating unique packages
for unique products, I'm going to show you the
different types of packaging. That way, you have a
clear idea which one fits based on your
own application and product that
you have in mind, such that you're able to modify everything to fit your
own unique circumstances. So I'm going to mention
at this current stage, we are going to create
the visual examples for the various packaging
options such that we have a clear idea how to move forward with a certain design. Here we go. So this
will prompt Chad GPT to actually provide for
me various options to visualize for the
packaging such that we're able to select the best fit based on
our unique application. So take a look at the response. We'll create visual mockups for various packaging options
so you can clearly see which direction feels right before committing
to one design. This is very critical because as you build up through the
prompt engineering practice, every single line of command
and the chat that you're having with CHAD GPT is utilized
to fine tune the output. So keep that in mind.
So these will be generic with logo place holders, neutral colors, and simple
text place holders. Here's the plan for
the visual examples. Excellent. Packaging options to visualize will cover
a mix of popular, versatile structures so we
can compare the aesthetics, practicality, and market fit. That's a great output because
let's assume you have no idea how your product fits from a visualization
point of view, from a packaging point of view. How would you like to present it? You need some inspiration. This will help you
develop that part before you dive into the creation of your
own custom packaging. For example, stand up pouch, works for powders, dry foods, modern eco friendly options, excellent rigid paper
box, electronics, glass jar with lid, plastic bottle with the label, cylindrical tube packaging. These are powerful
packaging options and it's giving you
where to use them. Now let's take a look
at the design approach. It's going to utilize
neutri colors, white, gray, and beige, easy to recolor later, logo press holders,
text for the product, the benefits for the product, and the weight,
multiple angled, front, angled and close up
shots, excellent, realistic shadows and
lighting so we can see them how they look
like in real life. See how powerful this
is. So now, if you want, I can create all
five mockup side by side for comparison or present each option individually so we can review
them one at a time. So at this current
point, it's up to you. Would you like to have
all of them side by side or review every single
one of them by itself? I prefer that we
go for this option individually because let's say you would like to
download the design, you'd like to modify by itself, you have the ability to do so. So what I'm going to say is, let's proceed with each option
individually here Now, Chat GPT will start generating
one option at a time. It's not going to just
simply go through all of them like one go.
On the contrary. You have to just simply take a look out of the first option, then you type proceed, proceed, proceed in order to keep generating every single
one of these options. So if you are new
to graphics design, if you are new to branding, to marketing, to packaging
design, product design, this will help you establish an important milestone
where you're able to understand the various
types of packaging options, whether you are creative,
you're an entrepreneur, you work in an organization,
whatever it is. That way, you're able to attach the actual label to the
visual. Take a look at this. This is one of the mockups. Or examples for the packaging. And here you go. Take a look
at this powerful output. Now, the first option,
which is the standup pouch, this is the resealable. This is option number one. Take a look at the powerful output that we have over here. We're able to see the logo. That's one. We're able
to see the product name. We're able to see the benefits, in case you'd like to
add some benefits, the net weight of the product, if your product fits
within this criteria. Now, this is a very
powerful application why because I'm able to see if my product fits
within such a packaging, such a packaging option. We're using a neutral colors, no branding integrated
whatsoever, placeholder for the logo, placeholder for the product
name, the benefits. That way, I'm able
to get inspired. I'm going to be using this
for my product or not. Now, let's transition to the
second packaging option.
6. Second Packaging Design Option: Now we're going to
be taking a look at the rigid paperboard box. We're proceeding one packaging
visualization at a time. Let's proceed with
this. Proceed with this. Design. Here we go. So simply, once you set up everything properly, like
I've taught you so far, you'll have the ability to
just simply type in proceed, and Chat GPT will
understand that this is the next design that comes in the sequence of the designs. So we started off with
the standup pouch. The second line is the
actual rigid paperboard box. Let's take a look
at how the rigid paperboard box looks like. Keeping in mind, if you have your own unique design in mind or your own
unique product, feel free to jump to whatever option that you have that suits your
own application. Let's say you do have
skincare supplements or specialty food items. This where you go for
glass jar with a lid, for example, as a go to option. And you can just simply
get to that part directly. Now, as we're going to see, Chat GPT will still maintain
the same design approach, neutral colors, having
placeholders in order to confirm exactly which direction we're going to go forward with. And like I've mentioned,
the more details you add at the previous stage, the definition of the product, the concept range, the more
fine tuned the app will be. But you don't have to go qui extensive and make
things complicated. You're able to achieve these professional outputs,
professional packaging, which normally takes months
of teamwork to sort out within a couple of minutes using the very powerful
prompt structure that I'm teaching you right now, integrating graphic design,
branding, marketing, and packaging design concepts in one complete bundle to help you Excel in the
best way possible. So let's take a
look at the output, which is in three D, by
the way, quite realistic. This is the second option
that we have created, which is the rigid
paperboard box. Excellent. So we can see
the placement for the logo, the product name, the
benefits, the net weight. Often, you tend to see this
within perfumes, right? So you have the ability
to download this. You click on Download
over here as well, and you have the option
to actually download it, modify it, or present it. Let's say you work in an
organization or you're creative within a department or you're building
your own product line. You have the ability to download every
single one of them. Then when you confirm
your brand identity, you confirm the logos, you confirm the color palettes, you have a clear idea which packaging option is the best fit for your
own unique application. Now, we're able to get
this packaging option. Let's take a look at
another packaging option.
7. Third Packaging Design Option: Welcome back. So
now we're ready to proceed with another
packaging option, which is the glass jar with lid. I'm going to say proceed
with the design. Now Chat GPT will list for me or create for me the visual representation for
the packaging. And as you have noticed so far, we're creating some
sort of an integration between the labels. And where did they fit in
terms of packaging point of view and the visual lineup. So if you're new to
this completely, you're a complete beginner, you don't have to
look here and there for how the packaging
looks like. I'm teaching you how to do it
with ease right over here, within the best tactical way using solid prompt
engineering practices. Will allow you to come up
with your own packaging, with your own designs for
your own unique product. And it's important to confirm
at this current stage, we are still using
neutral colors. We don't have any logo in
place, no product name, no details whatsoever,
which makes the output very powerful
because it's customizable. If you take a look at
the previous options, for example, the first step, the shapes, the
structure, the styles, the product type,
and form, the size, all of these details were
necessary to customize it specifically based on our
unique circumstances. And now I'm going through the generic approach for you to build up
that knowledge and to get inspired for your own unique product before we dive into creating
something quite specific for a certain
product that way you have a clear idea how everything is actually packaged together. So as the design unfolds, we're able to see it's
a three D design, which is very powerful. We're able to have these
three D visual mockups, which will help us visualize our product in the
best way possible. And guess what
we're not done yet. I'm going to show you how
to get quite extensive with these applications such that whatever product that
you have in mind, you're able to customize its packaging in the
best way possible. So this is the glass
jar, perfect design. Take a look at the lid. Take a look at the
logo placement, the product name,
and the benefits. This is next level. If you click on the image, you can see it's quite real. It's three D. It looks
quite realistic, which helps us visualize
our product placement. Now we're going to transition
from the glass jar to the actual glass to the
plastic bottle with the label.
8. Fourth Packaging Design Option: And welcome back.
Now we are ready to proceed with the next option, which is the plastic bottle. If you have noticed so far, I'm simply typing proceed with the design since I have properly set up CHAD
GPT from the get go. If you notice the conversation, the prompt structure
is very systematic, engineered and a
perfect way to actually deliver results in the
easiest way possible. So it's simply a matter
at this current stage, typing, proceed with the design, and you're able to
just simply keep releasing these
designs on the go, compared to having to go through the process
quite randomly, which might make it quite
complicated and you lose track. And Chat GPT might release
results here and there, which make no sense. At the end of the day, it's a tool that you need to know how to use to fill up your
own unique applications. So now we're going to have the plastic bottle with the
label design generated. So we have the options for either jars for
powders, for example, we got the paperboard packaging, if we do have perfume
as a product, or if you're selling, let's say, whatever a supplement
or a coffee, for example, you go for
the resealable packaging. So you do have all of these various options which
fit various types and fit various applications and various types of
products solids, liquids, powders,
detergents, beauty products, cosmetics, whatever it is. Whatever it is, we're able to actually create some
packaging for it, mockup for it in order
to visualize the output. Now, I'm expecting Chat GPT to have a slight variation
compared to this one. Take a look at the
sizing over here. The dimensions are smaller compared to the dimensions
for the one over here. And this is very
important because once we have set up everything
quite perfectly, HAD GPT will create
the packaging based on the best practices
seen in the market. This is very important. You want your packaging to stand out. It will not just simply
create a random package. It will create a package
and a visualization. That actually reflects the
real market best practices. Now, take a look
at this output for the plastic bottle design. Sometimes it takes
a couple seconds to release this depending on how many queries JAD GPT is having. You can just simply
refresh the chat with HAT GPT in order to expedite
the process as well. Now let's take a look at
the finalized design. And like I've
mentioned, Feel free to go through the previous
steps to go through the tailoring of the designs to meet your own unique
product directly. I'm walking you through
these steps such that if you have no idea
where to begin, what to do, what to start with, then you do have an idea
how to proceed from A to Z. Now, take a look at this
plastic bottle design. This is basically for
shampoo, for detergents. This is very powerful. I have the ability to
download this as well. We're still using
the neutral colors as part of the packaging. Take a look at other options
that we have so far. So we have covered
the stand up pouch, the rigid paperboard box, glass jar with lid, plastic
bottle with the label, cylindrical tube packaging,
which is coming up next.
9. Fifth Packaging Design Option and The Comparison: Welcome back. Now we're
going to proceed with the cylindrical tube
packaging option. Now, these are the top five
options that CHAD GPT has presented for basic
packaging approach, neutral colors, placeholders. We're not adding any brand
identity whatsoever. Now, at this current stage, since we have a clear idea, what are the packaging
options that we have based on various products? Feel free to use your
own color palette, get your logo if you have one, inject the product
that you're using. For example, you
have a beverage. You do have a certain
supplement or a sauce or a shoe or
product electronics, whatever it is, whatever it is. This is the stage
where we start to fuse the general packaging
options, the layout, since we have gone
through the steps and prompt engineering sequence
in the best way possible, now we are ready to add some
sort of level of uniqueness. We're able to add
the color palettes. We're able to add the logo. That way, we're able to
customize the packaging in order to fit with our
own design requirements. Now, what I'm going to
be doing is I'm going to have the current design, which is a cylindrical
tube packaging. Which is a very powerful,
unique style of packaging before diving into the
customization approach. And when I say customization, I'm going to fuse in some random color palettes and a random logo that
I've created in order to in order to build up a unique packaging which aligns
with a specific product. Now, you could have your
own unique product. Let's say, you're selling shoes, you're selling accessories,
whatever it is. Feel free to get your logo at this current stage and
get your color palettes ready because it's a
matter of dragging them and dropping them
into the prompt window. In order for CHAD GPT to proceed further with the
packaging customization. And I'm going to
show you as a level, at a pro level, how to place your products in a way
that reflects reality. So let's take a look at the last packaging option that we have over here,
which is the tube. It's a very, very
sophisticated design. I like this design
quite a lot because it's modern compared to the previous ones, which
helps you stand out. And if you notice, the cylindrical tube packaging
works for luxury teas, candles, rolled items, premium foods, unique
shelf presents. This is very powerful.
It helps you market your product easily. It has map finish with foil options for
future customization. So if you take a look at the
final output, here we go. The logo, the product name, and the key benefits. So now we have all five packaging
options, visuals ready. Do you want me to
compile them side by side comparison sheet so you can easily choose your
preferred direction? We can proceed with that. That way, we have a full on comprehensive
comparison that you could download, that
you could download. Then you can use it to confirm exactly which product packaging fits your application.
Let me show you how. Proceed with the
comparison Sheet in PDF format and create a table in the chat too. So this will provide me
with two different options. Option number one, I can have a PDF format that I
can just simply print, download, use it for your
own um ideation process, creative journey for
your own company, hierarchy reporting, for example, if
you're working with a graphics design department, you need to have a meeting with your team to discuss this. This will help you get
through the process, as well as a comparison
sheet and table, which will allow you
to add some sort of customization to this
unique approach. So this is the comparison sheet. You can just simply click on it, and this will download the file, then you can open it, which will have exactly
the same table over here. We got the packaging type, the description and
then we have the option to add the pros and
cons for each option. Now, you could find tune
this as much as you'd like. You can even integrate small images within
the table or have a completely different
column added by simply mentioning add the pros
and cons for each option. That way you have solid grounds for comparison before
you decide how to move further with the product packaging that fits your own unique
circumstances.
10. Branding Aligned Packaging Design: Welcome back. Now we're going to have
the packaging quite customized to fit the logo and the brand identity where
we're transitioning from the general packaging options to a more unique application. Now, like I mentioned,
at this current stage, feel free to get your own logo, color palettes if you have, and simply inject
them over here. Feel free to add them. Drag and drop the images
directly into the chat window. For example, I do have a logo which is set up
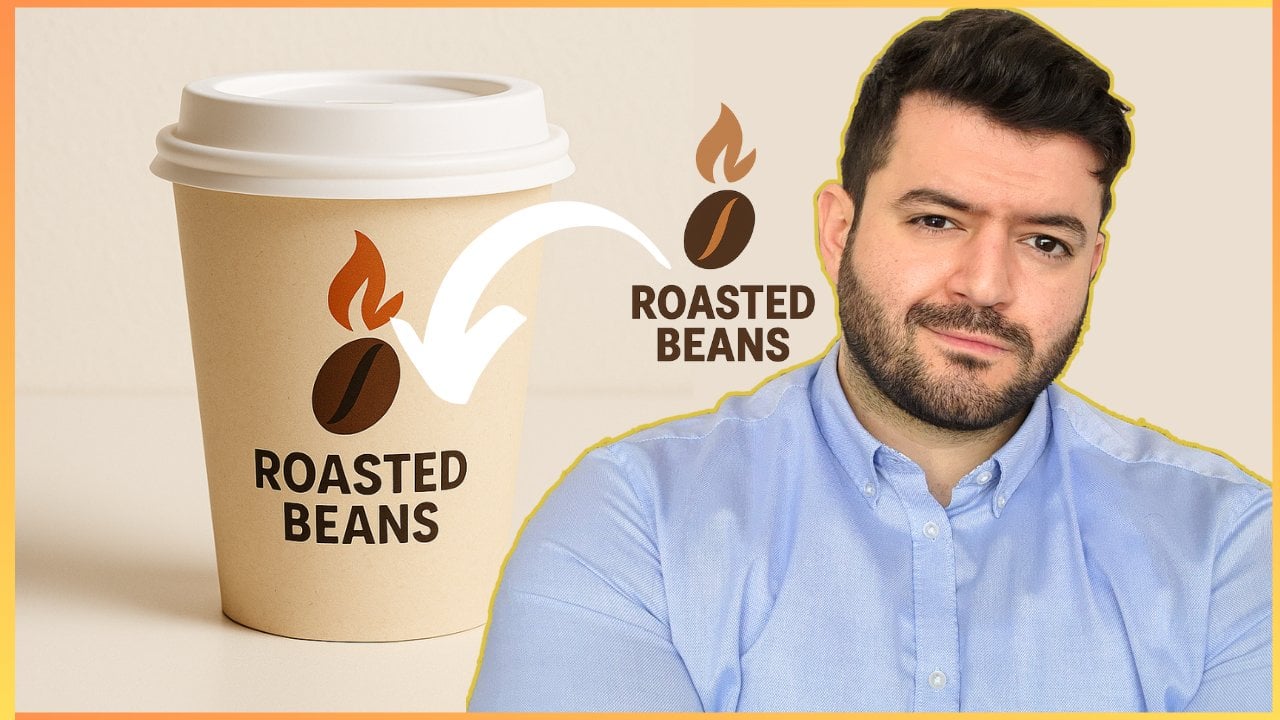
for the current example, which is the creation of
coffee beans product line. So I'm going to mention at this current stage,
at this stage, we are ready to proceed with
my own product packaging, which is a premium
coffee beans blend, which is called Roasted
beans. Here we go. So now I'm changing
the direction from generic to specific. I'm having CHAD GPT, customize the packaging
for my current, let's say, brand, which
is roasted beans, which is a premium coffee beans blend based on the current
chat I'm having with CHAD GPT, I'm going to be
sharing the logo, which includes the
color palettes. I'm going to mention I
will share the logo, which includes the
color palettes to be used to create my own
unique custom packaging. So this prompt structure, feel free to copy this prompt. It will help you customize
your design from the get go. So what I'm going to be
doing is I will prompt HAGPT to get ready
to receive the logo. Here we go. Now I'm going to
have HGPT ask for the logo. Here we go. Now we know your product is premium coffee beans blend
called roasted beans, which could be quite different
for your own application, and you'll be sharing the
logo with color palette. We can take the generic
packaging concepts and transform them into brands unique coffee packaging.
That's very powerful. Now, Chat GPT will ask me
for the logo brand colors. We can add the files,
whatever file is, we'll extract the color palette, define the primary, secondary, and accent colors
for the packaging. It will take a look at the
coffee packaging structure for premium coffee beans, has selected the best option. The standup pouch with valve
is the industry's favorite. But we can also adapt. We can go for the standup pouch, rigid box with inner pouch,
cylindrical coffee tube. That's very, very powerful
in terms of customization. And finally, for the third
step and the fourth steps, we have the design adaptation
where we place the logo. We customize the color
palettes, add specific details, for example, the origin, the flavor notes, add
premium printing effects, very powerful, and the
deliverables would include three D realistic
mockup flat dieline or ready for your
packaging manufacturer. That's very, very powerful. Now we are ready to
customize our design. Like I've mentioned,
for hypothetical cases, we're going to go for
the design concept for a premium line
for coffee beans. So I'm going to
share the logo file. Feel free to get whatever option that you
have at this current stage. If you have a certain
logo in mind, this is the stage where
you drag it and drop it. So I've added the
logo. Here we go. This is the logo, roasted beans. And the Chad GPT will
analyze the logo, and it will start to
customize the options. Take a look at the
feedback from Chad GPT to confirm to confirm that it understood what
needs to be done, and it has read
the logo properly. Take a look at this. I've gotten your roasted beans
logo from the logo. Your primary color
palt appeals include deep coffee brown for the
bean and the text, correct, warm amber flame
orange, excellent, gradient shadow tones for depth, optional for print,
but great for mockups. The backside. Excellent.
Perfect. Here's what I suggest. Start with the
standup pouch design, since it's the most common
premium coffee packaging, integrate your logo and
colors into the pouch mockup, add coffee specific
placeholders. Once approved,
adapt the design to rigid box and cylindrical tubes. Now, let's see how does
this look like up next?
11. Packaging Design Customization in Seconds: Welcome back. Now,
let's take our logo and start mapping the entire
brand for the product line, like we have mentioned,
we're going for the premium coffee beans. This is the logo.
And now let's take a look at the first option. And this is the
beauty of properly creating or crafting
prompt structures. Now, it gets easier and easier. Now, take a look at the
requirement from Chad GPT. You want me to proceed
with your branded stand up pouch packaging mockup. Proceed with the
Moka, here we go. Now, take a look at the design. You will be surprised that it fits naturally at this stage. We're able to take the product the actual raw packaging
and map our logo, map our color palettes
in a premium way which reflects realistic
designs compared to just having something basic. So if you are a beginner
at this current stage, within the class or
you are an expert, you will definitely find something within the current
class as a takeaway, which will help you take your application to a
whole new level. Now, let's take a look at the mockup quite
excited to see how the mockup would look like
simply by adding a logo, which includes the
color palettes. Feel free to inject whatever customization
that you have in mind. Now we're having the
packaging unfold for the first design option. Take a look at the backdrop. It looks professional already. This is very, very powerful. I'm quite impressed
with the current design approach that
we're having right now. Even the realistic
representation for the coffee air outlet or
valve, this is professional. Take a look at this.
Quite impressive. Roasted beans, take a look at the selection of the packaging, the option for the background,
the logo placement, the fonts used, medium roast, the origin, the flavor notes
to be added, the net weight. See how powerful
this is. This is a pro level going from
the basic design, which look like this, right? To actually mapping it to the design requirements
for the logo, for the color palettes, and this looks
quite professional. And it has selected
the go to option, like literally, when I
buy my own coffee beans, this is the packaging that
I use I find the zipper, we got the Air
valve for quality, and this is the premium
go to packaging option. Now, let's take a look
at another option, proceed with the rigid box. Now at this current level, we are mapping our
brand identity. We're mapping our
color palettes, our logos to the custom packaging
requirements such that we're able to select
whatever option best fits our unique requirements
and unique application. And like I've mentioned, feel
free to add your own logo. This could be a logo
for your own shoe line, for your own beverages, tools, a ts, whatever it is, your ecommerce, whatever it is. Feel free to add it at this
current stage and then start building up your
custom packaging. And we're not done
yet, by the way. It's not just simply a
matter of showing you at this current stage the
packaging customization. I'm going to actually
quite surprise you with what we're going to be seeing in terms of the
finalized approach to demonstrate how our packaging
will look like in reality, such that we're able to make important design decisions
at an early stage. So now we're expecting
the rigid box design before we confirm our selection. And frankly speaking,
I would like to go with this
current option as well as this current option. So I'm going to be selecting these two options for
demonstration purposes, and I'm going to take
you to a different level in terms of showcasing
your packaging options. Now, let's take a look
at the rigid box. Now, this looks quite unique. However, for a coffee
brand, typically, we don't usually find
the rigid box packaging, but Chad GPT has done a
really good job reflecting the quality and the design for the premium coffee blend
line that we have over here. This is a very
powerful approach. Now I'm going to proceed with
the design that we have, which is the rigid cylinder. Proceed cylindrical. Here we go. Got it by itself. Proceed with the
cylindrical. Tube. Typically, these are
the best options that you could go for for, let's say, my current brand, which is the coffee beans, either the soft
packaging over here, the resealable, or the
cylindrical coffee tube. Now, the cylindrical
coffee tube is often used for premium products. You can use it for
high end cosmetics, high end supplements, teas, herbs, coffee beans, coffee
powder, for example. These are some ideas to
help you get inspired. So we're going to take a look at the cylindrical tube option. We can go for this
one or this one. These are my go to options. So after making the selection, we have a clear
trajectory right now. What is the packaging
option that we need to do? I'm going to actually
provoke Chat GPT to suggest additional ideas I could use to help me take the practice
to a different level. Now, we're going to have the
cylindrical tube unfold, and I'm quite excited
to see all of these designs, because,
frankly, speaking, if I were to do them by myself, it would take me days, if not a couple
weeks in order to really fine tune every single
detail, not to mention, go through the entire rendering
and the design phase to reflect the nature of the product in the
best way possible. Now, obviously, this needs
a bit of fine tuning to add some details,
modifications. That's perfectly
fine. I'm going to teach you exactly how to do so. But it's getting 90% of
the job done for us. So we're going to have the
cylindrical design released. And like I mentioned,
I'm going to go for either the resellable
a pouch or bag, and the cylindrical tube. Now, usually this takes a
couple seconds at tops. But since you might
be having a lot of queries in terms of the chat, it might take a minute or two, compared to the typical
design process, oh, you're saving hours upon
hours of trying to do this. Take a look at how the
design is unfolding. This is very, very powerful,
very, very impressive. And I'm able to see from the get go that
we're going to have a really unique packaging for the current coffee brand
that we are dealing with, which will be my confirmed
choice, by the way. Like, I'm not going
to go for this. And over here, this
seems more professional, more unique, and it will stand out as a premium
coffee beans lines. Take a look at the finishing
of the product in terms of the detailing and
the three D designs, which by default
completes the theme. We got the logo, we got
the color palettes. We're able to have the
cylindrical packaging. It looks premium,
by default, right? It looks premium, which is my preference in
terms of coffee beans for the current line or project
that we're working now, obviously, we can go for
the comparison again, but I'm going to be selecting this option to
move forward with. So I'm going to confirm
this selection. So I'm going to just simply
copy this, by the way, just copy this cylindrical
tube. Here we go. I will proceed with the cylindrical tube option for the packaging. So congrats. So far, we're able to reach
this point where we have the ability to create the custom packaging for
our unique application. But like I mentioned, I'm going to actually push Chat GPT to take it
to the next level. So here's what we can do next
to finalize the production. Flat line design with the exact dimensions from
your packaging supplier. This will include the actual
layout that you present for manufacturers to produce
and bulk the packaging, material and finish
recommendations, product cost and notes. Now, we could go for the production ready
dieline on the spot. I'm going to be showing
you this up next. In addition to some
important differentiations for the finishing, that way, you're able to even
fine tune the design further such that you could add exactly what you're
looking for from a design
12. Die-line Details for Manufacturing: Welcome back. So, we have confirmed the previous
selection for the cylindrical packaging in line with our brand
requirements. We're able to proceed with
further customization options. I'm going to start off with
the flat dieline design. Then I'm going to
customize the finishing. So let's proceed with
the flat dieline. Here we go. So now, this will give me some
hypothetical dimensions. How would it look like? Let's say, I'm going to
be presenting this for the manufacturers to
design this for me, right? So it will present for
me all of these options. Required specs for the dieline, the height, diameter,
lead height, safety margins, print area, inner back details, extra design elements,
all of these stuff. However, let's say, let's
say you have no idea. Just simply go for the
standard coffee tube size. It will help you save
up the whole hassle. Proceed with the
standard option. Chad GPT will refer to the market standard based
and its database to confirm exactly what
kind of dimensions are used to provide the dieline
for manufacturing purposes. Take a look at this.
We got the height, diameter, lid height, material, print specs, artwork. Excellent. Everything
seems ready. Now, I'll prepare the technical flat dieline for
your roasted beans, branding so you can hand it directly to the manufacturers. Take a look at this
option as well. Do you want me to also include the gold couple four stamping,
copper foil stamping, a suggestion in the
dieline mockup, so the supplier knows
where to apply it, that will make it look
even more premium. I was about to select
this, by the way. Going through this
current option over here, the foil stamping. That's very powerful. I'm going to keep it as part
of the finishing, but let's include
this. Here we go. So now I'm going
to have Chad GPT, create the dieline
over here rather than a PDF because sometimes the PDF does not reflect all
of the measurements exactly. That way, we're able
to save ourselves the hassle from trying
to go back and forth. So I'm going to copy this just to make sure that
it gets it properly, create the technical
flat dieline over here, then click on SND now, HAD GPT will not create
a PDF because once you go through the
process of creating a PDF with a lot of measurements
like the ones over here, you might miss something. So I'm going to have CHAD GPT go about the process of
developing this over here. It looks like my
environment was reset, so the di ine just
created was lost. If you want, I can
quickly recreate the technical flat
dieline packaging, again, right now, so
you can download it. So I don't want to
download it, okay? I don't want download. Instead, I want the design
in the chat. Here we go. Because we have trained
at this current stage, hat GPT to go about creating a PDF from the previous
prompts that we have shared. Now I'm going to have
hatGPT avoid creating a PDF because sometimes as I go about creating a PDF with
such measurements, you might miss stuff
in the actual PDF. So to avoid the whole hassle of recreating things
here and there, we're able to just
simply create them within the actual chat itself. So we want to create the
technical flat dieline. Here we go. Schematic
style drawing showing bleed line,
safe zones, panels. Excellent. Perfect. So we're
able to utilize this as part of the custom design packaging when we are trying
to hand these notes, for example, for
the manufacturers, they might be asking you
for something like that. This will help you
actually just get an idea. Like, this is the
actual cylinder. This is the cut line in blue. This is the safe zone where you keep the text and the logo. This is the full
red dashed outline extends beyond the bleed area. So this is next level in terms of the
manufacturing process. But typically, you
wouldn't be going into such details because once you go about handing
these details over, it's sufficient for the
manufacturer based on their own interactions with other customers to provide you exactly what
they're looking for. However, we're not done yet. I'm going to be showing
you right now how we could actually modify the
finishing to make a pop up
13. Next Level Pro Packaging Part-1: Welcome back. Now
we're going to be proceeding with the
finishing options. Like we have mentioned,
at this current point, we have selected the
following cylindrical design. We've created the flat line or the die line basically for
the manufacturing purposes. If needed, feel free to
utilize this if you'd like. But like I've mentioned,
it's good to know, but it's not mandatory. But we're interested in at this current level is the customization
and the finishing. So I'm going to
mention at this stage, I would like to explore
various finishing options. So this will allow me to utilize my previous design and now
customize it even further. Take a look at the output. Now we got lamination finishes, specialty printing effects, texture and material
enhancements. Feel free to explore the briefing for every
single one of those details. However, however, I'm not going to go through
the exact description. I would like to
see how they look. Now take a look
at the suggestion from Chat GPT based on my brand. Since your logo uses deep coffee brown and
warm orange flame, a premium finish could
be matte laminate base, copper fold stamping, spot UV, Ibo logo, warm orange inner lid. So we have the
finishing options, and then we have the
suggestion for the finishing. So this is what
we're looking for. I can generate mockups for the cylindrical
tube in four to different finishing combinations
so you can see how each would look like before
deciding on the final one. So we've landed at
the right place. Just simply type in,
like I've mentioned, proceed with the options
one at a time. That's it. No need to make things complex. Let's go ahead with the
simplistic approach. So now we're going to go
for the first option, the finishing option number one, which is the matte laminate copper fold
stamping on the logo. That's very powerful. If you have no idea what that means, we can just simply
see what that means, and then we're able to
make up a decision, right? The look and feel,
matte laminate, copper fold stamping,
minimal extra decoration, keeps a premium and elegant. Now, as we go
through the mockup, this will be the next level
from the initial design. So we started off with the
raw general packaging, then fused our logo and our
branding and color palettes. Now we're adding
further levels of customization in order
to make sure that our product really stands out through the placement in the
market or in the industry, whatever industry
that you're at, and this applies to whatever product that
you have in mind. Simply for
demonstration purposes, we have used the
coffee brand option. This applies to soaps, electronics, sauces, cosmetics,
and the list goes on. So this is the first mockup
that we have in front of us. Let's take a look
at the finishing. As I can see, we have some
matte finishing over here, has some sort of a
leather feel to it, which is quite premium. And if you notice the
background or the backdrop, it's more aligned now
with the product. Take a look at the logo. This is quite impressive.
Take a look at this. Here we go. The
packaging, the print, the foil texture that you have on the actual packaging
representing the logo, even the briefing
chocolate and caramel as part of the aroma
for the coffee beans. This is very powerful. Like,
this is very impressive. Take a look at the
difference between this and this this seems
quite too generic, like off the shelf, this looks quite premium, right? Take a look at this customization that
we have done so far. By applying smart
integration techniques, we're able to take our product
and make it quite unique. Now, let's take a look at
the second finishing option.
14. Next Level Pro Packaging Part-2: Welcome back. Now, let's proceed with the second
finishing option. Proceed with the next
option. Here we go. So we have previously come up with the first
option that we have, which is basically
option number one, Matt eminate plus copper
foil stamping on the logo. This is a very powerful design, and this is one of
my favorites so far. Let's see if we're able to
get a more impressive design. Something which is
quite more impressive. Now, the second
finishing option, we got the laminate with spot UV pattern. This
is very powerful. It will add some dynamic
effect to the actual logo. Copper logo for the
cylindrical tube, the look and feel,
laminate base, copper foil logo and text keeps the premium metallic shine on the flame and the brand name. This is very impressive. Spot UV pattern, it's
like a UV effect, like it's actually shiny. Subtle, glossy coffee bean pattern wrapping
around the tube, only visible underlight for
a hidden premium effect. This is next level. Like, I really can't
tell at this stage, which one is my favorite. Shall I go for this one, or
shall I go for this one. But I think this beats
the odds over here. Like, if we examine
this even further, take a look at the covers, the finishing, the
foil structure, the UV option for the beans, such that we're able to see this under the
sunlight, the print, and the layout,
this looks premium, it has this leathery
premium feel. So this is very powerful. I'm able to see now that this is no longer the
option to go for. This is the option to go
for. It's more premium. I truly hope that you appreciate the transition from very basic, no design whatsoever to a generic design that fits our brand to full
on customization, and we're able to select which one really fits
our brand image. Now, let's proceed with
option number three, and let's see if we're able to get a more impressive
design as well.
15. Next Level Pro Packaging Part-3: Welcome back. Now, let's
proceed with the third option. Proceed with the next option. So far, both of these
designs that we have gotten, the first one and
the second one, they are quite impressive. Luke literally, these
are solid options. Now, if you take a look at the previous
prom from Cha GPT, we had the various
lamination finishes. Various printing effects,
textures enhancements, inner and lid finishes, and the suggested combo, right? Now, the three options that
we have went through so far, these are the standardized
options suggested so far, but this does not conclude
the list, by the way. We can just simply push for additional options where
we can just simply say proceed with another option or create a unique option, or you could just simply
change the color palettes. This is where you get quite
into the detail where you are trying to make the product
looks or the packaging, match the product requirements
as much as possible. So if you take a look
at the third option, and all of them, like I've mentioned,
they get the job done. Like, I'm really content and happy with all of these designs. But if you'd like to take
it one level further, feel free to tinker
with that as well. Take a look at this
incredible output. All of them, they are unique.
This is option number one. Option number two, take a
look at option number three. Like I've mentioned,
I really, really, really think all of them, all of them, they
are grey options. And I started off with
having this as my favorite. But it turns out this
became my favorite, and this one is gray as well. Take a look at
this metallic lid. The logo display
looks professional, looks glossy, looks
premium, right? Has this metallic feel to it, which makes it stand out. So as we have seen so far, we have covered
the first option, the second option,
the third option. How about the fourth option?
Let's take a look at this. With the next one. And you can just
simply download these. You can click on Download, and you're able to add them
to your own mood board. You're able to add them to
your own design briefing. If you're having
a discussion with your team members to confirm which design fits
your application, this will help you have a
clear path in front of you. Now, let's take a look
at the fourth option, which is the craft
paper texture, mat print, copper foil logo. So this will have a natural, eco friendly, artisanal feel. Matt finish keeps a soft, minimal glare,
rustic premium look. Okay, so I can see where Chad GPT is going
with this design. It's mainly related
to sustainability. So for customers who are
more into sustainability, eco friendly products, they're
able to actually relate. Such a design. And it
has actually changed the background completely to
reflect such an arrangement. And this is very powerful. Like every single one of
them is unique by itself. Every single one of them is represented in the
best way possible. If you have noticed, take
a look at the background, dark gray, light gray. Even lighter and gray.
Now, take a look at this, beige and look at the packaging. Roasted beans, dark
roast, bold and rich. Excellent. Excellent.
This is very powerful. Now, all of these designs so
far, these are professional. So we have went from
basic no idea in terms of the preferred
packaging to having a solid professional packaging that would take you months
trying to figure this out. Now, let's proceed
with the next option. Proceed with the next option. Now, we do have
option number five, which is the full on
metallic wrap print details for the final variation. So these are five
different variations. Every single one of
them is literally a completely different
design from the previous one from the previous packaging. Now, you could customize this
even further if you'd like. You're able to modify
some of the requirements. Feel free to tinker with us if you'd like to
add some sort of customization or
any modification. You can just simply
inject a prompt, asking Cha GPT to alter
a certain parameter. But I'm going to show you
how to actually do this at a professional level to
get the best results. Now, let's take a look at the full metallic wrap details,
the look and the feel. The entire tube has
a metallic shen, copper gold tone for striking premium look,
map printed details. And this is incredible. Excellent. This
looks quite premium. It looks metallic. It looks functional.
This is a very, very, very solid design. Now, we're able to create a side by side chart,
including the images. Feel free to
experiment with us or just simply the naming with
a comparison for you to pinpoint exactly what is the packaging that best
fits your own application. Let's explore these one, two, three, four and five. So we're able to generate professional grade packaging
for a specific product, for a specific brand in
the most professional, most effective way possible. And we are not done yet. I'm going to show
you actually how to modify some of these elements
at a more intricate level.
16. Graphic Design Edits and Modifications: Welcome back. Now
I'm going to be showing you how to
add some sort of customization to any of these designs that
you have selected. Let's say, for example, I would like to customize
the following design. What I would do is I
would click on it. Then this will prompt me
to the following window. Now, if you notice on
the right hand side, we have a toggle option. We're able to go through all of the designs that we
have covered so far. That's one thing
to keep in mind. Take a look at the top part
over here. We got a stylls. The stylls acts like a graphic
design, pencil or pen. So what I'm going to
be doing is I can select on this or take a
look at the prompt window. Describe what would you want
to add, remove or replace. So I'm going to show you
two different options. First of all, by typing. So I want to change the color of the lid to matte black. That's one. So that's one
option where you click on the image and then
this will prompt you to the window that I've
mentioned to actually add, replace or remove simply through the addition
of a prompt, and you would notice
that the image over here has a connection to
the actual prompt. This is one way to modify some elements within the design. It's very helpful
in terms of adding, removing, replacing key
prominent elements which pop up. However, if I would like to
design specific elements, like a specific element
that I need to change, I do have a different
tactic that I'm going to be teaching
you in a bit to help you go ahead and modify
the designs as much as possible and in any way that best fits your
own application. So we have went through from these professional grade
three D mockups and designs. And now at this stage, we are going through
the process of further modifications to meet our own unique preferences
because at the end of the day, hatGPT is a tool. And you could have
your own unique preferences as a creative, as an entrepreneur,
someone doing this as part of your project,
your organization. You could add these details. Now, take a look at
this modification. We've gotten this
previous design. Now we're able to shift it to a completely
different design, right? This is very powerful.
So I was able to modify this on the spot. Let's say I would like
to get modified or to change a specific element
that I'm not able to conveniently type
within the prompt windows. I would click on the image. No need to type in directly.
Click on the stillus. This will give you
this small knob to select certain key elements. So for example, I would like
to change the background. So I'm going to highlight
the background over here. Okay? Or this part
only, let's say, change the selection
to include reflection. Or include sunlight rays for
a nice effect. Here we go. Let's say I would like
to have some sort of lighting exposure over
here as sunlit area. I'm not going to be
able to type this as a prompt specifically because I need to mark a
certain location, which is the one over here. So I'm going to follow this
tactic where I'm going to have the selection, like I mentioned,
I click on this, I open the tills. Then I mentioned change
the selection to include sunlight rays for a nice effect, and you're able to
spot this, by the way. In the process of
generation where Cha GPT is actually modifying
that specific element. This is very powerful. So you could add
the modification through a prompt or you're able to just simply inject
the stillus to mark the area, and then you combine it
with the prompt in order to modify the specific location
or specific element. Now, take a look as
the image unfolds. You're able to spot the
sunlight rays as part of, let's say, a dynamic effect. This is very impressive
because even the lid itself, it's reflecting the sunlight. Now, compared to
the previous one, we had no lighting effect. Simply neutral background. Now we're adding an effect over here where
we have sunlight, and the sunlight
actually reflects on the actual product compared to the previous design option
that we had over here. See how powerful this is very very impressive,
and we're not done yet. So I'm going to
click on this again. How about let's say over here, I'm going to have a
small espresso cup. Add a small espresso cup in the selected
location. Here we go. So I have some
sort of an effect, lighting effect on the
design for the packaging. Now I'm going to add another
layer of customization. Since it's a coffee brand, I'm going to include
an espresso cup to be placed in exactly
the specific location. And feel free to
get creative with your own project,
with your own design. You're able to get unlimited endless options and variations for any application, whether let's say you
have your own soap brand, you got your own pastry shop, you got your own clothing
line, it's up to you. All of these tactics that
I'm teaching you right now, they work for creatives. They work for entrepreneurs. They work for companies, they work for professionals. So regardless of
your walk of life, the skills that you're
learning right now, they will help you level up your application in a way that normally would take
you years to do so. So I'm quite excited to see the current finalized
design over here where we're going to be
adding a small espresso cup. However, like I mentioned, still, we're going to push
it one level further. I'm not going to be just simply a going through the packaging
only on the contrary, I would like to show you how the packaging would
look like in real life, like through the actual
product placement. So we have customized
the following option, right, the following design. Now, we could select any of the designs
that we would like. However, since I've already modified the following
design, the roasted beans, I'm going to use this
to carry on with the demonstration in terms of how to take our packaging for our product to new heights to a completely different level. Now let's take a look at
the design as it unfolds. As you can see, I can see
some shades over here that reflect a coffee cup somehow, which adds a certain vibe
to our product, right? Now, once this finalizes, I'm going to be selecting
one of the designs, and then I'm going to be
showcasing the actual product. Take a look at this
powerful output. Very, very impressive, right? It actually selected
an espresso cup that matches the theme the branding, even the espresso inside fits perfectly with the sunlight
and the background. This is professional,
like next level. Even the light is reflecting properly
on the espresso cup. I did not select a white
espresso cup on the contrary. I selected something which
matches the color palette. This is very, very powerful. Feel free to go through
the customization, to tinker with it, to get
creative and to get inspired.
17. Finalizing the Graphic Design, Product Placement and Packaging: Welcome back. So we have added the element
of customization, and we are done with
the packaging option. Yet, I would like
to see how would my product look like
in a typical setting, let's say, in a supermarket, in a cafe, whatever it is. So I'm going to select the current design just simply because we
have modified this. That's merely it. So
my finalized design is option number five over here. So I'm going to be
selecting this, finish option number five. Here we go. So I'm going
to be copying this. We are done with the
packaging selection. And that was my
finalized Design, which is, here we go, finishing option number five. Now, I would like
various displays or various visual displays
for how the product would look like on the shelf in a cafe or any suggested setting. So this prompt will actually
have CHA GPT try to display some options for
me to be able to visualize the packaging
in a real life setting. Let's take a look at the
feedback from CHA GPT. Here we go. So option number five has been selected. We
have finalized this. As your final packaging design, we can now create multiple realistic placement
mockup so you can visualize the
roasted beans brand in real world
settings. Here we go. So these are the suggested
visual displays. Now we got option number one, retail shelf display,
cafe counter placement, lifestyle scene, home brewing, gift set arrangement,
close up marketing shot. And like we have done so far, let's proceed as
easily as possible. With one by one. Simple as that. If you have followed what
I've taught you so far, up to this current stage, your job gets easier
and easier and easier, and your prompts gets shorter
and shorter and shorter. Now, let's take a look at the
visual display number one, which is going to be the
retail shelf display, okay? So how would our design look like as part of the
retail shelf display, and we're going to go through
every single one of them, all of these for you to see how your product could fit
within various contexts. So this is the first
display that we have. These are the scene details. Multiple tins of frosted beans arranged neatly on a
premium retail shelf. Excellent, warm,
inviting store lighting to highlight the copper finish, slight depth of field to
keep focus on your product, but show surrounding context, consistent design, excellent. So it's setting up
the scene in details. Now we're adding some sort of videography, cinematography, sort of speak to our
packaging design process or display process of the
packaging in order to see how our design or our product or the packaging
for our product, how would it look like
in real life settings? Take a look at this. This is very, very impressive, right? Here we go, we got a shelf, and we got roasted beans. Looks quite premium,
quite extraordinary. I'm really, really, really
impressed with such a design, even the lighting
effect actually just gives the packaging like
a level of attention, which is very remarkable, and we're able to do so
within a couple of minutes. Now, let's proceed
with option two. Here we go. So we're going to take a look at the second display option, which is very
powerful. Here we go. Cafe counter placement, and more natural placement
for the product. So let's take a look
at the scene details, Tina forsy beans placed prominently on a
wooden cafe counter, background express
machine, cups, and light cafe ambience, warm inviting lighting with
shallow depth of field. Excellent. A few coffee beans
scattered on the counter. Excellent. Like, these are
some powerful details. As part of the scene, which will set up a really, really nice display for
the product packaging. So if you recap from the previous lessons
and lectures so far, we've started off
from a simple idea to a basic packaging option, diffusing our logo,
fusing our design, color palettes and
building up to a final placement of the actual product of the actual packaging
on the shelves. Normally, the process would take you months as part of teamwork, and we're able to do this by ourselves in a very strategic
and a very powerful way. Now, let's take a
look at the image as it unfolds. Here we go. So we're having a cafe
ambience over here, which is very nice, which fits
the theme of the product. Let's explore the
packaging as well. How would the
packaging look like? Excellent coffee counter,
we got coffee beans. We got the espresso machine, the coffee machine, and
this is the display. Excellent display. So
we have the shelf. We got the coffee
house or the cafe. Now let's proceed
with the next one. Simply type in, proceed. Like I mentioned, it gets
shorter and shorter. It gets more convenient to get these results because
we have set up everything quite perfectly
from the get go. Now, the third visual display
is a lifestyle scene. Home brewing. So roasted beans, tin plates
on a kitchen counter, French press or pour
over coffee maker news, morning light coming
through a nearby window, some coffee beans
scattered, maybe a cup, mid pour for an action feel, warm, soft tones for
relaxed home atmosphere. Now, let's create
the scene details. This will showcase your
product being used. Within day to day activities.
This is very powerful. So I'm able to showcase my
coffee brand within cafes, within shelves and supermarkets, within households
who use coffee, for example, using
my coffee brand. So this packaging, combined with the placement
of the packaging and the product will help you confirm which packaging best resonates with your own brand, which packaging best reflects the core brand
identity that you're having from A to Z without wasting months
trying to figure this out. Now, as we can see over
here, the scene unfolds. We got the coffee
machine at the back. Here we go roasted beans. We got an espresso
cup over here. That's very powerful. How
about the next display, which is the gift set. I'm quite curious to see how
my brand would actually fit as part of a gift
set arrangement roasted for my brand,
which is roasted beans. So the scene would include tin placed inside an
elegant gift box, surrounded by
coffee accessories, excellent, small scoop, white espresso cup,
and a pouch of beans. Soft filler material, like show a craft paper for premium look, warm lighting to keep the
premium and inviting feel. I like the design approach
for as part of a gift set. If you are a coffee
lover, for example, and you know someone
who loves coffee, you can give them
this coffee set, which is a great display, a great packaging option as
well to pass on the product. And all of these tactics
like I'm sharing with you, they apply to whatever product.
That you're dealing with. Feel free to experiment with us based on your own unique
requirements and circumstances. For example, if you are
using these tactics for a gift set or snacks or
sauces or cosmetics or tools, electronics, accessories,
whatever it is, these tactics that I'm
sharing with you right now, they apply, and they
work perfectly. Feel free to tinker
with them to see the end results based on your
own unique circumstances. Now, as we're having
the image unfold, I can see the gift set box. We're able to see
the espresso cup. You're able to see
my coffee brand, and you're able to see the
small shreds over here and a small coffee beans bag for a premium look and a
scoop for coffee beans. That's very powerful. So now we're able to
see the product and the packaging within
a gift set setting. How about from a
marketing perspective? Let's go with a marketing
shot. Is my packaging? Is my product designed well
enough to be marketed easily? Let's see. Proceed. Now we're going to
have a close up marketing shot with
scattered coffee beans. That's going to be
used as part of the marketing initiative
for the product itself as a final
step when you have confirmed the actual
design for the packaging. Now, take a look at the scene
details, roasted beans, tin as the main focus, coffee beans scattered
naturally around the tin, dark moody background
for premium, dramatic feel, spotlight
soft spotlight to make the copper and matt black op, shallow depth of field for an artistic marketing
look excellent. This is professional
marketing footage. Now, the image over here, we could use it to actually showcase your product as part
of marketing initiatives, if you're going to be
creating some sort of ads, for example, or as part of a meeting that you're
having within the department, if you're working in
a corporate setting and within the
design department, or you are creative
within an agency, you're trying to reflect and showcase a mockup
for the product. All of these tactics that
I'm teaching you right now, they serve the purpose. Now, let's take a look at the shot for the
marketing initiative. It looks quite professional. Take a look at the lighting
effects, the background, the actual logo placement, and the setup of the actual product amongst the coffee beans.
Very professional. So at this current stage, we have successfully created professional packaging for
a product from the get go, where we have started
completely from scratch, having no idea whatsoever
how we are going to be building upon our product
packaging requirements where we had basic designs, to actually moving on to
integrating our brand identity, then getting to
finalized modifications, then moving into customizations, then actual placements of the packaging and the
product as a whole. So I truly hope at
this current stage, you're able to get
inspired in terms of applying these tactics to your
own unique circumstances.
18. Wrapping up : Do, what do you think?
Impressive, right? I truly hope that you found
the class quite helpful. If it helped you take up your skills to a
whole new level, at least 1% in the
right direction, it's a job well done. I look forward to
receiving your feedback on the current class
and make sure that you follow my profile for the latest releases and updates, and I'll see you
in the next class.
 Engr. Hussein Attié, Entrepreneur I Engineer I Educator