Transcripts
1. Intro: Wonder if the snow
loves the trees and feels that it gets
us DEM, so gently. And then it covers them up snug, you know, with the white guilt. And perhaps it says, go to sleep darling. Lisa comes again. Hello friends. My name is Hannah, and I'm an acrylic artist. And I hope you all are doing. So in this class, we'll be learning to beautiful magic vent escapes
using gosh technique. What DO materials we will be needing for this
gouache painting? Then some basic mixing technique
and blending technique. And then two paintings that
has windows escape sunset. And the other one is
Chile window in detail. And to painting. Ready? So let's start with
these beautiful paintings. And I hope you will
enjoy this class. Stop it.
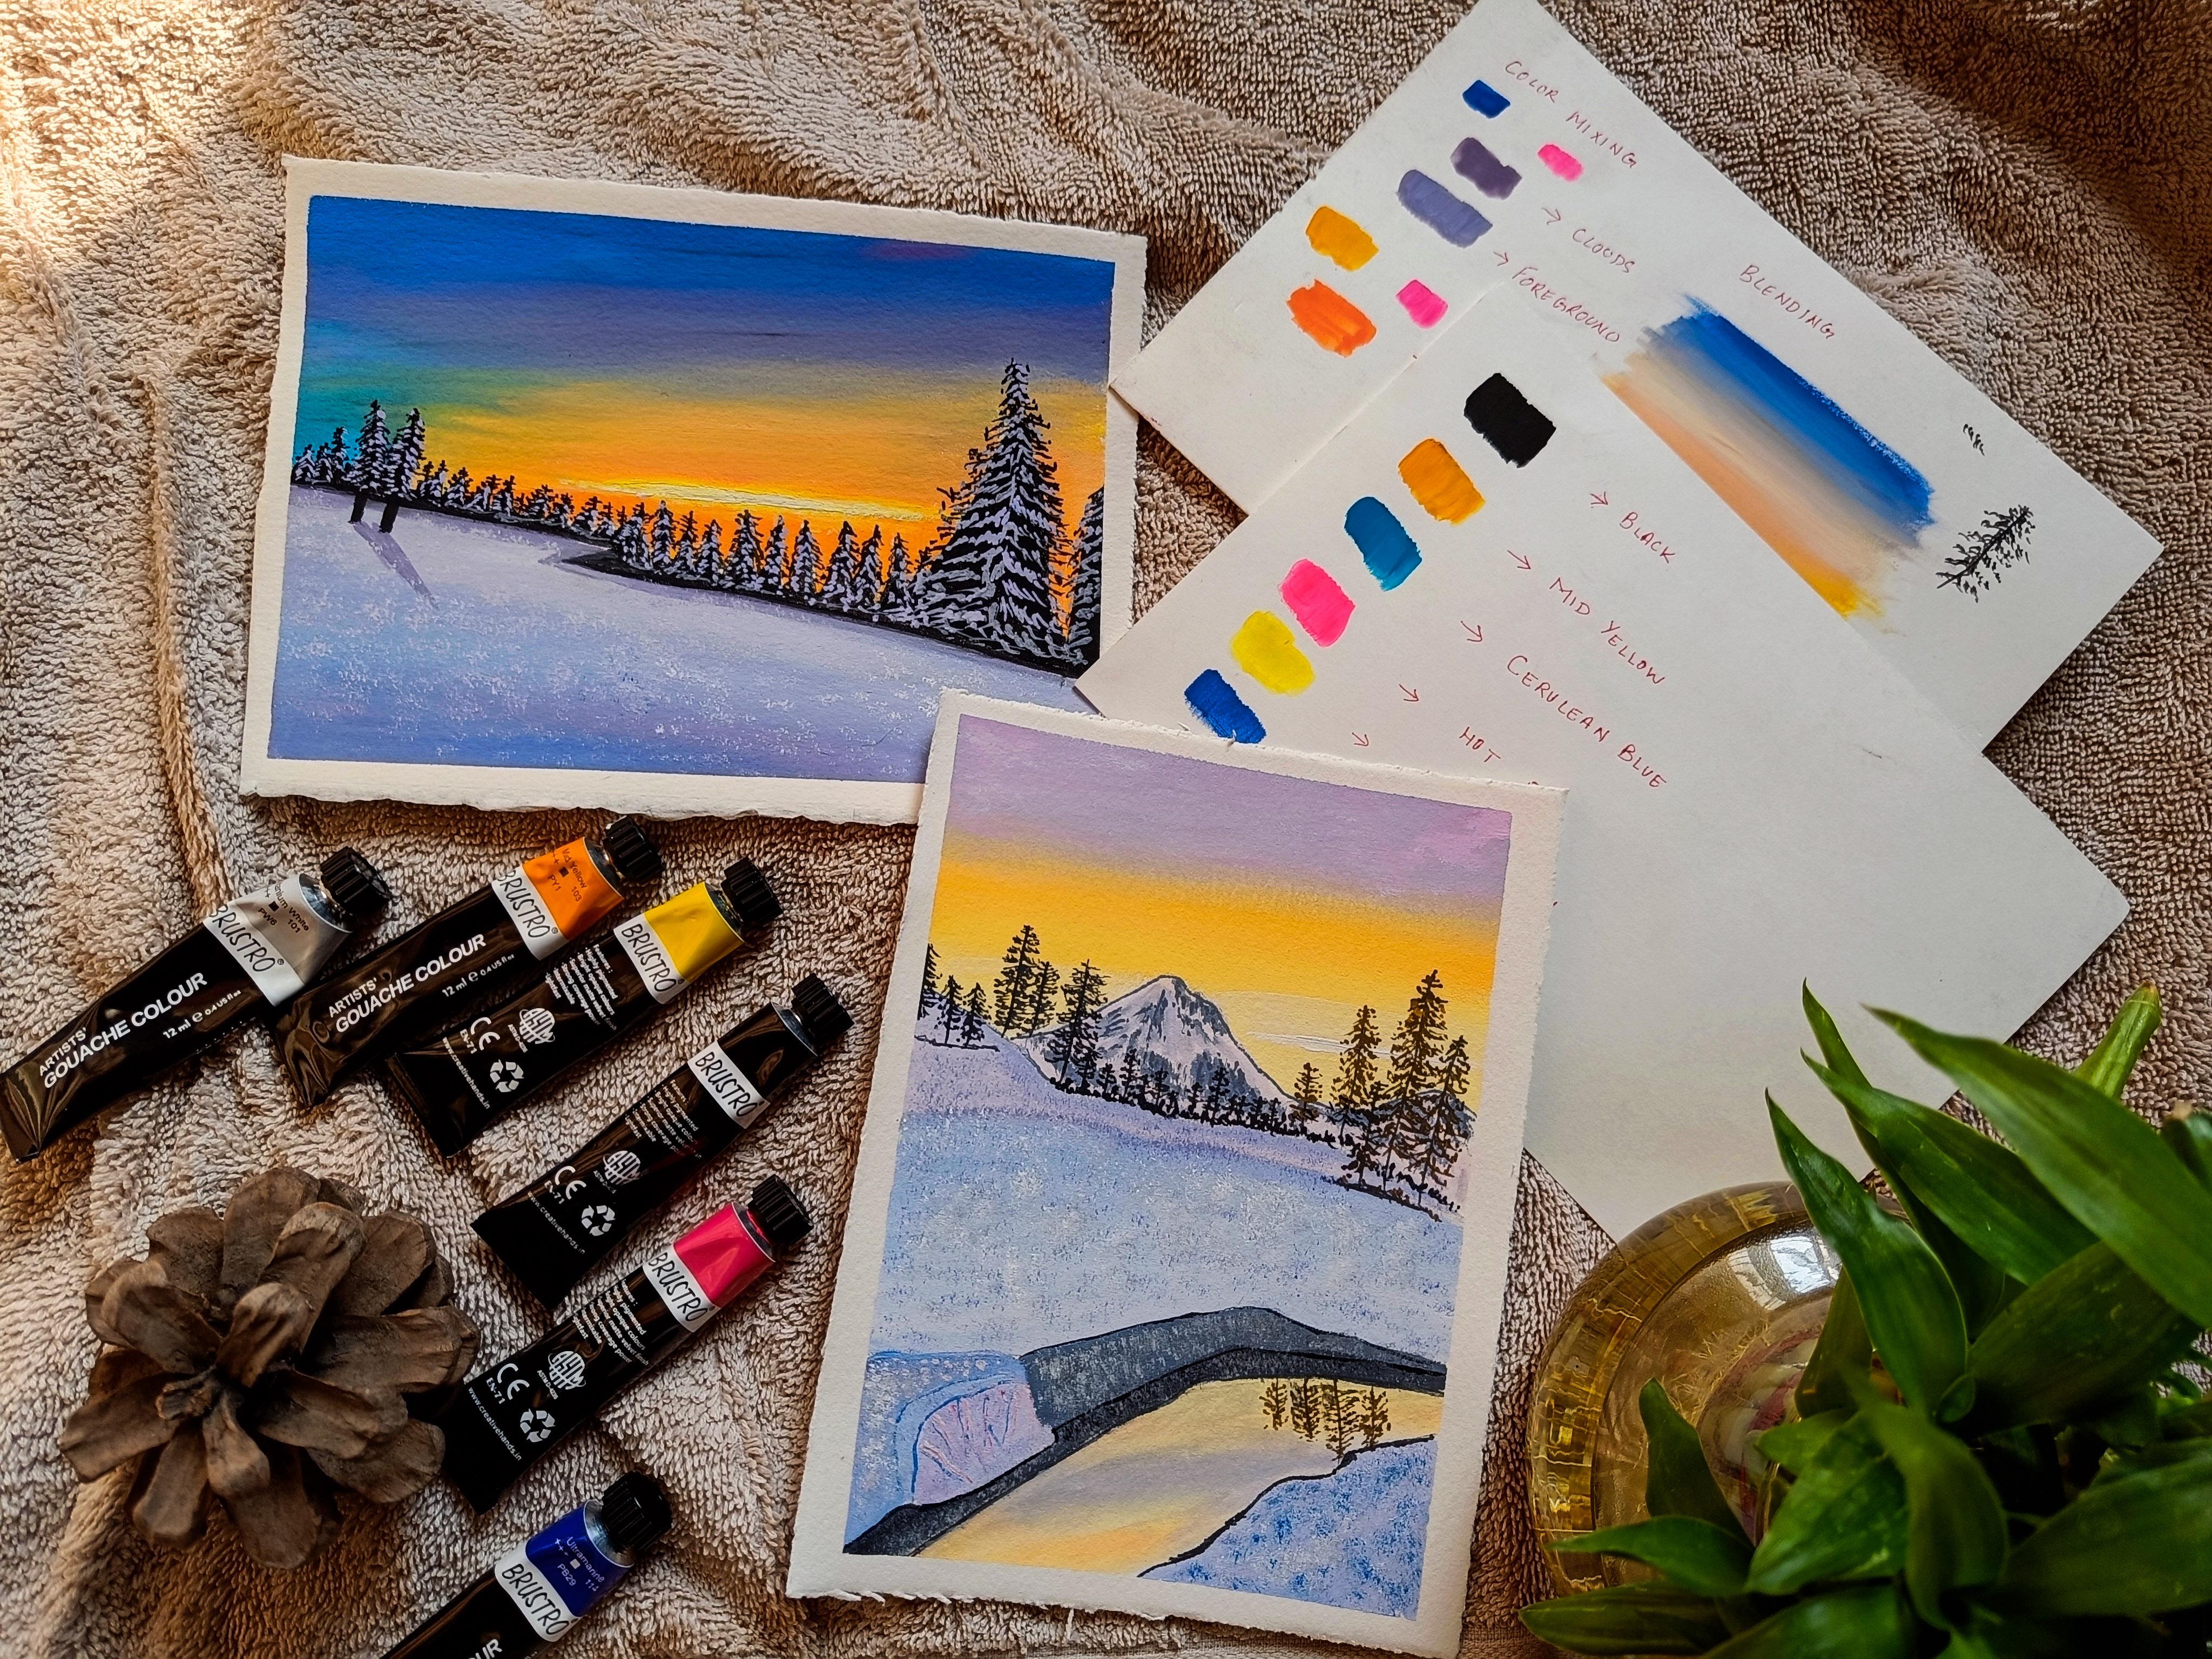
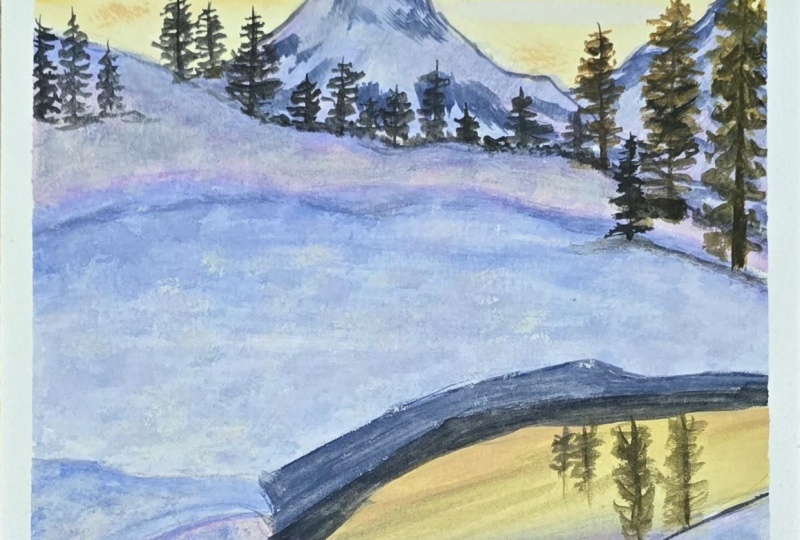
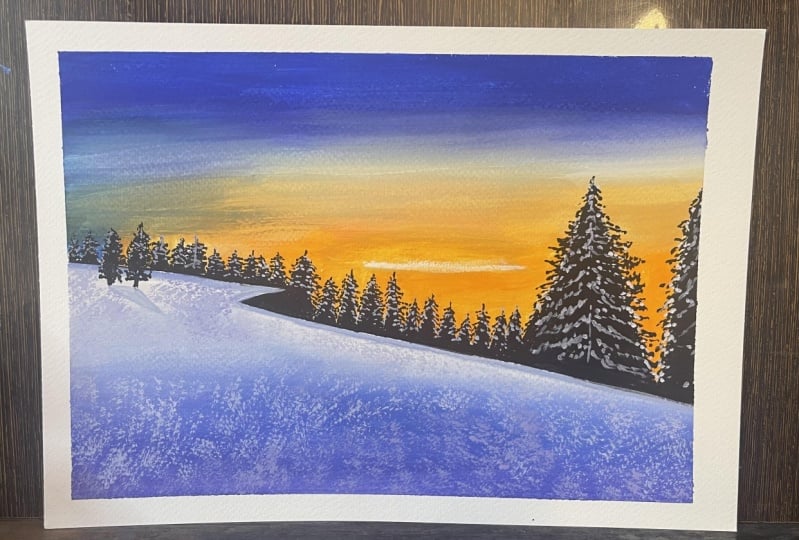
2. Materials Required: Welcome back. So this is the first painting
which we'd be doing. And the second one
is just a second. This is the second painting
which we'll be painting. So let's start with the materials
which we'll be using u. So this is the ox 300 GSM
watercolor cold press paper. The job got it into two parts. It's almost A4 size paper. And the colors which I'll be using is the
straw gosh, colors. So it comes with a set of 12. So few colors I'll be
using here from these. So apart from this
pencil and eraser for drawing and the brushes, this is the liner brush. First, let's discuss about the flat brushes of
different sizes. We'll be using that
three different sizes of pressures which
I'll be using yellow. One, is it too big, and
other doors small size. And then the rigor brush. This is another type
of rigor brush. And the second, this is
the rigger brush again. And this is the
Bristol flat brush and again the round brush. So these brushes I will be using on diet bending and
the palette knife for mixing the colors and the Spencer than the masking tape. And declared or
tissue paper towel for cleaning the brush. And apart from this, two jobs, one for clean water
and for one for dirty water and the palate. This is the most
important thing. So let's start
with the painting.
3. Basic Techniques: Welcome back. So let's first
discuss about the colors. So the first color is
black, muddy yellow, radium blue, hot pink, lemon yellow, ultramarine
blue, and white. Same Gallo will be using in
the second painting also. So let's start with some basic techniques which
we will be applying here. So this hot pink and
ultramarine blue and white is for the background and
also the foreground. So let's start with some basic techniques
which we'll be using you. First as the column mixing. And the second one is blending the colors
which your VR mixing. So let's take a flat brush and stopped with
the color mixing. So first I'll be using
your ultramarine blue. So you can see there's
lot of water on my brush, but you don't have to
use that much of what Darwin BIA actually painting it. You have to use
very less amount of water and more amount of color. And the second
color is hot pink. When we mix these
two colors together, it gives a very
nice violet color. And it's very nice and
soothing violet color which comes out when am not
mixing any white to it. It comes in with a
dark violet color. But when you are
mixing it to white, it gives a nice circular
Gallo material. See you? So I'm adding a
little bit more of a blue and a little bit
more of hot pink. So you can see how nice that
violet color has come up. So this color we'll be
using for the foreground, and adding a little bit more of blue and a good bit more off. This is the exact Gallo which we'll be using for
the foreground. And so this color mixing, this is the first BAD which we'll be using for
the foreground also, and some for the
background noise. So now let's start with
the second column mixing. Now this is the muddy yellow. It's like orange. If you don't want
to have mandela, you can use orange also
CAD or cad yellow. And then again,
mixing it hot pink. And you will see a nice
orangey color which comes up. It's really bright and it's like a fluorescent
orange type. It gives a very
nice texture to it. I can see how nice and
fluorescent colors. So these gallows, which we'll
be using for the clouds and this for the foreground as
well as for the clouds. Now let's do some
blending techniques. So first I'll do the blending technique
using to do three colors. So first color I'm using here is the dock one that is
ultramarine blue. Madame, just mixing
it to and fro. If the color is dried, you can obviously
add little bit of water to it because it
does water soluble. It's not like acrylic that
does not water-soluble. But yes, Gosh, is water-soluble, so you can easily
blend the colors. Now the second Gallo
which be using your is not this muddy yellow. Let's wash off the brush
fast and then you start with the Monday yellow and
David TOEFL, hot pink. So in between, I'm leaving
that gap because I have to mix the color and mix
these two colors together. It will create a greenish shade, which I don't want. So I have just left a little
bit of gap in-between. And then we'll start
mixing it with the column. So now I'm adding your white and starting the
blending technique. Adding more of white and just
moving upward direction. So I don't want
that greenish color to come up in my background. So I I'm just
blending the color. That's it. Try to blend the colors
from light to dark, yellow, not from dark to light. Just adding a little bit more
of what pink. Do you have? A nice violet color shape. Just blending the color and
moving the brush and D2 and flow direction.
As you can see. You don't need to repeat
this step until an analyst that line which comes in between the two colors is faded off. Whenever you are
blending the color and the color is
getting dried up, add some water and then
again start blending it. So again, I've added
a little bit of ultramarine and again I'm using and just to and fro direction and
blending the colors. Adding a little bit
more of media law. And again, moving the brush in the upward direction and
adding little bit of hot pink. Because when hot being mixed
with ultramarine blue and gives a nice while
its shape, while it. So that's what we
want the color to be. We don't want any greenish
color to come up. So this is the way we'll be doing the blending for
our first painting. And for the second one
will be just needing. Suppose if we are using just one color for
blending techniques. So first I've used
the dark color, and then I have added
a little bit of white to red and
again, moving it down. And now again I'm adding
simply wij to the lower part. And then I will
move the brush in the direction until the whole
thing is blended together. So in Gosh, you can
easily blend the colors. No doubt. So you can see how nicely the blending technique
has come up. So now let's start
with the painting.
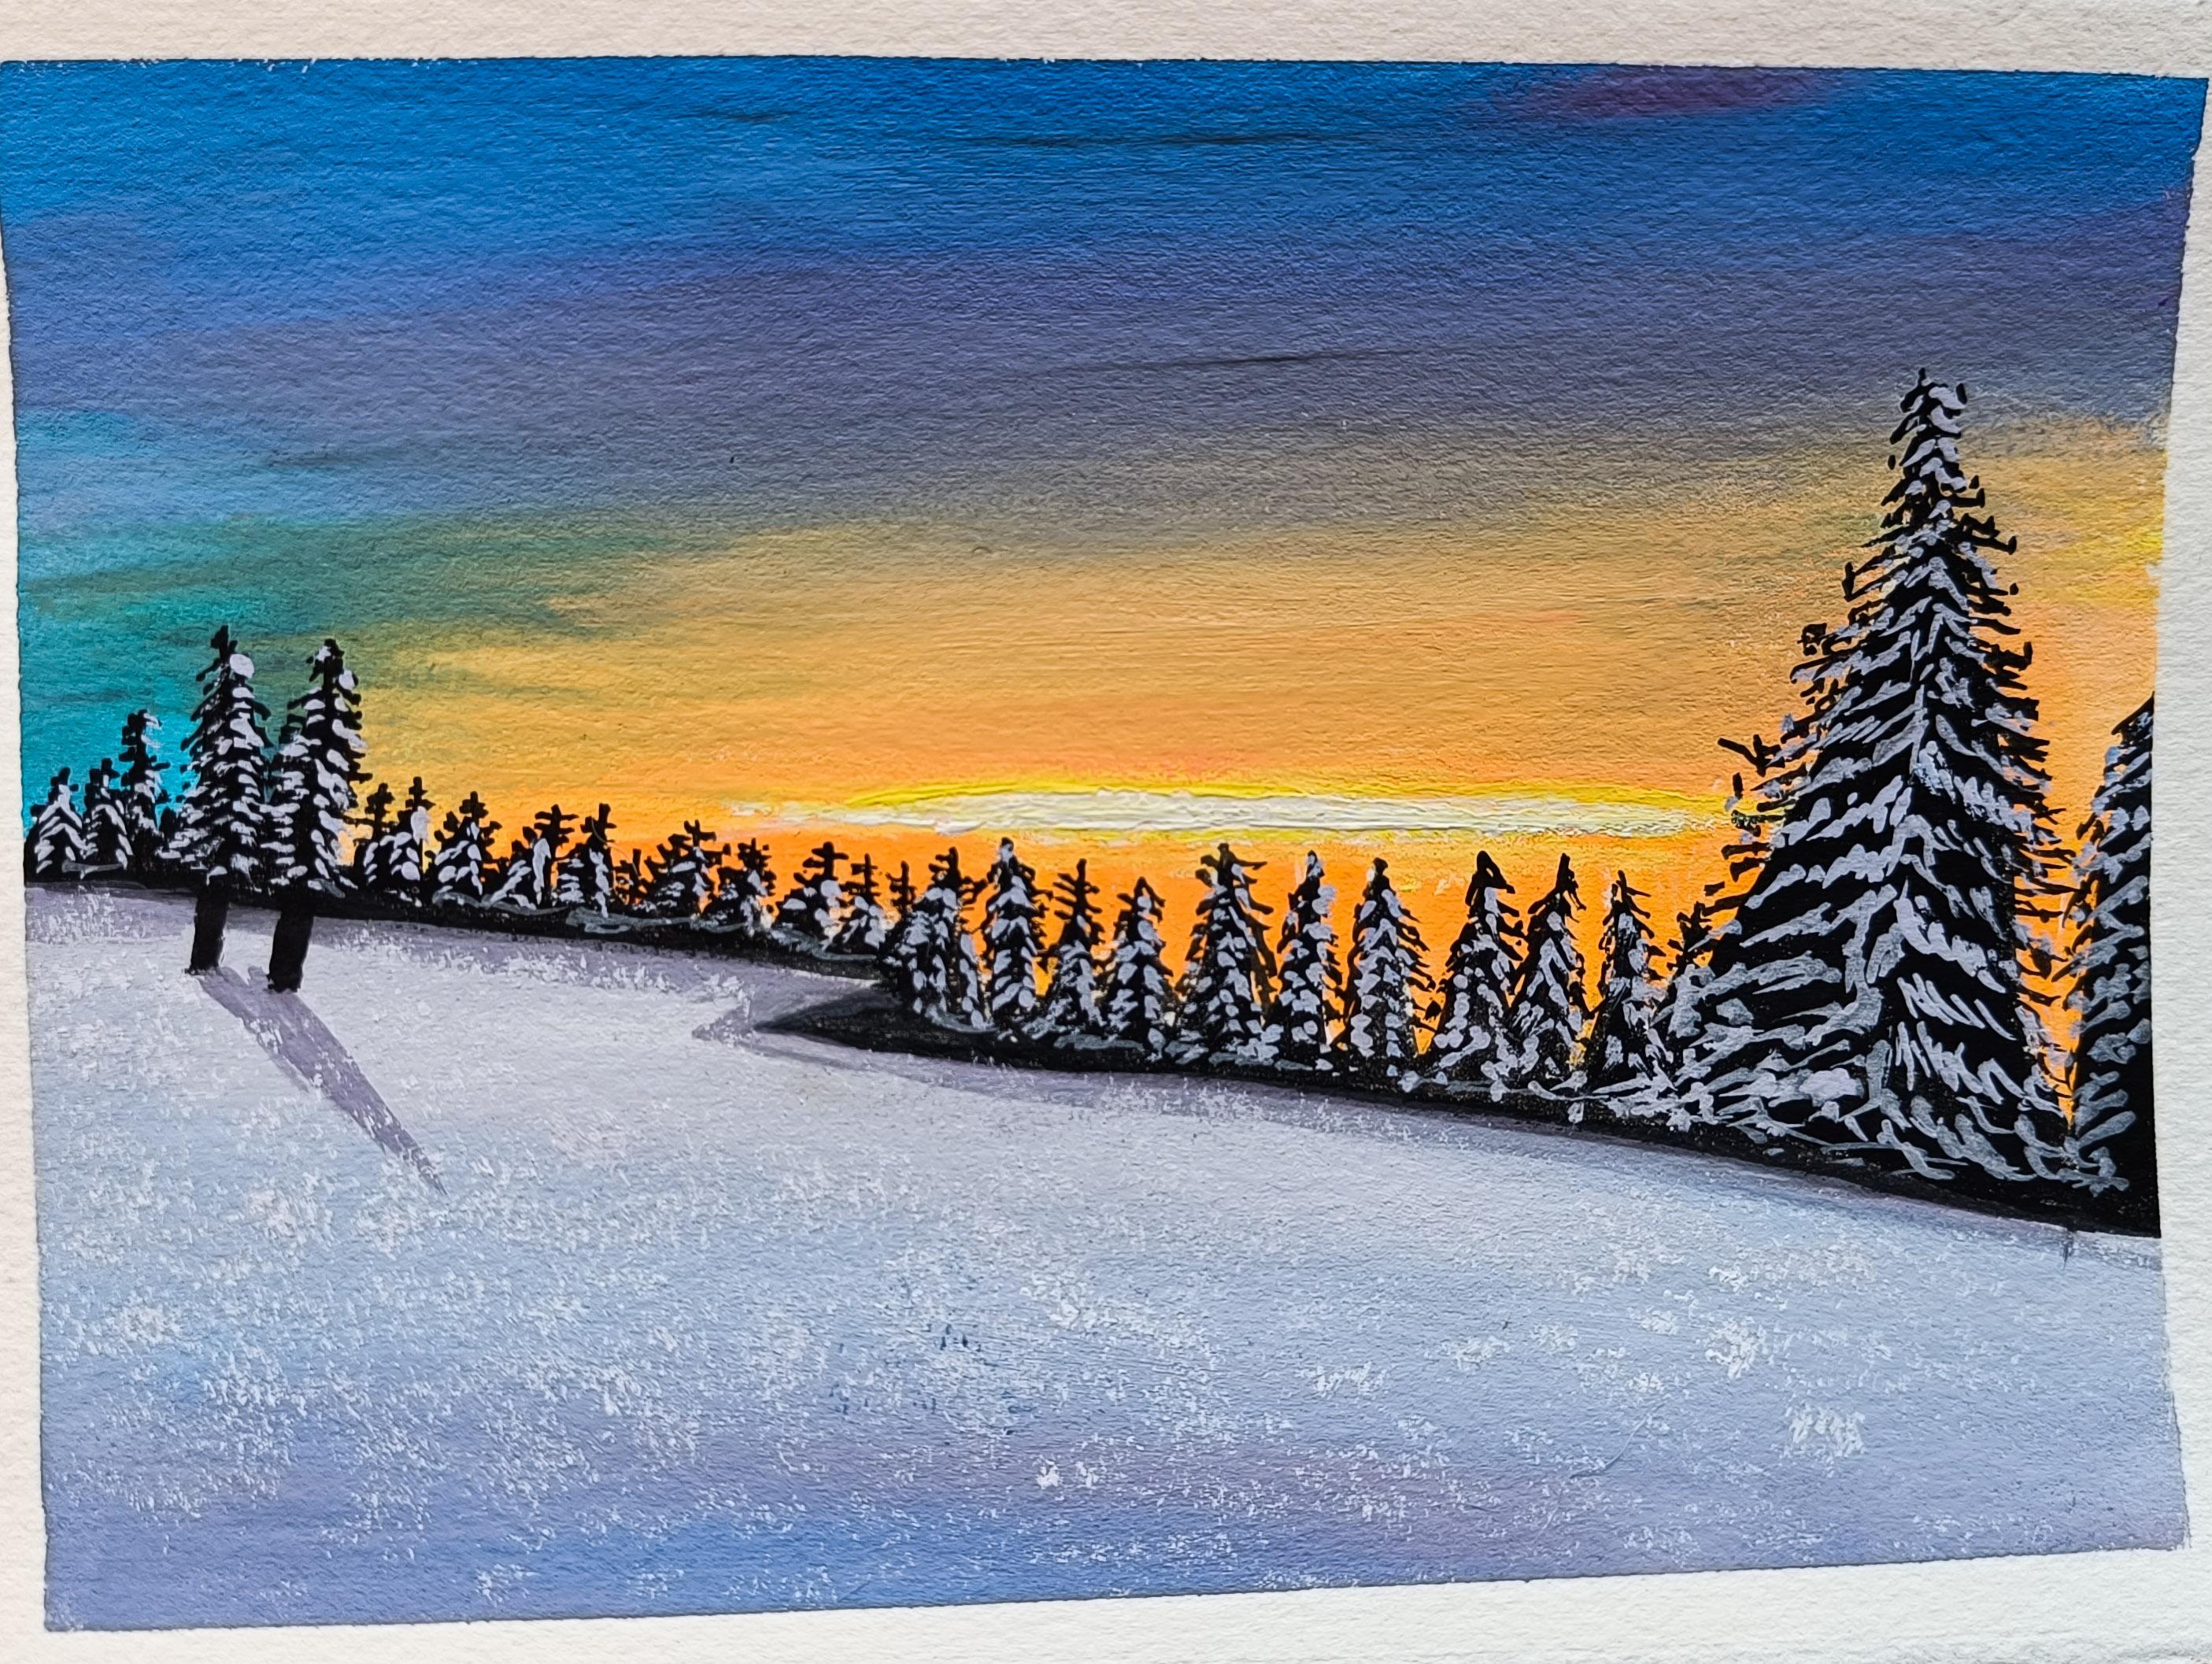
4. Sunset Winterscape Rough Sketch: Welcome back. So let's first
start with the sketching. So this is the first painting
which we'll be doing and just the basic freehand
sketching we'll be doing Gill. So I've already taken two
jars of water and the palate, but before that, I'll just tape down the corners with
the masking tape. So it's totally fine if you're
not using masking tape. But I like the white borders which come up event
B was masking tape. So here I am using the
oddest grade masking tape. Just a nice white border. And why is it drop-off
on the sheet? So I'm just removing
it for a while. And let's start with
the drawing first. So here it goes. I'm just using my normal pencil and just giving a
rough sketch to it. You can say a free hand drawing. So that just the division between the foreground
and the background. I hope it does visible to you the lines I'll just document. So that does more
visible to you. It's just the diagonal
line with the cross and then the tree the tree trunk that do trees which are
in between the snow Alia. And I'm just giving
edited shape to that G, which will come up so
far. Color blocking. That would make us
easy when we're painting the entire landscape. And same, I'll do create small, small triangle
shaped by entries. So first let's start
with the big tree. There's one victory
which is quite visible. So first I'll create that one. Just the triangle,
which just creating, I'm just creating the shapes
so that I have to leave those blank before I'm
doing the background color. Because if we apply that
background color on these trees, then I'll apply the
colors on these g's. It will create a mess and do not come up exactly what it is because this is
not acrylic color. That color, we can
do that like we can completely do the background and then start
sketching the BOD. But with cause you
have to create these specific areas which
you need to leave that area, and then you need to
start the background. So I'm just creating
a rough sketch of the pine trees which will come up so that I leave
those spaces in between. And then we'll start
doing the background. But so this sketch
is almost done. So let's start
with the painting. First, the background. So let's start.
5. Sunset Winterscape Background Blocking: So welcome back. So these are the colors
which we'll be using. And the first color is hot pink, lemon yellow, medium
blue, ultramarine blues, radium blue, black,
and of course white. So let's start with
the flat brush. First. Bit will be doing
the background. And before using this, we need two jars of water. One for 14, dirty brush
cleaning and one floor cleaning the clean brush and the
tissue paper or the clot, whatever you have for
removing excess of water. So now first, we will dip the brush in the water
and make sure the whole, entire brush is wet and remove
excess of water from it. And the first color which we'll be using as the darker one, that is the ultramarine blue. And I'll mix little bit
of surrealism blue to it, and a mix of white. So I think I've
taken a lot of white because the color has
lighten up a bit. So I'll just add a little
bit more of ultramarine blue and a bit of
radium blue also to it. Because we need a darker shade. And just make sure that the
entire corners taped nicely, then only you will
get the nice borders. So you can see now
the color is quite dry and it's quite light colors you have add more of
surrealism, blue to it. I'm just applying it
over the top area. If you see that your
brushes getting dry, just add a little bit
more water to it. And then again, start
filling out the colors. Because there will
be chances that your brush will get dried off and becomes little bit, you can see how dry it is. I've added a little
bit of water to it. And then again at
its dot, the color. So this, again I've added
what being anything, see the purplish shade
which is coming up. You don't have to add too
much amount of water, do it otherwise, your whole painting will
not come up as expected. You need to have a tick color. So you need to use very little amount of
water just to make that brush so that the brushes moving smoothly and the color is
blending nicely. You just have to add that
much amount of water. You don't have to add too
much amount of water, do it. Now. Totally remove your colors from that brushes so
that when you are using the lighter wash of color doesn't mix to that light color. Because we will be using
your yellow because, and if blue comes in
contact with yellow, you know, it will turn
into greenish shade, which we don't want. And now I'm cleaning it with the clean water.
So same technique. You have to use it for the entire painting and just
removing excess of water. And now using mid
yellow and white, pink to give a nice fluorescent
orange shade to it. You can see how nice the
color is, bright and shiny. This will give the effect
to the entire painting. See, I'm just filling the
lower area and leaving the shapes of the pine tree
which I have drawn earlier. Just trying to fill
in the gaps in between which is
in-between the pine tree. And just filling the area. You can see how bright orange
then it does mix to it. What I have added. Again, I'm just blending. Brush is getting dry it off. And just add a
little bit amount of water to it and then
start blending the color. I'm just leaving leaving
the material gap in between the blue and
the orange part. Because I don't want
the color to be turned into green modality
mixing it later. So I'm just leaving
that middle portion. I'm just blending the colors nicely so that the entire
color is blended nicely. So now at the one corner, the blue, a blue colors
like surrealism, blue. So I'm just adding it in
the Bitcoin and do it. And I'm that color
also am not mixing it with the orange one. So I'm just making
it showed that it doesn't mix with
the orange color. So just blending into it to
the ultramarine blue mix. Now I'm just washing
off my brush nicely and taking white and just dotting to blend the entire
area which is left out. So you can see how I'm blending the color and I'm just
additive but doubtful. Again, I'm washing the brush and removing excess water and
just without any color, I'm just blending it
as there's no color on my brush and just
blending it like that. Again, I'll wash my
brush and again, I will just dry off
my axes of water. And then again I'm
start blending it. This process you have to repeat 23 times until unless
you feel that yes, the blending has
been done properly. So you don't have
to mix the colors. You have to mix the colors
until unless that line in between has been removed. And when you are mixing the dark colors with
delayed one just tried to remove excess
of colors to from it. And just dry off the brush
with your tissue paper. And then again start blending just the blend brush
without any column. So in between there's
the white yellow part. The home using your, the lemon yellow to give a nice line to it with the
same brush I'm using here. You can see just the tip
of the brush here I'm using to create that lines, that sun effect, that sun
rays coming in from between. And just blending the color. The orange portion. And see the blending is the
main body of the bending. It requires lot of patience
and a little bit off. It's tricky, but the
black does, it comes up. So no need to worry about it. And I'm just adding little
bit of white to yellow part. I haven't used any
water in that. I'm just directly using the gouache color of
the doubt any water. And again, I'm taking that
makes sure and just blending the color same column,
just blending it. And bringing it in
that orange area. Blending is something
which requires a lot of patience and practice. Requires a lot of
practice when you are blending the colors it
comes with practice. It doesn't comes all of a
sudden, it needs practice. Then only you will be able to
blend the colors properly. So you can see I'm
just trying to make the colors blend
as much as possible. This is almost
done the blending, but just little bit of
final touch-up I'm doing. You're adding little bit of pink to make it
look more brighter. So it's almost complete. The background one. So you can see again, I'm adding little bit of white. Just draw white, no water to it. Just adding little bit
of white to the center. And this is almost complete without any color. I'm just blending it
with normal water. So this is almost done. So let's start with
the second button.
6. Sunset Winterscape Foreground Blocking: Welcome back. So now
we'll do the foreground. So same Gallo here we will be using that does deep purple mix and that little bit
more of a violet color. So I'm just adding
starting from the below. And then as we go up, the colors will start fading. So from darker to lighter
version will move upward. So I'm just adding
more of light. So here you can see that
a bit more blue is this, I'm just mixing little bit of hot pink and just applying it. Whenever you feel that
the color is getting dry, just add a little bit of water. Do we then start
doing it again as galoshes water-soluble so it
colors will easily dissolve. So just adding a little bit
more darker version below. So just move the
brush to and fro until the whole blending
is done perfectly. And again, adding
little bit of white. Just trying to blend the
color as much as possible. So why it is a great medium which can be used for blending. So just trying to mix
the color nicely. This is almost done
the foreground. So just blending the
color with my flat brush. Now this background and
foreground is done. So we'll start with the trees. These binaries, we'll just
fill in it with black color. That's it. Docking will be done
with black color. So here I'm using
my round brush, fulfilling those details, which we have drawn a
rough sketch of it. So you can see the
colors a little bit dry. Let's add some more water to
it to become more soluble. So I think I'll use a
smaller flat brush now. For bigger tree. Though, we are not doing
anything just blocking the entire pine tree structure
which we have created. And the rest detailing. We'll do after that. But first we will fill
in blocking the colors. So just enjoy the process
of fulfilling less. First draw that line which divides the background
and the foreground. And here you can see I have makes little bit of blue to it. It's not completely black. This class is just a big
elaborate glassware. And every person can try it. Even though if they are not
beginner, intermediate. They can also try for
offshore for fun. So here they are small,
small triangles. So I've just changed
my brush and using this rigger brush to complete that triangle shape because that flat brush
was not coming up nicely. So I've just changed my brush
and using my rigger brush. Creating those shapes. Hi. Yes.
7. Sunset Winterscape Tree Detailing: Welcome back. So now
we will start with the detailing of the pine tree. So here I will be using my rigger brush and we'll
start with the detailing. So I have just 10 down the
paint and I'm just using the rigger brush and just
creating the tree texture. Just drawing one line
and just creating random horizontal
and diagonal lines. Again cm just randomly creating diagonal lines
where the triangle. So this is the simplest
way to draw the binary. We can do the D dealings as well when the Dow drawing
those blocks. But this is the simplest way
of drawing any pine tree, which is covered with snow. So you can see I'm just
repeating the same process on other small pine trees
so that it looks. So when we're doing
the detailing of the tree with these snow color, and to look obvious, if there's spaces in between, you can create small pine trees. They're also suggest small random lines. I'm just creating
beside that blocking. So I hope you guys
enjoyed this class. And I wanted to share
this painting in detail. So that's why I created
the class I Loftus. The clouds and the spin Ding, De Jing and invoice. You can also do an
acrylic if you want. The same technique
you have to use. But make sure that
acrylic is not soluble. So you have to be very
careful regarding that. And yes, you can use
acrylic gouache, any medium, whichever you like. If you don't have acrylic goes, you can also use both the
gallows if you have that. So you can see most of my
classes on Skillshare is basically acrylic because I
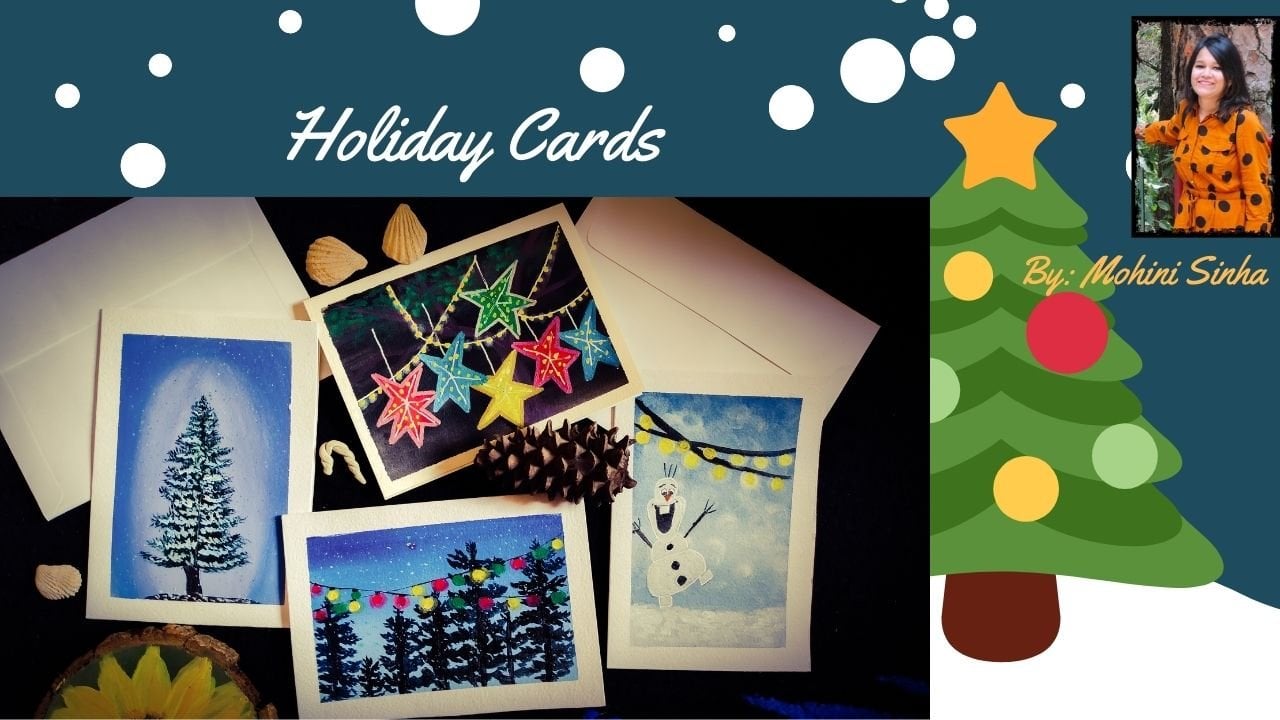
mostly do acrylic medium. You can also see
one class that is the holiday cards class and
that there is pine tree, which I have created specially
for the holiday cut. You can see that as well. How would the tree is created
that snow capped trees. So one thing, always
make sure that whenever you are using any dealings, try to use your rigger brush or liner brush,
whatever you have. Because those brushes gives
a very nice detailing and you don't have to put a lot of tick
colors on that brush. You can always use very light and liquid
form of Dell fluid. Then only you will
be able to create a nice small and shop textures. So just enjoy the process. Few more binary trees
are left bigger, 11 more smaller, one. Yes.
8. Sunset Winterscape Final Detailing: Welcome back. So now
let's start with the final BOD is the main
detailing. Just left out. So first, we'll, we'll be using the flat brush for the
outlining the division, which is dead between the
foreground and the background. So here you can see I'm just
using little bit of glue, same color, violet color. Here I'm using my
smaller flat brush. And in the lower area, which is dividing the
foreground and the background, I'm just creating this
line with my flat brush. Just deadline. And you can blend it
with that black color. Now let's draw the
shadow of the two trees. Just the triangle I'm creating. Those two trees are joining. Now. Can see that black
triangle has been faded away, so I'll just make
it a little bit off the dock with
my black color. Just done. But more is left. Now using my rigger brush, I'll be just taking
little bit of white. This is just a dry weight
and add it just to lie in the middle of that cloud, which is lemon yellow, so that it is quite bright. Now we'll be using the bristle brush for
creating these no effect. This is completely
dry technique. I have induced water on that prejudice
completely dry brush, and I will just be tapping
on that foreground. You don't have to
use lots of color on your brush because that
needs to be visible. So it's, the brush
is completely dry, no water in it. And just can see
very light pressure. You have to put on the brush. And just dab, dab, dab. Again. See how nicely those
small dot gives a texture of that snow effect and gives a
very nice snow effect to it. And it is a very
hard bristle brush. If you use soft brushes
to create this texture, but you have to use this brush, then only you will be able
to create this nice texture. And very light pressure. You don't have to
press it very hard, very light pressure
you have to put in. So I will just cover
the entire foreground. You can see I'm not covering
the entire portion. I'm leaving little
bit off spaces in between those dots so
that it looks like, okay, this noise spread all over but not
everywhere it is. There batches of snow
everywhere. It will look like. So you don't have
to cover the entire portion with the dots. You can leave some of
the areas blank also. So this texture is almost done. Just a little bit more is left. Now using the same
rigor brush and blue and hot pink mix to
stem mixing the color. Because now we have to create that snow effect
on the trees also. So I'm just creating
that wireless shade, but it too light. I'm adding more white to it
because it has more vide, but because of that sky
deflection test done and do while it so just applying that. So let's stop to it. The color has to be a little
bit fluid then only you will be able to create
those nice texture on that. Otherwise you'll not
be able to create it, just make it a little bit fluid. Then only you will be able
to create that nice texture. So I'm applying the
same techniques, models more lines, and giving
the shape to the pine tree. This is the easiest
way off painting the snow-capped trees. I think. Bigness, which I've
never done any painting, can easily paint to this. Sum just creating dots and
giving the shape tool D3. Just enjoy this process. And if you are getting impatient
doing these small lines, just take a break, have a cup of
coffee or anything, whichever you like, and
then start doing this. Because it takes time and
sometimes we get data, data to all water, just taking such a long time. But when you'll see the result, after doing this painting, you really feel very happy and excited that
you have done it. So just do it very slowly
and enjoy the process. When I started the
bending and the beaming, I happened to me also that I
used to get very impatient, have to complete this, I have to compete this. But in order to
complete this painting, the bending gets ruined
up and not feel good. So I better take your time
and then do your painting. It's not. And that thing comes up
when you are in a hurry, you have to be a little bit. So just by this process, we are almost done. Just the bigotry is left just
to trees or left, I guess. So if you're painting has
been does getting dried off, just add a bit of water to
it and then started again. You can always make that cosh colors soluble just by adding a
little bit of water. Do it. As creative. And you'll see this. And the whole
painting is complete. And it gives a very nice, I'm really loving
and hope you are also just giving it a good
bit of more white to it. And that the yellow
outline so that it looks little
bit more vibrant. Can see how vibrant
colors looking. Sylvia, done. So let's start
removing that tape, masking tape and see how it
looks with the white borders. Tried to remove the
day very slowly. Tearing off your paper, whichever you are using. So very slowly and diagonally, just pull off the masking tape and see how nice the
borders are coming up. So I hope you'll like the
spending and enjoyed it. Waiting to see your projects.
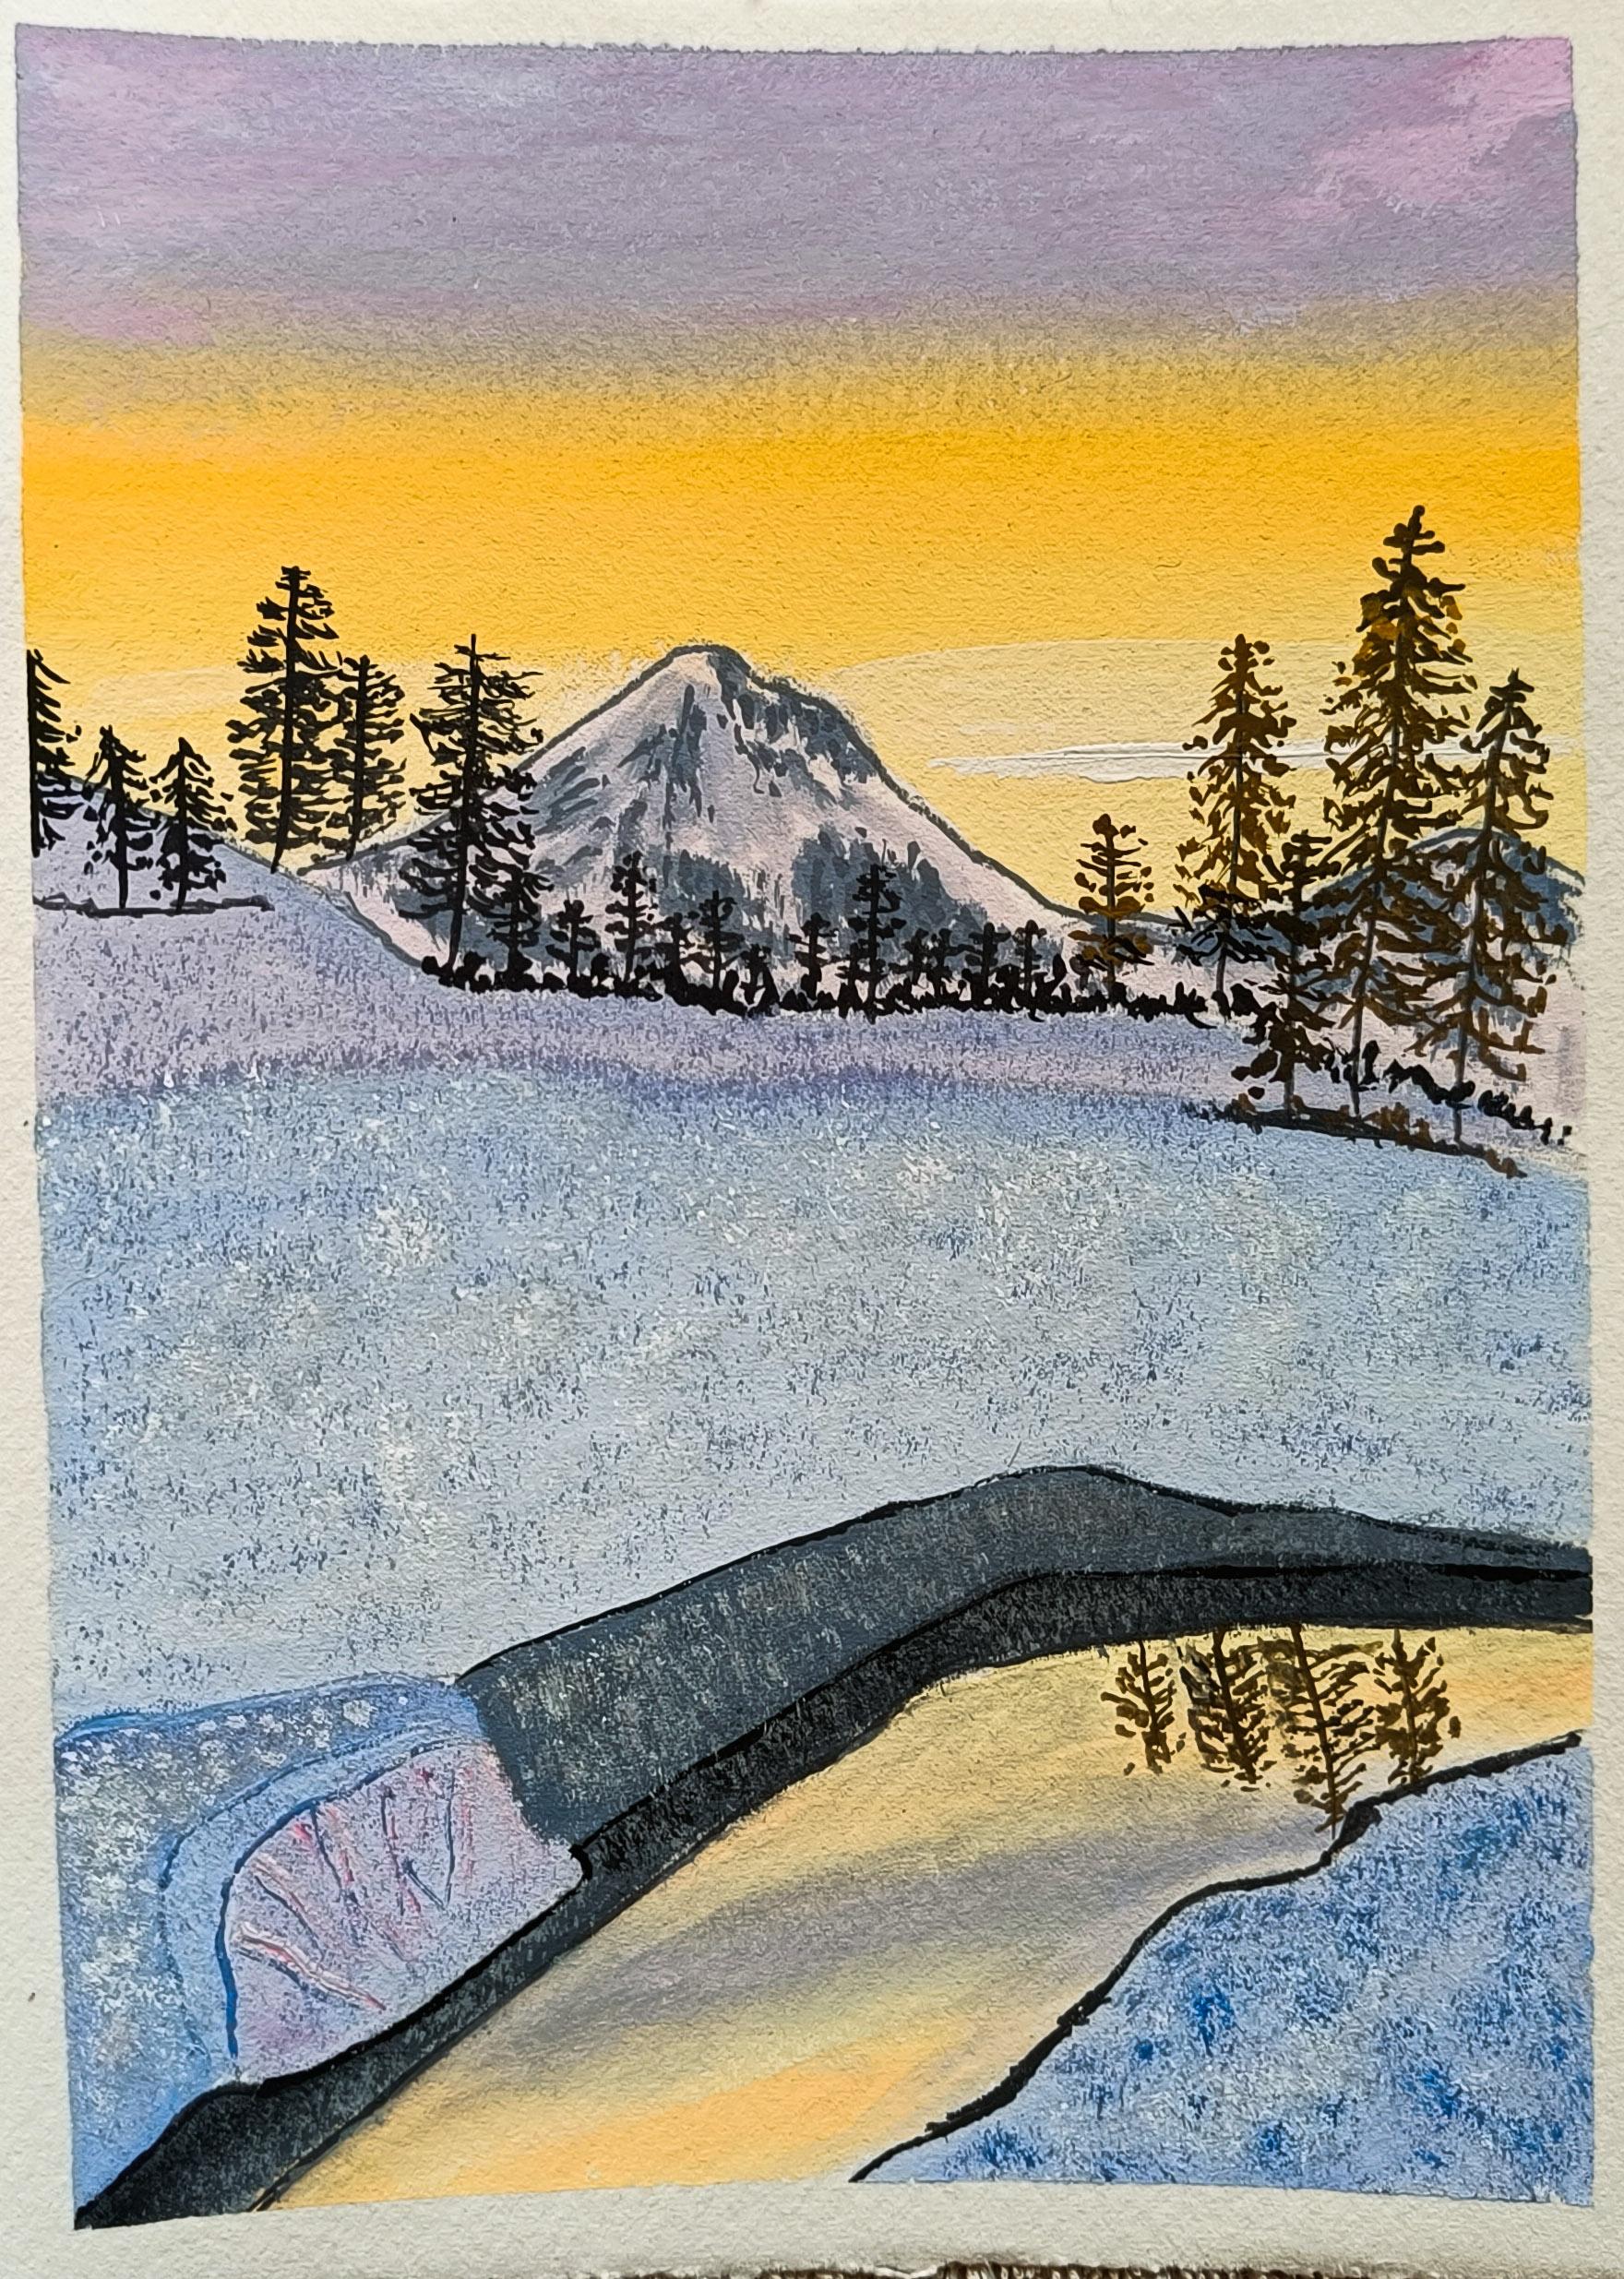
9. Chilly Winter Rough Sketch: Welcome back. So now let's
start with us second painting. This is something different but same color we'll be using here. You can see I've put my sheet
in the vertical direction. The other one was in the
horizontal direction. So this painting,
we'll be doing. So first let's draw the image. Just a rough sketch. Freehand drawing,
non-graded method, nothing. It is just a free hands
drawing we'll be doing, yeah. So just grab your pencil
and just dot withdrawing. So first we'll draw
the middle line. This is the center line
which I'm just drawing. I'm just random, randomly chosen the center
lane, just approximately. And then let's draw
the mountains first. And then we'll start
with D below foreground. For these very simple
freehand drawing, you don't have to do any
grid method or anything. If you are not good at drawing, you can just simply
draw a random sketch. This is just a random
sketch which I'm doing. It's not so difficult, just a random
mountain and revolve it we use to draw when
we are in childhood. So now the foreground
here you can see I've just drawn a diagonal shape. Just six sec. How the water is
moving doesn't middle, which is the water
reflection which will come up and the rest
as the snow area. Mostly I use a Britain
grid method when I'm doing something very realistic
and have to be accurate, especially the portraits I
use for landscapes also when I'm doing the bigger
projects on the canvases. But this is just the free hand drawing which
I am doing here. So I'm doing it very
slowly so that you can also go hand in hand with me. After drawing this sketch, we'll be starting the painting
or blocking the colors. And in this also I have
used the same gallows, which I will be using the jab, jab used in my
previous painting. So same color. No much difference,
just surrealism. Blue here is not used. Apart from that, all the
colors will be used over here. So now the drawing
is almost done. Suggests giving little bit of textures which we have
to create on the mountains. Just block, creating
some random shapes to block in that as well. So this is done. So let's start
with our painting.
10. Chilly Winter Background Blocking: Welcome back. So let's
start to adopt painting. I've just taken out the
colors in the palette. You can see the Daniel White, mid yellow, lemon yellow, hot pink, blue, ultramarine
blue and black. So these are the colors. We'll be using the same
colors and do jars of water. So let's start with it. But the painting and
the tissue paper, of course, for
cleaning the brush. So now let's start with D
painting with our flat brush. So this is a flat brush. I'll just dip the flat
brush in the water and then we'll start mixing
the color and the pain. The first the background. So first I'll use white because here the colors you
can see a very muted forms. So why does use a lot? So very subtle light color, which gives a nice wireless and pinkish shade to the clouds. You can see I have added
much of white and very, I think why does
90% and 55 percent bought hot pink and
ultramarine blue? So just trying to
create that color, very light, subtle color to it. So let's start with
the top first. So I'm just blocking the color. And C f naught
govern the entire, but just the upper part of
the clouds have covered. And then we'll just
wash off my brush nicely with the first one jar. And then with the clean
water just nicely, you have to remove
all the colors. Device it will mix with
yellow color and we're done and do another column
so we don't want that. So make sure that you have
clean your brush very nicely. And if you have two brushes, you can use data also. That is perfectly fine. But I'm using the same
brush which I have used for the above background. Now a year RAM using the mid yellow and white mix and just have left in
between the little area. Because data we'll be using
when I'm mixing the color. So you don't have
to touch that area. You just have to leave a little
bit of portion and Medan. And then you need to start
with D, lower clouds. I'm adding more white to it. And just filling
the lower portion. Makes sure that you
don't paint the clouds. Otherwise, you
know that galoshes soluble and a few will try
to use some other color. It will mix with yellow and it recreates some other Galois,
so we don't want that. So try not to use that
color in the mountain BAD. So now let's add little bit of pink and yellow and white mix. I'm just creating
little bit off. I-n-g look orange shade. Do it. And moving upward. Now just remove
the color and just wash off the brush
and then again start mixing that color. So I'm just blending watercolors and I don't have
any color on that brush. I'm just mixing it
but just the window removing excess water and just
trying to blend the color. Just moving the brush and D2 for reelection and
blending the color. This is one technique
of blending. Another one is off you
by using white color. So I don't want to
use much of whites. So I have just blended
the color that normal water and brush. You can see how nicely that
blending is being done away. Adding little bit
of hot pink texture to the above area because this
is not completely violet. This bit of pinkish shade suggest creating random
clouds and just blending it. Now adding little
bit of white below, because that is
quite, quite awhile. So just adding a little
bit of white to it. And now the same
color add be using for the river images there. So same color, which I have used for the background
for the river. Also I'll be using first I'm using that light yellow shade. And then the orangey shade. Again cm always leaving
some portion in between. So that when I'm
blending the colors, it gets blend, blended nicely. So I've just left in between
little white portion, the Jal, be blending
with my brush. Once I apply all the colors, all the colors have
been applied now, they're just wash off
the brush and we'll start with blending
with normal water. Suggest blending it
with normal water. You don't have to use
too much of what DO very less amount of
water should be there. Just dip in the brush and remove X's award by wiping off to the declared and then
start blending it so you can see how nicely
this has blended. So let's start with D. Second button.
11. Chilly Winter Mountain Blocking: Welcome back. So now we will
be doing the mountains. So first I'm using
the same brush, that is the flat brush, but of smallest size. And I'll be just blocking the background color
of the mountain. So here you can see I have
used same mixture of Gallo, little bit pinkish, hello, and adding more white to it. Because it is very
light pinkish and while it's not completely white. And I'm just blocking
in that area, leaving that shapes in between. Adding little bit more
of white because I need more light texture to it. So just enjoy. Just done. Here, I'm adding the
black also do it. So same Y-linked Gallo, little bit of
ultramarine blue also. And I'm just
covering very small, small dots and lines. I'm creating to give a nice
texture to that mountain. I'm just creating some textures. So you can see the
shape is coming up. Dementia result is
just beautiful. You just have to wait and enjoy. The process. Suggests lightning
that color up. So adding values separate. Little bit more of violet
D and white color. To add little bit
of shadow area two, it goes this shadow area. Just little not covering the antiabortion,
just little amount. And just darkening that
texture a little bit more. So it's almost done that
mountain now we will start with the snow-capped area
of a same color. That's why eyelid and
adding more white to it. Just covering that area
with my flat brush. But you can see just to give it a contrast
between the landscape.
12. Chilly Winter Foreground Blocking: Welcome back. So now
the foreground is left. So plus we'll do the blocking
and then the detailing. So here again, I'm
using my flat brush and ultramarine blue and white mix and little bit of hot pink. So it's drying,
suggest additive, but don't want to do it. So when you see that
your color is not mixing and that dry
texture is coming up, just add a little amount of
water and then stop bending. So this is just filling the area. Adding more fight because it goes down and becomes
lighter and shade. So you can see, bought the
paintings almost same, but they have
different landscapes that these have mountains
and those have pine trees. So these also have
pine trees, but these, but this pine tree will be
a little bit different. So just wanted to create the contrast between the
landscape and the mountains. I have used a little bit
darker shade of blue. It's not completely wireless. You can see now once that upper portion is done, but just Nia, just
trying to blend. Let's start with D area
which is above the river. So this is Docker. You can see DACA color, which is why led, but it is darker in color to
give a nice contrast between the landscape which is
dividing the sections. So just covering the upper part and the middle area will
be having different color. Just lighter in shade
and applying it above. And this is little bit
more pinkish color. We can say pinkish violet mix. So you can see most of
the painting you can do with the flat brush
and a liner brush. So you don't need
any other brushes. A BAD from liner and flat
brush and a four yeah. And flaws, snow, you
need Still brush. So I think three
brushes would be enough if you are bending
the staple of paintings. And try to use tick sheet, because this is 300 GSM. So use take sheet and then only you will
be able to create nice paintings and painting
with an odd come up behind. So does you can also
use for making gods. If you're creating
any holiday cards, you can create this painting. Now I'm just creating little bit of texture on the clouds. I'm just taking little bit off. What? Pink and ultramarine blue, more of hot pink. And just creating small, small cloudy
textures on the top. If you don't want to create,
it's perfectly fine. You want to just
leave it like this. That is also fine. So I'm just does
giving little bit awful cloudy texture to it. Let's sit here. You can see I'm just
using the tip of the brush to create
those clouds. And this pressure's
not completely, it's almost dry then only you will be able
to create that effect. And after that with just normal brush does
try to blend the colors. Because I don't want to shop
colors to come up as clouds. Now, just take little
bit of white row wide and just add a center line, which we have also used
in the previous painting. If you remember. Let's take black and ultramarine blue mix and also little
bit of white also. Because I don't want
it completely dark colored to come up and just filling the area which is
joining the land and D, Waldo. So once this below
lining is done, we'll do the upper bod, but lighter value by adding it, by adding white to it. You're also, you can use
round brush if you want. But DRM using flat brush because this is more easy
and convenient for me. And just be done with me. Video.
13. Chilly WinterTree Detailing Part One: Welcome back. So now let's
start with detailing first. So we have already done
the blocking part. So here I'll be using
my rigger brush and the color which I have
used for those foreground, same color, make sure I'm using. This is a mixture of black and ultramarine blue and white. And I'm just outlining that
mountain which is above. I don't want it to be
completely bad black. So that's why I have, I
added a little bit of ultramarine blue
and white to it. So I'm just outlining
that mountain BAD. So make sure that your
color is properly vet and it does get a little
bit in liquefied form, then only you will
be able to create a clear lines and sharp lines. And I'm just adding
a little bit dof details to that area
which is dark enough. Just small, small dots
to those area to give a nice mountain detailed effect. This small dots will appear
like trees on the mountains. So just the smallest
small dots and lines I'm creating randomly all over. It's just that we need to
use proper amount of color and water to paint the painting. This is the main thing that we need to take care
while we appending. Gosh. So this is just
random lines and dots. I'm creating urine. They're all using the same color now I'm outlining
that snowy area that does the landscape, but the same color. Now, I'll use
drop-off black color. I'm just mixing more black to it because I want to darken up that trees which are at the
bottom of the mountain. So just creating
small random dots and shapes create a
bushy effect to it. So whenever you are using
any sort of detailing, ladies always tried to use your liner brush
or rigger brush. They give a very nice
texture and detailing. Do it. You can use round brush also, if you have the smallest
sized round brush. But I feel more comfortable
using this rigger brush. Because you can see
it has long tale, but you can easily use it for just just creating,
wanted to create those. So guys, don't forget if you are painting these two
paintings or any painting, whichever this one or that one, do tag me on my Instagram, that is more any art gallery. I would love to see your
projects over here. And as well as over
D Instagram page. If you have to just
giving random dots, creating a grassy texture. So just mocking the areas where I need to create
those pine trees. And after that we'll be
creating the leaves. So now this is done. Now we'll be creating
the leaves jam, just wetting my pink
little bit more so that it becomes nice
and fluid form. And I can easily
create the details. Because when the pain just take, you cannot create such details. The binned has to be a
little bit liquid form. Then only you will be able
to create such details. And now we are
creating the leaves. Same technique I'm using web, which I have used over there
in the first painting. But the difference
is that the VIF was created the triangle and
then we created this. But in this we are just creating those random diagonal lines. So just enjoy the process
of drawing the pine trees. Yes.
14. Chilly Winter Tree Detailing Part Two: Each and every painting has their own unique
style and beauty, which takes a lot of
effort and patients. So you can see I'm just creating random lines and just
creating that leafy texture, which is just smaller dots
and specially at the center. But I'm creating little
bit more dense area so that the line that the
drunk is not very visible. That needs to be a little
bit more dense with leaves. So I'll show you
how I'm creating those leaves in separate Paypal. Let me finish this first. Now, same technique for
these small ones also. Just need to give the
shape of that binary, that triangular shape
budget comes out. So let's see how this tree
texture will come up. So I'll show you one g, how we are doing it and the rest you can do for all the trees. I'll just show you how
you have to do it. Does create one line and just small random dots
and lines I have created. I hope it does quite
visible to you. Can see just small
diagonal lines like the leafy structure which
I am trying to create it. You can see just small lines, slant lines I'm
creating over there. You can also create these
pine trees using Guam brush, fan brush that gives
a different look. And when you are using
this rigger brush, it gives a different look. So different, different
buying brush painting. You can do with the
different brushes. All of them creates a
different pine tree look. So you can see I've just created a dense
spot in the middle. So same technique here, I will be using for
the rest of the trees. So just enjoy the process and have a cup of coffee or tea, and then stopped
doing it slowly. So you can see the almost done with dead just
do three more. Binaries are left. And this tree,
which I'm creating, you have added a good bit
of that yellow texture. That many yellow because I don't want it to be completely black. Because of that sunlight
and reflection, it has to unintuitive bit
brownish, orangey shape. So I've just added as we go down more black, so above it as more light color. And as we go down into
a blackish color. So you can see those 23
creating with same color. Just loving this. I hope you guys are
also enjoying it. I would love to see them. So again, I am starting
with the delight, that is the warm color. And as we go down. So I feel colorist take you
can always add some amount of water to make it liquid form. Because we need liquid to flow through a precious
thoughts and sharp lines. You'll not be able
to create videos. Yes. So mostly background and the upper portion
is almost done. Now we'll start doing
that is a foreground to create a more realistic
look and more texture. So this is done. Let's start with the second.
15. Chilly Winter Foreground Detailing: Welcome back. So now let's start with foreground
detailing, so forth. Foreground detailing,
we'll be using your brush and I'm completely
using the dry brush. I haven't applied
any water do it. And I'm just adding
ultramarine blue and hot pink white to create
a nice texture to it. A little bit more of white. I'm just starting with
dabbing the brush. You can see I'm not
pressing it hard, very light and gender
press that you need to do. And the line which
divides the do landscape, I'm just making a little bit more visible with
the dot technique. So this texture gives a very nice look to
these no, bought. This technique we
have also applied and the previous painting also. So same technique
here I'm using. And I'm adding little bit
more of ultramarine blue. And again, doing the same thing. I'm not filling the entire area. I'm just randomly leaving some areas and
dabbing the brush. So you can see how
nice the texture is coming up when you are
leaving some areas and just dabbing the few areas gives a nice texture and
snowy look to that landscape. Just don't. So now we'll be adding a little white to it and a little
bit of black because I need a little bit darker
to create that effect below. So I'm just adding little bit
of white to grayish color. And here I'm not
dabbing the brush. I'm just using a dry
method technique and removing extra color. I'm just moving the
brush downward to create some lines, random lines. It gives a nice texture to that area when you're
using this crystal brush. As you can see. Same thing
I'm doing for the below, which is D shadow bot. So now we'd be doing
the outlining. That has been my same
rigor brush that I have used for creating
those pine trees. Same brush I'm using and adding water to black
because quite dry it off. And another liquid form just the same, divides the shadow. Just outlining. So it's just a division between the shadow and the
upper landscape. I'm adding just a little
bit of blue and white to it to give a nice outline to the upper area because I
don't want it to be black. So I'm just outlining. Now again, using my brush, I will be creating texture. So just make sure that your
brush is completely dry. And I'm using that black color. And just creating texture. To the below. Shadow
I just created. You can see that small, small d dealings create the paintings such beautiful
and just creating small, small details that
did and it does adding beauty to this landscape. You can try this out using acrylic paint also
using same method. Now again, taking ultramarine
blue and white mix. Just an outlining that snow
which is above the river. Just to mix and just
highlighting the doors. That's it. Now again, using
my brush to create more texture to the
area of just using white and just
creating small dots. Just using white and creating smaller textures to that area. Just draw white
without any water and just dry brush
technique I'm using here. And I'm creating small white
dots all over the land. Most company adjust the
shadow part is left. Does the shadow of
the binary that just reflecting on the left. The dating is done
for the foreground.
16. Chilly Winter Final Detailing: Welcome back. So finally, last part of the
painting that is the binary shadow with
tweeted be creating. Here again, I'm
using that color, that orange and black mixture. So just creating the lines
just above the tree. Just for pine trees, I will be creating. And same technique which I have used earlier
for the pine tree. Here also, I'll be creating
this shadow effect. Feel facing difficulty in
creating the below shadow. You can just don your row to the other side and then start
creating that tree. That will be more easy for you. I cannot donate because
I've just taped down and with masking
tape on the surface. So it does difficult for
me to done that out. So you can do that. That would be easy for you too. So this is my, gosh. I have shared to you on
my Skillshare class, meaning paintings which I have
done using wash technique. You can check out my Instagram
gallery for more videos. I have many other classes also regarding acrylic painting. You can check that as well if you like landscape painting. Now, again, using
my brush to brush, I'll just take little bit
of ultramarine blue and white and just create small
dots in the lower ground. And you can see there
are some black lines which are coming in that area, that Riverside, which
I don't want it. So I'll just take
again that seem to jive used fought that river and I'll
just go with that. I'm just covering that area. Make sure you're doing it properly at the ways
you would again, mess the whole painting. Because this is water soluble
and it's very difficult to when you are doing it. So make sure you're
doing it very carefully. I'm just adding the same thing as most complete. I hope you liked Both
of my paintings. So almost done. So this is almost
complete the painting. Let's take out the masking
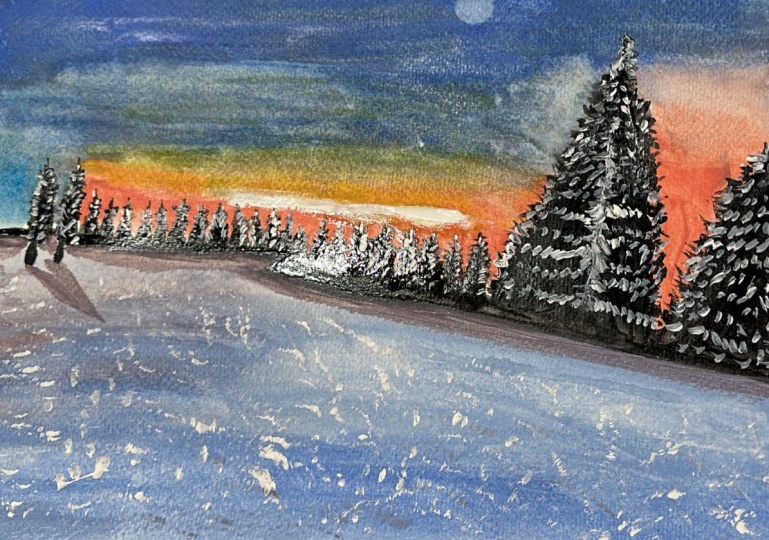
tape and see how it looks. So. So this is a smaller
version of painting which I did earlier
when I was practicing. So I'm just taking out the
masking tape and let's see how it looks with a nice
white border to it. So you can see you have to
take it out very slowly. So this is the
complete painting. And let's see the
other painting also. So these are the two paintings
which we have completed. And this whole lesson, I hope you liked it. And thank you and
have a nice day.
 Mohini Sinha, Acrylic and Gouache Artist- Nature Lover