Transcripts
1. Intro: Art is healing because it forces you to
forge a connection between your mind and your body. Hello friends. My name is more unison, and I'm an acrylic
artists from India. So today class is going
to be very special. So it's, it's related
to level class, which I will be teaching. And it's different medium. Apart from acrylic, I mostly
teach and acrylic medium, but this time I have
brought for you something new medium
that is posted. Yes. Who stutter is the color which we have been using
since our childhood. And it's like, gosh color, you can say poster colors, which we, which is
student base color. And if you are a beginner in any medium and you have
not tried any medium, I think you should go for
the poster color mediums that are very good and it
creates a very nice effect, same as that of gosh. So yes, this whole
class will be all for ten different
landscape paintings. And each day I will be
publishing one painting. We'll start from
the basic level. And for the tenth painting that will be
intermediate levels. So as we slowly increase
the level of the painting. So we'll start from
basic and then slowly, slowly will go for
intermediate level and the cupboard of
advanced level also. Likewise, we will be
painting the ten paintings. I hope you will
like these class. So in this class we will be
learning how poster color is different from the gosh medium and how they are unique
also in other way. And say, we will be seeing
the difference between them. And these ten
beautiful paintings, which we'll be doing. Let's start with our first
painting of the day. And slowly we'll be posting a one-by-one the
paintings every day. So let's start with.
2. Materials Required: So welcome back. So now let's discuss about the
materials which we will be needing for completing
these ten paintings. So first model is the brushes, these are the pressures
which we'll be needing. Then comes the poster
colors that as the gambling poster colors than the paper that is 300 and GSM. And then the tissue paper for cleaning your brushes,
then the palette. After that, the water container, and some masking tape. And apart from that, the pencils and scaling.
3. Gouache Vs PosterColor: Also, let's see how
these two are different. That is caution poster Carlos, how these two mediums are
different from each other. So as you can see,
this comes in a bottle and this comes in
Dubai and water both. I'm just taking out first the
gauche color and let's see how does thickness and
how this medium is. So you're using that
brushstroke, gosh, color. Both the colors are same, that it's really in blue. And now I've just dip
my brush in water. I am using this color
does civilian blue and just trying it on the
300 and GSM paper, that is 300 GSM watercolor
cold press paper. And you can see
how the color is. Just use water on my brush
that set apart from that, I haven't used any water. Just using this tick tick nice color and it's really
highly pigmented color. You can see it's
quite opaque also. So nicely that are
blocked in the color. So now let's use the poster color from
calmodulin and how it is. So let's take out
this post-doc color I'll be using in this same jar. And I'm just dipping the
brush in water and I'm just taking out this
color on my brush. So you can see I've
taken too much mount of fellow like I've taken
for that gosh, medium. And now you can see these
are also very soft colors, but these are not so opaque as that of the gauche mediums. So these are Quaid, less opaque. These are opaque but not as opaque as that of gosh mediums. So these actually
student grade colors, which are quite soft
and creamy colors, you can say both are
very soft and dreamy, but those are medium
is quite opaque. As compared to these poster
colors. As you can see. This is the main difference between the cosh
and bolster Carlos, supposed to colors are actually, or they, or both are opaque. But you can say this is student base and that is
more artist based colors. So let's take out the
tape and see how this very slowly just take it out because there
are chances of paper coming out when you need
to take care of it. So you can see these are more
opaque and these are less. So both are matte finish. This is student based. And the other one is Little. Highly high-quality. You can see the
artist base colors. Highly pigmented. These are more opaque. These are sort of less opaque. You can say it's not translucent
Also it's less opaque. And these are water-soluble. Water reactive. This is also water reactive. I feel like poster
colors are more reactive to order than gosh. So these are the difference between poster color
and gouache color. You can see.
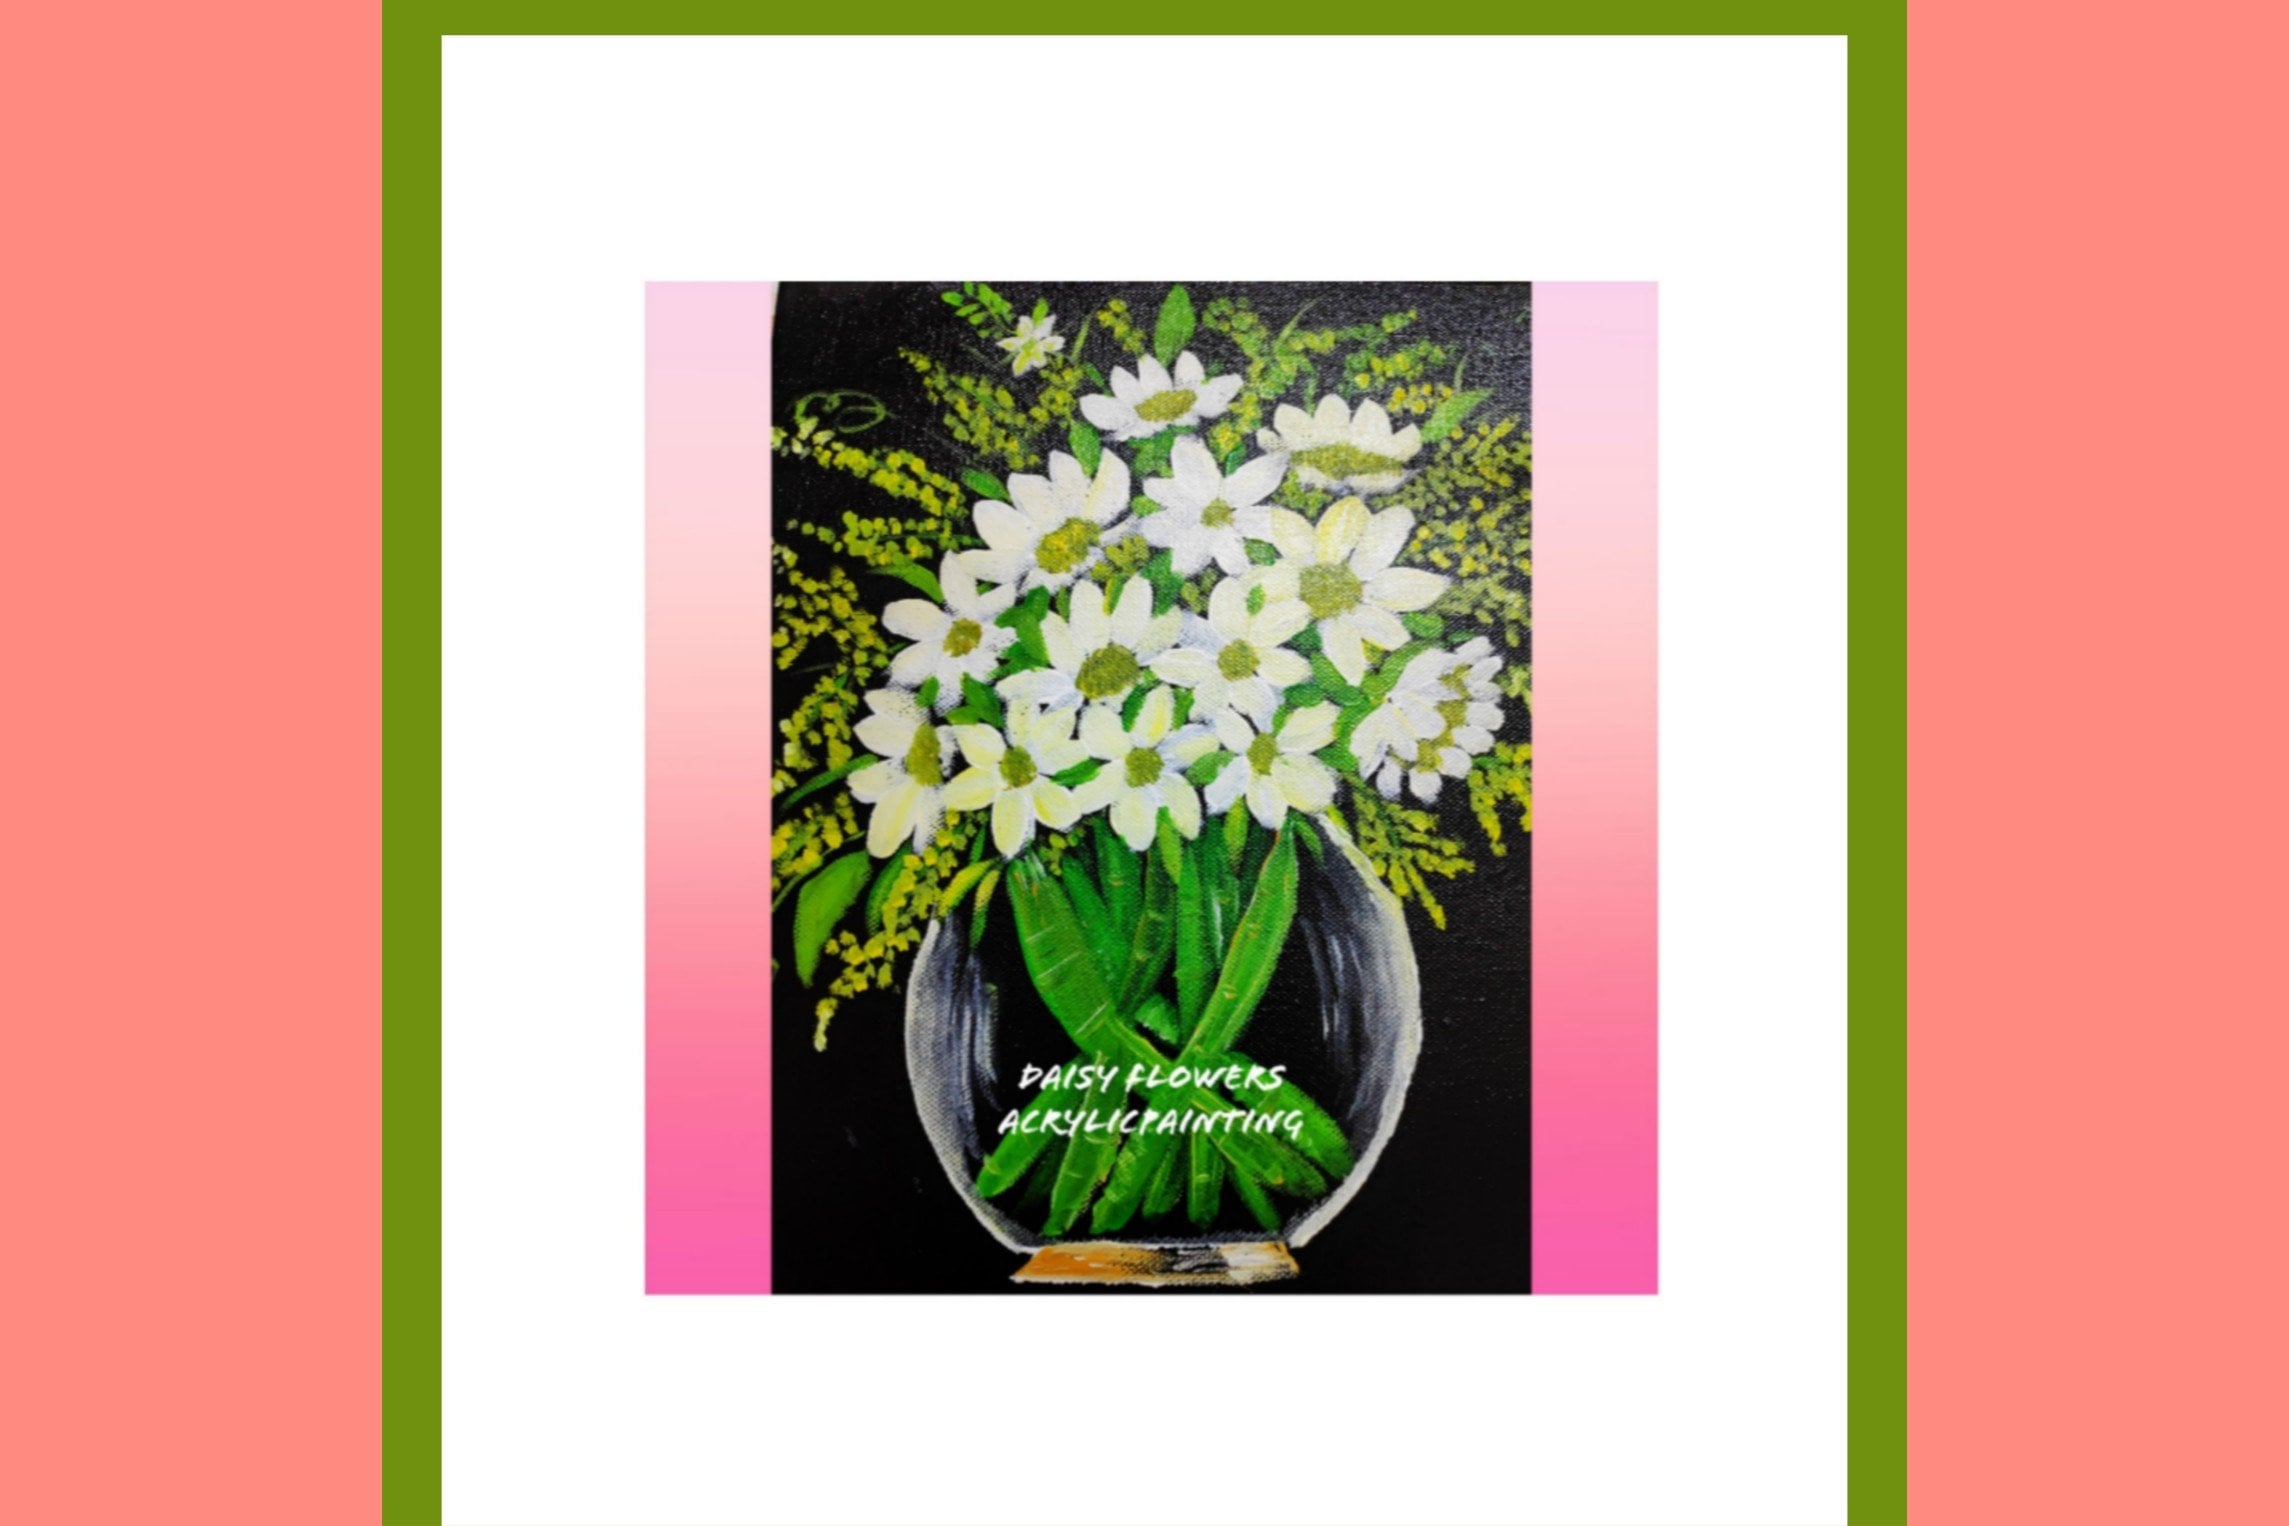
4. Palm Tree Background Blocking: So let's start with our
first painting of the class. So these are the colors and
brushes which we'll be using. Beach, black, white, magenta. So these four colors,
apart from that, these brushes, the splat, rigger brush, fan, brush sponge, palette knife for
mixing the color. So these are the brushes
and these two tapes, masking tapes from empty. The ballot caused the palate. And the base is 300 GSM paper, which is A4 size, cut into four sizes. And these are the colors
which I have just taken out. So let's now first base
to the masking tape. So these are the colors, as I have told you earlier, and I will be using this knife. So let's start first pasting
of the masking tape. So the thinnest one, I'll paste on three sides and on the lower side I'll
paste the thicker one. Give it a nice polarized
form of paintings. So that's what I'm doing. I'm just pasting it nicely. So that gives me a nice
border to this painting. So Bayes did very nicely so that there are no
gaps and in-between. The biggest size one
on the lower end. Ones, we are done with the
pasting and everything. We'll start with the painting. Let's start first with blocking. That is using flat brushes
for blocking the background. So just dip the brush in water. Just that much amount
of water we have to. Because these opaque colors and we want opaque colors only, we don't want it
to be watercolor. So just take your white and mix it with
this magenta color. And we'll start from top. First applying the darker color. Now you can see
it's already dried, so I'm just adding
little water to it, which you should not
add too much water. Water is only needed for blending the colors
and when it is dried. So as you know, these are
water-soluble and you can easily use water to
make it again soluble. So when it is getting dried, you can add water to it, but don't add too
much water so that it becomes like, Oh,
watercolor effect. Because these are
not watercolors, these are opaque colors. So we need to use
it like that only. Again, I'm mixing more amount of white to it as we're going down. And just blending the
colors also together. Now I'm adding little
bit of peach to it. And again, adding that color and slowly blending
both the colors also, blending is, is important when you are doing
the background. Again, adding more of peach
and moving downwards. So likewise I'll be
adding more and more of pH and we'll be
moving till the end. So that gives a nice contrast from darker to lighter color. So this is the background
sky which we will be doing enough was painting. This is a very simple painting, which I'm doing here. And now you can see I'm
adding just complete peach. I'm just trying to
blend both that colors. Just mixing both the colors. And now I'm adding
a little white to the speed so that becomes more lighter in color. So again, adding peach. When you're adding
lighter color, wash off your brush because
there will be chances that there's some magenta color
is there on your brush. So that you have to take care when you are using
poster colors because these are not acrylic
colors that when it dries and you cannot
remove the colors. These are water-soluble colors. Even after drying, you drop just one single drop of water
and it will be soluble. It can dissolve easily. So you have to
take care of that. So you can see the nice
background has been created. Now we will be drawing some
trees and grasses on that. So we'll be using though
that black color and our rigger brush for
creating some nice trees. So we'll wait for it to dry. And then we will
start with the tree, but just make sure that you have done all the corners properly, so that gives a nice border. So that's what I'm doing here. So we are done with
this background. Now we will be doing
some palm trees.
5. Palm Tree Final Details: Now let's start creating
some palm trees. Palm trees here I'm using my rigger brush for
creating such trees. Let's use black. I'm just liquefying
the black and then I'm just creating
this straight line, as you can see, first using the tip of the brush
and as I'm going down, I'm pressing my brush. So likewise, when you
press your brush, you can create thick lines. So this is one
technique of creating some nice palm tree trunk lines. Straight. Start from
dip pen as you go down, just press your
brush so that you create nice lines in one go. So when you go start from the tip of the brush and slowly, slowly as you are
moving downwards, just press your brush. This is how we can create some nice straight lines
for the palm trees. So these are some
different kind of palm trees which
are mostly found in desert or some desert
area naught in the area, the area palm trees
are different. But these palm trees are mostly seen in the
desert area so that those palm trees
I'm trying to create. So what I'm doing
here is I'm just creating a triangle shape of it. And the ends are
some zigzag form. So I will create
something like five of them of same
different directions. Then we will fill it
with black color. So similarly I'll do for
the other triangles also, I'll just fill in this
with the black color. So you can see I'm just
filling this block with black color and making
little taken in the center. So again, we will be doing
for the other triangles also, at least will create five
palm leaves. As you can see. I'm just creating
the structure of it. It is not a complete palm tree. I'm just creating
this rupture and then we'll be
creating some leaves. So just you can see
I'm just creating these structure that is
the triangular shape. And I'm just filling this
shape with black color. So similarly for
the last one also, I'll be doing the same thing. Makes sure that you
are black color is in fluid form so that you
can create fine details. Whenever we are creating
any fine details, it should have to
be in fluid form. The color has to be it not too much of fluidity so
that the color value, color pigment Z, or the
color pigment gets degraded. You have to use that matter, that much amount of
water that is required to mix the color and to
create some fine lines. Likewise, here I'm using
another brush rigger brush, which is of smaller size, that is two by zero. And I'm creating
some nice lines. You can see some nice lines
coming out of that triangle. And same in the
other directions. Two directions changes, but
lines are all the same. Again, see these are different
types of pine trees, which is mostly seen
in the desert area. So same thing we will be doing for the other
two trees also. So the first painting is
quite simple painting which I have chosen so that
you can easily draw it. And you can easily get into the hand movements of the
brush because we will be using same brush in
most of our painting. So this is quite
simple painting and simple basic painting which I'm just trying to
teach you guys. I hope you are getting it. Whenever you are
using poster color, don't use too much
amount of water in it. Use only that much
amount of water that is required for blending the colors and for mixing the colors, only that much amount. So this is one of the most important
thing when you are using the poster colors. Don't use poster
colors as watercolor. Don't add too much water in it. And one more thing, these poster colors
are water-soluble. It's not like acrylic
colors that when it dries and if you
drop water on it, it will not come out. This is not happening
in poster colors. Poster colors are water soluble. So even if it dries and if a drop of water
falls on your painting, your whole painting will ruin. So we'll make sure of that. It is just like a
gouache medium, like when we use water on it, it will automatically
be soluble. So make this keep, just, just keep this thing in mind so that and to protect
your painting, you can laminate this
or just frame it. Now you can see these
beautiful three trees have been created. Now I'm using my fan brush and little amount
of water in it. And then just moving the brush
in the upward direction. So I think it's quite dry, so I'll just add a little
bit more color to it. And again, I will move it in the upward direction to
create some nice glasses. I'm just using the tip of the brush to create
these grasses. So using the complete brush, just the tip of the brush
to create the grasses. So just adding little more water to it to become more fluid. And again, you can see that
it's Dr. vectors coming. So I'm just adding
little water to it, not too much water. So that the color
and just trying to create some nice grasses
in different directions. So that's how you
have to also do it. This is our first project, off the painting
which we'll be doing. And I'm using here this point. So close sponge and my white has been finished
values more white. So I'm just creating
this round circle, like a moon on the
moon or sun you can see on the top of the tree. And again, I'm just
taking a little bit more white and moving in
a circular motion. And now I will use my
rigger brush to create some nice so cooler moon
in the center. So you can see my color has already dried up
that white color. Just creating in the center. And some dean little
bit more white to it. Because I want a
little more dark because my white color
has already finished up. I'm just taking just draw white
without mixing any water. And this is it. Now we'll create some birds flying in the sky with
my same rigor brush. Just do three birds. Flying birds, just to be shape. And this is a
painting is complete. Our first painting, very
simple, very easy painting. Let's take out the masking
tape and see how it looks. So we can see how
masking tape is important to create some
nice borders to it. So our first painting
is complete. So this is your first project. So let's start with a second.
6. Valley: Hello friends. Welcome back. So let's start with
the second painting. Let's start just a
rough sketch off the mountains with a pencil. So there are 23 Mountains which are overlapping
one another. So I am just drawing
a rough sketch of it. Very light gets
you need to draw. You can see the two
mountains which are overlapping and one
on the other side. So this is the sketch and
we're done with the sketching. So now we will do
the painting buds. So let's discuss
about the colors. Burnt sienna, yellow
ocher, cadmium orange, cadmium yellow to
Daniel, white and black. So these are the colors
which we'll be using here. So for blocking the color we
are using the flat brush. So just dip the brush in water. Only that bunch of underwater
we need to use it. Then take this yellow
ocher and mix it with little yellow and a
little bit of white. So we'll start with the
blocking of the background. So you can see it's already dry, so I'm just adding
little water to it. So just adding more
color, two-word. Again, applying the
colors from the top, starting from the top. And we'll go down just using the same
flat brush which we used in the
previous painting. So just applying the scholar in one direction in a
horizontal manner. And so just taking now orange and this
mixing little orange, yellow, again
applying the colors. So in that case you need
to do the blending also. Just wash off your brush, remove excess of water
from your brush, and then start
blending the colors. This is how the
blending is done, even if it is acrylics
or it is cosh, this is the way how the blending potters done ceramic mixing little
white also to it. And just moving it in
the downward direction. And trying to cover this
entire this background area. So as we're going down, the color value changes, it becomes more lighter. It's a very simple
mountains cave painting. You can say these are lots
of mountains are there. And currently there are only three mountains which
we are depicting here. This is the background of
painting which is almost done. Now we will take
this fan brush and just this burnt sienna. Applying it on the
brush and just using the tip of
the brush to create some mountain
textures on the top. I'm not covering the entire
thing with this brush. I'm just creating some
textures on the top so that it gives a nice look
to the mountain. And then the same flat
brush I'm just trying to blocking in this upper
mountain with burnt sienna. You can use smaller flat brush also for blocking this area. So once this is done, we'll do the other mountain that is adding little bit
of yellow ocher to it and just covering this
other side of the mountain. So this is mostly yellow ocher, which I'm just playing. Little bit of one CNAs, they're just on my brush and
I'm using just yellow ocher. And covering the other
side of the mountain. Then comes the lower part. So for the lower part, before doing that, just creates, let's create some textures. Same on the other
side of the mountain, which we did on this side. Then we'll do the lower
side of the mountain. Just taking black and
just covering this area. But black color. So whenever you are
taking the poster colors, take the colors, don't use, don't mix too much of
water in it, otherwise, your whole color
will be ruined up. It will not create that
quality of colors, so you have to use very
less amount of water. Now you can see I've done with the blocking part,
that black color. This three mountains are
done the blocking part. So now we will create
some more details to it. So just taking this liner brush, that is the rigger brush and
creating some more lines on top of it to create some nice Dustin
or three textures. Just using this brush
and creating some lines. You can see some different lines on that big, some are small. So I'm trying to
create like that using the same
that burnt sienna. And as I'm going down, the size of the lines decreases, it becomes little smaller. Just applying it in between also to give some textures
to this mountain. Now, on the other side, we'll use be using
the same technique. I'm just mixing water into the Scala because
this color is already dried off and just applying
a little bit of small, small lines on this side. So very small, small lines
and textures I'm creating on the other side are using black and
creating same textures, same lines, some are
big, some are small. To create a nice or
treeline area you can see. So we'll be covering
this entire, this black area which
is going diagonally. And as we're going
down the lines, the size of line decreases, it becomes more smaller in size. So these three
mountains are done. So we will create
some more details to it with this
round Sponge brush. I'm just taking this bond
Russian adding a little water to it because my
wife has dried off, so just creating some
sun over the area above. Just taking adding more
water and just creating some nice Don't take
too much of water. And just using my sponge, I'm creating the sun and the center of these
two mountains. So this is it. You can see
how just moving the brush. Now, once this is done, let's add a little
bit more white to it. Just the row wide
without any water. And I'm just creating
a nice circle as we did in the previous
painting. Also. Dust, nice circle to it
with desk drawer wide without using any water
with our rigger brush. So we can see how the effect comes up when
you use that sponge. Now with my same rigor brush. So we'll create birds
that are moving in group, like in the area
which is in between the sun and the
mountain, just reshape. And we are done
with this painting. You can also create
some trees if you want. On the upper side, like falling palm trees or if you want more
detail into it. But I'm leaving it
like this only. My painting is almost done. And we'll just take out the
tape and see how it looks. So let's take out the tape
and see how it is looking. So this is a very simple
painting where we have used two colors for blocking
the background and the mountains soil. So you can see how nicely
the border has been created. So this is it and our
painting is complete.
7. Pine Tree: So let's start us next painting. So this is the colors
which we'll be using, black on blue and white. And the same size
sheet am using here. And these are the brushes, same brushes which we
have used earlier. So let's start with
the blocking first. With our flat brush. I'm just dipping the brush
and water, as you can see. Just taking this cerulean blue and applying
on the top of it. So just applying a thick coat of surrealism blue
on the top layer. And as we will go down, The, We'll add more
depth to it that is more white to it as
you will go down. So we're creating a nice value from the darker one
to the lighter one. Now, again, I'm taking this
blue and mixing little white. Too weird because as
we're going down, we're adding tint to it. I'm just adding little
white to it and I'm just trying to blend
both the colors. Whenever you are
blending the color, always move from the lighter, too dark position, not
too dark to light. Otherwise you will mess up
whole background value. So always try to move
from light to dark. So I'm just trying to blend
also as I'm going down. In poster color, blending is
quite easy because it is, you can always read. So you can see just
doing the blending part. So blending is easy because since these
are water-soluble, so you can always reactivate
those colors, right? So that's why it is easy
to blend the colors. But this is not in the case
of acrylics and gouache also, you can reactivate the colors. So that's why blending part
is easy and gosh as well. So you can see I'm just moving the brush and trying
to blend the colors. Now you can see my
white as financial off. So I'll be needing more white. But before that, let's create the mountains is on same am using same brush
and raw blue color. And just trying to
create a nice mountain. So I'm actually creating the mountains one over the other that they are
overlapping each other. So first blue color. Then as we go down, the color value increases. So I'm just adding little
black to it that is, in some already creating shades. You can see by adding black. When we add black, it called, we call
it as a shade. That's what I'm doing over here. I'm just, I've just
added a little black to it and I'm just creating the mountains
overlapping one another. So when you haven't, you must have noticed
that when you come towards the foreground, color value increases
the darkness. So that's what I'm trying
to create over here. So as we're coming
towards the foreground. So the darkness of the
mountains will also increase. So again, I will add a little
more amount of black to it to increase the
darkness of the color. Or you can see the
shade different, darkens the shade of the color. So I'm just, you can see, I'm just using the tip of the brush and filling
up the color. This is how we can
use a flat brush for creating some nice
mountain ranges which are overlapping
one another. Now comes the next mountain,
jaundice, more black. I have added to it,
as you can see. And I'm just creating
this mountain range, which is on the lower end. And finally, we are done with these four mountain ranges which are overlapping
one another. So once this is done, now we will be creating
the pine trees. So that is, this will add
beauty to this painting. So here I'm using my
same rigor brush, a little bigger size, that is size one. And I'm just creating
the lines as we did earlier in the
previous paintings when we were creating
the palm trees. So here we are creating
two pine trees, as you can see, with one
bigger and one smaller size. Now we'll start creating
the leaves with the brush, with the same liner brush, just making it a little thick. Now once these
lines are created, we'll start creating the leaves. So make sure that
your color is in liquid form when you are using, when you are creating
these palm trees and creating some
nice free textures. So what I'm doing is I'm
creating dots and simple dots, not in random directions
on both the sides. So my motive is that to create
a triangle as we go down. So you can see I'll
keep on increasing the size of the leaves
as we're going down. Because most of the pine trees
are in a triangular shape. So that's what I'm
trying to create a where you can see I'm
just creating small, small dots and increasing
the size of the leaves. So this can only happen when your color
is in liquid form. So make sure that your
color is in liquid form. Not take. Otherwise you'll not be
able to create such small, fine details of your trees. This is one technique of
creating simple pine trees. You can see there are
many classes in which I have painted different
types of pine trees also. So you can check that as well. So as I'm going down, I'm increasing the size of
the leaves on both the sides. So that gives a nice
triangular shape, Lakes deep triangular shape. Actually, I really love
creating pine trees. So in most of the paintings
I do create pine trees, especially in whenever
I'm doing any landscapes. So I think I really like
creating pine trees. So I hope you guys
will also enjoy while you are doing while you are
creating such pine trees. I'm just using the tip
of the brush and just creating these lines and
dots in random fashion. So I will not go
towards, till the end. I'll leave some place
for the tree trunk also. Then little bit lines
and stems in between. I'm just trying to create that. So this pine tree is almost done and we'll go
for the second one. So same technique we will use
for the second pine tree, just creating small, small dots. And as we are going down, the size of this tree,
leaves will increase. This background I have
created with blue color. You can drive a
different color also with purple or magenta, but any color and you can
add same neutral color, like white and white and black. And you can create different, different backgrounds
of the hills and all of the
background of this guy. It's not necessary that you have to create with blue color only you can create with any
color, whatever you like. It's just trying to teach
very simple painting, which not only looks beautiful, but also gives a natural look of the landscape as you can see. Just done with this tree also. So some lines here and there. Now, all this to pine
trees, almost complete. So now what we'll
do is we'll create some grasses with
the same brush. Just some lines. You can leave it like
this without creating any grasses or you can draw it. It's up to you how you like
your painting to be done. I'm just creating small, small grasses in
different directions I'm trying to create. So now the spot is done. So now we will take our fan brush and with the tip of the brush I'll
try to create some textures. Some more grasses with this flat brush so that it gives more nicer
look to the grasses. This brush is actually
very good for creating grasses three textures, anything, especially
the Bristol fan brush. So now let's take
out the masking tape and see how it looks. You can see a nice
border which is being created when we use
this masking tape. Finally, this painting is done. I hope you enjoyed doing
this painting as well. So do share your projects work. I love to see that.
8. Misty Forest Background Blocking: Welcome back. So let's start
with our next painting. So these are the colors
which we will be using here. So first is burnt sienna, yellow ocher, lemon
yellow, white, and black. So these are the colors
which we will be using. So here we are painting the misty forest and same
brushes which we will be using, which we have used earlier. Let's start just dipping
the flat brush with water and taking this burnt sienna and first applying
on the corners. So as we move
towards the center, the color value changes
with dark to light. That's what we have to create. The corners are dark, so we have used burnt sienna
on both the coordinates. And this is in portrait
form and we are moving the brush in the
vertical direction. So likewise, you have to move your brush in the
vertical directions. So now we will use
this yellow ocher. Again, apply this on the both the ends and we'll
try blending mode the colors. So I'm just, you
can see I'm just trying to blend both the colors. Because blending is also very important when you are
doing such type of painting. On both the sides,
you have to apply and you can see how the
color is thick. I've not put so much of
water in these colors. Water is only used for
blending purpose, that's it. Otherwise, I'm not using any
more amount of water in it. So it's just like
gosh, like gosh, we use the colors, same thing, we have to use it. So now what, Now
this lemon yellow on both the sides and I'm
just blending the colors. Blending should always be
done from light to dark. And it should not go
from dark to light always from light to dark. So this way we have
to do the blending. So this is blending is being
done in vertical directions. Just moving the brush from up to down and again down to up. So likewise, I'm moving the
brush and blending the color. Now, let's start
the center part. I'm just washing off my brush, taking white color and
applying in the center. Now, again, I'm trying to
blend with this lemon yellow. You can see how the contrast is from light to dark
on both the sides. So does background
part is almost done and we will be now
creating some trees, which are background trees. And there will be one
front tree that has the center point on which the whole painting
is being focused. So both the sides,
I'll create the trees. So let's start first
creating the trees. For creating the trees, we need the darkest color, not too much dark, but yes, we'll add burnt sienna. Will just take burnt sienna. And we'll start
creating the lines. It's not compulsory that
you have to create like same straight and
stream size lines. It should get can
be different sizes. It can be in someone bending or should not be required that you should have to create
like very straight lines. It can be thick, it can be thin, so trees have different sizes. So you can do that also. You can see I'm just
trying to create the background trees with stems. So slowly, slowly,
I'm just adding little bit yellow
ocher also do it to make it more light when I'm
coming to the center part. So that's what I'm
trying to do here. From dark to light,
we have to move. You can see, you can also
try this and gosh as well. Same technique you have to use, like you use when
booster colors. Same technique you can
use for gosh, all sorts. It's not like only you can
do with poster colors, but also same technique
with gosh color. You can try it out. And even you can create different shades
of the background. You can use blue and yellow, you can use green and
yellow and white. So different, different
shades you can create. Even you can use magenta colors that will also look very good. Magenta, blue and white. So that will also
look very nice. So different shades you can different values you
can create in the, at the bottom, at the backside. So you can see the trees
are not of same sizes. I've tried creating it in
different shapes and sizes. And now I will
create some stems. So whenever you are
creating stems, try not to create
like a straight line. Try to give us
exact motion to it. You can see I'm just using my liner brush and
trying to create those stems here and there that are coming
out of the branches. So as I'm going this inside, so I'm using the darker color. So likewise, we have to
create the branches. Take your diamond,
do it very slowly. It's not like in
a hurry you have to do where you can
take your time. So this is a recorded video. You can pause it
and you can do it, and then you can start it. So no need to do it in a hurry. Take your time and do it very slowly because when
you do it in a hurry, all your paintings will ruin. So take your time, take breaks, and then try to
do this painting. So this is a ten day painting. You can take 20 days, just fine. You can take two days to
complete one painting is not necessary that you have to complete it
in just one day. So again, see how I'm creating
some stems here and there. But these are not straight. These are like zigzag form stems which I'm
trying to create. Now once we are creating
this background tree part will create the main tree
which is in the center. That is actually
our center point. So I hope you guys
enjoying this, doing this poster
color painting. You can see a
background as ready. Background trees are ready. Now, let's start
with the main tree.
9. Misty Forest Final Detailing: So now let's start
creating the center tree. So you're just, I'm mixing
black with this bond C, and I don't want it
to be totally black. So I'm just mixing this bond
C and a very little amount. And then we'll create
this centered tree. So here I'm using again my rigger brush to
create the tree part. So if you're not comfortable
directly using black color, then try to first create
the rough sketch with your pencil and
then blocking it. So I'm doing it
directly, but you can, you can always draw and
then you can paint it. That is also fine. So you can see I've just drawn drawn the tree
trunk and I'm just filling this with
black and a little bit of burnt sienna and this color. Just trying to create
nice tree trunk. Now we will create some stems
which are going outwards. So whenever you are
creating any stems, makes sure that the origin should be thick and as you go
further, it should be ten. This is how we create the
three branches and stems. So thickness should
start from the origin, that from where it is starting. And as you go towards the end, it should be thin. Far as what I'm doing
is I'm just drawing a rough sketch of it where the line should go and then I am just thickening these lines. So that's how you
can also do it. But if you're not
comfortable directly drawing it with the black color, always try to draw with
your pencil first, and then you can draw or paint this with
your black color. This, you have to do it very slowly because it takes time. If you're doing, if you
will do it really fast, there are chances
that you can spoil the tree structure and there could be some thick
lines and thin lines. Draw it very slowly. Take your time, take
breaks and then draw it. If you are done with
the background part. If we're not willing
to draw the tree part, liver droid next day, it's not compulsory. They are. Do you have to do it in
just one single day? This is how you have to. This is how we can also
build patient's level. As you can see,
this is how I have my patient's level because I also used to do it very easily, very fast when I started my painting, then
slowly, slowly. When I started doing more and
more paintings every day, I started learning
to gain patients. And I started to do not only just one painting
like I have to complete it. If I'm not in a mood, I was I leave it there
only and then again, I start the next day. So this is how you
can also try it out. If you want to go with the painting and you are a beginner and
you haven't tried. It takes time. Even if it
is not coming perfectly, it's fine because in one goal, if you are a beginner, it, it happens that it should
not come like this. But with practice, it
will definitely improve. You can see I'm just using the tip of the brush
to create fine lines. So when you are
pressing the brush, you create thicker lines. When you have to
use the thin lines, you just have to use the
tip of your brush to create some nice
fine thin lines. So the more and more stems
and two eggs you will create, the more realistic the
tree looks actually. That's what I'm also
trying to do it. We started with a
simple painting. And as we are moving
towards the paintings, more and more paintings, which will be
intermediate level. So this is what I have
made this class for. So to start, from
easy to let tell, beginner and intermediate
to advanced level. So I've tried to
do this so that it also gives you a practice
to how to hold your brush, how to use your liner brush. And I haven't used
so many brushes, I have just used 34
brushes so that you can also use only 34 brushes
and you can paint it. You can see the more and
more stems you create. It looks more realistic. Now, little leaves, little dots, are there, small, small dots? I'm just making small small dots here and there to create. It should look like, okay, these are small, small leaves. This is not completely blank. Stems are there only their
leaves also in-between? Just dots here and there. So now let's use this yellow ocher and
create some textures. Some lines. Just adding little white to this yellow
ocher and creating some nice lines to give a nice texture to the tree
trunk and the branches. You can leave it like this also, but if you want it a bit
more realistic form, you can add these textures to give more realistic
to the trees. Just giving an adult
shape to this tree. So now there's three
partners, almost done. So let's create some grasses. So you can see I'm just
moving my brush in the upward direction and
creating some glasses. These glasses you
can also create with your fan brush also that also you can use for
creating the grasses. So both the sides
you have to create. This is De Forest. Painting is almost complete. If you're not comfortable
using liner brush create, using the fan brush as we did
in the earlier paintings. You can do with that also. I've added little yellow and white and creating
some nice dots. But just take white
little bit more. And then small, small dots to
create some flowers effect. You can see this painting
is almost complete. We will take out the tape
and we'll see how it looks. Let's take out the tape. So I hope you enjoyed
doing this one also. To share your project works. I would love to see them. This is our complete painting. You can see how nicely
the border looks when you put the masking tape. This is it. Thank you.
10. Magical Sky Background Blocking: Hello friends. Welcome back. So now let's start with
our next painting. So for us we will be doing the drawing part and then
we'll start with the painting. So I have just taken my pencil and we'll just draw
the mountains. That's it. That is the only drawing
which we need to do it and after that
we'll do the painting. So these are actually
overlapping Mountains which I'm trying to create. So this is the first one. Then the second one. You can see I'm drawing
the second mountain and then just creating some lines. I'm not trying to create
very straight lines because mountains are
nevertheless trade. And this is the third one. So just this much
sketching and we are good to go with the painting. But finally, as sketching is done, now let's discuss
about the colors which we will be using
for this painting. So these are the colors. First is black, magenta,
cadmium, orange, purple, cobalt, blue,
white, and lemon yellow. So these are the
colors which we'll be using here for
doing the painting. So let's start
with the painting. So I'm using my
flat brush and just wet my breath flat brush and I'm directly
using the color. So I've just taken ample
amount of color in my brush. And then I'll apply
on the top part of it because we are first
doing the background part. And then we'll go with
the mountain then part. I'm just applying the colors. Try to again, I'm adding
little more of this purple and white to red because I want little
purplish shade also do it. So should not be
completely blue. So I'm just adding little
bit purple also do it. I'm just blocking in
again that top part. And as we go down, the colors will change. So I'm adding more white to this purple color and a little bit of cobalt
and more of purple. So I'm just adding little
bit of white to it. And again, I'm just
applying another layer. And simultaneously we will
be blending the colors also because blending
is very important when you are doing
the background part. You can see I'm just
doing the blending also. So water is only needed when
blending needs to be done. That's it. Otherwise we have to use
very less amount of water. Now I am adding little
bit of magenta to this, this purplish shade and
little bit more of white. Little more magenta,
again, another shade. So you need to do the blending simultaneously when you are
blocking in the colors. If your brush is
getting dried off, just add little bit of
water on your brush, remove extra water, and then
again start blending it. So this is the technique
of blending any painting. If you're using gosh, if you're using acrylics
or any other colors. So this is the most important
step of the blending part, which everyone should do. Again, adding
little white to it, magenta and little water because my color
is getting dried. So I'm just adding
little water also. And now this cadmium orange, I'm adding little more
water to it because I want my colors to blend. If your color is
getting dried off, you can always reactivate
your color by adding water. So we can see how
this color value is changing from dark to light, but with different or colors. So they are mixing
so many colors and creating some beautiful
values to it, some beautiful
colors you can say. So. Likewise, we also learning
some mixing part also. So now I have mixed
here this cadmium, lemon, yellow and
white and orange. So three colors I
have mixed here. And I'm just applying, makes sure that you don't
do the mountain part. Because otherwise the
color will change when you will apply blue
on these mountains. So take care of that because these are post-tax
dollars and they reactivate very fast when it
gets in touch with water. So make sure that
it is not going inside that mountain part. So do it very slowly. Take your time and
complete this background, but you have to take care of
this as does not acrylic. So you need to take
care of that attitude, not go inside this mountain, but otherwise the whole
color will change into green when it comes in
contact with this blue color. So you can see I'm just blending
also bought the colors. So once we are done with
this whole background, but we'll start with
the mountain pod and then some tree leaves which
are falling from the top. So you can see as we are going towards more
and more painting, the painting is becoming little, little complex but interesting. So I have started with
the basic level and I'm slowly moving towards
the intermediate level. So that does what
I want to paint, so that people can learn
not only the basic part, but also the little bit of
intermediate level also. Finally, my background is done.
11. Magical Sky Mountain Blocking: Now let's start
with the mountains. So I'm just taking a little wide because my
wife has finished. So you can use always your palette knife
to take out the colors. Don't use your pressures. So let's start with
our liner brush. I'm just taking this
blue color and it'll white and a little bit of purple mixing it with
my rigger brush. This is of size one, which I'm using here. And now I'm just trying
to first outline it and then I will start
blocking the mountains. Just adding little
water to it because it is getting dried very fast, because the summers has
started over in India. The colors also getting
dried very fast. So it all depends upon the
weather where you are living, the dryness of the color, how fast it dries. I'm just blocking in with
that same color. Very slowly. You have to do it, take your time and do
it very slowly so that the colors are
only on that line, area, only on that borders. It should not go beyond that
because impostor colors, if the colors goes
out and mix with the color and it can
turn the color value. So that's why, Because it
is reactivated very fast. So you have to
take care of that. Whenever you are doing
any layering over d, any texture or any mountains, try to use colors. If you are doing any layering
over this or creating any details, you are. What I'm doing is
I'm just trying to block in the entire mountains. All these three mountains
are of different shades. I'm just trying to create that. And I'm slowly painting it. So most of the
paintings are off like 15 to 30 min I have created. So I think this painting
is almost 30 min painting. So take out your time out
of your busy schedule, just 30 min or 1 h. And you can paint really very
beautiful landscapes. It's not only a practice
to do it daily, but also you will see
your improvement, how you are holding your brushes and how you are doing it. And slowly your speed will also increase if you
practice it daily. So it's very
important to practice paintings if you are
really serious in it. As a hobby, also known as
art therapy also you can do it whenever you feel like you are getting bored or
you're not feeling happy, just do one painting
and you will see magic. Your mood will suddenly change. And do the painting and side-by-side listen
to soft some music. And you will see the magic that is happening when painting
and music combines together. Now here I've added a
little black to it. As you can see, I'm
just adding more of blue because I don't want
it to be totally black. So it's sort of black, blue and populist mixture. So now I'm just
creating the outline. And then I'll start
with D blocking, just outlining it first. And then we'll do
the blocking part. So I'm just adding
little white to it because it's quite dark. I don't want so much dark color. So it should be darker
than the upper one. So likewise, you
have to create it because when we come
closer to the foreground, it is much more darker than
the one which is behind. So that's what you
have to think in mind that the one
which is near to us, that as the foreground
should be much, should have much darker value than the ones which are behind. So this blocking you can
do with your round brush also and with your small
size flat brush also. It's not compulsory
that you have to use your rigger brush only. I'm using because I feel
comfortable doing this brush. So you can use any brush, whatever you feel like
and you can paint it. Now you can see here I'm
using my round brush to just fill in it quickly because that rigger
brush was taking time. So I've used a little
bigger sized round brush and I'm just blocking
in the scholar. So similarly we will be
doing the lower part, but that will be more darker. In summer's color dries so fast that you have to
be very careful. But this is good that poster
causes can be reactivated. But with acrylics, you
have to do it really fast. So you can see just
blocking D2 Mountains. Now the last one is left. So for the last one, my this blue color
has finished off. I'm just taking a
little blue color and mixing it with black. So I want a darker
shade so you can see how dark cutters when you
add black to this blue. So this is how the mountains have been distinguished between
the, between others. So as we come towards
the foreground, the value of the color, intensity, you can say
it should be dark. So the mountain part
is almost done. And we will now to the sun that is in
between the mountains. And here I'm using my sponge, round sponge to create this
nice circle with white. I've just used white here. I'm just using little
magenta also because I want a little bit of pinkish also. So I've just added a bunch into two-word, very little amount. Now complete white color. To create this center part. Again, I'm using my
rigger brush and just to create some outlines because outlines are missing. Just adding little white. Because I don't want one sword. Dark color. Outlining is done. I'll just use raw white. And I'll just apply
it in the center. So this is how we can
create a nice sun or a moon and just adding little
yellow to it to the outside of the circle. So our sun is done and now we will be moving
towards the trees.
12. Magical Sky Final Detailing: Okay, So now let's begin with our trees which are
falling from above. This also will be using
same black color. And my rigger brush makes
sure that your color is in fluid form then only you will be able to create these lines. I'm just being small, small
dots and lines to give a nice leaf texture which
is falling from above. It is not a complete tree, but it's just branches of trees which are falling from the top. I'm trying to do that. If you're facing any issue for
creating pointed leaf pad. So you can always
turn your journey or you can face difficulty while creating
some leaf texture. So what you can do is just
turn your sheet upside down towards yourself and then you can paint it so you can see
how difficult it is to paint. And you stick it. If you can. If you
are using any board, you can just turn your
board towards yourself. Or if you're not
using any board, just remove the tape
slowly and just move it upside down and then start
making those leaves. Because for leaves we need pointed thing to create
some nice leaves. Have just to turn my
painting upside down and I'm just doing creating some
leaves for college. So it's not necessary
that you have to do it. If you are comfortable
doing it like that only, then you can do it. It's up to your comfort level, how you can do the paintings. So it's completely fine if it is straight and
you can paint it. So this is one of the
easiest way you can do it while Just moving
towards yourself, turning your sheet and creating
the small, small leaves. So I'm just trying
to create bunches of leaves without creating any
tree stems and anything. And after that, you
can just join it. So make sure that your color
is like very fluid form. So you can see the shape
should be like this, like the bunches, like ground bunches of
leaves which are there. Likewise, you can
create some bunches of leaves falling from the top. Similarly, I will do for
the other side also. I'm just trying to fill
this entire upper area. These Falling Leaves
gives a very nice, so this adds actually the
beauty to this painting because in landscape trees leaves a
very necessary part of it. So there's all these ads, beauty to the painting. Few more details are left and we are done
with the painting. You can see how I'm
creating the leaves. So whenever you are
creating any leaves, try to make it a
bunch and as you are going down and the
leaves should be less. So likewise, you have to create the leaves and it
should be quite like, it should be like Goya,
cork rowdy actually. So you can see,
I'm just creating dots here and there
in random directions. It's not same directions
which I am doing. Another side, I'm
doing the same thing. And after that, we are
done with the painting. Just bunches of leaves. So I actually really enjoyed
doing this painting. I hope you guys are also
enjoying it because the sky part is very vibrant and looking very nice when you
are creating some nice trees. The trees, the leaves, textures. I'm really enjoying this. I hope you guys are too. And don't forget to
share your project work. It's not necessarily
that you have to share each and every painting. Whichever you like, the
most you can share it. I will love to see those. But if you are doing it
day by day one to day ten, that will be a practice for
you if you are a beginner. And even if you
are intermediate, that will be a
practice for you guys. So do share your project works. And this painting
is almost complete. So now we will just take out the masking tape and
we'll see how it looks. So slowly. Take out the
masking tape and you can see how nice the
borders have been created. And I love this painting out
of all the ten paintings. So I hope you guys will
also enjoy doing this. So do try it out. And finally, we are done
with this painting.
13. Starry Night Background Blocking: So let's start with
our next painting. So let's first do the sketching a little bit and then we'll
start with the painting. So this is the
landscape which is going from the left
to right side. And then a little bit of like
pine trees will be there, which will be creating directly
using the black color. I'm just giving you
the reference like this we'll be creating
and there will be one small dent in that portion
and that land land area. What we are doing
is we are creating some starry nights and
the tent is there. So when stars will be there. So just this tent
pad does ten Dario, just top circle and
little bit lines. And then like an umbrella you can see you can
create like that. And then the line which is
joining half of the stent, that should be bright. Actually. So I'm just giving
a rough sketch to this area will be a little brighter
than the above part. So this much drawing is
done not more than that. We have to do it. Now we'll
start with the painting. So the colors which we'll
be using here is black, porcelain blue, white, cadmium
orange, and chrome yellow. So these are the colors
which we will be using for doing this painting. Let's start. Just black and a little bit
of Prussian blue. And we are starting
from the top. So just making sure that all
the ends are covered nicely. Don't use too much of water when you're using poster colors. As you know, we have to use only water for
mixing and blending the colors so that
much amount of water is needed
only on your brush. It is required that much
water is more than enough. So I'm just adding
white and you can see I'm just trying to
blend both the colors. So as we are moving downwards, we will add more and
more white to it. And now we will not add black. We have just added
black on the top. So as we are moving down, we'll add more white. So from darker to lighter value, we have to create it. So you can see as
we're moving down the I'm adding more
white to this color. If you don't have Persian blue, you can use your civilian
blue and add black to it. It will create some what like this Prussian blue type color. You can use that also. So adding more white
as I'm moving down, we're just covering
this whole entire area. At line part. It's okay if some of
the colors are going inside those landscape
area because we are using blacks where it will
not make much difference even if the color goes
inside that portion. So it all depends what
color are you using. Black is very powerful color, so this will
overpower that color. So it's fine if it is going inside that also for blending, just take little water and then start blending
mode the colors. Because blending
is very important. We don't want any lines
in between when we're doing the blending pod
to take more water, you can see my brush
has dried off. So I'm adding more water to it. And I'm just blending
mode the colors, trying to cover
each and every area of the corners so that it is not showing off. Blending the colors and
moving towards the top. You can see whenever you are blending the colors always
go from light to dark. Don't go from dark to light. So does you have to
take care when you are doing such blending part? Now again, I'm
taking little blue because I want the
blue to be there. Just mixing the colors more. And I'm going just
above from light to dark portion and slowly
blending the colors. You can see from dark to light
value, you have to move. You can see there's a
line of blue color, but when it will dry off, it will let the colors little
fade off when it dries, especially in poster colors. So that's why we need to use bright colors to do the
post-doc color painting. But when it will dry off, you can see that that
line will remove slowly. So now let's do the
tent part first. So here though, for the tent, I'm using my liner brush
and this chrome yellow. And just first doing
the inside part, just making it a little bit and just adding little
orange also two-word. And just first doing the outer
part, just outlining it. And then taking this yellow
and covering the inside part. Very slowly. You have to do
it with your liner brush. Or you can use your round brush, smaller size to do these are filling of
colors and detailing. I can see I've just blocking
in with this chrome yellow. And now we need to
do the outline. Or doing that. I'm just taking
black and a little bit of orange so that it becomes a little bit of
burnt sienna type color. It's when you add a little
black to this cadmium orange. And I'm just outlining those
lines which we have created. Just outlining or taking little fight and mixing
it with the yellow. Just taking a little
wide and mixing it with the yellow and just
applying at descender. So just taking mixing both white and yellow
because I want this middle part to be white. So that's why I'm
trying to create little white texture
to it. This is it. And just little widen
these antibodies. Now this, again this orange
color and creating the lines. Now we have to do
the blocking part. But first, we'll create the pine tree structure
on the top of it. And then we'll start with the
blocking of the landscape. So using my same brush, that is the rigger brush,
I'm just creating. These are small triangle shapes so that we can
create mine trees. Same with black color I'm using and I'm just creating some doll and some short pine tree shapes so that we can create it later. Later we'll give
nice detail into it. You can do this with
your fan brush also, but I prefer doing it with this liner brush because it
gives more detail to it. It gives more realistic
and detailed look. When you use your rigger
brush to create such details. Do it very slowly,
take your time. And of different sizes
you have to create. You don't have to
create a same size. So try to create all different
sizes and variations so that it looks like a
realistic pine trees escape. Mic's on the top. These types of
detailing take time. So do it very slowly and makes water so that
you can create fine lines. And as I'm going up, I'm creating some small
sizes of pine trees. Because as we go far, it, it becomes smaller. Whatever object you see,
it becomes smaller. So that's why I'm
creating smaller sizes. Now let's create with
fan brush some stars. So just taking white and
water is there on my brush. With this fan brush, I'll just sprinkle white
color on top of it. You can see I'm sprinkling it. I'm just taking while just sprinkling on the entire
that blue surface. So whenever you are
doing these sprinkling, don't do this black area first for sprinkle it and
then do the black part. Otherwise again, you have
to redo that black portion. So see how nicely
this sprinklers coming out when you are using some liquid
form or for color. So now we'll create the lower
portion and some stars, like some shooting stars
also we can create. Now since there's a
white spots on them, so I have to cover them all. So that's why I was telling
that do for us the upper bod, that Stars part and then
go for the lower part.
14. Starry Night Final Detailing: Now let's start with our
remaining part of the painting. So here I'll be using my flat brush for first
doing this lower part. So this is cadmium orange
and little bit of black mix. And I'm just filling this lower part first and then we'll go
for the black part. So very slowly you have to
just fill in this area. So it's actually
brownish in color. You can directly use
brown or you can just mix this cadmium
orange and black and you can create some nice
burnt sienna color with very slowly so that
the color does not go inside the tent part because
that is the yellow color. So do it very slowly, especially the
corners of the tent. So take care of that. If you're not comfortable
doing with your brush, then take smaller size
brush and then to take your liner brush and then
fill in those areas. Now once we are done
with this part and the upper part should
be with black. So just take enough of black, sewed it should be
very thick color. Don't use too much water
for black, otherwise, it will turn into gray and
recreate some patchy effect. So take, take colors, don't take too much of water and just apply
black on top of it. Again, you have to take care of that tent part when
you are using black. So this painting is not like
very difficult. It's easy. But you have to take care
of all the details and corners so that
because we are using very dark colors and this, so you have to be very careful, especially with
that yellow part so that the color does not
go inside that yellow. So it's better that you use like smaller size brush
or liner brush. Here I'm using my liner brush
to create those corners, to fill in those corners. You can also do the same thing. You can also use your
liner brush to just paint the boundaries and
the corners which are joining the Denver area
and the upper area. So again, I'm taking a little thicker brush
because that was very thin. So I'm just filling in
this spot very carefully. Now once this part is done now we will be doing
some more detailing. Because detailing is
still left and just gives a nice outline with black
color also to this tent part. So now let's start with
our detailing part. I mean, detailing the again, I'm using a smaller size
brush that is two by zero for creating
some pine trees. Just creating lines
and creating small, small lines on both the sides. So I'll try to zoom in
and so that you can see it a little more clearly. So very small, small details
like triangle shapes. You have to create very small, small dots and lines
you have to create. For creating such a pine trees. Have just zoom in a little
so that it is more clear to you how I am doing
the texture pod. I'm just creating
dots and lines. One board decides to create such trees of different sizes. These are not all of same sizes. Try to create some
different sizes of trees because
whenever we see trees, trees are not of same sizes, so try to create
different sizes of it so that it looks
more realistic. So slowly, slowly
we have to cover this entire upper area. So always use your liner brush
for creating such details. Because these are very
minute details which needs to be done only with
your rigger brush. So you can see the dots. I'm just creating small, small dots on both the sides to create a shape
of the pine tree. So we need to cover
this entire area. So you can see the sizes, the sizes which are
above these are small sizes because
those were far. And as we're coming
little nearer to it, these are little
bigger and sizes. You're almost done with
this pine tree part. And then we'll do a little
detailing on this lower part, which is where the
tent is there. Let's add first little bit
more of white in-between these dense suggest adding water to it because my
wife has dried off. So just adding white
in-between those tens. So that gives more brightness
to this tent part. This tent part is almost done. Now, let's create this texture. I'm using my fan brush. And this both color mix. Just yellow, chrome, yellow and orange and just crying
to create dots. Just using the tip of the brush. I'm just trying to create
these smart small, small dots. Don't use too much water in this because otherwise that
dots will not come up. Tried to take very
less amount of water. I've just taken
that much amount of water so that it
gets reactivated. So that much amount of water
only you have to use when you are doing such a
fine detail things. I'm also adding
white to this color. And again, I'm trying to create
some textures over there. The brightness, these brightness
I'll due to this tent. So that effect I'm
trying to create. And then more of white
and let more of yellow. And to this side of this tent, more of this white
and yellow mix. So likewise, we have to create it to give more like
brightness to that. And now let's, now let's first create
some shooting stars. On the top with our
liner brush dot and just creating lines, some few more dots
here and there. And we're good to go. So let's take out the masking
tape and see how it looks. Take off the masking
tape very slowly, otherwise people will tear off. So this is it. So the complete painting. So I hope you guys enjoyed it and do share your project works. I would love to see them, so I'm just using little
bit of lemon yellow to give a nice shine on the
top of this dent. First time just creating the borders with this
yellow, lemon yellow. And then on the top of it, I'll just create
some nice lines with the yellow so that it
just turning this color. And then with the same brush
and just creating some fine, very light, very
thin lines to give like shine to this dent. Take more of a yellow
and then again create some nice lines. So and this is it. This whole painting is
complete. Thank you.
15. Mountainscape Blocking: Hello friends, welcome back. So now let's start with
our next painting. So first we will do the drawing, and then we'll start
with the painting. It's not too much drawing just little mountains and
then we are done with it. So here also some overlapping
mountains are there, which I'm trying to
create with my pencil. So each and every painting is of different form even if the overlapping
mountains are there. But the painting is
entirely different. So this is the sketching and now we'll do the, the painting part. The colors black, cobalt, blue, purple,
magenta, and white. So these are the colors which
we are using a flat brush. So let's start
with the painting. Just dip your brush in water and then just take the first color. That is the cobalt
blue and white. So almost same amount of weight should be there because I want a
little lighter color. I don't want very dark color. So little bit of
purple is added to it. So I just want some like
purplish blue color for the clouds. So I'm just adding the, on the first layer. We'll start with
the first painting. So again, again, just mixing a little
more amount of color. I have changed the
direction so that my shadow doesn't
comes my shadows. So again, I'm mixing the colors. And now again
starting from the top and adding little
more blue and purple, little bit of white. And again, because you
need to take colors, you cannot take like ten colors otherwise that, that value, that intensity of
color will not come off if you add too much
amount of water to it. Same goes with gosh, when you are using goals, you have to use thick Carlo. You cannot use ten
colors for gosh. So these are also same
post occurs also same leg. You have to use the colors
for doing the painting part. So just adding little bit
of magenta to it to give us some nice pinkish
shade to it. Just mixing the colors. It's the same cloud
which we have done in the fifth post-doc
color painting, but it's a little different. So just mixing a little more
magenta and wide separately. And then starting to add
little bit of violet. And again, starting from the edge of the mountain
and then we'll go above. So this is the pattern
which I'm trying to do. So you can see I'm just adding
white a little bit more. And then applying on the job and then starting
to mix the colors. Blending is very
important for mixing. So even if that
color has dried off, my brushes wet and it can
reactivate the blue colors. So for this, we don't have
to take care of the light. The color has dried off
and we cannot blend. So this is not a case
with poster color. So we can easily
blend the colors. So I've just added
water little bit. And I'm just blending
those color. Blending should be with
very light hand brushes. You don't have to press
your brush too much. So very light hand brush
and just mixing it very lightly so that you have
to blend your colors. So our top sky is done. Now, let's start
with the mountains. So before mountains,
I'm just filling this with this white, blue, and purple color or
violet color you can see. So just adding more of white because I wondered
too lighter shade. So that's what I'm trying
to do when I'm just filling the entire
this mountain area. So just filling this
whole mountain part. Even if I'm blocking the color since my color is very light. So I can see the lines
of the mountains. So that's why I'm using
Lake light colors. So just doing the edges and the of the mountains and governing
the entire mountain part. Now we're almost done with
this mountain blocking.
16. Mountainscape Detailing: So now let's start
with the detailing. For the tailing. We will be using our rigger
brush or same brush. Size one I'm using here. So I'm just taking
my rigger brush, putting it in water so that
my color tones liquid. And just taking this nice color and just outlining it first. Just outlining the mountains
where it ten lines you have to draw for creating the mountain boundaries
and mountain edges. And after that, we'll start
with the detailing also. So now let's take our flat
brush and I'm just taking a little bit of magenta and violet and a little white mix, little more of a
violet and blue. And now again, I
just wanted to to darker color on the
edges of the mountain. I'm just trying to fill
that color on the edge where the two mountains are
meeting as you can see. And I'm just trying to
pull the color down. This is little darker
version of color. We have used as a base
for the blocking. So I'm just pulling
this color down. Now, digging more white and just blending it
with the same color. Blending is also very important. So just trying to blend
these two colors together. So this is done the lower part. So now let's do the upper part. Just adding these
same lighter color on the upper part as well, because this is quite
dark than the one which we have used
for the below one. And I'm just creating
some textures like lines because mountains are
never like smooth mountains. I'm just trying to grip nice
textures to these mountains. Similarly, I'm adding little
white and I'm just creating some textures for the
lower mountain as well. Now, let's take our
rigger brush and black color and just
create the outline. So the outline is done for
all the three mountains. So now we will be using our fan brush to
create some textures. Just using the tip of the brush and the dry brush technique. I haven't used
water in my brush. It's just dry only the
water is on my color. That said. And just giving
some nice textures to this. The one which is joining the two mountains so that
it will appear like trees, small trees at far distant. Similarly, we'll
do for above also. Little bit more textures
we will create in between. So that it gives a nice shape of the trees in lines
or bushes in lines. So what we are doing
is we are creating some details so that the mountains look
more realistic form. Then again, using my
smaller size rigger brush and adding little
blue to the black. And I'm just creating some
lines with this brush. First I did with fan
brush and now I'm using this liner brush for
creating these lines. So take your time and do it slowly because these
are little tiny, time-consuming because you have to create small, small lines. So take your time, do it slowly and make sure that your color
is in fluid form. Then only you will be able
to create some fine lines. Every beautiful thing
takes time to create. So we are in the process of
creating something beautiful. So let's enjoy the process of
creating some small lines. And you will see how
this mountain looks after completing those
small, small details. So just urine there. I'm creating some lines so that it looks like
there are some trees, bushes here and there. Just small, small
details here and there. I'm just trying to create.
17. Mountainscape Final Detailing: Let's create some more details. So as we did on the other
mountains will do this. Foreground mountain
also very small, small lines I'm creating, as you can see, like
ways urine there, I will be creating these small, small textures and lines
with my rigger brush. You can also use your fan brush or your comrades for
creating such lines. But I have used rigger brush because I feed it as more
comfortable using this. Though it takes time by
using this rigger brush, but the effect and the
end product looks good. So that's why I use
mostly the rigger brush for creating any
such small details. We can see just small
lines and I'm creating urine there with my rigger brush and I'm just trying to fill
the entire this mountain, but now just taking a little bit in
black and while it makes very little amount, again, digging a little bit
of more violet and blue. So that was a little more black, so I left that. So now creating more details on the same edges which I have
created that black lines. I'm trying to create in-between those same small dots
here and there lines. I'm just trying to fill
those entire area. So same thing I will do for
the other two mountains also. So you can see we
have started with a simple painting and via more going into the intermediate one. So this is how we have moved towards
first the starting is simple and then we are moving towards little bit of
an intermediate level. So again, creating lines on
the top of the mountains. Very small, small details. Do it very slowly. Take your time and take
a break and then do it. But do it slowly and
take your full time. Then only you will be able
to create these textures. Now we're finally done
creating these textures. Now we'll create some
clouds on the top. So for this, we
will be using are this velvet brush and
magenta and white. I haven't used any
water on my brushes. It's completely dry brush. And I'm just creating
just moving the edge of the tip of the
brush and creating some nice cloudy textures. Don't use water. If your color has dried, just use a little
bit of water on your color that certain
not on your brush. Try to avoid water
on your brush. And just creating
few clouds, urine, they're adding little
bit of violet also, just creating nice
fluffy clouds. You can see straight
clouds, not fluffy, but some small, small
clouds, urine there. You're just a little bit of
clouds is not required also, if you don't want
to create clouds, you can leave it as it,
as it is like this. But if you want, you can create crowds like this. So now let's take our white color because my
white color has finished. And I'll take that sponge and little white color
and then I'll create a nice sun on the top. So you can see how nicely that round shape comes up when
you use this sponge thing. It's very useful for
painting such round shapes. It comes in many sizes, like bigger sizes also it comes same thing now I'm
just using that row wide. And with my rigger brush, I'm creating some nice so-called
worse shape in between that little bit stars
here and there. It's actually a more modest sun. So here in there I'm
just creating some nods, some big, big stars. We're almost done
with this painting. We'll just take out
the masking tape and we'll see how it looks. Just a little bit more
stars I'm creating. You can also blend those
stars with your liner brush. Just take water and just
make some round shapes. Some blending. Make it a little bit
of bloody shape. And then you can put
again one more than that so that it looks
like okay, they're shiny. Likewise, you can create
like shiny stars also. We're finally done
with this painting. And now we will take out our masking tape and
we'll see how it looks. This is our final painting. I hope you liked it. Do share your project works.
18. Cloudscape Blocking: So welcome back. So now let's start
our next painting. So these are the
colors to Daniel. Whites, really
blue, lemon yellow, two types of green, dark and light and black. So let's first draw a rough
sketch of our painting, which we will be doing. And then we'll start
with the painting. But let's start just
the, just the base. We have to create
that as the land. And we are good
to go after that. Just the base. There are two
overlapping land area. And then we'll do the painting. So this much is the
sketching part. So sketching part
is always simple. When you are doing such kinds of paintings like
landscape paintings, you don't have to do too much. So again, let's
start the painting. I've just dip the
brush in water, and now I'm using my colors. So let's first take my
smaller brush to paint. Let's first use
this Skype button. Then we will go with
the land bought. Suggest mixing
surrealism, blue and white and starting from the top, start, applying the colors
in the horizontal direction. And as we will go down, will slowly decrease the
color value by adding white. You can see I'm just applying the colors and moving the brush in the to
and fro directions, trying to fill the entire
area, all the corners. I don't want to
leave the corners. I want to cover it very well. So try to make sure that you have covered entire corners of it and just moving downwards. So just blue and white I'm
using for covering this. More of blue and less over wide. In this whole thing. I've used just one color because we need to
create the clouds. So I thought of creating just
one color at the backside. That is the background. So I'm just applying
just same color on the entire background part. Then once the background
has dried off, we will be creating some clouds. So finally, our
background is done. Now let's do the down part. Let's use our flat brush only and we will be
covering those first, I am using my darker color, that is dark green. And I'm just applying
first at the end. And little bit of lighter
green and lemon yellow mix and then moving upward. And I'm also blending
those two colors. As you can see. You can use, use smaller size flat
brush also for this, for doing this because
this is a smaller area, or you can use your round brush for creating such paintings. Any brush, whichever you like, you can do it, just adding
a little white to it. And again, moving upward. So these are actually very
vibrant green colors. So it looks very
vibrant when you use like when you add white
or lemon yellow to it. So from dark to light, it does. The shades are now the
upper part of the land. That is the greenery area. So again, the darker color at the base suggest. Creating the base and then a little bit thicker
because it is very thin. And then the lighter color. For this same color which we have used for the below one we will be using
for the above one. This is very vibrant
painting as you can see, blue and green really complement
each other really well. And it's really very cool
colors as you can see. So, so slowly, slowly via
doing the blocking part. And we're almost done
with the blocking board. And then we'll create the
clouds and some trees. Now just adding little
more of this dark green and just trying to
blend both the colors. So do it very slowly when you are doing such
kind of paintings. Because in each and every
painting that is blending, now Midas portion has dried off. Now, let's create some
clouds with my brush. Filbert brushes are actually
very good brushes when we think of creating such clouds and don't use
any water on your brush, just use your dry brush. And only color on your only the colors should
be little liquid form, not too much, but very little
because we already have this blue color
be at the behind. And as you know that the poster
colors are the reactive. So you have to use, take colors. So don't use too much of water. So just trying to create some
nice round fluffy clouds. You can see I'm not
mixing also the colors. I'm just dabbing the brush. Because if I mix the
colors and if I will press the brush also,
what will happen? The color which is behind this
white color will come up. So you'd need to do it
very carefully when you are using the poster colors. Even when you are using the gouache colors,
same thing happens. So that's why we use thick
colors to create clouds, or we leave that area wide. So that also you can do it. But I prefer doing it like this because it gives them
more natural look. So the bass part is done of the clouds will also do the overlapping of
the clouds as well. Since these filbert brush have nice round shapes
are at the top, it is very helpful for
creating such clouds. You can just use the tip
of the brush to create some nice round
shapes of the clouds. So it's a very good brush for
creating some nice clouds. These all are synthetic brushes, which I'm using here. So apart from the fan brush, all are synthetic brushes, which I am using. Fan brush is the
Bristol brush and rest. All are synthetic brushes. Just giving some nice
fluffy clouds, urine there. You can create any shapes of
clouds, whatever you want. It's not necessary that you have to create this shape only. You can create any
shapes because clouds are of different shapes. Now, just trying to add more
white to these clouds on, especially on the
edges of the clouds. You can see I'm just
using the tip of the brush and just adding
little more white to it. Similarly to the other
clouds also again, taking little wide and I'm just adding little white
to all the clouds. Again, taking little
wide and just adding white to the
upper end of the cloud. I'm not going till the end. Just adding to the upper end
of the clouds a little wide. Just trying to add
only in one direction, like the light is falling
from one direction. So I'm just making it more bright and just
overlapping again, one more Cloud with white color. So likewise, you can create
some nice, beautiful clouds. Again, take, take colors. Don't use water in this. Otherwise you will
mess up the paintings, so try not to use water and dry brush
technique is used here. So use that only. Then only you will be able to create some nice white clouds. We're almost done
with the cloud part, and now we will start
with the tree part. But whenever you are starting the tree part makes
sure that you are, this cloud part has dried off. Then only start with
the tree painting. So let this cloud to
dry out first because these colors dry very fast
if you live in summer areas. So what's the color
dries and then you can apply the next
color for layering. So he has this cloud is done, this base area is done. And then we'll create some
trees using Maya again, rigger brush, size one. I'm trying to create the tree branch tree trunk and then branches
just black color. I'm using you and I'm trying
to create nice tree trunk.
19. Cloudscape Final Detailing: So now let's start with
our final tree painting. So I'm just blocking this
tree trunk with black color. And same rigor brush
I'm using here. And I'm just spreading
little base area of the tree trunk with
my black color. Make sure that your
color is very thin. So just trying to give
a shadow effect to 43 part with my rigger
brush with black paint. Now let's create some trees. Suggest creating dots
and filling this entire such branches
and tree trunks am just trying to create and just filling this
with black color. Now here you have to
use thick black color because already there are two
colors in the background. So try to use thick black
colors because we're, we're doing the
layering part and this is the postdoc colors. So you have to use
tick colors too, so that the background
color doesn't come up. I'm just trying to give
nice shape to this tree, some nice round oval shape. So just adding dots, lines here and there. To fill up this whole space. Space where we need to
create the tree part. And also we'll do the
layering of the trees. So this is just one color which I'm adding because
this is a black color. So always the base
color has to be dark. And then we'll go with
the lighter ones. So the base is dark and this
as these opaque colors. So just creating the shape
of the tree as you can see, I've just created some
nice shape to this tree. And now we will add, will be adding
some greens to it. Some dark green. Again, this is also quite thick color
which I'm using here. You have to always
use take colors. Then only you will be able
to create the textures. I'm not covering the
entire black portion, I'm just putting
some greens urine. They're just also giving
little shape to it. Adding greens to the edges also. Do it very slowly. And then light green, adding little bit of
lemon yellow to it. And just adding on the top of this dark green,
this lighter green. This is all we create
some nice tree textures, some overlapping, some layering. This is called as
layering technique. Also, which we also use
an acrylic paintings. Even in Gosh painting also, you can use whatever
medium you are using. You can use these layering
method, except watercolor. Because in watercolor
you have to use the base as the light color. And then we go to
the darker one. But in this case it is
opposite verse we have used darker color and
then we are using the lighter and lighter colors. So likewise, we have to use it. I'm just adding little more yellow and
white and green mix to give more shades
to this tree. The more colors you
add to these trees, the more realistic
the tree looks. It all depends upon how you
are layering your colors, how you are applying the colors. The more layering
you do in clouds, orange trees, the more realistic these trees
and clouds look. We are almost done with
this tree painting. Just the final touch I'm
giving to these trees. And we're good to go
with the three-part. Haven't created any
branches in this. I've just created a nice fluffy
tree with lots of leaves. So just creating some
nice edge also at D. That is the shadow part. But black color. So now again, very important
thing, our sponge. So again, I'm using
the same sponge, white color and just applying on the top to create
some nice sun, which are having a
nice raised to it. And to create those rays, we can use our rigger brush or our flat brush to
create some nice raise. I'm just moving these colors
since my color is wet. So I can just move the colors in the diagonal directions to create some nice sun rays to it. And then you can fill this
middle color with more white. So take completely
row wide without any water and just fill
this middle portion. So we're almost done
with this painting part. Just a few more details
things and then we are done. I'm just adding little
green and black to it. And I'm just trying to create some just stay more of green. And I'm just trying to create
some nice fine lines which divides these two glass area. So just adding
little more green. And just creating the line, I wonder too darker effects or just have additive
black to it, to the darker green. And I'm just creating this line joins
these two land part. So this is done a little bit yellow to this lighter color and just applying
on the edge of it. So just taking a little more of yellow and just applying on the edge because that
portion is light in color. So this is it. We're almost done our
painting and just we'll take off the masking
tape and see how it looks. So I hope you guys enjoyed doing this painting with
lots of fluffy clouds. So do try out these, this project and do
share your project, work in the project section. And I hope you guys
are enjoying it. Few more paintings are left. And let's start with
the next painting.
20. Sunset Blocking: Hello friends, welcome back. So let's start with
our next painting. So this is the sheet and I've just put masking
tape in between. So here I'm just drawing a
rough sketch with my pencil. Some nice land area
that does mountains. You can say small mountains. I'm trying to create on the top. So masking tape I have
put at the center and nice circular son be there. So I have drawn very
rough sketch because we will be using
very light color. So let's start
with our painting. So these are the colors
which we will be using. First, orange and
then yellow ocher. Little bit of burnt sienna. Just applying first
code on these sides because sides will be bit dark as compared to
the middle part. So just creating
first to the sides. With my flat brush, I'm slowly covering the mountain part also and blocking these background. So you can see I'm only using
that much amount of water, which is needed to move the
color and blend the color. So you have to also
use that much amount. Now in the middle, I
have added little bit of this yellow that
is chrome yellow. And I'm just trying to
mix both the colors. Just trying to mix it. So as you know, these
colors can be reactivated. So I'm just trying to blend
these corner colors, also. Trying to cover the edge of
borders of the mountain. It's a very nice, warm color. You can see, which
I'm using here. So slowly, slowly I'm covering the entire background
portion and blending also. So now again, taking
little bit more of a yellow ocher because my
yellow ocher has finished. So I've just added a bit
of it with my brush. And then again, adding
little bit more of yellow ocher to it and
cadmium orange mix. And we'll do the lower part. First time doing
the middle part. And then little bit of
burnt sienna added to it, then doing the corner part. So same thing I'm doing, which I did on the
above background. The foreground also am
doing the same thing because we are creating water. So same color which
we have used above, same color we will
be using for below. Also. Just taking little bit of Chrome and just
mixing the color. You can see I'm just trying
to blend all the colors. Now, our background
foreground is done. We are left with
the mountain part. Now we will be using our rigger brush to create
the sun in between. So rigger brush of size
one, I've just taken, taking this row white color and just applying in the center, which we have created
very rough sketch. So I'm just blocking
in width this with white color. Very slowly. You have to do it. This time. I'm not using this sponge, I'm directly doing
with my brush. So if you don't have smudge, you can also do it with
your rigger brush. Now I'm just adding
chrome yellow to this side and making the circle. So likewise, you can do
it and create a nice sun. I'm trying to create some
sunset view actually is. So it's the kind of warm color
which I have used Rovio. Now, just blending
with my smaller size. Flat brush. So like ways you can
do your own blending. No need of that
dose Sponge brush. Now you can see that round part in the middle which was white. It has become, it has blended
with that yellow color. So what I will do this, I will again add white to it. So let's take again
our row rigger brush and add white to it
without using any water. I'm just using that
row white color. And I'm adding in the center
so that it looks bright. Now, the second
part is also done. Try to give a round shape
to it, proper round shape. Now let's do the mountain part. So for blocking this, we'll be using our
smallest size flat brush. So just taking orange
burnt sienna mix and a little bit of black in it because I want a
little darker color. So just taking a little more
water and then just blocking these mountains
with my flat brush. I haven't removed the
masking tape yet. We will remove after
doing this mountain part. So if we're blocking
these mountains, you can also use
your round brush. That is also fine. But here I'm using my flat smaller sites
flat brush so that I can nicely covered those
border areas as well. I'm trying to create a
little bit more orange with the just the mountain
which is near to the sun. Just blocking in. Now once we are done
with the blocking, then we will remove
that masking tape. Try to use colors, don't use too much water in it, otherwise you will not create
the nice opaque color. Stride to use the colors. So now let's take a
smaller size rigger brush and black color and a little
bit of burnt sienna mix. Just taking black and
this bond sienna, I'm just outlining the mountain. Do it very slowly when you
are doing this outline part. And the color has to be in fluid form when you are
outlining the details, any details you are doing, try to use the liquid
form of color. Then only you will be able
to create some nice lines. Now once these lines are done, I'm trying to blend
these lines with the brown color so that it
doesn't look very sharp. You can see I'm just blending those lines with
this brown color. So a mountain but
is almost complete. And then we'll start
with more detailing of the water and the part
which is behind the tape. Just trying to blend
that black color.
21. Sunset Final Detailing: So now moving further, let's remove our masking tape. Slowly. You have to remove it because we are using papers, so you need to remove
it very carefully so that it is not a tone. So just creating one
outline and then we'll remove on the below side
of the masking tape, just creating line with black
color with my flat brush. And then we will remove
the masking tape. So now we'll fill this color with bushes that is used same
color that is black first, I'll fill in this line
with black color. So try to use smaller size masking tape when
you're putting in between. Don't use tape masking tape. So you can see I'm just covering the entire area with black and just making sure that the black color doesn't
go beyond that line. So just blocking this
with thick black color. Now we will create
the bushes details. So for creating the details, we will be using a
rigger brush, again, size one, and just
creating small, small dots so that it
looks like some trees or some bushes out there
at far, distant. So just, and I'm not
creating same sizes. I'm trying to create
random sizes. Some are big, some are small. So that, so that it looks
like a real bush shape. So I've just closing the camera so that you can see it properly what I'm doing. So you can see I'm
just creating small, small lines towards
with my tip of the brush and creating
some sort of bushes form. So dry to use. Take goo color for this. Don't use too much water. Otherwise, you'll not be able to create such opaque color. So try to use the color. We're almost done with this bushes part and then we'll start with
the water detailing. That is also very important
because that will change the whole
scenario of this image. Let's start creating the water. Now I'm using my flat
brush and I have just used my tip of off brush. So just the tip you have to use. Make sure that your
tip is quite sharp so that you can use it in nicely
with the tip of the brush. You have to just dab, dab your brush to create
some textures. Don't use a flat brush. If the flat brushes to
try to thin it with water by pressing it with finger and then try
to apply the color. So likewise, you have to fill in these whole water area and try to avoid lots
of gaps in between. It should be very
close to each other. The lines, especially the color which I've mixed is
black and burnt sienna. That's it. I'm just trying to create the water effect
with my flat brush, just using the tip of the brush. Now I'm adding little orange
to it and it will black. Again, I'm creating
the same thing. Either you can use
directly burnt sienna or you can add orange
and black mix to it. That is also fine. So both the colors will
give the same result. So you can see how
I'm creating it. I will cover this
entire portion of the water with by
creating such details. Do it very slowly.
Take your time. You can see I'm
doing it very slowly and then just filling this entire portion
of the water part. We almost done with
this first layer. We'll take again black, little bit more,
little darker color. And then we'll
apply on the sides because side's a little
darker than the middle one. So I'm just making
it a little more dark by overlapping these lines. So on both the sides you
have to do the same thing. Then as we go down
the foreground, water should be also dark. So likewise, you have to create the layering effect in
the water part as well. So here also I'm just
using the tip of the brush and creating
these textures. So you can see the sites are
dark and the bottom is dark. So now we will use the raise to create the race just using
white color first. Just draw dry white. And just creating these, again textures with
the tip of the brush. And it should be just below that sun area where
the sun is setting. And as you go down, the lines should decrease. That means it should be
like a triangle shape. So as you are going down, it should slowly be smaller,
smaller and smaller. So likewise, we have to
create the water part. Then little bit of yellow is added to it on the upper part. Again, another layering for the water leave the little white in both the sides and then just cover the center
part with yellow. So you can see I'm just covering the center part now I'm
adding white to this yellow. And again I'm covering
the bot, which is yellow. So two to three layers are
there on this reflection, which is the sunset
reflection part. Now let's create some sky
with the same yellow color, yellow and white mix. Tried to use dry brush
technique over and dry color. Then only you will be able
to create some lines. So just taking very dry color and trying to create
some nice lines, just using the tip of the brush. So now let's take
our rigger brush and black color to create some nice either
this side or upside, whatever you like,
you can create. The palm trees I
create at these sides, just the leaves are visible, so I'm just trying to create the leaves with my rigger brush. Make the color a little
fluid so that you can create some nice fine lines. You can create full
tree also like starting from the lower
part than going up. So whatever you like,
you can create it. But I have decided
to create this tree, just the leaves are
visible of the tree. You can do this also, that is also fine. So try to create like bunches of four lines and they're
like cloudy lines. You can see lots of lines
very close to each other. So this is almost
done this painting. And I hope you guys
like this one. So this is something that
the water Let's create. You can create boards
also if you want. Or you can leave it like this. All up to you if you can, if you want to create
birds or something. Just extending these lines
more to create more Nice Look. I hope you guys are
enjoying this and this is our most second-last painting. So do try out these projects. Whichever painting you
like, you can try out. And I would love to see
your project works. Because I really like
seeing the projects, how it is going,
how I'm teaching, I'm teaching correctly or not. So it's very important
also give reviews so that I can get idea where I'm wrong and
where I am right. So thank you.
22. Reflection Background Blocking: So welcome back
to our last class of this project that we did. So let's first start drawing. I've just pasted the masking
tape again in between, I'm just drawing some mountains. Some nice steep mountains. Now, same mountains we'll be doing the on the
lower part also. Same but in the
opposite direction. Because the, these are reflections which we
will be creating. So reflection painting. So we need to have the same size of the mountains
as we did on the top. So after drawing, this
will do the painting. So let's discuss
about the colors. So these are the colors
which we'll be using. White, magenta, beach,
cobalt, blue, and black. And also, I think. Yeah, so these are the
colors which we'll be using. So let's first use cobalt
blue and a little bit of white and peach color mix. So it will give a
nice bluish shade. Differentiators
like grayish blue, just covering the
first top part. And then as we'll go down, we'll add more pitch to it. We'll start mixing
the colors, also. Blending the colors you
can see I'm simultaneously blending the color also because
my top color is also wet. So it is easily blending. Now, again, I will
take the speech and I will directly
apply on the lower part. First, skipping the
mountains and trying to do it very nicely so that it doesn't comes
inside the mountains. Suggest applying
and also trying to mix these colors,
these two colors. This is a different type of sky, different color of sky. It's like a pastel shade
you can see which. So it's a very nice color. When you add Peach to
this blue colored, the color value changes and it becomes
something different, something grayish, blue, pink issues also add
different colors there. I'm just trying to
blend these two colors. I've just added water and then just blending these two colors. Again, see I'm just
trying to blend the colors so that
it is blend nicely. Blending is actually very important when you are
doing the background. So just trying to blend
as much as I could, just adding little bit of more of beach to the lower part. So now let's take little more peach and
then start blending. Then little magenta added to it. Little more peach. And to create some nice
sky, some nice clouds. Just dry brush technique
here I'm using. Now. Let's take a little
bit of yellow, also. Very little amount of chromium I have added to this peach color. And again, I'm creating some nice clouds with
this yellow so that there is also yellow color
in this nice sky color. So now once our
background part is done, we'll do the mountains. Now for doing these mountains
we will be using are flat, small flat brush than this cobalt blue
little bit of magenta. And get rid of magenta
has added over here. Sorry, not magenta, it's violet. Violet is added over here
and little bit of black also to create some
nice bluish color. So white also little amount. And just blocking this
whole mountain Part. Two Starting little more white because I don't want
it to be so dark. So just covering these mountains would take poster colors. So you can see these are all take colors which I am using. You're taking care of the borders and I'm just
trying to fill these colors. On these mountains. You can use your round
brush also to fill these. It's completely upon you
which brush you are using. So, but try to take
care of the boundaries and the lines which are
there in the mountains. So I'm just doing the blocking. My color is drying very
fast because it is very hard in India. So that's why my main
color is drying very fast. Now you can see
I'm just trying to fill the areas which
are left white. Do try to cover all the board. Now digging just blue and
a little bit of black, a little bit of magenta mix. And just trying to create some nice textures
on these mountains. Same color I have used
but without white, little textures lines I'm
just trying to create. So just few lines
here and there. And then we will be doing
this lower part also. So the upper part is done. So now we will be doing
these lower part.
23. Reflection Foreground Blocking: So let's start with
our bottom part. So here I'm using my rigger brush and blue
and a little bit of purple, same color, which we did
on the above mountain. So same color we'll
be doing here. But first let's outline this mountain part and
then we'll go ahead. Doing the lower part. Just outline it nicely
with your same color, but it should be a little dark. Now finally, the
outline part is done. So let's take our
black and create a nice outline below
the tape, masking tape. And just remove the
masking tape after that. Now here we will be creating
some nice pine trees. So what I'm doing here, I'm just creating the
lines because you are we'll be creating some
like visible pine trees. I'm just trying to
create some lines, some triangle shape lines
with my flat brush, as you can see, just using my tip of the brush
and creating these lines. And also blocking at the
same time because we have to cover this entire
area above this line. So let's do it very slowly. And this is our last
part of the painting, which will be our domain. But I'm thinking of doing one more bonus lesson
for you guys. Let's see. That will be mostly seascape, so we'll upload that soon. So let's first do this
blocking of this pine tree, which is at a distance
pine trees series which are below the mountain that
at the base of the mountain. So this is done. We'll also be creative. We'll be creating some
pine trees above. But before that, let's
first do the base. Let's add same colors, same base color, which we
used for the background. And little bit of black also, and just covering this
whole area with this color, this light color, which
above this background part. Do it very slowly with your liner brush so that it
creates a nice line to it. So just move your brush and
create a thick line with this and then start
blocking the mountains. This is a bit a complex part, but it's not so
complex because as we are doing the
painting so long, so this will be easy for you. If you are doing city is wise. Just apply this darker color to the mountain part
which we have drawn. And you can see these are
not like fully the lab, just creating the
lines which are the mountain shapes are just
touching those lines only. I'm just creating some lines. So as you can see, I'm just filling the colors
and I'm just creating lines. There are no borders in it. So these are all
water reflections, which I'm trying to create. So this is how we can create reflections
of the mountains. So now we'll use this magenta and black also on
the top because of, because there are pine trees or little black reflections
are also there. So that I'm trying to create taking more black and just using the tip of
the brush and creating some more dots and lines
on the top of that. Just using the tip of the brush, which we did in
the last painting. The water part like that
only we have to do it. Now let's take the lighter
colors that is white and peach color and
blue color mix. And let's fill in the colors. So just filling this
lower part of the color and taking more of peach. And then again trying
to fill the colors. Same Lego background which
with which is above. I'm trying to create same thing. Just trying to cover
each and every area. And again, creating like
lines with this peach color. You can see I'm creating the
lines with the same color, peach color, and also
blocking in between. So this is one of
the easiest method of creating reflections. Any reflections either in
college or an acrylic. Any medium you use, you can create like
this, the reflections. This is simple reflection
which I've taught here. There are more complex
reflections also, but I was thinking of
the intermediate ones. So little reflections. Again, see the more lines
and details you create, the more realistic
these reflections look. Now I'm adding little more
blue to it. Does the lines. Now let's more blue
and black. Is there. So little darker color I want, so just dabbing my
brush and creating some textures like we
did in the last section. So just take your time
and do it slowly, patiently because it
is a bit complex. You might face little problem, but if you will follow
all the instructions, you will be able to do it. So now I'm just adding
more darker color and creating some lines
of the water. We can see. Again more lines,
good bit lighter lines to give the
water movement. So this painting is
almost complete. Only few more details are left. And we're good to go
with this painting. Let's create some pine trees
first with black color. So I've just zoom in the
image so that you can see it nicely how I'm
creating the pine trees. So what I'm doing is I'm
just creating the lines. You can either create big trees or you can
create smaller ones. It's up to you. I'm creating
these smaller ones only. You can create big,
big trees also. Just created the lines. And now some more
lines which are moving downwards and creating
some triangle shapes. Likewise, we have to do the entire portion
of the tree section. Very simple trees. These are simple pine trees, which I'm trying to create. This gives more realistic look to the painting when you create such types of trees in details and always use
your rigger brush, smaller size rigger brush
for creating such details. And this is due by zero rigger
brush which I'm using you. Now we are done with
this tree part. So let's create a little
more watery effect on the upper section or the lighter color
with a peach color. Just using the tip of the brush and creating
these textures. Adding little down
also, the lines. The more lines and more
details you create, the more realistic
your painting looks. So there are so many
colors and what DO, which is reflecting from top says almost the
painting is done. We'll take out the masking tape and we'll see how it looks. But before that, let's
add a little bit more blue to this mountain part. Now, let's take out the tape and do try out the project work. This is our tenth painting which we have already completed, and I'm thinking of
giving one more painting. That is the bonus lesson, which will be a seascape. So that will also be, that will also
help publish soon. So we'll surely update. You guys. Have a
nice day. Thank you.
24. Bonus Lesson Blocking: Hello friends, welcome back. So let's start with our last bonus class
that is the seascape, which we will be creating. Here. I'm just
removing this tape. It is not straight. I'm just putting it straight
in the center. Then we'll just do
a basic drawing and then we'll start
with the painting. So just the basic
drawing that is the waves which
we'll be drawing. And that's it. And we're good
to go with the paintings, some nice curvy lines
with my pencil. And this is it. This is the land and this is the water and above
with the sky. So these are the colors that is first color that does blacks, radium blue, white,
green, and brown. That is burnt sienna. So let's use a little water. And this surrealism blue. Just mix it with
water very little amount and then take
more amount of. First, let's add this
color on the top of this. So we will start from dark
and as we will go down, the value will decrease. Again. Now I'm adding
little white to it. I'm just applying the color and I'm simultaneously
blending the color also. Again, see my colors
were drying so I took some water to blend it nicely. So this is the sky
which we are doing. After that. We'll do the
C also see blocking. So first I'm doing the sky. So adding more of white, taking little water because
it is quite dry over here. So my colors also
drying very fast. So just applying again. Very light color and I'm just trying to blend both the colors. Again, taking, adding
white and then again applying the colors
and blending the colors. So this is the step which we
have done in our paintings. Most of the paintings, all the den post-doc
color paintings. We have blended the colors nicely and try to
use the colors. Now, let's do the C part. So I'll take green, this is a light green
which I'm using. And little blue and white mix. I'll take a little more green. So it is like a turquoise
color you can see. So just applying the color. So this is how you miss,
mix. These colors. Nice. See color. It is just applying
little blue on the edge and then just mixing
it with green and blue mix. You can see I'm using
the same brush which I have used earlier
in all my paintings. This is the flat brush. So just blocking
in the ocean Bart. It's almost the same
color and then dilution, I haven't changed that much. Just at the edge of where the
sky and the sea is joining. I've just added a little
more blue to red, rest and dire
colors almost same. So I have left little bit
of area where these C is meeting because
we need to create the waves with white color. So I've left that
area little bird. And just adding little black to this blue
and just creating some nice edge which divides
the sea and the sky. Just mixing this
color also that will wet so that it gives
nice variation to it. So color blending is the most important part when
it comes to any bending, either it is acrylic or
gouache or poster colors. Any painting blending
is very important. So now we're done with
this guide and with the C. So let's start with the dust, removing excess of
water and taking my white color and creating
some nice so Skype. Some nice clouds we have to use here completely dry
brush technique. My brushes dry and I have
used dry color. It's not. Fed too much. So just using
the tip of the brush, I'm creating some nice clouds. So now let's remove this tape and just block in
that area also. So again, we'll
take little white and add to that
color, blue color. And I'm just applying
it very carefully. I don't want the color to
go inside that seed pod. Also blending that color. Just do it very carefully
when you are doing this part. Because it is very critical part because these colors
are water soluble, water reactive, it will react and the whole painting
will mess up. So take it, do it very slowly and very carefully
when you are doing the lines, especially the lines which are joining the sea and the sky. So now the above part is done. So we are left with d sand area. So the sand area
we will be doing. So we'll just take white and
this burnt sienna color. And we'll apply it
on the sand part. So take little more white because I wanted
to lighter color. So just applying over
the ground area, that is the foreground. Just blocking the color nicely. So using my same flat brush and just blocking the foreground. Just digging a little
more white and let just making it more
light, the color.
25. Bonus Lesson Final Detailing: So now let's take our white
color now my white color has finished and I'll be using
my fan brush of size one. Just a dry color, which I will be using
your take, liked this, take color and start
creating this water effect. So just using the
edge of the brush and creating some nice
dots. As you can see. If you don't have fan brush, you can use your rigger brush also for creating such effect. That can also be used. Or you can use your flat bristle brush
for creating such effect. So any brush, whichever
is available with you, you can use it. So I'm just trying to give some nice water
splash effect to it. So we'll also create some
more waves in between. With my flat brush. I'm just taking the tip of the brush and just
taking the tip. Just applying this white
color with my tip of this flat brush and create just dabbing it and
creating this effect. Likewise, you can also
use your flat brush, which you have used for your
background painting and all. And you can just use this tip of the brush to create
some nice waves. It's a very simple painting. I haven't created
much detail in it. I tried to make it more simple so that you
can paint it easily. Since this entire
poster color painting, I have covered everything. I didn't cover this part, so I thought of giving it as
a bonus lesson to you guys. So now what I'm doing is I'm
just creating this border of the sea wave with
my black color. So by using my rigger brush, I'm just creating nice fine
lines with this brush. It's very thin brush. So you have to also use thin brush for
creating such lines. And then we'll cover
the extra area which is white with
this brown color, and we'll try to
blend these colors. Now, taking my biggest
size rigger brush, this is of size one and
just adding one CNN black. And now I'm covering this
whole area with this color. You can see after applying this nice
thick layer of color, I will start blending it. By adding this color. It gives a nice 3D
effect to this water. Like a shadow, it reflects. So this is very important to
do when you are doing this, any seascape painting, especially when the
waves you are creating. Now again, I'm taking
my white color with my flat brush and just applying little brown and I'm just
trying to blend these colors. My lighter color, like this, you can blend the colors. So since it does water reactor, you can easily blend the colors. So now again, I'm taking some fan brush and just
creating some nice dots. By just moving my brush lake diagonally to all
the directions, like adding little
white also to this. And creating some nice
dots here and there. So that it looks like the
sand pebbles or something. So little, little
detailing is very important when you are doing
such type of paintings. So I hope you guys like these poster
color paintings and do share your project works. I will love to see those fewer of them has
already shared ID. Thank you so much for
sharing your project work, but please do share your
project work so that I can also see how
much I have taught. You guys, have taught
it correctly or not, and do shadow reviews as well. So now I'm just trying
to outline again with little thick outline with black color to give more
of shadow look to it. Do it very slowly,
very patiently. So a painting is
almost complete. Only few details are left
and we are done with this beautiful ocean painting. And I'm just creating a few dots here and there with
my black color only and with my buoyancy and also. So finally, our
painting is ready. So let's take out the masking
tape and see how it looks. I hope you enjoy this
entire series of poster colors and do
share your project works. And if you want to
learn something new, you can tell me in the
discussion, discussion box. So that prepared this
for my next class. So if you have any questions, any doubts, you can always
ask me directly from. I'm also available on Instagram that is more
in the art gallery. So this is it. Thank you.
 Mohini Sinha, Acrylic and Gouache Artist- Nature Lover