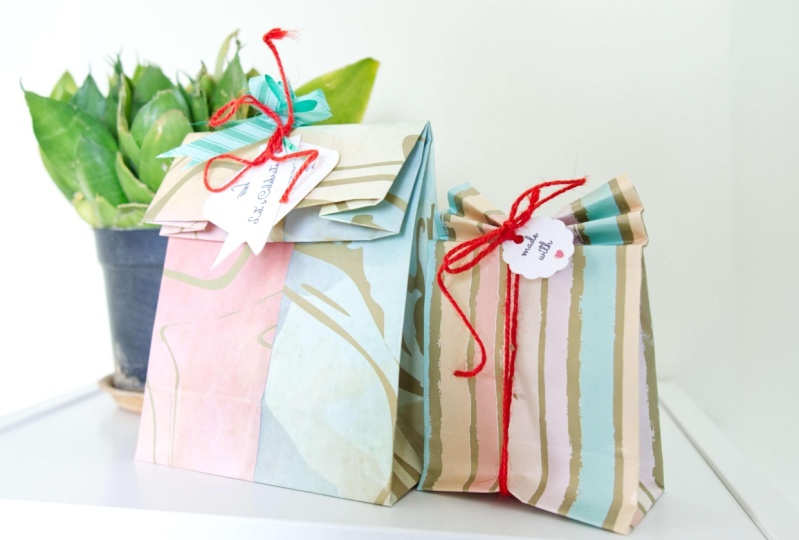
Gifting Gala: Creating Heartfelt Gift Bags to Cherish & Share
 Cloudia David, Co-Founder | Entrepreneur | Designer
Watch this class and thousands more
Watch this class and thousands more
Lessons in This Class
-
-
1.
Introduction
1:03
-
2.
Class Project
0:55
-
3.
Choosing the Right Paper Size
1:17
-
4.
Simple Ways to Fold Paper into a Bag
6:20
-
5.
Decorating and Finishing the Gift Bag
2:17
-
6.
Conclusion
0:47
-
-
- --
- Beginner level
- Intermediate level
- Advanced level
- All levels
Community Generated
The level is determined by a majority opinion of students who have reviewed this class. The teacher's recommendation is shown until at least 5 student responses are collected.
118
Students
2
Projects
About This Class
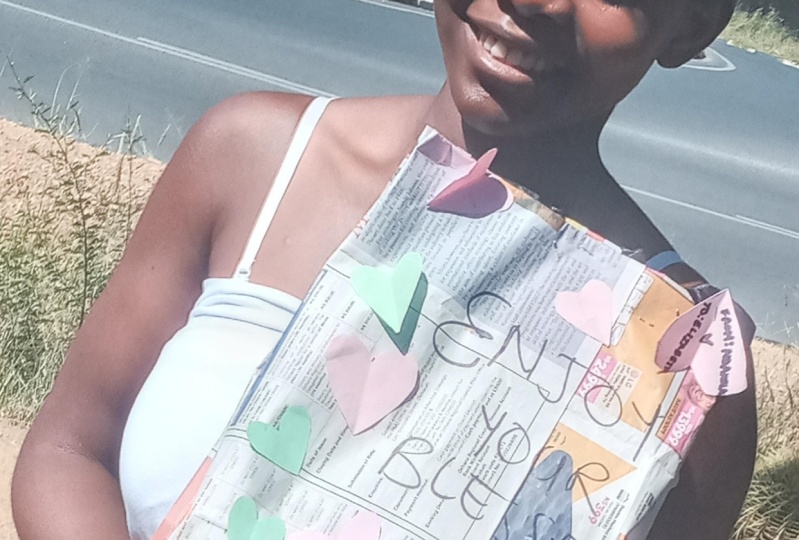
Crafting your own gift bags adds a touch of warmth that no store-bought bag can match. They are a canvas for your affection that are sure to spark joy in the hearts of your loved ones.
Do you want to add a personal touch to your gifts? Do you love paper crafts and DIY projects? If yes, then join Cloudia, a fashion and lifestyle accessory designer from India, in this fun and creative class on how to make your own paper bag!
In this class, you will learn how to transform ordinary paper into beautiful and unique gift bags for any occasion. You will also learn how to decorate your bags with different materials, such as ribbons, stickers, stamps, and more. Cloudia will guide you through the whole process, from choosing the right paper, to cutting, folding, gluing, and finishing your bags. You will also get tips and tricks on how to customize your bags according to the theme, size, and shape of your gifts.
This class is beginner-friendly and suitable for anyone who loves paper crafting. You don’t need any special tools or skills, just some paper, scissors, glue, and your imagination. By the end of this class, you will have your own paper bag party, ready to impress your friends and family with your handmade gift bags!
Background royalty Free Music By fesliyanstudios
Meet Your Teacher

Cloudia is a visionary product designer whose exceptional problem-solving skills and expertise in sewing and lifestyle crafts distinguish her in the design world. Her creations are not just aesthetically pleasing but also stand as testaments to sustainable living, reflecting her commitment to eco-friendly practices. As an entrepreneur, Cloudia co-founded Harsh and Cloudia Digital Imaging and Design LLP in 2020, a venture that has made significant strides in the visual media and design industry.
Her passion for design is matched by her love for adventure. A motorbike enthusiast, Cloudia often embarks on journeys across the diverse landscapes of southern India, from rolling hills and dense forests to ancient monuments, seeking inspiration in the tranquillity of nature. Her affinity... See full profile
Hands-on Class Project
Your Class Project is to create your own personalized gift bag that reflects your personal style and adds a special touch to your gifting.
Materials Required
- Any crafting paper in the size, color & print of your choice.
- A plain sheet of paper in the same size of your gift bag to be used to strengthen your bag.
- Scissors
- Glue or Tape
- Ribbons, Gift tags, markers or any other decorative items you wish to use.
Instructions
- Design your Bag: Think about the person you're creating this bag for. What colors do they like? What's their style? Use this as inspiration to design your gift bag.
- Fold: Fold the edges to create the shape of the bag, securing them with glue or tape. All the steps in making the bag are outlined in the class.
- Add Handles &Decorate: This is where you can get creative! Decorate your bag with ribbons, draw designs with markers, or add stickers to personalize it.
- Final Touches: Add any final touches to your bag. This could be a tag with the recipient's name, a personal message, or additional decorative elements.
Share Your Creation:
Once you've completed your gift bag, take a photo and share it with the class. Include a brief description of your design choices and the inspiration behind them. I can't wait to see your beautiful and heartfelt creations!
Join the Discussions:
After sharing your creation, reflect on the process. What did you enjoy the most? What challenges did you face, and how did you overcome them? Discuss with your fellow classmates in the discussions and learn from each other's experiences.
Class Ratings
Why Join Skillshare?
Take award-winning Skillshare Original Classes
Each class has short lessons, hands-on projects
Your membership supports Skillshare teachers
Learn From Anywhere
Take classes on the go with the Skillshare app. Stream or download to watch on the plane, the subway, or wherever you learn best.