Transcripts
1. Intro: Hi, I'm Elizabeth White Line, and I'm a freelance artist and designer. My work mostly revolves air on the themes of mermaids, marine life and beaches, and I work mostly with pink marker and acrylic paint. I've been selling my artwork on society six since the spring of 2016 and the huge increase in sales in the past few months. I want to share what I've learned and how to maximize your earnings. Society six is a print on demand website that allows customers to order your artwork on a variety of products. It's a great way to generate passive income as Society six takes care of all the production and shipping for orders and your own royalties. For each sale, you can say your own mark up for prints, framed prints and canvas prints, and you earn a 10% royalty on all of the other products that you sell. And the best part. You maintain the rights to your work, whether you're looking to start selling your artwork or just add another stream of income for your business. Society six is a great thing to add to your portfolio, so today I'll show you how to set up your shop. The steps to prepare your artwork for upload the most efficient way to upload your artwork . Some artists resource is that are super helpful when you're getting started and my tips for success. I also have a full reference guide that you can download, which includes checklists for uploading and full list of product dimensions on society. Six. So let's get started.
2. Setting Up Shop: Okay, so your first step is going to be to sign up for society six. So you can head to society six dot com and go over here to the upper right to join slash log in. Do you wanna click? Sign up and make sure that you click Upload are not discover art because you want to be an artist on their website. And then this will take you to create your user name display name, email, password, all of the usual things. And then the other thing you need to do is sign up for PayPal because is how you'll receive your royalties for what you sell. Simply go to pay, pal, click sign up and just a personal account, and then you'll continue on and create that account. Once you've done that, Society six will charge a $1 transaction fee, which will be refunded is just to make sure that your accounts are properly linked. So now I'm going to log in and show you the next steps. Once you've set up your account. So once you've wanted to your account, you can head over to your shop and the first few things you're gonna want to do our upload a profile picture and cover image and add your artist bio. So cover image. Just make a square image and I suggested either being picture of you or your logo. I use a picture of me here, and I use my logo in my cover image. And so the cover image. You want to create something that's 1000 pixels by 100 pixels, and you can easily do that on photo shop. I chose to use my cover photo as a way to add my social media information and my website because Society six does not have links to your other social media on through your shop. So it's a great way to display that information if you want people to see it and again it will side of my logo. And this is one of my unpopular artworks just to kind of show off what I dio. You also want to make sure that you add an artist bio, which is a little bit tedious, but just write about who you are, what your favorite things are. What inspires you kind of something about your artwork and then include your email address in case anyone wants to contact you. The easily confined that information
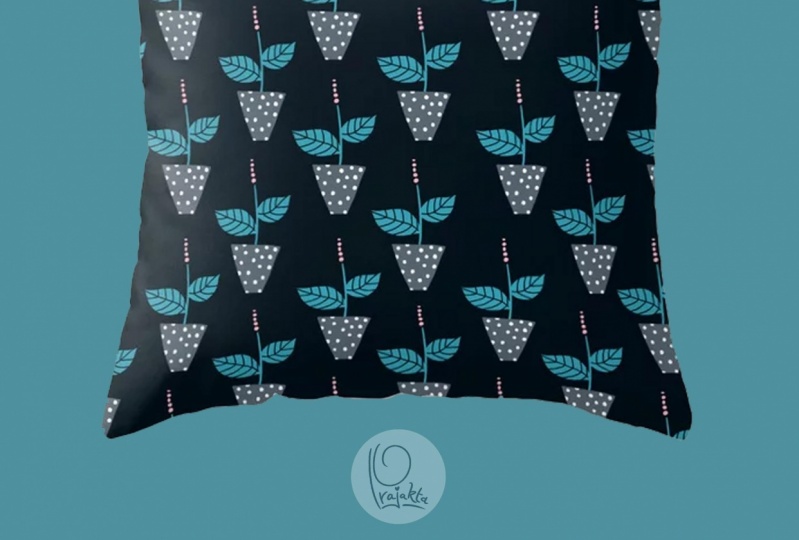
3. Preparing Your Art: Once you have completed a piece of art, the ones upload to society. Six. The first step is to scan or photograph your artwork. Um, I highly recommend scanning as opposed to photographing because that weight on to bring about lighting or the angle of your photo. But no matter what you decide to do, just make sure you do it at the highest possible quality that you have available. For example, my printer scans at 1200 DP I so that's what I always do. Eso. Once you have it scanned or photographed, you'll have to resize your artwork in Photoshopped to ensure that your pixel dimensions meet the requirements for all of their different products. So Society six requires that your initial artwork upload is at least 6500 pixels. On its shortest side, it's at least 72 DP I. Usually it should be higher andan that it's in RBG color mode. So before I show you the details of, um, re sizing your artwork, I just want to show you some of different types of artwork and how to handle that. I divide my artwork into three different categories when I'm thinking about uploading them to society. Six. The 1st 1 is what I call a floating piece of artwork, and that's illustrations like this that aren't constrained by the specific dimensions of the original work. Just has a plain background, so I can resize it to any size or shape that I want with ease. The second type is to have a repeat print like this man ity print. This also works on any dimensions because you can keep repeating it and changing the scale to work on any product dimensions that you want. The third is the most difficult, which is artwork that goes all the way to the edge like this that can't really be resized to certain dimensions. Thinks peace does work as a square. I have it on products that allow that as well as this vertical orientation one of something like a mug. Where has a very landscape narrow orientation? It just simply won't work, so you don't need to spend your time worrying about that. Once you have finished with the edits of your artwork, you're gonna want to export the file so that you can upload it to society. Six. And when you go to file export and go to export as and you can either export it as a J peg or a PNG. If you have transparency in your file like the third upload that I just showed you, you're gonna want to use the PNG and make sure that transparency is checked. You can also change your image size here. If you would like, you can simply Teoh higher percentage and it will increase your image size instead of doing it initially. Um, just another way to do it. And once you do that, you'll be ready to upload to society. Six. So now I want to show you how to resize your work in photo shop. So right here. This is my 10,000 by 10,000 pixel square for this artwork which you can go to my going to file new, and this will pull up where you can specify the pixels and quality of your image. So here I have a preset 20,000 pixel 300 rebel resolution and RBG color mode and then just hit create. So besides this square upload, I also have the this vertical orientation, which is how the original artwork looked and I'll use this on the products like art prints and vertical wall hangings that have this orientation and as well, I prepared this third upload, which has a transparent background on the end. So I got rid of the white paper there, and this is what all used for stickers and T shirts to have that blue edge. Instead, Once you have finished with the edits of your artwork, you're gonna want to export the file so that you can upload it to society six. And when you go to file export and go to export as and you can either export it as a J peg or a PNG if you have transparency in your file like the third upload that I just showed you , you're gonna want to use the PNG and make sure that transparency is checked. You can also change your image size here. If you would like, you can simply Teoh higher percentage, and it will increase your image size instead of doing it initially. Um, just another way to do it. And once you do that, you'll be ready to upload to society. Six
4. Uploading Your Art: OK, now it's time for me to take you through the uploading process. So when you're ready to add something, you simply click cell right here, and it will prompt you to upload your initial piece of artwork azi discussed in the last video. So you click that, go to your documents, so I'm gonna upload my square as my initial up loon. So click open and it will probably take a minute to load. So once your artwork is uploaded, the first step is to give it a title category and add your tags and description. All these are very important to get your work found in search. So you want to make sure you take the time and do it all properly. So I'm going to name this piece of vitamin C since that is what the text says and then it's a watercolor painting. So, uh, uh, that as a tie, you could enter 20 tags, and I highly suggest adding all 20 a song, as you can think of 20 and don't use irrelevant tags because it doesn't really help you. Um, no one that searches Christmas, even if you tagged out for this images, gonna probably want to buy a picture of waves with pieces of vitamin C, so just take things that are relevant to your piece. You don't have to tag colors because their software automatically analyzes the colors for you. Um, so just sit to subject matter or things that are relevant. Um, so I'm gonna keep tagging different things related to Canada's beachy theme. Um, you also want to make sure you add a description, which I think is something people often skip over. But it really does help your work get found in search. So you do want to add that on and it doesn't actually display on that piece anymore. So no one actually sees it is just for search. Um, so, yes, that'll be my description. And then I will continue to create products. Now that all the previews have loaded, I'll take you through the process of editing your or work for all of the different society six products. So you'll start with our prints, framed prints and canvas prints, which, like I said, are the only product that you can change your mark up for everything else is a 10% commission. So here you got Eddie. Our print and I already put replace my square upload with my more vertical orientation because I think that looks better for a print. And then these are the mark ups where you can set them since these air the most popular products on society. Six. I see these mark ups as a little bit low. So I change mine. 23579 and 11. And I have shared my pricing, other ones in my guide that you can download. Geno seems like a lot, but think about the time that you put into it and it doesn't seem to have slowed anyone down for purchasing Preds for me. I know a lot of other artists raise their prices as well, so you can either upload a new picture if you want enable, disable or zoom into your current upload. Um, so all kind of take you through and so show you some of the different things. They have a lot of products that are square, like metal prints are always square. The wood wall art is always square, whereas posters always vertical. When you upload the 10,000 by 10,000 pixel square, there are a few things you'll need to note. For example, wall hangings come in this more landscape orientation or a portrait. Orientation and landscape will be enabled if you upload a square. So if you want the vertical orientation, which is what I want today, I'm going to upload my vertical piece, which is going to switch the orientation off the wall, hanging eso that is perfect for my vertical piece. As you can see, it can be tedious process because it can take a while to upload these large files and replace. But it is totally worth it to have the perfect product and have it exactly as you want it. As you can see here is thes scale, so you can zoom in and out of your piece. Um, usually you don't want to have any white space on the side. But if you have a piece that's floating, unlike this one that's not constrained by the dimensions, it's super easy to just use this scale, and you can just use one upload and it's super duper easy. And then this is also some approx have this scene allowance here, which is kind of the edge of the product. Some of the furniture has this kind of the spillover of your design. So keep an eye out for that, and you could always refresh the preview to make sure that your artwork looks exactly how you want it. As you can see, the preview for my wall hanging has refreshed and it sound. It's vertical portrait orientation, which is what I wanted. So since I can't take you through every detail of the upload process, I'm just gonna give you some of my notes and what to think about with the square upload method that I taught you. So, for example, the wall mural comes in either eight foot by eight foot or 12 foot by eight foot and Onley . The square is enabled with your square upload. So if you wanna have the more landscape orientation, you'll have to upload new dimensions, which you can find in my downloadable guide. Another note. Some products come in either portrait or landscape again, like the wall hanging. So, for example, the tapestry automatically is this landscape orientation if you upload a square, but if you want it to be a vertical tapestry, I'm you can re upload something there, too, notes for wallpaper, I would say Don't enable the wallpaper unless you have a seamless repeat or a floating illustration and really think about. If someone would love that on their wall, for example, I know that no one's gonna want Vitamin C written 100 times on their wall. So I'm not gonna bother to enable that today Really think about whether your products are going to be the best they could be if you wouldn't buy it. You know what else probably will so don't enable that and allow it to clutter your feed when you have other things that look even better, another note side tables. They come in either square or round. So when you're uploading that, you want to make sure that you're our work will look good in either shape, and it's on cutting anything off if it's round. So more examples. The throw blanket can either be vertical or horizontal, and it does upload this vertical orientation with square, which is how I like it at the moment. So I'll leave that beach. Towels is another one. It does this horizontally if you upload a square, so if you want it ah, vertical orientation you'll have to use the pixel dimensions, but I mentioned so that you can upload it if you wanted to say vitamin C the other way. Bath mats are also have the two different orientations. Same with the serving trays. Ah, both the acrylic and this bamboo serving tray. Cutting boards come in round or rectangular, and only the round will be enabled if you upload a square. So if you want the rectangular orientation and you will have to do a new upload, so a couple other notes. There are some products that have a template. So when you goto edit, you'll see here that you can download the Photoshopped template if you want to exactly customize your artwork for this photos. Phone case dimensions and it's not really important for that phone case, but there are a few others where you definitely might need template. Let's go back down, for example, the all over graphic. T This is a new product on, and you'll see this is the T shirt, and you obviously are gonna want printed like this is the front. This is the back, and these are the sleeves that just would not make sense for a T shirt this way, so you would definitely want to use the Photoshopped template. If you want to create on all over print T shirt and it doesn't go back to the top of page every time you add it something just a note. Backpacks and duffel bags also have templates, which are really helpful on, since they have so many different pieces that are sewn together. It's usually very hard to just throw your artwork uploaded and have it look the way you want. I've now finished my up loading and editing process. I've decided which products I wanna have available my store and I've edited those products to be exactly how I would like them to look. So once you're fully finished this process, you can go back up to the top of this page and you'll see the button here, which will say, publish. I've already published it and then once you have published, it will be shown on your shop and to go back. If you want to add anything, go over here and then you click. Manage my posts, which will take you to the list of all of your posts right here and you can see a list of all of them in the order that you've uploaded them, and you can click on these three dots over here and go back and edit your info or your products or delete it, which you can also change back to a draft that way as well.
5. Artist Resources: society six provides tons of great resource is for their artists. Want to show you a few? So the 1st 1 is thes Society six artist Hub group on Facebook, which I highly recommend. Joining you have to read over the rules and answer a few questions to be approved, which includes that you have to have five unique designs available on your store. But after you had approved, this group allows you to connect with other artists, ask questions, get news and updates and be updated on society. Sixes promotional schedule. So as you can see here, they posted about design challenges, different tips, um, more challenges there. Blawg posts. And then here we have the upcoming promotional schedule so you can click on this and they'll let you know what's going on for the week Ahead said that you can plan for marketing and all of their sales have thes PNG over lease, which you can download and then click. And as you can see here, this is easy. You can put it over any image that you want, and then you have that as a way to use from marketing. Another important resource for you is going to be the society six Blawg should get to clicking right here says We'll take you over to the blawg, and it's divided into a bunch of different sections. Ah, the most important one for you is going to be the artist education section. So this contains important news for artists like new product launches, pixel dimensions, changes to products, tips, reminders, ideas and even has information on trends and advice from successful artists. So, one of the really important things you can find it here is the monthly creative brief, which I highly recommend reading every month. So it's release is being in the month, and society shipped six shares what their most important products are for that month. What sells the best, what trends they're seeing and just to keep you updated on what's really popular so that you could make sure that you're incorporating that if it works for you, even has other blawg posts about, you know how to say inspires, be creative and even more tips. Um, these kind of things will also be shared in the Facebook group if you join the artist hub so you can kind of go there to get all of that information as well. So Society six also just launched thes social media ready mock ups for framed art prints. So these are ideal for posting on social media on Pinterest using on your blog's etcetera. They're Photoshopped templates that you can easily drop your artwork into to make it look like it's really in the room and gives you it really cute set up that you can use on. And there's tons of different options for what looks best for your artwork so it will look like this when you open it in photo shop. So all you have to do is drag your art working and center it, which it will automatically do it using this grid and you're good to go. Just make sure that you do look at how you're framed prints actually look on your society six shop to make sure that they're consistent image across your platforms
6. Tips For Success: I've showed you the full uploading process and shared. My resource is I want to share with you my tips for success. So Number one is to be engaged on the society six platform by following other artists and promoting their artwork. You'll have more support in return. The hearts of the EEC next, every artwork on society six is how many likes or promotions that art has, and the number that you have really determines where your artwork it's found its search. So the more you have, the better. I heard. Spend about 20 minutes a day trying to follow new artists and promote artwork, which you can easily do going to the my society page, and you'll get a full feed of artists and their work, which you can easily just click to promote. And it's a great way to see what other creators are putting out there. Number two is to work to develop a cohesive theme for your shop. It can take a while to develop your own style so you can totally let it change and evolve over time. But having a few unifying themes is really great when other people are looking to follow you or customers. I have an idea of what you dio. For example, as I said, I do a lot of Ocean Beach things, and a lot of my arberg isn't an ink. So those are the few threads that tie my shop together. Number three is to keep creating, while the point of sites like Society six is to make income from the art that you've already created. You want to keep adding new work all the time and somewhat consistently so that you can say relevant and engaged on the platform. Number four is to not obsess about everything. Society six is a great way to earn a few extra dollars, but it's probably not gonna be your main source of income. And it kind of defeats the purpose of passive income if you're focusing on it all the time , so you want to just focus on the most popular products instead of trying to make every single thing perfect. For example, I know that our prints, mugs, pillows, blankets and tote bags are some of the most popular products from my shop, so I tend to focus on those instead of perfecting furniture, curtains, rugs, things like that I simply leave those products disabled. Number five is to sign up for the Society six affiliate program. This is a curator program that allows you to earn a 10% commission on products that are sold using your curator link. So this allows you to earn extra royalties on your own work, which is really great. So you want to make sure that you use that link whenever you can. For example, I always use my curator link. If I'm creating pins of my products or sharing them on social media, you can use a girl shorter makes it really easy to fit that curator link in, and then you can earn a 20% royalty on what you sell. Number six is just stretch your artwork. You want to make the most of every piece of art that you create, so what you can do is if you spent hours creating a watercolor painting, you can put it in photo shop, and with a few clicks, you could make tons of color edits. You can create repeat prints and just create tons of options for your customers. You can easily take one piece of artwork that took you few hours and with maybe another our you've created 10 more pieces that you can upload, and now you have every possible color scheme their color customer could be interested in. If you need more ideas about how to stretch your artwork, you can take my class called creating a seamless print using photo shop and illustrator to maximize your artwork. And I also highly suggest cat coax class from paper to screen digitally editing your artwork in Photoshopped. That class really inspired me and taught me so much more about the possibilities in photo shop. And there's just endless possibilities of what you can create. So definitely share your society six shop and what you learn in this class in the project section. I can't wait to see everyone's store and make sure to download the reference guide that I created. If you want the checklists and all of the info from this class in written form, it also has all the product dimensions for every product the society six currently offers, so you can easily customize any product that you want without having to track down the dimensions on society. Six. Thanks
 Elizabeth Weglein, Artist and designer