Transcripts
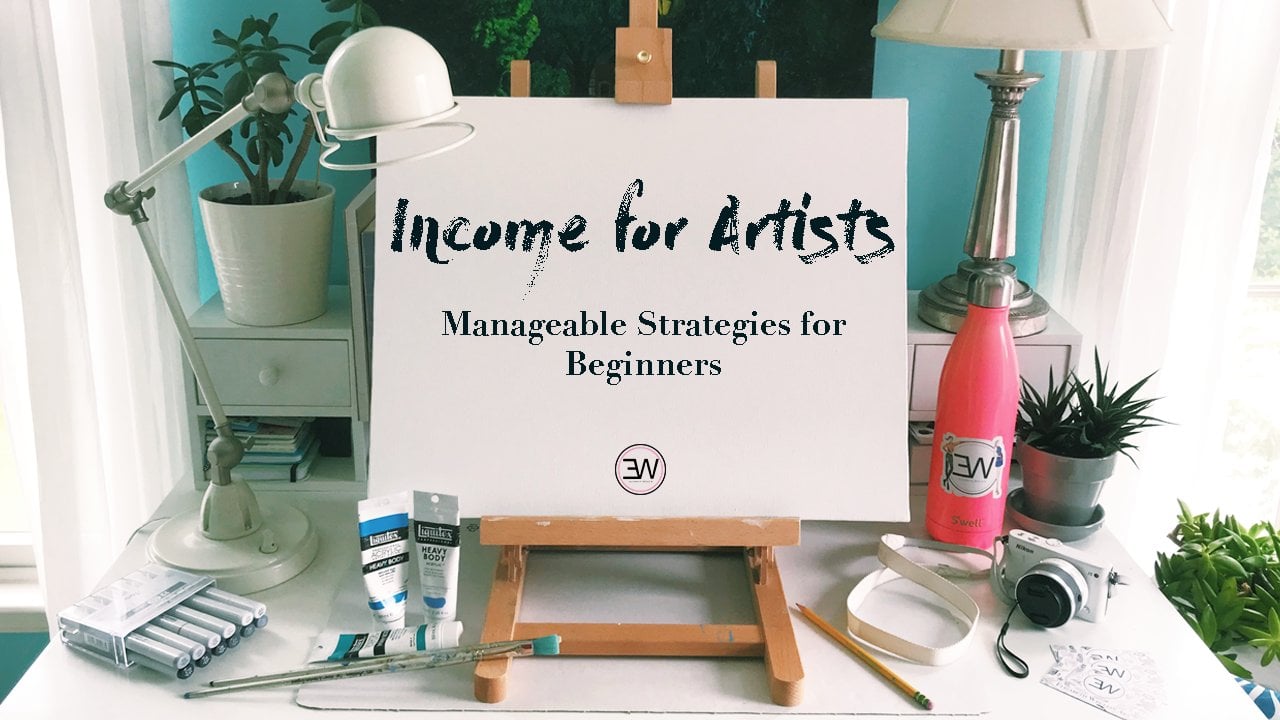
1. Introduction: Hi, my name is Elizabeth logline NIMA, painter and illustrator. And today we are going to be talking about art licensing with print on demand. This is my eighth sculpture class, and it is an updated and extended version of my class, gets started with print on-demand, start or boost your art career on society six, if you're coming from that class, there will be some repeats an abrasion in this class, but there'll be a lot of new information as platforms have updated. And I've learned lots more since I published that class. A little bit about my history with print on demand, I started with a red bubble and Society six in 20152016. And since then I have been adding to my portfolio, figuring out what works best and just working to grow this opportunity into a really important income stream for my own business. And while Print on Demand is by no means the hemo millionaire, it's grown to be a very important part of my art business. And today I really want to share all of the nitty-gritty details so that you too can get your shop off the ground, whether it's starting out day one or if you've been struggling, I wanna give you the tools to succeed with this opportunity. Today I'll take you through the entire art licensing process from setting occur shop to uploading your artwork to building a portfolio and hopefully selling your first product. In addition to the videos and today's class, I have a full downloadable resource guide that has all of the information and links that you'll need for today's class. This fully downloadable resource guide can be found under class project. If you look to the right under resources, at the end of this course, you'll have a brand new marketplace in which to share your artwork and you'll know exactly how to take it from that piece of paper or Canvas two, uploading and enabling those products so that they look their best and are ready to sell. Whether you're an artist who's just thinking about starting to sell or license their artwork. Or whether you're an established artist and you're looking for another income stream for your business. This class will take you through everything you need to know about adding print on demand as a part of your artist's life and business and how to go through all of those details to make this a profitable venture. So let's dive in.
2. Class Project: For your class project, I want you to sign up for a society sakes, red bubble or republic, or all three. And then it show us three pieces of art that you're going to be adding to your shop. Bonus points if they are the three types of artwork that I'll be talking about later in today's class. And then dropped the links to your shop so that we all check them out.
3. What is Print on Demand?: Alright, let's talk about the basics of print on demand. With print on demand, you are licensing your artwork for companies to print on a wide variety of products, slake this cup or face mask. You retain the rights to your art work and earn a royalty for every product that you sell. You got your work in front of a large audience without having to deal with the physical inventory, shipping, or customer service that comes along with it. Printed a man is a great income stream to add to your business because it's unlimited earning potential. And once you understand the process, it's relatively quick and easy. Alright, now I want to talk about each platform and a little bit more detail. So at least to my knowledge, red bubble was one of the first bleep big players in print on demand, and it was started in Australia. I joined Red bubble in 2015 as my first venture into print on demand. It's kinda don't for its quirky kind of nerdy aesthetic. And stickers are probably the most popular product I'm going to bubble, followed by now masks and other apparel. But they do offer a really wide variety of products. They established a program for officially licensed fan art a few years ago. So that's a really cool option. They have partnerships with various companies or movies, TV shows, gains, and you can read the guidelines and submit your fan art for review. So can become officially license art on their site. On red bubble, you kind of set your own product markup for each product individually on their site. They have a base price for everything and you can choose the percentage that you want to add on top of that. Red bubble. Earnings are paid on the 15th of every month for products that have shipped, as long as you meet there, $20 earnings threshold. If you don't meet that $20 threshold met month, it is moved to the next month and next month. And then if you don't meet that $20 threshold within a year, they do a onetime payout at the end of the year in January if you haven't met that threshold. Alright, so then republic is a smaller company that was actually acquired by red bubble in 2018. They have a much smaller pot offering, but it focuses on a parallel. And then a couple of our products that are very popular with print on demand, like stickers, phone cases, tapestries, Little bit of wall are, and a few more. They have a focus on sustainability, which is what drew me to them. All of their printing the use a 100% biodegradable water-based via an inks and all of their perilous certified for ethical manufacturing since they are now part of red bubble. The same fan art program that red bubble offers is offered through the public. And the two sites do have kind of a similar vive in terms of their artwork aesthetic. Republic has a set list of earnings margins. So there is a list for if the item being sold is at its regular price or if it's at a discounted price. So it's really easy to check off that spreadsheet and look at what you'll be earning for each product. And then you're paid on the 15th of the month for the previous month's sales. And then Society six. So Society six establish itself as a destination more for home decor and wall art products like betting and pillows, tapestries and more. I joins us IE6 in the spring of 2016, and I've been able to watch their product offering really grow and expand. Now include things like furniture and lots more lifestyle products. The most popular are work on societies. Six is usually more modern, trendy with contemporary color ballots. But you absolutely do not have to fall into that aesthetic category to be a part of their platform or be successful. You are in a flat 10% royalty on all of their products. And then on their art prints, you can set your own markup on top of their base prices for the payout of your earnings. It's a slightly more convincing on society. Six, you're paid at the beginning of the month for a sales that have cleared. The way it works is once you sell a product and societies six, it's, it's in pending for 30 days so that the customer can either return or cancel their order. And then after those 30 days or up, it is eligible to be paid next month. So for example, if you sell something on January 15th, it would clear on about February 15th and then you're paid on March first. It's frustrating that you don't get paid when orders are cancelled or returns. But in my last few years it really hasn't happened that often. Making sure that you, the images that you're uploading, our high-quality and well edited is going to reduce the amount of returns that you have.
4. Setting Up Shop: All right, the first step to setting up your shop on any of these sites is going to be to sign up. So the links to sign up for all of these sites will be included in my resource guide, but I will show you here. So the first one, societies six society 6.com slash sell art, is going to be where you're going to sign up for societies six, it's going to have a little bit of info and why should sell and Society six, and go about their community, how everything works, and a little bit about their products, frequently asked questions and some resources and then simply click, get started. And then on red bubble and go to red bubble.com slash about slash selling named click start selling. Or again, it's gonna give you a little bit of information about their platform. And then click start selling. Same width, t public. So T pelvic signup slash design are such sell art online and you just enter your email address. So we'll go in to create an account and it will tell you all about how T Public Works. So go in and sign up for everything now and then I'll talk about setting up the other bits of your shop. All right, so once you've signed up for each site to the next step is going to be setting up your shop a little bit more. The first thing is going to be to add a profile picture and cover photo to each shop. For your profile picture, the minimum dimensions you're going to need for the three platforms is going to be at least 324 pixels wide. You want it to be a square because either going to be displayed as a square or a circle on your site. And I suggest either using a headshot of yourself, this is one of me. She's kept it simple or your logo. And then for your cover photo, the dimensions vary a little bit per platform Society six, you want to keep at least 1000 pixels wide, red bubble 2400 by 600 pixels, and then t public, 1000 by 3 thousand pixels. This is a version of the cover photo I used for each of my shops. I include my logo and then different sea life that I've inked that as an example of the work that I do. So you can create a couple of different versions to fit each of your shops. The next thing that we wanna talk about is payment. Most platforms are gonna pay you through PayPal. I think societies six and t public, that is the only option. Red bubble does have an option to direct deposit into your bank account if you set that up. But the easiest thing to do is just create a PayPal account, link it to each of your shop so you can receive your monthly payments. Now I wanna talk a little bit more about customizing and setting up each of your shops. So this is my society six shop. You can see my banner here and my profile picture. Society six. You can add a little bio. So I added a little bit of information about me and it shows when I joined. So there is an option on society seeks to edit the way your shop is displayed. So you can click edit shop. And these are some of the settings you can change. So if you want to sort the artwork that I showed on the society sakes, you can either sorted by the most popular art work, your newest artwork or just random. I have random just because it shows a better selection of what I have to offer. And sometimes it doesn't update the popular art work very well. And it tends to just show one piece of artwork on everything which doesn't really work that great for me. So I just do random or if you want to customize, if you only want to show wall art on your shop or furniture, home decor, whichever department you want you can select, or you can select certain products that you want into display. So those are a few other ways that you can customize how your shop looks on societies six. And then here is where you can edit your cover image, avatar, or your bio. So we'll click Save. And then one other thing that we'll want to do on societies six is when you go to cell here. This is your artist's studio where all of your artwork lives, and you'll see where it says set store markups. So when you click here, this is where you can change the markup percentage on all of your wall art. So these are the only products on society six where you can customize the amount that you're charging. And it's just the markup on top of the base price, which society six charges. And you can change it per size as well if you want. I've just said it a flat rate for all of these. And canvas prints 15%. So you can edit that here. You can change it anytime and then save ana, say cancel. And then let's go to red bubble. So this is my red bubble shop cover image and profile picture. And then this is going to sort, this is where you can just change it as if you were a customer changing this here. Is it going to change it, how it looks for everyone? So then you can customize. So we want to go to account dashboard here and then see where it says product pricing on the side here. This is where you can customize how much you're charging fair bright bubble products. So read mobile, you have the ability to change your markup on any product. So I have set my markup as a flat twenty-two percent on top of their base price for all of my products. But you have the ability to change that per product if you would like. Or you can keep it the same for all of them. It's going to show you the retail price that is charged for each of these products and then the margin that you're going to make per product with your current markup. So that's how you can edit their tea Public has the least amount of customizing options. This is just how my shop looks. My cover photo, profile picture. Obviously you can change that. And then in terms of t public earnings, there's no editing that you can do there. But it does have good Republic.com slash earnings. It shows you these are all their product options. This is what you are in if you sell one of those at their regular price or at their sale price, drew just keeps it really easy if you can keep track of what your earnings are, there.
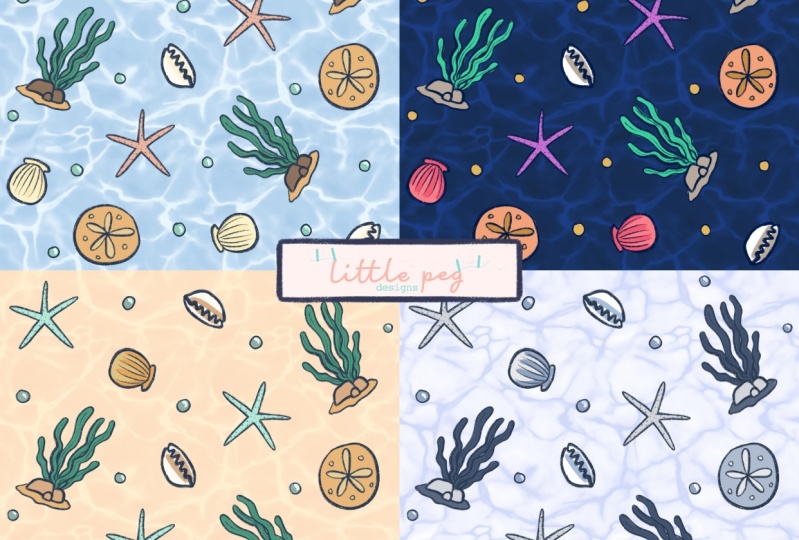
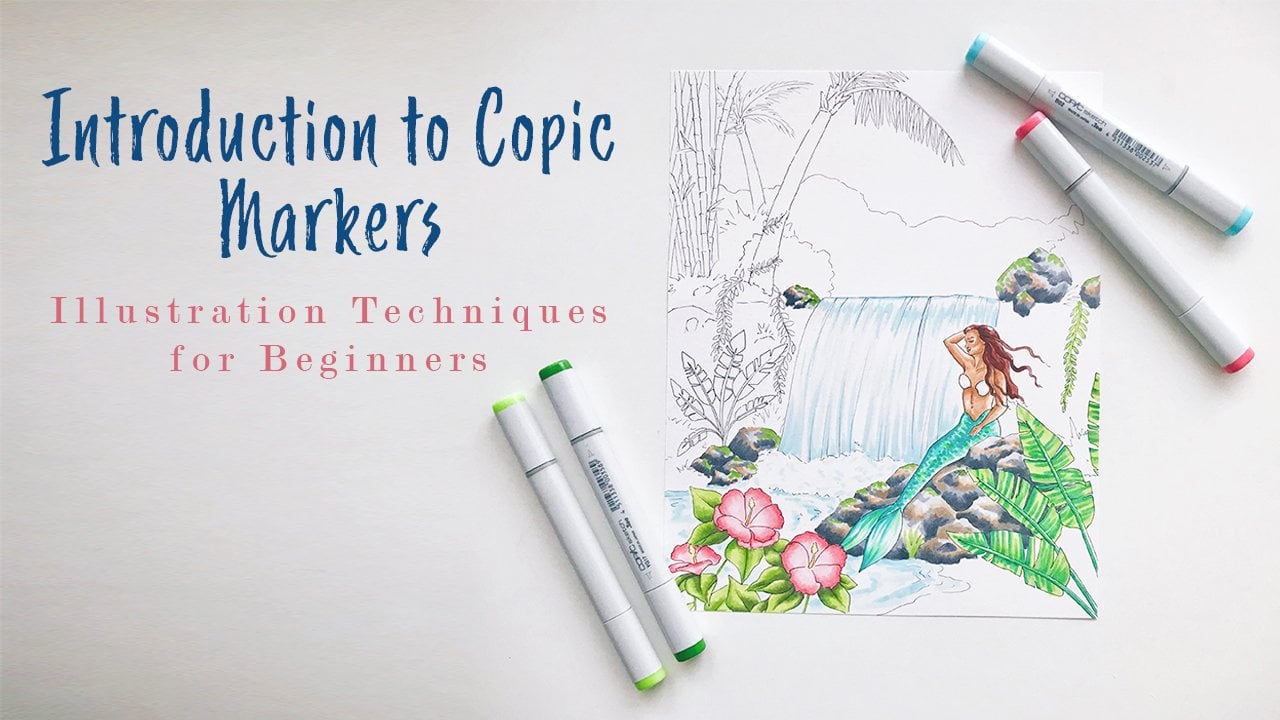
5. Preparing Your Artwork: Alright, now I'm going to talk about preparing your artwork to upload to these sites. So first we're gonna talk about the types of artwork that you might be uploading. So I've kind of broken down all types of artwork into these three options for upload. So the first one is going to be a floating artwork. So this is anything that's not going to touch the sides of your file. It's going to be floating and it's a great option because it looks great on almost every product. So I just chose this little blue crab that I ink to show an example that I, the second type of artwork is a full bleed artwork. So this is something that goes all the way to the edges. It covers the entire canvas. And it's going to not probably work on every single product, but it's still a great option, especially for art prints and any large kind of rectangular or square files. There's also varying levels, kinda two full bleed artwork. So even if your work does go on all the way to the edges, if so, might look great on a lot of product if maybe the interests of their urges concentrated, concentrated in the center. But I chose this mermaid artwork where she stretches across the whole canvas to show you some options with that. The third type of artwork we're going to talk about is a repeat pattern or a seamless pattern. So this is something that can be infinitely repeated in different scale to customize on a ton of different products and is a really, really great option for these print on-demand sites. So keeping these three options in mind, and now we're gonna talk about how to take your artwork from paper to screen. So the first step in taking your artwork to screen is either to scan or photograph. If you work, especially in a larger scale, photographing is probably going to be the better option for you. So you can either use if you only have an iPhone, that's an option as well, or if you have a high-quality camera, go ahead and use that, use natural lighting and the best option as possible to kind of create that photo that looks exactly like your work. Option number two is to scan your artwork. So if you have a printer with a scanner for years I had been using an HP office jet printer that has the built-in scanner. So I've been using that and then I just got an Epson Scanner That is a little bit higher quantity quality and has a larger scanning area. So I'm going to be using that going forward. So a little bit about file types and sizes. If your art work is photographed, you do not want to resize it size at any larger than the original image that you capture. Your just gonna wanna make edits to make sure that the color is looking the best you can edit, edit out the background or anything like that in Photoshop. You can do that, but otherwise you don't want to resize or change the pixel dimensions. If you are scanning the artwork, you want to choose to save it as a TIF file with the highest available DPI that your scanner will allow. For the HP office jet that i've had, it was 1200 DPI and my new Scanner goes all the way up to 4800 dpi. Any where there is totally fine. It's gonna give you a great high-quality image that is able to be printed larger than your original work. So say it was an eight by ten ink drawing. You can size it all the way up. It's gonna look great printed on that larger tapestry, for example. Once you have that scan tiff file, you want to create a Photoshop file in RBG color mode. You want to make sure it's 300 dpi. And you wanna make sure that the longest side of your artwork is at least 10 thousand pixels. You're going to see this as we talk about uploading your artwork. But for almost all of my artwork, I create a 10 thousand by 10 thousand pixels square, and that is how I put that to file in. And then I will go into how you save each artwork. Alright, so if you want to make edits to your artwork, if you just have an iPhone, you can use disco light room or the built-in edit options on your phone to make any color edits that you want to play around with that use Photoshop for all of my editing so I can do things like remove the background of a floating image and then I can move any mistakes or little marks, you know, if I dripped paint or there's a pencil mark that I haven't erased. I can remove that on Photoshop. And then you can also use Photoshop to create any new color schemes. Or if you wanna go into making patterns, which I talked about, you can do all of that on there. And I also have a bonus lesson at the end that's gonna talk a little bit more about editing artwork in Photoshop. So you'll learn a few tips if you're not a pro at Photoshop. Ok, so for saving your image for a floating artwork, if you have removed the background and are just preserving that floating image in the middle, you want to save it as a PNG file because that preserves that transparent background. So you can print it, say, on a red t-shirt. And it's just going to have that crab in the center, instead of also printing the white block around the crab from your original artwork. If your image had does have a background color that you wish to preserve, you can save that as a JPEG and keep that background color optional if you want to save a cropped version of the image versus that 10 thousand by 10 thousand pixels square. You can do that. And I will show you a little bit later why you might want to do that. Ok, to save your option as a full bleed image, you're going to want to just save it as a JPEG because you're not going to probably have any transparent parts of your image. But if you have decided to remove the background or any other areas of the image for a product color to show through, you will save it as a PNG to preserve that transparency. And again, making sure that the longest side of your artwork as at least 10 thousand pixels. I think this artwork was originally an eight by ten ratio. So if it's 10 thousand pixels on its longest side, you want to make sure it's 8 thousand pixels on its shorter side. To save your artwork for a repeat pattern. Again, as long as it is not a transparent image where you don't want any background color, you're just going to simply save it as a JPEG to preserve that original square. And then if you want to create other scales of that artwork, which I will again talk about in a later video, that is option to save multiple files as well.
6. Uploading Your Artwork: General Tips: Before we get into the specifics of each platform, I want to go over some general tips for uploading the work. One, only enable your artwork on products where it looks amazing. I know it's super tempting to add your artwork to every possible products so that you have the most offerings. But you don't want to clog your storefront with products were artwork doesn't look its best. It's not interesting for customers and is taking the place of something that someone could really want to purchase. Two, make sure you have the variant types of artwork that I talked about today in your portfolio because they all agree on different types of products. If you have a core portfolio of these different types of artwork in your style, you'll be ready to join a new platform and be ready for whatever their product offering might look like. For example, when I joined tea public, I looked at their offering and realize that the floating artwork was going to be what's gonna work best on most of their products. So I was ready with those pieces in my portfolio to start my upload process, three, use only relevant titles and tags for your work. Using popular tags is tempting, but it's not really going to help you in the long run. You have to think like a customer and think what they would be searching and that they would be excited to find your work. For example, a customer is searching for Christmas, and while that's a very popular type at holidays, and if you have Christmas artwork, certainly use that. But putting a Christmas tag on a seashell print, just because you're putting it out in December, the customer that searching Christmas is probably not going to be interested in or purchase your seashell print. And that's really not going to help you with any platforms algorithm along the lines of titles and tags. I also want to mention that you do not want to be uploading any artwork that contains companies logos or artwork or, um, other imagery or quotes or anything, you have to check on all these sites that you are not doing that. And I know it's tempting because I'm sure artwork exists on all of these platforms that is violating those terms. But I know, especially on the society six, you cannot tag any other brands or copyright holders in your tags. For example, a couple of years ago I did a painting of a mermaid and she was wearing a Versace top. So I tried to type Versace in the comments or in the tags, and it just banned me from doing that. It wouldn't let me. So you just want to make sure that you're avoiding this spline. You don't wanna get into any legal trouble and it's just not worth building a portfolio that's based on other companies, brands that you're not allowed to use.
7. Uploading to TeePublic: Oh right. To start learning about the upload process, we are going to go through t public first because I think they're upload process is probably the simplest to understand. So you'll go up here to your icon and then click upload a design. So you can only choose one file for your Art worked upload to all products. So you'll choose your file. And then while that uploads and processes, we will go through the title maintaining description and the other tags. Since we're just doing our simple floating artwork here, we'll just two blue crab. I'm also gonna make blue crab the main tag because that is pretty self-explanatory. T public is great because it actually brings up a bunch of sadist suggested tags for you. So you can start typing in prompts and it will say, okay, blue crab, awesome gift. Sure, apparently that's something people are looking up on t public crab. I'm from Maryland's OL tag, Maryland since we love our crops, maybe Maryland craps. And you can go through and do this with a bunch of different options. So definitely keep your tags relevant, but this will give you some awesome suggestions that you might not have thought of. And then for the description, I'm just gonna say inked blue crab. Pretty simple. Okay, so the first thing you're going to want to edit is your apparel options. So t public offers a bunch of different apparel options. So it's going to start with T-shirt. You can choose either printed on the front, the back, or both. I have just done print on the front so far. Over here you can edit the scale of your artwork and you want to make it a little smaller. And then you can center it either way here. And then you can select a default color that you want your shirt to display as I'm just gonna select white just because they think it keeps it nice and simple. You have to select a color for the Huddie as well because that does not operate in white. So I liked as vintage had their color. And then same thing with the baseball team because they are slightly different. Let's go with red. Why not? So once you have decided that that's how you like your shirt on, those different a pearlite options. Right here it shows you these are all of the available colours for the apparel that your work can be printed on. And it depends on your our work a little bit, but for example, the Crab obviously is black, so you don't want to be printed on black shirts because it's just not going to show up. So you're just going to choose the light options so it gets rid of all those dark colors you can go through and custom add or subtract different colors that you like or don't like for your artwork. But you can also just hit the light or dark option. You know, you'd hidden dark if your work is all white, just makes it easy for you. So I will select light. And then these are all of the other products here that they offer. You can easily toggle on and off products just from looking at it here. And then I can click on one to edit it. So for example, this is just keeps it simple. I'm going to say die cut the design only because it keeps it a little bit closer to the edge. Another option if you hit dicot design and background color, you can actually set a background color for your artwork so you can go through their whole color wheel and choose different options if that is something that you wanna do. So I'm not gonna do that, I'm just going to keep it dicot the design. Cases here we have the option for a phone case and a laptop case. Slight frustration of mine is I can't enable or disable these separately. So I like it on the laptop case, not a huge fan of the phone case, but I have to keep them both because I want this design up on there. So that's how the case is. Look for the mug. I'm going to edit this because I don't want it in the middle. That's on this side. It's hard to see, but it does have a way to center it on the sides. So I'll have it on that front of the mug. And then same with this one. I think I'll just make it a little bit smaller. Wall art, you can choose your orientation of the artwork, and then you can choose your ratio with a transparent image like this. So just kinda makes it easier. I think I like that one a little bit better. Notebooks looks pretty good on there. Don't need to make any edits. The pillow, it is obviously way too big, so I'm want to scale that down to about there. Make sure it is centered and we are good to go. Tote bag looks pretty good and centered on their tapestries. So they, for some reason have them separately like this. I am just going to make it again slightly smaller just cuz it seems you're getting kind of close to that edge. And again, I could add background colors if I wanted to. Pins makes it pretty easy. We have the magnet option as well, and this is someone to the stickers. I'm just gonna have it a little bit smaller and then the masks as well. So I will just make this a little bit smaller and it's a little hard to tell on this preview. But then you are all set with those. So you will just hit either agreed and then publish. And your work will take a second to process and it will feel it gets frozen. And then it will be available on your shop. As you can see, what's super fun about t public is your art work actually is on sale for about the first three days after you've posted it. So great way for marketing to post about an everything once you've uploaded a new artwork and then you can find it on your shop. Overwrite some other nuances with uploading to t public. So if you have a full bleed image and Daniel go through that whole same process, you're gonna upload artwork there and do the title tags and everything. I'm going to skip that part at the moment while I let this upload. And then I will show you your options with the full bleed artwork. It's a little bit more limited on t public, so I've shied away a little bit from adding these types of artwork to this site. But depending on whether you want to have those offerings or not, I'll show you what you want to do. Okay, so we have our upload ready. So you probably aren't going to want a full bleed. Artwork like this on a t-shirt. There might be some that you do want this personally, not for me. So what I'm gonna do, instead of going through this all of us individually. I'm just gonna say I don't want to print it on a parallel sticker. Sure, we can leave the sticker might be cool. The case doesn't really work for this artwork. There might be some full bleed artwork that it works on because you could increase the size and then get it all the way up to be full bleed on that phone case. But as you can see, it just doesn't really work for this particular art piece. So it will just depend on the individual work. Same with this one here. It is nice because you can rotate it so you can kind of get it to work, but I'm not going to worry about it. So we're just going to turn off cases. Mugs again doesn't really work. It doesn't go all the way to the edges and people just aren't really going to be a fan. The wall art, so that's a great one. So we just wanna check, I think that looks like the right aspect ratio. So we'll keep wall art, that's perfect. No books. This we can see, we can put it all the way to the edge and see how we feel about it. Kinda cool. We can leave the notebook. You can also click this if you want to print it across the whole front and back doesn't really work on this notebook, but it works great on some other ones. Again, you can kind of pull all the way to the edge. So that decision will just kind of be up to you and your artwork. Pillow again, doesn't really work on this our work because a pillow is square and a square just doesn't really work that well for this type of piece. For me. Tote bags, I already know it's going to be cut off if I enlarge it so it doesn't really work on that one. So we'll turn pillows and totes off tapestries. It does work here because you can change them to portrait and then you can enlarge them to hit those edges. It's a little bit hard to tell what their pre use if you've gotten all the way to the edge. But there we go. So I'm sure it works on tapestries then pins doesn't really work with a circle. So I'll just turn that off. Same with magnets are the same with the stickers. I'll leave that for now. Masks. I already know it's not going to work. So once you finished there, again, hit and publish and you're ready to go with that full bleed artwork. Alright, and the last option discussed is with repeat patterns. So as I mentioned before, you could only upload one pattern or one image. So you want to think about if this is the scale of the pattern and everything that you want to upload, because there's also no option on t public to tile your pattern to make it more repeats. So again, we're probably not going to want this on a parallel just doesn't really work. So we're just gonna go ahead and turn that off. Jointly. Love it as a sticker. Cases shore this should be q, will increase that scale. Make sure it hits all the edges and that works. It's not all the way to screen there. Okay? And then seeing what this, we're just going to increase the size to make sure it is covering all the edges. And that works for that one. Mugs The same way. You can actually make this go all the way up and fill the whole area of the mug. So we'll just do that for both of those wall art and is queued as wall art. So we'll just leave it as that square, the notebook. This is where it's a great option, will do print on a front and back and just swing this all the way to the edges. And then this sun we will increase all the way as well. Pillow, cute, tote bag, just need to make it a little bit bigger. And again, you may not love the scale of this pattern. I could have easily made a four tile repeat of this. And that could have been the upload that I chose to do. Just have its original one tile square here. So again, hitting all those edges, the pin, I don't know if anyone will really love a pin of this anyway because of the probably be small and even I can go all the way to the edges. Just not that interesting. Same with magnets, not really the way to go. The mascot could be cute because we can get it to extend all the way to the edges. Seek Sure it's going all the way out there. And then again, you'll click, I have agreed and then hit publish. Alright, I want to show you one more really cool feature of t public. So there is an option on, you'll see on your shop it'll say edit, copy or deactivate next to all of your listings. So for this one, I'm going to click copy. So what happens when you click copy is that it's going to copy the tags, descriptions, titles, enable products, colors, and the scale and placement of that artwork into a new design where you can upload new piece of artwork. So what's great about this? Let me go back 1 second is that you'll see, so this is a series that I've done of all these mermaids with different states symbols. So as you can see, I have this inked version of the Texas mermaid, and then here I have the color version. So what I wanna do, I'm gonna be using the same tags, the same everything for it. So I'm just going to hit Copy. This was the first one that I uploaded. And then new can't see. Poppy. Wait for it to load. And then you'll see here so it's copied everything. So all you'll have to do is drop in that new file and you'll be ready to go. The one thing keep in mind is you really do want to make sure that it's the same kind of design. It's a great way to upload new color waves and everything, but you'll want to make sure it's that same size, which is telling you right here. Otherwise it's going to throw all of the sizes and everything out of whack. So just ensure that you're uploading same kind of thing you want to title on same size, same orientations, everything like that. But then it makes it super easy to upload new options like that.
8. Uploading To RedBubble: Alright, now let's talk about the upload process on red bubble. So again, you go up to your icon here and you could either go to manage your portfolio or add new work and miss can I click add new work here? And as you'll see, you have these two options. You can upload a new piece of work or copy existing work, which is going to be a similar process to what I showed you with t public. And we'll get to that in a few minutes. So first we're just going to upload new work. We'll start with our floating artwork here. So we will upload that. Then again, you're going to want to title your artwork. So again, I'm just going to title this one blue crab. With tags. You just type as many tags as you want and just separate them with commas, et cetera, et cetera. The great thing what I do to actually is just copy these and save them in a note because it makes it easy to add to society six later in our next video. And so it says US 15 relevant types per upload. So again, you want to fill those up and then yep, separate them with commas and then with your description and you can just add that again. I'll just keep it simple. And blue crab. So then again, you'll see you have the option to add a background color if you want to do that where it's transparent. And then you can also, if you rise, you uploaded the wrong image, you can just click here and replace that image. So then you're going to get into your product previews. For each product on red bubble, you can edit them individually and then enable or disable them. So we'll just start with the standard print clothing. So say I want to move this up. You can choose, you know, front or back. You can choose what you want it displayed on all that good stuff here is where you change the size on the product and then you can center it there. I'll just bring it back up here and hit Apply Changes. And let's say I don't really love the tank top for this one's not really going to work on a dress. You can just go through and change it there. So what you can also do if you want, is if you click on a piece, say for whatever reason, this one you want to use a different image. You can just simply click replace image, choose a different one, and it will upload to that product. Unfortunately, if you want to upload a different image for a couple different products, you will have to go through this process for each separate product that we would like to change the photo for. Another cool feature that I would like to show you for red bubble, which is going to be more relevant with our patterns, but is great also for floating artwork because sometimes that looks great tiled. So you can actually tile this and create a pattern. So as you can see here, I've just chosen a regular grid and then I can scale it down. And now you have a crab print without even having to create a pattern beforehand. You can do the offset grid because they think that looks a little bit better. Maybe you want to make them a little bit smaller. And there you go. We have a crowd print dress. So you go through that process and do it with any product that you want to do that with. So then you'll just want to scroll through and edit. For example, the mug. Scale this guy down, center it on the front there. That's an easy edit. And then again, just going through and uploading or enabling and disabling products as you see fit. And then as you see down here, they have a few products that they've labeled as advanced products. You can use their same upload process like all the other images. It's just a little bit more crazy because of all the different pattern pieces that are used to create them. So for example, if I don't want to use their template, I don't wanna do anything crazy, but I can do is either just scale this down and a little bit more. Say maybe I just want a crab on the front pocket of the backpack. So that kind of gives you a preview there. Or you can make it easy and again, do a print. So that's an easy way now you have a crab print backpack, but you can also download the templates for each of these designs if you really want to refine how your art work is going to look on these products in Photoshop. I usually don't take the time to do this. I usually just enable these products. If I have a repeat pattern that isn't going to need a lot of engineering on the product. So once you're finished with your whole upload process enabling editing, you can select up to to media that your artwork is. So for this one, I'm gonna say drying and design and illustration. And then you can create different collections if you want to. This isn't going to fit into any that I have created so far. And then you can optimize what you're work is shown on inner shop or you can choose, you know, I really want the shone on throw pillow for example. You can choose that. This mature content, no, i don't put anything out there that's mature content. If you want to, that's totally fine. Just make sure that it's marked so you don't get in any trouble there. Make sure that my work is public and then check that you have the rights to sell this work and then just hit save and it will process and show you all of your options. So we'll let this process here. And then I will show you the preview page. So as you can see, and I'll give you this message. It might take up to 15 minutes to appear in your store, but it shows the work that you've added, the tags, the description. If you want to change something, you click edit to go back to that screen and then it's going to sharp, start showing you previews of your products. Obviously we haven't edit on all of these. So it's gonna look a little crazy for some of them. But this is a great way you can use any of these links here if you want to share pin on Pinterest or anything. And then you can also just view in your shop. And it shows you all of the products that are available once they load. All right, and if we wanna go through this process, again for adding a full bleed artwork, will choose that option. Again, you're gonna wanna go through Azure title tags description. You also can see this preview at the bottom if you want to do these steps before your artwork has loaded. So that as an option as well. Sometimes it takes longer to load than others. So again, as we've talked about, a full bleed artwork is going to be a little bit more limited on what you're going to want to offer it on. So I'm going to disable it on all of this clothing. Let's see, might work on a phone k sum there previews are a little strange, so you kinda have to go back and look at how it works. And I think it'll work on, whoops. Kinda works on the pillow. Maybe I'll leave that for now. This one. So because my image isn't quite large enough, it's going to cut me off. They're going to allow me to scale it up anymore. But I can also create a larger image if I want to and replace that if I decide to put on a shower curtain, so wanna make sure that prints cards and posters are enabled. And then I'll just go through the rest of the products and see if it works on any products, you know, work great on a notebook and things like that. Again, the wood and cannabis prints, but that's probably going to be pretty much it for this artwork just because it is full bleed and the way it kinda stretches across the canvas isn't gonna work for everything. Right now let's talk about a repeat pattern. So I am going to select one of the previous humanity color ways that I've uploaded to get here and you just go to a managed portfolio. I'm going to click the Settings button and then copy settings. It will bring you to a page that looks like you're editing that artwork, but it has just copied it into a new option for you. And then I'm gonna go ahead and do is just delete. So loading, but delete the copy of part of the title just because I wanted to keep it as manatees. We're just going to click Replace all images. And what that's gonna do is just place your new image exact same edits that you made with the original. You just need to make sure that it's that same dimensions, which is going to tell you up here is the 10 thousand by 10 thousand pixels. Replace it with your new color way. Delete this wallet loads. And then it's going to replace with a new color way exactly as it looks here. All right, and now we can see it has a loaded with the new color way here. And you can totally go in and edit any products that you want. You're not committing to have it looking exactly the same. If you wanna make some edits, it just adds it like you had it before because it makes it really easy. Like for example, I like the Batman will add that there. And then I think it looks good. And again, you'll see how this is some of the advanced products look with a repeat pattern and it just makes it so, so much easier to make those products look awesome without needing the templates when you have a repeat pattern. But I'll just show you, for example, how things look with a repeat patterns. So I've chosen the pattern. You want a regular grid because it's a seamless pattern. It's going to grid perfectly. If you offset it, it's not going to match up. And then you can just hear, changed the scale and make it as large or small as you want. And it just repeats seamlessly as much as you want. And then you just hit Apply Changes, finish out. And as all of these still selected from the previous work, you just have to click that you have the rights and everything and just hit save work and you're ready to go with that copied setting.
9. Uploading to Society6: Alright, and now for the most complicated upload process of the three, which is society six. So you're gonna go to cell. It is going to bring up your whole portfolio. And then also you can scroll over to your products. So I'm going to be talking about how we can use this feature and a little bit, but we'll start with new artwork. So when you're in here, you're just going to click Add new artwork, and then you're going to select EAR files. So this is where you're going to upload multiple files if you need to. So I made a second version of the blue crab. So I have the 10 thousand by 10,001 that I started with. And then I made kind of an eight by ten version of it. And I'm gonna be using for the art prints, some upload both of them. And then you, this is where you're gonna add your title. And then we'll let that upload for a second. Alright, and then you'll see this featured icon you are going to want to select featured for the artwork that's going to set for the default for all of the products. So I'm going to set it for my 10 thousand by 10 thousand pixels square because majority of the products are square and it's gonna make it a lot easier. And then I'm gonna go in and change those couple of products to this version here. So they know click Continue. You have to agree to their terms and then no adult content. Alright? And now you're on their product page. So right here on the left you'll see you can select all of your categories. It's going to give you some suggested tags. And then you just have to enter each tag and press Enter for it to add up to 20 tags are allowed. But what's also really great is as I mentioned before, if you did them on red bubble and then copied and pasted them into your notes. You can actually just copy and paste it in here and it will just separate all of them. So it makes it super, super quick and easy. You can also copy and paste your description. So that's what I do when I'm uploading across a bunch of platforms. So you can see all of their products are separated into different categories, are still all loading at the moment, but we will start up here with your wall art. So the reason I made a different, whoops, you have to hit save details over here, which is often a little thing that I forgot. So now let's say I'm gonna go to Edit. Right? So you can see these are the different and minimum dimensions for the aspect options for this artwork or this product. So it can be square or portrait or landscape, and it's going to auto-fill based on what you click on. So it for whatever reason is automatically already changed it to the eight by ten version, which is what I prefer for this artwork. So I'm going to hit save and enable. And this is where things start to get a little crazy. So a lot of their products have the exact same aspect ratios. So here you can make the process a lot quicker and easier for you. Is you can click these options to save and enable these different products with the exact same look that you just edited here. So I already know I don't want the outdoor for cushion because that's one where it's a little bit of an advanced setup. So I'm just going to keep it these options. You could also fully skip this option if you want to customize each and every product separately. But for right now, I'm going to enable these four products. So what we did just to start off with, so we edited the framed mini print, but because we also selected the mini arc print, this one is changed to look exactly like that one already. I prefer to change my products for the art prints to a better dimension. So this is changing to the like eight by ten ratio just because I think that looks better than the square. And it's also going to give it that landscape orientation, which I just think looks a lot better. So I am just going to enable those. So that's going to go for all of these many art prints and then through the metal prints, I believe. So. Sure, I like the way the mental print looks. I'll enable that. The poster, you know, this is something that only has one ratio. You can't make it horizontal. So it's probably going to be one that I ditch, but I'm just going to let it load for a second and then we'll see how it looks. So I can bring it down here a little bit smaller. Again, you have the option to center it. And then instead of saving it enabling, I'm just gonna hit cancel. I don't want a poster of it just because it's a little bit too small in the center of, so I'm gonna leave it off the wood wall art. Again, it's only available as square and it's in these nine different titles. Britney, looks good. So on they will that won. The wall hanging. This is one of the products where it starts to get a little bit tricky. If you have a square, it's going to automatically create the landscape of the wall hanging. And then if you have a tall skinny photo, it's going to change it to the portrait mode, as you can see from these dimensions up here. So here you can see it says extend area completely to all edges to allow for seams. And then the green is the finished product area and the dotted line is the safe area where you know it's going to be shown. So pro floating image like this makes it easy because we can just contain it within that safe area, center it and we're good to go. It starts to get a little bit tricky with a full bleed artwork. But again, it's still really easy with a repeat pattern. So we'll save that option there. And a similar thing is going to go for a lot of their other products. So again, we have some different Curtin options. I liked the tapestry, will go to the throw pillow because I'll show you. With this square. So this is one of their many, many products that have a square ratio to them and that's the only option. So once this loads, Alright, so we like the way it looks and we're just gonna click, Save and enable. And this is going to bring up a ton of options that we would like to enable. So yep, square tote bag, wall clock, we might have to edit it because it's around. Will do the shower curtain, do vey comfort or floor pillow sticker. We already did the wool wall wood wall art, but we'll keep it there. Wallpaper. Not gonna do it for this design, perfect for coaster. Barstow encounters tool I might hold off and same with the side table, but I'll enable all of these products that are all square, makes it super, super simple. So then again, you're just going through and editing products so you can make the crab smaller if you want to enable that rectangular pillow, you have the option to create a tile for a wallpaper. We have rugs, we have furniture. There's so many, so many options on society sakes, which is awesome too. You can go through and edit things individually. Like little quirks here you'll see the coaster, it's split until the coasters. So you'll want to go in and edit this product. And then you can choose, Repeat this design on all coasters and spread of, instead of splitting this design onto for Coasters, which is what I've done. I don't think I've ever used the split option, but you can't do it for the 3p pattern. And then since we already did all of this, I'll just hit skip this step. And then it's gonna reload everything. So you'll just want to go through and choose all of your options. Load completely. They've added some new products here, which is exciting. And again, some of these like the apparel and bags, so like they're defiled bag. You, as you can see here, my image is not large enough. I often just forget about the defiled bags unless I'm doing a repeat pattern. But there is a template available. I believe there's also a template available for their all over print t-shirt. So you can download those for Photoshop if you want to completely tweak and customize your design. Within the apparel, you can click, edit and you can change the colors that your artwork is offered on. So again, like we talked about with t public because this crab design is black, we want to disable the dark colors so that it's not shown or printed on dark fabrics. So I'm just going to adjust it and then click Save and enable. And then I will save it for all of the other apparel options. Although you do have to go into each apparel separately and deselect those colors. Kind of annoying. Societies takes is a little bit glitchy with our upload process. So you might be finding different quirks here and there throughout your time with society, Six. So more ways to customize. And then again, like the yoga mat is something that needs a little bit more of an extended dimension. But those are all of their product options. So once you've customized with your floating object, you can just select this and hit publish. And now we will talk about the other artworks. Floating is the easiest one I find, especially on societies sex. But now let's get into full bleed and repeat patterns. Alright, now let's talk about full bleed artwork on society six. So you are going to go in and select your file. Alright, here we go. So this is also a spot where if it does work to have a cropped version of your artwork that is a square. I would definitely go ahead and upload that here as well and perhaps select that as your featured artwork. I am just going to have this one because the way this one extends all the way to the edges, I don't really have a cropped square version that works for me, so I'm just gonna keep it the original dimensions as is. No. Title it, select here. All right, and then to start off, honestly, if it works with your artwork, if you only want to do art prints for a piece of art, that's totally fine. Most of these sites, art prints are the most popular products. So if you only wanna do that, That totally, totally works. This one, I'm just going to shift it over a little bit. So we get her face in there because it's still showing kind of her mermaid tail. So psyched up at the poster serving tray, acrylic tray and many art print. I'll enable all four of those with this setting. And that, as you can see, yep, all of my art prints are enabled, doesn't really work on the square. Someone to leave that alone. Again, it doesn't work with the aspect ratios of the metal print, the wall hanging the way it has the same allowances and everything, it's probably going to get cut off. So I'm going to ignore that. Looks cute on a tapestry. And sometimes wait a second for everything to load, not going to work on any furniture. Oops, I guess my images and even big enough for the bed and bath products for this option. And I mean, it works on, you know, the serving tray when it loads is, you know, a rectangle so it works on there, so I'll leave it there. And then the cutting board here to the via strange cutting board might not be good to take my own advice. So not enabling things that I don't need. Bowl, put it on there for analogist to look at it. And I mean, you don't want a bath mat that's gonna go vertically. That doesn't really make much sense. The cutting board, I mean, we're the acrylic try it works. It could definitely work for a phone case, I would think. Probably not actually. So that's pretty much it. And if that's it, that's totally fine. Don't feel like you can't upload a piece of art if it only looks good as an art print, that's a totally valuable thing to have in your portfolio. So just keep that in mind with the full bleed artwork. And then again, if you do have an option, Bray cropped square, that works really great. We are work it's going to be able to enable a ton more products. But just keep that in mind when you're working with full bleed products on here. Alright, so the next step here is going to be your full bleed artwork on society Six. So Society six does not have the ability to tile artwork like red bubble does. So what you're going to have to do is create different files for different scale prints. So what I normally do, so I'm going to select the first file here. This is my single square of the pattern. And then this option here is one where it has been repeated four times. So I'm gonna open those files and let those upload. I sometimes also do what's going to be a 16 block of that print, which so I just take the file with the four repeats and put that in photo shoot in Photoshop with that artwork for times. So you'll want to have different scale of this pattern because if you think about all different product options a society six offers, it's going to be very different for the patterns scale that you would want on say maybe a little pencil pouch or something like that versus a full curtain, which is something that they also offer. So that's why you want to have these different options of the different scales of print. So I'm going to select just the first little square as my featured one, which is going to be the default for all the products. And then product by product, I'm going to go in and enable and the other option as well. So you can add as many different print scales as you want with these files. But you can also change within each product the amount that it's, you know, it's zoomed in and everything so you still have the opportunity to do some customising. So again, I'm going to go through this here and we'll hit continue as it pulls up your previews of the different products. Okay, so for art prints here with a print, I'm going to leave it probably just this one tile the larger manatee, that's probably what you're going to want to see on these anyway. I'm going to enable these mini art prints and we'll do the metal print as well, poster, wood wall art. And then let's look at the wall hanging to start with. So because it is a square image that we have, it is going to automatically enable the landscape kind of option for the wall hanging. But here is where you have the option to, if you maybe want to, the other print scale with amenities are all a little bit smaller. Let that load the preview that might be what you want on a product like this. So again, you can save an enable. Here we go. So that it's gonna reload, it's preview with that smaller scale. And then again, it's going to be totally up to you. Something like a curtain is where I'm going to enable that smaller print like this. Because you probably don't want your, these giant manatees on their curtain. So all of that options is then going to be up to you. So it's pretty easy with the print, as long as you have those files all ready to go that you've created in Photoshop and uploaded. It is going to be up to you to just decide how you want that product previewed or how he worked that print previewed on all of your products. The great thing about an all over print is that you can pretty much enable every product on society six, with this option, there's only really going to be a few things where to me it doesn't really work as well. But this is probably the most versatile type of artwork that you can use, pretty much on any print on demand site. So as you can see, it's loading on different bedding. I might change the scale there. Different tabletop options. And again, another product like the cutting board is one. There is a circular cutting board like this, or there is a rectangle option is not going to give you the rectangle option if you have uploaded a square image, so it's automatically and enable that round cutting board there. Some other options here. I mean, wrapping paper is a great one that superheat with any seamless print. So again, this is pretty self-explanatory. Let me just show you one other option. So say, see we have this Apple Watch Brand, which is a brand new product from them. So you can click Edit. And then again, we It was pretty much cut off. You could barely tell that they were manatees on there. So we are going to go in and select this product option or Picture option, what that load for a second. This is where the society is six, process gets a little bit longer because you do up to wait for it to upload or to preview and it sometimes takes a second. So ideally, I think I would use even smaller scale of this print for this option, but you can't change the zoom. So you don't want there to be white edges here where your artwork isn't fitting the product. But just to preview. This might be more the scale that you're looking for on a watch bands. You can really see all of those manatees. And then you can use these Center options to center it on the product. So you can still change the scale of your work on the product previewed use wanna make sure that it's filling edges all the way up that product. So I'm not going to enable this now because it just doesn't really work. I want to create another print file later, which actually on the topic. Let's go in here, let's click Edit again and then say, okay, this product isn't working with any of the Once I've created so far, there is an option you can drag and drop or clicked, upload another file for your computer. And once you've done that, you'll see that option on all your other product, products. So it'll be in my library and you can choose that scale as well. So it's super easy to, after you've chosen those initial files to add another one end to the mics if you want some other scale or some changes. So let's see, we've gone all the way through tech. And then let me just show you some other options. So let's these load for a second. Okay, so this all over graphic print shirt is a cool option for a seamless print because it prints all over the whole shirt. Well, it's going to be a little bit more complicated is, as you can see here, these are the pattern pieces for that t-shirt. So this is where you have the option to use a Photoshop file template to fine tune the placement of your artwork. So you can really spend a lot of time perfecting this, making the print, you know, maybe seamlessly wrap around all those edges. I studied fashion designs, I know all about that. But this is an option where it's a little bit more complicated. Or if you just like the pattern scale, you can just enable it as is here. But you do have that option to use a Photoshop files who really fine tune. I think that option is available with the double bag as well and some of the I believe the outdoor floor cushion. And there's a couple other options. I think the backpack is another one where it just has a lot of pattern pieces. So if you want that ability to customize, you have that capture a parallel. We have these outdoor and lifestyle products where again, you might have to make those edits and make a slightly larger file if you want to make them manatees available on a yoga mat. So that's just totally up to you, whether you want to take the time to do that or not. And that is all of the products for a full bleed artwork. Alright, so I want to show you one other feature of your artist studio and Society six that is a little bit different than the other platforms and comes in handy. So as you can see up here, it says my artwork and my products. You're mostly going to be using the my artwork tab because that's where you're going to add a new artwork and then go through all of the steps that I've just showed you. But there was also a tab for my products. So this is where it lists all of the available products on society six and you can click on 12 then see all of the artwork that's available on that print. So I'm going to choose one of the newer products that they just launched, say water bottles. So it's going to show you at the top here how many of your artworks are enabled on that product? How many are disabled? And then if there are any that are incomplete. And you'll also see here, you can download the Photoshop template for water bottles. You can search the title or tags for artwork and then sort them by different options. So what you can do here as when societies six releases a new product, it's a lot quicker to choose that product and enable all of your past artwork on that product. You can simply click Edit and you'll go straight to that product without having to go into each artwork individually to enable an edit dot-product. It's a much faster process. And in the next video I'll talk about the importance of being ready for new product launches. So this is a great, great resource that society six has to make it quick and easy. So usually what I do when water bottles were brand new, it said that I had 0 enabled and they were all disabled. So what I went to is I went to all my disabled artwork and then simply went through and clicked on, on, on for all that artwork or it was something of a pattern. I could click on there and change the scale, make those easy edits. So it's a really, really quick process to enable new artwork. And also if you want to go through and manage all of the artwork that's enabled on water bottles. Say, I'm not sure all my water bottles are looking great. Let me take another look. It's super, super easy to do it this way, which is an awesome, awesome resources Society. Six has added with their new artist studio.
10. Artist Resources: All right, so I want to share some helpful artist resources with you. And I'm gonna be starting with each platforms blog. So this first one then I have up here is red bubble. So this has some helpful articles and fun things that will help you in your journey as an artist on their platform. So they have different helpful things as articles about how to promote your officially licensed fan art. This has some recent post that they've done helpful things about what's trending for the holidays. And then up here it has different categories, so you can look at different articles from them. And then t public is our second one here. So this is their blog. And once again, it is organized by different topics so you can easily click on one of those to refine their posts by that tag. And then they have just different helpful advice for you as an artist on their platform. So helpful things like content calendars can be great for planning and helpful with knowing what's coming up on their platform. So then the next one is society six. So Society six once again has these different tabs of different categories of blog posts that they've done. So this homepages has all of their different articles. And then as an artist, what's gonna be most helpful is the Learn tab. So on this one it has really helpful advice for artists like they had all of these holiday success guides that they did for the holidays since not just wrapped up, but then it has new product updates and just different fun advice. They have sometimes these seasonal creative briefs that give you an overview of upcoming trends, dates, popular tags, and everything that can help you with your planning. And just help you to be as successful as you can be on that platform. All right, the second most helpful resource is going to be emails from each platform. And they all go about this a little bit differently. My favorite one is t public because they send out at the beginning of each month information about the sales that are going to be going on that month. So you can add those dates to your calendar. Just helps for if you want to share on social media or maybe you have an email list that you're going to be sharing these updates with that is super helpful for planning. They include some fan art program updates and other little tidbits of information that are just helpful for your success on t public. So look out for that at the beginning of each month. And then Society six does things a little bit differently. They do what they call their weekly artist heads up. And they include things like new blog post, their promotional schedule for the upcoming week. And if they're doing any product spotlights and new blog posts as well. This promotional schedule is super helpful. And once this loads here, alright, so this is for this week, their promotional and marketing schedule. So it gives you the dates, what the sale is, when it starts, when it ends, and the details of the sale. You can also download this PNG overlay, which is going to give you all of this information and it's great. You can overlay it on any of your artwork. Again, for sharing on social media or anything, it just makes it super, super easy. And then the third one here is an example from red bubble. They don't send out emails quite as often as the other two platforms. But this, for example, is the email that they send out when they were launching masks. So letting you know they're launching masks. And here is a little bit more information about the massive they're launching. And then you can click learn more to get started with those. The third artists resource for you is of course going to be social media. So for example, I've pulled up all of their Instagram pages. I don't know about you, but personally, this is the platform that I use the most, at least at the moment. So they all go about this a bit differently. This is red bubbles official Instagram page. They do a lot of different artists features they'll share, you know, different promotions and fund marketing images. And it's just a great place to see kinda what they're featuring, What are is popular on their site and just give you some fun ideas for new pieces you might be wanting to add to your red bubble shop. Alright, and then t public here, very similar to red bubbles, shares a lot of their user content. So make sure you know you want to tag them. If you are in histogramming any pieces that you think would fit in well with their feed and maybe see if you can get featured. They have some helpful story highlights up here and then of course links in their bio if you want any of that information. And then Society six actually has two Instagram's. So this first one is their official Society six page. It's mostly geared towards customers, but it shares a lot of, of course, again, artwork from their artists. And then a lot of staged really fun home scenes using red bubble artist's products. So it gives you lots of fun ideas and shows their products in a real situation, which is just really fun to see. So that is all of those. And again, shows you what's popular on their platform, what people are interested in and what pieces they're interested in featuring. So it's also really helpful as an artist to be following their society six community tab. So on here it's a little bit more geared towards artists. So again, sharing artwork from the platform, make sure to tag them. I think they say to tag Society six community if you want to be featured. But what's great about this account is that on their stories, they are posting lots of updates for you. So different tips from artisan, their platform or different product launches. It's just a great place to get those kind of reminders. If you're not checking your email is frequently or that's just not where you want to get your information. There's also the option if you're a Facebook user, there is a society six community facebook group that you can join as well. And it's not really designed to be a place for artists to communicate with each other. It's actually just a feed of them posting, updates, blog posts, and all of that stuff. But it's a great place that if using Facebook you can get all of that news. There.
11. Tips for Success: Alright, these are my tips for success with print on demand. One, don't obsess. Print on demand is somewhat of an efficiency play. So it's about making the most of your time and your artwork. You have to find a balance of being able to offer your customers lots of different options without feeling like you have to offer them every single color in the rainbow and every possible product. Remember that the platform doesn't owe you sales and a lot of your portfolio will probably never sell. There'll be a very small part of your portfolio that ends up being popular and account for most of your sales. I can tell you that probably about 50% of the artwork that I've uploaded to these sites has never sold and an evident in any given period of time, one piece of artwork can account for 15 to 20% of my sales depending on what's popular. To be engaged on these platforms. Look for trends, pay tonnage of their marketing, social media, and what other artists are doing. Three, pay attention to new product launches. A. Make sure that these products are available in your shop. Having new products enabled and perfected when they launched, we'll put you ahead of everyone else who hasn't had time to enable those products yet. And it may get some new eyes on your work. For example, red bubble sent out an email to artists. I believe it was a ME that they were going to be launching masks. I sat down that night and enabled all of my work that I wanted to be available and masks on them. And I had already sold one a few days later when I didn't even know that they had officially launched yet. And maxim ended up being one of my most popular products on red bubble. I've sold tons of them in the past few months. So that night of work was totally worth it for work to develop a cohesive style or theme to your work and constantly evaluate your shop. Most of the artwork that I uploaded in 20152016 when I started has been removed and replaced by better artwork and better quality images. I didn't really know how to edit my work properly for upload until probably 2018. So I've gone back and removed a lot of that artwork that probably wasn't being printed in the best possible way. For example, I into series that I call my Mermaid letters in 2018. And they did pretty well. But my skills and style has kind of evolved since then. So during quarantine, I decided to pull out my iPad and use procreate and actually redo all of these mermaid letters. And now I upload them and they're doing even better and they fit better with my current style and everything. Five, you want to stretch your artwork, make your artwork work harder for you. Use what you've already created and either make new patterns or new color ways to offer more options to your customers. For example, my most popular repeat print is my manatees that I used in today's class. And I upload it and think about five different color options to start with. And now I'm constantly adding new ones. When I noticed that new colors are trending or just have a new idea for them. And then a piece leg my under the sea flesh sheet they did a couple years ago. I pulled out some of the different seashell elements and then repeated them into a print. And this is another one of my best selling prints. Now. Six sign up for affiliate programs. Society six has what they call their curator program. And you can go into any products and grab a curator link. And then if someone clicks that link and purchases the product, you are in a 10% royalty. You can do this for other people's products and you could also do it for your own products. So you can earn an extra 10% for selling your own work through that link, which is awesome. I believed the public also has an affiliate program that I just realized. So I will be signing up for that to use bare affiliate links as well. Seven, share your work on Pinterest and social media, and again, use those affiliate links. You can link their societies six shop or red bubble tea public three-year website and share these products with your audience. Get people excited about them. If you purchase these products yourself to test them out, you can share them with your audience, which is great. And you can test out the quality and take some great photos to share again on Pinterest or social media. Eight, use the previews or mock-ups. So these platforms provide for social media, makes it super easy if you can't go ahead and purchase all of these products because let's be honest, we all can't do that. So that's a great way to get realistic images out there of your products. Bubble has some Photoshop mock-ups that you can download from their site to use. And then you could also just pull the images that mocks up for their product listings. That's what I do. I'm on society six because on their products have bright ones. You could also purchase different mock-up files from places like Creative Market. Or you can choose asylum and image. You'll get a Photoshop image and you can just drop your artwork in there and it gives you a great realistic mock-up of what that product looks like. Great for social media and Pinterest.
12. BONUS: Easy Photoshop Edits: In this bonus lesson, I'm going to go over my most used Photoshop edits and I'll go over some different things that make it really easy to edit your artwork for upload depending on the type of artwork that you're going to be editing. So I'm gonna go over how to move a background of an image, how to do a color overlay to change the colors of elements, for example, in a pattern. How to change that background color to lasso your different elements onto new layers. If you want to create a multicolor pattern, how to use the color changer with the hue to create new color wi's. And how to use the white color picker to change your photo to look most like your original artwork. Alright, the first one that we're gonna go over is how to remove the background color. So this is the blue crab that we use today for our floating image. So this process is going to be something that you're going to want to use on a lot of your floating images. So this one has not, the background has not been removed. So what I'm gonna do is you're going to go over here and you're going to select the magic wand tool. And once you've selected that, you want to also look up here at this box, it says contiguous. So this is going to depend whether you check it or not, depending on how you want this artwork to go. So when contiguous is not checked, when I click on my white, which would be what I want to remove. It selects all of the white in your image. So what I will be doing here if I go ahead and hit delete, is all I have left now is that black background. So when I undo that and then check contiguous, So I'm going to hit command D to Deselect. So now if I click this again, it has only selected the outline of the crab, so it's only selected the white that's outside of that outline. So it just depends on the artwork that you are using, whether you want to remove the background just around the image or everything that's not line work like this crab here. So this one, I went ahead and removed everything when I uploaded it. So that's what I would do just because then if you print it on a red T-shirt, for example, instead of having a black and white crab printed on there, it's just gonna be like the Incas printed on there. So that's why I use this hack a lot, especially for floating images. Alright, the next edit that I use a lot that I want to show you is going to be the color overlay tool. So as you can see, I have removed the background for my crab here. So it's just the ink that I put on the paper that is left on my screen. So what I'm gonna do is go down here to this little affects. Click on that and right here where it says color overlay. So what this does is actually just overlay the color on everything that isn't transparent with your image. So this is a really quick and easy way, especially if you're someone like me that's working in ink or just any solid color artwork to change the color of your artwork at the touch of a button. This is so, so easy and then you just click here. And you can choose all different colors. You can test out different combinations and see what you like. And then you can just keep saving this with different options. And then I have hundreds of different crab colors that I can upload and just makes that super, super easy. I do this same process with a lot of my patterns. So I've, I was gonna make a blue crab pattern. I could use this same tool to create different colors. So another option if you don't want your floating or work to have a transparent background, if you would instead like it to have a background color. This is super, super easy. You'll just add a new layer, which again is this button in the corner here, right says Layer oldest dry it down below. I don't need to, so just keep this one here. We're gonna go over to your paint bucket tool, and then this is the color that it's going to fill with. So you can go ahead and change your background color to whatever you want, and then simply fill that in. And you can do this as many times as you want. And then you can also combine it with your color overlay. So maybe I have this blue background and maybe I want the crab on top to be white. And there you go, you've got a whole brand new color way. Both of your art Berg and of the background. Now I'm gonna be talking about how to use the lasso tool to create different layers and then the color overlay again to create your patterns with multiple different colors. This is my seashell print, which probably looks familiar because I use it in it's all blue form on my class photo image. So this file, I actually have separated out all of the elements into different files. And then again, just use that color overlay tool to change the colors. So as you can see here, like all of my novelists are on the same layer, so I can toggle them on and off all at the same time. And then I can go back into color overlay if I decide I want to make them, you know, bright green instead. So what you do once you have all of these, so say that these are all together. I'm just gonna go through and actually just merge all of those. So this is now all on one layer. We'll ignore those. And what you do to create a new layer to separate out your elements is you're gonna go over here to the Lasso Tool. I use the political polygonal lasso tool. I just think it makes it a lot easier. So let's say we want to separate out all of these seashells. So what you do is just click a point. Andrews hinted, keep clicking around it. Make sure you're not overlapping any other elements or they will be cut out. And then we're in, it has the little close circle. And then it becomes the dotted line. You know that it's been selected. Instead of going through and making a separate layer for each separate seashell, what you just do is click shift, you know that that little plus sign next to it. And then you can start clicking again. Select your next one. All right, and let's just say I have done them all and I'm ready to go. So I'm as kinda hit Command X to cut them out of that layer. And you go down here, create a new layer. And then it is Shift, Command the paste in place, and it is on its own on a new layer. So now, independently of those other layers, I can go into color, overlay and change the color of those two seashells. So what I do is just keep repeating that process until you have all of the different layers that you want. And then you're easily able to make different color combinations with as many layers as you. And it's just a fun way to create new color ways for your patterns. So another option that I want to show you to create some new color ways is to use the hue to change them. So I am using this really old at this point, watercolor that I did. I don't use this technique that much now because most of my work is solid color, so the color overlay works a lot better for me. But if you're doing more pieces that are full color, this might work great for you. So what you wanna do is go over here to where it says hue and saturation. Click to pull out this menu here. And then on this hue slider, what you can do is actually just slide along. And it's going to recolor perks of your artwork to a totally new color way. So it's a super fun way to make new color ways. Similar to what I just showed you with the lasso tool. You can use that to create new layers. If say you wanted to only change the color of the poem weaves in your illustration. So that's totally an option if you want to do it independently instead of altogether like this. But it's just a really fun way to create new color ways, but that still preserves like that gradient of the leaf. Whereas a color overlay would just make it, you know, all hot pink. It wouldn't have that subtle variants and that's water color texture preserved. So just another really cool way to do some changes. Alright, this last editing trick works best if you are photographing your work. So here I have a picture of a painting that I did a couple years ago. And I did it in natural light. I use kind of an old canvas and poster board to try and bounce the light back on the image so that it got the truest color possible. But one thing that really helps with this is to go to curves right here and open that tab. And what you wanna do is select this white color picker here. It's going to set the white point of your image so the lightest part of your piece, you can click and it will readjust the colors of your piece based on that value. So what I'm gonna do is zoom in a little bit here. Find somewhere that's going to be a really good white. And as you can see, that was a really subtle, but it just added something little different. Change those colors up, adjusted touch to give it that most accurate element as possible. And then after you've done that, you can go ahead. You know, any normal adjustments. If you wanna do any brightness or contrast hue, saturation, you can still make all of those edits. But this is just a great thing to start with when you're editing from a photo. And you can go ahead and click a different value to Like if I click the brown, that's what happens because that's obviously not going to be the white point of the image. But if I click over here, just changes it just a little bit to change up that Hugh. And then here's a second painting from that collection as well that we can take a look. All right, and then here is another older photo from that collection. So I'm gonna click curves again and then go in here, find a good white point here. Select that. And again, I think that barely made any difference. But I've had times where it's media really big difference in the photo. So if you're piece doesn't have any white in it, make sure if you're photographing it, use a little bit of white background or something that's going to give you that value to select, to recolor your work just to make sure it's as accurate as possible from paper to screen. And those are my favorite most used Photoshop Tips.
 Elizabeth Weglein, Artist and designer