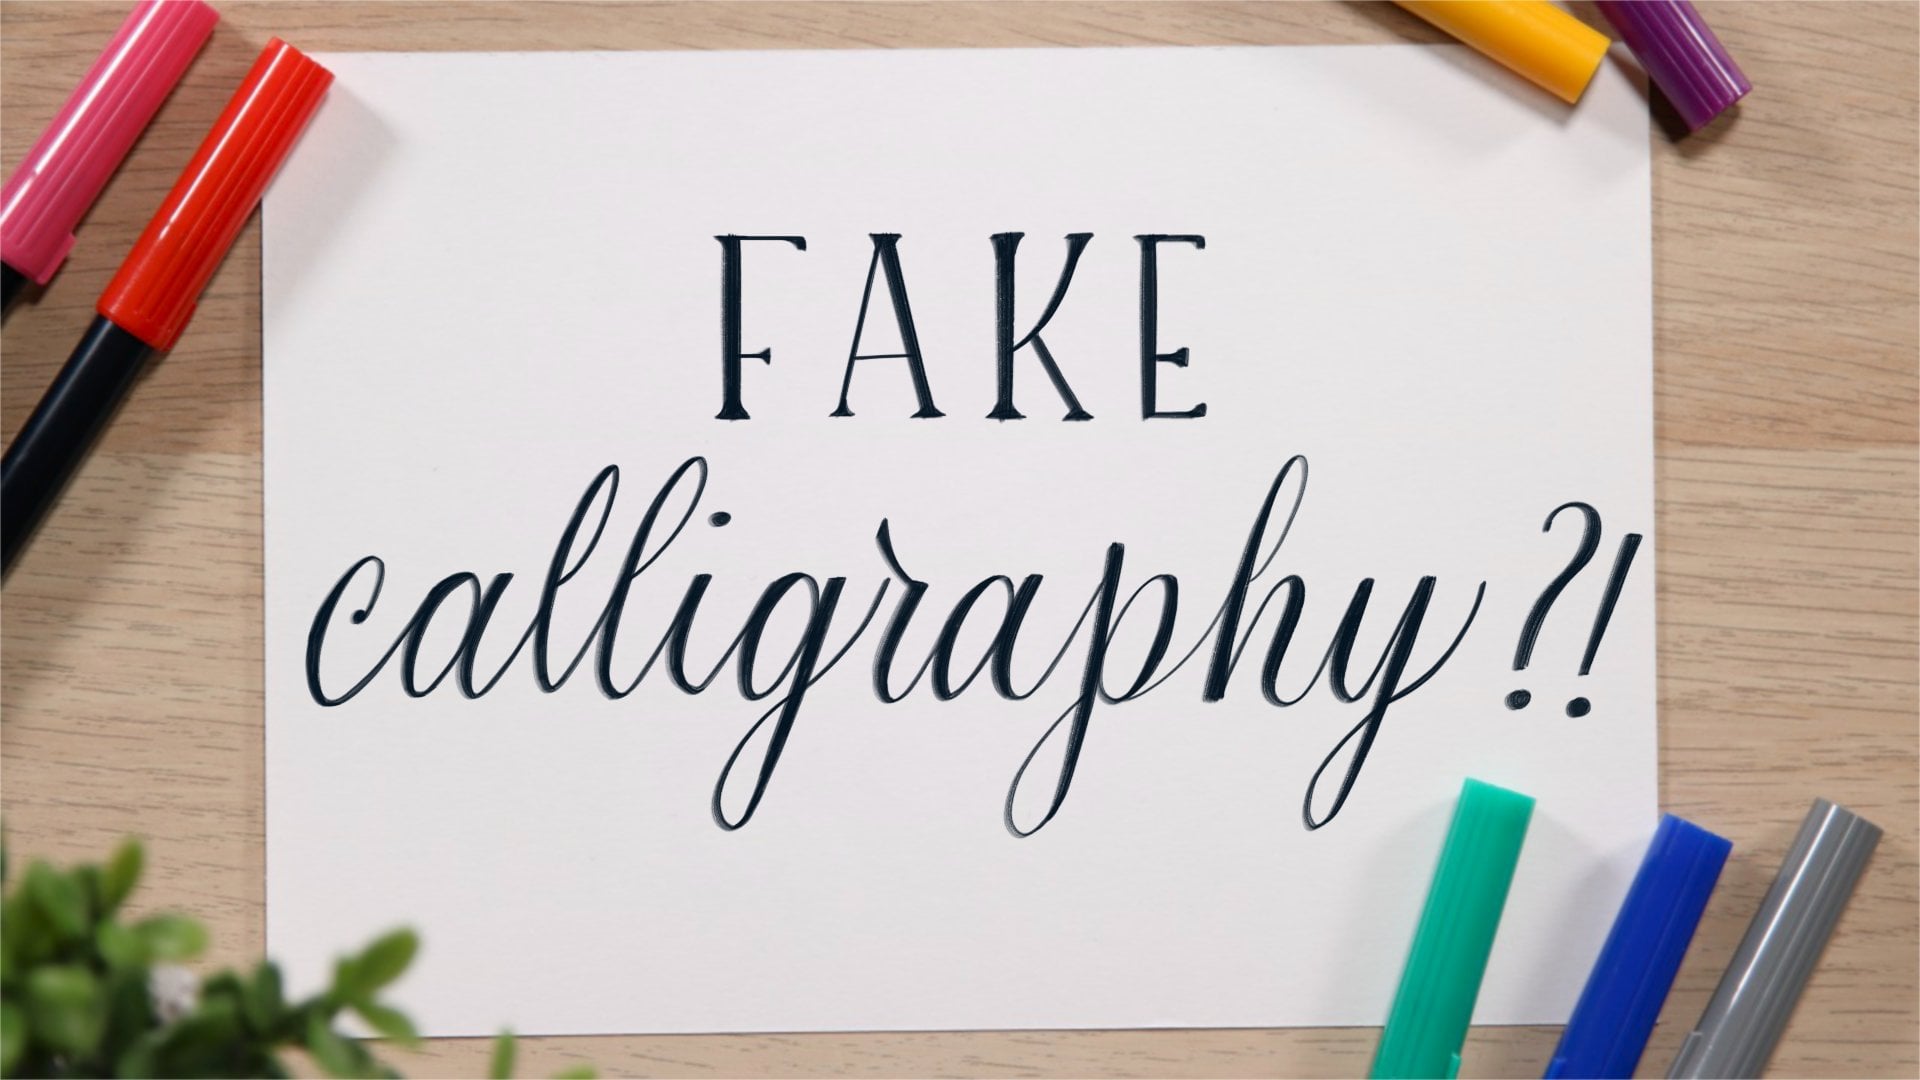
Transcripts
1. Introduction : Have you ever looked at
the lovely floral drawings and thought that you could never draw something as beautiful. I have all the time. Hi, I'm Andy, a line drawing and calligraphy
artist from artsy letters. I've always loved
all things artsy, but only in the last five years have I tapped my
artists vein again. I used to spend hours and hours scrolling through
Instagram and Pinterest, wishing I could draw things
as beautiful as those I saw, but it always seemed
too daunting. However, I discovered
that with practice, things do improve and
you can quite fast find yourself drawing things
you never thought you could. In this class, I will
teach you how to draw a beautiful
composition with peonies. We will cover all steps from a simple pencil guideline to drawing the outline and finally, adding details and shading. We will go over
each perspective of the peony and then put them
altogether in a composition. This class is beginner friendly, so everyone interested can
join and follow along. No prior knowledge is necessary, and the materials needed are just some paper, a
pencil, and a pen. By the end of this class, you will know how to draw peonies and you
will have created a beautiful botanical
composition that you can share it
in social media ads, your planner, or even
hang on the wall. Looking forward to
seeing you in the class.
2. Project description: Hey, so glad you
joined the class. Let's go over the class
structure and overall project. There are two main
goals for this class. The first one, you
will learn how to draw peonies in a
line drawing style. The second goal of this class is to learn
to plan and draw a botanical line
drawing composition using the flowers
we learned before. This way, by the
end of this class, you will not only have a beautiful flower composition
you drew yourself, but also have the confidence
and skill to draw these peonies again as they will be part of your
visual library. So let's look at the
required materials and let's get started.
3. Materials: In terms of materials
for this class, we will need some paper
inedible art eraser, a pencil, and a pen. I prefer an HB pencil or a mechanical pencil as
it is smoother to draw, an easier to erase. Also, for the pen, I usually use a fine liner
with different line weights, such as a 04 or zero to the brands I like
include microns, unit pen among others. For the paper, ensure you use some paper that
will not bleed through. Especially if you do your
final project in that paper. For the sketches, I will be
using regular paper and for the projects I will use my Canson mixed
media, imagine paper. So let's get into learning
how to draw peonies.
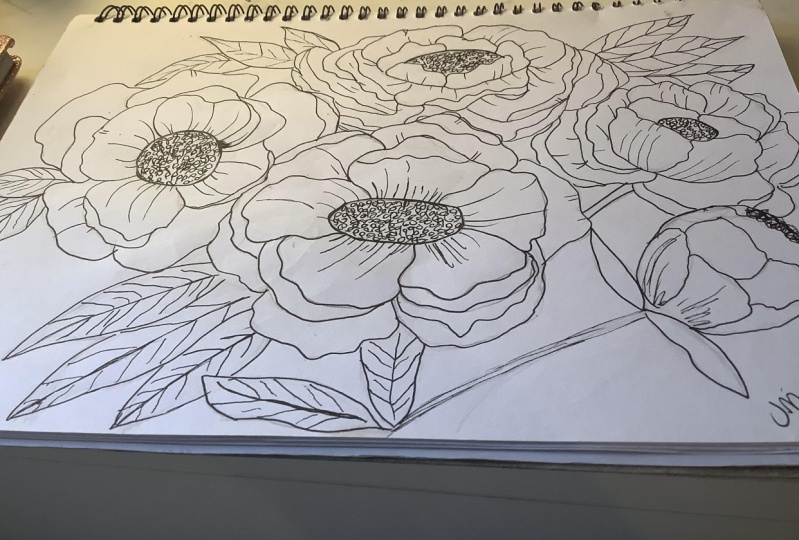
4. Drawing peonies: Okay, so now that we've got
all our materials together, let's start drawing
some peonies. What we need to take
into consideration with these flowers is
that they've got, when they're completely open up, they've got a big center. And then they've got a
row of petals all around, and then another two or
three rows of petals. So for our guidelines, what we're going to do is we're going to draw some circles. So the first circle
will be our center. I'm going to draw this
with a very heavy line. It doesn't have to be
a very perfect circle. Then we're going to draw more
or less the same distance from the edge of the center
to our first-line of petals. It's going to be more or
less the same distance. And this is what is
going to do or is going to be our guideline for
the first two things. Then the remaining circles are the remaining
lines of petals. They're not going to be so
far apart from the first. You're going to be
more or less halfway. And then one more. Okay, so this is going to
be our first guideline for our first flower. In terms. In terms of actually
drawing the flower, I'm going to go ahead and
do directly with the pen, but you can continue on
doing with your pencil or mechanical pencil
for the center. And the way I like to do
it is a very loose floral. So all you need to
do is just some little l's are some
little piece, okay? Going in all directions
as you can see, or some little loops
if you prefer. And we're going to fill in our
drawing with all of these. It doesn't really matter
if it looks nice or not. As you can see right now, it just looks like, I
don't know, weird things. But trust the process
and just keep on doing your center of the flower. Okay, so now that
we've got our center, then we're going to do
our first-line of petals. The petals are semi-circles and, well, they're not
actually semi-circles. There actually. More. So the petals are shaped, most of them as a circle
or as a curved line. And this line comes a little bit inwards
towards the center. And then you will
see that they are somewhat cuts in the edges. A lot of the, lot
of the pencils in the flower will
be turned inward. So we'll have to add an
extra line like this. And then when we
add the details, you're going to see
that it's going to look like the pencil
is turning inwards. Let's do this on our
guideline. Flower. So mostly they have five or seven petals in
each of the circles. So let's do that. Let's
do our first petal. As you can see, I'm not
doing it very perfectly. Let's do a second petal. I think I'm going
to have to do like seven for the size of this. This one's going to be a
little bit more around. This next one, I want it to
look like, It's like this. So the center is here
and the petal is going to go forward
and then turning. So let's see how we do that. Has to be less curved
here at the end. And then I'm going to add an extra line here so that
it looks like it's folded. Once we start adding the
details or you will see that this will make a
lot more sense visually. So 1234, then I have
to add three more. Let's just do another one here. One more to the side. And a final one here. Okay. Then as I want them all to be
looking towards the center, I'm going to add
these lines here. That will give our eyes the
visual cue that the flower, the petals are alternating in towards the center
of the flower. Then for the second
line of petals, we're going to do
the same thing. You don't have to
be worried that it looks all perfect, okay? The petals can be bigger. They can either start
from where the other one finished or they
can just go ahead. And here in this part, all you're seeing is just
the top part of the petal. I usually make these
one's a little bit more jagged because as these ones are
turning their nicer and here at the end
they can be jagged. And so we're just adding
a few more all around. So this is the second
line and we're going to add a third
line of pencils. I feel that this
guideline is very big. So what I'm going to do is
I'm going to do my petals a little less wide or
high in this case. Okay, So some of these petals on the second and third rows
are going to be turned. So let's see which ones. I could actually do that with. This one, e.g. this one here. This one is half this one. Okay? So now that we've got
our main drawing in, let's switch to our 02 micron and start adding the details. So here what the micron is
going to do is we're going to do short little lines that will give you the idea of the direction in which
the petal is turning. And it's going to add some more information
for your eyes to see how the petals are churning
and how they are looking regarding the
rest of the flower. So in this case, you
want all the lines to be curved. In each petal. You want them to go towards more or less the same direction, coming from the center up to the edges and from the top of the petal
to the center as well. So let's do that. And you can see you don't
have to add too many lines, just, I don't know, five
to ten on each petal. Some of them coming from the center of the
flower and others coming from the top with
fewer coming from the top. And if you want to
add a little bit more of depth to your flower, what you can do
is you can darken a little bit at the edges where the
petals meet the center. And add a few more lines that
go on to the actual petals, ideally in the same direction as the detailed lines
you added before, so that shadow is visible. Another thing you
can add as shadows is when a petal is
behind another one so you can darken a little bit the lines so that you can see that there's a shadow there. As you can see, our flower
is already taking shape. So this is a flower
facing forward to us. If we want to draw a
flower on the side. The process is more
or less the same, but what we have
to do is we have to change our guidelines. So in this case, instead of being
an actual circle, we're going to do it as an oval. I want my flower to be looking
in a diagonal this way. So I'm going to
have an oval going on a perpendicular direction. I'm going to make it
a wide oval, like so. And the other thing
that we need to take into consideration is that the petals that are further
away from the center, the ones that are at
the back of the flower. So I'm going to do
my center here. So it's not in the
center of my oval. It's a tinier oval. But there is a bigger distance from one side to the other. And this is important
so that it gives the perspective of the
flower itself. Okay. So for now I'm not
going to add further, further lines of the guidelines. I'm just going to go
and do the center and the first-line of petals. So the center as you already now we're going to do
the little else. Or peas or very tight curves. In this case, since
it's on the side, we can make them go
a little bit out of the main circle or an
oval in this case. And as you can see, I'm very rugged and very loose with bees. Let's add a few
more of the petals. So in this case, I want to have a few
petals that will be going more towards the side. Like so. Most of it, what we're going to see is
the part that is turned. And let's do the same thing
for the other side like that. Then we can have
a curved one that will be turned inwards. And then we can have
one that's further up. And these ones can
also be turned in, but not so much from
our perspective. So here I'm still using the same pen just to give you
the idea or the illusion. So you can see how
they're turning. Now i'm, I'm going to
add a second guideline. In this case, I want the
petals more or less like this. So it's another oval and I
will continue on this idea. Here. One of them
is completely open. The next one is on its
side here from the center. And as you can see, I don't always put one
from the same line, finishing exactly where
the other one begins. So this is our peony
from the side. Now, let's look into drawing a bunch about is going to
be mostly a closed circle. So it won't have
the center visible. So let's do our closed circle. Let's think on which way the
petals will come and join. So I want to do is
talk like this here. And so it's going to be more
or less in this direction. I'm just going to add
a few more guidelines here so that we know where our different lines
of petals are going to end. So one of them is going
to end more or less at the center of the
circle in a curved line. And then the other one will
be at a fourth of the circle. And then we're going to have
a small circle at the top. So now that we've got our
guidelines for the bud, we're going to start
and draw our petals. So we're going to start
from the bottom of our circle all the way
to the first guideline. It's going to be a curved line. Then jacket at the top, then curved again to the nth. Then the next one will
be the same idea. So going around with the circle, with the guideline,
jagged till there. And then a third one starting also from the bud
and then like that. And in this case they're
all going to be together just to give the idea of
being a closed circle. So let's do that
for the other side. And now we're going to do
the second line of petals. So we're going to
start from the side. Another petal. Finally. We're going to do the same thing
here at the end. So we're going to do here just some squiggles to give an idea of petals
being intertwined. And then we're going to
do the remaining petals. And one thing that you need
to take into consideration is doing fewer and fewer
petals all around. So I started with four
here, then three, then two, and then just
a few of them here. Then we're going to add
our detailed lines. Remember, they have to be curved and all in
the same direction. The one here at the bottom, since we want it to have
an idea of being a circle, I'm adding more lines and I'm adding them to
different directions. Here to give an idea of depth, I like adding the second line over the petals for the shadows. So this is our bud, and now we're going to add the little leaves that normally
come out from the bud. So this is just going to be
irregular, kind of leave. And we just need to add
two and then the stock. And this is our bud. And finally, since we
touched on the leaves here, Let's just draw some
leaves for these flowers. These flowers usually have
a stock like the one here. And then a few leaves
that are what I call the most regular ones. So they are in the
shape of an eye. So they're like two
curved lines that start both in the same place, widen, or gets further away from each other and
then come together again. This will be our leaves. You can add detailed
lines like this. So coming from the center. You can also make leaves that the center his bigger to
one side than the other. So here for the one on the side, we can add leaves, either that or looking
behind the petals. Or e.g. if we add
the stock here, we can have full leaves
coming from the side. As you can see, I'm not very picky with drawing
these leaves either. Okay, so now that
we've finished drawing our sketches of the peonies, we know how to draw a
peony from the front. We know how to draw a
peony from the side, and we know how to
draw the little buds. So join me in the next lesson where we will start
doing our projects, sketching how our composition
is going to look like, and doing our final
piece. See you there.
5. Final Project: Okay, So welcome to our
final project lesson. Now that we've got our sketches, then let's put this onto its side and keep
it as reference. And we're going to start
drawing a few sketches of what we want our final project to
look like our composition. So the first thing I always recommend is
doing a tiny sketches of, or tiny thumbnails of what we want our final
composition to look like. So let's start with bad. Since my paper. Since my paper is going
to be an A5 paper, I'm going to draw a
little rectangles here on my sketch paper. It doesn't have to be pretty, it just has to be
functional and give us an idea of what we want
for our final project. So in this case, what do I recommend it? I recommend starting
with the pea flower. So I'm going to draw e.g. I'm actually the first thing I'm going to do is
I'm going to give it the shape of what I want my flowers to have
overall the composition. So one of them is going to
be more or less of a curve. The other one can be
like a bouquet, e.g. another one can be just overall shape,
something like this. Just covering the entire leaf. And so these are good ideas. So the first thing
I'm going to add, as I was saying before, is I'm going to add my biggest flowers first and then I'm going to add the smaller ones that
will be filler flowers. So I always like adding more or
less three flowers and then a few buds and
a fluid, a few leaves. So I'm going to add a
first flower here, e.g. then a second one
coming up here, and then two smaller ones. And this is an idea. Second idea would be to have a central flower than one
coming from the side. Now the one on the
other side, like so. And then having leaves
like this example, a few smaller buds, I always try to
keep things more or less balanced on both sides. If it were a bouquet, we would have more flowers. And the ones at
the back would be smaller because of perspective. And then the stems would
all come to the end here. And then we would have the here. That would be okay. In this case, I'm
actually thinking of I wanted to do something like this so that
it could be like a car. Let's do it a little
bit differently. I'm going to add my
first bit of flour here. Then a second one to the side. This third one not so big. I want the leaves. Like maybe a bird
or two, like so. Another bud here. And then I could add
texts here, e.g. I'm really not happy with
any of these sketches, so I'm just going to add, I'll just keep on doing
sketches until I'm happy. I think I might go with something on the
lines of this one. Okay, So now that we've got our sketch more or less defined, let's put on this guideline
onto our final project paper. So since this is going
to be my final project, my lines in pencil
will not be as heavy as the ones that I
did before in our sketches. So, I'm sorry. If in the actual movie or in the lesson you won't be able to see how the guidelines here are, but it's good so that
you can have an idea of how it actually should look when you're doing
your own project. Okay, So my main
guidelines are now in, and I'm going to start adding and drawing
my actual flowers. So let's just do as we
did in our sketch paper. And let's start drawing
the flowers that we envisioned for
our final project. I'm starting with the centers doing our curved lines in various directions
or peas or else, or just little loops. It's okay. If you go
over the same area, it will give you a little
bit more of a shadow. Turning my first petal. In this case, as you can see, I shouldn't have started with the flower here on the side. I should have started with the one that is the central file because we are the
ones I want them to be behind my main flowers. So I'm going to stop doing this one and start
doing my main flower. I'm going to start
doing the petals. This third flower,
as you can see, I've started it in
a different way. So I started doing some petals around and
then I did the center because I wanted
the center not to be completely circular or oval. Then I'm going to do
the rest of the petals. I use the same idea from the previous flower so that you could get another example. Now I'm going to add
the petals all around. Since I want my button
to be further or more closer to me
than this flower. I'm going to start drawing
it before I finished. This flower here. Now I can go and finish
the petals for this. Now I'm going to add
just a few leaves, some of them coming
out of the flowers. I usually like to make
Paxil two or three, few more here. And now we're going to change to our micron 02 and start
adding the details. Since we've drawn all
our flowers already. It's important for you to know which petals are
turning inwards or not, because that's going
to have an impact on how you're going
to draw your details. So try and be careful with that. So I'm going to
start drawing mine. And he will see as you
do your own projects, that it's in the
details that really makes the things come
together and look prettier. In the case of these flowers that I drew in a different way. Since I want the petals to
look as if they're coming from the bottom of the actual flower. And the center is a little bit, is half not visible
from the side. I will start my details
here at the center. But only for those petals. The rest will start. Normally. My detail lines, they're not all the same size, but they're all turning towards more or less the same direction. Here in the bud. The
idea is the same as we did in this
flower over here. Then here in the middle. Since there's a lot
more leaves here, we just darken a little bit. Okay, so now that we've finished doing most of our drawing
and most of our details. The next thing we're going to
do is we're going to erase our guidelines and
then see if we can add some more
details to really make these flowers
pop. So let's do that. Okay, so now that I got
rid of my guidelines, I can see that there
are still some places where I need to add
some more details, some leaves here, some
pencils somewhere here. And then I'm also going to
add a little bit more of shadows so that it really makes the flowers pop.
So let's do that. For the extra shading, I like going back
to my 04 micron and I go over all the petals again. And that really usually
makes it pop a lot more. As you can see, I am not going directly on top of lines
that I've already done. Some of them, I do leave
a little bit of spaces, and this gives a little bit
more dynamism to my drawing. Now I'm going to go over and
around my center. Darkening. It goes well. And as you can already see, this one is already
popping a lot more. So let's repeat the process
for the other flowers. Okay, so I'm quite happy with how my composition
is looking. So I will give my
project as finished. Let's look into
the next lesson to see the final thoughts.
See you there.
6. Final thoughts: Here we are with a finished
piece in our hands. How does it look? Are you
happy with the results? I just loved how the
composition turned out. I hope you've had as much fun as I did creating this project. If you liked this project, don't forget to upload
your project to the project gallery
and leave a review. I hope to see you again
in my next class. See you there. Bye.
 Andie Lopes, Calligraphy & Line drawings