Transcripts
1. Introduction to Class: [MUSIC] Have you ever looked at
lovely floral drawings and thought that she could never
draw something as beautiful? I have all the time. Hi, I'm Andy, a line drawing and calligraphy
artist from RT letters. I've always loved
all things artsy, but only in the last five years have I tapped my
artists by and again. I used to spend hours and hours scrolling through
Instagram and Pinterest, wishing I could draw things
as beautiful as those I saw, but it always seemed
too daunting. However, I've discovered
that with practice, things do improve and
you can quite fast find yourself trying things
you never thought you could. In this class, I will
teach you how to draw a beautiful composition
with daisy flowers. We will cover all the steps from simple pencil guidelines to drawing the outline and finally adding
details and shading. We will go over
each perspective of the daisy and then put them all together in a composition. This class is beginner-friendly, so everyone interest can
join and follow along. No prior knowledge is necessary. The materials needed
are just some paper, a pencil, and a pen. By the end of this class, you will know how to draw daisies and you
will have created a beautiful botanical
composition that you can share
in social media, at to your planner, or
even hang on the wall. I look forward to seeing
you in the class. [MUSIC]
2. What you'll take home with you: [MUSIC] Hi again. I'm so glad you
joined the class. Let's go over the class
structure and overall project. There are two main
goals for this class. The 1st one, you will
learn how to draw daisies in a line drawing style and
different perspectives. The 2nd goal is to
learn to plan and draw botanical line
drawing composition using the flowers that
we learned before. This way, by the
end of this class, you will not only have a beautiful flower composition
you drew yourself, but also have the confidence
and skill to draw these daisies again
and again as they will be part of your
visual library. Let's look at the
required materials and let's get started. [MUSIC]
3. Materials: In terms of materials, what we are going to use are
just three simple things. What we need is just
some regular paper. In this case, I'm going to
use some Canson mixed media. This paper, I like
it a lot because I'm able to use it for
all types of media. But you can use any
printer, paper, or anything because most
of this class is going to be just to learn how to
draw the actual daisies. For the project
what I decided to do is just to make it a
little bit different, is we're going to use a canvas. This canvas is 20
by 20 centimeters. For it, just so that you can add on the ink and
it doesn't come out, we are going to
use a sharpie pen. For the training and
for the lessons to learn how to do the daisies, I'm going to use an HB pencil, and then my microns in different
sizes because they all allow me to paint over it
if I want to afterwards. Basically, these
are the materials, so let's get started
with the class. [MUSIC]
4. Drawing Daisies: Okay, so once we start
drawing daisies, what we need to take into
consideration is that, basically these are flowers
with a small little center. Then they've got some
petals which are elongated with a curved line at the ends. What we're going to do first is, we're going to draw
our guideline. Our guideline is going
to be a small circle. I'm doing this a lot
heavier than I would regularly so that you can see
it on the paper hopefully. But what you want to do is, you want to do the
pencil lines a lot less heavy so that it's easier for
you to erase it afterwards. So we've got a small center, and then we've got
a bigger circle, which is going to
be our petal size. In this case, we're going to
do a daisy from the front, then we're going to do
a daisy from the side, and then we're going to do a daisy that is either
looking up or down. You'll see in a bit. In terms of the center, I'm going to start with
my heaviest micron. But this is, I wouldn't
usually use the 08, I would usually use the
02 and then the 04. In this case, I'm going
to do the 08 and the 04 so that you can actually
see it better in the video. In terms of our center, the center is more oval, so let's draw the oval here. Then we're going to add
a little bit of detail, which is going to give
a little bit more of a depth to the actual center. So we are going to
add some little dots. This is a technique to
actually fill in and to give some shading to the actual
shape that you're drawing, you'll see that the
more dots that you add and the closer
together that they are, the darker it will become, and therefore it will give
you the idea of shadow. Here what I did is, basically, I started adding
more to one side and less on the other so that we
can have some sort of light. Then what we're going to do is, we're going to start
and draw our petals. The petals are, as I said, long and then they
curve at the end, okay? Also, you want the
petal on the edge to be wider then
closer to the center, and you want them to not be necessarily altogether
close to each other, so you can leave some gaps. As you can see, as I'm
going around the center, I'm going all the way
next to my guidelines. The lines don't have
to be straight. In fact, they shouldn't be
straight because if you do them a little bit less straight, it actually looks more natural. Now what we're going to do is, we're going to add some lines
along the petals to give it a little bit more
information so that our eyes can actually
see the movement of the actual petals and how they're curved or how
they're straight. So I'm going to start with a line more or less
from the middle. It's going to be a
very light line, and we don't want them to go all the way together
up until the end. So just do some curved lines. As you can see, it already gives a lot more
information to your eyes. I like adding more
from the center, so that it gives a little
bit more shadow and depth. But as you can see, it's all done in
a very light way. Depending on the way
you curve your lines, it will give you a
different perspective. So in this case,
you can see that this petal is turning
a little bit more, rather than being all
straight like this one. I always like to add lines both from the center and
from the top of the actual petals so that you can have a little
bit from each side. I like adding a little bit
like two small lines here and then the longer and continuous
lines from the center. Usually, I turn my
paper as I draw. But for your sake
I'm not doing that, so the lines might
not come out as nice as I would
normally have them. Once you start looking
at your flower, you might see that
there's something missing or you want
to add a little bit more of details or information. So in this case, I
feel like I need to add a little bit
more of some petals, although I'm not going
to put them altogether. But I will add an
extra petal here. One more here, and this will be just half
a petal that is visible. Okay, so basically this
is your basic flower, more or less looking
straight at you. Then, it's got a long
thin stalk like this. This is your basic daisy. If you want to draw the daisy in different perspectives,
because normally, if you look at a photo
of daisies or if you go out in nature and you
look at the daisies, you will see that they're looking towards different sides. They're either like this
going down or you'll see them not directly straight
but a little bit more on the side and you
want them to give you this perspective,
for example. The only thing that you have to do when you're drawing it is, the guidelines will have to
be a little bit different. So the more the guidelines are, the center is the same
distance from the outer edge, the straighter it will look, and as the center is different the size
from here to the edge, and on the other side to
the edge is different, or the closer and the
furthest away it is, it will give you
a sense of depth. So let's see that. In this case, I
will draw a center a little bit more
in an oval shape. Again, I'm doing this with a lot more pressure
than I usually would. Then I want to do the
sides of the flower. I want them to be closer on one side and further
away on the other, and this is on purpose, okay? Let's start with our center. Again, going around on the oval. Adding the dots to
give it more depth. You can always do this again after you start
adding the petals, and then let's add the petals. So these ones here
will be really big and the ones here
will be smaller. As you can see, I'm doing
this more of a curved line, so that it gives the idea
that the actual petal, if the center is here, the petal is like this. So it gives you the idea
that the petal is turning. You always follow
your guideline. I'm going to add
an extra one here. It's okay if the
petals are funky. I actually prefer
them when they are. As you can see,
you already start getting a little bit of
the perspective idea, but we're going to
accentuate that with our lines and
our detailed lines. Here, I'm going to
do it a lot more curved than I did on this side, and I'm going to add the shadowing here so that
it accentuates that idea. It is important that the lines that you're doing
on each of the petals, they all fall more or less
on the same direction. Once you're happy with
the way it looks, you can add the stem. In this case, since
it's like this, the stem can be a
little bit more curved. There you have it. Another perspective
that you can have is basically when the
center is at the top, and then the petals
come to the bottom. To do that, we will do the center of the flower
again, another oval. Here, we will do as if it were a triangle or a
trapping piece in this case. This will give us more or less the idea of where the petals should be in terms
of our center. Now, for our petals, what we're going to do is we won't have petals
here on the top, we will only have petals
here on the bottom. Normally, the flowers look like this
when they are a little bit older and already starting
to lose some petals. They're going to
have further gaps than they would normally. But you can always draw
some as if they were at the back. Now, to add the details, we're going to follow along the same things
that we did before. As you can see, I'm pretty loose with the flowers that I draw. Then we're going to add the stem. This is another perspective
of the daisies. One final perspective is
when they are mostly closed, but the other way around, so let's do that. In this case, what you will
see is basically the stem and then the start of the
flower towards the petals. You won't see the center. This will be a triangle,
but the other way around. In this case, I'm doing
the actual triangle, but also this other oval so that it can give you
a little bit of depth. You can do the petals that are closest to you up till this one, and then add a few
more petals on the back so that you can see both this one
and these ones here. Let's do that. In this case, I start with the stem, so just two parallel lines. Then I open them up a
little bit as the triangle. Then I might get like a zigzag. This is where the petals
are going to come out. Then I start adding petals
in the shape that we already know from the
different other perspectives. Then you can add a few more along this side. This actually is quite big. It's quite big for me, so I'm going to make this oval a little bit
smaller, like that. I'm going to add the other petals
from the back. As you can see, I'm
very loose about these. Now, just going to add
a few more details, so the lines as well. Once we start doing
our composition, one thing that we're going
to have to take into consideration is if the stalks of the flowers will
intertwine or not. In this case, what I
will do once we get into the composition
is actually, I'll draw first the
actual flowers, and then at the ends, I will draw the stalk so that
it doesn't look like this, and it's not that pretty. One final thing that I
want to show you during this lesson is basically how to draw the buds
and some leaves. In terms of buds,
these are very simple. They are basically, we just
need to draw a little circle. Then basically, just a few lines along the circle to give the idea of a closed little
bud and then the stalk. Now, you can also
draw a smaller one, which can be just like a little, as you would draw a little
apple, for example, and then give it
some lines as well. These are the flower buds. Finally, for their leaves, as you will see in
photos and everything, you will notice
that the leaves of the daisies are all very fluffy. Let's call them that way. They're all over the
place, you've got leaves, usually have leaves
that can either be very pretty and
very well-defined. In this case, they
are all a little bit, I'm not really sure
how to say them, how to describe them. But they're a little
bit all over the place. Let's draw the leaves. In this case, the
way I like to do the guidelines is basically, I usually start with a line, and then I draw more or less the area that I want
the leaf to take. Then what I do is I add a lot of little as if it were spikes, and I make them all seem a little bit
confusing and just irregular. I think irregular would be a good word for the
leaves, exactly. The important part here is just to take
into consideration more or less the orientation
of the actual leaf. Then we can add in a more irregular or in a looser
way, these actual leaves. Let's do that again. I'm going to do it
directly in pen, but you can always do the
guideline with the pencil. First, the center of the leaf, and then I just add some broken that's following along the
general direction of the leaf. The thing here with daisies is that you want to add as
many leaves as you want at the end so that
they will fill in the composition
and they will give you a nice overall finish
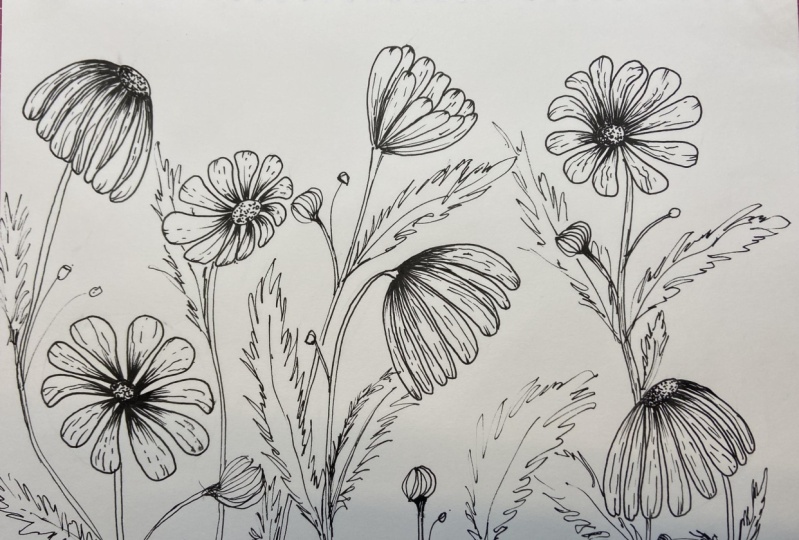
to the look of the piece. Basically, this is the lesson on how to draw daisies from
different perspectives. On our next class,
we're going to get the canvas and we're
going to go and draw these in a nice composition in the canvas with
our Sharpie pen. I will see you there.
5. Final Project: For the final project, let's first start with
a blank sheet of paper. What we need to do for now is
just a few sketches to get a feel for the overall
composition of what we want to see in our Canvas. Basically, let's start
doing some squares because our Canvas is a square. Well, some of these
are not really a square, but that's okay. Now what we're going to do is
we're going to go and draw a few guidelines just for us to have the idea of how we want
our overall sketch to look, and how we want our overall
composition to look. For example, if I want to
start with a main flower here, and I want it to
be looking upward. I'm going to draw my
small circle here. Then I want, for example, one of the other flowers
that have the circle or the center on the
outside like this. Then I want another one
that is open, here. Then I want the one
that is not so happy, so it's a little bit sad. These are just little bots. Then the idea would be
to add a lot of foliage. This would be an example
of a composition. Then, you can also draw
a bouquet, for example. A bouquet normally has the overall shape of a triangle with a small
triangle at the end again, which is when you
usually have a bow. Our bouquet would have
a lot of these daisies, so we can add. Some of them open, some of them closed. In the bouquets, you normally wouldn't have daisies looking already sagging, so we're not going
to draw those. Then with all the
leaves and a few buds. This could be a second sketch. We can have a third one with something a little bit simpler. For example just for, with one flower,
and then the bud, and then we can add
a second flower. For example, here
we could have one that compounds the
petals looking down, and a few more buds. Here, we've got three
examples of compositions. I think I actually liked
the first one better. But you can draw any of the ones that you
would like best. Now let's go to our Canvas and follow along
with this composition. For the Canvas, basically I'm going to draw first my
guidelines with the pencil. I'm not going to use a very
heavy pencil because in the end I want to use this
as a present for a friend. I'm going to actually do
the guidelines quite light, and then I'm going to use just my sharpie pen to do the entire part
in terms of ink. Let's start with that. As you can see, even though I didn't do a lot of pressure, the graphite in the
Canvas is quite visible, so I'm going to
even do it lighter. For now, I've drawn some of the guidelines that
I want to follow. Afterwards, if I see that I need to add a little bit
more information, more detail, I will do so. Now I'm going to switch
to my sharpie pen. I'm going to start adding the information or the
details that I want. Let's just repeat the
process that we did before. Remember, the ones
that are closer to look a little bit
more turned and curved. I'm just going to draw the
outline of each flower, and then at the end I
will add all the details. In the project, there's always a point in which I start looking at
the things and I don't really like it because
you still haven't added the details that will
really make it pop out, so just keep going
and don't lose faith. It will look pretty at the
end and you will love it. But there is a point in which you start doubting yourself
and doubting your ability, but please push on
through and continue until the end because you
will really like the result. As I said before, in this case I'm not drawing
the stocks because I want to see where I'm going to
put all the flowers, and then at the end I will add the stocks for each
flower and the leaves, so I'll just do the
actual flowers for now. Be careful with the Sharpie
because since you don't have different weights in
this actual Sharpie, you have to do either
even a lighter line so that it doesn't look as
heavy as the rest of them. Be careful when you put your hand on top just to be sure that
the ink is already dry, otherwise, you will
smudge the entire thing. I'm filling this a
little bit empty still, so I think I'm going to add
maybe another flower here. This is actually too
close to the other one. See the problem with
the guides in paper. Well, in Canvas with
the pencil marks, they don't really
come out that easily, so it's best to really
do them very lightly. Now I'm going to
add a few stalks and then I'm going
to add a few buds. Here, I'm going to add
a few leaves already. As you can see, now I'm adding the stocks here, but I won't ruin the
rest of the drawing. Now that we've got our flowers and our leaves and
our buds all in, I'm going to go with my rubber and I'm going
to try and take it out, most of the
guidelines in pencil. Let's see how it goes. Now just to give it
a few highlights, with a bronze Sharpie I'm
going to add a few details. I like adding the
bronze because it gives the idea of a
different contrast, and it also gives some
metallic glitter to it, and that's why I really like using the bronze on the flowers. Nevertheless, you
don't have to use it. You can just keep it
as it was with the black, or for example, you can always paint
it with other colors. For example, the Canvas, you can paint it with a acrylic ink or you can use other Sharpie
pens with other colors. Here, for example, I used other colors before
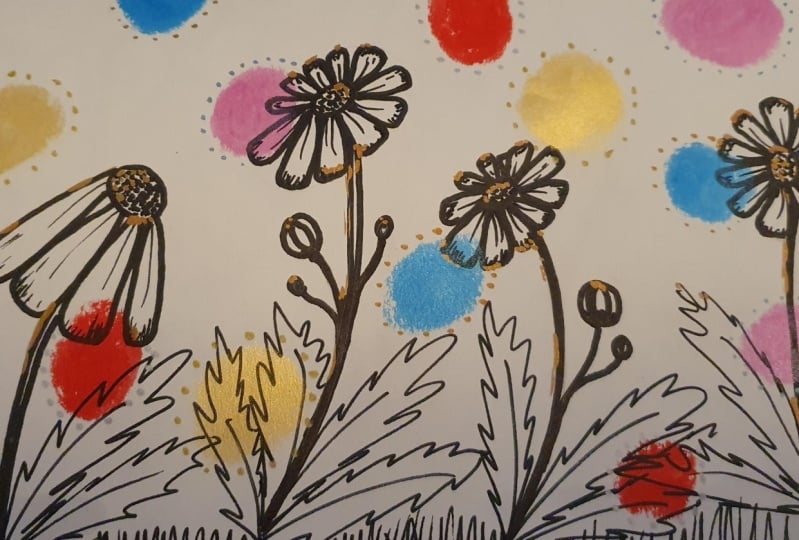
I drew the flowers in. This is another idea of
how you can actually draw your flowers in a
canvas with some color, or you can actually fill
in the petals themselves, and the flowers themselves. This is the end of our project. Let's go on to the final video and final thoughts
for the reveal. See you there.
6. Final Thoughts & Project Reveal: [MUSIC] Here we are, with a finished
piece in our hands. How does it look? Are you
happy with the results? I just loved how this
composition turned out, and it will be a birthday
gift for a dear friend. I hope you had as much fun as I did creating this project. If you liked this class, don't forget to upload
your project to the project gallery
and leave a review. I hope to see you in
my next class. Bye.
 Andie Lopes, Calligraphy & Line drawings