Transcripts
1. Introduction: So you have created a beautiful drawing, a sketch, and now you decide that you wanna painted, but you have thrown it on completely the wrong paper. So how are you going to get the sketch to the paper? For example, this paper you want to use, or you might have found that perfect photograph online. And you say, That is nice. I want to draw that. I want to paint that. How do I get that onto my paper? That is what this ART classes about. It shows you some method how to get a sketch, a drawing. You have worked out two different paper so that you can continue working on it with different materials and still keep the original sketch. What do you need for this? That depends on the method you can use. Of course, you may need a pencil, you may need a ruler. But every lesson we'll explain right away and what you need for it. And it will demonstrate how to do it and show what things you can use to transfer a drawing to paper where you can say done here, paints it until a different paper and still keep the original sketch. Alright, so I would say if you want to know how to do that, move to the next lesson. And we're going to have some fun together transferring this. And I'll show you some tricks on that.
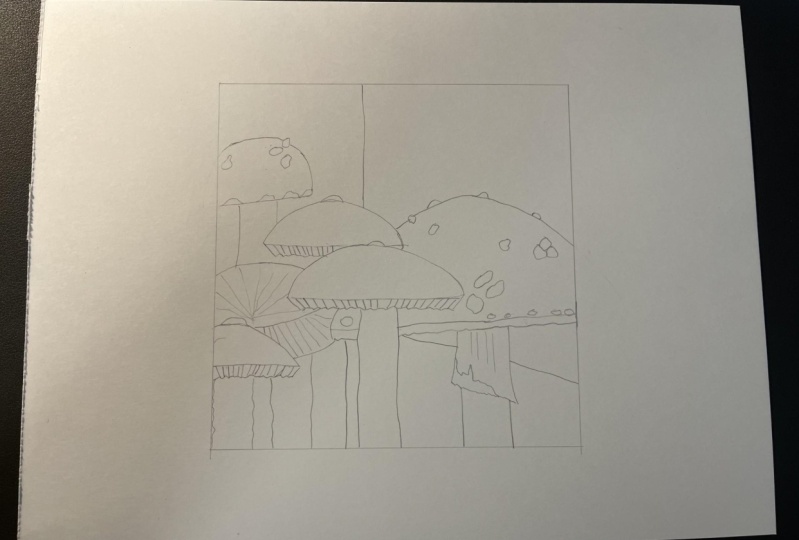
2. Transferring through a Window: Welcome to this lesson. What are we going to do in this lesson? We're going to transfer a design to new paper. Now there's different ways to do that. And in this lessons, we are going to discuss a few of the ways. So let's start right away with the first lesson and follow it for this lesson, I'm going to move downstairs so you see me do a different view. And once I have done that few, I'll be back again in the next section. So enjoy that and look at the first way how to transfer this designed to different paper. Because sometimes you just don't want to use your original design. You just want to bring it to a new paper and work it from work from there. I wanna keep this original design and my notes. And I just want to transfer to different paper. And then I can do various projects from these acute duties on water color. I can do this with acrylic paint, with ink, all kinds of materials called pencils. And I can bring this transfer to different kinds of papers and we're just going to look at a few ways to do that. You do see a little bit of a blurry few now, but that's because I'm trying to tape through window. You can even see a little bit of meat coming into the picture. And what I'm going to show you is probably the most easiest way to transfer a design to a paper. And that is by using a window in day light. And what you can do with that, you can put your design on this window. And that's the design we made. And now what I'm gonna do is under design, I'm gonna put a blank piece of paper. And are you probably see already what's happening on this blank piece of paper. What does under there will shine right through. Now the easiest thing to do is get some masking tape and tape it right on the top and the bottom so that your papers won't shift. But you can see this works pretty well. And it's a bit tricky for me because I'm behind the camera now, so I'm trying to show you that. So if I do this toad stool here, then you would just trace it. And lightly. I'm not doing it lightly or design. And trace it in here would be our boundary box. And you could just trace everything like that. And of course you can go a lot closer than Ico because otherwise you don't see anything. And then you just trace whatever is under it. And then when you put this away again, you're ending up with whatever you have traced. And that is a great way to copy whatever you made on your paper and just put that paper, Ryle Buffett and just start tracing. You might tape it down. I didn't tape it down on the window. Probably just tape the papers down to each other. Not on window because that will make a mess on the window and then just start tracing. And as you can see, see, that works pretty well if you press a little bit and then start tracing whatever you have under it. So this is probably the easiest and the cheapest way to trace a design you have made until a new paper, but doesn't know, does more. So let's go up to my studio again and take a few more of these ideas.
3. Transferring with a Lightbox: Well, welcome back. We've done one way now and that is transferring it through a window. Now there's another way to do this. And instead of having a window and if it is evening, what you can also use this, this is what they call an LED light box. Now this isn't LED one and it's on top. And the Julius connect to power and to switch there, you switch it on, it just emits light. You put your design on it. And you basically put your favor on it, and it just shines through. And I'm not going to put it on because it emits a lot of light and it just throws of the camera. But you get the idea. Works like a window, but works everywhere at, in the evening, in the morning, one does no light. Or when you don't want to use a window, or just when you want to use, working on a table works great. So that is a second way to use an LED light box and it just emits light and you can trace everything just right. As with the window. You can trace everything. Now these are not expensive. You can buy these for 10, $15 nowadays. A dollar store even I've seen them and I've got a brand, one urea and it's a bit more expensive, but the cheap ones we've had those two and a dose, dose we're caret two. So ok, that is the next way. And what you do basically you put your designs and you tape it on the corners. That's the easiest. And just make sure it doesn't move because once you move it, then you lost your way. So make sure you tape them down. Well, I want you to take them down, you switch it on and you start tracing. That will be the second way, but there's more ways. So in the next lesson we're going to look just at another way again. So I'll see you in the next lesson.
4. Transferring with the Grid Method: Alright, the next lesson we're going to actually do something. Well, you may have done something already. If you have a lightbox, perhaps you have bought and light bulbs, or you use the window to trace. But what we're gonna do next, what if you don't want to use the window? What if you don't want to use an LED books, but you want to transfer this still to paper. And then what you're going to need is a ruler. And of course you're going to need a pencil, maybe an eraser, and things like that. You're going to need a new paper which you're going to work and I'm just going to work on a regular paper, but that could be what color paper, mixed media paper, a canvas, whatever you want to bring this to. And what we're going to look at next is the grid method. And for the grid method, what I've done is I actually designed a grid. So you see here a grid. And what you can do for grit method, I show you this is a great way to transfer a design to another paper. And it has a few advantages. So I'm gonna get this clean piece of paper. And what I'm gonna do is I'm gonna just, I'm not going to use my original, but let's say this will be my design and I'm gonna make it myself fairly easy. And I'm just gonna do basically for the demonstration. One, pretty close to the ego. Marvelous design, isn't it? This could be a class on its own, couldn't it? Alright, so that is my design. Now this design I want to bring to different paper and I want to use that grid method and what we will do. So lets say, Let's pretend the next sheet of paper, if it comes, yup. Axis. Pretend this is an expensive piece of paper on which I want to use. What color paper? Let's imagine watercolor paper. But it could be anything, Kansas for painting, for inking, whatever you want. And I have this design. I wanna keep this design in my sketchbook and I want to transfer it here. So the easiest way would be you create a grid and this is a transparence piece of plastic. And I put this with a waterproof marker. I put these lines on it and I can have small small grids. And a small grid is that you can use if you have a complicated designed to bring that or you can use larger grit if you have an easy designed like this. And of course you can do the whole paper now this is divided up into, to show you this. But you could do it in one whole sheet of paper. And what do you do with this? I'm gonna put it on here. And what I'm gonna do is I'm going to number it 12345. C. Make sure you can see that actually. And six I'll need here. And I'm gonna give this lattice a, B, C, D, E, and F. And we might need a GEV of it. So I'm going to put that aside for a minute. You can see it here and what I'm gonna do on my piece of paper now the great thing for click method is that we need ruler and our pencil is that you can actually design your design. You can enlarge it or make it smaller. So like a copy machine, you can enlarge it and make it smaller. So let's say I have this design, but I want this on the whole paper. Then I have to work out. Let's say now my grit is 1.5 centimeter by 1.5 centimeter. Squares always use squares, but I'm gonna make this double the size. I would want to 3456 and then times three would be actually 18 centimeters. So what I would do, I would get a ruler and gets me 18 centimeters. There we go. And I'm gonna do 1234561234567 here. So that would be 21 centimetres. And there you go. And I'm gonna do the same 18 centimeters here. Now you can of course measure everything. I'm going to line my ruler up right there and go 18 and deaths would be my new grids. Can you see, you know, I gotta move my paper up so that you can actually see what I'm doing. And it looks like this isn't totally 18 or this is more than 18 slides. Okay. So that's it. That's my order, which I'm going to work in an hour kind of kept these three centimeters. I said my boxes will be free. I'm going to enlarge my design. So every order three centimeters, I'm just gonna put a line and you can do the same right there on the opposite side. And I'm using an 2B pencil, I'm pressing rather hard. But if you do this with a design and which you can paint over or use to use s. Now, this one is wrong as an inking. Then don't press hard using HB pencil and just press very lightly. And I'm gonna put in these lines, of course go from dot to dot and then you get horizontal grid. And I want to vertical lines, so we get a real grid. All right. And then on the top here, and do the same, 369121518 every other three centimeters. And of course, if you use n schist and please do use edges, 369121518, whatever metrical system you use, metrical or imperial. Or perhaps there's countries with even different systems item. And there we have a grid. So this is actually the same as here. Only what I did is I enlarge it. Now let's see what we get this all on tape. And easiest thing is to fold this a little bit. Now you don't have to do that. Of course, if your design, I'm doing that so that we can actually work and see what's happening. Now we get everything in the camera and we can see the whole design well, alright, and then of course we do the same here, a, b, c, d, e, and f. And then the last possible Vg 123456. All right, and that's it. And now I gotta sharpen my pencil so I'll be back in a second. As great thing about video, I've sharpened it and you didn't even notice a sharp and because I'm back just the same right away, pretty much. Okay, so we have now our enlarge design. I'm gonna bring my grid here. And what I'm gonna do is I'm going to just look at the tofu. And normally you would pretty much tape this down or even put a courage with pencil as we then down here on your design. Then you have all these lines on your design. Perhaps you don't want that and tape it down so that it doesn't move everywhere. And I'm just going to look at my toes. So I'm gonna say, okay, I'm going to start right here. At this point. This point is in Section V, A5, B5. And I'm going to look at B5 here. This is B5 and I'm looking at it and you can measure this or you can just estimate. I'm going to estimate that it's about right there. I'm gonna put a point and that is this point. I'm going to move up and I see that the next one is crossing through c, the line c and four crosses there. Then I'm going to Z, where this line, this line I'm following ends. It ends in C. And then in box three on the bottom, see books free on the bottom and almost in the middle, just side of the middle. And you go. And I'm going to look at the next point that goes online D And on three line d free and a little bit up right there. And then the top is in the line y3. So that would be this line y3. And pretty much we're gonna put it in the middle. Then the next one would be underlying f and E13, a little bit down ground there and a quarter from the bottom. The next one is in the middle of this one. So that would be the bottom, top of four and the middle of f. And then the bottom of this, I'm gonna skip this one. And I'm going to say OK, five on the bottom. And I've sketched roughly, we do this 0.4. Let's do this point that is in four and underlying G in about the middle. And then the next point we are going to adjust, let's say would be around here. It's a bit rough, of course, this design. Then I'm going to follow this. Bottom line, that is on the line f n In five, on the bottom. There you go. And I'm just going to follow it along. Now here it's going to go down a little. And that would be it. And I've cut this part. What I can do it just can trace a line. And I get my design like that, that you could do that trace or the other way you could do this. If I have this design, I can just sketch from point to point. And by sketching, as you can see, I'm going to go much more accurate than when I draw the line. Now, there's my toast to dance. Good. Now I just need to go to E, five E, And then in the fifth of course, and animals, okay, this point is not in the middle, but out of the middle of forward from this point around there than would be one down there and this one goes on the six to six would be my bottom. And still in the E. And I'm going to say us pretty much in the middle. And I'm going to sketch my line in their ego. And on this one is in C. So I'm going to go in and see just outside and I see follow these points and that will be the totes too. And then we could do to circles and everything. And you can measure it and get your toads to that way. Now, of course, might also list, as you can see, completely off, because I didn't sketch this well. But if this is off, this is going to be off too, as you can see, because this is way too wide, way too far. So you get the same there and the new could measure all these points or just say, OK, I'm seeing where about that is. And that is here. And it's pretty much there and so on. Or you could just do that again, or even with this move to a smaller grid so that it can be easier. Now if I've enlarged this whole tos two, you could do the opposite way to make a very small grid and decrease it and size. And that will be decrypt method. It's pretty easy to use. You can always use, you just need a ruler and you need a pencil and you can bring in your design. And now I can do whatever I said. This would be watercolor paper sonar could start painting this one thing you have to take notes, do it lightly, not fake lines like I do so that you can see really good what I'm doing. But make, if you make your grid for examples, do that column size. So if I would make the grit in real life, I would do this and I wouldn't even use this pencil because this pencil is to be C. And now you get very, very faint lines which you can see and you can take away whenever you want. Alright? Now if you are done with this and you have gone to strong, let me show you how to correct that. Okay. Let me put this aside. So we've seen this this I'm gonna clip to make some photographs of everything and we're just gonna take this piece of paper. And there's, as you can see, there's a grid on it already designed and let me put in here now let's say this is my grids. And I've turned that told Stowe. And I'm just drawing it in as you can see. Really strong. Yeah. So what can you do to bring this down for that, you need something else in this bag and needed to erase a devil's calls or some colors, partly Eurasia. And you see if I can get that thing out. Stock, video, endless way, feedstock Harris, and what you can do with this seed, this you can shape into any form you like, like really thin parts, but you can go very accurately erased. But the cool thing about this is if I make a bot from my hands are getting a nice exercise. This is what I can do. I can adapt this graphite and now look what happens. Just pressing and you can hear it's sticker. But you can also see what happens. And of course I used a very thick punishment, refusal HB, This is not as bad, but you can bring your design down. You told me my camera was shaking a little bit from this. And it lifts off the graphite really nicely. And it gets thinner and thinner and thinner. And the more I go over it, the more graphite it will lift off. And that is just a simple trick you can use to bring down that design you have and make it fainter and fainter again. So you can hear that sticking. Now, you could do it with a regular eraser, but the fingers, you have little control and it's going to smear. And this is very hard to get off anyway. But then you stand the chance that you erase everything. So if this kneaded eraser, it allows you to put as much pressure as you want and it doesn't smear the rest. And that's the great thing about this and this line. See that I've done the faintly see and spending really more faint and faint and faint. And if you do it like PC, and then you can bring back your design as much as possible, but you still want to see it. And then you can start working on your next step, painting over it, inking or do whatever you want. And you have a faint design on your paper. Alright, that is the grid method. And that's not all. There is one more method and I'll show you that in the next lesson. So I'll see you in the next lesson. And that will be pretty much the last, less than two of how to bring your design to a different kind of paper.
5. Transferring with Graphite: Okay. I'm back. Hopefully. You're back to yes. What if you can hear me your bacteria, of course. We've done a few things now. We've used a window for our design. We've used a grid methods for our design. Putting a grid and enlarging even did design. The next thing we can do. And I'm gonna go back to this one. Let me go back to the discrete method one. Let's say that is my design because I really don't want to mess up this one. We've seen the window and the LED, but there is another method that has pretty good method2. And what are we gonna do with that method? You need something for humanity, graphite. You could use a pen like an hour pencil like this where I can slide out and get a really long piece of graphite. Or you could also use something like this. These are graphite blocks for this method. And this method is in a few steps. So what are we gonna do with that methods? If you have a design and you say, I want to transfer this designed to a different paper. Then you get a graphite block and I have a hard one here and a medium one or two. You might even use an h p1 or use your pencil and what I'm going to show you what to do. So with this design, I'm going to demonstrate that with this just block. So here's my paper. On the other side is my designer one we're going to do now with this block. I'm gonna just totally fill this in like death. Now. I need, I don't have a good surface for this, so let me put some paper under it and get a good surface. Now, you can do the two pencil with pencil like this and you're just gonna go, but it will take a little bit longer. And you're just gonna go like this. And so on and so on. I'm using this block because it quit goes quick for a demonstration. Now once you've done the whole area where you drawing this, now I'm doing this rather thick so that you can see the idea. Once you have done this nicely. And putting this a science, what you do next is you're going to get your paper, which you're going to use. We're going to use just the SPAP because it's smudged already, put the rest of the site. And let's say this is my Canvas or whatever, what color paper. I'm going to put this on it. I'm going to make sure it stays where it is. You could show you could tape it down. I'm going to just take a pencil. You can do this with pen t2. And what I'm gonna do is I'm going to trace pressing my design. I made, I'm gonna trace it now. Actually, I'd say the most accurate way to do this, unless you do that on a window. And this is a pretty easy way to do this. And I'm going to bring in these lines. And if all goes well, if I take this away, I'm going to end up with this. So here's a designer. You probably see pretty much that it is a bit rough. That is because the paper under it, if you do it, it doesn't smooth surface. You get a nice smooth thing and what you can do next, you're going to take the kneaded eraser we had in the previous lesson. And I can start dabbing this away until it's really faint. See the works really nicely. And there you go. Now I pressed hard. You don't have to lift a drawing. Of course. You don't have to press harder than I do. And then you bring it back, and then you get your design. And now if this icon work, so if you have a pencil, like I have clutch pencil, they call it. You can do it like that. If you have graphite blocks and use medium or even use hard ones and go like I did. Then you can just transfer any design you have easily to the next thing and the great thing about all these methods now I'm showing that with a design I made. But of course, the great thing about dead Islamic, pick something else with it. If you have a photograph, you can use all these methods. So you can use what I did with the graphite. You get the photograph, you just start getting your graphite on the back, start tracing it. You can use your grief method, put a grid on the photograph and transfer it, and so on and so on. That would be this lesson. Now others doesn't nonetheless than after this, we're going to review this again. So this is a great way to, you can transfer by going doing the back. And that was Appears obviously this one. Now be careful where you put this because this is going to search everywhere and you're going to get this stuff on your fingers like IFC, dirty fingers, but that's okay. You can clean that off. But a great way to transfer your design. Alright, so if you have some graphite laying around, have a clutch pan like this which you can move out and do that. Or even a regular pencil, make it into a thin long, which bit more tricky. And then use this method to picked up math Fatou to transfer your designed to something else. Okay? That is that for this lesson. And I would say, you can do this or just move to the next lesson right away and that we're going to conclude this section now. All right, so I'll see you back whenever you're done or just in a minute.
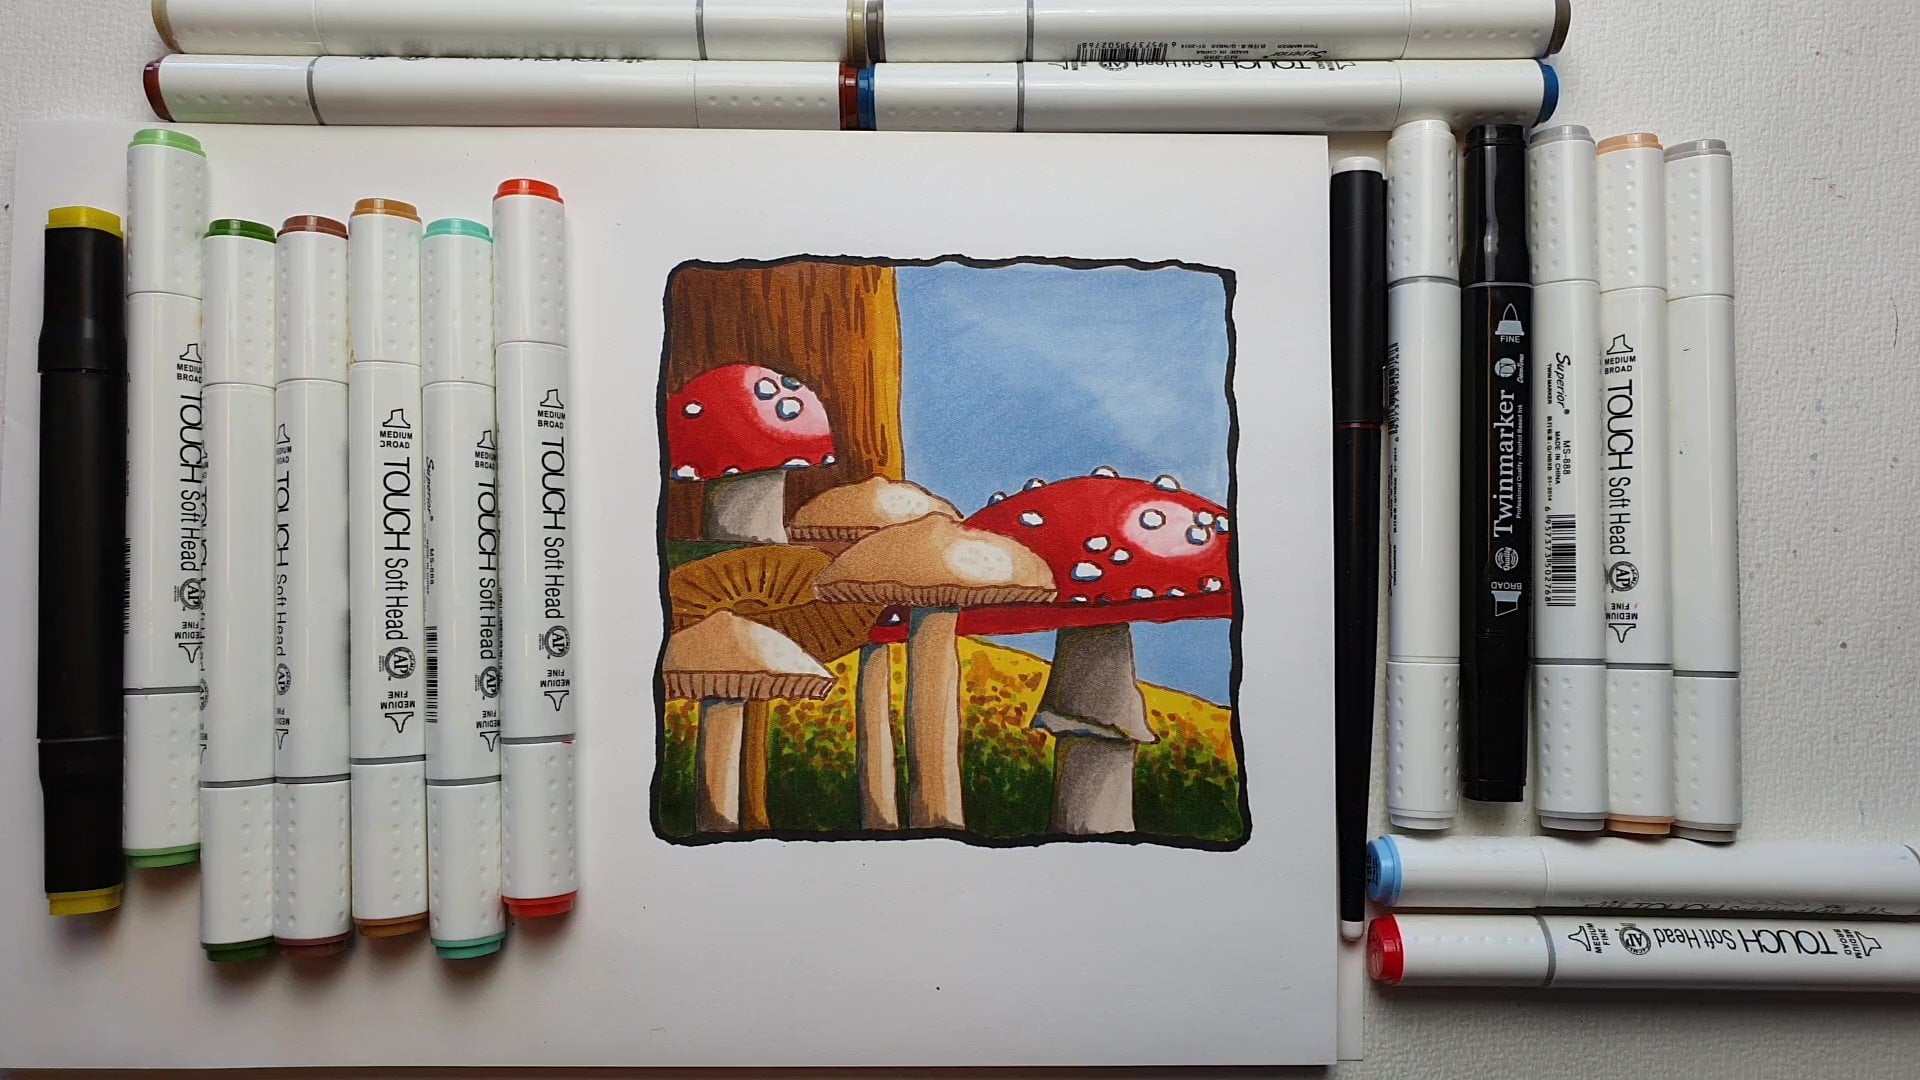
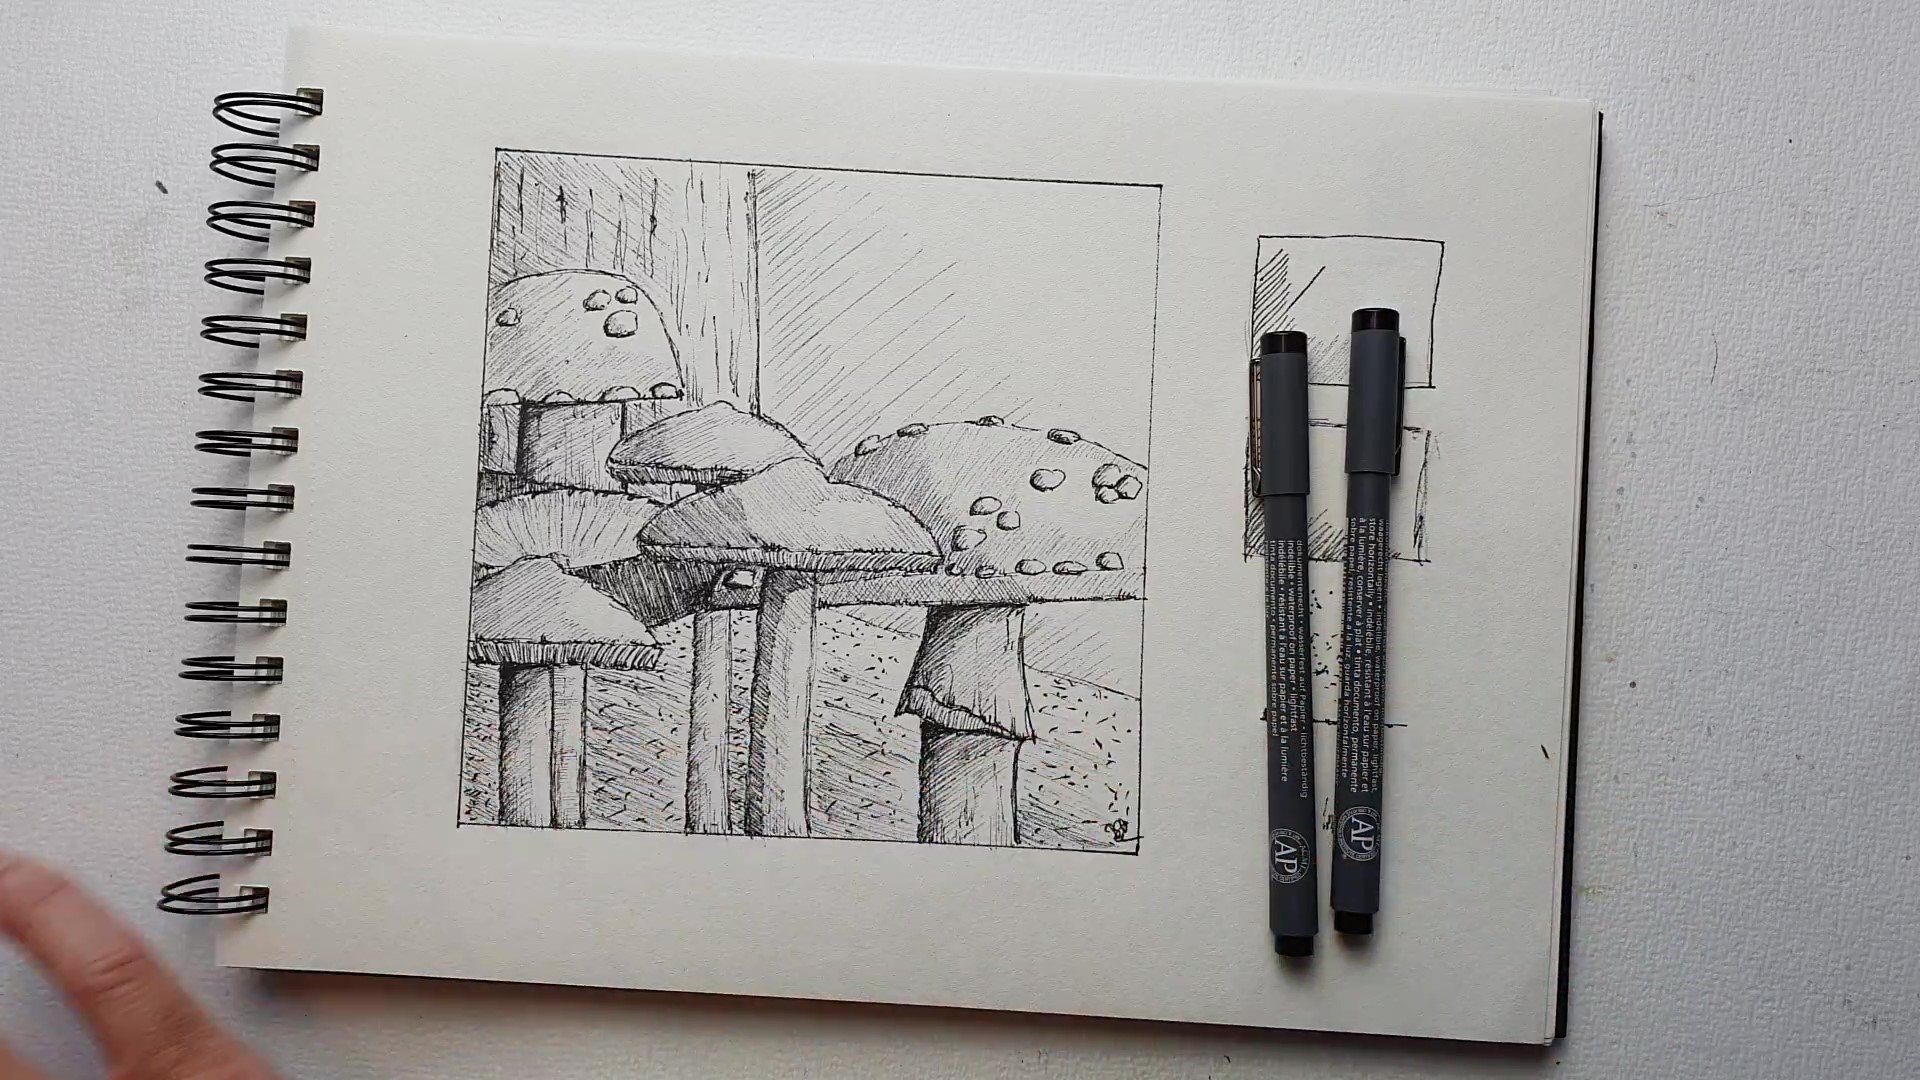
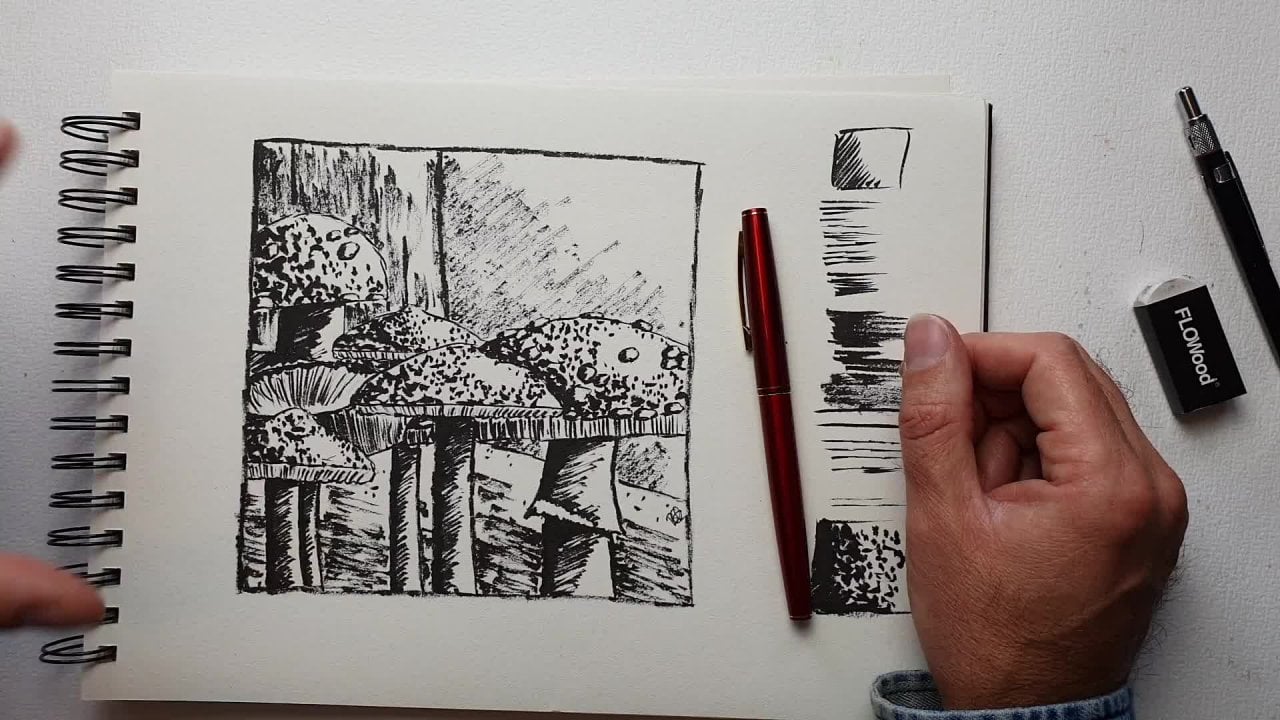
6. Transferring Outro: Welcome back. Let's recap. Ok. This is recap LA would review of the whole thing. What we've done is we had a design. Now the neat thing is about this. I have a drawn design, but almost all of these method I showed you will work fine with a photograph to, you could use them or you can put this against a window and trace. It might be a little bit tricky to do. And you could use a light box, especially if you have a thick photo, it will work, but it's going to be a bit tricky. So if you have a thick photo or from a book, you can't put against a window. And of course, you can use discrete method, great method. If you have a loose photo and it is fixed, you cannot transfer it. Then what I will do is to craft, put the graphite on the back and transfer it. So you now have a number of great ways to transfer this design, or a photograph or whatever you're going to use it. But we're using this in this autumn lesson drawing, this autumn drawing, we're using this to get this autumn scene to a different paper and that would be your project right away. Now if you have done this project in the previous class, created that, then your projects for now is to get this onto a different paper, which ever paper you're gonna work on. So if you're gonna do watercolor transfer to watercolour paper, if you're gonna do ink than you do, just could do regular sketching paper if you use marcus, then due to market paper, colored pencils, do it to the paper you would work in with colored pencils. And just, there's gonna be more lessons after this. And you can pick whatever lesson you want. So I'm gonna do a few of these designs and I'm going to transfer it to different kind of paper and work on a few projects and pick the one you want. And I would say so the project for you now is two. Get this design and transfer it to different paper. You can use any method you like usual window if you have an LED books used that are human or by an LED blocks scattered and then use it. Practice a little bit if you want to use the grid method to do it. And even if the grid method, the fun thing is to do to make it small, enlarge it, or if you want to do, or if you wanna do the graphite myth method, pick one of these methods and transfer your design to a different kind of paper that's just basically the project. And that's all there is to this part. So thank you for being with me in this part, and I hope to see you in one of the other parts that comes after this.
 Benjamin A, Art Teacher, illustrator Art by Benjamin