Transcripts
1. Introduction: I love making and
watching things move. It just excites me
seeing it come to life. But what if you can hear it too? There's something about
pairing movement and sound together that just
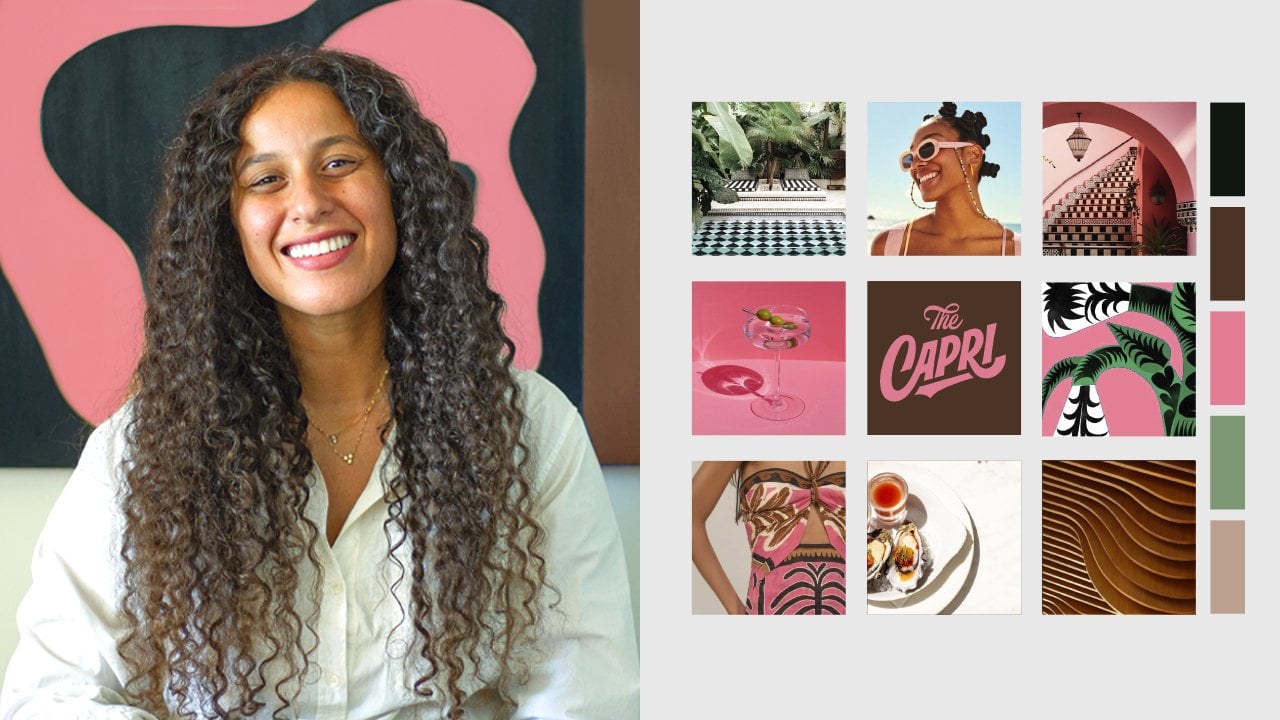
makes my mind tickle. Hi, I'm Hadija, but
everyone calls me Dija. I make graphic designer, an illustrator and
a motion designer based in Cairo, Egypt. I worked with
clients like Adidas, Coca Cola, and some pretty
cool local brands here too. I taught myself motion design a few years ago and
I'm still learning, so I'm right where you are. I really believe that as a
designer or an illustrator, having motion design as
a skill is one of the best you can have in
your pocket these days. In this class, you'll be
learning how to create simple, yet striking animations
for Instagram, using basic shapes
on after effects. But here's the twist. You're also going to be
learning how to pair it with sounds and audio to take
it to the next level. Creating an audio visual
piece is much more impactful, in my opinion, than
just movement. You're adding another layer, another dimension
to your artwork that just brings it to life. We'll be going through
some royalty free sounds, then jumping into after effects to set up and import files. I'll be then walking you through a simple animation covering basic tools like shape layers, matching it with your audio. Exploring multiple
effects like trim paths, tapering waves, vehicle paths. I even threw a bonus lesson as an intro to the camera tool
for a cinematic effect. The best part is this class
is beginner friendly. Whether it's your
first time using after effects or you have
a little background. I wanted to create
something for someone who's just starting because I
know how intimidating, scrolling through your phone, seeing all these
complicated animations, and feeling even afraid to try this class is a perfect
place for you to kick, start your journey
to motion design. All you need is after
effects and an open mind. This is how I started my
motion design journey. And now I love incorporating
motion and sound into my branding videos and
animating illustrations. Use this class as a starting
point that will transform your set of skills and elevate yourself as a
versatile designer. I'm so glad you're here and
I'm excited to get started.
2. Class Overview: I'm so glad you decided
to take this class. The reason I opted to make this class for beginners
is because honestly, this is where I started my
journey with motion design. And I wanted to show
you how you can create something so simple
yet so striking, using the most basic tools. I just want to quickly walk
you through the structure of today's class and
highlight some of the tools you learn
in after effects. The first lesson
we'll be walking through together is
picking our audio. That will be our main
guide for the animation. Then you're going to set
up your after effects file that fits the dimension
of an Instagram reel. And then you'll be adding shape layers using basic shapes. I'm going to be mainly
using stroke lines today, but feel free to use circles, squares, triangles, or
rectangles in your project. The following four lessons are going to be adding trim paths, tapering wave and wiggle path effects to
your shape layer. To transform a
basic shape player into something that's a
little bit more exciting. Then I also wanted to
throw in a bonus lesson as an intro to the camera layer
for a more cinematic look. Feel free to stay or skip
that lesson if you want. Then finally, we're finishing it off with learning how
to export your file. So without further ado,
let's get started.
3. Choosing Your Audio: My usual process for these types of animations is that I
usually scroll through my Instagrams feed
and keep saving audio that I find sounds
interesting to me. It can be a unique beat
or a cool combination of sounds that I think could mesh well with
using basic shapes. I try to go for something that has no vocals, but if it does, then it usually has an
interesting undertone tit with bases or snares or something I can build
the animation on. When I find something
that I like, I save it and I usually screen record it and save
it on my phone so I can have the exact audio clip I want and I can build
my animation on it. I then air drop it
onto my computer, and I usually export it later on after effects without sound, So that when I go back to Instagram and upload it to
the audio that I saved, it usually matches right up. But for the sake of this class, I'm going to be
walking you through the exact same process, but instead of heading on
to Instagram for audio, I'm going to be using one
of my favorite resources for royalty free music so I can share the audio with you and build the
animation on it. So I'm here on Pixabay
and this is one of my favorite
resources for images, stock videos, music,
sound effects. It has really nice high
quality resources and a link, a few of the, my favorites
in the resources down below. But for now we're just going
to stick with Pixabay. And you want to head on to sound effects because
usually music has vocals, so sound effects would be the most reasonable category
here for this type of class. Then you have here,
you can pick by theme and you can
just scroll through. And what I usually
like is just to listen to a bunch of sounds.
Take your time. I usually like to find something
that's like a bit short. 159, 10 seconds, 5
seconds, nothing too long. So I don't have to
cut up the audio, I can just use the
whole clip as it is. You can go by theme or you
can just like keep scrolling randomly until you find something that sounds
interesting to you. And this is completely
subjective, so there's no right and wrong. You can just put
your personality into it and go with
what you like. I already got out
something that I think would be suitable
for today's class, and it's a very,
very short audio, it's 4 seconds, and I
think it would do well with basic shapes and building something
that's quite simple. But again, it has a little
bit of flavor to it. So let's give that a listen, okay, what it is.
It's just basically those first four nodes that
act as like a ladder almost. And then there's like a big vibrating splash of
a snare at the end, which I thought would
be interesting. It can be cool to
alternate between textures of these ascending or descending lines and then have a completely different texture for that splash in the end. This is just how I go about it. I find a lot of similar audio
like this on Instagram. You can find something
on Tiktok that you like. Any application that you
use will be totally fine. That is just usually my process. I find something
that is interesting. Try to imagine it in your
mind using basic shapes. Sometimes audio can sound
like curves and circles. Some audio is a
little bit sharper, so you can use squares, lines, triangles, and
that sort of thing. Be creative with the way you think compare with the audio. Well, that's pretty much it. When you're ready to
go, you just head on to download and that's it. I'll meet you back in the next
lesson and after effects. So grab your audio wherever it's from and I'll meet you there.
4. Setting Up File on AE: All right, so you want to go ahead and open After Effects, And this is going to be the
first window that comes up. So you want to click
on New Projects. And then you're
going to go ahead to Composition and click
New Composition. First things first,
we want to put the right dimensions for an
Instagram wheel already. Here we have a template that
says social media portrait, which is perfect for
Instagram reels, and it's usually
1080 by 1920 pixels. Just for your information, I already have that set up
because I do this quite often, so my composition settings are always set to this somehow. Then I usually like to
just keep it 30 frames per second and resolution full, but we're going to play around
with that later as we go. Just so we don't
slow up the file. And then you want to put in your time code and
your duration. The audio that I
had was 4 seconds. I'm just going to go
ahead and put 4 seconds here to the length of the audio. If you're picking something
off of Instagram and it's like 15 seconds or
16 seconds or less, or more, then you just want to time it according to the
audio from the gecko. And you can name your
composition if you want, but I'm just going to leave
it like that for now. I'm good with that. And I'm
just going to press okay. All right, so in this window, you have your
dimensions ready to go. First things first, we want
to import our audio file. A quick shortcut to
do this is command I. You're going to find your
audio here on the very left. I just usually like
to drag it down. There we go. We have
our audio sets here. If I just give this go by
pressing on my Space bar, it'll just keep looping. We have that here as our guide. Now, if I were to be using
an audio from Instagram, for example, I would put my
screen recording over here. I would click off. If you see down here, you have the E and
the sound microphone. If it were a screen recording, there would be a
video right here. I usually like to turn
that off and just keep the audio for
myself as a guideline, that usually is my guide
for the entire animation. And then right before I export, when everything is good
to go and it's perfect, I just delete the
audio from here. And I would put the animation on Instagram and it should match right up to
your saved audio. So you can do this with anything that you're
uploading onto any app. Basically, that's pretty much
our setting up the file. And of course before
you do anything, make sure you command S save and just save the project to however
name you wanted to save. So I'm just going to call
it groove Real for now. That's for setting up your file. On to the next lesson and
we're going to start building this animation step by step
according to each beat.
5. AE: Shape Layers: All right, so the first
thing that you want to do is put in some
color to this window. Okay, so we're just going
to add a background here. You're going to go
to layer new solid, that's basically your
background color. You can change this anytime
throughout the animation. I'll show you how, but I'm
just going to go with, I don't know, maybe a pink. Probably change it later. If you just want to change it, just make sure you
click on the layer here and go to Layer
Solid Settings, and click on the color window. And you can change it
at any point in time, which is completely normal. After seeing the
entire animation. You might want to change
your mind throughout. Actually, let me change it now. Maybe I want it to
be like a blue. Okay, there we have it now, because we have five
distinctive beats. So we have the first four that sound
almost like a ladder. Okay, so these are
the four ones. And then you have the fifth one that's a little
bit like a splash, creating a vibrating effect. What I have in mind is
I'm imagining them to be like four different lines or four lines on
top of each other. Sort of like a ladder that's
building up to something. We can make those lines, we can play around with
them with their textures, We can taper them,
we can wave them. We're going to make
them look a little bit interesting than
just solid lines. And then in the end, we'll
see how to make like this big vibrating
splash at the end. I think I'm going to
stick with strokes and lines for this animation
for the class. The first thing you want
to do is go to Layer New and click on Shape
Layer. Shape Layer. Any shape you draw
inside of after effects, you can either use a fill or
you can draw like a circle. Or you can keep it
as a stroke here and you can change it into
a rectangle if you want. Or you can even
use the pen tool, as you would an illustrator. You can change here
the stroke width, either from here or down below. But we'll get to that
just in a second. Okay. As I said, I'm
imagining four lines on top of each other
here or vertically. Maybe vertically is a
little bit more interesting since that's how
it's set up here. I'm just going to go to my pen
tool shortcut if you want. And just like draw a stroke, just as you would
an illustrator. Then you want to go down here to the window for shape layer one. You can easily change the names of these
layers by pressing Enter and naming them line one. Or for organizational reasons, you can go to the colored box here and you can color
code your layers. But this is especially
useful if there's a ton of layers in the file and
in the composition. And you just want to organize
them into categories. Maybe I'll keep the lines
here orange just so I know which ones are my lines and which ones are my
background and audio. Anyways, we go
here to shape one, drop down, stroke one, This is where we're at today. Drop down, okay. We're going to be focusing
on stroke width today. Color, taper, and wave. And we're going to
even add animation to it and check out those
bad boys over here. For the width you want
to go here to width, and you can play
around here with how thick or thin you
want your line to be. But I wanted to be a little bit quite thick today
because I wanted to fill up the entire page
here when I add more lines. So I wanted to be really
vibrant and, you know, attention grabbing, maybe
we'll do like a 255. Okay, That's all right. All right, so now I want to listen to the audio
again and see where the first beat
cuts off. Okay. There almost, okay, a millisecond 20 is where
the second beat comes in. Okay, so what I'm going to
do is I'm going to take my layer here and command
C command copy and paste. And I'm just going to
duplicate my line here. And then I'm going to take my cursor over here
to the 20th second. And I'm going to go to
my keyboard here and press option open bracket. And that's going to that layer for me over here to where
the second beat starts. So let's try that out. Move it around a little bit. Yeah, I think that is on time. See, you just have to go back and forth and kind
of like play around with the timings and the layers until the line pops at
the very right second. Okay. And I'm just going
to do the same thing for the two other beats here. Okay? I just changed around a little bit of the lines
like their positions just so they are all
equivalent in ****** here. Let's give that a
listen and see if it matches up to the audio
just as our base here. Okay, I'm going to leave the very last splash of a
beat till the very end, because I think we'll add a very different
texture to all of them as if they're vibrating. But for now, I'm just building
like that ladder here. You see how my layers are in sequences and they're
basically cut up. As soon as the beat
comes on to their turn, that's when the layer is placed. Okay, I'm happy with the
timing more or less. You can always go back and
tweak things at a later stage, but I think this is
okay for what it is. These are our shape layers. For now, this is a
great way to build your animation is just to
put on some shape layers. And then we're going
to come back in the next lesson and start
adding some textures, tapers some waves, and some trim paths to this just to make it a little
bit more exciting.
6. AE: Trim Paths: Okay, now I think I want
to add some trim paths. What trim paths means basically, is the line would
start at one end. And like slowly animate
till the very end. So it doesn't just appear
abruptly as a line. This also matches the music. If you hear it in a way, you see how the beats drag a, a long, a little bit, so it's
not like an abrupt beat. It swooshes in a little bit. This is the feeling
that I want to mimic. We're going to go to our
line one here, layer. And we're just going
to drop down the menu. We're going to go here to
Add and click on the arrow. Then we're going to
click on Trim Paths. It's going to add a
little menu here. You want to drop
that down and you have your start and your offset. We're going to just play around with the start
and the end here. At this point in time, our end is at 100% If I
click on it and click zero, this is what's going to happen. The line disappears,
because now it's at 0% The end here is at 0% I want to click on my stopwatch here just
to add a key frame. And then I'm going to move
the cursor a little bit, say till the next line comes up. And I'm going to
bring it back up to 100. You see what that did? It just animated the
line going down to 100. Let's see what that looks like. It drags on the line a
little bit and gives it a nicer feel to the animation instead
of the abrupt presence. Okay, that's what I want to
do to the rest of the lines, but instead of all of them coming from the
top to the bottom, I want one line to
come from the top to the bottom and the other line to come from the bottom to the top. And that will give a
more interesting look than having them all
symmetric in that way. So I'm just going to close this menu and go
to my second line. Same thing, you're going
to add trim paths. Go to your menu.
Okay, for this one, instead of making
your end go down to 0% you're actually
going to go to start and go to 100% You're reversing here
the roles a little bit. I'm going to go down to 100
and click on my Stopwatch. And then go till
the next line comes up and take it
back down to zero. Let's see what that looks like. Maybe I want to move
the key frames a little bit before the
actual layer starts, just because it will give
a more smoother look. Let's see what that looks like. Yeah, I like that more. We can do the same
thing to this one, Just drag it a little
bit to the left. So this starts right
before the layer appears. So the line is a appearing on the frame and
not completely out of frame. It's just a tiny little detail that will make things
look a bit smoother. Okay, great. And now I'm just going
to repeat this with the two other lines and see what our trim
paths look like. Okay, let's give that a listen, maybe we can just
drag this out a little bit because I think
it's a little bit late here. Okay, I think that
looks good. For now. That's just adding
one more element that makes it look a little
bit more interesting. I think I'm ready
to move on to make some tapers to the
lines just to give them a little bit of
a more unique look than just the blank. That's what we're going
to do in the next lesson.
7. AE: Taper Stroke: Okay, so you want
to just like head on to line one again and drop down the menu and
then click on stroke one and then taper.
Drop that down. Let me just drag my
cursor till the end here, so I can see what the
full line looks like. Okay, And then you
can play around here with the start
length or the end length. If I take my end length here and drag it
up all the way to 100% you're going to have a very sharp edge at
the end of the line. Then same thing, if
you take it up from the start length to
100% you'll have a sharp pointed end at the
beginning of the line, because my line is
going downwards. This one, I'm going to go in
and change the end length. If we play that,
it will look like a sharp line going towards
the frame downwards. That's what tapering does. Then I'm just going to do
the same thing to line two, but the other way around
I'm going to make the taper go upwards. Okay. Now let's give
that a look and listen. Okay. Now visually that looks a lot nicer than just
plain old lines. It kind of looks
like a little bit of a tiger or zebra pattern there. And I like the contrast
of the colors. I always like to use like high
contrast colors or really, really monochromatic colors just to have a more striking effect, especially when you're
using basic shapes. You need kind of colors to
help you amp things up. I'm pretty happy
with the timing and the texture of the lines so far. Now we can kind of visit the end beat the one with like
a big boom in the end. We can do that using waves just to give the
feeling of a vibration, like how sound waves behave. Like there's like
a big vibration or something like huge waves that come out at the end of,
there's like a big bang. I want to mimic
that same feeling. Then in the end, we can revisit the whole
animation and add like a few little details
here and there to make it even more interesting
if we feel the need. Let's go ahead and do
that in the next lesson.
8. AE: Wave Stroke: Okay, so I want to drag my cursor over here
and see exactly in my time frame here when this big vibrating splash
at the end happens. Okay. So I think it happens
around the second, second and 11 millisecond. We can always like
tweak it later, but just to give you
a little indication. Yeah. Okay. The last line touches
the beginning of the frame around 210,
which is perfect. Because then we can
stay on this time frame here and go back
to line one here. You want to go down to, you want to go to stroke
width here and stop. Watch that key frame there. That's just an indication that I want at this point in time, the exact stroke and the exact shape I have
here to stay the same. Then when the splash happens, I'm just going to move
my cursor exactly at 02:11 I want my stroke
to be a lot thicker. I'm just going to
eyeball this four now. I might come in
later and change it. I'm just going to put it at 380. I'm going to go down to
wave here below taper. Drop down that menu. Right now, the amount of wave in
that line is zero. There are no waves.
Let me zoom in a little bit so we can
see a little bit better. Okay, if I drag this up, you see immediately we have
a wave you can control, not just the amount, you can
control the wave length, how many waves are
in that percent? It can be like real tight
waves or really wide waves. It just depends on the type of look that I'm trying to achieve. And this is just all like trial and error again. No
right and wrong. Okay, for the wave length, I like it at 100 just to have that Quite a
bit of a contrast here. Maybe I'll have my amount at 70. Maybe I'll increase my
stroke width a little bit. Let's try 500. Just the same way I watch
my stroke width here. I want to stop
Watch also my wave. I'm going to go to 211 onto my wave amount here and I'm going
to stop watch that. Then I'm going to go back to 210 and bring it down to zero. Then we're back to the stroke. If I move my cursor here, I have my stroke the way
it was from the beginning. And then like a
millisecond afterwards, I have my wave and
my thickened stroke, that's the immediate snare of the vibrating
splash in the end. Then what I want to do
is drag my cursor till the very end at 03:20 I'm going to bring my wave back down so
it eases out to the stroke. This is what I
wanted to look like. I'm just going to put
it at zero here then. Same with the stroke width. I'll just copy the same
key frame I had in the beginning and paste
it where my cursor is, it's back to where it is now. And it's just going
to like slowly ease back into what
it was actually. Let's just give that a listen. I always like to try things out. Zoom out, try it on one layer
first, see if it works out. And then add the
rest to the bit. As I'm going through
the animation, I like to just bring down
my resolution to a half or a third just so
it renders faster. Because when you have a lot of layers or a lot of details, which is not the case here, but in general, it's much easier to view it in
half of the resolution. And it will just
render much faster on playback instead of
having it on full. And then later on when you're completely done
and happy with it, you can view it in
full resolution. Okay, let's give
it a listen, okay? You see how that wave effect mimicked the beat of
the music a little bit. And it's nice how
it eases out in the end because that's what
the audio does as well. Okay, I'm good with that. Basically what we do now, we're just going to copy
paste our key frames here. I'm just going to go
to the cursor till the very beginning
at 02:10 I'm going to basically select
my key frames for my stroke width here. And I'm going to command
see that go to line two, go to Stroke Width
and paste that. It's just going to do the exact same thing for the layer below. Same thing for the wave. Click on the wave amount. Come and see that if I
run my cursor through, it's going to give
me the same effect as the one before it. I'm just going to do that
for the two other lines. Okay? And then press on you. Press on you again, so you can collapse
all your layers. And let's give it
a go and listen. Okay, that looks cool. I just want to go back
here to this bit. Okay, I'm thinking if it'll be a little bit
interesting if we play with the wave length
here for some of the waves, so they don't all have
the same exact waves. Play with the
different textures, so it can give it a more interesting and an
asymmetrical look. Yeah, let's see what
that looks like. I'm just going to
put this to 100. Here. Stop. Watch that. Go to 211 and bring it up. Okay, let's try
that for line four. Okay, now let's
give that a look. All right, so I
just went back in and changed the wave
length for also the first and the third line
because I just liked the texture of this more than the extremely close
and compressed waves. This is also just
personal taste. You will just tweak it
here and there as you go. Let's just give that another listen and see how
that looks like. Okay, I think we're
on a good path here, but I think it's
just like missing a little bit of extra touches, a little vavavoum somewhere. I think we can explore
a few things here and there in the next lesson
and finalize this one.
9. AE: Wiggle Path & Color Change: All right, to add even more
interest to the ending here, the way the audio
hits that note, it gives me a little bit
of a vibration effect. Besides it going into
waves like this, it seems a little
bit static to me. What I could do is add
wiggle paths again. I'm going to go to
line one and just put my cursor over 211, drop down and click on Add, then head to wiggle paths. And it just does exactly
what it sounds like. It's going to wiggle the
path a little bit for me, I think you can play
around here with a size. It's going to show you how
much it's going to wiggle. But I think, I don't want
it to be too too much. You see how it kind of distorted the waves here a little bit. So I wanted to be a
little bit subtle. But again, to give me that
slight vibration effect, it's kind when
you're like snapping a band and it wiggles a
little bit from the snap. So I'm going to
bring down the size, probably back to ten, just so it doesn't
distort the wave. And then maybe I'll
crank up the detail to like 15 and maybe
wiggles per second. I can bring that up a bit. Let's try 30. For now, you want to stop
watch these changes here. You have three key
frames almost. And you want to go back to 210 and bring all of these
numbers back to zero. It doesn't change anything. And I also want to change my points from corner to smooth. Actually, let's drag out these key frames here a little bit so we can
see the difference. And let's hit the space
bar and play back. Okay, so you kind of
see the wiggle here. Let's bring down the wiggle
per second, 220 maybe. Okay, then let's go to the third second 1010 and copy
our first key frame. It eases out back
to what it was. Let's see what that looks like. All right, that's just like the tiniest bit of
a detail that I wanted to add just to give it that little of a
vibration effect. Now you want to copy paste
all these keyframes here. Command put your cursor on the beginning of your key
frames at 02:10 Close it up. Go to the next line, content, add wiggle paths. Click on Size and paste that. And it's just going
to paste that all throughout and give you the
same effect to the rest. And I'm just going to repeat this with the other two lines. Okay, now let's give that a go. Now, something else that
I want to do just to even make a little bit more striking with the
first four notes. Instead of just having one line go up from the
top to the bottom and the second line go from the
bottom to the top here. We can also use color
to our advantage. Remember when I said that
I like to use really contrasting colors to give
that striking effect. We can push that even further
with each note that hits, we can add a yellow background
color and a blue stroke. It changes from yellow to blue, from yellow to blue,
from yellow to blue. With each striking note here. That's just going to
give it a little bit of more contrast in
terms of color and really emphasize that
beat that keeps hitting. Let's try and do that, and I'll show you
exactly what I mean. Right now. My
background is blue. I'm going to keep
it that way for the first note, but then here, right when the
second line appears, I want to add a yellow
background here. With my color picker, I can just go to the
exact shade of yellow. Click. Okay, I'm just going to trim my yellow
background option. Open bracket. It
starts at that point. And I just want to
hide this for now. And then I'm going to
duplicate my line over here, my stroke color here. I'm just going to duplicate it. I'm going to call
it line one blue. And we can even
change the color here so we don't get confused. I'm also going to trim
that layer up till here. Then I'm going to
change my stroke here. Go to Stroke to the eye dropper and click the
blue off of the background. And then same thing
with line two. You want to duplicate that, change your stroke
to the blue color. You want to cut these
new layers up until the second or the
third note that comes in option close bracket to cut. On the other end, if we reveal the eye dropper
for the yellow background, you see that difference. What I just did there, you're just duplicating
the stroke over the stroke and the background
over the background, but you're just
changing its color and cutting it at the note. Let's just give that a go and
see what that looks like. Okay, so you see how the change
of color here just really emphasized the audio a little bit more and gave
it that striking effect. Instead of it just being lines. It's just like really simple
applications that can really push a very
simple animation paired with the audio. Okay, now we want to
do the same thing. The yellow blue second
note was blue on yellow. The yellow on blue. Then at the last note, I want to change it
again to blue on yellow. And then for the splash, I'll leave it as it is. It just keeps changing
back and forth. Okay, so I've added my other contrasting
color layers for the stroke in
the background, and let's see what
that looks like. Okay, I'm pretty happy
with the textures and the, and the color
changes we've made. Now, the very, very last touch
that I want to add is the, as the waves come back to
the shape that it once was, I just want to have like
the strokes thin out or thin into nothing at the end and we're left with the blue
background at the end. Again, this is
super, super simple. We're going to go to
the very last second, I think here 320. When the strokes have come
back to the original shape and we're going to go back
to our trusty line one. Then we want to go to stroke
one and stroke width already here my key frame is placed
at this time frame at 29. All I want to do is just drag out my cursor till the very end of the animation and just
bring it down to zero. It's just going to
thin into nothing. If I do this, it's just
going to disappear. It's just more of a smooth
ending and not a static one. And it's great because when
the animation loops again, it starts at a blue
background and it ends and it will end
at a blue background. So it's just a
little bit smoother as like a Jeff or something. Yeah, I'm just going
to go ahead and add the rest of the key frames for the stroke width, for
the rest of the lines. All right. Let's do it. Yeah, that looks
much smoother to me. Okay. I really, really
liked how this turned out. Yeah, it can be as simple as that or as complicated
as you want to be. You can start here
and then build it up as you feel
more comfortable playing around with the
tools and getting to know some of the effects
on this program. We're done for the most part. In the next lesson,
I'm just going to show you how to finalize your file and get it
ready for Instagram.
10. Bonus: Camera: Okay, before I export, I thought to throw in a bonus lesson if you just
want to take it up a notch and learn an extra tool on after effects that
will just give this like a cinematic
effect almost. I like to use this tool
just to take up a, some really simple animations and it really does
make a difference. It's all about adding those
extra tweaks here and there. Something that I thought
of because it fits this beat of these
entering lines. I thought I could
add a camera angle and zoom in on the first
two or three lines. And the camera would zoom
in at the first line here and go down with it. And then move towards
the second line, go up with it and
the third line, and then it would just
cut to the full frame. Here you can see the four lines together before
they wiggle at the end. This is just an extra step. Definitely do not need to do
this if you don't want to. But it's a cool effect
for a cinematic look. I'm just going to
show you how I do it. It's pretty easy, pretty simple, straightforward to
add a camera layer, you first need to convert
your active layers into three D. If you head onto here in this
composition window, you're going to find a
little three D box here. If you hover over it,
it'll say three D layer. I want all of my lines,
not my background, because that's not going to be moving to be three
D. I'm just going to click on the empty box under three D layer and
just check them all the ones you
want to be three D. Then I'm going to go over to layer and add null object. I added my null layer here and
I'm going to make it three D. Then I'm going to
go again to camera. I'm going to select
the two node camera. Then I'm going to go to
parent and link here. And select and hold
down the parent, whip the swirly icon
as you're dragging it, it's going to create a line. You want to just drag it
over to the title name here, null until it hovers and grays it out and
then just release. You're going to see
that next to camera, it's going to have it linked
here into null three, right there. That's it. You're just going to
click for position at the null layer and this
is what we're going to be mainly manipulating and
using the first set of numbers here is the x axis and the middle one is
the y axis, up and down. And the third one is the z axis. So I'm just going
to drag my cursor here where the line one begins. And I want to really
zoom in on that, on the very tip here. And I want the camera
to move downwards with it so we can begin zooming in. Okay, so I'm just playing around with the angle of it because
when I want to zoom in, I want the other
line next to it to also appear when it shows up. So I think that'll just look better when both lines
appear at the same time. So I think that's a good angle and I'm going to just stop, Watch it here, to
tell my camera that this is where I want to start
the zoom in. All right? And then as the line
moves downwards, I want the camera to also
move downwards with it. So with my y axis, I'm just going to go down. Okay, so let's just
give that a go. Okay, that's exactly
the effect I wanted, so you kind of like zooming
in and moving with it. Okay? Now, as the other
line starts here, I'm going to stop. Watch that. Then as it goes up, I want to go up as
well with my y axis. Okay. After tweaking
around a little bit, I think I like it
better with just zooming in on the two lines. And then when it hits on line
three, the third line here, I just cut the camera angle
and the null object and it immediately zooms
back out on the beat. It doesn't disrupt the movement or the lines or
the color changes. If it were more of
a smoother audio, you can move around the camera smoothly if it fits the audio. But I feel like in this case, first two lines with the
movement seemed better. And then cutting it off
completely and zooming back out to full frame fit
the audio better. Let's just give it a
listen and see if adding the camera angle added like
a more cinematic effect. I think I like it much better. Like this, it adds another
level of interest. Instead of seeing all the
lines together in one frame, it's nicer to just start out
with a zoomed in and like a two liner first and then
see them all come together. I think I'm happy with how
this turned out in the end. We are good to go, We are ready to finally.
11. Exporting: Okay, after you're happy with your animation reel and you
feel like you're ready to go, make sure your resolution
is back on full. If you had played around with this and of course
command and you want to go to file export and add to Adobe
Media encoder Q. That's just going to open
up the media encoder app. Okay, your animation should
come up right here in this window and it's going to have a status
underneath it, ready. And you can click the output
where it's going to go, automatically just
puts it in a folder here and you can choose
where you want it to be. Then you can name
your file and save. When everything is just good
to go, just press Enter. And then when it's done
it'll say done here. There you have it. It's
good to go for Instagram.
12. Class Project: Like I mentioned, the beginning, I wanted to keep this exercise
super short and simple. So that if you're new to this, it doesn't intimidate you, but at the same time
it won't limit you. This is the reason why I
love motion design with basic shapes because it's
really for everyone. If you're not too
keen on illustrating, this is a perfect start to
your motion design journey. I hope you're excited to
try it out yourself too. For your class projects, you can use the exact
same audio that I used. I'll link it in the resources so you can go ahead and
download the audio file. Feel free to use
different shapes, colors, anything to make it your
own or you can head onto your Instagram meals feed and scroll through and find
an audio you like, save it, screen, record it, and use that file as your audio on after effects
from that point on. It's the same exact process. When you're done exporting your file head to
Vimeo or Youtube, upload your video there, copy the Lincoln, paste it here in the class
project section. And don't forget to take a
screenshot of your video so it can be your cover image
here in the class projects. Of course it goes
without saying, please post it on Instagram
and tag me, Share it with me. I would love to see it. And
if you have any questions, please don't hesitate to
ask me. I'm always here.
13. Thank You: Thank you so much for
taking this class. I hope you found it fun or
helpful or interesting. And please leave me
a review down below. I would really appreciate
it as it helps other students know what
to expect from this class. If you feel like you're ready
to take your animations up and notch in a more advanced
and real world setting, then please head on to
my brand video class, where I take a deep dive into animating a logo and
a brand identity. Thank you again and I'll
see you on the next one.
 Khadija El Sharawy, Independent Designer & Art Director