Transcripts
1. Introduction: Hello, everyone, and welcome
to fold Paint Create, making a concertina art
book for mixed media fans. In today's video, I'm
excited to show you how to create a beautiful mixed
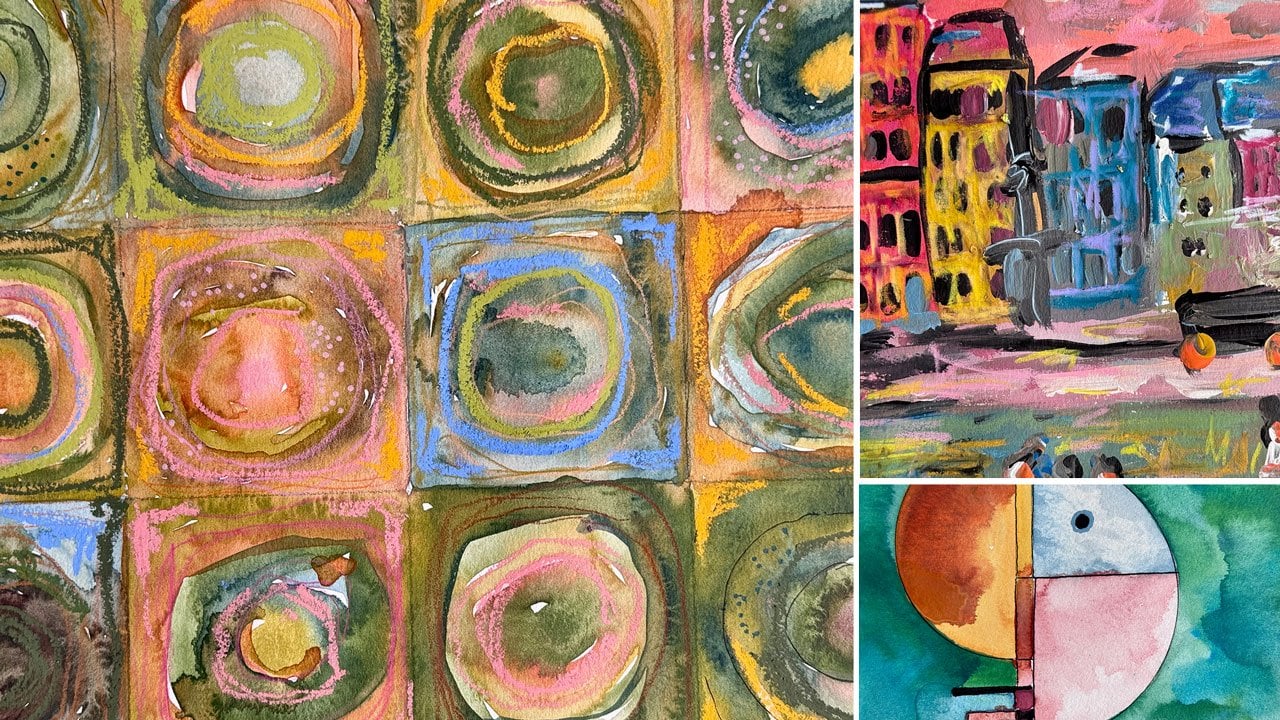
media concertina book. This project is all about experimenting with
our art supplies, having fun with
some abstract art, and turning it into a
unique handmade book. I'm Denise Love, an artist
and creative educator, and I'm excited to
bring you this fun and creative dive into
handmade art journals. We'll paint, fold, and
assemble it step by step. So whether you're a
seasoned mixed media artist or just looking for a
creative project to try, this class is for you. Let's get started.
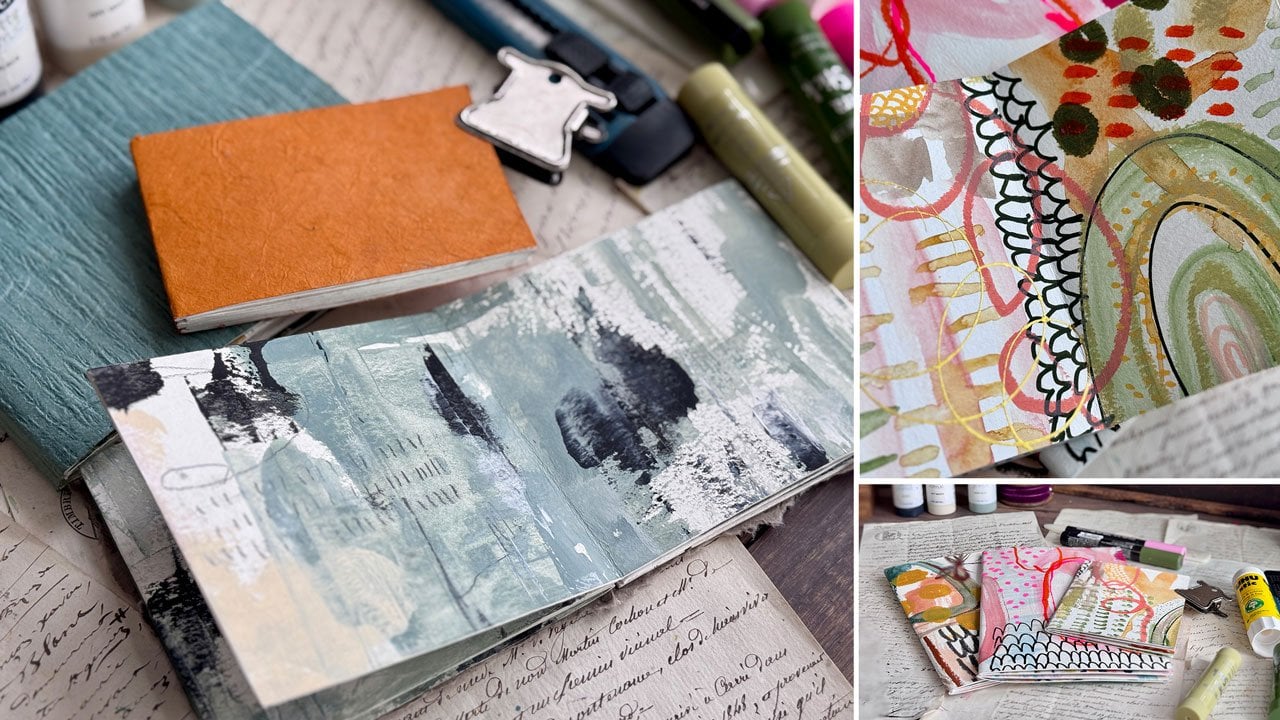
2. Class Project: Class project, you'll create your own mixed media
concertina book using watercolor paper, paint and handmade covers or any materials that you
happen to have on hand. Start by painting both sides of your paper with
abstract designs and then cut it into
strips and fold it into a zig zag
concertina format. Assemble your book
with coordinating paper covers and a rib enclosure
to complete the piece. Whether you use it
as an art journal, a collage base or a
standalone artwork, this project is
fun and a creative way to explore mixed
media techniques. Share your finished book
in the class gallery. I'd love to see what you create.
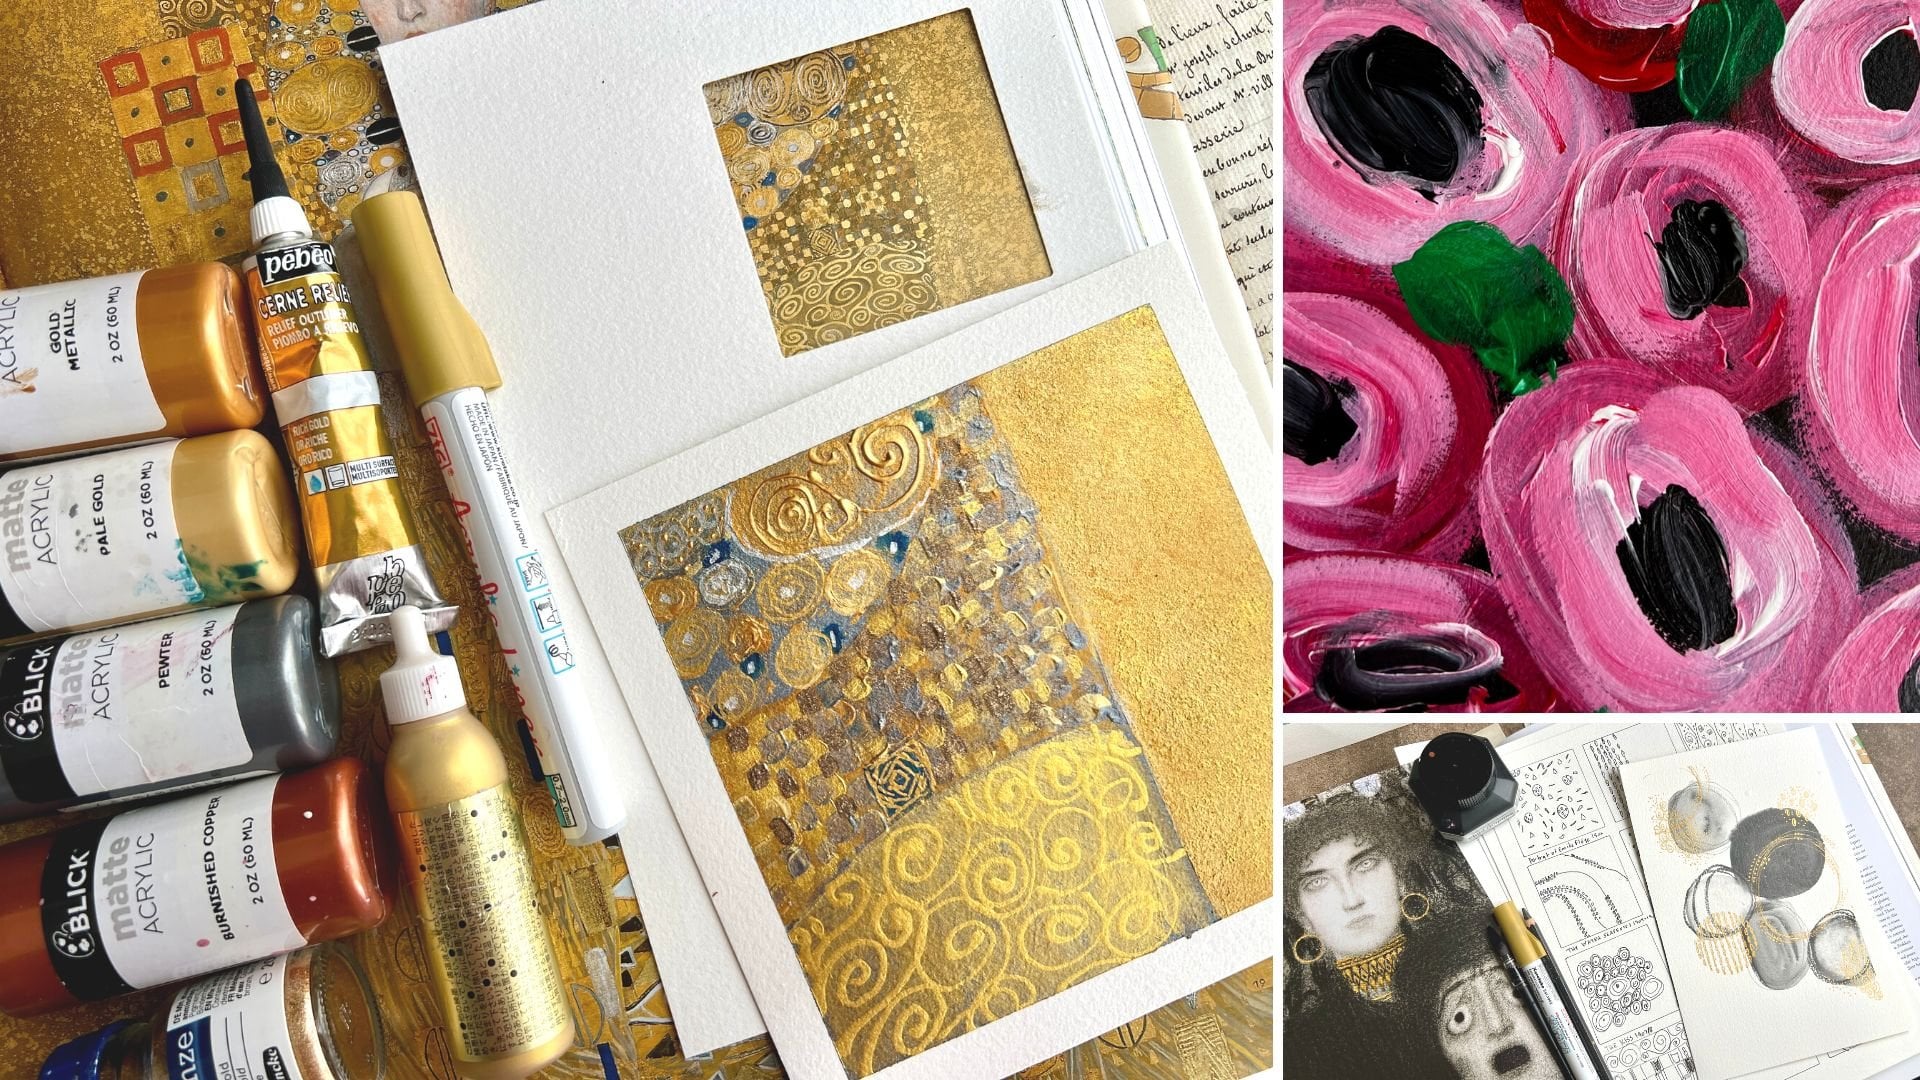
3. Supplies: Let's start off by taking a look at the supplies that we're
going to need for class. You need a big piece of paper. This can be any paper
that you have on hand. I have several large
sheets of arches, watercolor paper that 33, the great big ones by
22 or so, they're big. Those would work fine if you've
got a big piece of that. For this class project, I'm going to be
using a big piece of the Canson Excel paper. And I have a big pad, 18 " by 24 " that lives under the bed in my guest room
because it's so big. But it's the exact thing that we need for a
project like this. This is just 140 pound
cold press paper, and we're going to be using
one sheet of paper to make our book and I like
it to be a big sheet. You can do this smaller and make little mini concertina books, but I'm going to make a
big one, so I'm going to use this sheet of
paper or bigger. So you need a piece of
paper. You also need some bookboard which is
basically a nice heavyweight, um cardboard or press board. But also, if you
just happen to have some extra sketch pads or
watercolor pads or paper pads, this back page of that
pad is perfect and you can just steal the back of that off of your paper pad. And really, you shouldn't
throw those away. You should every time you
use a thing of paper, just keep that back
piece because it's perfect for making your
own handmade art books. I keep all the back
pages of those. But you could also have bookboard that's
what it's called, and it's just a packet of
nice thick heavyweight board. You also need a bone folder and I'm going to be
using a glue stick. You could use a glue stick. You could use tacky glue. You could use other
book glues like the neutral pH adhesive glue.
You could do any of that. But for my project,
I'm going to be using the glue stick
because it's easy. And I like the Oho sticks. You need a bone
folder because we're going to be using
that to fold paper. I've got a utility knife and a big ruler that I'll be using to cut my
paper into strips. I'm going to be using
some two inch vet, use a book repair tape to
attach my sections together on the backside because it's
really, really sticky. You could use masking tape. I probably would avoid
painter's tape or artist's tape because those are
generally low tech tapes. So if the tape that you
have is the blue tape or the purple tape or
the white artist tape, those tend to not be very sticky and I feel like after a while, they would start
to peel and come up and not hold
your book together. So I'm going to be using
white bookbinding tape. You could also use a nice
quality masking tape. Gaffers tape would
probably be fine, or you can do some of the
other concertina methods where they actually glue
the two sections together. So I'll talk about that a
tiny bit as we're going, but I'm going to attach
mine with the um the tape. And then I'm also going
to be using all of the any art supply
that just inspires me. So I'm going to be using some KuratakiGanzi watercolors
because I like them. They're kind of a mix between Western watercolors and gouache. They're kind of
little more opaque, not quite as translucent, and that's what I
love about them, so I'm going to be using those. Also going to personally be
using some acrylic inks. I've got the Delawi inks and Amsterdam inks
and a variety of colors, and so I might be
pulling some of those. You could also pull out any mark making
supplies that you have, any paint pins, pasca pins, anything at all that you want to decorate your paper
with now is the time. To get out all your
supplies and make a big sampler sheet of the different things it's
time to play and experiment. If you've got something
you've never tried before, and you're like, Oh, just waiting for the
perfect project. This is the perfect project. I just want you to start
experimenting with all your supplies in
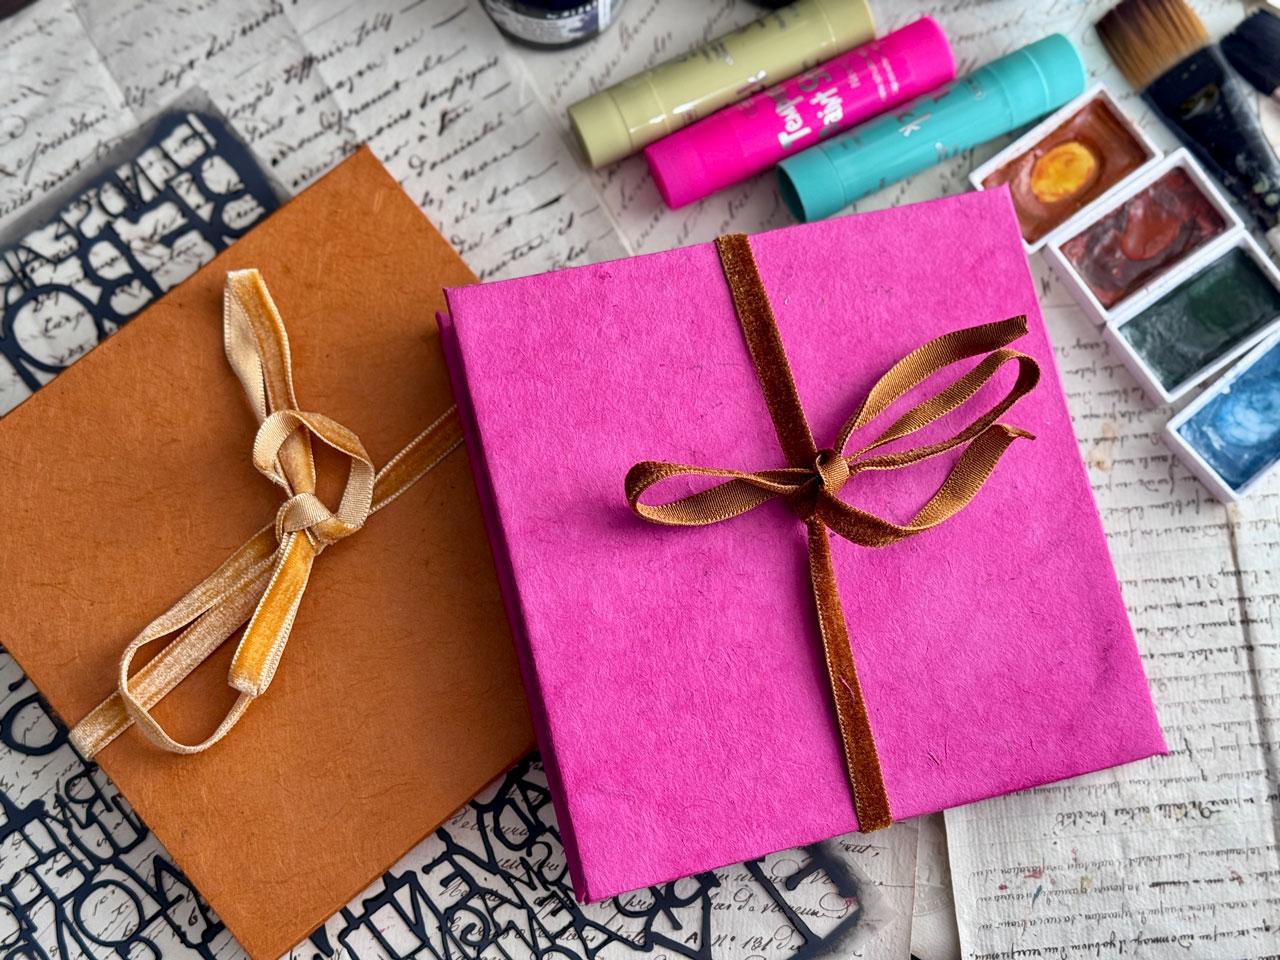
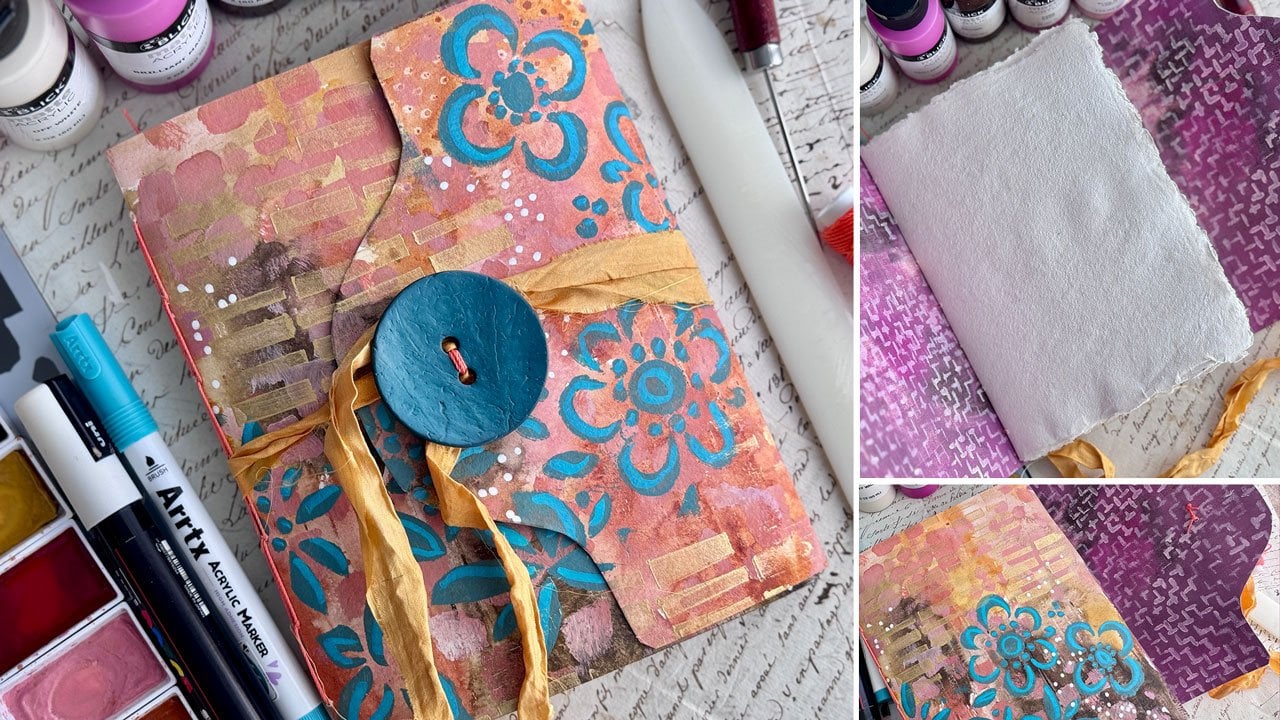
a project like this. One other thing, I'm going to be using some handmade paper. I don't know which paper I'm going to use
yet for my cover, depends on what colors
I paint inside, whatever I'm inspired, which direction I'm inspired to go. But I've got some
large handmade papers that I've gotten
from **** you could look online on the Blick site
and look at handmade papers or visit your local art store and just see what kind
of papers they have. That's one option for the cover. I'm going to be using
these for my cover. Another option is to paint your cover and decorate it in whatever way you're
inspired to do. So you don't have to
have a handmade paper. You can cover it with whatever
you're inspired to create, but you'll see as we're going
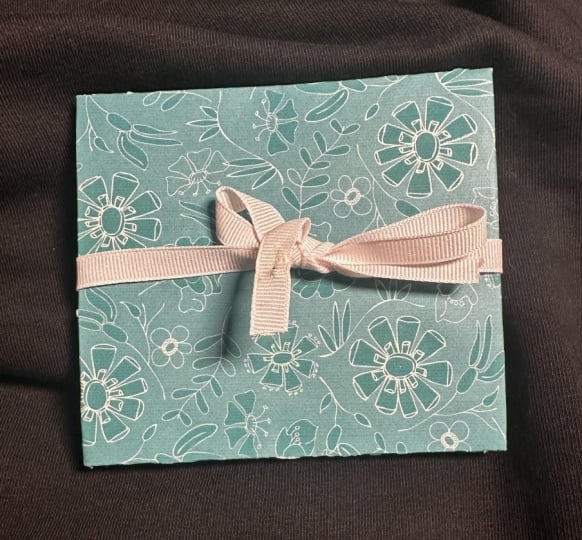
what we end up creating. Then also, I'm going to tie my book clothes
with a ribbon, so a piece of ribbon
would be handy, and it does need to be a
little bit longer than this. This is one I had cut short
on a book I made for myself. And so, you know, live and learn,
but it needs to be a ribbon that's not super thick. This is about a quarter
of an inch thick, so it's not so thick that I
couldn't tie it in a tie, but you could get creative
with your closures. I've got lots of different ways that I close art books now that with buttons and ribbons and fasteners and you can
get creative with that, but we're going to be using
a ribbon on this project.
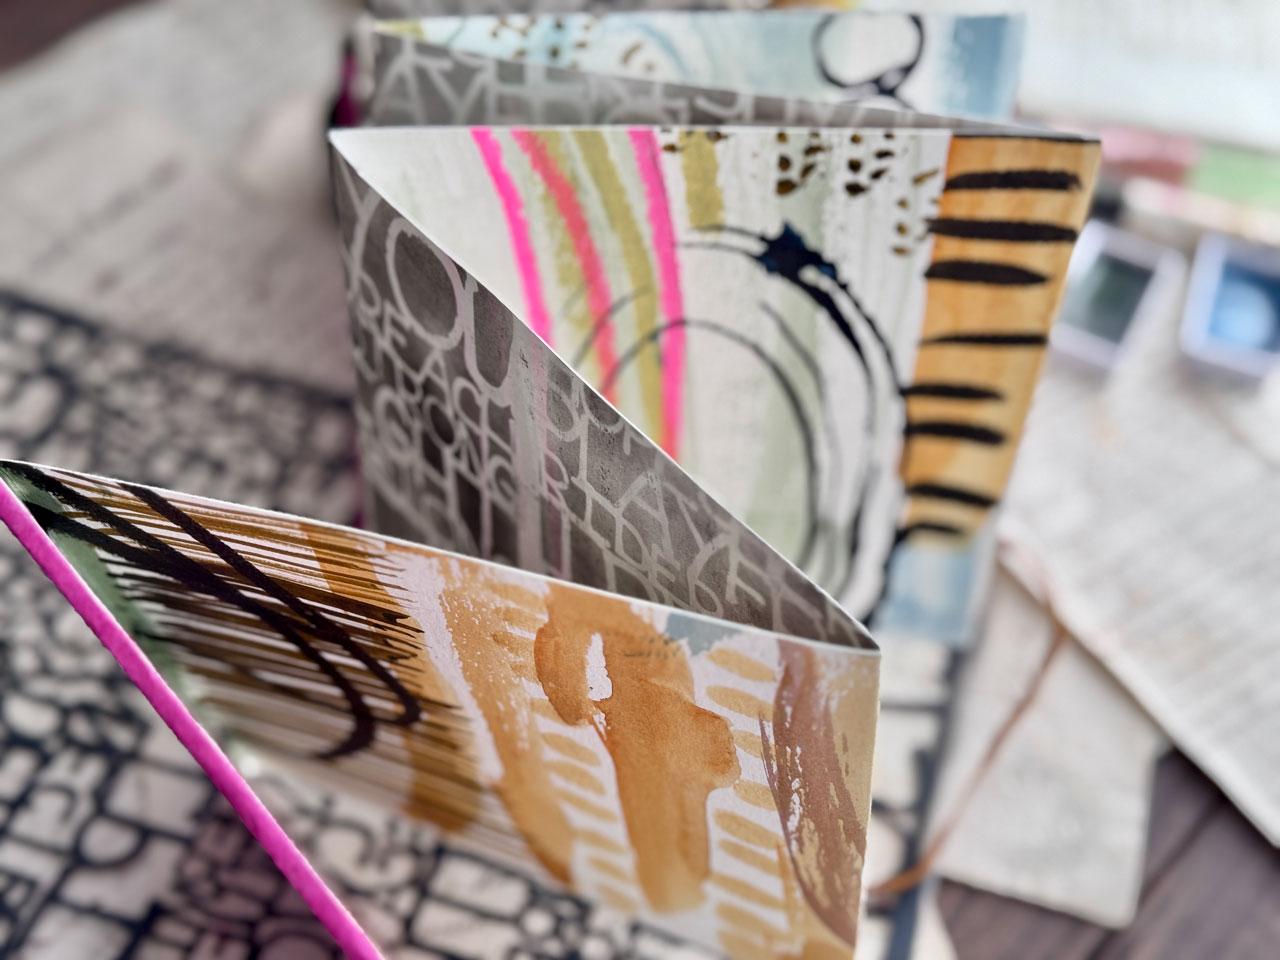
4. Painting & Cutting Paper: Other thing I happen to think
because I got inspired. I'm going to do
I'm going to paint the backside and the front side on some other books
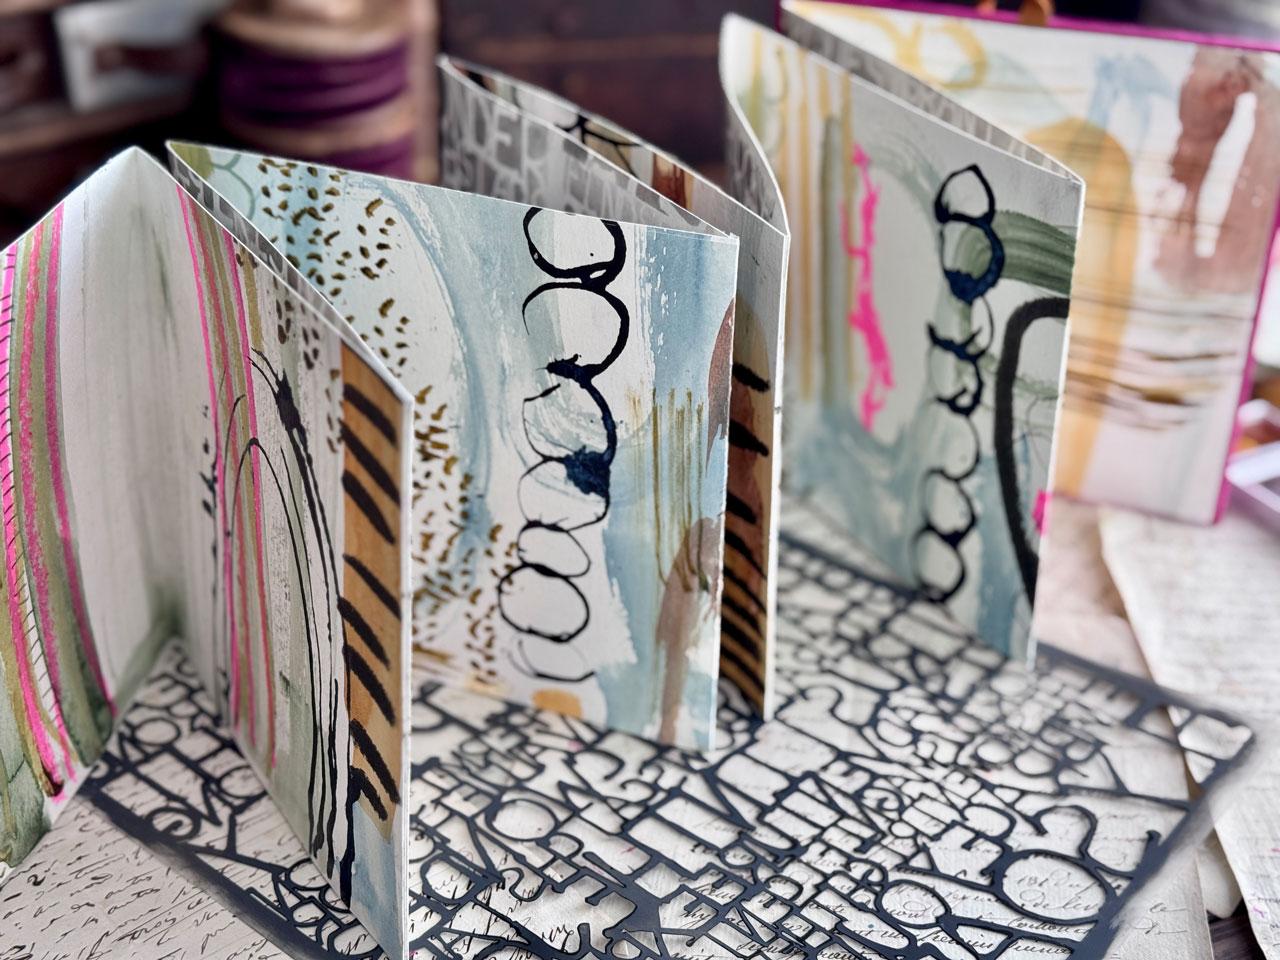
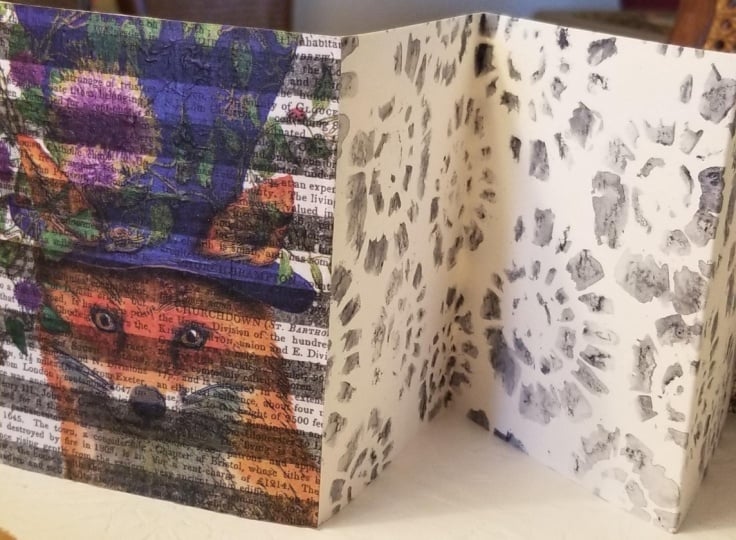
that I've done. I did not paint the backside. I just painted the front side. And then I did something fun. Here's the other one, one
of the ones I've created. Usually, the
concertina book is two sided and comes out kind
of like an accordion, but I thought it would be fun on this one to do one sided. And then glue all of
the backsides together. So it kind of made a
traditional kind of book. So this is another option
that you can consider, but it makes the pages
nice and thick and yummy and you get all the way to the back
and then it closes. So you can see here how I've used the ribbon
as a closure, and I only painted on
the one side because I attach the other side
all glued together. So this is one way
we could do it. The other way I was thinking just kind of came to me and
I'm thinking, let's do it. Do some type of painting or stenciling or something
on the back side. Then when that's
dry, flip it over, then paint the front side and then both sides are painted. Keeping in mind that
wherever we seam it out, it's going to have a white
seam on the back side, but I'm okay with
that because I've already planned
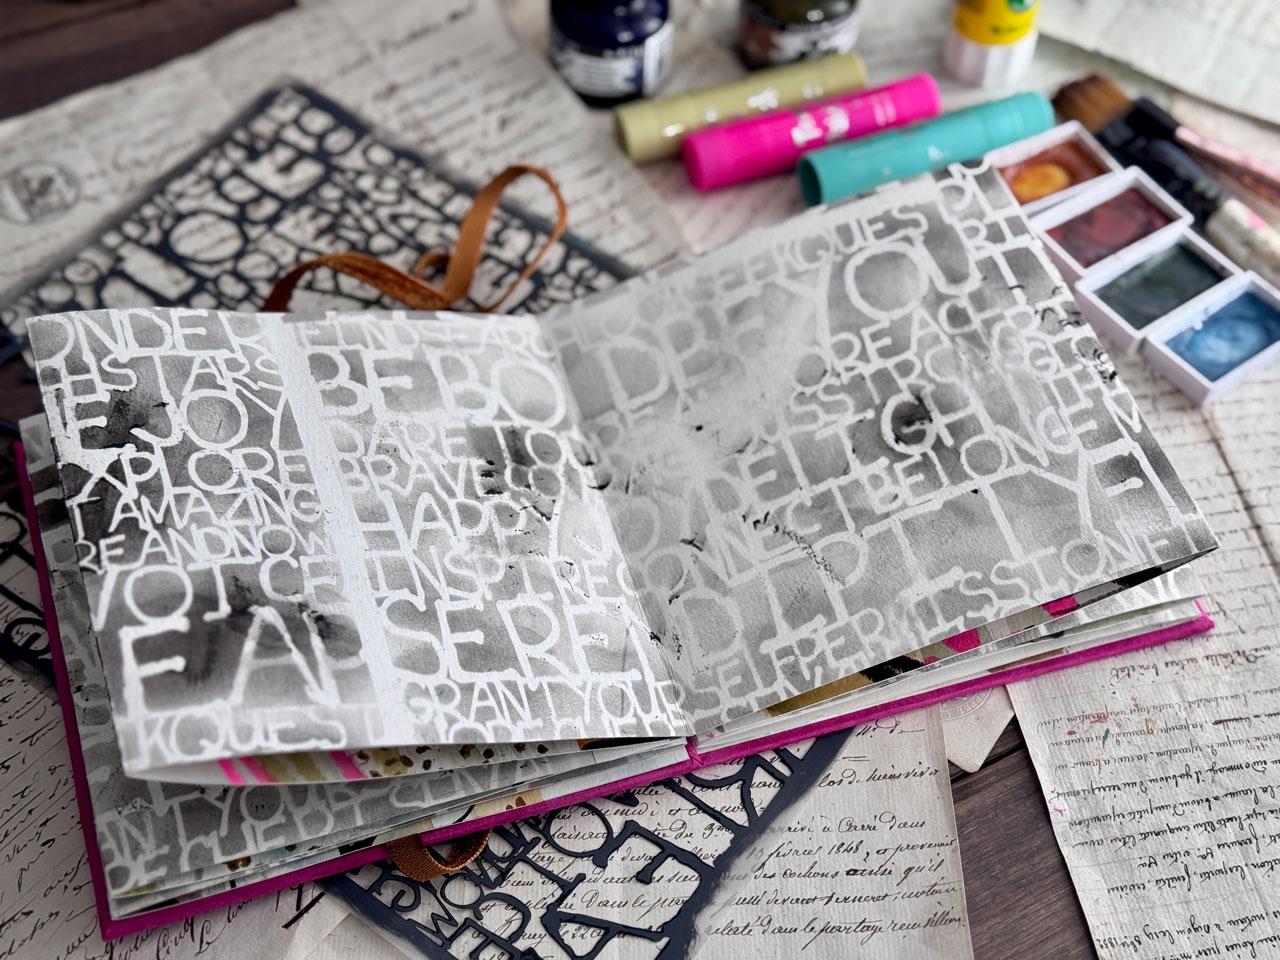
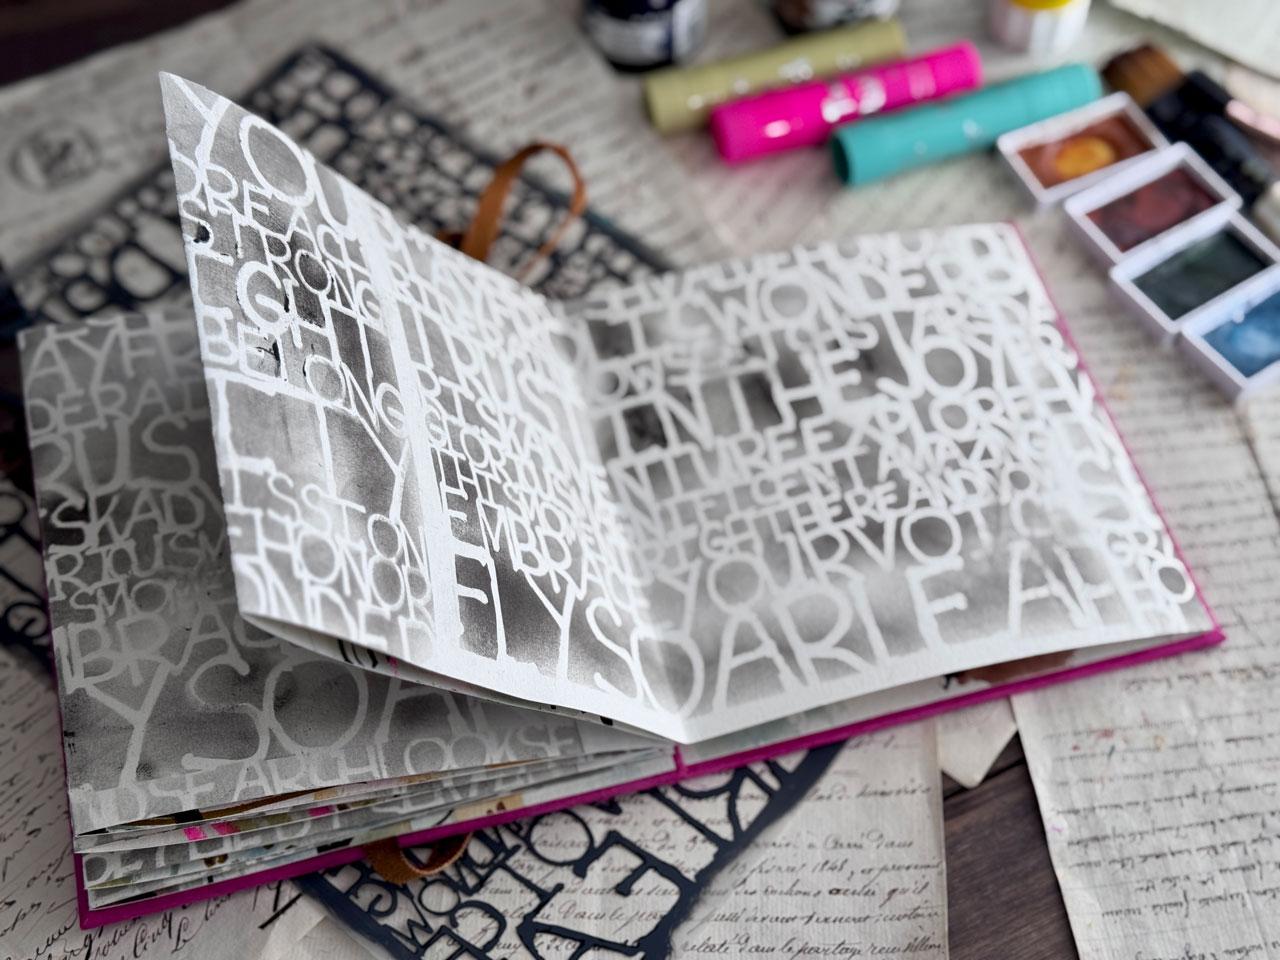
for it to do that. I think on one side,
I'm going to put stencils. Pick a
stencil you like. This is a stencil girl
stencil and it is um S two oh nine Dub DUBE
it's just positive words and I'm liking the thought that the back could
be black and white. That also you could
add to your supplies. I'm going to go
ahead and do that. I've just pulled
a piece of paper out. That's the front side. I'm going to flip it
over to the backside, and I'm going to
try something new. I'm going to be using
an ink blending brush and an art crayon to
do the stenciling instead of acrylic paint because I think
it'll allow me to continue painting on the
other side a little quicker. These are fun because I discovered and we could
do black paint also. I mean, we might should do black paint now that
I think about it, but these dry fast and
I was thinking like, could we draw on
here and then take our ink blending brush and just smear it around and
see what that looks like. Um, so let's try it. We're just going
to smear it around and see what our stencil
work looks like. So add this to your supplies. I thought about it as soon
as I was putting stuff away. I was like, Oh, what
if we did this? So many good ideas just start coming to you as you
start thinking of stuff. So let's see what
that looks like. Oh, my goodness. That's exactly what I want. Okay, so you just
kind of roll them up. These are the
marabou art crayons. Comes in a little box like this. And they're super fun, and they're like, I like them. As I throw them
all on the floor, they're kind of like the
temper sticks, which I like. But the temper sticks
are, you know, a children's art supply, and they're not meant
to last as long as, say, a nicer art supply. So I've been experimenting with some other materials
and playing with some other options just to see the ing as well
as a temper stick, 'cause temper sticks are fun. So I'm going to
continue painting this backside with this
stencil, just moving it around. It's just going to
be these words over the whole thing, and
I'll be right back. All right. I'm down to the very
last little section here and I'm just
kind of working it. You could color the
ink blending brush with the tip of the crayon. I found that works really good. Also, if you have a
plastic cutting board, you could scribble
this don't use the cutting board for your kitchen anymore
after that, though, but you could scrub
a little bit of the crayon on the cutting board. I have a plastic
watercolor container that's like a cutting board. And I was thinking, I need to go get one of my kitchen
cutting boards, but you can put it on that
and scrub your brush on it, and it kind of gives you a more even color
way rather than coloring the little bit of
crayon through the stencil. I've just been experimenting. I haven't had these crayons
very long and I thought, This is the perfect kind of project to play
and experiment. I was just using
a little piece of tape to help me hold
the stencil there. And there we go. Now we
have the whole thing, and then I just throw
this into some water until I'm ready to take
it to the sink and I just wash it with
my brush cleaner. I've got this stuff called
the master's brush cleaner. This is perfect for scrubbing a little bit of soap and
washing it with water. These come pretty clean.
They're inflending brushes. So with the ink,
you generally have the ink stay on
there pretty good. Those wash pretty good. So now we're going
to let this dry. I wasn't looking for perfect. My goal here was interesting
and different and I don't mind any marks
that I've got or any differences that
I've got because when we have this in
a folded up book, I think that's going
to look really cool. I've got it on my fingers because I was holding
the stencil down. This stuff is water soluble, so we could probably move
it around with water a little bit at this point if we wanted
to, that's not my goal. I'm just mentioning
some properties there. Yeah, I'm going to wash my
hands and let it set up for a moment and then we'll
flip it over and paint the other side.
I'll be right back. A property of those
crayons, I should mention, they dry within 24 hours, so it's not going to completely dry the first time you use them. If you get some of these
little temper sticks, they dry pretty immediately, but they're not artist quality, so you could have fading throughout the
life of the product, more so than most of
your art supplies, which is why even
though I love them, I hesitate to really use but
they would dry immediately. This is going to take 24 hours to really set up and
be dry completely. But we're going to keep going and just see
what we can get. For the other side, I got
my cutting mat under here. For the other side, we're going to paint and play and experiment and fill the sheet with
all of our art supplies. I'm going to pick
some watercolors a color palette to play in. So I generally like to pick a color pilot
from the color cube, and this is the color
cube by Sara Renee Clark. I love these because they've
got 250 colors per box. And if you just are
stuck and you don't know where to go and what's your next color should be
or how you could really make a color pilot more sophisticated rather
than just picking, say, blue and orange, what else could I pick to go
with that blue and orange? Well we could have a blue
orange and look here. We could have an ochre, an indigo, and a black. That would make it more
sophisticated and fill out the palette a little easier than just two colors, for instance. I do like to pick a color
palette and just say, let's go for that.
Like this right here. I'm loving this set of
colors and I feel like maybe that hot pink cover could
be a good cover for that. Yeah, that'd be
good. I also reserve the right to put white, black as your neutrals and gold. Those are going to be
the ones that I always reserve to go ahead
and pick also. So let me pick a color palette
and I'll be right back. I've picked a few colors
out of my watercolors. This is the 48 piece set in the art nouveau
set by Kura take. And even though my goal
isn't to get exact exact, it's just to kind of push
me into a direction. It's a way to narrow down your choices right
at the beginning because sometimes when you have too many choices,
you get stuck. Everything's harder. You just can't move forward
because you're like, Oh, I don't know where to go with
this, and you get stuck. I find that at
least starting with a color palette is a good way to push me in that direction. And depending on
how sloppy I am, I may or may not push
paint on the other side, and I'm not even
worried about it. Don't get stressed about
the different aspects. You can be for the
first one, just play. Then after that, you can
be more careful and you can make some decisions
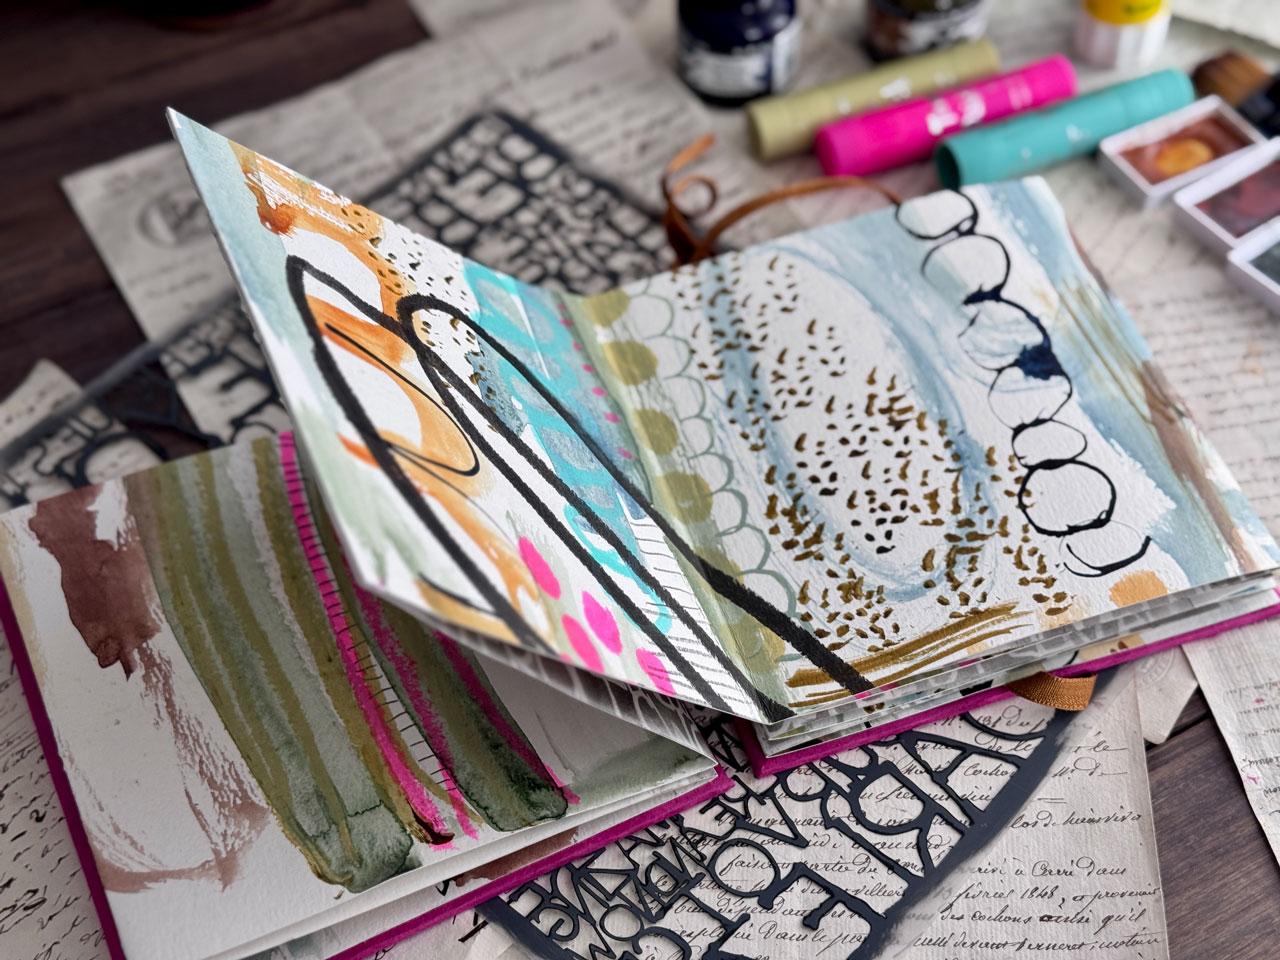
and you can get creative. The goal here is to fill
the page with color and marks and just be creative and don't get stuck
in what things look like. I'm going to start with a
layer of watercolor and then mark making on top of that,
and then we'll cut stuff up. I've just pulled some colors. I don't quite have this
rather gorgeous blue. I've pulled five oh
four green gray, which may or may not
be the right color, but it got me there. Then I got six oh
one grayish blue. Four oh two Mars yellow and
four oh three Venetian red. That just at least push
me into a color palette, whether it's exact or not. Then black, I'm
going to reserve for mark making and some
other stuff as we go. I'm just going to wet these colors down and
then just start painting. There's no right or
wrong way to do this. Got a thing of water over here. I'll be dipping my brush into. The goal is just to fill
your page, have fun. Don't worry about. That's
a pretty color, actually. Look how pretty that color is. I did not expect that actually. So I'm going to just
start laying color down, doing some mark making, maybe making some odd
shapes or different marks, and you're going to cut
this up and then fold them. So wherever, some of these elements end up
is going to be the fun, interesting surprise
part of the project, which is what I love. This is my Princeton Neptune, flat wash brush, three quarter inch square
wash brush. I love it. I love the Princeton
Neptune ones. They seem to hold a lot
of water and color, and so it's my favorite
ones with these. I'm just going to play and
experiment and mark make and see where are we going to
end up when we're done? Make shapes, make colors, let the brushes give you some interesting lines and
patterns, switch up colors. Don't get hung up on
this looks terrible. I've already messed it up.
I want you to keep going. And painting and playing, and then trust the process
and just have some fun. Enjoy the ugly stage that we get to all paintings
have an ugly stage. Just don't even
let it bother you. Just play and just say,
Where am I going to end up? I don't know, but we're going
to like it wherever it is. Perfect chance to try out
all your mark making and anything fun that
you've been wanting to experiment with or art supply you've been
wanting to play with. This is your moment. It's time to shine and make a great big sampler of all the things that
you ever wanted to put in your art or play in your art and you
just didn't get to. I'm sorry if this paper is a tiny bit bigger than my surface, but the point is,
cover the whole sheet. Let's see. We've done the blue
and the green. Let's go back with
some scary colors. This is scary. Oh, no, I
don't want to mess it up. Right there with you. Oh,
my goodness. Oh, my gosh. Okay, that colors
a little crazy. I don't know if it's
the one that I wanted. But let's just do it anyway. Let's just trust this process. I get the coolest
pieces of art and things after doing stuff like
this because I got brave. One moment of braveness
gets you places in your art that you just
never even imagine. So I want you to just
be brave and go for it. No matter how crazy it is. And I pick crazy
color palettes out of this little thing on purpose because the crazier the color
palette that I've picked, the more I've loved it when
it was done, crazy enough. And sometimes I even look
at it the day that I've done it and I'm like, I
don't know about this. And I'll come back a
couple of days later, and I'm like, Whoa. So cool. Oh, Ar This
wanted to drip right here. Let's just do it.
Oh, I don't know. I don't know about that color. I don't know about that one. But we're putting it in
there. If you got a drip or something that
happens and you're like, that was a mistake. I want you to put the
color to other places. And that way, it
wasn't a mistake. It was a deliberate decision. Not saying it was
a good decision, but it would then make
it at least deliberate. Let's just school.
Let's do that. Now I've got all four of
the watercolors in there. I don't have the black in
there yet. That's okay. Because I'm feeling
like we could pick out some ink colors and do some
lines and some drawing. This one is Indigo
by Daylor Rownie. The thing with the
inks, some of my inks, um Oh, this one works. Some of my inks
don't soak up ink, but when you first
start the ink, shake them up and squirt out the lid because stuff gets
stuck in that dauber. And when you're going, you
squirt out a whole jab of ink that you
didn't mean to do, it might be a glob that had
dried in there for a while. Okay, so if you
like to draw and do botanicals and some fun
shapes and things like that, now's the time to play
with some of those ideas. Oh, I love it. I love Indigo. Let's do some more over here. You can draw with paint pens
and you can any kind of pin, really, you can get
your microliners if you like to draw stuff. I want you to get creative here. Don't get hung up on
what it looks like, fill the space, move around,
do different shapes. I want you to make sure too, to be sure to go edge to edge. Don't leave a big gap at the sides or the
top or the bottom because that's part of your page and I don't want you to have a big section
that you're like, Oh, it looks like I forgot
this whole section of paint or whatever because I
didn't go edge to edge. So I do try to go
ahead and move around and get in there with the
different edges and stuff. I'm just looking
around my inks here. Saying, what do I got? What do I want to do? Do I
want to mark make? Do I want to stop and
let this dry and come back and mark make? We
can certainly do that. That might be fun because we could come back
with some paint pens. I've got some Artis
pens that I like. I've got some posca
pens that I like. These are acrylic paint
pens and so we could continue drawing and mark
making with our paint pins. Oh, I like this.
That's kind of fun. So yeah, just keep going. But if you've got some
things that need to dry, you might let those dry before you start putting your
hand on here accidentally. Not sure I'm there
yet. I'm looking for, I'm looking for the antelope. Oh. And then, too, experiment
with your different brushes. This is a brush that I've
used for my medium and stuff, but it stiffens up super cool. And what we can do
with brushes like this is we can make
a line or something and then come and
drag through and let that brush give us
some cool mark making. Like, look at that. I
love it. I love it. Oh, my gosh, look
at that. Oh, that's super cool. Super cool. You can put some ink on
another piece of a piece of disposable palette paper. We could put the ink there and run the brush
through it and then come back and do some
cool mark making. Oh, yeah, good choice. That brush is just stiffened
up to the point that I just get super cool marks. I bet I could get
some good dots. Okay, that's fun. So play with your
different brushes and the marks that maybe
you can get out of those. Then when you're done
with this project, you're going to
have a book that's the coolest thing you ever made, and you're going to be like,
Oh my gosh, I made that. Trust the process. How
fun as you're doing it. Look how cool that is. I
love that. That's super fun. Trust in the process. I don't want you to get hung
up on what it looks like or if it's going the way you want it or if it's doing
what you wanted to do. I also like mark
making with graphite. This Pit Mat graphite is one of my favorite graphite
pencils and it's ten B, so it's very a very soft and it's going to give me some good dark marks in there. But we could come
through and start doing some mark making with our
favorite pencils and pens, with the paint pens and stuff, you can also do it with your
graphites. I love that. We could also come in and make really mindful marks if
you like dashes or dots, crosses or anything like that. We could start coming in and adding some of
those in there. You could also save
the fine mark making for after you make the
book and then go fill back in the sections that
you want to fill in. So as soon as we make the book, it doesn't mean it
has to be done. It just means that we got to a point that
we were like, oh, let's make the book and then continue adding the aspects
that we think it needs because then you could be really deliberate to what each page needs to get it finished. Stuck my hand in some ink. But yeah, I kind of
like that idea, too, where we then go
back and complete the different pages
because we don't know right now what's going
to end up on each page. So how do I know whatever
I'm doing is going to really complete it out and be the finish that we
need? I don't know. So Markma have fun and get to
a point where you're like, Okay, I think I need
to make the book before I continue on. So we're going to do a little more play and mark making here, and then we'll be ready
and we'll let it dry. We're going to mark make
some more and let it dry and then we'll be
ready to make our book. I want wonkiness and craziness. I'm not holding the pencil way up here where I
have a lot of control. I'm holding the pencil way
back here where I have less control on purpose. I don't want it to be perfect. If you need some
perfection and you like everything to be a little
neater as you're working, then hold your pencil
a little tighter. Let these areas dry before
you continue on with the extras that we're doing
here on our piece of paper. It's all about letting go. And having some fun and
trusting that process and not getting hung up with things being exactly
perfect for me. Okay, so I'm going to
keep on keeping on. I'm going to keep adding stuff, thinking I'm going
to pull out some tempera paint sticks just
because I have them, and I think maybe
one of these colors could be good and
they'll dry faster. Still looking at my
color pallet here. Kind of feel like I
want some mark making in something close to that blue. That's not close, but
maybe it's close enough. Don't get hung up
on exact colors either if you pick
a color palette. Let's just pull these out. But little temper
sticks are fun. I'm just not loving
that they may not last. But we're gonna try some anyway. So I want you to pull
all your materials. Let's try that one. It's probably not the
right color either, but, you know, then don't get stuck too on exactly
the color palette. Don't be afraid to branch out. So now I'm just going to pick
some colors out of here. I like these because they
dry almost immediately. And you can layer
on top of them, and we'll just hope. In the end but our lovely book stands
up to the test of time, as long as we would want it to. But I just feel like I
want some of this in here. You can do oil pastels
and soft pastels, too. Those are some of
my favorite mark making tools for
stuff like this. But what they are going
to do is they have to be finished with a
finishing spray, whereas I don't have to finish these with
a finishing spray. They're going to
dry and be good. And when I'm looking at things that I'm going to
make into a book, I tend to want things that don't require the finishing spray. So that's why I'm not leaning towards oil pastels
or soft pastels, which I like love love. I feel like this
might be too much. Let's do it
somewhere, maybe not. Wow, look at that. Okay, I like that.
Surprisingly enough. Maybe I'll just turn
that into some circles. It's nice as a little
adder onto those. That's fun. This
has some ink on it. Again, just fun and
mark making and play. Nothing specific,
anything you've wanted to experiment
with, let's do it. Let's experiment with it. Let's see where it goes. I've got some black. Let's
just put the black in here. That was a brave move. Brave move there. Oh my gosh. Then you might
look at something and think, Oh, no, you did the
wrong thing there. But keep in mind, we're going to separate this into
different pages, and so when we're done, we're not going to see
that big thing I just did, we're going to see other stuff. And it pulls in the black from our color
palette, which I like. Oh, that's super fun. This is your time to get crazy. Crazy, crazy? Here's some gold. I like some gold.
Let's do some gold. Okay, so hot pink is
a fugitive color, it's a fugitive color,
no matter what. No matter what. No matter what brand you get, hot pink is a fugitive color. But I'm feeling like maybe I want some splash
of pink in here. I don't know why. I'm just
going with that flow. I want to just kind of feeling like I just wanted
a touch of it in there. And it might not be
the right choice, but this is the time to
experiment in place. Don't worry about did I
make the right choice? Liking it there. But just know, over time, we know that hot pink
is a fugitive color, no matter the brand, whatever that pigment is that
they do with that, it just does not hold
up to the test of time. But I like it. And I
put it in here anyway. And we're gonna take
a picture of it. That way, when it does fade, we'll know what it
originally looked like. Look how fun that is, though. Oh, my gosh. Ah, super fun. Okay. And then once you get to a point where you're
like, I don't know. Did I go too far?
Do I need to stop? Once you get to a
point like this, I do want you to
go ahead and stop. We're going to cut this
up. We're going to let this dry because some of
this ink doesn't dry. So that's the bad thing
about acrylic ink, it takes longer to dry. But once it's dry,
we're going to cut this up and make our book, and then we can see where
we're at. So I'll be back. All right now I've let this dry. And what we want
to do is cut this into three long
strips equal size. This paper is 18 " wide
by I think it said 24. Yeah, 24, it's two feet
this way, 18 this way. I'm going to cut it
into six inch strips. I'm going to take my ruler and just mark where that 6 " is. And mark where the 12 " is, and then I'm going to come
down a little further and do the same thing and then
line those up and cut them. And hopefully we'll be right. Don't get hung up and
stressed if it's not perfect. It doesn't have to be perfect. Perfect is not the goal. Showing up and creating,
that's the goal. I'm just going to line those up. And then take my utility
knife here and cut those. And I'm just
checking size there. And then all we're
going to do, and I've got a metal ruler here with a little bit higher
lip and I like that because I'm less
likely to cut wood. If it's a wood ruler
and I'm less likely to come up onto say my hand. Okay, so my cutting mat
is not long enough. I need a new one 'cause I like working on these
big pieces of paper. I may need to go get
me a bigger cut mat. Had this one for, like, forever since, like, forever, forever. So I'm just gonna line
that up again and then finish that out. Here we go. And then I'm gonna cut one more strip,
and then we'll be set. And
5. Assembling Book: All right. We got all three
of our pieces cut now. You got to think for a moment, which do you want to
attach to the cover? For instance, if we look at one of the other
ones that I've made, we can see that we're attaching one of the
very first page to the cover. In our case on this one, I want this backside to be the backside
attached to the cover. One edge of this will be
sacrificed for the cover, and then the front side, I want to be the
part that I painted and that I created
the book from. We have to think that this needs to be folded that
way when we're done. So as I'm thinking about it, if I fold it this way, because you're going
to have three folds this way and then this way. So if I fold it that way, and this would be
back here, obviously. So we're making a double UR andM or if I fold it that way, the wrong side is facing out. This is the side that
would attach to my cover. And this would be the inside. So what I wanted to do is
if I fold it this way, this side would be
sacrificed to the cover. So that's what we
are looking for. So you're going to
take the good side of the art and you're going
to fold it in half. And we're going to just press it down and then that's where we're going to use
our bone folder. Depending on what materials
that you use on here, you might want a piece of wax
paper so that when you're flattening that with
the bone folder and you could do it with your hand and you can
do it with a spoon. But I'd put a piece
of wax paper here so that while you're
scrubbing back and forth, flattening that out,
you're not scrubbing on the art itself and
making anything run. Then once you've
got that in half, I want you to fold this
side up and again, we'll just press that down
and remember those crayons I use take 24 hours to be
completely dry and permanent. So definitely need a piece
of wax paper for that. And then we'll just
flip this over. And just press that down. Again, we're not
looking for perfect, but we are looking for
good enough, basically. Doesn't have to be exact because I might not have cut everything
exact and it's okay. I'm not I don't get stuck on whether everything's
perfect perfect. The fact that I created
it and we got to a finishing point is
a lot to be proud of. Press that down. And then we'll just fold all three
of them just like that. We could go ahead and do
the other side before we press both of
those sides down. If that one's ready. Now we're ready to
attach our pieces, but look how good that
looks from this side. Where's that side? Oh, my gosh, now I'm getting super excited. And I have an up and down on
mine because I used words, and I want the words
to be up and down, so I just need to decide
which one do I want to sacrifice this front
edge to be the cover? Which one looks the best or
which one looks the worst? Which one do I
want to sacrifice? So I think this one I'm going
to sacrifice to a cover. So I want that to be the end. Basically, what we're
doing here is we're now going to attach all of these. And I got off on my cutting. I don't worry about that
because we could trim that just a tiny bit to
make it look like it was supposed to be that
way when we get to the end. I just don't get hung up on mistakes or if I didn't
get something cut straight. I like wonky, so wonky, it is. And what I'm going to
do is I'm going to sacrifice an edge on this
backside to the tape. If you wanted to do it
without the tape, you know, you could kind of fold one of these one way
and fold one the other way, and then sacrifice an edge. So if I had folded these
back the other way, let's say I had folded
it this way instead, I could have sacrificed one
of these edges just like that and glued this
page to this page. And then they would have kept
going with a glued edge. So that's one way
to do it. You could just sacrifice a page
and glue it together. And then this one
right here would also this page would
be glued to this page, and then the book
would continue on. So that's one way that
you could attach these if you're going to be bothered
by the tape on the backside. I thought I would
just throw that in. But when you do that,
two of these are folded the same way and one
of these is folded backwards. So we folded it originally that way to make the blue work, you got to fold it this way where you've got that just
opposite of those two. But I'm going to do
the tape method. So basically, I'm going to tape all three sections together, end to end to end, and then
our fold will keep going. So that's what I'm gonna do.
You've got choices there. And then there's
also where you can, like, do a tab and
glue it to the tab. But I'm just not going
to get into all that. I'm going to do this and try to get it kind
of centered there. We can see right
there where it's in the center and
then flip it over. And then I'm just going to line. This is why I like
heavy duty like a Gaers tape or a book tape. I'm going to line
these up really good. So that we're
completely even there. And I can even take
my bone folder and a piece of a wax paper, and I can really
get that down good. And then I'm just going to
take a pair of scissors, or you could use your utility
knife if you needed to, but I'm just gonna
take a pair of scissors and cut our tape. And this is the one where I've
got the edge slightly off, so I could come back with
a utility knife and really even up this edge or I can
just do it with the scissors. So that at the edge, there's not that gap there. That's how if you do cut them crooked, that's
how I fix it. You can get creative there
with how you fix it, but just trimming it so
that the two sides match, you don't even know it
when the book is done. And then it just
folds up nicely. But this is what you end up getting on the back side.
You get a piece of tape. So if you want to do the
two pages glued together, then fold the center one
opposite of the way you fold the end ones and you
can tape the pages and just sacrifice two of your
pages. I don't mind the tape. That's why I already knew
I was going to do that, already had it in my plan. And then this is what the
backside is looking like. And, too, you could always
come back with a black marker, a paint marker,
and decorate that. I was kind of
thinking that myself. I might decorate that,
washy tape that. You can put all kinds
of stuff there. You can get real
creative. Alright, so now we've got one more of these. I. All right. Once we've got it here, I might give it one extra press. We're ready to make our cover. All right. So this is the
page I'm sacrificing, and this is the page
I'm sacrificing, and we're ready to
make our cover. So we've got the
bookboard that we are going to cut
into the right size. And basically, what
I'm going to do is take my book and give it about a millimeter of space on this
side, just a little bit. I don't want the
cover to be gigantic. I don't want it to be so much bigger than the whole piece. I want it to be
fairly the same size. So I'm going to
take my pencil and just kind of mark off the
size of the book here, and then take my ruler
and I actually have a fun plastic T square because
I did drafting in school, and so I like T squares. And I'm basically just going to give myself a straight
line all the way down. And that'll kind of
give me a chance to line it up and make sure
it's lined up right. And then I can kind of
see what size that is. Go six and a quarter
and six and an eighth. Hm. So really, if I move
that line to right here, then they'll be the
exact same size, and I don't have to
measure it again. If I move it to right
beside it, let's see. Let's do that, and then I don't
have to measure it again, then it'll just be a smidge. And that way, I'm using
the equal parts of that. Then we're just going to cut
that with our utility knife. I've tried lining it up with my little T square and
using that to cut, but it's so flimsy that I just every time I do it,
I mess it up somehow. So the big metal rulers
really are easier. Now, this bookboard or the
back of the sketchbook, whatever you're using is
so thick that you want to run that knife a
couple of times. Don't try to force
it the first time. Just run it until
you get it clear. Alright. Now we've got our books cut,
the front, then the back. And you can just check the size and make sure that they're
going to be the right size. I like to check and make sure I've got them
the way I cut them. So I didn't switch one around,
but it should be square. But I like to just
double check back too. And this is going
to be our front and our back then looking
at the colors inside, even though I don't have
a lot of pink in here, I'm wanting to use
this hot pink. So, you know what? I'm
just going to go for it. Doesn't really
have to be exacty. But what I'm going to do
and I've picked a ribbon. I think I'm going to
go for this ribbon, which I have cut. To about let's
see, there's 18 ". And so 18 " plus 15 ". So 33 ". So I've cut it to
about 33 ", which, if I'm looking at this one, that's about what I cut it at, which made it about one like, almost three wraps of that. And that's what I figured
out was long enough because the first ribbon I'd cut for this book was too short. So about three wrap arounds is a good size if you want to
keep that in your mind. And then I'm just going to go
ahead and use the hot pink, and I'm going to cut it
a little bit larger. Then my bookboard doesn't
have to be perfect because it's going to be the seam there will
be on the inside. So don't get hung up on it being perfect on the
inside that we glued down. And then I've got that. And then what I'm going to do is take my glue
stick and glue down each of these boards to this. And what you might do too if
you forget, like I forget, which side is up and down, just to make sure
that you kind of keep them going in the
right direction. Okay, that was the right
direction, I believe. We're going to totally forget. But once you get them
going the right direction, you might just draw
on it so that later, you'll know that
was the right way. When we glue it on our
book, you won't see that. But just having that on there will help
you keep it going. I'm going to glue one of
these down to the paper. I'm going to glue both of
these down to the paper. Just a nice layer
of glue on there. You can use any glue
that you've got, yes paste, that PVA glue, any glue sticks are
fine, gluing them down. I want to still see
the arrow I just drew, keep that where you can see it. And in the center,
doesn't have to be exact. Then I'm going to go
back to the first one, and I'm going to cut
out a little area here, in a slight Y shape and giving myself about a
millimeter or two right here at the corner because I'm going to fold these over
and that's going to give me a nice corner without
shorting myself, hopefully. We'll see. Sometimes I do it and sometimes
I short myself. All then once you get
your four corners cut, let's just go ahead
and do both of them. It doesn't have to be perfect. Don't get hung up
on perfect there, because we're gonna it'll
show up on the inside. And the outside will be perfect. I like perfect, but I don't
mind if it's on the outside. Then I'm just going to glue each flap and I'm
going to pull it from the two sides and
then the two ends because if you're using a
paper that's likely to shift, this will at least shift it
all in the correct direction rather than pull it as you're
going around your piece. Again, this will
be on the inside, not even trying to get
it to go edge to edge. I'm okay with it
being at least mostly stuck down because we're going
to stick the whole thing down and then it'll
be nice and secure. Okay. And then now I still know. See, there's the front. Perfect. And the bi doesn't
matter. Um. And I can still see my arrow so I can get it going in the
right direction. You don't want any big
globs of glue stuck out there because
it'll make a lump on a lump under your paper. So try to get any
globs out. Okay. Then you see that arrow will keep you kind of going right and there
we go. Perfect. Now, I just got to make sure we're ready to stick
our first one down. Generally, what I do for this because I don't know
exactly where it's going to land over here is I'll just take a piece
of wax paper just in case I get any glue on the outside of this and I'll
just put it right here. I'll put the glue on
this side because that's what we're
going to be gluing down to our cover there. That's the side I
decided to sacrifice. And I just cover the
whole thing really good. And now we are ready
to put that down. I'm trying to This is the
way it's going to go. So I'm trying to get
as far over here as I can without being over and then it's centered in
between the center because I'll have just a
millimeter or so of space. So I'm kind of looking at
it from this side, usually. If I open that out of my way, I can see exactly where
I'm putting it down. You can see I'm putting
it down right there, where I've got it
centered on both sides. I got about as much on this
side open as that side. And then I'm just going to go
ahead and press that down, and then I can
open this back up. And if we need to protect it with a piece
of paper, we can, preferably not the one
with the glue all over it, which I am definitely
likely to do. Then just take your bone
folder and smooth that down. And then when we're all done, you can see we have
a nice edge there, nice even edge all around, and right there, so we can
see how pretty that is. Then we're going to do the
same thing for the other one. Again, I'm going to
glue this piece. Let me get this in here just to protect the underside because sometimes you just get a
of glue that sticks on the side of the paper
and I just don't want that to stick down. Then whatever art supply
that I've used here, this is glue friendly. Once it's dry, if you're
using an oil pastel there, that's probably
not glue friendly. Keep in mind what art
supplies that you're using, maybe use glue friendly ones
and I got that going up, so hopefully I did the other
one going up. I don't know. You might have saw
that and thought, we're just looking, wait, before we do that, this is the back and I
want the ribbon. Before I get this glued down on the back side, we
want the ribbon. Determine whatever side
is the bike for you. Then right across
the middle of this, glue this ribbon in as
close to center as you can. Alright, so you got
to do that first. You can't forget that or you won't have a
ribbon on your thing. Okay, now we're ready to
kind of line this up. Visually kind of get it centered and kind
of straight there. Hopefully I got the right amount of space compared to the front. And then I'm going to take my wax paper and smooth down
again with my bone folder. And yes, we have the piece of ribbon in the center of
that, but that's okay. I might have gone
the wrong direction with the ribbon now
that I see that. Be creative with your ribbon. I got one running
in one direction on the other book and this one
run in the other direction. Ah. That's okay. Yes, I do. I have it going the
other direction. But look at this. Now
we can tie it off here. So be creative. It's okay. If you get one going one way
and one going the other way, it just kind of adds
interest to your piece. So, like this one
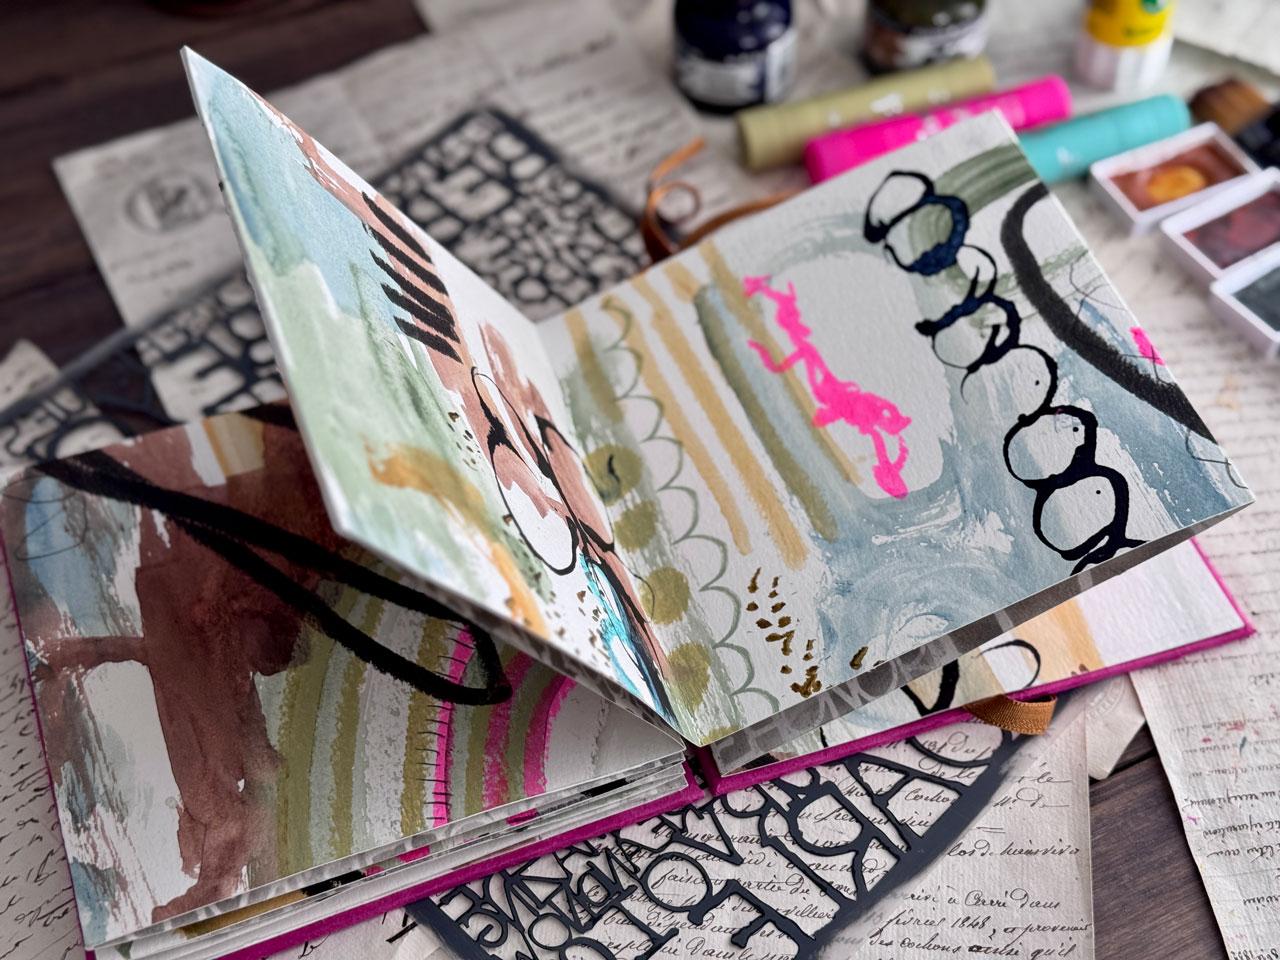
goes side to side. And this one goes up to down. And then as we open our book, look what we have created, and you can see now how all
the different elements that we created add interesting
things on each piece. So let's just look at these. I'm cracking up on my ribbon. But it doesn't matter. I
mean, good point of that, and I'm glad now that I did that is it doesn't
matter, really, which way that ribbon goes, 'cause when you go
to tie it shut, it doesn't matter
if it's up or down or side to side. That's funny. Here's a side to
side one. I'm going to crack myself up now. I love that I got the
pink cover because it pulls the pink that we've
got going through here. Then we can look at
each page and evaluate, does this page need some more, and we can then come back and work on these pages to give them some finishing elements
and complete them if we think that each page
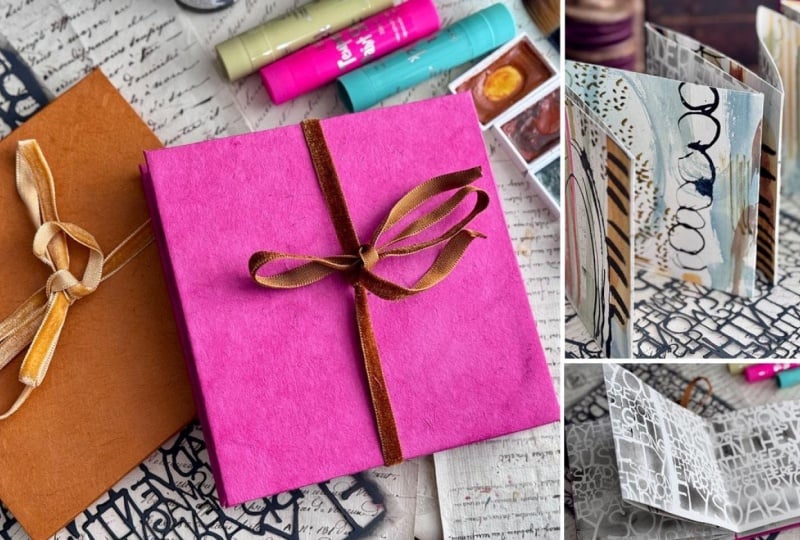
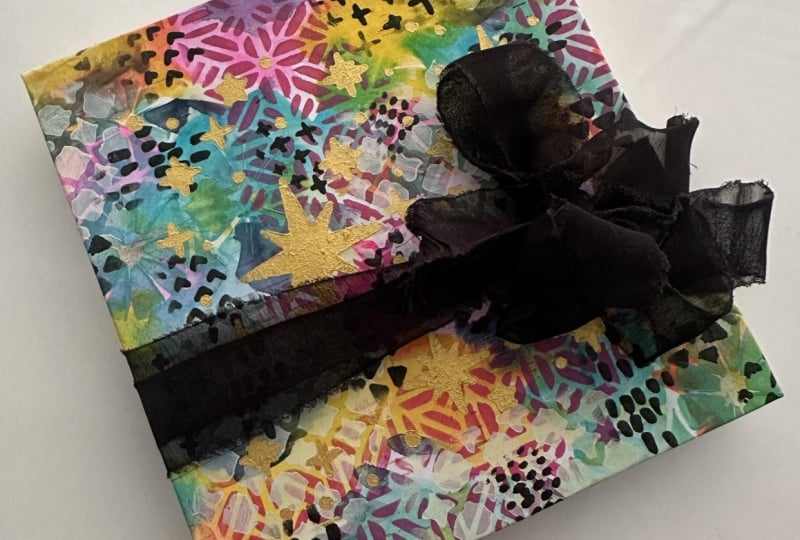
needs a little bit more. Then the fun thing about these is Ah, now we have a backside. And the backside is super fun. And we can come back
and we can decorate the center with some
washi tape or with some designs, drawings, doodles. But I like it because
I use tape that was the same color as what I decided to do back there, which
you could certainly do. If you do some wild and
crazy thing in the back, pick a color of tape that
would complement that. Um so I love that. Both sides now have cool stuff. How cool is that?
And a fun closure. Just kind of crack
myself up with my little ribbon there.
But look how fun that is. So whether you do it side
to side or top to bottom, don't get discouraged
and think you did it the wrong way because
look how cool that is. Alright, I hope you had
fun with this project. I can't wait to
see your projects that you do with
something like this. This I'm definitely going to continue making
more of these. It's so much fun. I love this. I love looking through
these. These make me happy. So I hope you enjoy making one
of these concertina books, and I'll see you guys next time.
6. Final thoughts: I hope you had as
much fun creating this mixed menia
concertina book as I did. This project is a wonderful way to experiment with abstract art, layering and bookmaking
while giving you a beautiful interactive piece to continue working
in or display. Remember, there are no rules. Just play, explore,
and enjoy the process. I'd love to see what you create, so be sure to share your
finished book and thank you for joining me in this
class. Happy Creating.
 DENISE LOVE, Artist & Creative Educator