Transcripts
1. Introduction: Hello, everyone. In this class, we're going to create
a mini art journal that's as unique as
your creative style. Starting with a vibrant
mixed media cover, we'll use watercolor
acrylic paints and paint markers to add layers
of color and detail, incorporating beautiful stencils
for texture and design. Inside we'll sew a
signature of pages to the cover using an easy
chain-link bookbinding method, perfect for beginners and
experienced makers alike. I'm Denise Love, an artist
and creative educator, and I'm excited to
bring you this fun and exciting dive into
handmade art journals. This project combines painting, mixed media and
bookbinding techniques into one creative adventure. Get ready to bring your journal to life. So let's get started.
2. Class Project: Last project is to create your own mini mixed media art journal
from start to finish. Begin by designing a
unique layered cover using any supplies
you have on hand, including watercolor,
acrylic paint, paint markers, and stencils
to add depth and texture. Then assemble the journal by
sewing a signature of pages inside using a simple yet beautiful chain-link
bookbinding method. This project is perfect
for exploring color and texture and bookmaking while crafting a one of a kind
journal for sketching, collage or creative play. Share your finished journal and the process photos to inspire others in their
creative journey.
3. Supplies & Getting Started: Take a look at the
supplies that you could consider using
for this project. I definitely encourage
you to use what you have. This is a fun project
that could be used with any papers and any paint
supplies that you have on hand. Then we do need a few
bookmaking tools, but they're small
and inexpensive. You'll need some waxed thread. That's what I find
works best with the bookbinding so
that the thread um, doesn't tear over the
years from use and stuff. I like the wax the book thread comes in several
different colors. You could use embroidery
thread if you wanted to, but it's not wax, so
it's not my favorite. But this is what
I look for there. Also, you'll need a great
big embroidery needle, the great big ones like
an upholstery needle or embroidery needle
that works best. With the bookbinding,
you'll need an because we're going to be
punching some holes and a bone folder so that we can press everything nice and tight. That's my book supplies that
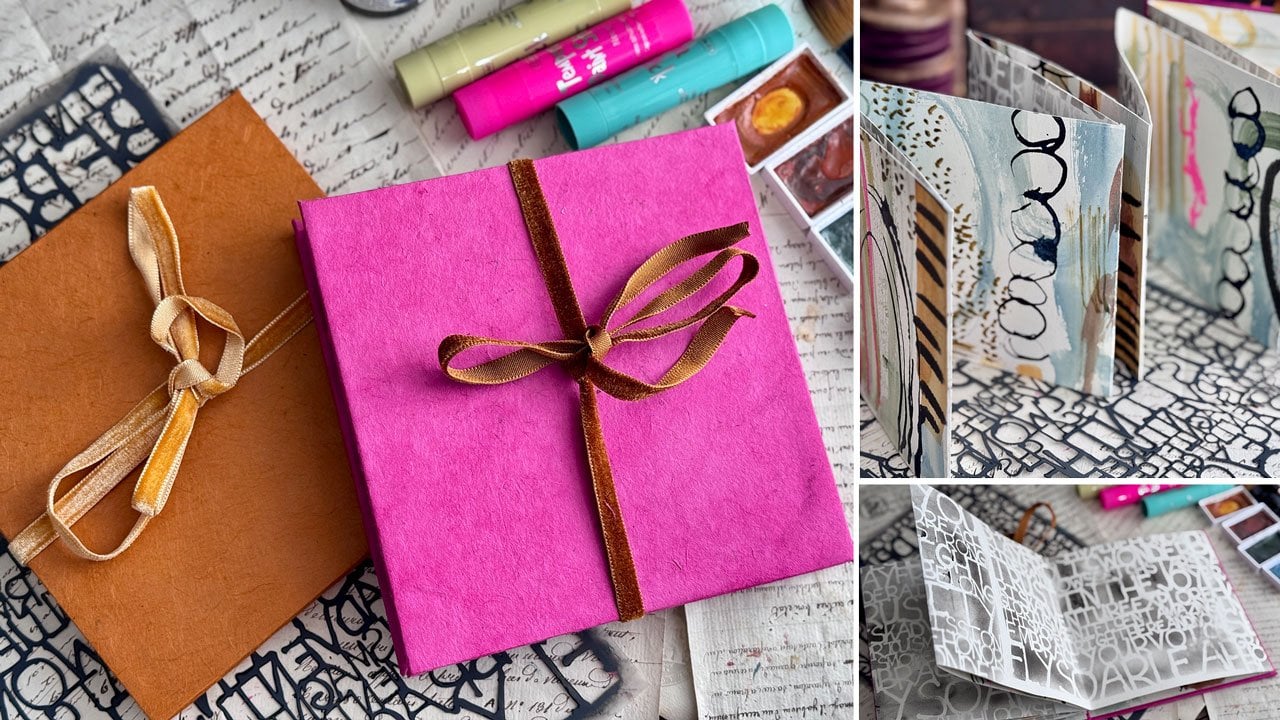
we will be using in class. We'll also need some paper for the inside and some
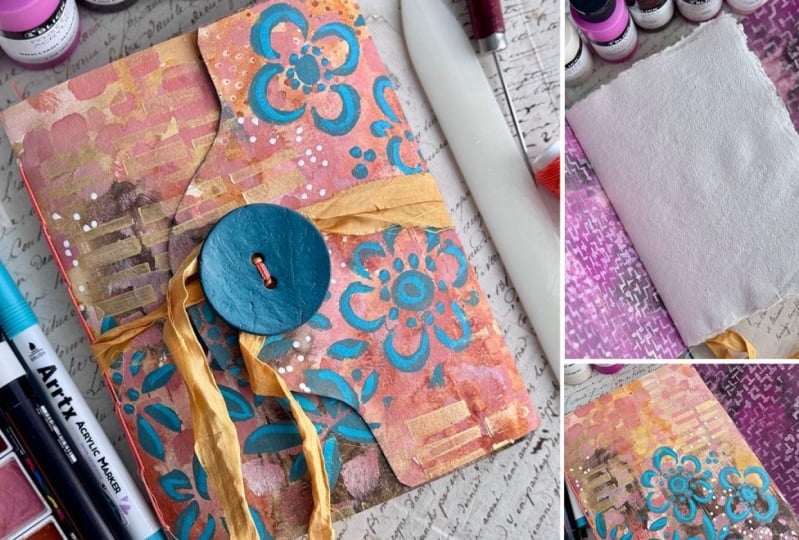
paper for the cover. This is basically the setup that we're going to be creating. We have a set of papers on the inside and then we'll
have a cover that we paint, and then we'll have
it stitched together. And I like a flap, so I made a flap for this one, and that's the format
that we're looking for. So any kind of paper that you want to use on
the inside is fine. I also have some
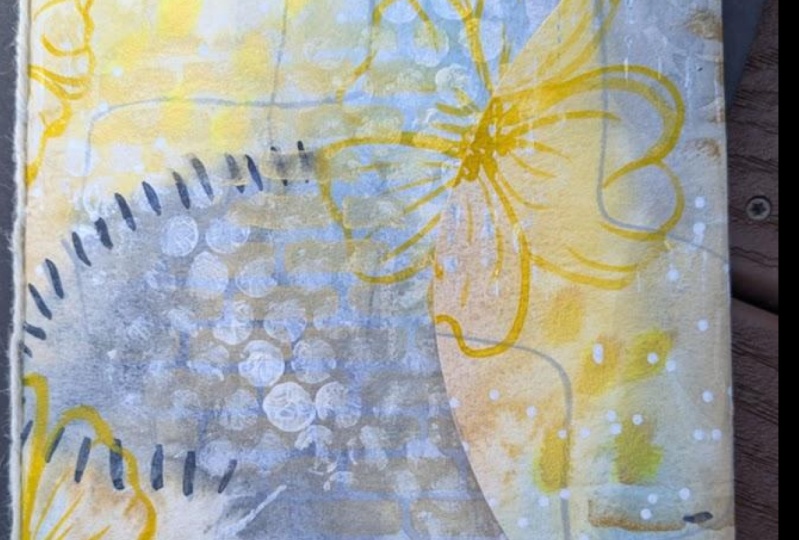
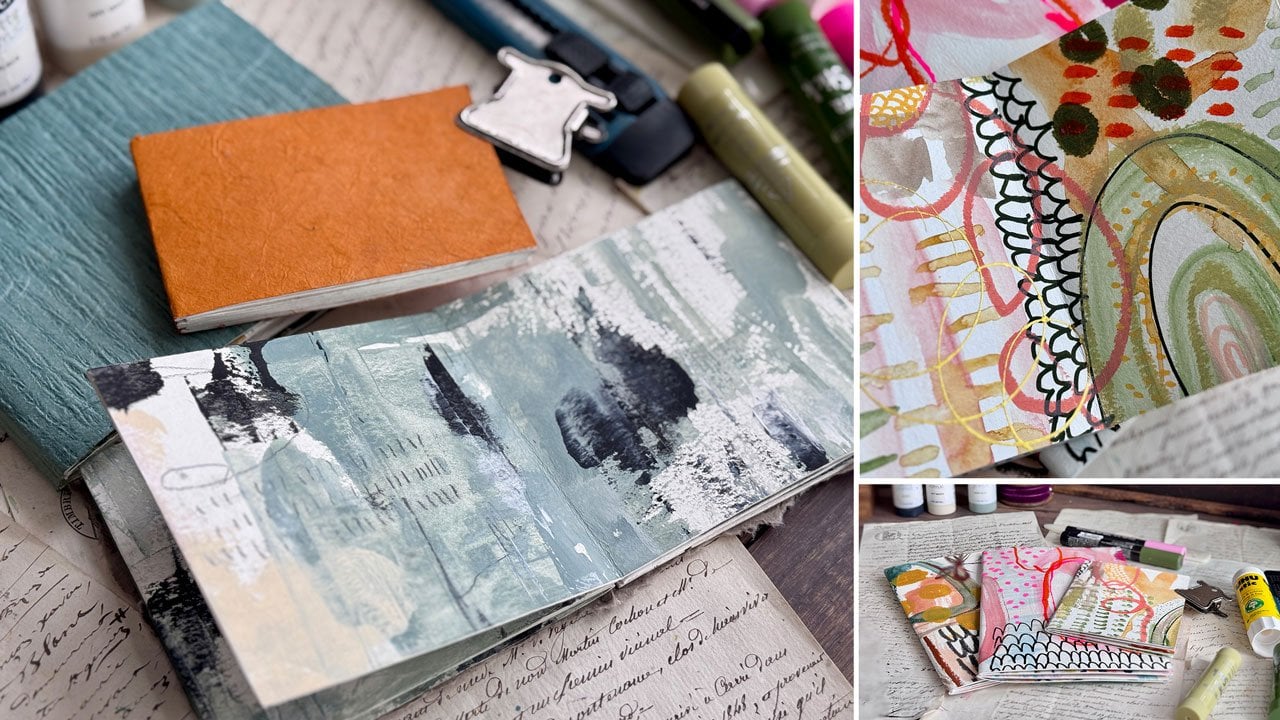
other art journals that I've made in the past. This one is randomly
all my wax papers and kind of junk papers where
I just had paint run off, and I can go back now and add to these and collage and
paint and do fun stuff. So that could be, you
know, a fun option, and it's a cover
that I've painted, and it was just kind of
leftover a leftover sheet. You could also do this is an old a photograph portfolio or folio cover that I've
got some ribbon on, and you can do things like
fun pockets and stash art. You can do wax paper, different papers, handmade
papers, vintage papers. So you can do art that
you've already painted. You can use antique
papers in there. You can print off copies
of antique papers and use that if you don't want to use old papers like the originals. But that's another option of your papers that
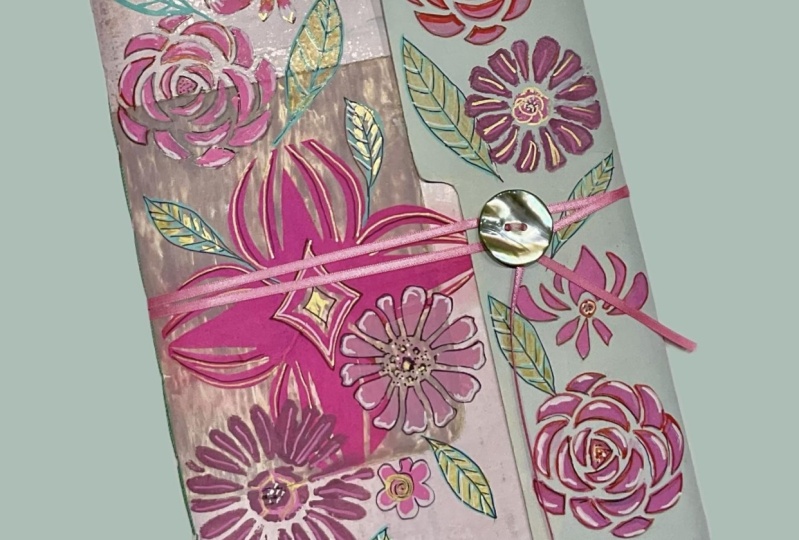
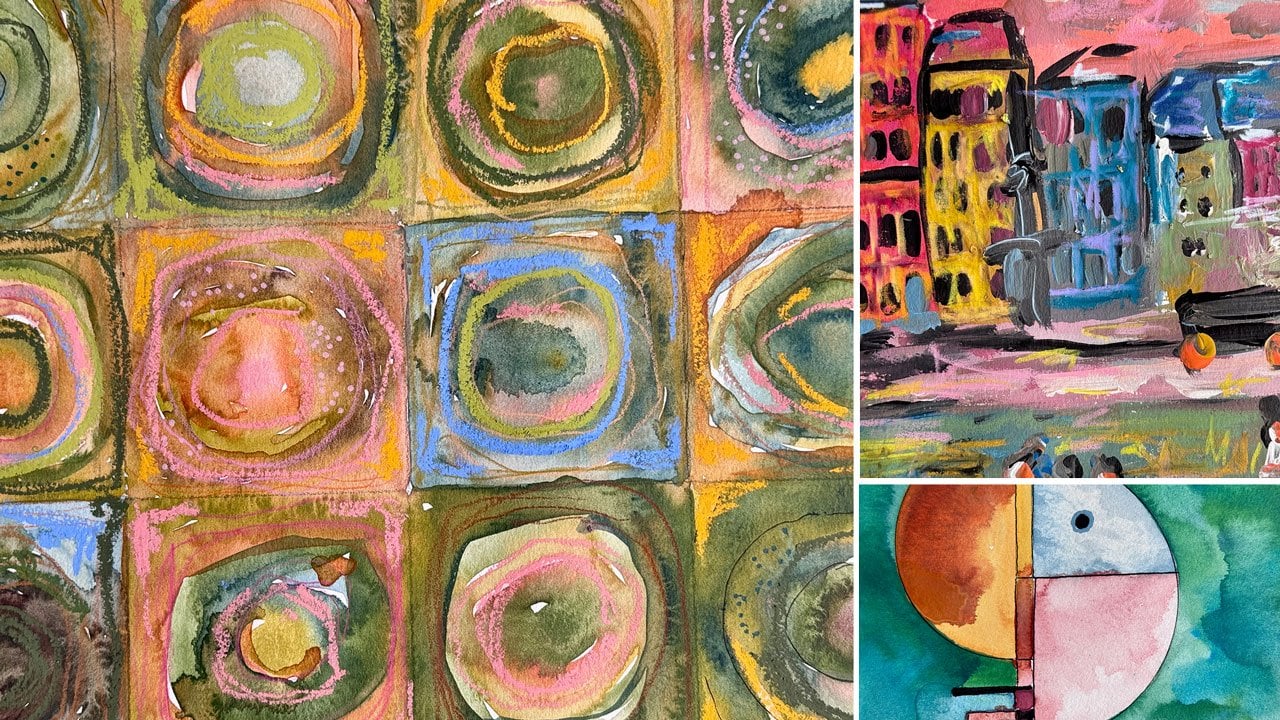
you could look for. Another thing that I've done in another book that I've made is use the vintage
papers as, say, the outside and some
handmade papers further in, and this is made with a
nicer watercolor paper because I like to paint on nicer watercolor
papers in my journals, and you can see different
papers and fun elements that I have included in
my signatures for that. So you can get as creative
as you can imagine. So for this project, I'm going to be using
some handmade papers from the Leather Village. Uh, you can use any of your watercolor papers
that you've got on hand. What I liked about these
is they were already torn, and it was a fun size, and I wanted to try it out. And because I already have
this in my paper stash, I decided I'm going to pull that out, and I'm
going to use that. I'm also going to
be using a piece of Canson XL water paper.
To do my cover. So if you want to do
the whole book in Canson paper, you can
certainly do that. You don't have to have
different papers. I'm going to be using
a color palette. I like pulling a color palette
initially when I do stuff. This is from the color
cube volume two by Sarah Renee Clark what I find
by picking a color palette. You can find color palettes
online very easily. Um what I find is
this gets me over one of the hardest parts
of art making for me, and that's What color can I use? Where should I even go
with this to get started? Even though I may veer off
of this color palette some, I do like it to help me
narrow everything down because I like all
the colors and all the supplies and when
you have too many options, you can almost be paralyzed
from too many options. This helps me narrow those
down into a direction. I'm using today, I'm going to be using the KatakiGanzi
Tam Bi paints. This is the art nouveau
set and the 48 piece set. I have both sets because I like to do color
palette challenges and I have pulled colors
out of each one of those to at least
get us started. I'm going to go for
47 raw umber deep, 46 burnt sienna and you can use any brand
of paints that you got. I just like these. I've got four oh
two Mars yellow. I've got 44 yellow ochre. I pulled a pinky color out
for this 17 coral pink. It's as close as I could
get and I liked it. Then I thought, what
if we had a pop of a color in here like Rose
matter Deep number 36. I might not like it
and I might like it, but that is where those
thoughts pushed me like, what about this?
What about that? Then move this off my table. Then I'll be using a variety
of Joggles stencils. After I paint the cover
and get that started, I'll be using some
stencils and some mark making tools like markers or pasca pins or anything that you've got that you like to mark make with. But I just have a variety of joggle stencils to pick from, and I actually have a set, which is part of the Elizabeth
St. Hilaire Joggles set. And these are patterns for
laying her stencil collection, and they are available
individually on the site also. I have some of these already, but I decided to get some
fresh new ones because I love stencils and sometimes
I just beat them up, so I thought, t's start fresh. But look at all these patterns. H. Oh, my gosh. These are so exciting. I can't I can't
wait to use these. So then I got a fun
flower one a why not? And then I got a fun
Jim Tim Holt's stencil 'cause I like the ones that look like bricks and patterns
and stuff like that. So that is the direction that I am going in today's video. I'm going to have lots
of options to pick from. And let's just get
started painting. So this is one of
the bigger pads. It's a 12 by 18 size. And I know that with
the paper that I've picked and played with a little bit and then
had in my closet. I know that this is supposed
to be seven by 10 ", but it's various sizes. Seven ish by ten or 11 " ish. But what I want to do is pick
out my pages that I want to use as my signature because
I'm going to kind of use it as a rough measuring
tool for our books. So one, two, three, I'm going
to make six pages, four, five, six, that'll give
me six pages to paint on. And this is 100% cotton paper, which I like to
use cotton papers. So anytime I see, like, a handmade paper
or cotton paper or anything that's like got
some pretty edges on it. I can also use the Honamule which is my favorite
paper to paint on. I could also use the arches. I can also use the
Canson paper and just tear all the
pages out and give myself a lovely set of
torn pages to work with. But I'm going to fold that
in half and that's going to tell me what size my
book is going to be. I'm just going to use my bone
folder to get that really, really nice and folded. Then this is going
to give me kind of just a rough eyeball of is this paper big enough
for what I want to do? And so I already can
see that if this is the front and then
this would be, say, the back, then this would be the flap cover that I'm wanting, and I can then choose how much of that
flap I want to use. So it's perfect.
This paper is very obviously larger than
what I actually need. And I did that on purpose
because that way I can paint all over it and not really worry
about what I'm doing. I can do any design I want. I can play and just have fun. And then we can make
stencils all over it, and then we can pick our favorite section
of that basically. I'm actually going
to get started. I'm just going to
wet down my paint. I'm going to be using my
Princeton Neptune brushes, this great big one
because I love it. This one I actually have
something stuck in it. Let me just see.
There we go now. Then I've just got some
water off to the side here. I'm just going to paint
the whole thing and then we're going to
have to let that dry. But I also want to
paint the inside. What I might do is paint the inside with
some acrylic paint because I've also
pulled some paints out. I've got some acrylic
paints out here in the blick paint because I like the I like the matte paint. This is a black mat off white. I've got some brown. Then I was thinking this deep
pink might be fun. I'm almost wondering if I just go ahead and
let's just get crazy. Let's paint one side,
and then we'll go back. That was a lot of paint. Then I will go back with the
watercolor on the front. This is the back side. I'm not trying to get anything
specific here. I'm just wanting
something crazy. What if we take a Bear. And brayer all this on and
get the whole thing painted, something wild and crazy. And then we'll have to let that dry and then I'll flip it over and paint
on the other side. And remember, I'm not going edge to edge with my book cover, so I don't have to paint
edge to edge either, really. I'm just thinking that this would give us a
fun, interesting, weird combo of colors
using the brayer. And I could have
even got it a whole lot thinner with putting the paint on a sheet of paper
on the side and done that. That could have also
been where we went. But this is what I did, so
it's where we're going. And then once I've got that painted and covered
where I want it, we're just going to have to stop a moment and let this dry. That's pretty cool, actually. If this is the inside of
our book, that's neat. So paint the inside
however you want. You don't have to do this. I just had an idea in my
mind this would be fun. I'm going to maybe grab some wax paper so I don't
paint onto my table. And then we're going
to once you've got the inside painted with a paint, go ahead and let that dry and then we're
going to flip that over and use it and
paint the other side. I'll be right back. This is almost dry and I was
thinking and I went back after it started
to dry and ran the brayer across it again
to pick up some paint, which is pretty cool
because now you can see some underlayer in there. But I thought, this
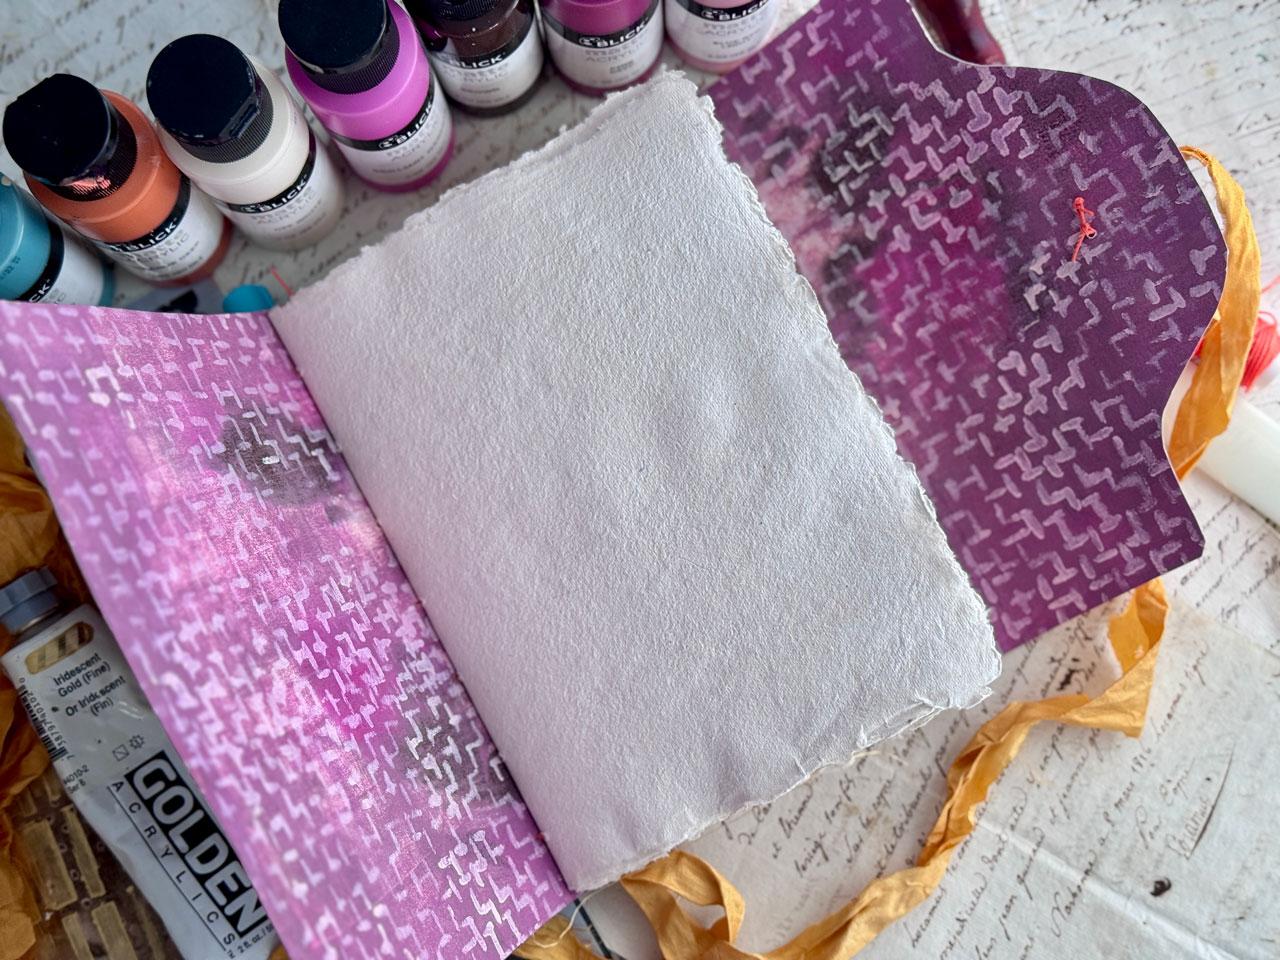
is the inside still? What if we stenciled
on the inside this is focus on the positive by Elizabeth St.
Hlai on the jog site. What if we did an all over
stencil pattern on this, then that would be a fun
inside pattern on here. I actually like to stencil
with little sponges. You can use whatever favorite stencil thing that you have. I'm just thinking maybe
off white or cream color. I'm not looking for
perfection here. I'm just looking to cover all the stencil here and you
can use stencil brushes, use whatever your favorite
stencil thing is, I got a dry sponge and I'm using a thin layer of paint
just to get an all over, very slight texture on here so that it's not
just this pattern. Let's just see what that looks like. I'm just going
to hold it down. What? That's exactly what
I wanted. Oh, my gosh. I'm going to go ahead and
do the whole thing here, and then I'm going
to let it dry. You've got a couple layers that you'll be doing
and then you'll want the layers to dry
before you move on to the next thing. That's
what I'm going to do.
4. Painting Cover: Alright, so this is now
completely stenciled, and it's dry enough. It's mostly dry. And I'm going to
flip it over, and I'm gonna paint on
the front side. And it does not even matter that I've managed to somehow
magically get paint on this side because
it's just going to add to what we're doing. And it's not even gonna
not even going to matter. Just be aware when you're
painting like I did, you may get some
paint on both sides. But to me, it's not a big deal. Then what I'm going
to do with this side. It's like extra mark
making before you get started is I'm going to use my watercolors and
I'm going to paint the entire sheet of paper
just like I did with the backside and
then I'm going to stencil and then
I'm going to mark make maybe with some extra
paint markers or whatever. You could do the mark
making after the fact, if you wanted to cut
the book cover out and then mark make after
you could your choice there on how you
choose to layer up the different elements that
I'm working through class. But I like to do
it blindly almost because then I can just be surprised with
where we ended up, which I think is the
fun part about painting a big piece of paper
and then cutting it up. I love to cut stuff
up and then you're always amazed or surprised where you ended up
when you're done. So I'm painting the
whole big thing with the colors that we picked and then we'll
be mark making. I'm just going to go ahead
and continue on here with just big splashes of color. You could do a
pattern. You could do like I'm doing and do
big splashes of color. You could be very mindful and cut the cover and then
paint something specific. I mean, it really is just skis, the limits on a
project like this. Let's move into something else. I'm going to go
ahead and continue layering and just
see where we end up. I mean, once you get it covered, you could stop and let that dry. You could then do some
additional mark making. You could come back in
with a brush and make marks or a pencil or
something water soluble. You'll notice when I hold a paint brush painting
with watercolors, I hold it way back at the back and loose like this rather
than holding it real tight like a pencil
because this lets me be a lot looser and
more fun with how I'm painting than I
would normally get if I were holding it real tight
and real controlled. So a lot of people mention the way I hold a paint
brush when I'm painting, but I'm looking for big
abstract painty things. I want that to be very defined. I'm going to get a couple
of pieces of cardboard out and do something
fun. I'll be right back. Hold a couple of things out of my box of stuff I
just randomly save. I've got a piece of
corrugated cardboard. I did not tear this top off
like this. It came like that. It was packaging
that somebody sent me with something in it
like a book or something. What I love about the corrugated part is when we push that down and then set something on top of it and then
let the watercolor dry, we'll get grooves. So cool. I also have shelf liner,
which is super cool, which I could go ahead and
put down right here and then we'll get pooling of the
watercolor as it's drying. You want to do this
while it's wet. Then I got some other
waffle packaging that I thought,
let's just try that. What I'm going to do is
let these all sit here. I'm going to set something
on top of it so that they flatten out
and then I will be back in a moment when this is drier and we'll see
what patterns we randomly got from just
some packing material that you can save every time
you get a box of packaging. All right. I hope we're
dry. We're going to see. I went away I made myself
go away for a minute. Okay, this one wasn't
squished down enough, so we got a tiny, tiny bit
of pattern, but this one, this makes me excited
every time I do it because it creates lovely
lines in your piece. This one creates lovely dots. So if you got the shelf
liner, grab a piece of that. Look at that. Okay. I've got some wet spots
where it's pooled, so I'm going to dry that real quick and I'll
be right back. Alright, I've got this dry. And now I'm kind of thinking, let's see, the other
side still fun. Now I'm kind of thinking, like, look at this when we fold this. Can you see that as the outside and the inside? How fun is that? Ah. Not quite the color way I was thinking it ended up on the inside, but,
man, it's still cool. Now I'm kind of
thinking, What if we did a little bit
of stencil work? And this one is the Elizabeth
St. Hilaire Argyle stencil, but look how cool it
is and it's random, a bit like what we
had underneath. I want it to be subtle. Let me grab a little
piece of wax paper. I just kind of keep this
wax paper stuff on my desk. What if we did a lighter pink. We're still working in our
similar color palette. I'm almost wondering if we throw a surprise color on here at
the end if we'll like it. I've got paint on my fingers. There we go. I don't know
where that came from. I'm thinking a little bit of argyle in there add
to our pattern. I've got some orange. And also have this cream. We could do some little
mixes there and a dry sponge and maybe a little
bit of pattern and then thinking
off the cuff here, but what if we do this
flour one in a blue? The reason why I say that we can test it out and then we
can change our mind. But if you look at
the color wheel and you come over
here to the blue, right directly across
from that is the orange. That's its complimentary color. That's the color that's going
to make it pop the most. I'm wondering what
if I'm just going to mix all these in
my sponge and get, like, a fun different
pattern going in here. But what if we did that
pop of a blue flower? Like, maybe I don't know. Maybe we'll hate it,
but I'm just kind of spitballing some ideas here. So a lot of times
on the stenciling, I don't go wall to wall. I just kind of meander
with it and just see. That's kind of fun what we end up with. And so
that's where I'm going. And because I'm doing this on, you know, a large random sheet, it's really not going
to be able to tell what our final cover is going
to have on it until, you know, we pull that cover till we cut the cover
out, basically. Who fun. Alright,
that's different. I think I'm gonna stop there. Okay. I'm kind of wondering
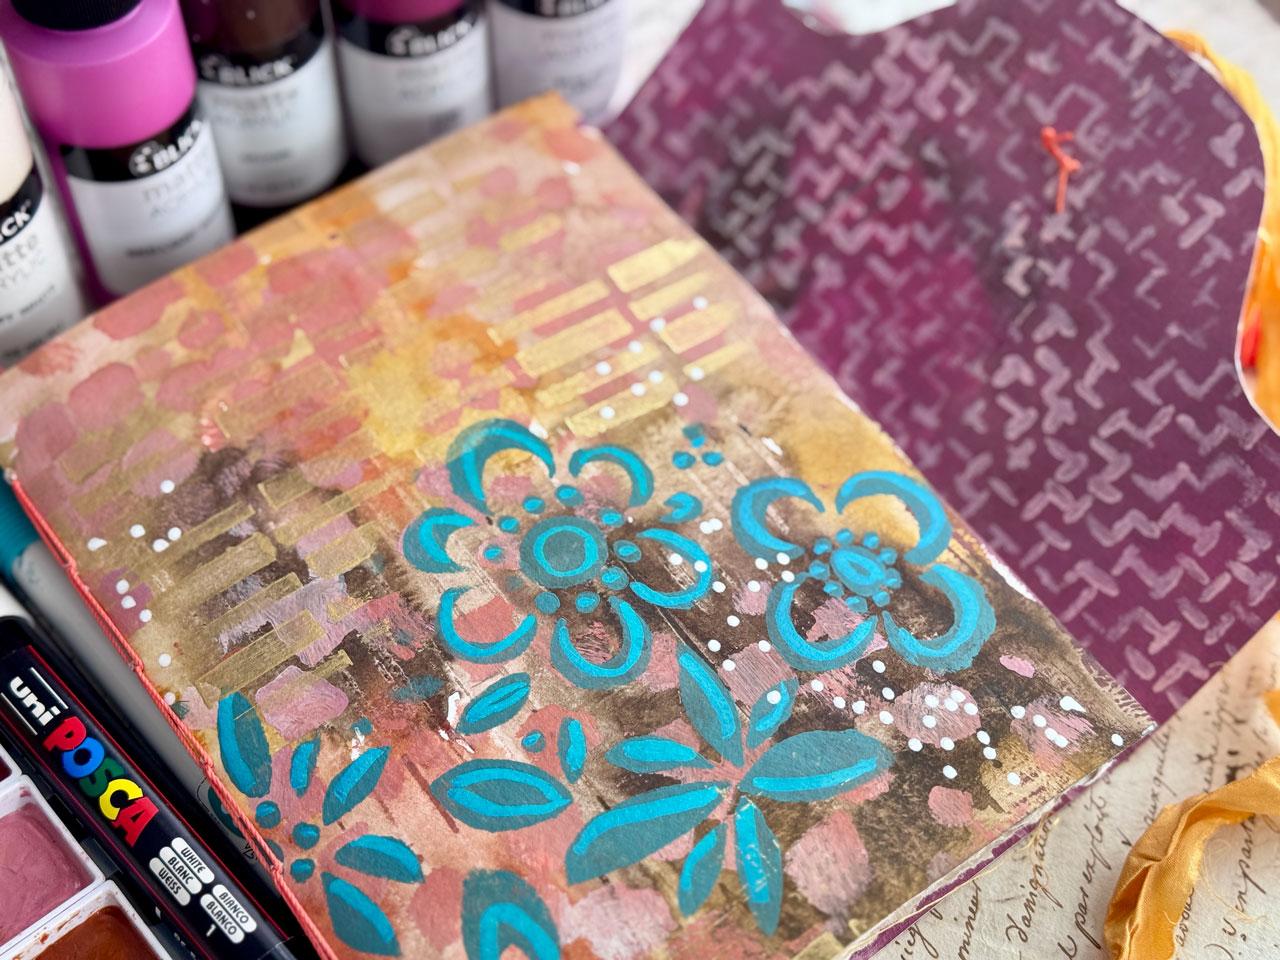
are we gonna like the blue? So this is the Italian
wedding stencil also by Elizabeth St. Hilair. I might just test it
in a corner here. Put a little paint down. This is green, blue deep. This was orange deep. This was blue, red light, and this was off white
in those Blick paints, which I like because
they're not shining. I'm going to do
one down here and see what this even looks like. And if we're going
to love it or not. Then a lot of times
what I do on top of stencils is marker
work with a pasca pen. After that, I'm feeling that. What do you think? Are you
feeling that pop of blue? I think I am. I like
that flower a lot. But I'm going to go
ahead and do a spread of all the different flowers and just let it do its thing. Then I might mark
make on top of this with some paint pens to
give them some detail. I like to mark make on top
of it to give them a pop. And make them feel
less like a stencils, more like a painterly
thing that you did. Okay. I like that. I love that. Okay, good choice. Good choice. Okay, let's do it on this
side. And just play. Time to just play. Okay, I'm going to dry that
real quick and then I'm going to mark make on top of
this with a paint pen. And I just throw my sponges into some water until I
can get them to the sink, and that way the
paint doesn't dry in your little sponge and you just keep using those over and over. That's the little
round artist sponges. I just cut them up and
use those like that. Okay. And whatever paint
markers you have are fine. Paska markers would work good. I also have these little
Arctic acrylic markers that I like, and I like them because they have so many different colors. Move this paint out of the way. So any paint markers
that you've got that you think are the right colors,
you can just go for that. I like these because
there's more color choices, which I feel like I want
more color choices. So this is the Arctic
acrylic markers, which are just as
good as the pasca. There's several brands out there that you could play with. And then I'm just going to decorate and
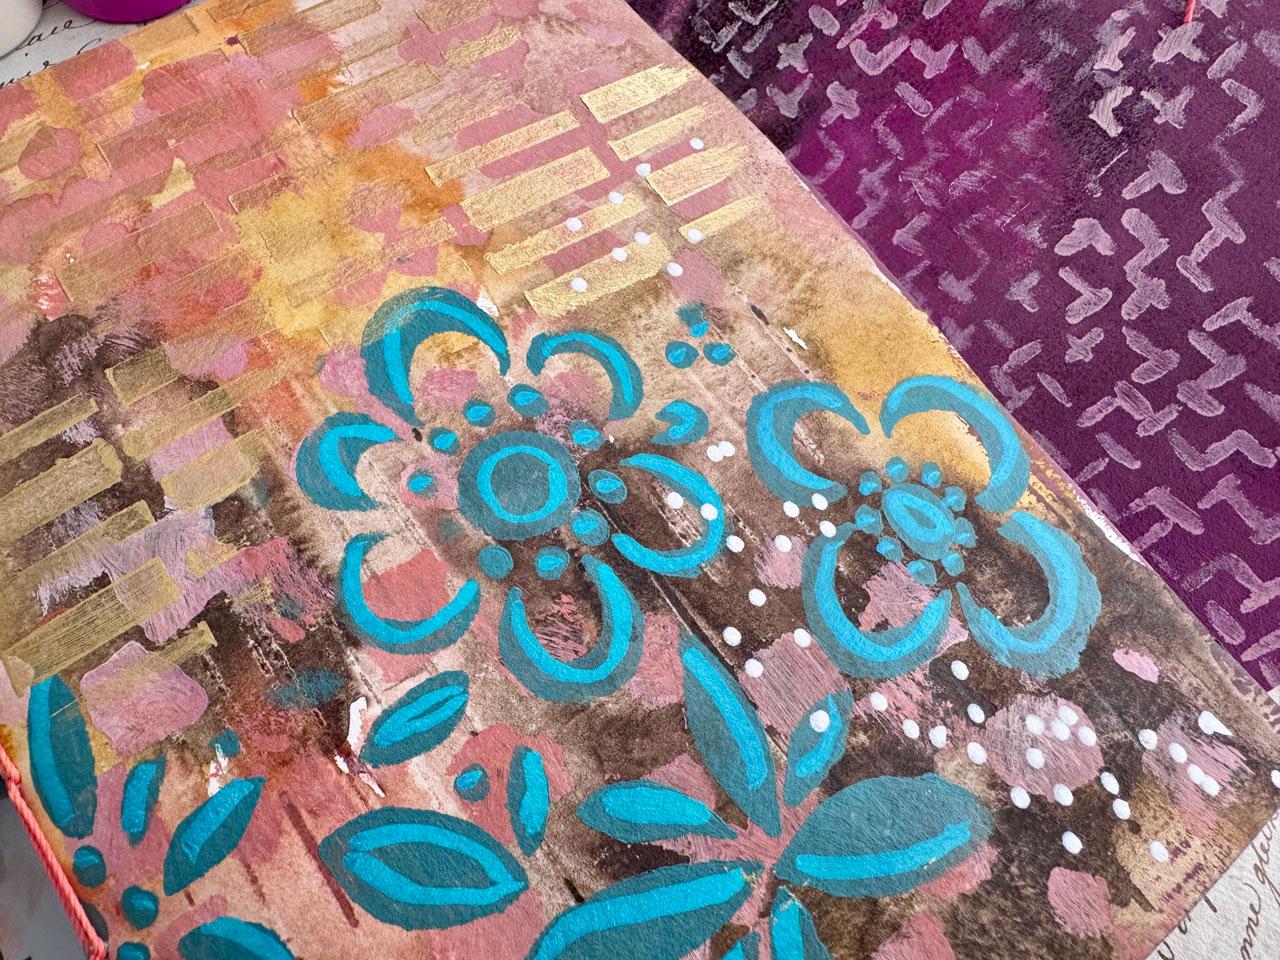
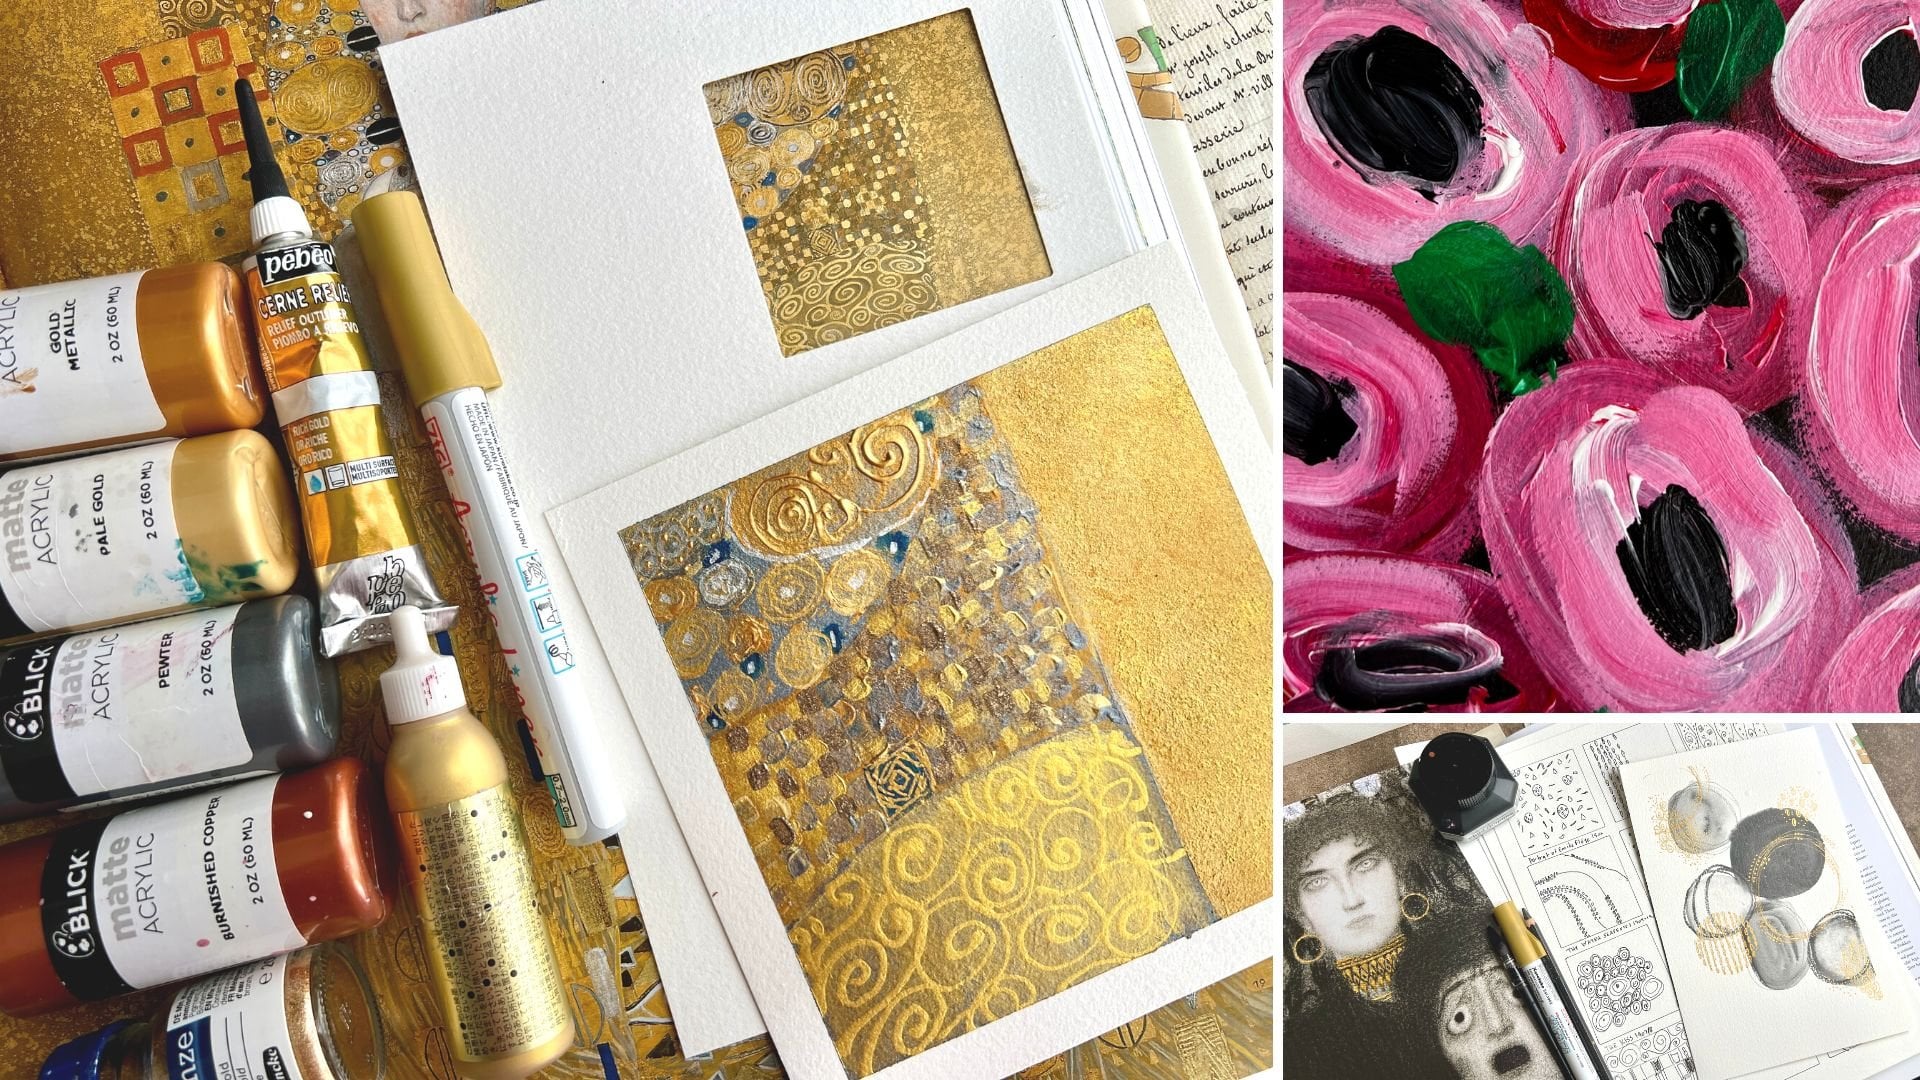
start mark making. I really like it when there's a little pop of
gold in the piece, and so I might actually come back on top of this
with some gold, and you can use
any gold is fine. I got gold pins and some golden iridescent
gold paint is good. I might actually stencil just a little bit of
gold on top of that. I'm thinking because I like
this Tim Holt stencil. Maybe we'll throw a little
gold in there in this pattern. Got to where I cut
the tops off of these so I can get the stencils
out slide them back in. I'd like to put
them in a notebook, but I need to be able to tell people what stencils I'm using. This one is Stamper's
anonymous layering stencil called sticks STI CKS. I'm just thinking
we could either go up and down, kind of
feeling up and down. I just want some gold. And it's not going
to be a super color, it's going to give a shimmer. That's more of my goal here,
which is why I've picked. Oh, yeah. Okay, that's
exactly what I wanted. Just the shimmer. I'm going ahead to the outside edges with most of this because
once we cut this up, this could be collage
material that's left over. So you can keep on
using what we cut out. That's why I've gone a little
bit to the edges there. I feel like maybe some
extra mark making, maybe some dots would be fun. So maybe I'm going to do some
white paska dots in here, and then I'll be ready to
turn this into a book. All right. Okay, so we could come back later
with some more dots, but I think I'm there for now. So what we want to do now
is cut this cover out. We just need to decide what part of this cover that we want. I'm going to grab
my piece of paper, because what I'm going to do is mark, where do I want that? I'm going to cut that as a big long strip, so
I'll be right back.
5. Assembling Book: Alright, let's do this.
I've let this dry a moment. I know that this is the
size book that I want. You can use any
side that you want. This could also be the inside, and that could be the outside. You can just kind of decide as you're going like,
how did you want it. And I kind of wanted this
part to be the front, so I'm kind of thinking
this strip right here. And so I'm just going to
put this right here and take a pencil and kind of
mark where I want this. On both sides, just to
the edge of the paper. Like, I don't want
it to be huge. I don't want it to be short. I do want it to mostly
cover the edges. I don't mind if a little
of this pops out, but I do kind of want this whole thing to be
the right size. And Okay. And you may be off a smidge. Don't get hung up on. Is it exact exact? Is
it perfect perfect? I mean, I want it to be
straight and beautiful, but I don't get stuck. So just measure it
as best you can. And then I've got a
big metal ruler so that the blade doesn't
cut the ruler. If you're using wood rulers, then the blade could
just kind of go right into the wood and cut the
wood instead of the paper. I've done that before.
And it's not thick paper, so I just go ahead and
run all the way down. Look how pretty this
leftover piece is. You see how it doesn't
even matter that we had paint on this before. It just became part
of the decoration. Or at least it did for me. And then we're gonna
cut this side. And I'm cutting this
on a cutting mat. It's not on my table. Oh, that's gorgeous. This you can make little
artist trading cards out of. You can make them into
collage material. You could cut a
piece of this to be a piece of art
inside of our piece. It could be a pocket
inside of our piece. Let's just see if this
is about the same size. So it's close. We're not too
far off. I'm good with that. So now we need to decide where
we're going to fold this. And I was wanting this right
here to be the front side. So what we're going to do
is fold that right there. So that it's right there, and it's the correct
kind of size. And I'm just going to
take my bone folder. And if you're afraid you're
going to smear anything, you could take a piece of wax paper or
something to do that. And I'm just pressing
that edge nice and tight. And there we go. So now
we've got one fold. And look how cool that
is when you open it, and that's the inside. What? Now, I almost want this
to be an envelope. So I want this to come down
like this so that it has some area to flip
over and then we can cut this kind of decorative. And so I'm just kind
of eyeballing it here. We could also take
our bone folder and a ruler and score
that a little bit. If you've got a
scoring tool like this fun little device
here that's got ridges in it that could help you
with your scoring. So if you've got a scoring
thing. You could use that. I'm not going to use it today because I know not everybody
is going to have that. But what I'm kind of thinking
is we could just go right here and just decide where
exactly do we want that fold? Because I want it to
fold and be There we go. Let's just do that right there. This is just eyeballing it. Doesn't have to be perfect.
G to fold it right there. I'm going to press that
down with my bone folder. And I'm standing
up when I do that, so I get a really good crease. And then we can just check it. Folds beautifully. And now, what if we make this a
scalloped edge or something? I'm kind of thinking Look
at this. Oh, so pretty. I'm kind of thinking, and we can even We could even make this like a pocket
inside of here if we wanted. Totally filling that, then we'll have a pocket right there. Oh, my gosh. Okay, so to make
a scalloped edge, I feel like I just
need a piece of watercolor paper or
another piece of paper. We'll just say, This is
just a piece of copy paper cut about the
size of our piece. 'Cause look at
this little trick. Um, I'm just going to do this here because
I don't want it. I actually want to
use some of this. Actually, let's just
mark the whole thing. Okay, so I'm going to
use this in a second. Okay, so part of this is going to be my template
for the holes. So I'm going to go
ahead and fold this and use this part for
my whole template. And I'm just going
to cut this part off because I'm going to use
this as my cover template. So what if we just fold this in half and you could
cut a curve out. You could cut yourself
a triangle out. I'm kind of thinking, What
if we did ourself a curve? Just something just kind
of So we could do that. That's kind of I don't
know about that. Is that enough? I don't
think that's enough. So maybe if I go,
Oh, let's do that. Okay, and I folded it in half, so both sides will be the
same when we're done. Okay, so let's do this. This is gonna be my flap template. Hmm. Look at that. Oh, that's pretty. Okay.
Oh, that's pretty. Look at that. So you can do the flap template
anyway you want. But I was just kind of
thinking, Wouldn't it be fun? To have something that
just wasn't just square. And then we just got to decide, like, how big do
you want the flat? Because, you know, here's
the edge of the book. We want it to be a little shorter than the
edge of the book, definitely, but do we
want it to be huge? Maybe not. So I'm kind of
thinking way back here. Um, yeah, I'm kind
of thinking there. So then you can
just draw it with a pencil and cut it
with your scissors. And then, if you've got
any pencil mark leftover, you could just come back
with a little eraser and just clean the edge. Look at that. Look at that. Okay, now let's
assemble our book. So I've made a little
template here. It's going to be the
size of our pieces, and that's going to
be my whole template. So I'm going to mark the holes and then
we'll punch the holes. So our book is 7.5. And I kind of want
enough holes there to be able to show the stitching that we're
going to do on the edge, which is going to be super easy. So I kind of want enough
Enough on the edge. Let's see. What I've decided to
do because it's 7.5, I centered the
paper on the ruler, and then I cut them
at three quarters of an inch from each end. So if we move that back to
the original measurement, we've got three quarters
of an inch from each end, and then I marked it at
1 " intervals apart. I've got one at three
quarter and three quarter, and then inch inch,
inch, inch, inch, inch. I think that's what I want because the chain
stitch is really fun. So what I'm going to do
first is mark my cover. I've got my all here. We might use a clip to really
get this in the right spot. I want to get it right
there on the edge. I've got it right on
the edge of that. Now, with it slightly folded up, I'm going to punch the awl
at an angle going straight through that piece
right there and make a hole right where each mark is, and that will help me
line up the holes when I get to the pages that we've already picked
and folded in half. We'll be ready for that. So I'm going to use the same
template on both of those. And then you can see I've come through the backside
right there. So I've got that
ready. Now we're going to do the same
thing on the paper. We picked six pieces of paper. Yeah, and you want to make sure they're exactly where you want them straight
where you want them. Then again, right up to
the edge of the fold. I'm going to kind of center
it because remember, the covers a tiny bit
bigger than the pages. So I want these I want
this to be centered, but it's going to hang over
a tiny bit on the top and the bottom because
covers a smidge larger. Now I've got this right
there even where I want it, and maybe I'll just
clip it on both sides. With a little bulldog clip to make sure that
that doesn't move. Then I'm going to
go right through the center of just like
I did with the other slightly at an angle to
make sure that I'm coming through over here at the angle of the cover
rather than to the side. I'm just going to
go straight through all those pieces of paper and it doesn't have
to be perfect. Close is good enough, but slightly at an angle. O. Don't get hung up on
perfection at this point. You just as good as you can. It's a homemade art book. It's meant to be quirky and fun. There we go. And the last hole right there, poking
straight through. Now, what color? What color for the thread? I'm thinking the orange or
we could do pink or brown. But I'm feeling orange. I'm going to keep these clip together but move this
template out of here. Just so they don't move
while I'm deciding. We've got that comes around. Gorgeous and I'm thinking
that I want the orange. Now what I'm going
to do is I'm going to cut a piece of thread about three times the length of that cover and give
myself plenty of room. Then I've got a long
embroidery needle. The bigger the
needle, the better. You could use a curved
needle if you want, but you don't really need to for this type book. I like
the straight needle. What we're going to do
is thread the needle. I'm going to tie a knot on one end and just leave
a little tail there. I like to do a double knot, so I'm going to
tie a double knot to make sure that we've
got enough there. Then this is basically
going to be the up. Then we're going to
go through the paper. Let me make sure I
got enough there. We're going to go
through the holes in the paper very easy and then through the first hole in the book and pull
that right through. You're going to love how easy. They're going to come right back through the second hole of the book and second
hole of our paper. You love how easy this is. Then I'm going to move this
to the side a little bit. We don't want our
needle to catch in the thread in the
middle of the thread because then it just doesn't
move like it's supposed to. All right, so back
through the first hole, let me I'm moving
all around here. Hang on. Back through
the first hole, I'm trying not to snag
the middle of the thread. There we go. We
are going to just make a loop back through
the second hole. Basically, what this
does is it makes the first hole be a fake
chain link, basically. So right back through
the second hole, and then you can kind
of pull it taut, not so tight that you're
wrinkling the paper, but tight enough that you
get it to do what you want. And then now right
through the third hole, coming right out the backside and then then this is
what you're going to do. You're going to
thread the needle through that set of threads
that are already there, and that's going
to make our chain. Look how pretty that is. Back up through that hole
that you just came through. There we go. And then just pull. You might have to pull
from the outside, but you want to get it
where all your threads are nice and taut. There we go. So just tug until you've got a nice tight loop
there, basically. And then we're ready to
go through the next one. And again, you should be right on the money with
where that comes out. And again, just
through the thread, make a loop, and back up through the hole that
we just came through. And just pull it tau. And so we're making a
really lovely chain there on the back side. So now right through
the next hole. And see, these are
really pretty when you got enough holes
to see the chain. You could do less. A pamphlet
stitch just has three, two at the end, and
one in the middle. What I like about this versus, say, the pamphlet stitch, pull that tight while
you're going is the interest that this adds
on the spine. B through. Now we're ready
for the next hole. I just like the extra
interest that something like a chain stitch gives
you, right there, through that and make a
chain and I'm just trying to pull it as I'm going right
back through that hole. And then I'm going to
make our last chain. So right through that last
hole, make your chain. And then right back
through that hole. Now we are ready
to tie that off. I just loop it underneath
that loop right there and then pull it through this
loop that we just created, and then I pull it all the way down to the end and I
like a double knot. I'm just going to loop it
in there one more time, and then back through
that loop I just created and then gently pull it towards the
edge and there we go. Now we have a completely
sewed together book with a cover. At this point, you could decorate your cover even
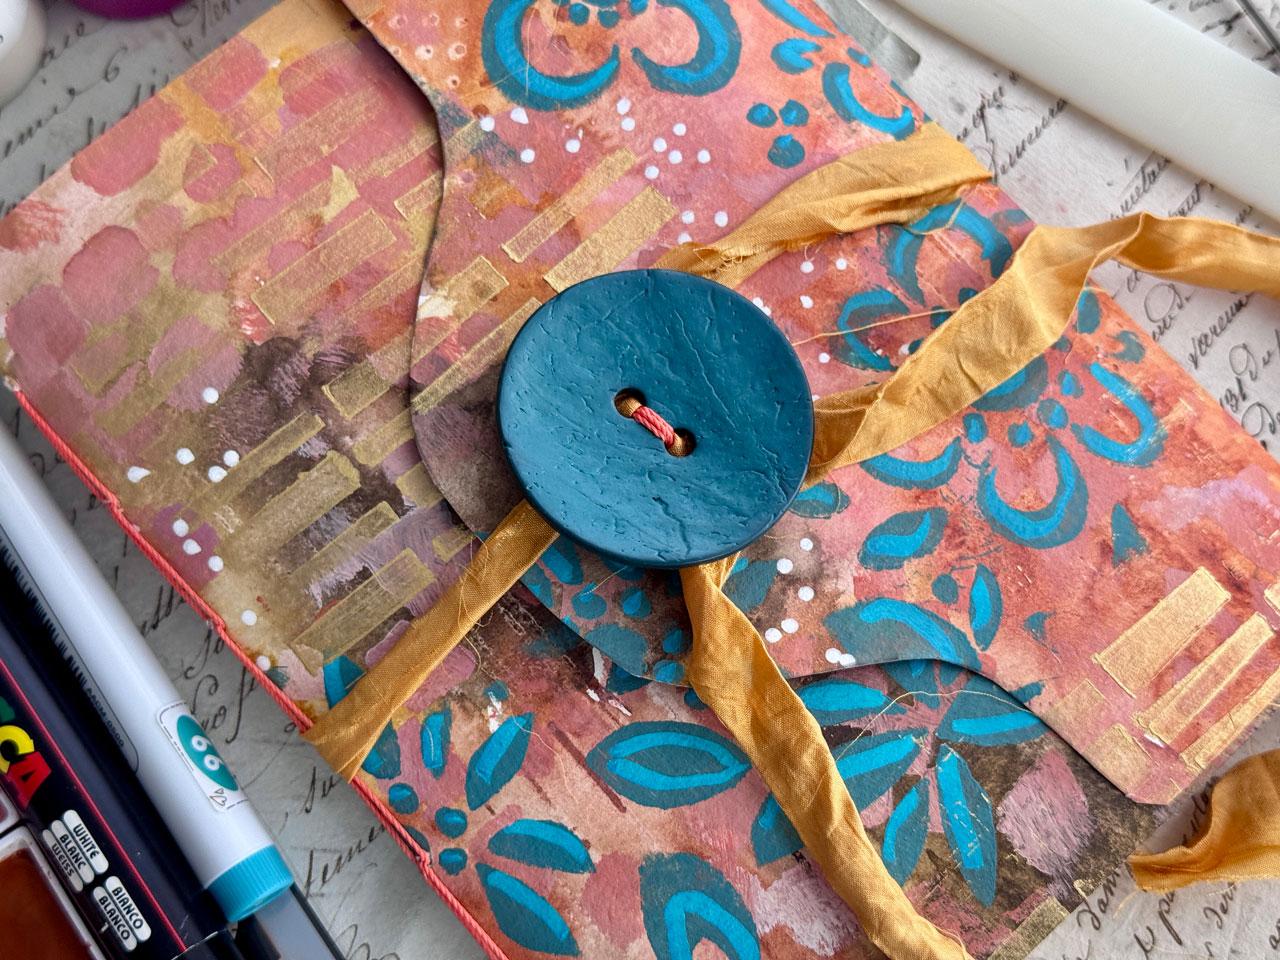
more if you're like, oh, I need some extra pieces. You could also use some ribbon actually have some ribbon right here and
it's a good color. This is some sorry ribbon. I had this as a
photography prop, and I thought, this
would be perfect. We could make ourself
a little fun ribbon closure with a couple of loops and we could either so
a button right here, like a vintage
button and tie this around the button to be our
loop and loop it around. Or we could just glue
this to the inside, glue it just right there, and then we'd be able to then loop it around and
then just tie it off. That's another
option. I think I'm going to use a button,
so I'll be right back. Okay, so I actually have my grandmother's button box because she was a sewer and I have a whole bunch
of buttons in here, but I also have some buttons
that I've purchased, and I got this button here
and you can get bigger ones. These came from Joanne fabrics. This came from Hobby Lobby, I believe. So look around. Here we go. It's Armia came from Joanne. It's this organics brand. Um, So these are the
little organics buttons, and they were not expensive. And so I went when the buttons were on sale
and got some buttons. That would have been a fun
one. I didn't see that one in there. But I like big buttons. These are vintage ones out of my grandmother's stash
of buttons in here. So any kind of button
would be fine. I thought this pink
one was kind of cool. So any button would be fine. But I particularly love
the great big buttons. And so, and because that's a curve button at
the fabric stores, you'd be able to find
something like that. I just took that same thread, that same orange thread, and
sewed it on to the book. And because these are
knots and it's wax thread, I'm just going to trim those, and that's just going to be the inside of
that, and it's fine. It looks nice. Look how pretty that
is. Oh, my gosh. Now you could just take
something like this. And either do a little loop like that and not
even tie it to it, but look how good that
worked out just like that. Or you could just tie this to the button up
underneath, tie it there. And then it can be more
permanent and then, you'll be able to loop this
around and then loop it shut. And, you know, give
yourself enough ribbon at the beginning for the
book to get fatter, you know, depending
on what it is that you decide to
do in the book. So you want to give
it a little bit of leeway so it can get
a little bit fatter. And so maybe not tie your ribbon on permanently
at the very beginning. But really, you don't
even have to tie it on. You could just do like
I just did and give it enough room to loop around like that and
then pull it around, and there you go. And you got a pretty ribbon
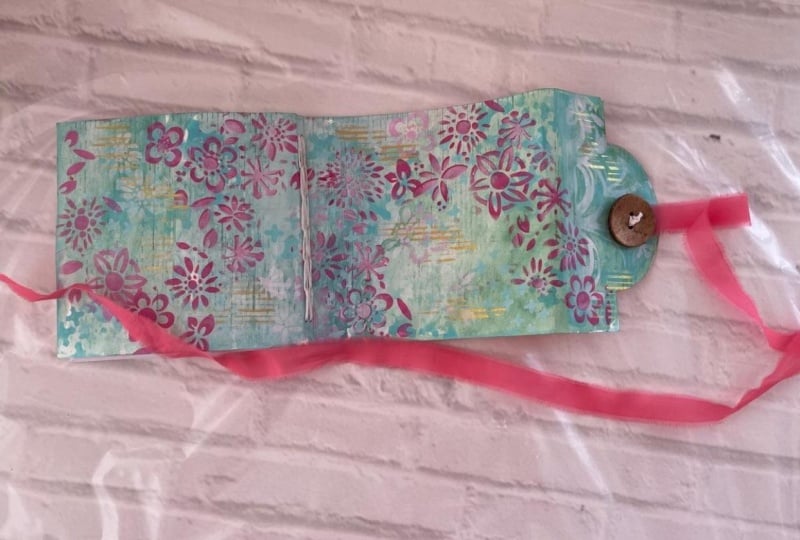
tying your book together. Look how gorgeous that is. Okay, so I love loving
our yummy chain stitch. And then when we open this up, got little pieces of thread. Now you can see the inside
is actually finished. And we could have painted
it after the fact. If you don't want to paint
it first, you can paint it after you've made your book. And now we have all of these
lovely pages to paint. And I made mine
with just the pages themselves without
the decorative paper or the old papers I've really discovered that I like
to paint in these and make them into a whole
book of my little paintings. And so that's where
I've gone with this. You could definitely
make it a junk journal and have all
kinds of papers, or you could have some other
papers in here, you know, dispersed throughout, which is what I do on a
lot of my other books. You could also go ahead and glue in something to the backside
here and make a pocket, just glue around the edges
and have a pocket back there. Or you could have even a pocket down the side where you glued it on three sides
and you could have a tuck pocket with
your extra leftover, if you wanted this right here
is particularly beautiful. So that would be fun.
So just have fun with this and get
creative and mark make and find yourself a fun closure and
ribbon for the outside. I hope you enjoy
making a delightful, lovely little
handmade art journal, and I'll see you guys next time.
6. Final Thoughts: I hope this project has inspired
you to explore the magic of mixed media and bookbinding in a fun and approachable way. Whether you use your mini
journal for sketches, notes or creative experiments, it's a reflection of your
unique artistic style. Remember, there are no rules. Each layer, color, and mark adds to your
creative journey. I'd love to see your
finished journals, so feel free to
share your work and continue exploring new ways
to make art in your own. Keep creating and most
importantly, enjoy the process.
 DENISE LOVE, Artist & Creative Educator