Transcripts
1. Introduction: hi and welcome to the class on making floral borders. In this class you will make the designs which can be used anywhere like dresses, balls, bullet journals, stationery and paintings. We will start back collecting references from life and from the Internet by sketching lose . Then we will create motives for our borders. Along with creating borders. I will also show you how you can make them seamless. And at the end, I will show you my coloring process by painting to sample stripes off borders. So come join me in the class.
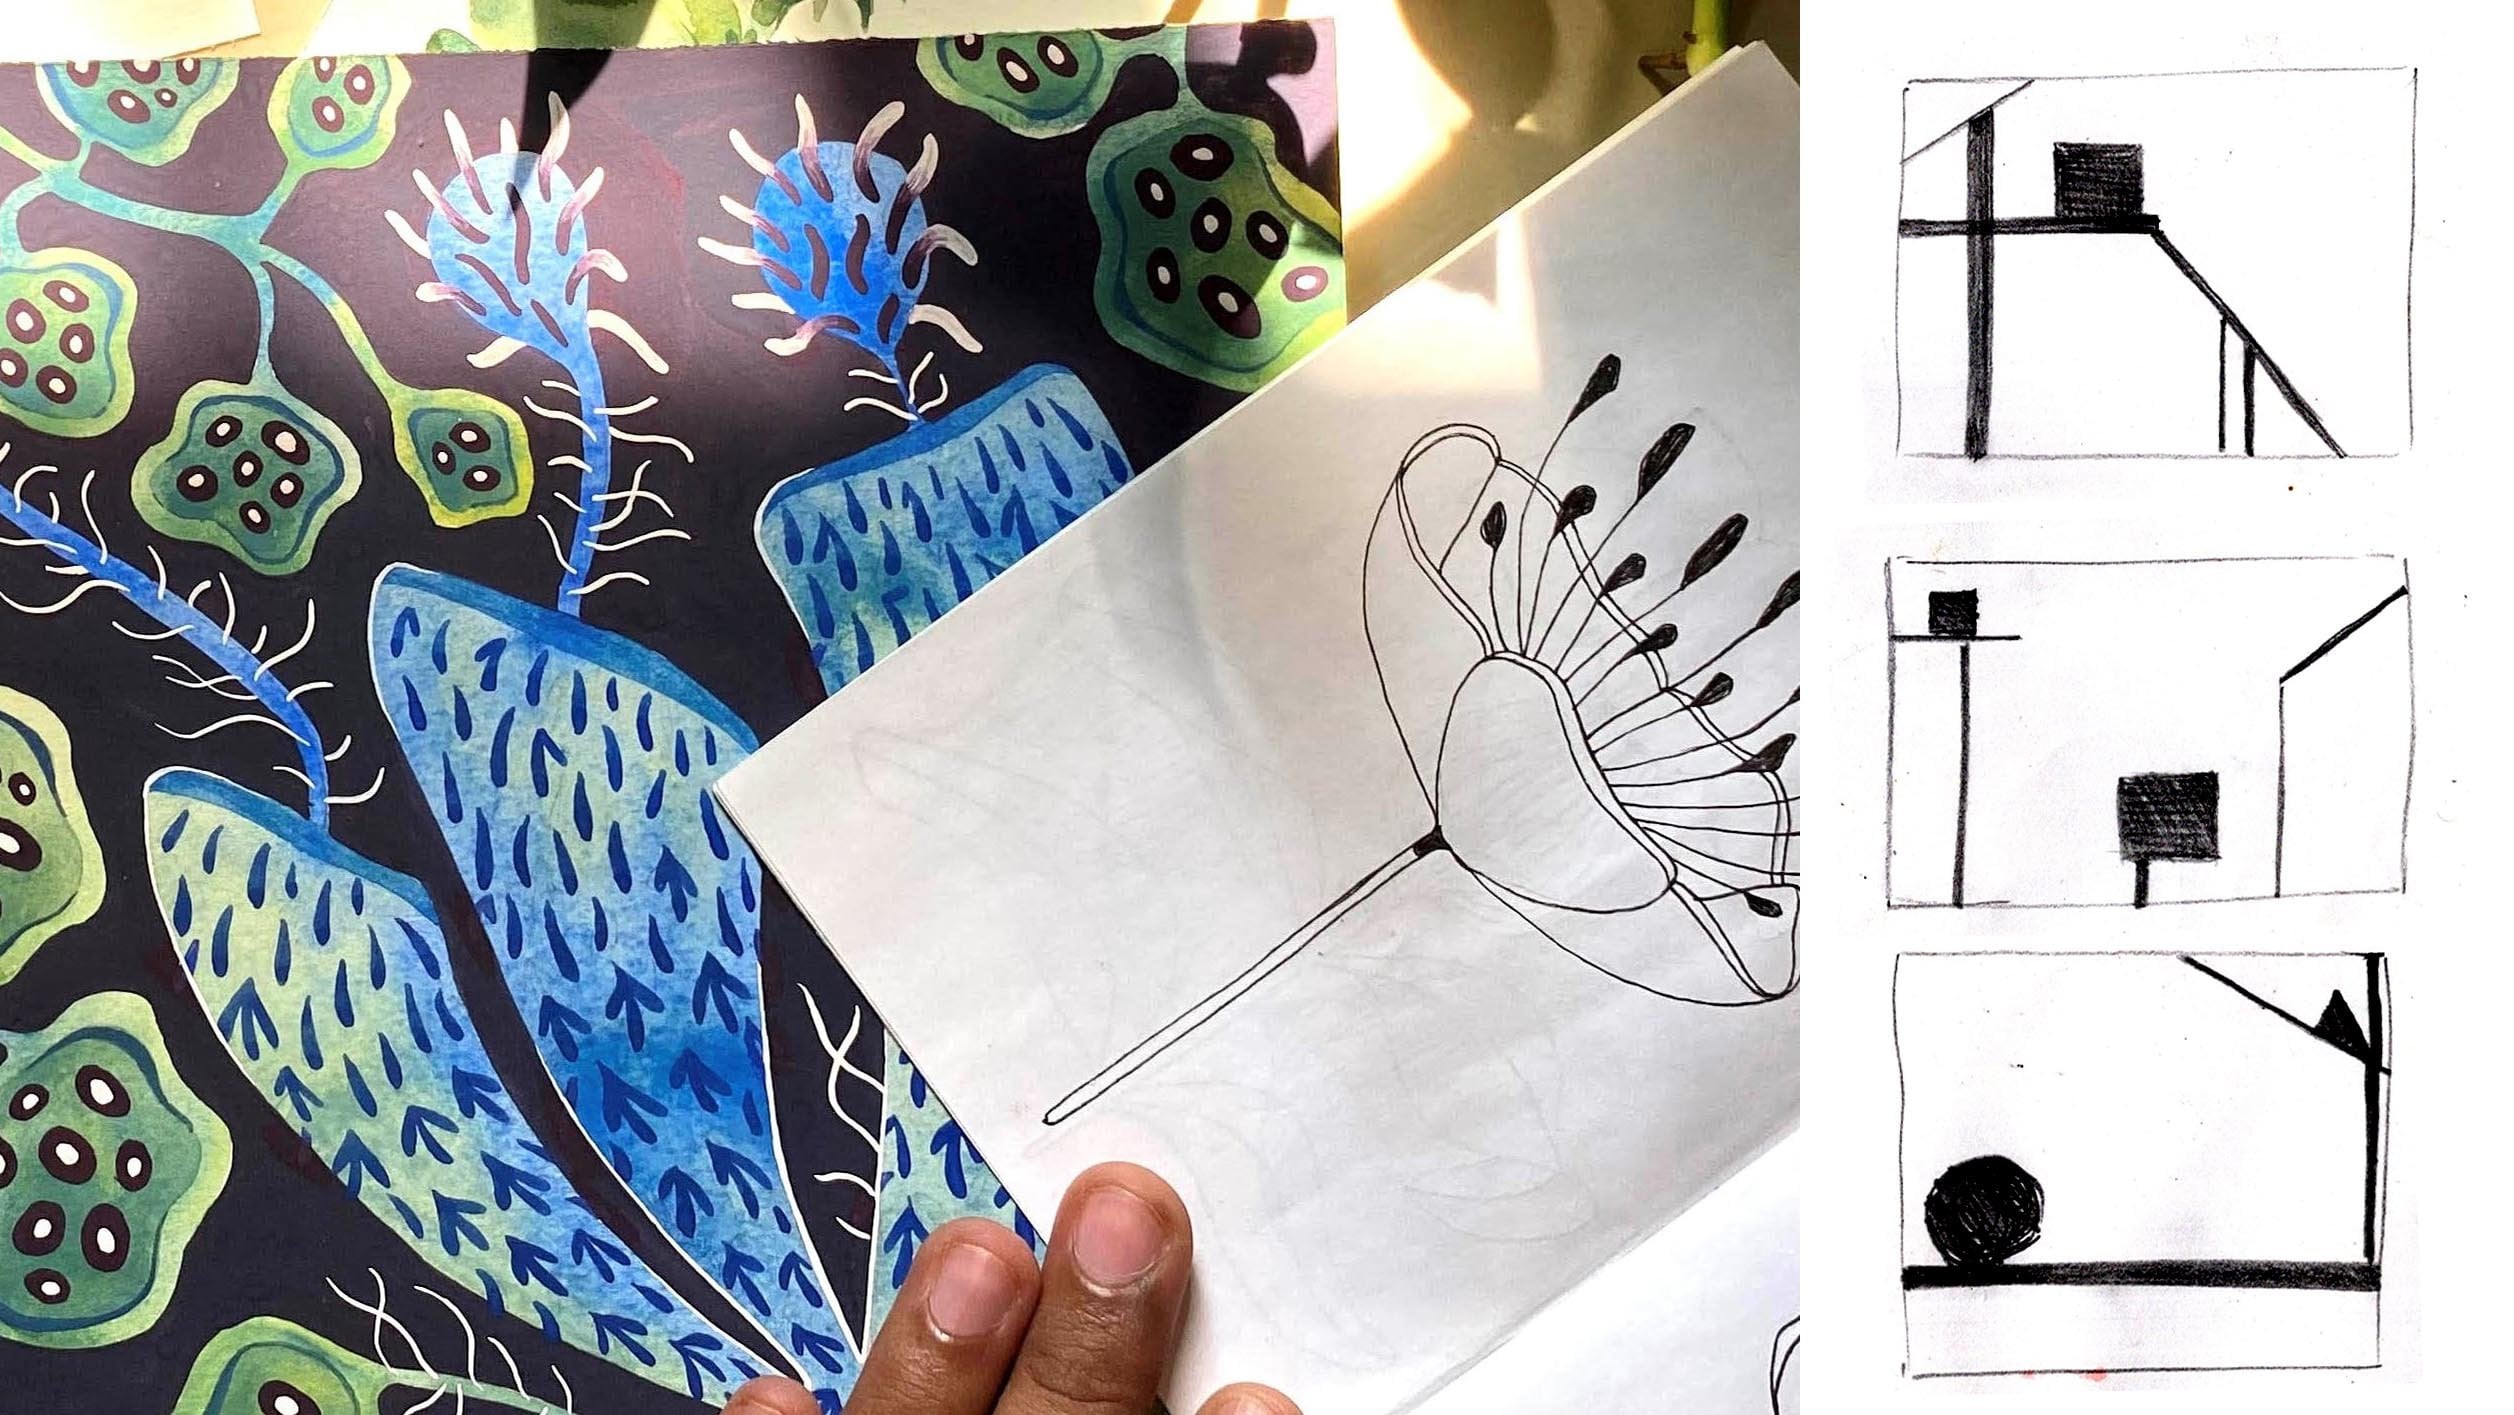
2. Using references: Let's start the class by collecting references. As I always said, just to do, no art on the planet was made. All will be made without inspiration and reference. When we start without it, the only draw. What we know. We want to expand their space off knowledge, and we want to get familiar with many different forms. In today's case, we will most probably draw the simpler, easy to remember floral shapes. If we go on drawing without reference, even those simpler shapes are beautiful. We also want we're right in our book. Let's start with the easily accessible Vince. Go to a garden if you can, and observe the plants and flowers. I am in my gallery at home. We have some flooding plants, which are commonly found in India. Observe the flowers from all the sights, observe its growth every day to note every stage, Then look at the leaves and sold for their different shapes. Compare the shape off leaves and the flowers on them. Observer that these two forms have any similarity. There is not much thought that goes into this process. We just want to visually understand the forms todo that sketch the flowers and leaves from multiple angles. In this way, you will understand the structure better, and it will be helpful. At the time of designing. You can sketch, lose and free. I use a six B pencil best Edler as it is a softer run. I get soft and tin that lines to indicate light as well as dark, and they claims to show shadow I can drop into it and also filling mass when needed. Studying from life is important as we see the object directly with arise. There is no other barrier between us and the object and like drawing from photos. The object in front of us is in three D, and we convert it into duty while drawing on paper. So observing it from different angles is important to know the form. We have started the family or form still now, so we will go on the Internet to get other varieties off forms When they drove from photographs. The information has already been converted into duty for us. We just have to look at the contours and other necessary details. Using this information to make our own uniforms is easier In this week. I am using a mechanical pencil year to get a consistent line. I just typed flowers on Google to get these images. You can go on Pinterest to get more variety, and also some rare and beautiful shapes drove up a drags. You don't think about the use off these. Get just now the village. Select them vinoodh it Just enjoy the process off observing and sketching. - You can also do one extra step and make reference sheets off Lars and leaves. They come in handy when we quickly want to design something, or at the time when we feel lost on out off inspiration. When we take our forms from references to sketches and from sketches to drawings, a lot of unnecessary or extra information gets omitted. The lines that are kept are enough to tell a story off that form. - So collect all this can't just you created in the next lesson will design floater motives using them
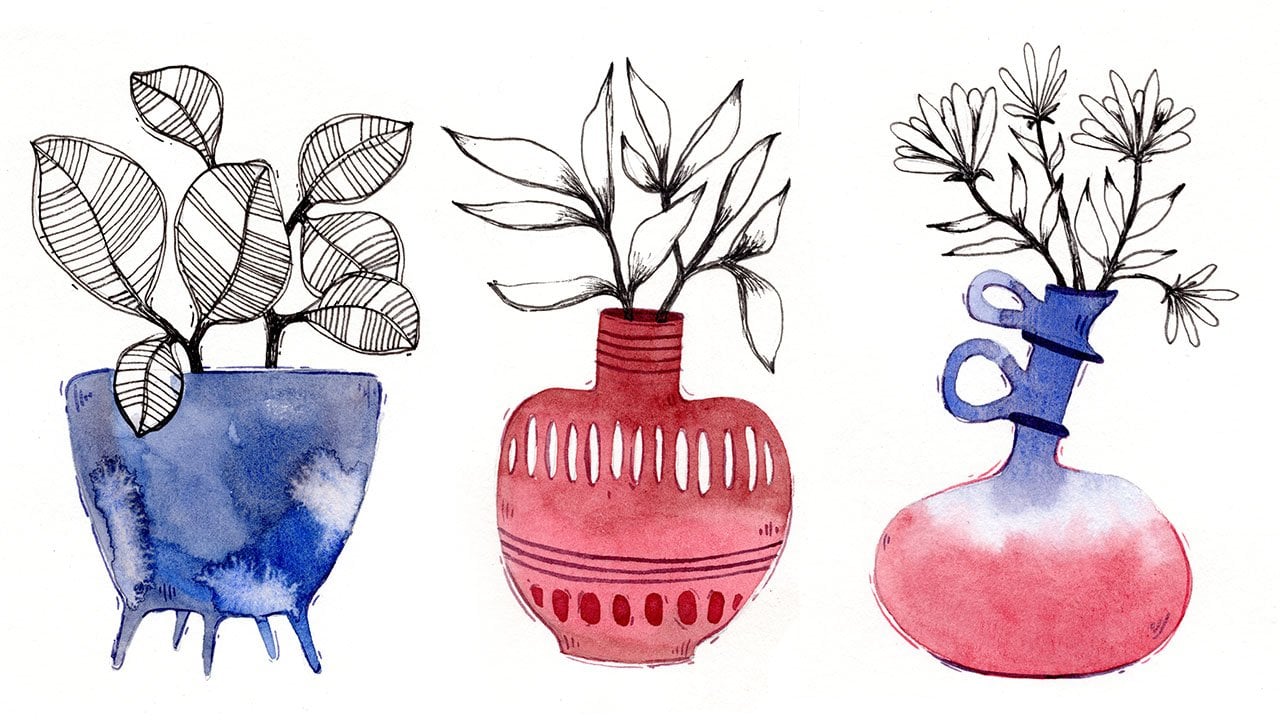
3. Drawing motifs: we can start drawing board a statically, but we might get lost in the process as to how we can arrange the elements in the longer rectangular space. There are chances that the design can become monitor nous if we approach it directly. Motives are like planning borders in advance, but quickly and in a small space. And of course, they can also be used to design other things like compositions, or can be used in a repeat to make a pattern. The motives can be made in three types drawing a single flower, symmetrical and asymmetrical. If designing something is new to you, you can start by drawing just a single flower. Draw different leaves combining with different flowers. Doing this alone will give you so many beautiful motives. That's why drawing where idea of different shapes when sketching is important. Then you can slowly make her motives more and more complicated by adding one or two branches on adding another diaper flor that leads to our next design off symmetrical motives. There are a lot of possibilities off drawing them. Add vertical and horizontal guides within the box to get different designs. Making these categories doesn't mean that the borders will be made in the same V. We can muster the three Moti's to create one border or a symmetrical motive can be converted into an a symmetrical run. I am using a four sized printing paper here. Eight. Rectangular motives can easily fit on one paper the read the page vertically and horizontally in half, just to save time off measuring, I fold the paper lightly and bench board the corners. And then these markings can be joined. I left some gap between the rectangles and also drew a margin around the paper. Draw a vertical middle line in each box for symmetrical motives. They also work as a guide for a symmetrical ones You can also draw. A heart is under a middle line if you want. Now select one off the sketches. This one attracted me the most, as it does not like any usual flower. I use a mechanical pencil for designing as I want straight lines without any variation. Composing and making a form is more important to me. In this step, I started by drawing is the medical motive mess. Symmetrical motives are not completely symmetrical. They're slightly different, which gives them an organic feeling. I like to draw freehand onboard the sites. You can choose to drop one side, forced and then trace it on another side. I need to use any reason at some places to make slight corrections. If they are easily visible, use combination off big and small shapes for visual interest. A word must detailing draw only basic shapes and some lines to give required information. I'm drawing in a symmetrical motive. Next, draw a course stem forced and then add flowers and leaves to it to create a simpler, a symmetrical motive. I drove from the base in the middle. Draw one to do leaves there on dry cough line on one side till the Midland off the books at the flower on top ofit and broad leaves on the stand. Repeat this on the other side by dry, different type of golf, and lastly, draw another extension off stem from somewhere. You get the beautiful motive there. - Let's draw a single flower. Now this looks simple but looks really beautiful. Start in the boredom middle draw. Same type off leaves, men touching the edges on board the sites keep on extending the stem and adding lease, drawing them differently, as if each one is folded in various angles will give a natural look. This is why sketching from life is important. We get to observe how nature behaves and how it keeps on changing. Now, Dr Larry on top, - I mostly started raw from the base. It becomes easier to decide the next step in this week as we know that the plants and nature grew from the bottom to top second veils. Making asymmetrical motive is to follow the middle line and add flowers and leaves on board the sites extend This time I heard as you go on drawing. This is why I like to draw a middle line. It serves as a guide for a symmetrical motive, says Bill. You can also add a horizontal middle line to get more possibilities off design. In no time your design gets ready, then I elector draw over it with a fine liner to make everything look neat and permanent, just like in your pencil marks. Before using a pen. I have greater menu of such motives. Making them is addictive. You keep on signing would and more possibilities as you go. - I really separate the motives we just created by cutting the page. And there will be I did in tow message. You can create as many off them as you want. The practice will never go to waste. You will find making them easier when you keep on practicing. The only way of improving and anything is to keep on doing it. Don't judge your walk before having at least three sketches off it. You can always choose one from them, but discarding only once get you created is not a good idea. So here are the eight motives we created together in the next listen. It will start creating borders using them.
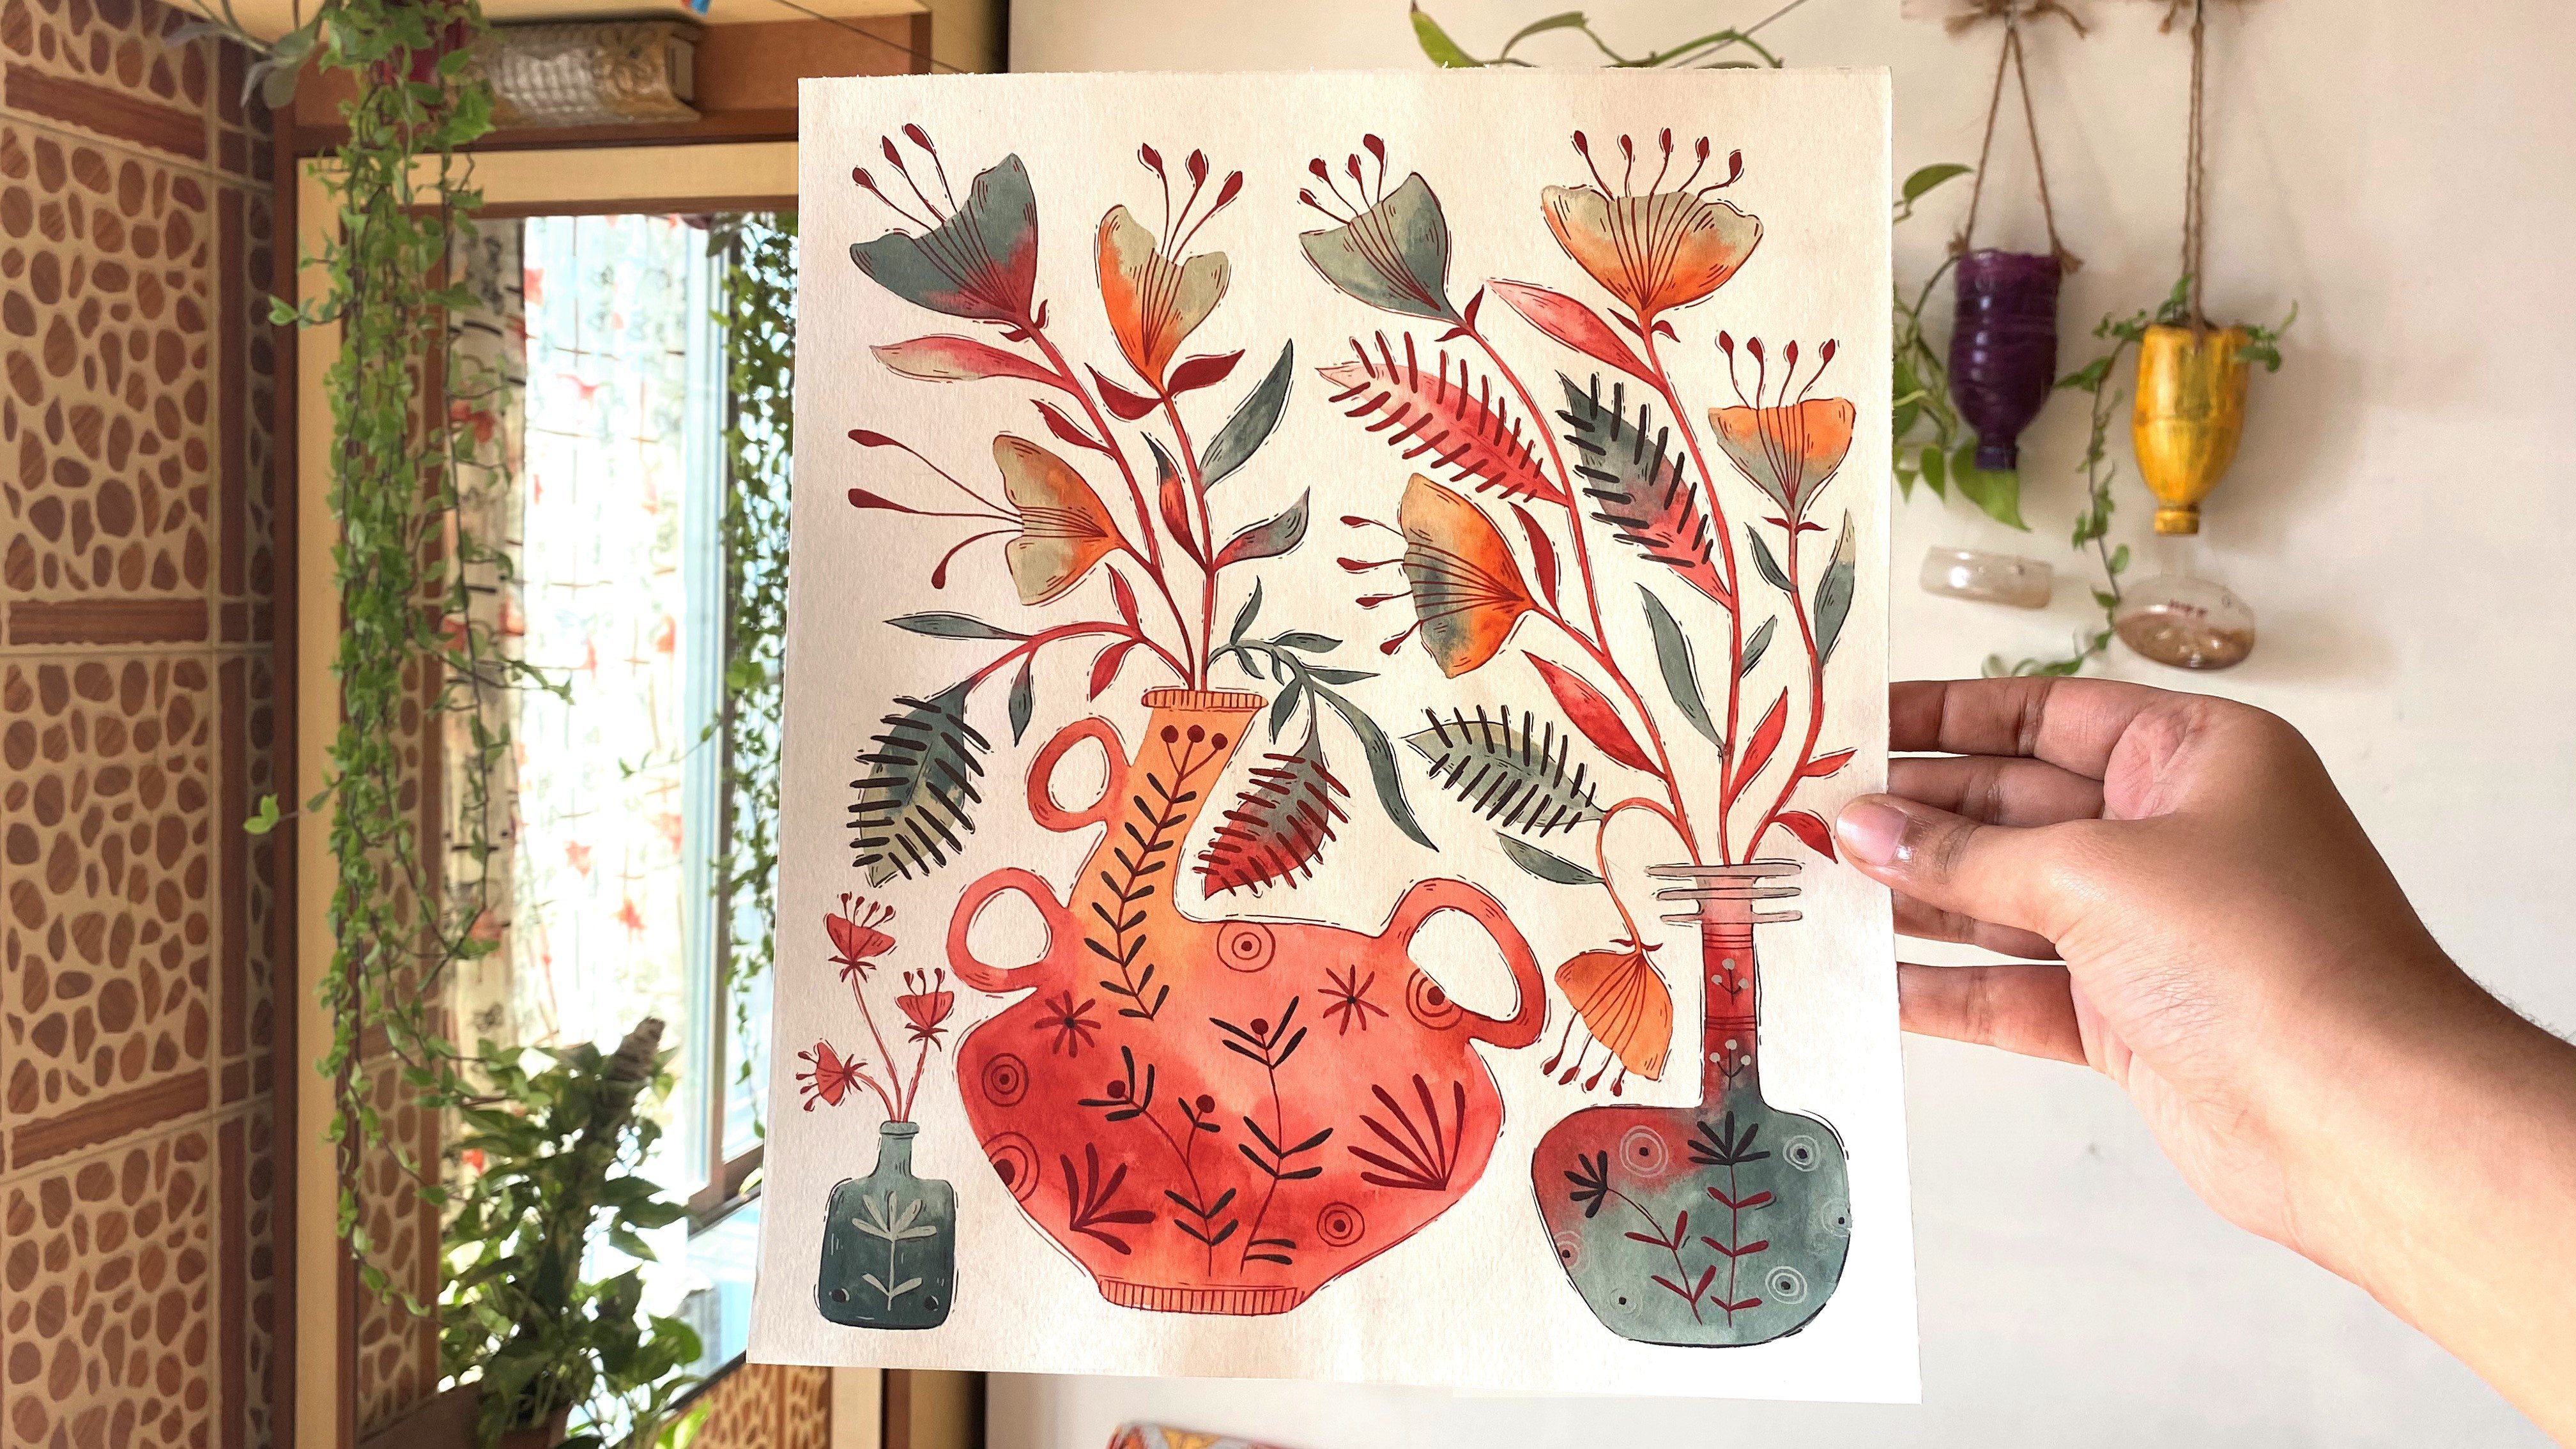
4. Creating borders: I have selected for off these motives from the aid we created. They have more attractive floral forms and better designed than the rest of before we will try making three borders using them. This beach is half off a Force A's. Let's start by dividing it in half by drawing a line one broader border and do dinner and delicate borders will fit on this page. Draw the middle line by joining the two markings were made and draw three stripes. We will also need immediate line in each strip. Let's mostro motives to create one border. We will start by drawing the forced s symmetrical motive changed the gulf according to the size off borders. Then, by drawing one stem in the middle, brought the second more d for flat on top. Repeat this process to get the border. I will show you the process off, making the border seamless at the end of this lesson. But for now, concentrate on just making the design. The space looked empty in the middle, so I changed the size off. Leaves balance the design by drawing big and small elements. Only small or only big elements will not bring interest we need radiation, which is one of the principles of design. Let's start with that next border Dinner borders look delicate. This most probably won't be the size we will use in reality, in paintings or anywhere else. It will be much more smaller, but these pages will serve as a catalogue of design. We can choose from them whenever in need. It is not necessary to use the motives exactly as they are. Keep them as a guide in front. Off you change the shapes or size as needed. Think about designing the border forced and not a scoping the motive in Repeat. If we will go on coping it, it will look stiff. But when we think about designing a border, it gives a more natural look to it. There is a flaw in the design. In this way. - We will make our third border as symmetrical. Keep the leaves and flowers seem, but you will need to add just the cuffs off stems to fit the size. - Other elements which can be added are Jorma tickle sheeps. 10 strips off Jorma Tickle shapes can be drawn on both sides. Off Florence. We can also create drama trickle motives on Dad In the middle, the stiffness is Jorma tree compliments well with the flow and softness off florals. Even simple straight lines look good in borders. Now let's see how we countries drawings in the repetition wherever needed. If you want to trees the left side. On the right are trees, the exact same design with geometry. This technique will be useful. I have a small but a paper to your I have drawn the underneath designed by keeping it over the paper. Make sure to mark the size on the corners to make the tracing accurate. I have the smaller piece off paper, which I have filled with a pencil. This will work exactly as a carbon paper. The only difference will be that we can. It is the markings if any corrections are needed, keep this paper between the felt paper and the tracing paper and draw over everything with a 10 pencil, preferably a mechanical pencil, until the design gets transferred On the sheet on Dhere, you get the exact same copy off your design. I then made these borders permanent with the pen. Here, have some more designs I have made. I really don't know where I will use them or actually use them or not. But I just love making them. But the process and rectangular size off them is what I like now, as I promised. Let's see how we can make the borders seamless. You will need to papers off exact same size. Making a seamless border means the same design on the left matches exactly on its right. You can scan the designs were making and color them digitally as well. Draw a desired size on these papers. Remember to match the lines on boat off them. This time measured everything for accuracy. Let's select one motive from her collection. This one looks simpler and easy. For this demonstration, you can start drawing somewhere in the middle, then leave the drawing in complete near the end of the paper. By taking the second paper matched the lines, you can stick them temporarily with the masking tape. Complete the flower on the second paper. There's going drawing in this week. Once you have fared, the forced paper moved the second paper down without flipping it and complete the design when you think you're done. Just joined the papers with the masking tape. Your handmade seamless design is ready to be trees or scan in the next. Listen, I will show you my painting method. We will pain two stripes off borders in gosh.
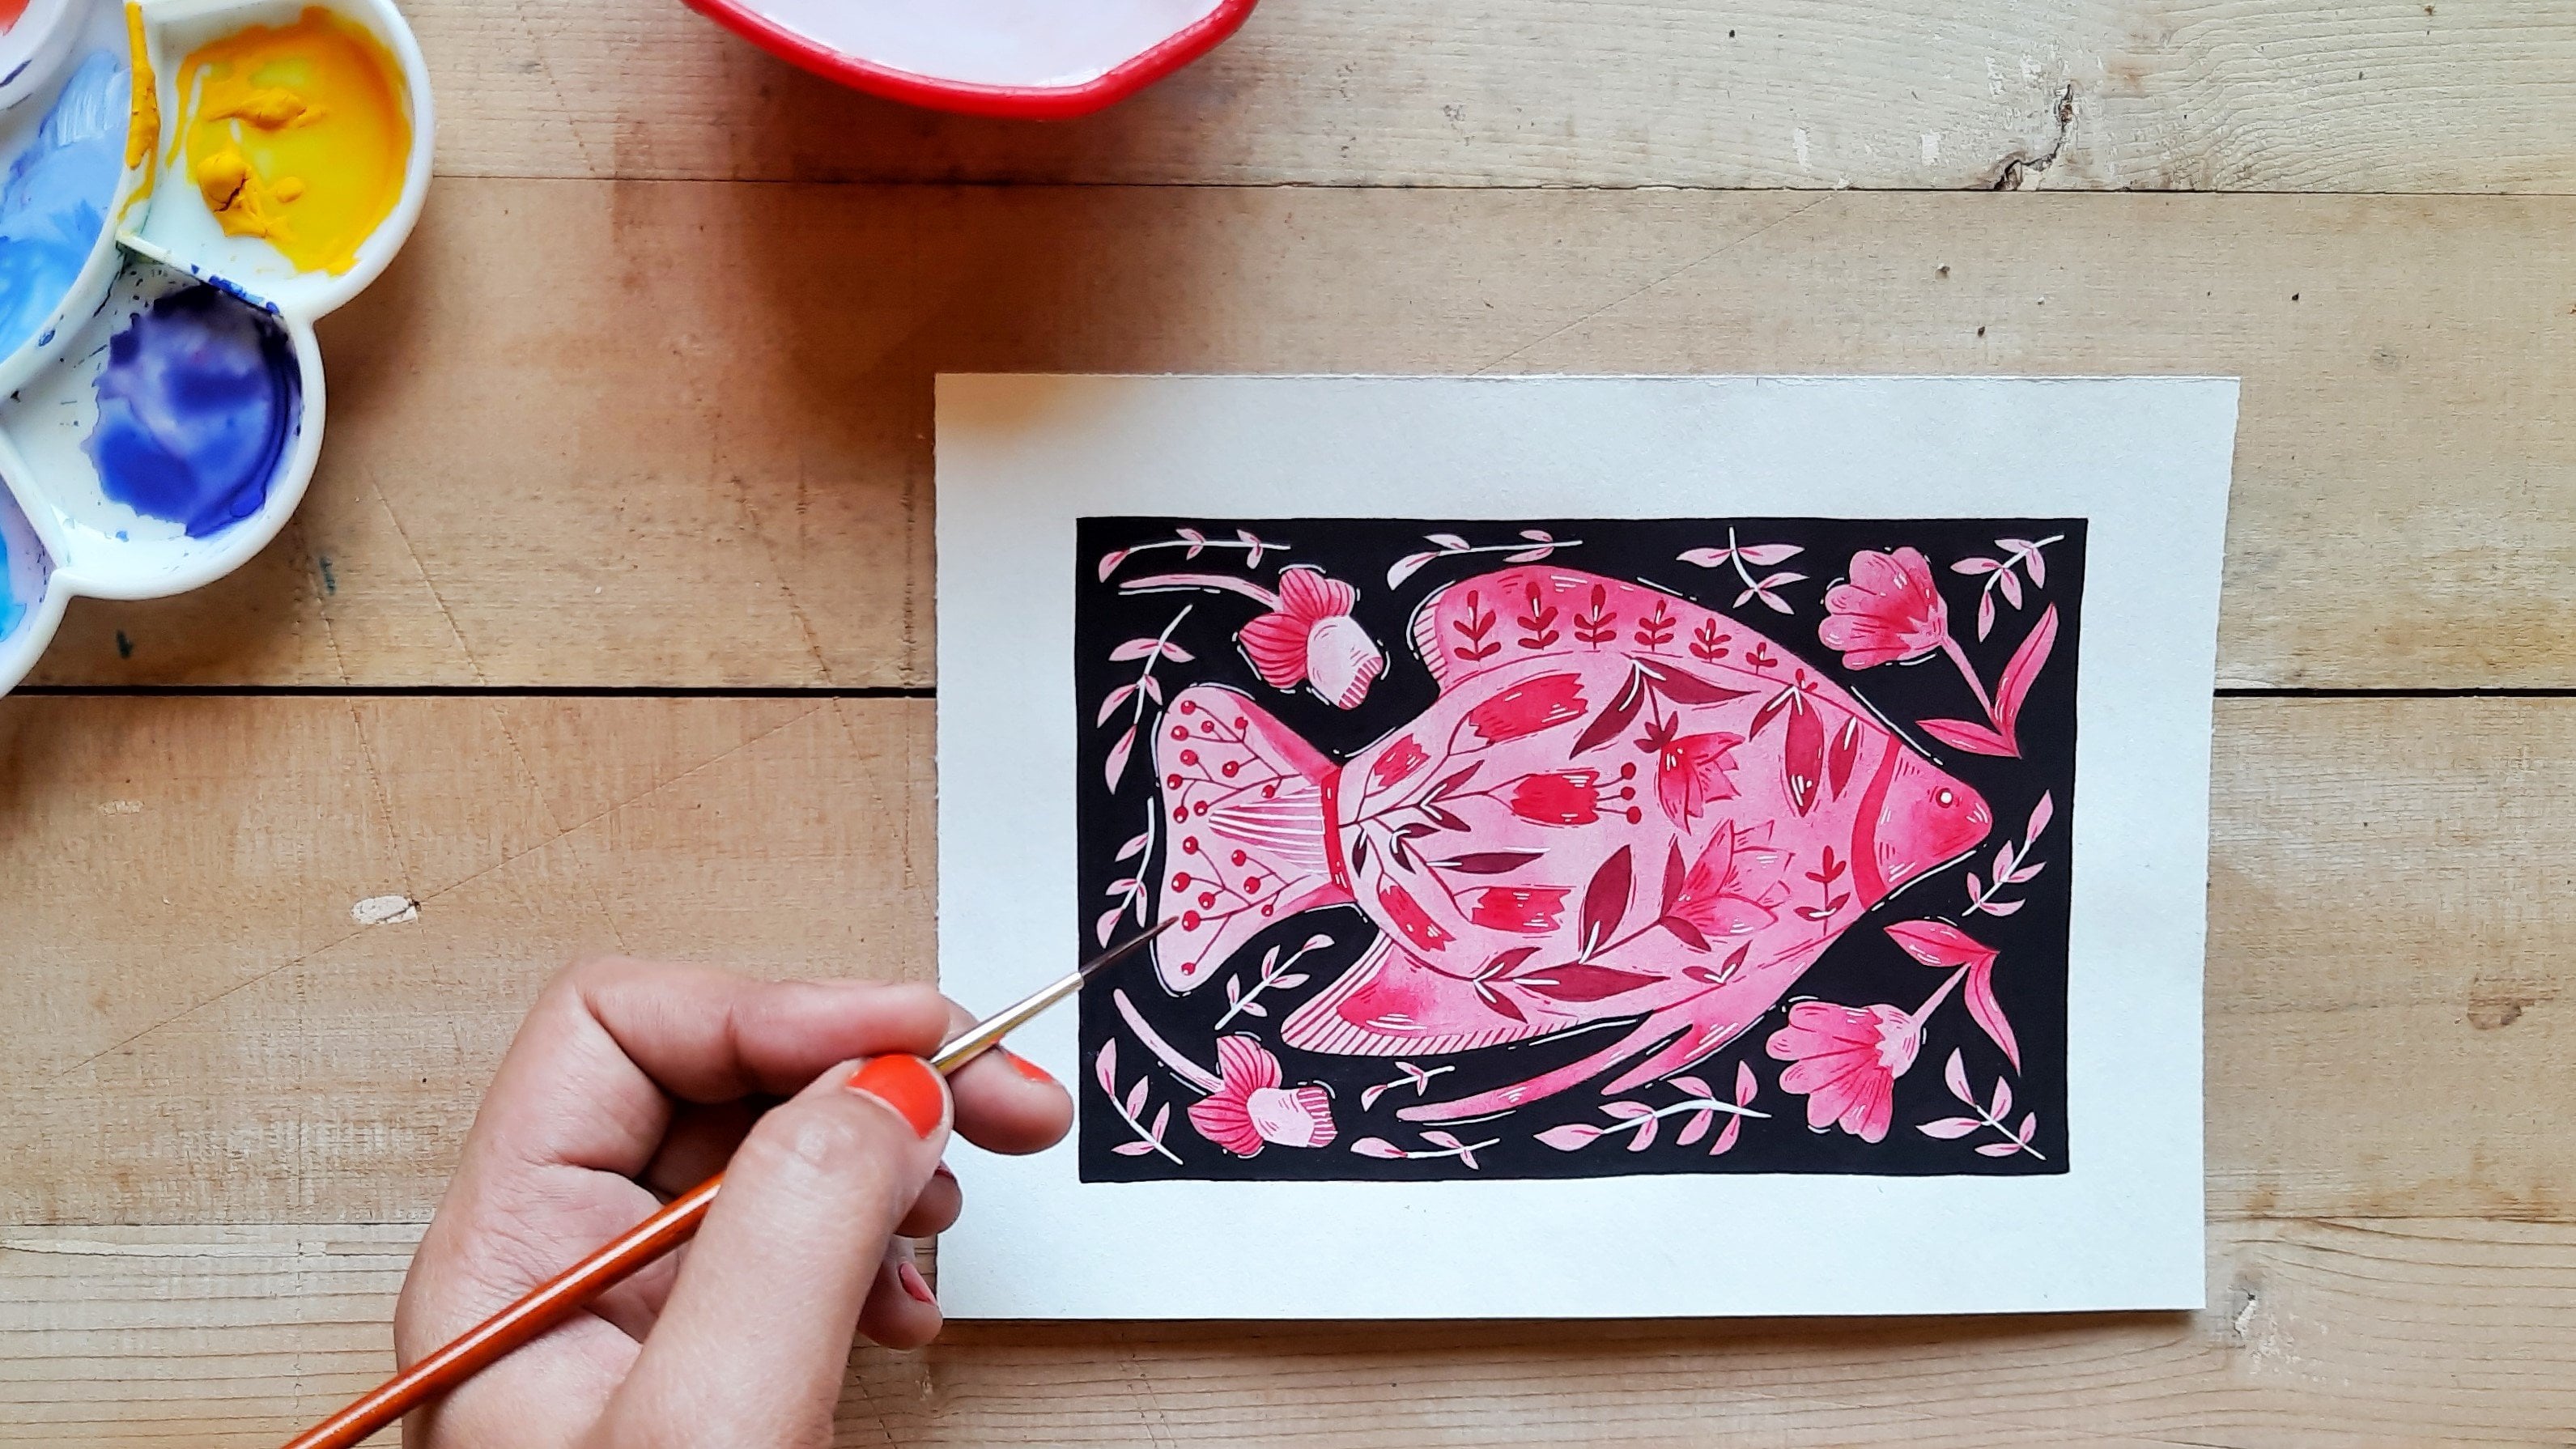
5. Painting borders: we have successfully completed creating borders and we know that there are, unless possible, raise off their designs. You can apply this knowledge of designing borders anywhere you want. You can use them in textile design or the great your balls at home with these borders. Use them in graphic design or just pain. These undresses, they will surely look beautiful. You can even use them in your personal daily journaling. If you make pain things like I do, you can include them there. And of course you can just create them for the joy off it. These are some motives are painted just to test color schemes and to see how to oppose the borders. - I have given a border toe this painting on I absolutely love how it looks. Here I am including my painting process. I have no plan as to where I will use these borders. But I just love the process off creating them. These are probably very huge than what we will use in practical. But I found this size useful toe make color experiments and detailing I am painting using art is ago sheer For the first border, I decided to use only ultra marine, blue and medial. The green you see your is the resulting mix off these two colors. The flowers are dominated by ultra marine blue, and the leaves are yellow, but the overall painting is lose where I have let the colors mix with each other. - My first layer is usually the one that requires major work and half off the painting completes there. I could have painted the negative space with any light or dark color, but then I decided to leave it weight as it gives really nice contrast in the painting. - Let's keep this to drive and start with the second border. I will given overall water revolts to this one, and I can paint a village. Once it dries. There is funding painting lose. Then I painted these lines on my fourth border using ultra marine blue. The voice on our second border has right. I will paint the flower by giving them a grated wars from top to bottom with the same crimson red I've used for the base. Then I painted the leaves with pressure in blue. I am also making these leaves created by adding more water while painting their tips. - Let's rule Last step, which is detailing it is important to take breaks while we are in the process off painting . This is required to award stagnation or chaos in the mind that does. Why I did this detailing part the next day, with a clear mind, I tried painting a flower on a rough page, forced. It is good to experiment to see which colors look better on the first layer. This is what I have roughly decided. It doesn't attempt to increase the contrast in the painting by adding dark shaves off green and light tones by adding white. I have also painted this layer fairly Oh, big so that it is visible on the first layer. - So do dirty tailings. On the second border, I only used crimson red Why it was used on the darker part wherever necessary. - At the end, I painted these geometrical shapes with thin lines. I use my rigger brush with long hair and fine point toe get really delicate lines in both the borders and here are meant to painted sample borders. I hope you enjoyed this class and found it fun and useful. Do share your designs with me. I would really love to see everyone's unique creations. Thank you for joining me in this class.
 WindowsOfMyMind