Transcripts
1. Finish Your Quilt Intro: Hello. Are you ready to finish
your quilt? I'm Elizabeth. Here on Skill Share, I teach courses about quilting and sewing and
different projects. In this particular course, we're going to cover
finishing that quilt top. Let's say you made a quilt top already and you're ready
to finish it and you want some different ideas
or perhaps you have several blocks and you're trying to figure out how
you can resize those, put it together and assemble it and prepare it for quilting. Perhaps you want some
different edging, a different type of
binding on the side of your quilt versus just a
standard straight quilt. This is the correct
course to take. Let's say you took
my previous course, the winter quilting
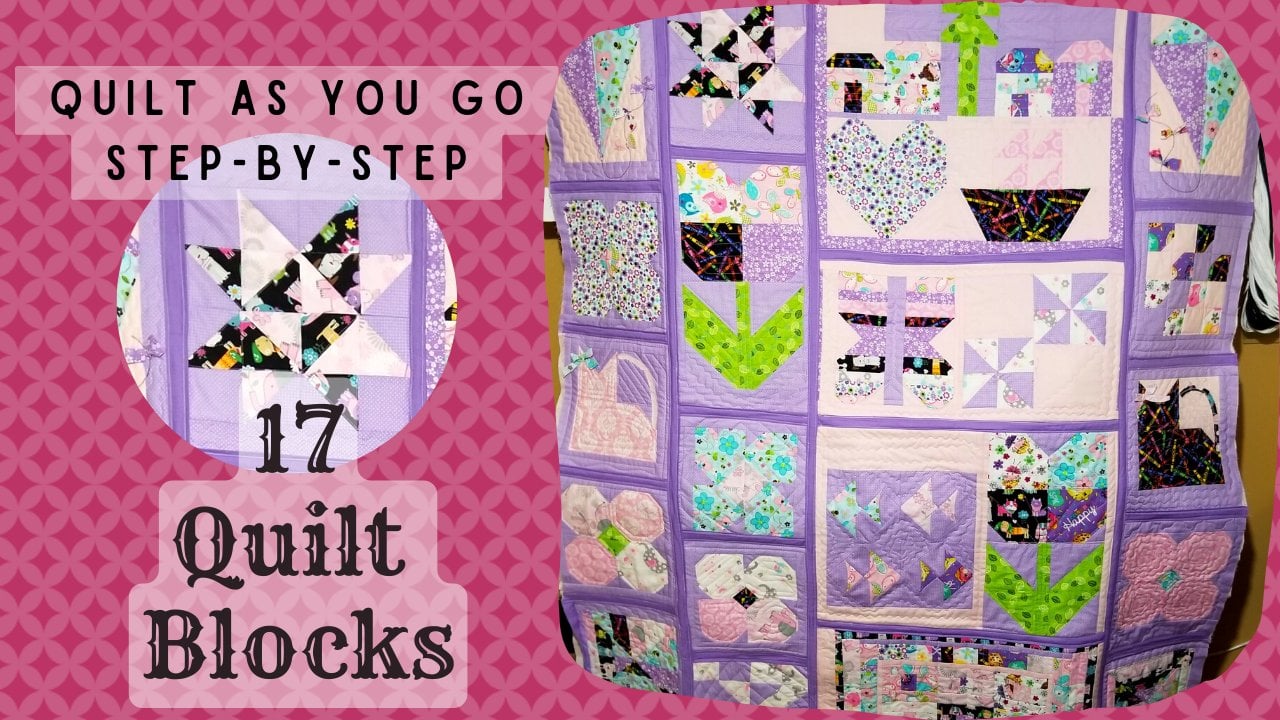
project where we learned 16 plus blocks, two different panels, and now you're ready to
put that together. You have the option of simply going over there and
taking that course as well. You can use the link here
in the about page and go straight over
there right here on skill share and
take that course. Either way, if you are
ready to finish your quilt, this course will cover how to
map it out, how to plan it, how to resize your block,
how to assimil them, and how to put a beautiful waved finish edging on the side
of your quilt. I welcome you to join me. Go at your own pace. You have the option
to skip down to the lessons that apply
to what you're doing. If you already have
a finished quilt, if you use the course
previous and now you're ready to
figure out how to assemble those and
put them together, or perhaps you're
just curious on the whole process of
how a quilt is made. This is the course to take. I welcome you and I'll
see you in there. Let's get started,
finishing your quilt.
2. Plan Stage Map: It's now time to start assembling and
planning the layout. The best way to do that is
to either on the floor, perhaps you have a display
wall with a sheet that you can pin your blocks to or
maybe even on a bed. The way that I generally do it is I will lay
all of the blocks out so that I can see them and I can visually build how
I want them to lay out. I'll then take my notebook
pad and I'll sketch out the placement of where I have put each
one of the blocks. As I do that, I can then visually see what
they look like. I also take my phone, take a picture of all of
them laid out that way I can see what they look like based on color and
how they're flowing, and if I want to
make any changes in where each one of
the blocks are located. I have my papers that have each one of my
blocks laid out, telling the size, and that way
I know what that block is. When I do that, I will take a
piece of tissue paper and I will draw the same square as
I have on my notebook sheet. I put it in plastic
because tissue, once you've moved it around, I can keep laying it back over my drawing and then that
way I've got it framed out. Now on the tissue,
I actually put the actual measurements of each one of the blocks,
what they were. This gives me a map. That way I can measure
them and I can tell which size each one is. I only do that in
a block fashion because I'm building this. As I build it, I'm able to put and move around just
like puzzle pieces, each one of those blocks. With this in mind, and I sit back down with
my notebook pad, I will begin adding up the measurements of
each one of those blocks, and that gives me a measurement
of how long and how wide. I will also set myself a goal of what I want
my measurement to be. For this particular
one, the goal is to be at least 42 " wide by 60 " long. And then that way,
I've written that on a posted note and with
that posted note, I already have my shortest
width and my widest width, which is also duplicated
on my notepad. When I add these together, I know exactly how long
all of these laying together and just eyeballing
it and just saying, Okay, that looks good there,
that doesn't look good. I get my measurements. I know how wide the
widest block is and how long them added
together without sashing. Once I've done that
and I get my numbers, you can see how it is
just in human nature, we just have a natural way. Without having pre measured
or predetermined anything, I simply made the
blocks that I enjoyed, liked, and desired to be
in this particular quilt. As you can see,
the length of all of these together, two panels, along with these
blocks came out to 53.5 long without any session
and from here to here, the way that I want
to map this out, is the longest width is 21.5. Now what's unique
is on this side, all of these are staying in a vertical line and look
at the magic of that. The same thing, 53.5.
Same over here. Then the width here, my widest width out of these
laid together is 10.5. Now, what that does for me
is it tells me that I can basically make all of
my blocks 12 " wide. I just need to add additional bordering when I've come
up with a said number, I can then deviate and make any changes or adding
and subtracting. Now in this particular
layout, I have two panels. I have one at the bottom, and I have one at the top. I just so happens
that they ended up on the same side
because I wanted to use this as my main
line of structuring my layout and getting my
placement where I desired it. The next steps that
I have is I have my tissue overlay that tells each size of each block and
where they will be placed. That's all that's on there, is just their name and
their measurement. Then this way, I'm not
having to shift through all these cards and keep
going back and forth. I have them already
mapped out on my notepad.
3. All In A Row Organize: So now I can basically take
each one of my block as I have them when I put them together the way
that I had them laid out, I know that all of these for this sheet are my ones for
my left row one vertical, and I've mentioned each
one of those blocks, and I will go to the next all of those are going in
that vertical first row. Then the next ones I
have pinned together are all of the ones
that are in the middle. In that, I put left,
middle, and right. That is a single panel
that's going horizontal up top that I have mentioned
here on my sheet, and I have them
sketched out as well. I know that here that it's
just those three blocks. Now the way I'll have to do
that panel is it will be lengthened or shortened based
on making them all equal. When I get to that step,
I'll share it with you. Then of course, the
middle vertical, that's two rows together. That's these two rows together
and I have them lined out. I know that these will
be all the center. Then of course, the
very last one is the final panel that
is down at the bottom, and it is 18, so that is here on
this bottom panel.
4. Size Goal Width Length: Now what I plan on doing
because I know that much by doing the adding and subtracting or
whatever it is I need, I know that right away that
I want to add four to 4.5 inch sashing and that's in these rows that would
go down these rows. These are the sashing. I have that laid out and
that is the goal. The main thing I
need to do right now is to make each one
of these blocks 12 ". These main blocks.
These verticals, they will be a
separate measurement, so I'm not worried
about them right now. I know that in these sessions to connect these blocks
together in this vertical row, I need to add 2.5
inch to connect them. That's once I've built
them out to 12 " each. So the main thing
that I'm trying to let you understand
is I'm only focused on this row for now because when this
row is complete, it will dictate the width
of the remaining sides. It will dictate the
horizontal panels, and it will dictate the width of this in a whole,
the whole quilt. I just want to focus on building this one
row out for now. That's going to be
the simplicity to assembly is to put these
blocks to where they are all equal in size and
connected because that is a straight vertical row and there's no more math
that needs to be done. They just need to be
built out to 12 " each and then connected
together in a long row.
5. Resize Goal How Wide Long: When I'm deciding I
want these to be 12 ", I now have to decide how much fabric I have to sew
to each side of this block. This block is my smallest
width on my entire layout. It is 8.5 ". The next one is also
8.5 " in height. The width is 10.5. So I only need to
worry about my 8.5. And then I have my sweater
one that is 8.5 in height. It's 11 " wide. So out of all of these blocks, my shortest width is 8.5 and
that is going to be in row, this vertical row and it happens to be the very first block. So what I do to make it simple to show you what
I'm talking about, I know that I need
1 " on each side. For the seam allowance
because it's going to take a half inch here and
a half inch here. And so, of course, 1 " for SEMs. The block is already
8.5, and technically, because I need that
1 " seam allowance, if I wanted to, I
could just say 13. And that will give me
my SEM allowances. I've added it back
because I want my block to be 12 " wide. So I'm basically adding an inch for the seam
allowances and giving it 13. If I subtract the 8.5 from
my 13, I borrow my one. You see how this is
going. That's my half and then eight from 12 is four. I need 4.5 additional inches. I've got to divide that
between two sides, one on this side and
one on this side. That is going to automatically
give me two and a quarter. Each one of my strips
needs to be cut two and a quarter inches
wide to be sewn to the side. Then of course, the
length of this block. This particular block is 9.5 ". So I know that I need to
cut two strips that are 9.5 " long by two and
a quarter inches wide, and you'll do all of your
squares the same way.
6. Tall Short Blocks Noted: So I go right down the row. Here is my sew machine that's my next block that
I have in line. And based on its measurements
is actually 10 " width. So that is a change
that I had not made on my original
measurements for my block, but I know that now.
Well, that's easy. We need to add a half inch on each side to make this
or the seam allowances. So that's 1 " for seams. The block itself is
already 10 " wide, and in order to get
it up to 12 " wide, on each side, we've allowed
our seam allowance, and we know there's 2 " there. That's a difference 10-12122, and that's 3 " that we need. We have to equally divide it
for each side of this block. So we know that two into 3 " is going to be
1.5 inch strips. So we need to cut
21.5 " strip and width by the length of our
block came in at 8.5 " tall, so they would be 8.5 ". So we'd have to cut
two, 1.5 by 8.5 " and so to the sides
of the sewing machine. The candy jar with the candies, sometimes it gets a
little complicated because it's such a
small difference. And this one, we are now
at a 9.5 in our width. We know that we of course, want to get it to 12. Inches. Now, if we're
just looking at the mat, here's a secondary way
that you can do this. It may be even easier for you if doing it on paper
is cumbersome. We naturally can look
right here on the mat, and we know that to get that
to our 12.5 inch mark from the very side of the block
is at a 2.5 measurement. We've got to add an inch on the sides for
the seam allowance, one on each side. That's naturally 3.5. If you divide 3.5, then they'll get you
one and three quarters. We want it to 12 " wide. By laying it on the
mat, we have 2.5. We add another inch for our Seam allowance.
That is our 3.5. And if you divide
three point 5.5, half of three is 1.5. Half of a half is
a quarter, 0.25, 1.75, and then the length of your block on
this one is 11 ". I'd have to sew on 211 by one and three quarter
inch long strips, and that's how you're
working it out. So that takes care of the jar with the candies
and sewing your strips on. And if you want to, you
can do just like that. Just put you a piece
of paper on there, and that way when you go to
cut it, you know what to cut. That way, if you have
a general consensus, most of your strips end
up being the same width, you can cut more than one row, and then that way
you can just sew them on and trim them off. The gift is 10 ". We've already done the
math workout for 2 ". It's basically if we're
doing a ten inch wide block, we know we wanted 12
", so that's two. We've allowed another inch
for the same allowance, we would need a 1.5 inch by 11.5 " the length
for the present box.
7. Within Half Inch Fixing: The sweater, that's where
it gets complicated because it is
already 11.5 " wide. We need it 12 " wide. What I do generally on something that short of a
distance is I may add just a piece on one side or the other
versus both sides, or you can divide the difference
and then trim it down, which would be to nothing, a half inch on these. Well, it would take
inch and a half to sew onto each side in order
to make them balance. That's very small because
by the time you say that inch and a quarter
strip to each side, it would almost
disappear because of your half inch
seam allowance. You can just take
that difference, add the half inch plus the
half inch seam allowance, 1 " strip, and sew
it to one side.
8. Rulers Mats Easy Math: You already know
how to do the math, how to determine what you need as your sides and
your seam allowance. Then of course, the height of the block is always going to depict how long your strip is. And then trying to
make it that width, just determine how
much it already is, how much you want it to be, and do the math and know that you're doing
that by measurement. Of course, you're 0.25 is going to be a
quarter of an inch. Your 0.5 is going to be a half an inch and your 0.75 will be three
quarters of an inch, of course, we have our holes. Whenever you're
doing measurements, sometimes it's just better
to take the block itself, light on the mat and using the same rulers that
you've been working with. And let them work as
a tool that you need. If you know that this
block is already 9.5 laid on the map and you center it and you
want it that distance, then lay your ruler there
and it will tell you exactly how much you need to cut to get it to that
size that you need, and that is the
easiest way to do it. You can always use
the numbers on your map to do that
to help map that out, and then you can determine how long you need
to cut each strip. Once again, this one
right here would be one and three
quarters and of course, to do the other side would be one and three quarters
to get this 12 " wide. This strip is always going to
be the length of the block, that makes it easy for you.
9. Pro Method Close Edges: When the block is close
to the width that is your goal for how wide you
want your blocks to be. Example, Ben, this is
11.5 inch wide block. My goal is to make my blocks 12 " wide because you only need a half an inch to make
it the correct width and because the seam allowance
is a half inch as well, the fabric would almost
disappear and remember, you're going to
have sashing that's going to be going aside of
these most of the time. So if you wanted
to, you could take one side and add
your strip to it. You need a half inch seam
allowance for one side, and you need a half
inch to make this 11.5 inch block 12 ". So you would just
take a 1 " strip by the length of the block, and this particular
block is 8.5 ", and you would cut a 1
" strip by 8.5 " long. And sew it to one side. Then allow your sashing
song to these blocks to make up and tie straight in and that's all you
have to remember. If you did it any larger, then if you're trying to
make it bigger than 12, then of course, you
would have to do all the other blocks that you're attaching to the same size. So sometimes the easiest way is to pick one side or the other and put that extra half inch on it and just allow your
half inch seam allowance, and then that equals out
that one block for you. That's how you can
take one that's a little more complicated
in the measurements because it's so close to
the size you're going for and size it up
to the size you need in order to tie it
into your quilt and have it to balance in
cosmetic appearance.
10. Create Work Panels Easily: Now, this is the top panel. In creating this top panel, if I just added these
squares together, they would be 24 " and that's
not even sewn together, that's just laid side by side. Because I am planning on
having an upper border and this particular panel will be in the top corner of
my layout here. I'm wanting to put
a colored border around my quilt
and I do not want my music notes to blend or disappear into that
top border sashing. What I'm going to
do is I'm going to add 1 " to the bottom of the whole note and a 1 " strip to the top
of the half note. For the seam allowance, that's basically a 1.5 strip that is the
length of this block, which is 8.5 and this
block, which is 7.5. I'll then sew these together. There is enough background on the tree block that when
these are connected to it, it is going to have a per
se background sashing and that note will still
be shown up in the panel. That way, I can surround
this panel with a 1.5 inch strip once I've
got them added together. For now, I want to add my
strip to the bottom of the whole note and my strip to the top note and then
sew them together, and then I'll add an inch around the top and the
bottom of this panel. It becomes its own solid unit.
11. Panel Working Sashing and Size: So I've now added my
inch and a half strip to my shorter in
length or height of my nodes in order to get them to look like they're
going up and down and putting the tree in
the center almost to imply this saying,
Oh Christmas tree. Now with that, it
made this panel when these three
blocks are connected, is going to be 23 ". Because of the way that the quilt itself is
going to be mapped out, I need to make this panel wider. So here we have 12 ". We now have these 12 "
on these rows of blocks. I know that in the center here, I want to put at least
a two inch sashing that makes the distance
between these, of course, 26. Since this panel now
is sitting at 23, I need to broaden it to 26. I'll be adding a
two inch strip on each side for the same allowance
to make this panel 26. Then I will surround it
with an inch and a half. At this point, I need to add a two inch wide strip
onto this side, which is 9.5 " tall and two
inch strip onto this side, which is 9.5 " tall. That will give me the
additional 3 " that I need to make this
panel 26 " long. Then once I have completed that, I can add an inch and a half
to the bottom that will be 26 " long and I can add an inch and a half to the top 26 " long, all of this being of
the background fiber.
12. Orphan Blocks Scrapy Quilting: Now in building this panel out, it ended up having a
finished length of 19.5 " and it was only 7.5 " tall. What I did is these half squares we had
leftover from the candy block, along with the little
squares that were cut off from our envelopes and
other pieces that we did, I've decided to add them to the sides here to
build out this panel. As you can see, I've
just sewn these squares together and just made
them into a shape, and I have one that's
going to be on this side. One on this side. Now, these will
have to be cleaned up and made to measure the same. Then, of course, it's
going to still need some extra to the top and the
bottom on this side. And all these strips that were left over from
working on the quilt, I'm going to select
some and add them to these little
rectangle shapes and build them out so
that they will fit. Then I'll add them to it and see how much longer I need my panel. So what I always find really
unique is I added that little strip on to these pieces and it is exactly what I needed. It might be the slightest
difference, less than a 16, and I'll attach these to the sides of my panel and
see how long it is now. I've added these on and
I'm extremely pleased. My panel is now 24 and
a quarter inches long. And this is awesome because
I was trying to get at least that much
because of the sides, I want to border
out this panel so that really stands out
in the full length of quilt and I needed to make it taller in
order to look correct. I wanted to use another one of my fabrics
and this is what I have and I'm going to add a border all the way
around this panel. When I do that,
believe it or not, this panel will dictate what
the length of the quilt is. My goal is to get the quilt at least 62 " long, if not 64. What I'm going to do
is border this out in at length that is contenting
me and makes me happy, and I will be able to then see how long everything
adds up to be. I've moved this panel to the
upper half of the quilt. In the original layout, I had the broader panel here I'm now and I
have this panel, the smaller envelope here. I've now switched
these positions. This smaller one is
going to go up top. This larger one will
go at the bottom. I did that whenever I
took a photograph of it and seeing what it
was going to look like. I also shifted
these on the panel. I moved the whole
note in the tree in the half to where they're
lined up this way now, and I took my new measurements. These two panels sewn together
in a vertical fashion, I want to put a
border in between, and that is why I'm saying this particular panel
being moved up top will dictate how long the quilt will be and it will
either be 62-64 ". I'm going to border it out now by putting a
border around it. I've already shown you
how you can measure. If this panel is 7.5
" and I desire to put at least a 1.5 to two inch border up top
and at the bottom. All I have to do is
lay my ruler there and measure an extra half inch
for the seam allowance. That way, if I
want this panel to be 11.5 or if I want it to be 12 " depending on how big you're wanting
to make your panels, then you can lay it on your map. You can look at the bottom. And you can look at the top, and that way you can measure. I know that down here at
the bottom, it's 1.5. If I add a half inch, I just need to cut a
two inch wide strip that is 24 and a
quarter inches long. I would also do the
same up here so that they will match this
border and this border. Then by doing that and
adding that onto my quilt, it will then have a
measurement of 10.5 ". And that is really, really
how you're doing it and making it easy so
that you don't have to think about it
really, really hard.
13. Quilt Size and Sashing: Already know that if
we add a border here, we're going to add those three together, this vertical panel, this vertical panel,
and the border, and that will determine
the width needed. For example, if I wanted this 2 " and these are
already 12 apiece, then I would simply sew my three inch border
sashing inside here and that would equal to 26 because of the
same allowances. Therefore, this smaller panel
that's going to be moved up top would also need
to measure 26 ". That is how you determine
and build out your quilt. You plan it and write that
plan down, sketch it out, lay it out on a bed floor, or maybe you've got
a wall that you can hang flannel to
and place it on there. And then you can see
your plan in action. Make your measurements when
you tie them together, and then you can make up for the difference by
adding borders and sashing in order to fill in those blanks and make it the length and width
that you desire.
14. View Assembled Half: So here we are. I've
added these panels. This is the one that goes
up top and as you can see, a two inch strip has been added to the
top and the bottom, as well as the sides and added these little half
square triangles and a strip from all
our other blocks. That extended this
piece to 27 ". Instead of hitting a sashing in between these or
a border sashing, I bordered out the sides of those two and
sewed them together. And still it had to be 27 ". This sashingtp and
below this panel, finish that off and it
just frames it out. As you can see, these
have been added to it. Now when we get down
here to the bottom, where the music note and
the tree panel is up top, you'll note that there is
a 2.5 inch mortar piece or sashing but at the bottom
is only a 1.5 inch. That is because in framing this out and keeping it looking
in the form that I have, I can now add my sides to
it and the vertical panel. I just wanted to give you a shot of how this
is coming together. I decided on 27 " here because this mortar
sashing will have an additional sashing
that will dress out the entire quilt this particular panel
with these ornaments, will be a top and bottom of the vertical side that will
go over here on this side. This is how you can lay
it out and you'll have all the measurements and know
how I did what right here, you can now see real clearly the strips that were
added in between. For example, over here, it was only a 1 " or 1.5 inch stripping and that was just
to connect those blocks. But on this side, it was broader to make up
the difference at an inch and a half that
connected those blocks together. All built out to be 12 " from what their
original size was. So it's just looking
beautiful. Just absolutely. Gorgeous. The next
step is to add on the vertical panel and finish it out with
its trim and of course, the additional
boarding that will go from the top to the
bottom on each side.
15. Border Finished Quilt Top: The overall plan is
to use this fabric to really truly make it
look fancy and deck it out. I will cut that and
this will be sewn to the vertical panel and the vertical panel will have
to be expanded in length. The vertical panel
right now is 54 ". However, with these
pieces sewn together, this whole distance of this
quilt is 59.5 thus far. I need to set this one
up and I will add the same bordering
sashing this strip, and then also at
the bottom edge. Since this is 12 " wide,
it's pretty quick, can add a 2.5 inch strip
to the top and bottom. That will add an additional 4 " and get me at
the 58 inch mark. Then I'll see what I want
to do from that point.
16. Quilt Top Plus Backing Choices: So our quilt top is now made and we have
our measurements. It's now time to pick out a backing and a batting and
sandwich them together. You can do a walking foot and do regular stitches
on your sewing machine, or you can send it
off to be quilted, or perhaps you do some free
motion quilting yourself. If you have a amateur long arm quilting
machine like I do, once you sandwich it together, you can pin it onto your
frame and begin quilting. I'm deciding on how much backing or which backing I
would like to use, of course, I have my batting, which is a low loft
and it is cotton. That will be
sandwiched in between. Now I have 2 yards of a printed cotton fabric that
looks like plaited flannel. This one is a wide back. As I told you before,
I more my fabrics, and it is solid red with the blacking in
it, marbled look. Then I have an actual flannel. This is a type of
real low law flannel. It is mostly polyester
than anything, but it's very soft and
it has cotton in it, and there's 2.5 yards. With the flannels, a
lot of times they are a little bit wider than
standard yardage. Then, of course, the
wide back is very wide. It really depends on
the size of my quilt. I do want a colorful backing, which looks beautiful when the
quilt is just line folded. And if I needed to, I can also make my
binding with it. But I have enough fabric
that I'm going to be doing my binding with the fabrics
I used to make my quilt. These are just some
ideas that you can use. If you need to, you can sew your fabric pieces together
and make your backing. The idea is to make it large enough to cover
the back and of course, you're going to
need your binding.
17. Quilting n Pattern: So I've now picked
out a pattern that I desire to quilt onto my quilt and I have
placed the quilt onto my frame and prepared it. So it's ready to be stitched. I've got my threads picked out. I do green, gold, and red with white bobbing, it'll be white on the underneath and I have it set up
here on my frame, preparing it to stitch. That's your next
step. You just have to decide if you want to do a walking quilt foot with your standard
sewing machine, or if you want to do
free motion quilting, where you can stencil it on, or you can do your
long arm or send it out to have it quilted
and sent back to you. This is the next step
before binding the quilt.
18. Scollap Wave Edges: Once you've quilted your quilt and you're ready to
put on your binding, you may want to consider
using the scallops, binds and template to put a more curved side to your
quilt versus just a straight. If you've never
used this before, I'm going to show you
how you can use it. This template is put
out by quilting a day and you can do
scallops, binds or waves. This is basically your wave or your vine and this one
is your scalloped edge. Now, what's great about it is
when you get this template, it comes with a booklet. And the first thing you're
going to need is a few tools. Very common tools we're
going to use are ruler. I'm going to use chalk and
you may want a piece of paper or something to mark where you're going
to be going to the most. This is how it works.
You basically take your ruler and all this
is stated in the book and you'll go to the corner
of your quill and you're going to draw
a line from corner to corner diagonal on each of your corners on each
side of your quill. Now, you first need to know the measurement
of your quill, the width and the length. Right now, we're working
on the web to just show you really quickly
how easy this is to use, you will be told this in the booklet
and then the booklet, there's a chart and it tells you exactly how many scallops or waves you will make
depending on the measurement. First, I know that
this is 45 " wide. You deduct 4 " and
that puts me at 41. Now by division and
doing the math, I know that without my booklet, by doing that division, I can do eight and a quarter. What I will do is I'll go from my diagonal here where
I've already got it marked with chalk and will set I will find my eight
and a quarter mark. This ruler gives eights, quarters and halves
as well as holes. I have my quarter here and I can set my ruler right there. Now, there are two
ways you can use this. I've already determined
I can't use the scallop. Number one, the scallop goes too deep into my quilt when
I try to do the curve. The second thing is, if I use that entire
inch with or without it, it's still going too
deep into my quilt. I'm going to do
the wave instead. What you do is you just
set that at your diagonal. I already know that
by the division, minus eight and a
quarter to 8.5. I'll wind it up and then I'm putting it
right at the edge. I have not trimmed
my quill off yet, so you want to do this
before you trim it back. I've got my curve at the top. I'm meeting my marking
with my diagonal. I know right here is the other 8.5 and I've already drawn
my line and made my mark. But before you do that, easiest way that I
was shown to do it. If this is my point, I've got my pen there and you could use a
piece of paper so that your eyes go directly
to your markings that you'll be using
at the 8.5 mark, for example, it will also
tell you in the book exactly how many scallops or waves you will get for
each one of that distance. I'm going to put a needle
right on my 8.5 here. What's cool about
using the pen is my marking can bump
right against that pin. I automatically puts me at
the top edge and once again, I'm already set on this side. Now, once you get
all these pinned and marked and it looks like it came out correctly
and you're set, you can then draw your line from your point of distance
across your wave. You will do all this
and do the entirety of all your edges before
you make the next move. You'll take a very nice clean, sharp fabric pairs ears cut. You'll then create
your binding and you'll do your binding
based on your measurements, but also allow for that extra 4 " because you will have your corners and
when you'll turn, then you'll have
these dips as well. You still want to use the
same measurement to determine your binding as you would without the curves in the waves. Then when you get
here, basically, when you have done that
measurement correctly and you started at your 8.5
and you're on your diagonal, when you do this side, your 8.5 marking should hit just right on that
diagonal and once again, you'll go down this side. Do your math first, make sure you do your
four inch deduction. That way, if the length
of your quill is larger, then you'll have your 4 " taken off and
then your division. Like I said, the booklet
will tell you that, but if you cannot
locate your booklet, then just know to
do the division. This width is 45. I took off 4 "
that put me at 41. In order for these arches
to turn out right, I had to use 8.5 to eight and a quarter on my wave marking from point to point. Mine ended up being
the 8.5 on this side, in some places eight
and a quarter. I tried it both ways. I
did eight and a quarter, then I did 8.5 and I
was able to regauge it. If it is just off a hair, you can make those adjustments preferably near your center. I did this side, my quilt
was 64 " in length, took off the four that left
60, and dividing that out, that still put me at the 8.5 to eight and a quarter per wave. See on this wave, I will get this
little neat point that it's coming to
and it just really, truly adds more character and really attractive
on your quilt. If you were doing the scallop, it would just be a circle. With the wave, it's going to be a little corner
point with an angle. It's just going to
be really nice. My next step is to make my
binding and sew that on.
19. Trimmed Edgess: So now we've prepared
ours with the wave, and we've trimmed it out and cut off the excess from the sides. And you see these beautiful little corners is just really, really neat and just gives the quilt even more beauty
with the waved edge. Next thing now is
to make the bind.
20. How Much Binding: Or you're still going to
make your binding based on the width and
length of your quilt. But then add that 4 " because
you'll have these dibs and that is going to take
up a little bit of distance and you want
to have that extra. Make sure that you allow 4 "
on each side of your quilt. Then of course, your
turn corners is always an and that's how you can determine how much
binding you need. If it's 64 plus four is 68, another inch for the corner, that's 65 and I know that's for my length and I
would add that together. Two times 65 would
give me 130 ". Then the width of mine is 45. I'm going to add four at 49
plus an inch for the side, that'd be 50, that's
another hundred. I would make 230 " of
my binding to sow. You just sew it
same as you would. Your binding is going
to be 2.5 " wide. That's what I'm planning
on doing on this. I'll sew it on
this side and then I'll hand sew it down
on the back side.
21. Scallop Dips Explained: Get to your curves, if you will sew
your binding, stop, leave your needle down and
turn your quilt a little bit straighter and then start sewing the binding up
around the curve again. When you let go of
it, it will have this nice little gather area and it will serve just right. You just go ahead and that way
you're not per se pulling, but you're straightening it out when you get to that turn. You're going to just
leave your needle down, turn and sew it just like you
would your regular binding. Then that way it has that
natural little give and dip. If you need to, you can snip in here just ever so
slightly, not deep, just a little slight snip in the corners
when you get there and if you are using your
binding is cut on the bias, then it will have a little
bit of stretch to it anyway when you pull at
it. That's the next.
22. Binding the Curves: So now we're ready to
put our binding on. You don't want to
start in your corner. You want to start further down, and I want to start on end here. You want to give yourself
plenty of room and make it inconspicuous where you
begin and where you end. I'm going to start in the
center of one of the waves. I have my binding right here and you want to
allow yourself at least around a ten inch tail and
the reason being is you'll be connecting your binding and
may or may not be too close. You don't want to be in a curve when you do that when you
bring your binding about. I'm going to start
midways and start my binding there so that when I get ready
to put these together, they'll come together
real natural. You're still going to give yourself a quarter of
an inch seam allowance. I'm just going to start
stitching in the middle of that wave and that will allow me enough binding to connect
whenever I come about. And when you start
your stitching, in the beginning
of your binding, when you start out, you might want to
give it a backstitch just so it'll have
enough for you to be able to pull
on it whenever you get ready to connect
your binding together. You're just going to follow your wave and make
sure you're doing your craven inch seam allowance
and just stay right on it and just follow your wave just the same as
you would a straight edge. And so you're coming about, and I'm going to
show you when we get over here to the depth area, and then that way you
can see how I do it. And once I get to that dip, I'm going to plant my needle. I'm going to leave
my needle down. I'm going to raise
my foot and I'm basically just
turning the quilt. I'm going to turn it to where my binding stays in
line with my curve. And that's the reason why
you want to do the bias. Now, if you need to, you can
actually snip in that curve. So they'll open up a little
bit, and then that way, you're almost giving
it a straight line. So basically, let me just
back up here and show you. So right there in that curved
area if you wanted to, you could take and
just put a small snip a little bit of snap so that
it almost seems straight. You'll have this little
bit of a give to it. And then that way, when you put your needle back down and you
bring your binding about, you'll have that little
bit of give that you need. Now I'm just going
to bring my binding over and start stitching again. And it's just like that. And your binding you'll
just follow the curve just like you would any
other time. Just keep going.
23. Binding Quilt: So now we're ready to
put our binding on. As you can see, you don't
want to start in your corner. You want to start further down, and I'm going to
start on an end here. You want to give yourself
plenty of room and space and make it inconspicuous where you
begin and where you end. I'm going to start in the
center of one of the waves. So I have my binding
right here and you want to allow yourself
at least round ten inch, six to ten inch tail. The reason being is you'll
be connecting your binding and may or may not be too close. You don't want to be in a curve when you do that when you
bring your binding about. I'm going to start midways
and I'm going to allow myself at least six d 10 " and start my binding there so that when I get
ready to put these together, they'll come together
real naturally. I do love yes and you're still going to give yourself a quarter of
an inch seam allowance. I'm just going to start
stitching in that middle of that wave and that will allow me enough binding to connect
whenever I come about.
24. Binding Quilt 2: And when you start
your stitching, in the beginning
of your binding, when you start out, you might want to give it a
backstitch just so it'll have enough for you to be
able to pull on it whenever you get ready to
connect your binding together. You're just going to follow your wave and make
sure you're doing your craven inch seam allowance and just stay right on it and just follow your
wave just the same as you would a straight edge. And so you're coming about, and I'm going to show
you when we get over here to the depth area, and then that way you
can see how I do it. Once I get to that dip, I'm going to plant my needle. I'm going to leave
my needle down. I'm going to raise my foot, and I'm basically just
turning the quilt. I'm going to turn it to where my binding stays in
line with my curve. And that's the reason why
you want to do the bias. Now, if you need to, you
can actually snip in that curve so they'll
open up a little bit. And then that way, you're almost giving it a straight line. Basically, let me just
back up here and show you when I set that foot down. Get it turned back like I
had it, put my foot down. I'm going to backstitch
here because I just started right there
in that curved area, if you wanted to, you could take and just put a small snip, just a little bit of snap so that it almost
seems straight. You'll have this little
bit of a give to it. Then that way, when you put your needle back down and you
bring your binding about, you'll have that little
bit of giv that you need. Mine is gathering because
this piece is not on the bias and that's the
whole reason you want to cut your binding on a bias is because it will
have that giv for you. Let me get line back up here. And now I can put my foot down. I need to backstitch that and make sure I got that
hold going on there. And now I'm just going
to bring my binding over and start stitching again. And it's just like that. And your binding you'll just follow the curve just
like you would any other time. Just keep going.
25. Mitering Corners Binding: So now we're here
at the corner and we've got this much
of our binding sewn. And what you'll
do is you'll come to basically consider
it a diagonal. When you get to the diagonal, you can actually stop and
take the quilt out and that might be easier when you're first learning how
to do your binding. That way you can
get familiar with where you need to stop
and how far you can come. The next thing you're going
to do is I want to show you I took mine out from under the sewing machine
so you can see, I've got my binding coming here. I'm going to fold it
back just like that, just like I'm making a
little folded square, and I'm going to bring it back. When I do, as you
can see, my corners, it actually meets and it's at an angle because this is
coming down on an angle. It is almost like you're
making a little cross back and bringing it forward
in the actual angle there, so we'll arch away. That's because we need this binding to start connecting
here and coming about, and we've already
got it sewn here. What we'll do is we'll put that back under the foot and we're going across that fold because it will flip over
and be the underside. That way we got our angle. So we'll start around
our curve again, and we'll have our neat
little fold that we'll tuck over whenever we go to
sew the other side. And you can hand sew that or you can machine
stitch it down. I prefer hand sewing my binding down once I've
attached it by machine. Here where we did that and I'm showing you how we came
across the actual fold. When we flip that over
to sew this down, it's going to make that neat. Of course, you want to clip
your bulk out of your corner or I do sometimes and then other times I just fold it over. It will actually
naturally fold as you flip it over and you can put a warm iron on this if
it makes it easier. But you will have your pleated
corner already and it'll just make itself there because you've already
created it on the front side. Then there you go, you'll have your nice little neat corner and just as pretty an angle
as you can ever wish for, and then you'll be
able to ditch it down and just keep a trucking as
you go all the way around. That's how you do your
corners of your binding.
26. Outro Finish: In looking at your
finished quilt, you will absolutely every time be amazed and think to yourself, Oh, my. I did that. It's such a great victory and sense of self
accomplishment. You have now expanded
your skill level and know how to assemble
and plan out your quilt, put it together,
resize it, smaller, larger or to any
top that you want, and finish it and give it a beautiful scallop
wave edge for something that's a little bit different other than your
basic straight edge. I've enjoyed
teaching this course and going on this grand
adventure with you and looking forward to seeing your finished quilt by submitting it in
the project's page. Ask any questions or
comments in the discussion and check out the other courses I teach here on skill share. I look forward to
our next adventure. Until then, congratulations. Dandy yours, Elizabeth Morgan.
 Elizabeth Morgan, Dandly Yours