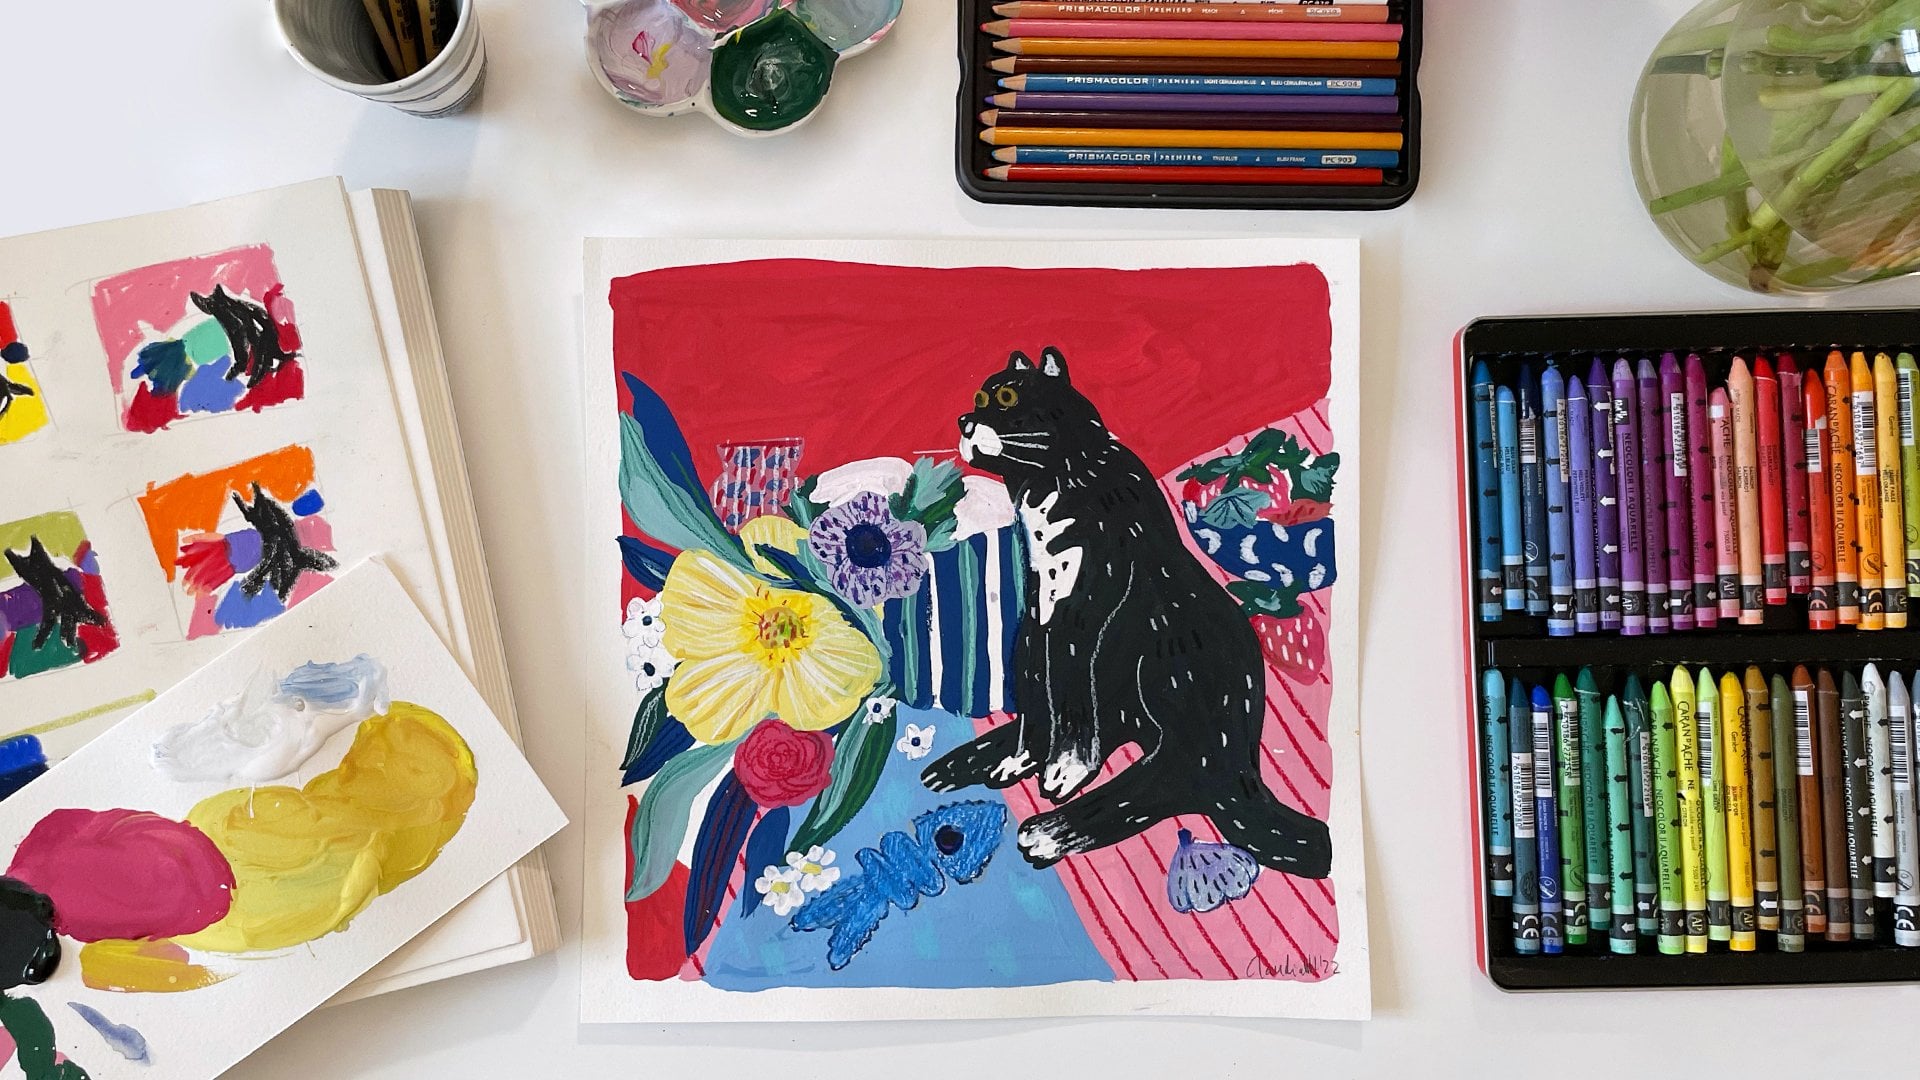
Transcripts
1. Introduction: Do you ever wonder why
after practicing for years, you don't have a defined
artistic style yet? It's definitely not
because you are not creative or you lack talent
or you're unmotivated. It's because no one has ever shown you a
system that works, a system that you can use to develop a clear
voice in your art. Hello, I'm Claudia,
an architect, illustrator, an artist, and
also a Skillshare teacher. It has taken me a long time to actually perfect
this process. But when I started illustrating, this is what I actually
use to develop my style. Now I am also in a
transition phase. I want to show you life, how I develop my own
style and how I use the system that I
have developed to my advantage in order
to define a clear path. One of the things
that I struggle with, and I see a lot of
students struggling with is the fact that you don't
have a clear direction. You don't know where to start. I can tell you that
through this system, I have helped multiple students, and I have helped myself develop a clear artistic style
and know how to progress, know how to keep practicing
and know what their taste is. So together, we're going
to learn how to define your artistic voice following a very clear step by step guide. We'll start by collecting inspiration and
training your eye. That way, you will start
developing taste and a gut feeling to know what it
is that you actually like. We're going to analyze it and put all of the things
that you like into words and categories
so that we can easily name the things that we like because when we
can name something, it is easier to save it in your brain and actually
internalize it. There, we're actually going
to do something quite iconic. We're going to create and sign our very own style manifesto. It is something like a
guide for the future, something that you can
always look back to and remember what it
is that you like and what it is that
you're working towards. Finally, we will apply
everything that we have learned through a six day challenge in which we're going
to paint a lot. And we're going to
repeat a lot of things, but we will learn consistency, and consistency is the
key to progressing. In just one month, you will see your natural voice emerge. This process, you can repeat
as many times as you want, but you will see
that one month of consistent training
already brings a lot of changes with it. This class is for beginners and for more advanced
artists who maybe feel a little bit stuck in their creative practice or
are a little bit burnt out. They need a fresh
approach and they need a new direction because
the core skill that you will learn in this
class is how to develop your taste and how to build
your style intentionally. I want you to be able to experience the joy
of being able to express the things
that you like and to be confident in your
taste and in your work. By the end of this class, you will have more than
just painting. You will have a system
that actually works and a starting point to develop your own artistic defined voice. So let's get started, and let's talk about
the class project.
2. Project Description: Before we dive into the lessons, let's talk about the
class projects because this project is where everything where the knowledge
comes together. In this class, your
project is actually to build your artistic
voice step by step, following the system
that I have created. And we're going to do this
through three key things. One is an inspiration library. The second one is
the Style Manifesto, and the third one
is the practice and experimenting stage. And just so you know,
this class isn't about creating one definite
final piece, more about learning a
process and seeing results. And I chose to teach this
way because when you break down a process in
small singular steps, it's way easier to achieve, and it doesn't seem so daring. So this whole process
takes about a month. I have broken it down in four weeks, but you
can, of course, extend it and make it fit your requirements
and your timetable. Don't actually have to
go and buy anything new, any new material
for this project. Maybe you have something
at home that you always wanted to try
out or maybe you go out and buy some
material that you always wanted to try out,
but that's all you need. You need that. You
need a sketchbook, and you might need a
printer and some scissors. That is important.
That's not necessary. Remember, this is
about experimenting, not having the perfect setup and the perfect materials because
perfection doesn't exist, and we're actually
looking to make bad art. I have included a
Style Manifesto template that you can fill out online or you can print out and fill out by hand
if you see convenient. And remember, you don't
have to do it all at once. You can come back after two or three weeks and complete the course
little by little. I have a few tips
before we begin, because this might seem daring. But really, I have
made it as easy as possible and not
complicated at all. So start simple. Don't seek perfection. Seek to experiment
and to make that art. Focus on consistency. Don't focus on perfection. If the drawings don't look the way you want, it's totally fine. We also learn from mistakes. Actually, we learn
more from mistakes than from beautiful
finished pieces. And what we want is to learn. And please, I really encourage you to upload your
progress as you go so I can actually give you feedback because I will
be here stoking you. I'm very noisy, and
I love seeing how people progress and what
things you actually like. So upload your inspiration,
upload your progress, and see me there stoking and talking to you
in the comments. Alright, so now that
we know what we're actually creating and
how this process works, it's time to start. Next lesson is going to be
a little bit theoretical. We're talking about
the myth of having a defined style because I don't want you to put any
pressure on yourself. So let's have an open
discussion about this.
3. Myth Busting: Why You Don’t Have a Style, Yet: Before we start actually
building your style, we need to clear something out. Not having a defined
style is not a fault. It just means that you're
still experimenting. It is completely
normal, and most of us, most artists might think
that style is something that you just discover that
is waiting there for you. But in my opinion,
that's not it at all. It's something that
you work towards, and it's something that
is always ever changing. It changes with you. When your world views
changed, so does your taste. So does your art style, then. An art style is something
that adapts to you. You don't adapt to
a distinct style. You need to get to
know yourself through introspection and analyzing what it is that
you actually like. One thing that is
not so common to say is that actually
an art style, having style and having taste is basically taking
decisions constantly. Actually, your taste is probably already better than
your art skills. So maybe that gap feels frustrating because
you want to be here, but your skills are still here. So you have to progressively get better in order to
match your taste level. And that doesn't
happen overnight. It never happened overnight. You didn't learn how
to read in one day. It took a long time. And this is the same
thing. You have to train your creative muscles, and you have to
train your eye and your gut feeling to what
it is that you like. Think of a style as
choosing a direction. Not a final destination
because it is never final. It's something that changes
with the course of time. And I want to be very
clear with this. Your goal is to experiment. It is not to create
beautiful final pieces. Your goal should be to
create bad, ugly art, art from where you can
learn something and to do it consistently through
repetition and to keep at it. Your goal actually is to keep motivated and to
keep at it until you're happy and
you feel joy when creating Please don't
compare yourself to others, especially in the beginning, don't seek validation
on social media. You are in a progress, and the important
part is that you know what you like and that you
know what brings you joy. If you're having a bad
and hard time painting, then you will not
want to do it again. And that is definitely
not the goal. Our goal is definitely not to make art that is
liked by everyone. Our goal is to make art that we like and that
we enjoy making. And remember, sometimes
I get stressed that, Oh, I'm defining my style. It's like I'm signing
a contract for no, you're not defining
your identity forever. This is a progression
like everything in life. You change your mind.
It's totally fine. You're running an experiment. And as you move forward, you have to give yourself permission to change your mind
and to explore other parts of your art journey. That is the way we progress, and that is the way
we create with joy. So in the next lesson, we're actually starting
our four week program. I hope you're ready. The first thing we're going
to do is gather inspiration, and this is a very fun part. Actually, you can do this
for longer than one week, but let's concentrate
on the first week and take it step by
step. See you then.
4. Week 1: Building Your Inspiration Library: Welcome to Week one of
this 30 day challenge where we're going to find your illustration and art style. And this week is one of
the most important ones. It's where we're going to gather inspiration to build the
foundation for your own style. We're going to start building a reference library together. And what is this? You
might ask yourself? Well, it's a collection of all the things that inspire you. In this case, we're going to be working on illustration and art. So it's best if you
also choose artworks, but inspiration is everywhere. You could be collecting
movie stills, you could be collecting
photographs, you could be
collecting things from your daily life, furniture, vases, ceramic pieces
that you like. I personally would try
to focus on collecting references from the medium in which you're trying
to develop a style in. Say, if you're trying to
develop your painting style, I would also look for paintings, illustrations, even posters, but something visual
that is not real life. And as a heads up, this
process of creating a reference library is
not a one week thing. An artist, you're always developing your style
and your taste. So you might need to keep
doing this for a while. You need to get inspired. You need to go to museums. You need to go out of the house. You need to look
at other artists, at your colleagues,
at your peers, at your friends,
what they're doing, what they're painting, what
materials they're using. That way, you would feed your internal
inspiration archive. Our goal for this week is to
collect at least 50 images. Y 50? Because when you look
for like ten or 15 images, then you start being very picky and you think and
overthink a lot. The goal here is to start
trusting your gut instinct. So you're looking at
a lot of images and you're trying to collect
as many as possible. So you have to
decide fast what you like and what you
don't afterwards, we will analyze what it is
that you have gathered. But first, you're
just looking at the image and deciding very fast if you like it or if you don't like it,
trusting your gut. So if you like it, you
save it. Don't analyze it. Just take it and
put it in a folder, put it on Pintres,
put it on tumbler. Whatever medium you're
using to save your images. So speed is the most
important part here. You're trying to collect
as many references as you can within a week. If it's more than 50, perfect. But at least 50. Really don't worry if all
of this collection of images feels a bit inconsistent or chaotic,
that's the goal. We're going to see
everything that you like, and then we're going to break
it down and look at it. Within the chaos, your brain is subconsciously choosing
things that you are drawn to, and afterwards, when we look
at it and we analyze it, it will all make sense. We will see the patterns form. Maybe you like bold colors, maybe you like glitter. Maybe you like only
pictures of cats. You will see that unfolding just by collecting
inspiration I swear. And here a very
useful tip for you. Try to avoid collecting
things that you think or that society makes you think that
you should like. If you're an illustrator, you don't only have to
look at illustrations. You can look at the Old Masters, at oil painting, at
Japanese poster design. All of this could
influence your style. So don't be afraid to
look beyond your field, but remember to keep it
visual because it is important to have
references that are painted in the
beginning, at least. When you evolve a
little bit and you start to develop
a defined style, you can start looking
beyond your field. For now, let's focus
on visual stuff. So paintings, maybe graphic
design, something like this. So these are my practical
recommendations for gathering. Either you open a folder
in your computer, you call it inspiration and you just drag and drop
everything there, or you create a Pinterest board, and you start collecting
from Pinterest, even though I don't
recommend that that much, because in the end
then you will only use Pinterest as your
inspiration source, and maybe you find
inspiration elsewhere. So you should be able
to also save it there. If it's not Pinterest, maybe
you want to make a tumbler, or what I personally have is
a secret Instagram account. Mine is called Klaus
Daily Archive, where every day I post for myself only three
different artists, and I do a little
comment on why I like. Places where you
might want to find inspiration are
the easiest ones, for example,
Instagram or Tumbler. Then we also have this
website called dot n, maybe even Tik Tok, any other webpage from an
artist that you can find, physical books, of course, exhibitions, and of
course, museums. Maybe your friends, if
you have friends that are artists and do
art themselves, packaging design,
posters, you name it. I just gave you some examples
so that you can choose, but inspiration can
really be found anywhere. And if you do an
online collection on Pinterest or Tumbler
or even, like, a Google Drive,
share it with us, especially with me because
I'm very noisy and I want to know your sources
and all your inspiration. You can leave the link on
the project page down below. So now let's collect all of these images. And
here's the task. Once you have collected, you can leave them as
an online archive. If it's easier for you to
look at them that way, but I personally do
enjoy printing them out. My printer screamed at me because it's
running out of ink, but I did manage
to print them out. And in the end, I think I have a little bit less
than 50 but because I have already gathered a lot of inspiration, and these are mine. As you can see, my
inspiration is steering a little bit away from
traditional illustration. And that is because I'm also right now in a
metamorphosis phase. I'm trying to develop my style. So let's see what we gather together and how we
can analyze this. Now, when you have
printed your references, you might have a lot of
chaos and different sizes. Now you have the very tedious
task of cutting them out. Do as you wish,
either collect them online and leave them online or lay out them with canvas or Photoshop or in design
and print them out. Either way, you have
one week to do this, collect 50 images
that inspire you, and we see each other next
week in order to analyze them. Let's start to make a little
bit of sense out of what it is that we actually
like in our taste. I love getting to know
myself and how I develop my taste and style.
See you next week.
5. Week 2: Analyzing your Style DNA: Welcome to Week two. I hope you had fun collecting
all your inspiration. This week, we're going to
analyze your Style DNA. So we're going from
collecting and getting inspired into
really thinking and analyzing and understanding why you like the pieces that
you like and how you could implement that
into developing your own very unique
voice and artistic style. We're going to break
your inspiration into four categories. You could use more if you want to I just wanted to
simplify for the beginning, and afterwards, we can always add more into the categories. We can say that you like
this and this and this. We can say that you specifically like this topic, but for now, we're just going to do
a rough categorization using this for
little topics here. I would recommend you
to take little pieces of paper and write
down the topics. As you can see, I did decide to print out all
of my inspiration. For the beginning, I think
this is the best method, even though my printer
did have a hard time. For example, the blacks
didn't come out really black. Anyway, doesn't matter. It's good to have
them because you can play with them
and make a collage. And in the end, you have kind of like a little
inspiration booklet. I don't know if you
will still keep using this method when you advance a little bit more as an artist. But for the beginning,
it's super useful. When I first started
illustrating, I think I've shown
you this before, but I did collect all of
these inspiration images, and I glued them into
this little booklet. I wrote about them, and
you could see, like, the different kind of styles
and how I categorized them. And this really helped me a lot, especially when I
was stuck and I didn't know what to
draw or how to draw it. So I would just look
at this inspiration, and it was like a little bit of a refresh little bit of, like, getting out of my head
and looking at what other people are actually
doing and just, you know, having references because having references is really important, especially for an artist. You don't need to copy, but it is very helpful to
see what things are actually possible and how people are translating
ideas into drawing, what colors they're
using, and what styles. So let's start categorizing all our little printout images. I would put the
categories up here. Let's put emotion and story,
composition and style. Line and shape and
color and texture. I will tell you a little
bit about each category. What I mean by emotion
and story is that you actually like the story
that's being portrayed, like the topic, and it also makes some sort
of emotion in you. Composition and style, you
like that it's realistic. You like that the composition
is a certain way. You may be like that
it's more abstract. You like that they
use puntism or cubism or something like
that. Line and shape. This could mean an image
where they're using only bold lines and geometric
shapes or the contrary, very organic shapes
and nothing defined. Color and texture, I think
that one is self explanatory. You like that maybe there's
a lot of mark making, or if they're using oils
that is very thick, like, kind of, like an
impasto technique, and you like the color palette. Let's start looking at
some of them together, and while I do this, you
do it for your own, okay? This one, for example,
I love the colors, and I love the texture on it. So it's going into
color and texture. That was a no brainer for me. Next one, let's do this one. This one is a digital
painting of a horse, and it's kind of
like the fuminated and has gradients and
a lot of glitter. I think I also like the color
and texture for this one. This one here, I think I
enjoy also the colors, but especially also the
composition and the way that the elements play together and kind of like
this magical story. So we're going to put it here. For this one, this one is difficult because
on the one hand, I like the story, like how
kind of imaginative it is. On the other hand, I
like also the colors. So I think this is going
to be with emotions. Sorry, this one was wrong. This one goes on
emotional story. I think this one is
more the composition and the style that I like, playful, but also realistic. And maybe you have seen
that I don't have many, like, typical
illustration references. That is because I myself,
I'm also in, like, kind of like this
metamorphosis period in my artistic journey. I am trying to figure out how I can develop
my style further, and I thought this
was the perfect opportunity to also show you. So we are actually
doing this together, and I hope we can get a little
bit of clarity after this. For now I'm seeing
that I'm liking more elaborate things and when I first started
illustrating. You can see that right away
from the things I chose. But also, I'm still
very into color. I haven't gone into the complete opposite direction to what my actual painting DNA
is. Let's continue. This one has a bathtub
and all of this glow. And I think I do like
the composition. I do like the emotion
and the story, but mostly the color
and the texture. This one is also color
and texture for me. Oh, we're very
heavy on that one. This one in here, I do like
the story that it's telling. I do like that it's, like, kind of, like, a little
bit of renaissance. For this one, I love the lines and the shapes
in this one here. And this one I like the
color and texture a lot. For this one, I like the
composition and the style. I like the sort of realism. This one I also like the
composition and the style. It's very dynamic
with the birds, and I also like that
sort of realism. This was not a painting but
some sort of, like, objects. And from them, I actually love the color and the textures. I have analyzed all of mine.
I'm sure you have more. So maybe you need a bigger
table than what I have, or you do it little by little. So I think in these categories, you can see that I put less important into
line and shape now, and I still keep all of
the color and texture, and I'm gearing towards
finding a story emotion, conveying it through
the painting and also playing with compositions and
different types of style. In the style category, these paintings are
way more realistic. If you compare it to
the color and texture, there's a lot more
abstract things here, and in the composition and
style, it's more realistic. So I do still have influence of all of
these abstract things, but I think I am
developing a little bit more towards a little bit
more intricate drawings. We look at this, it is important to recognize also repetition. Where do things repeat? For example, I see here a
lot of topics of animal, fantastic beings, and
landscapes and architecture. When I look at
emotion and story, I also don't see
that many people. There are some, but
they're rather abstract. And I also see a lot of
repetition and a lot of very intricate
cut out scenes. It's not like they're
doing a huge landscape, but it's rather zoom
ins or Zoom outs and also very simple
compositions at times. When I see that
composition and style, I see rather realism and I see intricate textures and very
interesting color palettes. Line and shape, there are still some bold choices in here, but I think they
don't speak to me as much as all the
other categories. So now, you look at your things,
and what do you realize? Maybe you realize
that you tend to like a very limited
color palette. Maybe you tend to like
very simplified shapes. Maybe you tend to like
very complex compositions, maybe you tend to like realism, maybe you already recognize that you tend to like a
specific material, for example, watercolor
or gouache or pencil. Maybe you like text
in your images or even portraits or you
like to focus on animals. Those are all the
things that you can potentially observe by
doing this exercise. So don't stay with
these four categories. Now we're going to go
a little bit deeper, and we're going to
look at each category, and we're going to
try to see which are the repeating
factors in each one of. As I said, line and shape, I don't think are
important for me, so we're going to
take this one away. This category will not apply
in my further analysis. So we are in the emotion
and story category. Let's look at what we have here. To look further into
the categories, I recommend you to do
this in your sketchbook. I am going to do it on
a plain piece of paper, but it's best if you just glue them in your
sketchbook directly, and you have always
the references. So now let's just glue them all, and then we start analyzing. It doesn't have to be too
pretty or too precious. Just glue them
together how you can. I don't have anything else
than this packing tape, but you have a nice Washi Tape. That would be actually
a little bit nicer. So I have meticulously and
beautifully glued all of these little images as a collage under all of the different
topics and themes, and now we're going to
look at them one by one. Let's start by
emotion and story. So looking at all of these
pictures as a whole, I can see that there's a lot of storytelling in these images. And it's not like there's
always, like, a person, very realistic person
being depicted, but it's more of like a feeling. There is repetition in many
of the instances like here, here, here, or here, so we will write this down. There is also heavy
storytelling, but about mystical things, maybe even to do with nature, fables, maybe even more
magical things, magic. And there's also a few more
modern interpretations. I can see here and
here, fashion. I can also see architecture
being displayed. So we're going to put
topics, fables, fashion, architecture, animals, and
landscapes, but secondary. And you might also
be wondering, Oh, but I also like the
composition of some of these. Yes, that is true. One thing doesn't take away the others. All of the artwork has a distinct composition
and color palette. It's just that you
were more focused on, for example, the story of
one than the composition. In this case, we will also
look at the composition of these ones because I can see
that they're quite zoom in. For example, here and here and here and here,
they're like Zooms. So we write down
composition, Zoom. As for the color palettes, icy pinks, icy red,
lots of blues. And I think the most
important thing that we can learn out of all of these paintings is that they try to convey a deeper message. It's not just what
you can see there, but there is a deeper
interpretation behind them. So we write interpretation. Deeper meaning, Let's
look at the next ones. Let's look at the
composition and style. And let's see if we
can add something new or if everything
we have already looked at in the emotion and story paper is also
reflected here. We can see repetition
again, repetition. Here, I start to see realism. So a style, realism, and also like shininess. Things are shiny.
Things sparkle. So we put shiny. Why not? I also see people, but not so many and
rather animals. There is here a portrait
of someone with long hair, and I start to see texture. Texture starts being
very important. I guess that belongs also here. The shiny is texture, and it's texture of shiny hair. It's the texture of
water, how it sparkles. It's the glow of the
water, things that glow, and I still see architecture, and I still see zooms,
like we said here. And as for the colors, this one's are a little
bit more mature. So in colors, we will put
mature and also unexpected, but still kind of bright. I guess as of colors,
I like everything. Let's see if we can add something else when we
look at color and texture. This is the most vibrant out of all of them,
as you can see, and I do see a lot
of mark making, gradients, heavy textures
of paint, bright colors. Bright colors, we already have
still ins in composition. Water, glow, heavy textures, and I see as topics a lot
of architecture and nature, flowers, vegetation in general, and still mystical
images, lot of sunsets. Very interesting. As you can see already in the first
in the emotion story, we could analyze a
lot about my style. So let's just write it now
in clean and see what are the topics that we are dealing with to develop
my style further. Let's hear style. What are we going to
write here? Let's see. As of topics,
storytelling is a topic, mystical and esoteric topics. So magic. Animals, fashion,
architecture, landscapes. Including flowers. As of composition,
we like Zooms. And we also like
quiet and busy also. Not Zoom out, I wouldn't say. We can put that we
enjoy repetition. I see lots of repetition of topics and of elements
in the paintings. Style is realism. With deeper meaning texture
and color pink, red, blue, mature, shiny,
glowy, mark making, gradients, and heavy textures. If there's anything else
that I get to discover, I will add it to my list. But I think these are
really good basis to start understanding
what I actually like. And actually, you
just need to look at the smooth board to already
know in which direction I want to or I feel like taking my art and what it is
that I actually like now. When you're doing this exercise, I have actually a very big tip don't stop and over analyze every single image
because most of them will belong to more than
one category in the end. You like the colors of probably all of them,
to some extent. But there is
something about them. You have to try to focus on that something that
makes you drawn to it. What is so special about it? But don't over analyze
it. Just categorize it. If you feel like it
doesn't belong there, you can always change it and put it in another category or just leave it as it is and
just use this as a moodboard. Another thing if
there's images that you look at afterwards
and you say, like, actually, I don't like
them, don't put them in. You don't want to
have any inspiration that you actually don't
enjoy, of course. What I want you to
have by the end of this step is a list and a clear or clearer understanding to what actually
you're drawn to. What is it that you like?
What is it that you actually enjoy when
you're looking at art? What is it that you find
fun and interesting? And remember, if you don't want to print out and do this collas, you're welcome to
just organize them in different folders that
actually also works, so you can just
scroll through them. Important is to look
at the art and try to understand what it is that these things
have in common. And I recommend you to write them down so
that you annotate it, and you can always look at it, and you can always evolve. Style is not a static thing. It is a linear thing, and it is okay to
change your mind. Now I'm just showing
you a technique that helps you understand how your mind works and helps you get a clear understanding
of what you like. But it is not something that will always
remain like this. So this is a good exercise that you can repeat every year, every two years, every
few months to try to see how your taste
has changed and adapted. And next week, we're actually going to do something
quite iconic. You have kind of
already done it. You have already annotated how you want your
style to evolve, but we are going to
do it more official. We're going to be writing our
very own Style Manifesto. So be ready, and
I hope you enjoy analyzing all of the
things that you like and starting to develop your
taste and actually gaining clarity on how your style
could start to develop. Super exciting.
See you next week.
6. Week 3: Creating your Style Manifesto: Welcome to Week three this week. And in this lesson,
we're going to be creating your very
own style manifesto. What is a style manifesto? Well, we're going to be
doing something quite iconic and we're going to be taking everything that you have
learned about yourself. And we're going to just,
like, lay out it nicely, and maybe you will have to
sign it at the end because we're doing a contract a
contract with yourself. You are committing to
developing your art style and you're committing
for a week of painting. It sounds daring,
but don't worry, it's going to be super fun. So I have made this process
quite simple for you. It's just a template
that you have to fill out things that you
don't want to answer. You can just, like, not answer. And if you have more to say, you can always add
more things to say. It is important to keep it
simple because at this stage, I think clarity is more
important than creativity. So we're going to try to be as specific as we can when
we answer the questions. We're not trying to
invent something new because style and
taste are already in you. We're trying to define it. We're trying to put words to it. So open up the style
Manifesto that I have provided you
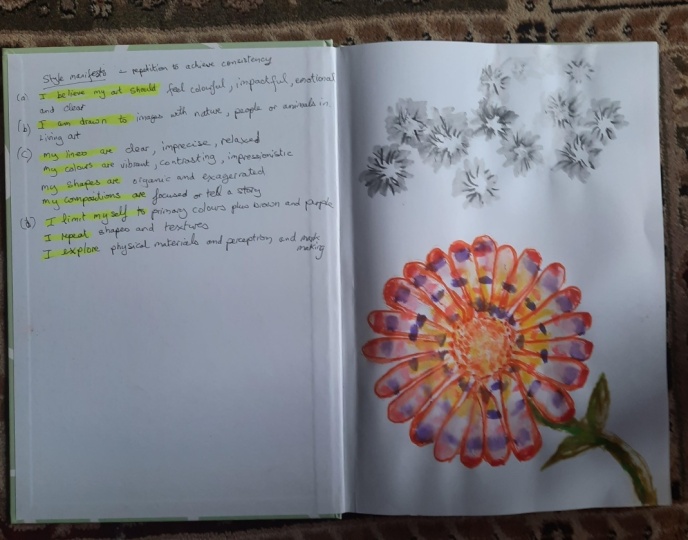
and let's start. Section one is about things that you believe about your art. The first line is, I believe
my illustration should feel. And here you're going to define the emotional direction
of your work. I believe my
illustrations or my art should feel like mystical
and esoteric topics. Zoom in repetition and realism
with a deeper meaning. Next one is I am draw too. And here is where you're going to basically
summarize your taste. You're going to try to
use as fewer words as possible to define what
it is that you like. So in my case, I'm going to say, I am drawn to storytelling. We could keep going, but let's try to keep it as
simple as we can. Now we move on to Section two. In section two, we're going to try to define our
visual language. This means how your work
will actually look like. What kind of colors,
what kind of lines, what kind of textures
you're going to use. All of that comes
in this section. So if you're drawn to lines, graphic or not graphic, you're going to
answer this question. My lines are, then you will
think about thickness, precision, how they are. For me, I will say my
lines are non existent. They're blurry, and it's more of a realistic style
because in real life, you don't have lines
going around you. Now we talk about the colors. My colors are in my case, they're going to be
vibrant, full of texture. And very bright, but also
quite mature at times. You can say that your colors
are limited, are muted, are bright, are pastel, full of texture,
full of mark making. Now you're going
to talk about the shapes that you
find in your work. So, say, my shapes are organic, are geometric, are big, are small, are
realistic, unrealistic. In my case, I will say my shapes are organic
and rather realistic. Now we talk about
the composition. My compositions are or tend
to be minimal centered, balanced, diagonal,
whatever you. As for my compositions, I will say they're
full of repetition and rather Zoom ins. Just be aware.
Don't overthink it. Like I've been
saying all the time, don't overthink anything, choose the things that
feel the most consistent. And if you don't
mention something, it doesn't mean that
it doesn't exist. It's just that it's not the
most predominant feature. We're trying to define your
style as best as possible so that you have a starting point and you can develop from there. So this section is
quite important because we're setting
ourselves constraints. And what does that mean? Constraints are what
turn preferences and things that you like into an
actual recognizable style. You will start by filling in, I will limit myself
to and then we decide what will you limit
yourself to a number of colors, tools, techniques. Now we will decide things
that you will keep repeating. So I repeat topics of animals. I repeat colors, I
repeat textures, I repeat materials, I
repeat compositions. Choose one thing
that you want to keep improving and repeating on. And this is important because repetition creates consistency. And by adding variation
into repetition, you will get to know the things that you like and
you don't like. Oh, yes, you might repeat certain shapes, certain objects, certain topics, certain
colors, certain textures. And now we will say, I explore. And here is where we
leave room for growth and what you actually feel like you want to
explore in your work. I really feel like I want to explore realism
and storytelling, and that has nothing
to do with style. It's just a preference and a
wish that I have right now. So make your wish and tell yourself what you
actually want to explore. And remember, you're not
locking yourself in. You're just defining a starting
point and a direction. Now, the last section
is the commitment, and this is the most
important part. So let's read it
slowly together. For the next seven days, I will create daily. I will not seek perfection. I will build, I will not search. So this is an agreement that you're going to
do with yourself. You are committing to the
process, not the outcome. And this is super
important because the process is what's going to guide you into
developing your style. The outcome in the
end doesn't matter. You have to go through
the process in order to get to know yourself and the
things that you like. So now print out your manifesto and actually physically sign it. This is very
important because you are entering a contract
with yourself. You are committing to developing your style
for the next seven days. And basically for the
rest of your life, you will keep improving and
you will keep coming back to this manifesto and comparing
it to your actual style. What has changed
and what hasn't. So now you're no longer
guessing what your style is. You're actually
following a direction. I have some tips for you
before you go and you start completing the
manifesto for yourself. First of all, keep
your answer simple. As I said before, and all the
time, don't overthink it. Just say the first thing
that comes to mind. If you're hesitating
between options, look at the collages
that you have made and see what
appears the most often. That will be your
answer. I think I've said it already five times, but these are not
permanent answers. You can always evolve
and change your answers. What matters is that you start. So by the end of this class, you have signed your manifesto, and you have a clear
direction with which to start
developing your style. Have turned your
taste into decisions, and you're committed
to following these decisions consistently. And be ready because next week, I'm going to show you the seven exercises that we
will be doing to actually start
developing your style by painting. See you there. Bye.
7. Week 4: Exercise 1, Practicing and Experimenting: Welcome to Week four.
This is the week where you're actually
going to draw something. Finally. You have been
very introspective. You have been analyzing,
looking, getting inspiration, building your library
of inspiration, and now it's time to
apply what we have learned about ourselves
and our taste. I have prepared six exercises for you and one day of recap. You're going to be
doing one exercise a day during one week. Don't worry, if you don't
have a lot of time each day. The important thing is
that you do the exercises. It doesn't matter if
you have 5 minutes, 30 minutes, one or 2 hours, you just got to do them. You have to do the work. You
have to practice every day. And we are not looking
for perfection. We are literally just looking
for getting things done. You have to practice, and if
the things that you create are ugly or imperfect,
it doesn't matter. You have to get
into the habit of practicing and
painting every day. That is the most important
part of developing your style. And I know everyone tells
you this, but it is true. The analyzing part and the getting inspiration
part is very important, but getting to work is
equally even more important. So let's start with day
one of our exercises. Today, you're going
to take out of your inspiration
sheets the painting that speaks to you the most. The one that you think it's fun, the one when you're like, Yeah, I want to paint take that one, and you're actually going to
try to copy it one to one. Use the materials that you
want that you have on hand, maybe wash, maybe
oil, maybe pencils, crayons, whatever
you have on hand, use those materials and try to recreate this
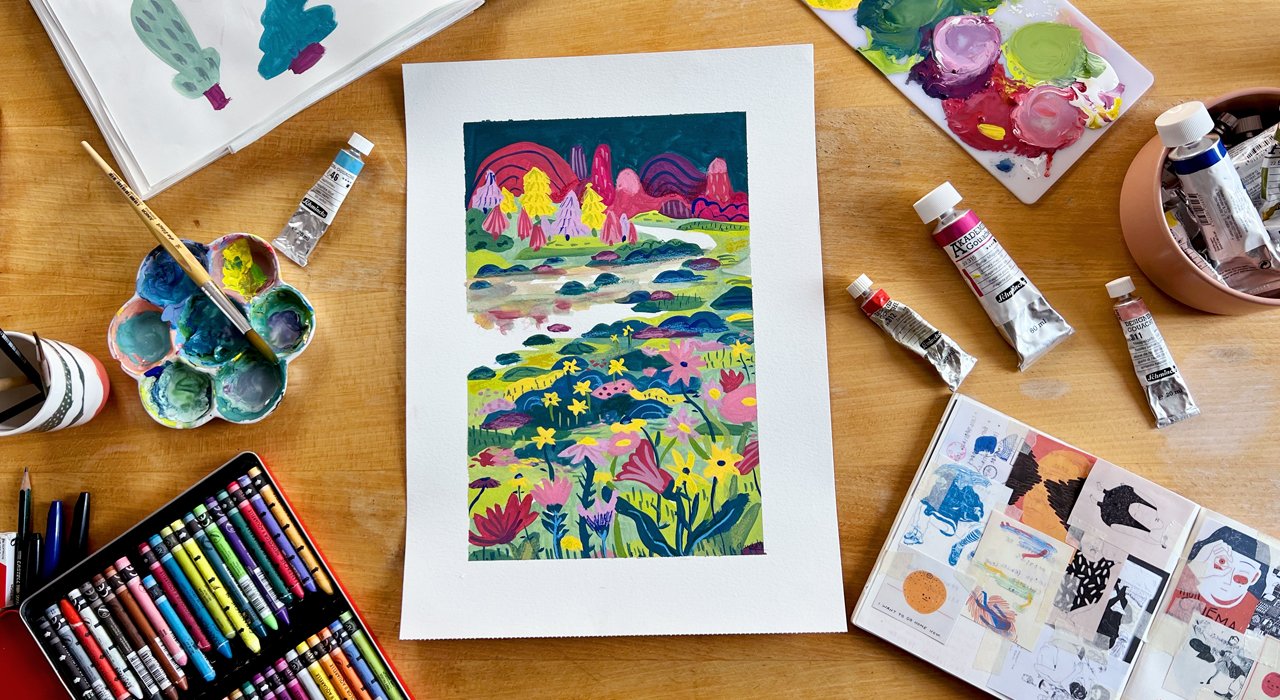
image one to one. I decided to recreate this
image by Mia Bergeron, and I love it because it
has this kind of, like, gradients and very neon
colors and a lot of contrast. It is also a landscape and has some architectural features, and I feel like it's
telling a story of this gloomy night with a
very neon swimming pool. I just love this scene. So I personally have chosen Guas to try to recreate this
image just because it's the material that I'm most
used to working with. So I know that I
would be confident when trying to get
the colors right. And actually, that was
the most difficult part. Getting the colors right. This neon color, I
think it's mostly only possible to do in oil because it seems like it
has a lot of layering, and guache doesn't permit for so much blending
and layering, and it doesn't get
such vibrant colors. It is true that somehow
I did manage to mix it after a long time of
trying to mix this color. And I did get quite a neon and quite a bright
green or I guess, it's like a turquoise
kind of color. So what I try to do
is from imagination, try to build this painting
and see how I would layer it. So I started with the background and then the different elements, and I layered on top of them. I learned that gouache
is not ideal for this because when you put wet
on wet, it mixes together. So gouache actually
acts like watercolor. It can be reactivated
with water, so it's not the
best for layering, but it also doesn't blend
exceptionally good. So I do think that the colors in my painting are quite separated, one from the other and
not really blended, and it doesn't
have this gradient glow that I wanted to achieve. And especially the trees, they're not glowing
as I wanted them. But I do like in general, how loose the drawing
is, how abstract, but still you can see the
shapes and how there is this contrast between the
architecture and the nature. So I do think that I learned a lot while replicating
this painting. I do wish that I would have
tried a different material, but I was confident this one, and at least I could
get something similar. I'm really unsure how
she managed to do this very dark but still
bright background. Still, I tried my best, and
I'm very happy with it. I think it took me a long time, almost like one or 2 hours because you can get really
into details if you want to. So that was day one,
just copying a painting. Now, choose the painting that
you want and just try to copy it one to one in the material that you
feel most comfortable. And please post
it in the gallery down below so I
can check it out. And most importantly,
have fun and be very insightful about the things that you're doing while
you're trying to copy, what you like, what
you don't like, how you could improve, what
would you do different the next time and see
you on day two, have another very nice
exercise ready for you. See you.
8. Week 4: Exercise 2, Reinterpreting: Welcome to day two of
your drawing exercises. And I know the day before
I did try to sell you this exercise as something
really exciting. I'm sorry. But sometimes you just learn
when you repeat things. And in this case, we're going to be working
on repetition. So take the same drawing as the day before and try
to reinterpret it. This time, you might want
to change the colors. You might try to use
different materials or a different technique. You might try to even
want to simplify or make the shapes more complex,
however you want. Your only task is to reinterpret the drawing
of the day before. But you're free to
do however you want. If you only have 5 minutes, remember, you can just
do it in 5 minutes. The goal here is to get
the ball drawing and to get you to paint and
to develop your style. And style only develops
once we are consistent. And consistency sometimes means repetition. I am so sorry. So let's try to reinterpret the painting and see
what you come up. I tried to change
the colors because I thought that the green
was a little bit too much, and I do enjoy a lot of
blues and blue hues, and I didn't want
to make it so dark. So I tried to be a little
bit more abstract with the colors and a little bit
more loose with the paint, a little bit more loose
with the mark making, and add a little
bit more texture. I learned from before that
the blending did not work, so I tried to adapt my
blending technique and make it more like patchy colors and a little bit more textured. This time, I still use
squash just because sometimes it is
good to go back to the materials that you
feel confident in, especially when you're
trying to paint something that is a little
bit out of your comfort zone. In this case, these
very neon colors and this kind of scenery, a little bit more
realistic are quite out of my normal illustration
comfort zone. So I did want to rely on gouache because at least I know how it works
and how it blends. But I do think it's a very nice reinterpretation
with a mark making, with the different colors,
with the textures. If you compare it
to the day before, this one has a lot
more dynamism. I have to say I do like the contrast in colors
in this one better, but I do like the dynamism
of this painting a lot. And I understand why because I was working
with the Guash, not trying to imitate
something that was clearly done in oil paint. I was just working with
the material that I had, so I was adapting
it to its needs. And in the end, it
comes out a bit more dynamic and with a
little bit more character. So now, take your painting. You can even reinterpret from your own
painting and not the original if you don't want to and try to change
something about it. Be maybe more free or don't
look at the reference, do a reinterpretation of it. And please post it
in the gallery, and let's continue today three, it's maybe an exciting
day, maybe not so much. You will see. Have fun with it. Remember, that's
the most important. See you in Day three.
9. Week 4: Exercise 3, Reinterpreting the Interpretation: Welcome to day three of
painting to develop your style. And today, I sadly don't
have an exciting day again. We're doing a reinterpretation
of the reinterpretation. Yes, I've told you
1 million times, developing a style is
mostly about consistency, and that means repetition. So we are repeating. I am so sorry. And this time, you're going to look at your reinterpretation
and reinterpret that. So just be a little
bit more loose, maybe really change
the colors totally, try maybe a different
material, change the shapes. Be a little bit more
free this time. Don't look at the
original artwork anymore. Look at your interpretation. In this case, I didn't want
to use any greens anymore, so I went completely into
the purples and the pinks, and I did a little
bit more reflection, and as you can see, a little bit more mark making
and even more texture. I wish I would have
done more contrast. I wish there was more
black in my painting. Somehow the black
didn't translate. That sometimes happens
in guh that you don't get a lot of contrast
with the paints. They're not as saturated, as vibrant as, for example, oils or sometimes watercolor
when you layer them correct. It gets a little
bit nut and plain. I did like that a lot when I was doing my original illustrations, but now I'm seeking
something more vibrant. So I am happy with the
pinks and the purples. I am not so happy with the
depth of colors of the blacks. I am, however, really happy with all of
the mark making and the little reinterpretation
of the bushes and also how the background
is and the trees. The trees look a little bit
more like clouds than trees, but either way, I think
it was very successful. So be free, reinterpret
your interpretation and create an artwork that is very different than
the original one. Make it your own.
Change the colors. You're welcome to change the material if you
haven't done yet, but you're also welcome to keep the same materiality and
just tweak the scene. Maybe try to paint
the same scene, but from a different angle,
whatever works for you. That is day three.
And I think next time we are not ready to let go. I just got to tell you we are still doing the same
painting. I am sorry. I have said it 1 million times, but repetition,
repetition, repetition. So have fun in day three and let's see each
other in day four.
10. Week 4: Exercise 4, Trying out a New Material: Okay, so if you
haven't done this yet, day four is to try this painting in a
completely different medium, something that you have
never tried before. Maybe you have some oil pastels hanging around in your
house or some crayons from your kids or some pencils that you haven't used
in a while. Take those. Let's use them to
create this painting. And yes, yes, it's a
reinterpretation of the reinterpretation of
the reinterpretation of the original painting. I am really obsessed with
Mia burger, it seems. We've done four
paintings already, but it is important. It is important to
have constraints. It is important to
constrain yourself to certain materials,
to certain images, to certain ways of painting
in order to know what feels right for you
because we're trying to not only get to
know your taste, your style, but also to
develop a way of painting, a way that feels
inherently yours, a way that make you feel
happy while painting. So I decided to use the
oil pastel actually, I won them on a
giveaway on Instagram, and I think they
are pretty cute. They were a pain to use because all my fingers were
covered in oil pastels, and I didn't exactly know how
to blend in the beginning. But I do feel like
with oil pastels, I was achieving this
glow that I wanted. The colors were blending
together a lot more. It is very messy. I know, and it has not a lot of detail, but the blending, the glow, the vibrancy that I was
looking for, is there. So it really surprised me. I did not expect it to be
this fun to use, basically. I was feeling like a
little kid just dipping my fingers in paint
and painting around. And I think this has
a lot of potential. And now that I have tried it, I want to explore it further. I want to see what
else I can do with it. I was having a lot of fun. You can see me smudging
around the paint and how it blends and how it
really creates a contrast. So I hope you have the same experience with
the new material. And if it doesn't happen, then try another one. You know? Actually, I would prefer if you repeat these
exercises multiple times because developing
your style and your taste is not something
that happens within a week. Not something that happens
within six paintings. It will take a long time. So if this painting
with the material that you initially chose
does not work out, try another one and
extend this exercise. It doesn't have to last a week. It can last however long
you want it to last. You can be doing this for
one, two, three months. You can be doing this for
a lifetime, actually. For now, there's focus on taking the same painting
that we have painted already three times before and painting it again
using a new material. Next time, we're trying something new. I hope
you're ready for it. We're painting something new. Finally, for now, focus on the reinterpretation and
remember to have fun with it.
11. Week 4: Exercise 5, Interpreting a New Artwork: Welcome to Day five. Today, we're finally letting
go of our original painting, and we're choosing another one from our inspiration board. So I have a lot, a lot of painting that I
would like to replicate. And I think this time, I want to do a little bit of an expressive sunset scene because I was having so much
fun with the OPA styles. I want to try them in
a different setting. So this is what I did.
I took something that I already liked that I learned that I like through all
of this repetition, which was landscapes, nature, these oil pastels, the
blending and the gradients, and I applied it
to a new painting. So the subject matter,
I didn't just invent. That is one constraint that
we're putting ourselves. The subject matter
already exists. We choose it, and
we're just trying to replicate it using the
techniques that we like. We are maybe even
adapting the shapes. We are changing the colors. If you already know what kind of color palettes you
prefer to use. We're using the materials that
you have learned to love. We are recreating this scene. For me, I loved all
of this blending, and I learned with
this painting how to add a little bit more depth
and a little bit more detail. I think, in this
case, the clouds turned out very nice because they're a little
bit more layered. So there's things that
are not blended in the foreground and there's more blended stuff
in the background. I still want to learn how to
add even more detail into the paintings and
maybe how to be a little bit less
messy while painting either way, what I have
learned to love is the vibrancy and how the
colors blend together. And I hope you're having a
similar experience recreating all these paintings
and you're learning to love something that you
didn't know you loved before. This is for me. I'm discovering
real time with you. I'm discovering oil pastels, and I'm having so much fun. In the end, discovering your style and painting
is about having fun. Because if you're
not having fun, if you're just struggling, it doesn't make sense
to even paint. You want to be having fun. You want to do something
that you enjoy. And please don't
try to be perfect. Don't try to even
be near perfect. The first, the
second, the third, the fifth time you do something. It's just for you
as an exploration. Let's try to reinterpret
another painting that you love, and let's try to see
what the results are. Have fun with it, and we
see each other tomorrow for day six of painting to
develop your style. See
12. Week 4: Exercise 6, Creating Your Original Artwork: Welcome to Day six. Today is our last day of
actually painting. And the task for today yes, it's to make an
original painting. Take everything that
you have learned and apply it into this painting. You don't have to use a
complex subject matter, but something that speaks
to you and something that you can actually manage
to do within a day. Or maybe within a
longer period of time, if you feel like applying
more time into this painting. But don't push yourself to make the most perfect artwork ever. Remember, we are experimenting. So this is an experiment. For me, I chose to do a
landscape because I've been liking landscapes a lot and I've been liking using
this Oil Pastel. But I wanted to give it a twist because I feel so
comfortable with quash, I still wanted to
incorporate guash. And actually, I wanted to
see if by using Guash, I could add more detail into the painting because
this is what's been lacking from the Oil Pastel experiments
that I've been doing. I haven't been able to add the detail that I
actually want to add. So I started with
a base of quash. I painted the whole background with it in this little house, and then on top of the quash, I layered the oil pastels, and I still blended it, and I think it gave
it a nice depth, and I still like the
gradients that it makes. And you can see, when you
compare to the first painting, this one is much more blended and it has sort of like a glow. When you only use guash, it's very static, I feel like. It's nice to make bright shapes, but it doesn't blend, and
it doesn't make this glow. And I think because
I want to develop a little bit more of
a realistic style, then this sort of blending and layering is very
important for me. I couldn't have that before
in my illustration style. It didn't fit it. But
now that I'm evolving, I want to incorporate it. And I think tools
like oil pastels, maybe even oil paints, maybe the next thing
that I want to try out, are really useful for this. Oil pastels, I
find they're quick and they are easy to blend,
and they are just fun. But I am excited to continue
trying other things, like, for example, oils or
other types of pastel. Why not? It's all about experimenting and getting
to know what you like. So after putting the base
and layering on top, I tried to make a little bit
more details using wash, but I learned that
not all wash types can be used over oil pastel. Because the oily basis
repels the water. So only acrylic wash, which doesn't reactivate with water works on top
of oil pastels. That's a good thing
to know. And it's still a little bit messy, but I feel like it's less
messy than the other attempts. And I have learned something
that is very important. Depending on how you use
your finger to blend, you can create different shapes. So you can do up and down, and then it's more of
a dynamic movement. You can do circular,
then it's more blended, and then you can also
just lightly tap it, and it still allows for this original vibrant
color to exist. So now it's your turn. Try to imagine your
own original artwork and apply what you have learned. Look at this as an experiment, a way of combining
things you already knew about yourself with the new things that
you have learned. So combine these two things together and try to
make an artwork, an ugly artwork, an experiment,
something unexpected. Don't strive for perfection. Strive for experimentation. That's the whole notion that I want you to take away
from this classes. Experimentation leads
to self discovery, leads to discovering your style. Tomorrow, on day seven, we will look at all the
paintings together, and we will try to see what
we have learned by doing this process and how we can improve and how we can
develop this further. So see you tomorrow for
our last day together, Day seven of our
four week program to develop your artistic
style. See you there.
13. Week 4: Analysis and Recap: Welcome to Day seven and sadly, our last day of our four
week program together. You have done six paintings
during this week, and you have experimented and
repeated a lot of things. I know I know there was
a lot of repetition, but also some interesting
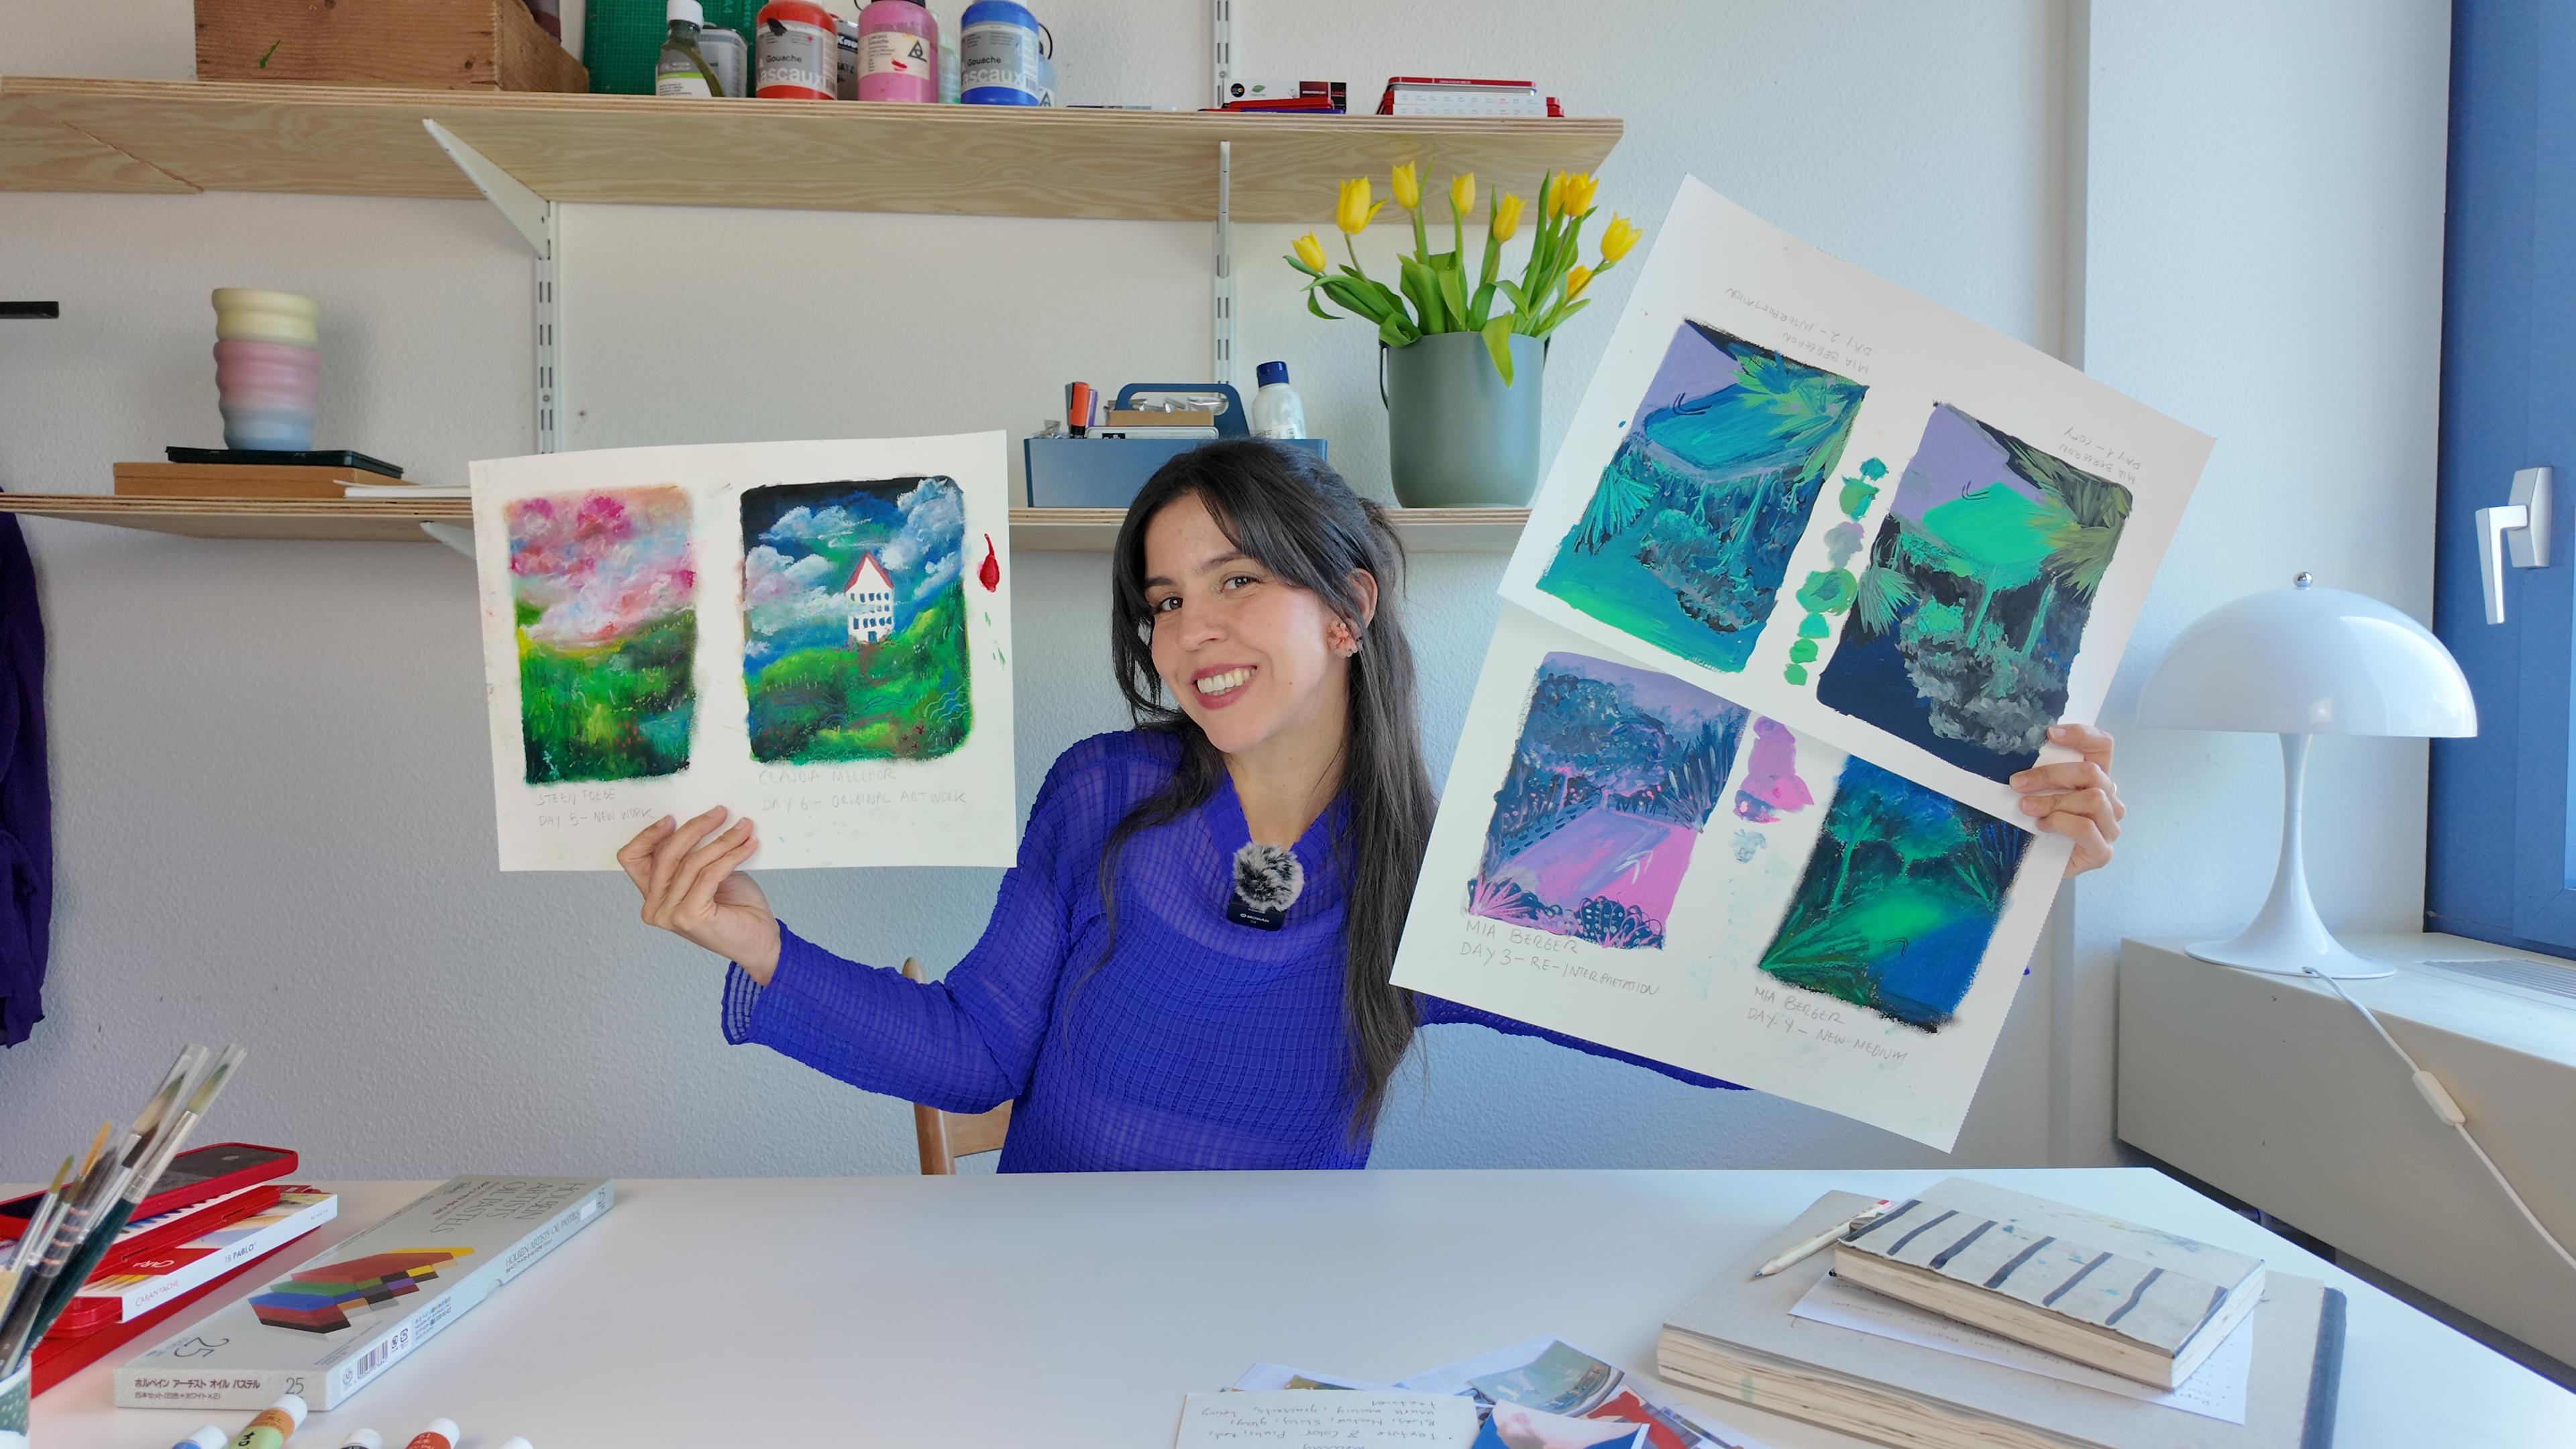
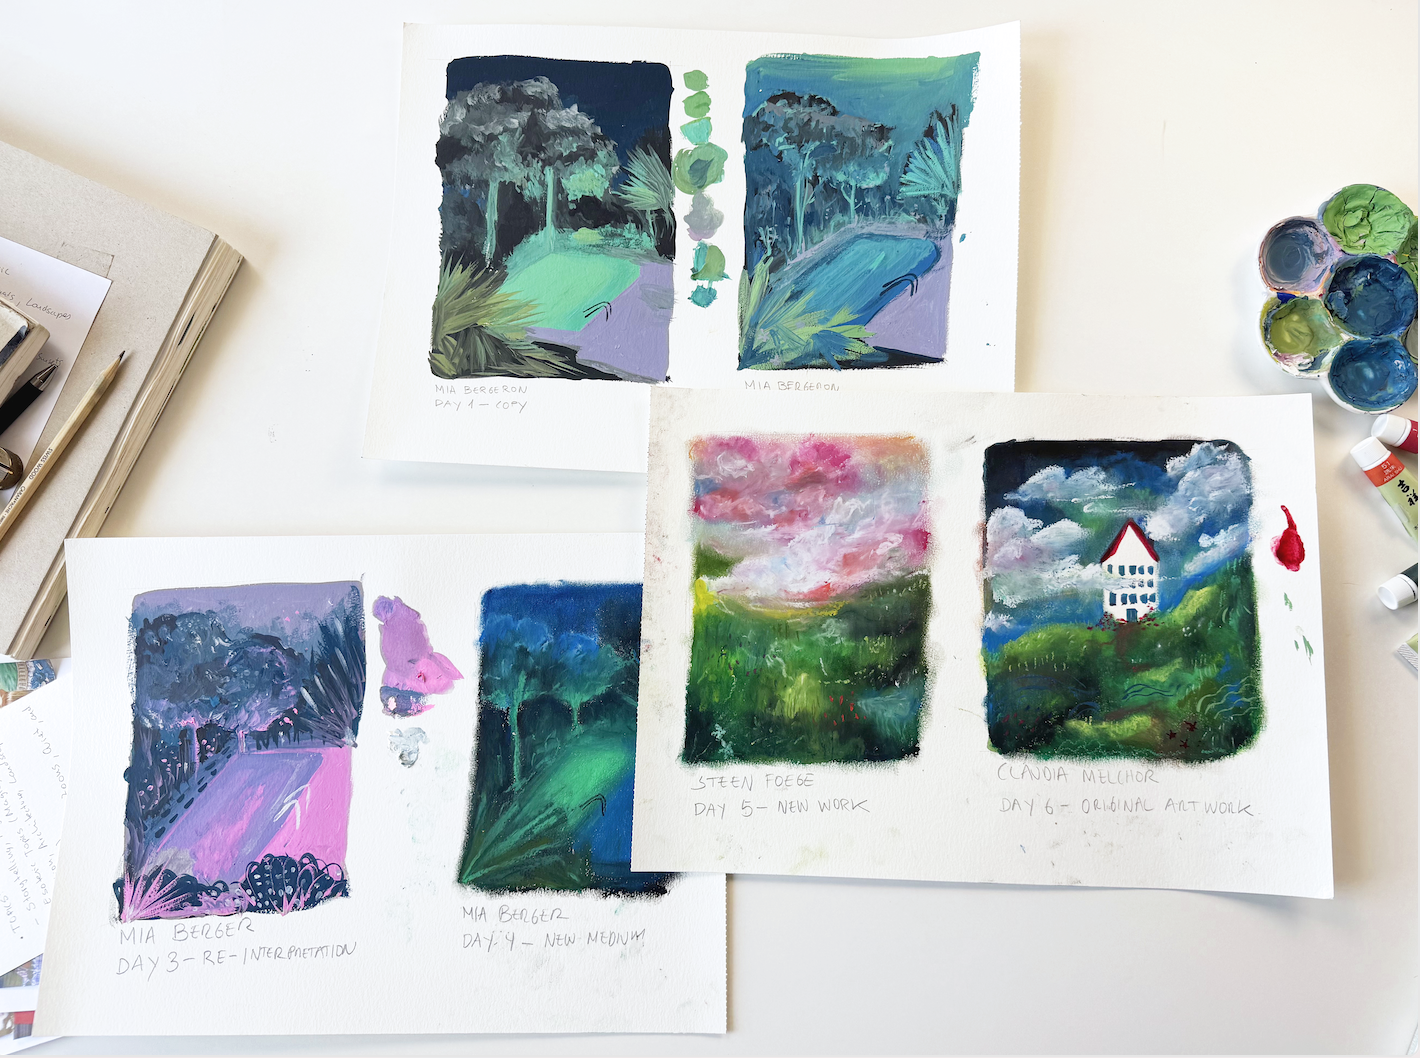
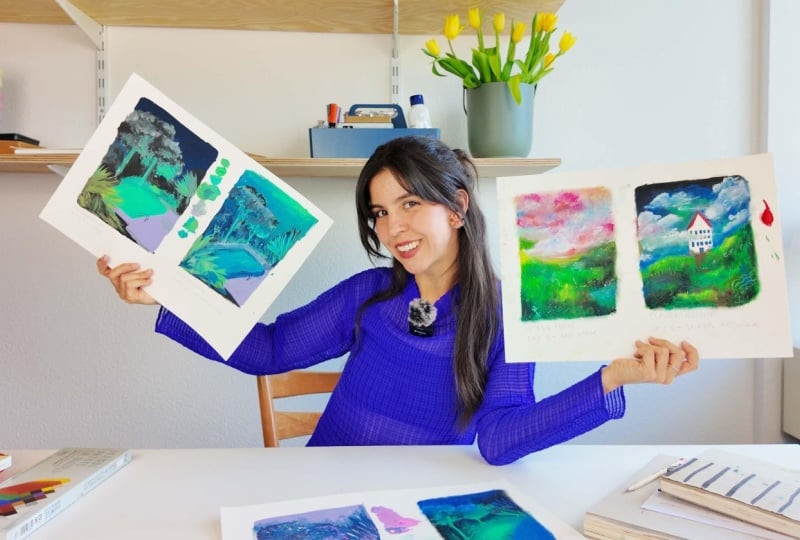
experiments, I hope, at least. So I'm looking at all of mine, and you can clearly
see an evolution. This first painting looks very
much like my actual style. Maybe a little bit more blended, maybe a little bit more
unexpected colors, but still quite blocky. And the further we go, the more wild the
painting started to get. So this one already adds
a lot of movement and a lot more mark making and
a lot more diffuminated, gradienty kind of attempts. When we continue and we see
the next one in comparison, it's also flowier and basically, I think these two
are quite similar, but this one is a little bit more like my current
illustration style, especially down here, the
bushes and the mark making, it looks a lot like something
I would do right now. And then, actually, there's
a big jump, you know? Like, this one looks very static and maybe like
I didn't do it myself. These two look more like
what I normally do. And this is
completely different. So by really just
changing the material, I created something very unexpected that I haven't
seen me do at all. And there's moments in this
painting that I really enjoy. Of course, it's quite messy and undefined if you
compare these two. This one is a bit more
beautiful than this one, but this one has potential. And while looking at these two, they have much more
vibrant colors. They're more organic. They're a little bit wilder, but I feel like they're also
a little bit more realistic. And a little bit more
what I want to do. So I feel like I'm
on the right track. I mean, you have to
understand this is a process. It will not end today. It is good to have this what
I have proposed to you, this four week program to
kick start the process. But you have to continue. You have to revisit your taste. You have to revisit
your references. You have to revisit
your inspiration. You have to add, and
you have to take away, and you have to add constraints to your work in
order to know what works and what doesn't is why you have your
Style Manifesto, where you're committing
yourself to developing a style, and you're telling yourself
the things that you like. And that is why I also
ask you to please do all of these repetitions
and to paint so much. So basically, this
whole development is divided in three parts. One is the inspiration. Two is the manifesto. Three is the putting in
practice, the painting. And these three steps
can be repeated one after the other
infinite times. Infinite times. So don't get frustrated if by the
end of this class, you don't feel like you
have a defined style, it's totally normal. It will not come
in just one month. I'm just giving you the tools so that you can actually
kick start the process. And for me, I want
to write about my process that I am
liking more realism. Maybe you also want to make some keywords about the
progress that you have seen and keep them to yourself in a
diary or in a paper close to your manifesto so
you can actually see what you like at the
end of this process. And maybe if you repeat
this class again, you can update that and see
how you're progressing. For me, it's realism, it's blending, it's gradients,
it's vibrant colors. And I think it's nature
and architecture still. And maybe we say something
about the materials as well. So we say mixed media. I think it's still mixed media, but with oil pastels
and with quash still. I would like to try other
things, for example, real oil and maybe mixed
media with real oil, maybe painting on
different surfaces. When you change one thing about the painting process,
everything changes. So it's always good to try different variables
and see what sticks. And I will not be tired of
telling you this again. Repetition is the
way to consistency, consistency is the
way to progress, and progress is how you learn how to make art that
feels like you and how to create a style
that looks like you that breathes
your creativity. So don't be afraid of making mistakes, making imperfect art. Just be consistent. Stay at it and have
joy while doing it. In the next lesson,
we're going to conclude this four
week program together, and I want to give you
some advice on how you can continue to progress in the future. So let's
conclude this.
14. Conclusion: Congratulations. You have
finished this class. You have finished this
four week progress to develop your style. Taking the time to actually
reflect and try to understand your taste
and what you like is something that not
a lot of people do. So this already puts you in a very different
place as an artist. You have a starting point. You have a direction, and
you know what you like, and you know how
you want to improve yourself and how you want
to improve your art. Let's take the time
and do a little recap of all the things that
you have learned. You have trained your
eye to recognize the things that you like
and that inspire you, and that is the
starting point to develop taste and a style. Then in one of the
most important steps, you have learned to
put those visuals that gut instinct that
trained eye into words. You have learned to
analyze what it is that draws you to certain pictures
and certain inspiration. You have built a library of
inspiration and you have organized it following different elements
such as storytelling, composition, color, and line. So you have an
overall picture and a nice little
inspiration library to go back to and to reflect upon when you're missing a
little bit of inspiration. Have created your very own
quite iconic Style Manifesto, and you have signed a
contract with yourself. In this Style Manifesto, you have defined very clearly
what it is that you like, what it is that you
want to work towards, and what it is
that inspires you. And you have committed to
bringing that to life. You have committed to
developing your style. You have also decided what constraints your
style will have, and you have basically just
committed to the progress. Thank yourself for that.
The most important part, you have actually brought everything that you have
learned into practice. You have, through consistency,
through repetition, starting to clearly see results
while developing a style. So bravo to you, a round of applause is one thing that I want you to take away from this class is, yeah, repetition and consistency makes progress, makes style. I've said that 1 million times. But also style not something that is waiting
to be discovered. It's just not sitting there, and one day, you're
like, Ah, hurrah. I discover myself. No, you have to work towards it. And that means not only working
in the sense of painting, but also in the sense
of introspection and asking yourself questions
of what you like, what you don't you enjoy, and what you don't is built through
repetition, consistency, and lots of decision making, basically the basis of taste and style is
decision making. It depends on which
decisions you take. That is how the result
will look like. And many times you will think, Oh, I'm lacking inspiration. But forget that. Many times, you don't need inspiration. What you need is to show up
and to try different things out and to not be afraid of failure and
of making bad art. Actually, your goal should
be to make bad art. That's the only way to learn.
Get that in your brain. You are meant to make bad art. Lots of it until you finally make something
that you like. And for the future, if you
feel like you're stuck, I can recommend you to
do this whole class. By the way, this not only applies for art and visual arts. It can also apply to writers. It can apply to sculptors, to people who do cooking
and need inspiration. It is a process that
is clearly defined in three steps,
gathering inspiration, analyzing inspiration, and applying and testing and
analyzing and experimenting. If you do that
consistently in any field, you will develop a
signature style, you will develop taste. So moving forward, I recommend you to do the last
part of this process, which is the testing,
experimenting, and the actual painting, and you can do the six exercises with different paintings
using different materials, testing, experimenting,
writing down, thinking about it,
and trying again. Just through consistency
and repetition. Yes. Repetition.
So before you go, make sure to share all of this, all of this process with us with me in the project
gallery down below because I am very noisy
and I like to see how people develop their style and what things they try out. And I am sure you will see a huge difference from beginning
until end of this class. And for sure you
will get to know your taste and
yourself a lot better. It is kind of like a
self help this workshop, post your inspiration pictures, post your Manifesto, and post all the six paintings
that you have done and any nice comments or
questions that you have. I will be here, and I will try to help you
as much as I can, and I will answer all your
comments in a timely manner. And if you enjoy this class, I have many other classes
here on Skillshare. Another one that
might interest you is focused on gouache
and landscapes, but it's also to
develop your style. And I teach very
similar concepts there. I would also love if you
follow me on Instagram. That's my name there, and on
TikTok, it's also my name. I post regularly,
and I would love to communicate with you
also outside Skillshare. So have fun experimental note
and repeat repeat, repeat. I'll see you in the next one. Bye. Bye, bye. We made it. Look how many colors, look how many emotions. Look how many things we painted.
 Claudia Melchor del Rio, Architect and Illustrator