Transcripts
1. Introduction: Hi, welcome to the How To Shoot Better Videos On Your phone course. My name is Chris. I'm a full-time filmmaker and photographer from England. Now in today's world, a video is an absolute must and it's important that the videos that you share are of a great quality. The problem with that is most people believe you need really high-end cinema or TV cameras to capture great video, but the reality is, if you're watching this course, then chances are you have a phone and therefore you have a video camera capable of shooting high-quality video footage. Of course, you can just load up the video camera app and you can just start filming but there are a few pitfalls that people fall into and there's a few mistakes that people make which makes their footage look more amateur as opposed to professional. Stick with me throughout this course and I'm going to run you through some of the best camera settings that you can use on your phone to get the maximum potential out of your phone. Then I'm going to move on into camera movements, lighting, sound, editing, and we'll finish this off with a nice ultra. The whole point of this course is to run you through some of the best tips and tricks to help you go from decent video footage to great video footage captured with your phone. Grab your smartphone and load up the camera app and let's begin shooting some great video content on your phone.
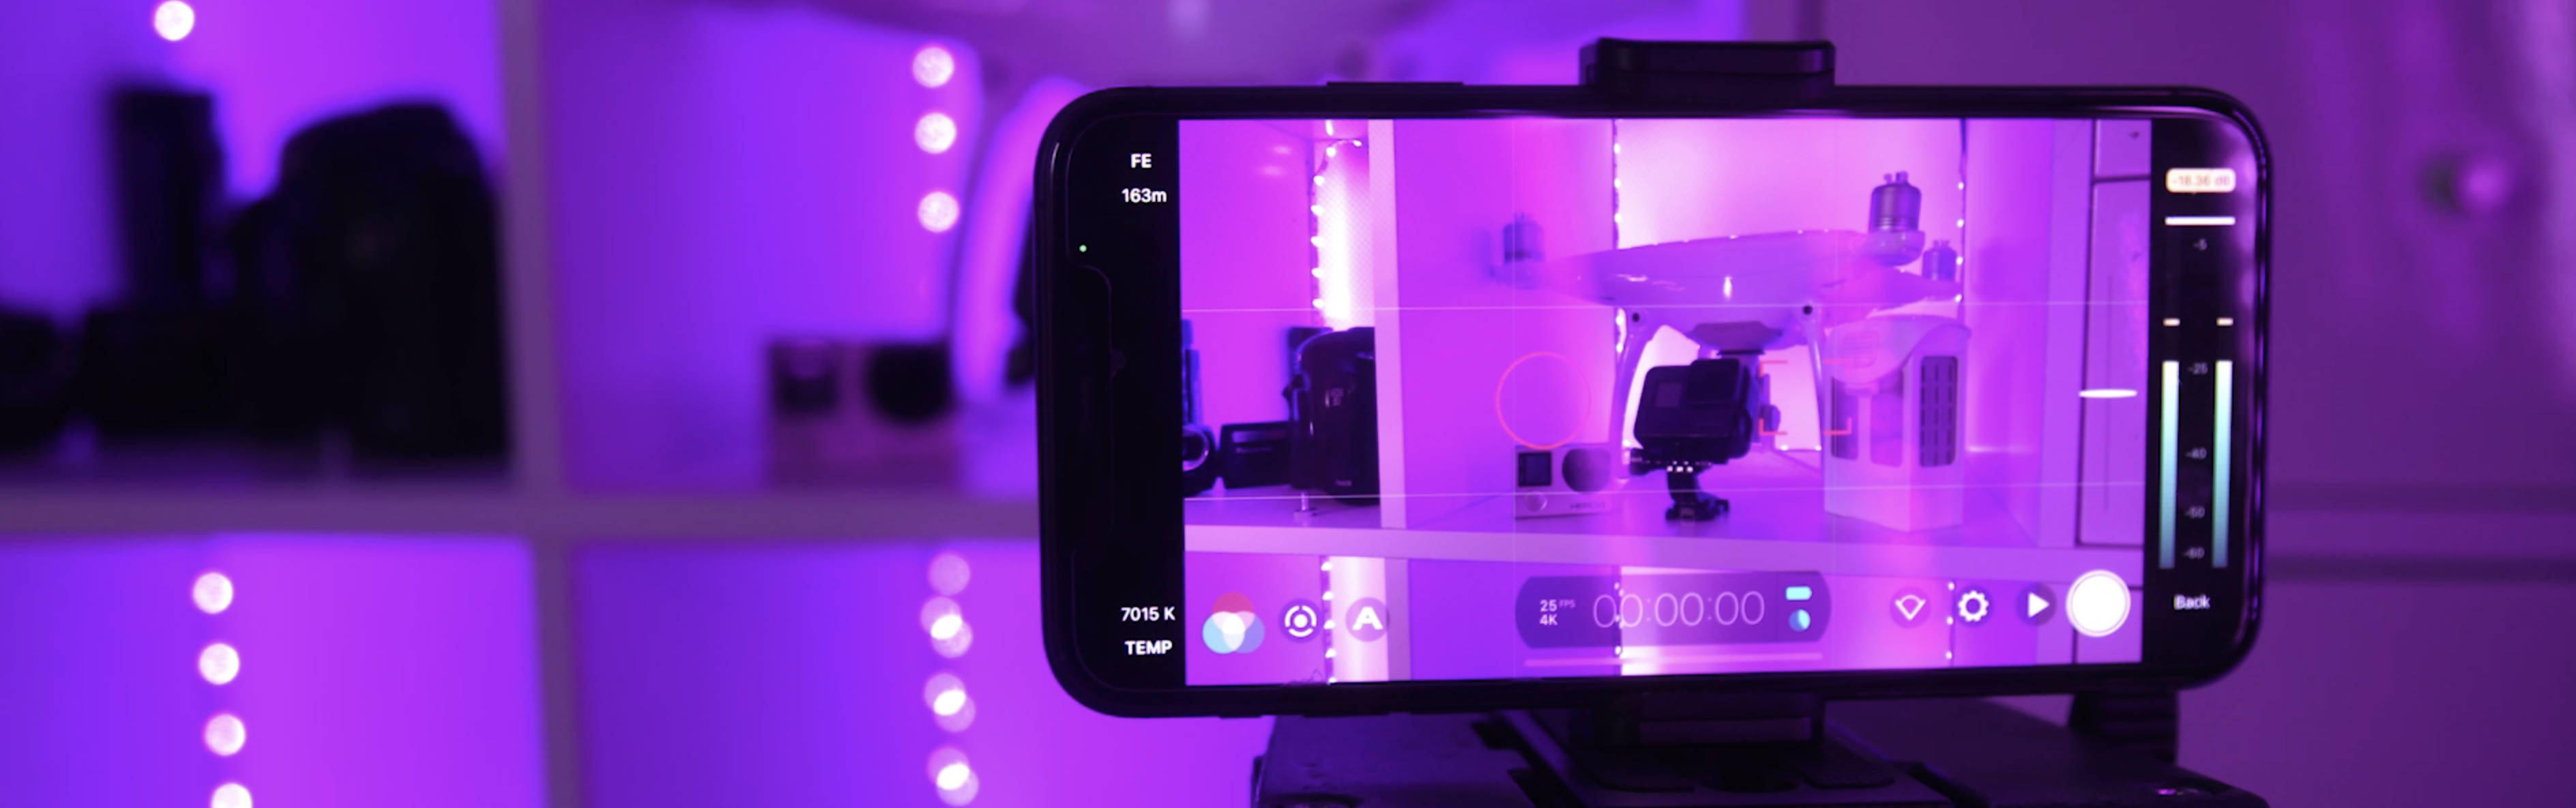
2. Camera Settings: In this episode, I'm talking all about camera settings, and the reason why I'm talking about camera settings is because the settings that we choose can be the real difference between good and bad video. Now, if you just load up your phone, you go onto the camera app, switch into video mode and start recording video, you'll get a half decent video. But the problem is that your phone is designed to be as user-friendly as possible. This means whether you're a professional videographer, somebody who's just getting into video, or maybe even somebody that's not even interested in video. They just want to quickly capture their kids playing in the park or their favorite band on stage at a gig. It means that everybody has got a good quality video straight out to the camera. That's fine. But if you want cinematic, high-quality videos, then you're going to have to take full advantage of the sensor in the camera. That means we're going to have to go from automatic to manual. Now the problem is you can't actually switch from an automatic to manual mode on the default camera app. That's especially true with iPhones. You're stuck with that automatic video mode. If you wanted manual mode and you wanted more control, then I would recommend downloading a pro film app. Now FiLMiC Pro is the app that I'm going to talk about today, but there are other video recording apps that you can use that do exactly the same. But before we jump into that professional app, I'm just going to run you through a few tips and tricks to do before we actually start filming. The first thing that you want to do is to make sure you're filming in the correct aspect ratio. The aspect ratio is basically just which way you're filming. Now it's tempting to just load at the camera app and stop filming like this. But the problem is filming in vertical is only good for vertical purposes. If you're uploading into Instagram stories, you're uploading to Snapchats, then vertical is great. But if you're filming a more professional video that will live on YouTube or Vimeo, then you want to switch over into widescreen. Then you want to make sure that you're using the main lens on your camera. Not the ultra-wide, not the telephoto, you want to be using the primary lens. The reason why I say stick to this lens rather than using the other two, is because this is the most high-quality lens that you have. If you go to the ultra-wide, you'll notice a little bit of fuzziness in the video. If you go into telephoto, you'll just see a little bit of digital sharpening, which doesn't look particularly flattering. By default, I would say go 16 by 9, so widescreen and then stick to that main lens. But with that said and done, let's jump into a professional video app. The app that I'm using in this example is FiLMiC Pro. Now, there is a free version. I have got the paid version and most of these professional apps actually do require some level of subscriptions. My subscription was £13 or £12.99. It's not too bad considering how much I'll use the app. If I load up the FiLMiC Pro app, it's first just going to put this into widescreen. It's going to load up. As you can see, we are widescreen. The radical thing with this app is we have full control over all of the settings. If we go down to the bottom, you can see it says 25, 4K. This is 25 frames per second and 4K video size. Now, if we go into the settings icon, we can change the resolution. We can change our aspect ratio, which is really cool. If we wanted a really cinematic video, we can add those balls onto create a cinematic video, or we can just keep this to 16 by 9, and then we can change the quality all the way up into 4K. I would recommend going all the way up to 4K to get the cleanest possible image. Then you can see you've got frame rates and generally you want to keep this at around 25 frames per second. Next up, you've got audio and we'll come back to audio in a later episode, so let's ignore that one for now. Then we've got device, and these are just a few settings which we can ignore for now. Now, if we go down to the bottom left corner, you can see you've got these three colored circles, and this is your white balance. You can just move this around to get the color of the room that you're looking for. In my example, I'm using a white light in the frame. I want to set my white balance to a white light. In this example, that would be 5500 Kelvins. Of course, you can't just set to automatic white balance and that will select an automatic option. But you do generally want to keep this locked to a setting. Have a play, move this around to get to a color that you're happy with. Then once you've found your color, we can move on to the next setting. Now as you can see, you've got this circle and you've got this rectangle. If I was to tilt this down, you can see it's just going to automatically focus on this. Now, if I was to tap the rectangle and then tilt up, you can see everything is blurry. The reason why is because we've lost the focus onto this points. If you wanted to create a really nice background blur, then you can do that by locking the focus. Alternatively though if you tap that off, then it will go into the automatic mode. This is really cool because you can create some really awesome rack focus effects. Then next up we have the exposure toggle, that's the circle. If we tilt up onto here, we tap that circle so now it's red, you can see the exposure is locked. If we uncheck that, you can see the exposure or the brightness is going to change, which doesn't look too professional. But if we lock that at a point in that we're happy with, you can now see it's going to stay at that setting and that looks a lot more professional. Then of course there's loads of other settings in this app and if you're using an app which is similar to this, then you'll have a load of other features available to you that you can use. Now, the beauty of having an app like this is you have full access over all of the controls. I'd recommend downloading FiLMiC Pro or an app similar to FiLMiC Pro and having a play with all of the settings available to you. To sum up this episode, essentially you just need to be able to download an app that allows you to manually control all of the settings of your camera. Any automatic settings will give you amateur results. You want manual control over all of your settings. This will give you a really nice professional, consistent look. In the next episode, I'll go through a real life case study and show you which settings I use in the FiLMiC Pro app to get the best possible results. I'll talk you through why I'm using each setting.
3. Using FiLMiC Pro (Professional Filming App): As you can see, we're inside of the Filmic Pro app. You can see we've got the setting here, so we've got this keyboard and we've got this trackpad, and this is our scene. First of all, we're just going to start off by looking at the color balance. If we go into this bottom left corner, you can see you've got these three circles and then you got this icon here, and then just there you got temp and tint. The temp is the color temperature of the lights. As you can see, this is quite an orange light. If we pull this temperature down towards the blue, that will actually start to cool that down and then you'll actually see we get a nice white look to our footage rather than this orange look that we had before like this. Essentially, what I'm doing here is I'm looking at the color of the lights in the space and then I'm trying to match it so that it matches in the scene. That looks about right. Of course, you can play with the tint and the temperature as well until it looks right. I'm just going to pull that down towards the greens, and that now looks right. Our color balance is set to 3,355, and now that starts to look a bit more natural. Now, at the moment you can see this circle and this rectangle are both red. If I was to turn them both white, you can see that the settings are going to be adjusted. If I put my hand in front of the camera, you can see the focus and the exposure changes. But if I was to pull away, the focus changes again. Now, if I lock the circle and I lock that rectangle, and now I do the same thing again, you can see that my hands, even though they're now in front of the lens, they're not focusing. Let's turn that circle white now, and you can see the exposure is now changing. If I was to do this and then I tap that circle to turn it red, you can see we've now got overexposed footage; this bright part of the image is now overexposed and it's too bright. This is where I can just go into the bottom left so I can press this circle and I can pull this setting down so that we can adjust the exposure. As you can see, the exposure has now been adjusted and that now looks perfectly exposed. The same thing applies for the focus as well. If I was to pull the focus up here and then I lock the square, you can see that now looks a little bit blurry. But if I go back into that setting and I go over to focus on the right, you can see I can actually change the focus myself. However, I'd say the best way to do it is just to come off that menu, turn that square, or that rectangle white, and then just lock it back off again. So that is now locked. If I bring my hand in front, that's not actually going to change. Next up, you can see down here, this icon here, you can see we can change the lenses. We can go into the telephoto lens, we can stay on the normal lens or we can go into our ultra-wide. However though, like I've mentioned before, the ultra-wide and the telephoto are not as sharp as the standard lens. I'm just going to keep that locked onto the standard lens and I'll just lock these two frames off again. As you can see, I need to pull down my exposure again because that has overexposed. Let's leave it there. Now, going to go across to the Settings icon, and as you can see, we've got all of these settings here. The first one is our resolution. You can see across the top you've got all of these different aspect ratios. You've got 16 by 9, which is our widescreen. You've got a slightly wider one, which is 17, 9. You've got 3, 2, 1 by 1, which is a square, 2.2-1, 2.76-1, 4, 3, or 2.39 to 1. These wide aspect ratio, these ones are our cinematic ones. If you were to shoot something that was to be more cinematic then you would go into this aspect ratio. However though, I'm just going to keep this as 16 by 9. Of course, you can see I can actually change the frame size. By default, it might be set to HD 720 but I would recommend pulling this all the way up to the highest number, which is 4K in this example. You can change the color from economy to Apple Standard to Filmic Quality to Filmic Extreme. Filmic Extreme is just going to give you the most color information from the frame. Then going across the frame rate, you can see we can pull our frame rates all the way up to 60 frames per second but we don't want that. We want this to be set to 25 frames per second or that's 30 if you're in America because 25 is the best and most cinematic frame rate. Your frame rate is basically how many still images for one second of video. We'll keep that as 25 frames per second. Then we'll go across to audio and we've got the option of selecting our mic. So we can go for the iPhone Mic back, iPhone Mic front. If you've got another microphone plugged in, then you can select that. Then you can select one of the settings here. This is the format. I recommend recording into AAC and then keep 48.0 kilohertz. You can also connect a Bluetooth microphone as well, or you can just mute the audio by selecting video only. However though, I generally like to keep the audio on even if I'm not recording official audio through this phone, just because it's helpful for syncing. Then we can go into Device and we can select Save to Camera Roll to save that into our camera roll on our phone. I'd recommend keeping an orientation lock to stop it from changing the orientation when you go into vertical, and then everything else here is completely fine. You can actually turn off the Zoom Rocker, which is on the right, so you can't see it at the moment. But if we get back into the device, and turn the Zoom Rocker back on, you can see on the right, you've got this really cool Zoom Rocker like this. It's a really nice soft way of zooming in on your video. Of course, there going back in, you can see you've got some other settings here. You've got some presets, CMS, so this is time code and all of that official video professional stuff. Don't worry about that for now. Then you've got hardware so you can do a Clean HDMI Out and you can connect to specific apps: DJI Osmo, you've got Anamorphic Adapter. If this all sounds too complicated though, then don't worry about that for now. Then going across you've got Camera, and you can select one of your cameras. I'm going to go for wide. Then you've got the Guide here. Your guide is this overlay here. This is just going to help you with framing up your image. But once you've gone through all of these different settings, you can actually have a look down here in this bottom bar to have a look at your histograms, and if histograms mean anything to you, then these are all here. Histograms are basically just a very easy way of helping you to expose your video correctly. However, if this doesn't mean anything to you at this point, then don't worry about that feature for now. But once you've gone through all of those settings and you're happy with the look of your video, you can just press the "Record" button and that will start rolling your video for you.
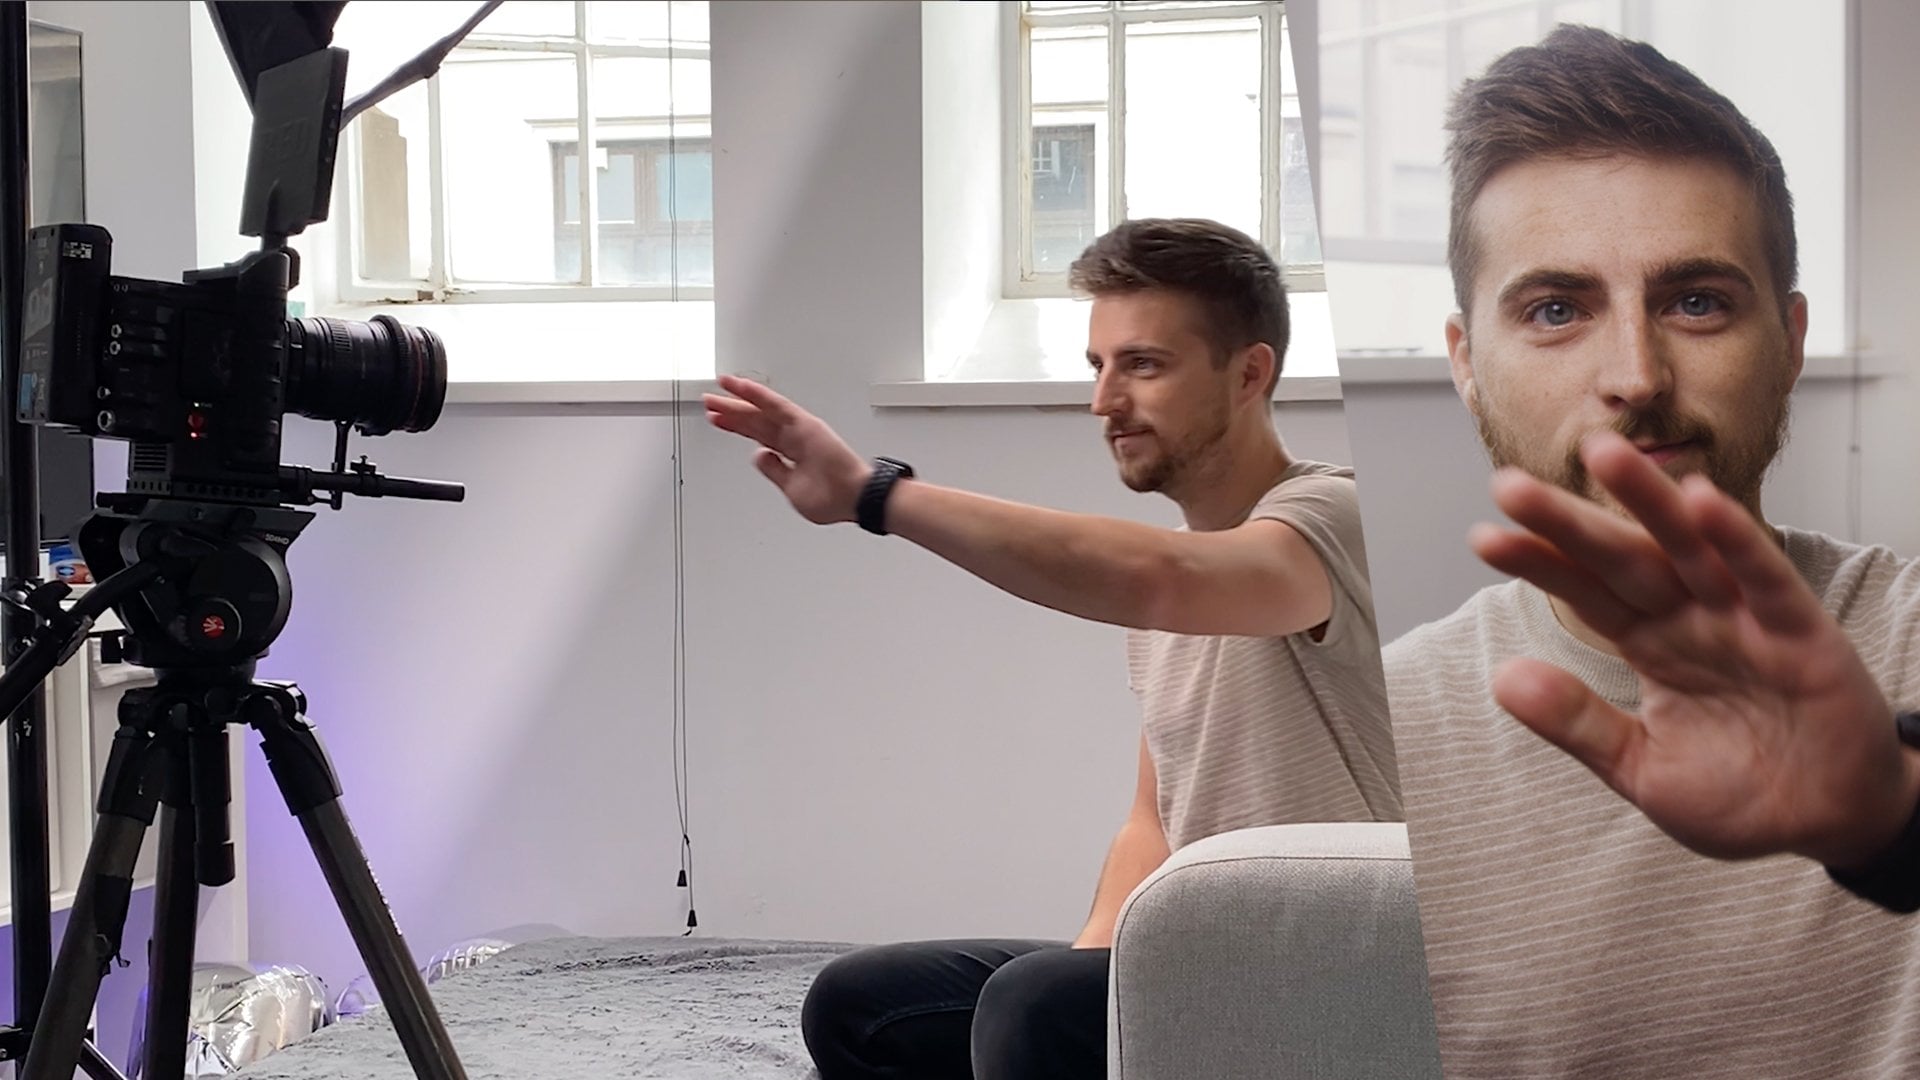
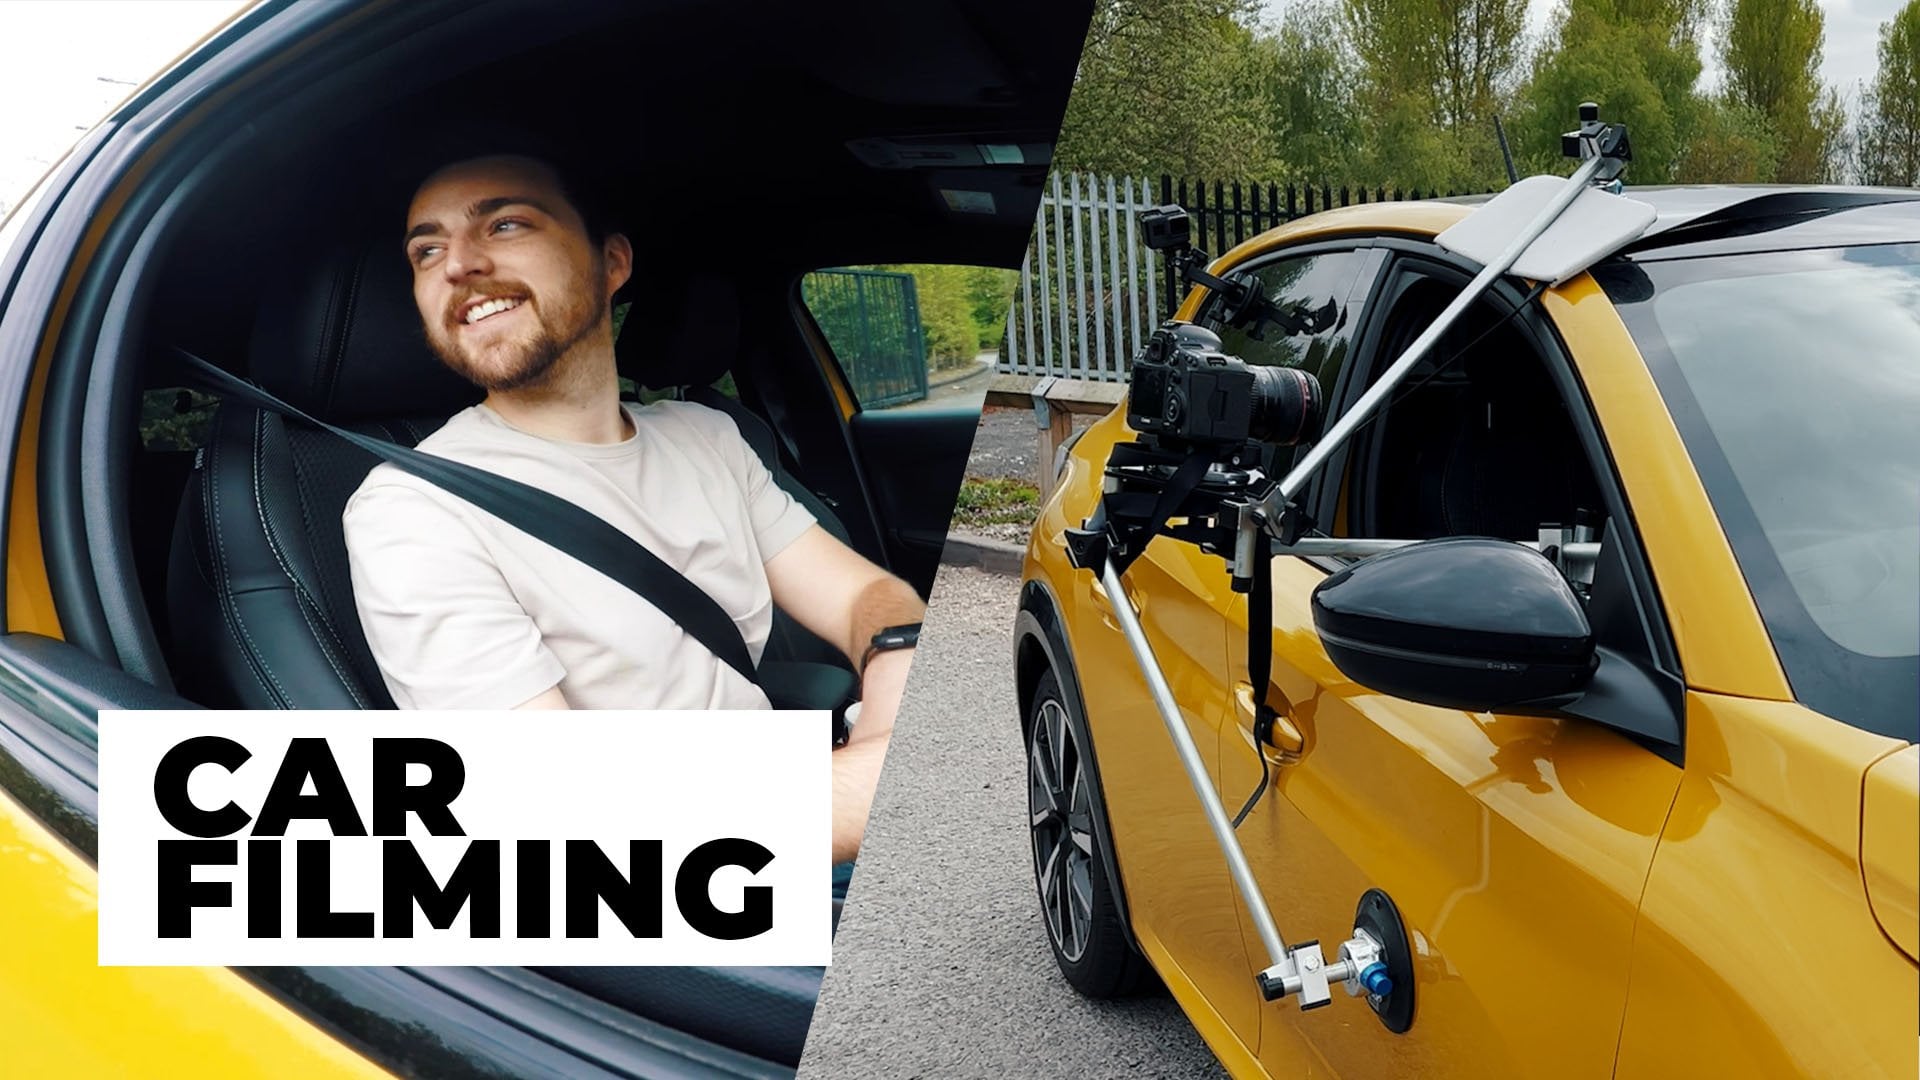
4. Camera Movement: One of the quickest and easiest ways to tell if a video is professional or amateur is to look at the camera movement. Now, it's very tempting when you're filming a video on your phone to just pick up the phone, go into the camera app, and just run around and start filming like this. But the problem is when you're filming like this, you get small amounts of shake from your hands that are then converted into your footage. This camera shake and the small vibration just gives you a fatigue, a real amateur look. It's really important that when you're filming your videos on your phone, it's really important that you get a device that will either keep it static, or smooth out any camera vibration or any handheld shake. The first option is to use a tripod for your phone. Now, it doesn't have to be a really big video tripod. It can be something really nice and simple because your phone is super lightweight. Now, a tripod is a really good option if you want more control over the look of your footage. Now, if you're filming interview content or if you're talking into the camera, then putting your phone onto a tripod will give you a really nice consistent look to your footage. You won't have anybody holding the phone, you won't have any of that awkward camera shake. You just get a really clean, sleek look. Of course as well, if you get a decent tripod for your phone, then you should have the option to pan and tilt. A pan is moving left to right, and the tilt is a movement up and down. If you get a nice fluid head on your tripod, then you could actually combine panning and tilting to create really nice elements of camera movement. Now, I won't go too deep into film-making and how camera movement can affect your video. That's something for another course. But basically just adding a nice amount of smooth camera movement into your footage can make your video look more professional. Of course, it is always important as well that a camera movement is motivated by something. Panning from left to right could be revealing more information about what you're looking at. But long story short, putting your phone onto a tripod gives you a really solid, smooth look. You can go for a static, a locked off shot, or you can add a little bit of panning and tilting movement into your shots to have some routinized, controlled camera movement. Of course, though being on a tripod does limit you to one spot. The tripod is static and the camera is going to move around on top of the tripod like this. But if you want to move forwards or backwards or orbit around an object and physically move in the space, then you're going to have to look at getting a gimbal for your phone. The DJI Osmo is a really good suggestion. Essentially, rather than running around and doing all of the movement by hand, you are putting this into a gimbal, and that gimbal is going to smooth out any vibrations or handheld camera shake that you would produce by holding it yourself. Now, these gimbals are really easy to operate. You can pretty much just buy one, it arrives the next day, you put your phone in and you're good to go and you can get some really nice cinematic footage. But here are my top 5 gimbal moves if you want to create cinematic video. The first gimbal shot is a tracking shot. This is where you're tracking forwards or tracking backwards. Generally, this looks really nice if you have somebody in the frame. Somebody's walking towards the camera, you're walking backwards, keeping them locked in the center of the frame, that's going to give you a really nice solid shot. Next up is an orbit. An orbit is just you spinning around them, and keeping them framed up in the same points of the video. If you were to frame somebody up in the sensor and then you span around them by keeping them in the sense of the frame and then you orbiting around them, the subject stays where they are, but that background is moving. It creates a really nice effect. The next gimbal move is a slide. This is just a movement going from left to right or right to left. Now, a slide looks really powerful when you've got an object in the foreground. Maybe you have a wall in the foreground and you pull away from that wall. You've got the wall here and the camera is revealing the background or the subjects. These are really powerful. Alternatively, if you have an objects in the foreground and you just slide pause that, that can look really nice, it adds depth into your frame, and it can really add a really nice cinematic layer onto your footage. The fourth gimbal move that can look really good is a fake jib or camera crane movements. Essentially, the gimbal or the phone is going to go up in space, but at the same time it travels up, it's going to tilt down or tilt up at the same time. If the camera comes up, then you're tilting down, and if the camera comes down, then you're tilting up. Doing this creates a really nice effect. My last gimbal move is for more of a close up situation. Let's say we've got our phone on a kitchen wall top and there's a few objects in the space. If the camera just pulls through those objects, you can get a really nice effect here. It could look really nice as well if you're pulling the phone back and as you pull the phone back, somebody puts something into the frame. This could look really nice, especially if you've got your focus locked because you can pull the phone back and then the cup can land or an object can land at the point where it's in focus. This can look really awesome and really cinematic. Now, even though gimbals are amazing, it's really important that when you're filming with one, that you put the least amount of shake and vibration into the gimbal because it's not going to iron out any up and down movement. If you're running along and your arm is going up and down, then up and down movement would be translated into the footage, and you'll have this weird bobbing effect in your footage. It's important that you treat your arm as suspension or another layer of the gimbal to try and keep the arm as smooth as possible. If you're doing any aggressive movements, then try your very best to soften up the movement with your arm to try and take off some of that bump or some of that movement. Just paying close attention to how your body is interacting with the gimbal can actually make a massive difference in the quality of footage that you capture with your gimbal. Essentially, when you're filming your videos, don't go handheld, don't just grab your phone. Go to the camera app and start filming like this. It's really important that you put this onto a tripod and go for a static shot. Or alternatively, you use a gimbal like the DJI Osmo and get really nice smooth shots. Now of course, if you wanted the drama of having handheld camera shake in your footage, then that's completely fine. I'm not saying you can't do that, I'm just saying in most circumstances you probably wouldn't want that. If you were shooting a video of a boxer and you wanted that aggressive camera movement, you wanted to feel like you are in the ring with the boxer, then moving around with the phone could create a nice layer of drama. But if you're shooting a corporate video, you're shooting an interview, you're shooting a promo video for something which isn't aggressive, then you probably wouldn't want that shaky handheld feel. You would want a nice smooth look to the footage, and that's where your tripod or gimbal comes into play.
5. Video Transitions on your Phone: When it comes to filming videos on your phone, a really quick and easy way of adding style into your edit is to use some in camera video transitions. Now, there's loads of transitions available, but I'm going to give you my top three transitions that I use on a very regular basis. These are really easy ways of adding character into my work. The first transition is nice and easy, and this is a whip pan. A whip pan is basically going to whip the camera in one direction and it's going to look like we've just aggressively turn the camera and we've gone from our first shot into our second shot. The way that we actually manage this, the way that we film in this, is we're rolling our shot and at the end of our first shot, we just going to whip the camera in one direction. You can go to the right, you can go to the left, you can go up or you can go down. Then once you've done that whipping direction, you want to stop recording and then we'll go onto our next location. Now you don't have to go to a new location, but you want to make sure that something in the scene has changed in order to warrant the use of this transition. You could just be whipping over and then coming into the same scene, but the outfit has changed, or maybe you're whipping from a wide into a close-up to reveal a detail. Or maybe you could literally be whipping between locations. Maybe we're in this location and then we whip and go somewhere else. Once you've whipped away at the end of the first shots, you either you want to go ahead and find your second shots, we'll turn the camera away from the scene and then we'll start rolling and then whip into the scene. Now, it's really important that you travel in the same direction. If you were to go to the right at the end of the first shot, you can't come in from the left at the start of the second shot because it will be really confusing and quite jarring. If you whip to the right, then you want to pull your camera to the left of the start of the second shot and whip into the right. Doing this will ensure that the transition has a really nice flow and it will make that transition really seamless. When it comes to editing this transition by the way, all you have to do is just go halfway through the motion on the first transition, make a cut, and then you do the same thing at the start of the second shot. So halfway through the movements, put these two clips together and you'll have a really awesome transition. Transition number 2 is going to be similar to the first transition, but instead of whipping in a direction, we're going to rotate. At the end of the first shots, we'll go 3,2,1 action, whip around and go clockwise or you can go anticlockwise. I'm going to go clockwise in this example. I'm going to whip around to here and then I'll cut when the phone is upside down. Then at the start of the second shot, we'll start upside down, carry the action in around until we get back into this right orientation. In theory, it looks like the camera has spun 360 degrees, but the location, the shot size, the outfit, the angle, something has changed in this transition. End of first shot, rotate one direction, start to the second shot, continue that around to complete the transition. Now, transition number 3, and the last transition I'm going to mention in this episode is a sliding transition. Essentially, you want to find an object that you can move the camera behind and you want to slide behind the object at the end of the first shot, and then slide behind a different object at the start of the second shot. This is our shot and this is the objects that we want a slide behind. You just going to roll the camera, slide across to the right and then would disappear behind this wall, and then we go to a new scene, we stop behind the wall, and then carrying on that same movement, so left to right, we're going to start behind, pull across, and then reveal the new scene. In theory, it looks like we've just trapped behind something. I've moved the camera behind an object and then we've gone into the new scene. Now, it's really important with this one that there is some level of haste to the transition. You can't have a really slow slide across because you're going to see the cut between the two clips. But if you go at a decent pace, it will hide that cut in the motion blur of the footage and you'll get a really seamless transition. Again, this one is very easy to edit. You just cut at the point where the screen is filled with that wall, so make sure you're nice and close to that wall so that the lens goes dark. Then you just cut to the next scene and then you're sliding out from that post or that object, and you'll have this really cool, seamless transition. In camera video transitions are a really easy way of adding character and flavor into your edit. Now, not every project is going to require one. In some edits, these transitions will fall really out of place, so it's up to you as the video creator to figure out when is the best time to execute these really creative transitions. Now, like I mentioned as well, these are only three video transitions. There are so many other video transitions that you can complete to add more flavor into your edits. Have a play with your phone and start creating some really awesome in camera video transitions to add flavor to your video.
6. Lighting: In this episode, we're talking about lighting and lighting is arguably the most important part of this entire process. You can have the best camera that money can buy. But if you're lighting is bad, then the video is going to be bad and the same thing applies for your iPhone or your Android phone. You could have incredible lighting and your video can look incredible. But if you're lighting was bad, your video would look bad. It doesn't matter if you're in the right camera settings. Bad lighting makes bad video. Now essentially, there's two ways that we need to think about lighting. First of all, there needs to be enough light in the camera sensors that you get a clean image and then the next is we want to shape the light to get a nice cinematic look. Let's tackle that first one to begin with. Essentially, you just need lights in the frame. This means that don't film in the middle of the night with no external lighting. Don't film in a dark location if you don't have extra lighting because unfortunately, you'll end up with grainy footage. You'll know you haven't got enough lights into your camera sensor when you look back at your footage and you'll notice that everything looks a bit fuzzy. That's video noise and that's the first way that people can tell that your video is amateur and not professional. First of all, you just have to make sure that you're filming in a well-lit environment. Now next up we want to talk about shaping light because just getting enough light into the camera isn't enough to get a great video. We want to be able to control that light and build a specific look. Now if you're filming a person, generally you want to go for a three-point lighting setup. Now, I've talked about three-point lighting in another one of my courses, so I won't go into it in loads of detail here. But essentially, this is a lighting setup that consists of three lights. You've got your key lights, which is one big lights on the side of the camera. Next we have the fill lights, which is another light just on the opposite side of the camera and this is filling in any shadows that the main key lights has cast onto the face. Then we've got a back-light. The back-light in this example is just this nice soft glow on the back of my head and the reason why we have this back light is because it helps me to stand out from the background. Your three-point lighting setup is one lights up here, another lights up here, and then one lights behind just out of frame. Those three lights would give you a really nice, smooth look. However, if you wanted to make things look a little bit more cinematic, then you can turn off one of the front lights and just have one lights at the front and one lights at the back. Of course as well, you can experiment with color. You don't just have to have natural colored lights. You don't just have to have whites lights or orange lights. You can actually use color to your advantage. In this example, you can see I've got four purple strip lights and then a purple lights behind this unit. These lights are basically giving this shot some character. Now if I was to turn all of these lights off, all of a sudden you can see this shot is nowhere near as impressive as it used to be. This is just a little bit flat. There's no character. It's just me against a fairly messy background and it doesn't look too good. Adding colored lighting into your frame is one of the easiest ways to inject character and make your videos look more professional. You can buy video lights that are capable of changing their colors or alternatively, you can just buy a standard video lights that just shoots in a white lights and you can get a colored filter to change the color of the light. Whatever you decide to go for, just make sure that the color is relevant to the frame. Don't just throw some color in there for the sake of it, make sure you've thought about the colors and why you want to use those colors in your frame. If you're shooting an interview piece for your business, for example, and your brand colors are blue and yellow. Then use blue and yellow in the frame to help to enforce that branding in your video. Color can really help with your brand and color can help create a really nice image. Color can really help you to create a specific feeling. Each and every color can have a specific connotation and it's really important that you think about that as well. So red can be quite a loving color, but it can also be quite an angry color. Blue can be very calming. You don't necessarily have to think at this level for every single shot that you do. But playing with colors and figuring out how those colors affects your frame can really make the difference between an amateur and a professional video. But of course, if you don't have access to lighting, if you can't afford to buy RGB color LED lights, or you can't buy any soft-box lighting kits, then that's completely fine because you can just use the big light source in the sky, the sun. Of course, though, shooting outside does come with a few complications. First of all, you want to try and avoid direct sunlight onto the person's face. If you're filming somebody either face them away from the sun so the sun is behind them. Alternatively, you can use diffusion or bounce to bounce the lights or soften the lights that is hitting the person's face. Alternatively, though you could just shoot in a shaded area or film on a cloudy day when you are not going to have to worry about competing with the harsh direct sunlight. Whatever you do though, just make sure that you're getting enough light into the camera sensor and make sure that you're really thinking about the light to get the best possible video. Lighting can go a really long way to not only make your videos look better, but they can really help to convey a specific tone or a message. Put the time into getting your lighting rights and I promise you it's going to make a real difference in your production.
7. Sound: If you're filming interview-type videos, you're filming a YouTube video, you're filming something with audio, then it's really important that you have good quality sound. Because unfortunately, if you have really good-looking video and terrible audio, unfortunately the terrible audio is going to make your great video look bad. It sounds weird, but bad audio can ruin great video. Alternatively though, on the flip side, if you have great audio, then it excuses and makes up for the fact that your video could look a bit more on the ugly side. It's really important that we put the time and the effort and the energy into capturing great audio. Now, generally, the golden rule of thumb when it comes to capturing audio, and this is the same if you're shooting audio on your iPhone, or you're filming audio for a big Hollywood production, the general rule is to get your microphone as close to the person talking as possible. That's it. This is an example that I do all the time, and if you've seen another one of my courses, you've probably already seen this. Take this microphone, for example. This microphone sounds really good, really clear, but the problem is when I take it over there, literally just one meter over there, unfortunately, all of a sudden the audio sounds terrible. The microphone is just here, but the audio sounds terrible. If we listened to the audio inside of the camera as well, unfortunately because the camera is over a meter away, the audio sounds terrible. Now, as soon as I get this microphone close to me again, the audio sounds greats again. If you're capturing your audio, you want to get your microphone as close to the person talking as possible. Now, let's talk about microphone options. First of all, you can go for a Lavalier microphone. This is a Lavalier microphone. It's around €50 on Amazon. It's made by Rode. All you have to do is just plug this into your phone. You have your phone, you just plug this into the phone. Now you would need a headphone adapter for this, but you just plug this in. You can go to your voice recording app on your phone and you can capture great quality audio. All you have to do with this microphone is you just put this in a microphone clip. You pop this under the shirt, and then you can just wear this on the outside of your T-Shirt, and then you've got crystal clean audio. Of course, the problem with that is you need an iPhone to capture the audio. If you're filming video and you're capturing audio, then you're going to need a phone for the audio and then you're going to need a phone for the video. That can be a little bit awkward. You could, however, actually, if you frame this up correctly, have the phone mounted quite close to you, and then have the cable running down out of the frame, up inside your T-Shirts and then mount it this way. If you are walking and talking, then you would need to get another phone to capture the audio to the video. A quick tip as well, If you are capturing audio on one phone and video on another phone, then it's worth doing a sync clap when you're recording your audio and your video. Because once you do a sharp clap in the take, you'll get an audio spike in the audio waveform and there'll be a visual marker in the video. All you have to do to sync up the audio and the video is look for those two points and then stitch the two bits together. That's how I sync my video and my audio when I'm filming this type of content. Of course though, if you didn't want to go for their Lavalier option, you can actually buy microphones for your phone that you can just put on your phone. But again, you want to try and make sure these are as close as possible. Of course, you could always just go for the good old classic voice recorder app on your phone. If we go into the voice memos app, if I was to talk into this phone, you can see because I'm this close to the phone, I'm gonna get a really nice high-quality audio. Now, if I wanted to, I could just hold this out of the frame, I could put this on a microphone holder or a boom arm or something, have this frame just on the outside of the frame. When the phone is this close and I'm using the voice recorder app to capture this audio, when it's this close, it sounds good. But the problem is when it's all the way over there, again, same problem. The audio doesn't sound anywhere near as good. You could just record your audio with the voice recorder app on your phone, just make sure that it is nice and close to the person talking in the frame. There's loads of different options for recording audio. You could use a Lavalier system, you could get a shotgun microphone from Amazon that just plugs into your phone. Or alternatively, you can just use the microphone in the camera and then just use the voice memo app to record your audio that way. Just make sure you do your sync clap when you're filming your video and your audio so that you can sync these two together.
8. Outro: There you go. Those are my top tips for how you can capture great video with your phone. Just because you don't have an expensive video camera, doesn't mean you can't have great looking videos. Just follow all of the tips mentioned in this video, and I promise you'll have great looking footage. My challenge to you now is to go out and shoot a really awesome cinematic video with just your phone. Feel free to use a gimble, a tripod, microphones and lighting, use whatever extra equipment that you like, but the one requirement is the video must be filmed on your phone. Then once you've filmed and edited that video, please do consider uploading it to the students projects section on this course page because I would love to see your work. If you do happen to upload your video, then a promise to check it out and I'll let you know my thoughts and opinions on your work. Sorry, thank you ever so much for watching this course. I really hope it was beneficial to you, and I hope you enjoyed it. If you're interested in learning more about film-making, then please do check out some of the other courses that I offer. But if not don't worry, I just appreciate you watching this course. Thank you once again and have fun shooting your really awesome, visually pleasing cinematic videos on your phone.
 Chris Brooker, Filmmaker & YouTuber