Transcripts
1. Introduction: If you've watched a
film-making tutorial, chances are you've probably
been given the advice, get a gimbal and put your
camera onto a gimbal. Or if you've been to a
wedding, a music show, or some other event, you've probably seen
someone running around, move one of these things. But the thing is, no one one teaches you how to use these. They just say, get a gimbal, and get these really
awesome shots. In this course, I'm
going to run you through what gimbals are, why you would use them, when and when you
should not use them. Then talk about the technique, what you should do,
what you shouldn't do, and then how to control other things on your camera like, your focus, and your monitoring.
By the way, I'm Chris. I'm a full-time filmmaker and
photographer from England, and I specialize in
music and dance videos, but I also shoot adverts, corporates, and more. Gimbals are a big
part of my workflow. I'm always looking
for a really nice way to get seamless smooth footage. Throughout this course,
I'm going to be talking from experience, and talking about everything
you need to know about gimbals. Let's get into it.
2. What are the Benefits of Using a Gimbal?: First things first, what are the benefits of using a gimbal? Well, a gimbal is
basically just going to smooth out your
camera movements. Rather than holding your
camera in your hands, if you place it on a gimbal, the gimbal is going to
do its best to iron out any imperfections
or camera shake. Essentially, if
you do this right, you can get some really
beautiful moving footage, and it looks like the camera
is floating in the air. Now traditionally,
the way to achieve this is to use a Steadicam. But Steadicams are
very expensive. They start at £3,000, £4,000, £5,000, and
they go all the way up to really high numbers. Steadicams aren't really
an option if you're just getting into the world of video
creation and film-making. That's where gimbals come in. Because you can have
gimbals that range from £200 all the way up to
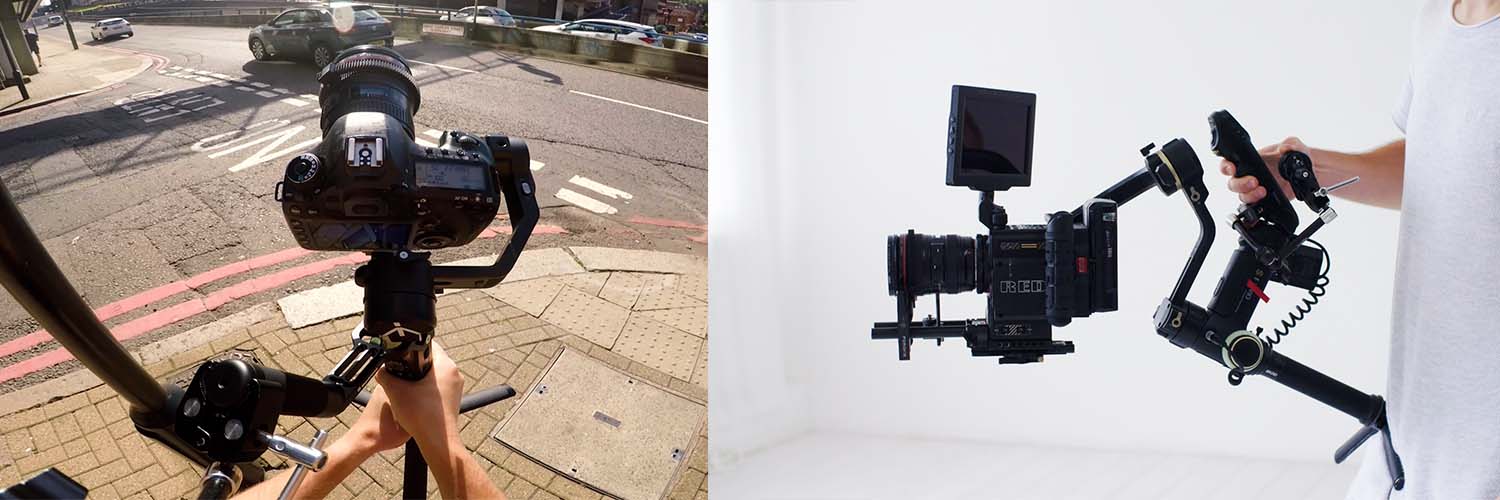
a few thousand pounds. Take these two
gimbals, for example. This is a Manfrotto gimbal, and this goes for
around £300 or $300. Then this is the Zhiyun crane 3S which is intended
for larger cameras. This is the gimbal that I
use on a regular basis. But that is somewhere
around £7,800 or $7,800. Gimbals are a tool
that you can use when you're filming
your videos to smooth out any imperfections or handheld camera shake
from your footage. If you do it right, you get
really nice floating footage. Now, if you just purchase any random gimbal and you throw your camera onto the gimbal, and you just power it up, chances are the footage is
not going to look any good. It's going to be wobbly,
it's going to be shaking, probably vibrate
quite aggressively. That's because first
of all, we need to balance and calibrate
the gimbal. In the next video, I'm going to run you through
the balancing process, because getting your gimbal
balanced correctly is the first step to capturing really awesome smooth
footage with your gimbal.
3. How to Balance a Gimbal?: Balancing your gimbal is one of the most important
parts of this process. Because if you haven't
got your camera and your gimbal
balanced up correctly, then, unfortunately, it doesn't matter how good the gimbal is. You're never going
to get that really nice, seamless, smooth footage. The camera will
wiggle and it would just look really amateur. The first step is to
actually make sure that your gimbal can
take your camera. Certain gimbals will have
different restrictions. This gimbal can take
around two kilograms. Make sure that the camera is not heavier than the
payload of the gimbal. Then also make sure
that the gimbal, this area here is able to
accommodate your camera. Because if you've got a
camera which is too big, so if I was to try and put Sony F7 or a Red Gemini
onto this gimbal, it'll be too big, too chunky and it wouldn't fit, and plus as well,
it would be way too heavy so it
would never balance. But once you've made
sure that your camera and your gimbal are
a perfect match, you would then want
to go ahead and put your base plate onto the
bottom of your camera. These is just these
plates here which enables you to connect
the camera to the gimbal. You should get a base
plates with your gimbal. But if not, then you can
purchase these fairly cheaply. I just want to
make sure that you screwed on nice and tight. Just scrub a screwdriver
or a tool of some sort, and then just make sure this
is [NOISE] nice and tight. Then once you've done
that, you can just slide the camera onto the gimbal. Now as you can see instantly, this is not going to fit, so I've got to make
an adjustment. This is where I'm
going to have to pull this part of
the gimbal over. I'm just going to
slide that over, and that should
fit the camera in. Now, before we start
actually balancing a gimbal, we want to make sure
that the camera has everything that it will
have when you're filming. Make sure there is
a battery in there. Make sure the lens cap is off. Make sure you're using the
lens that you plan on using. Then once you've got
your cameras set to half of you you're going to
have it when you're filming. We can start the
balancing process. First of all, just make sure
this is nice and tight. Then we just want to start
with this access here. You just want to unlock
this and instead, you can see that it's
completely out of balance. First of all, I'm just going
to slide this forward. Then I'm just going to try
and get this to the point where it doesn't fall back. If it falls backwards then
it needs to go forwards, if it goes forward then it
needs to be pushed back. Just make sure you get this
balanced up perfectly. Then you can tighten that up, and then you can just
double-check this. That's not going anywhere. Next up you want to
go down to here. As you can see, if
I just turn this, if I try and face this
like this, it's dropping. This is because we need
to adjust this here. As you can see, we've
got this dial here. If we just pull that down
and then we hold that up, you can see you want
that to try and hold. That's not holding at the
moment we just pull that up. That is holding, but it's
coming down a little. I'm just going to push that
up a little. There we go. That staying exactly
where it needs to stay. I'm just going to
tighten that up. Then I'll bring it
back to this position, and if it falls again, then I can just make any small
adjustments to this again. I can just slide this forward a little bit
and lock that in. Now we've got this
access all balanced up. Now we can move on to this
axis, the side-to-side. If we just unlock
that and let it go, you can see it's just going
to fall over to the one side. This is where we can just
unlock this knob here. Then we can just move
the gimbal side-to-side and make sure that it
sits perfectly sensor. So you want this to be
perfectly horizontal. There we go, that staying
where it needs to stay. We'll just lock that one off. As you can see, unfortunately, I made a small adjustment there and it's thrown off again. I'll just make another
small adjustment and that looks like
it's staying put. We'll just lock that
access off again. Now we're coming down
to the last axis, which is this here. If we just unlock here, you can see this is the axis
that we're going to adjust. In order to make sure that
this is balanced correctly, you just want to lean the
gimbal over to the side, and if it moves,
it's out of balance. It's not calibrated
or balanced properly. We'll just unlock this option here and we'll push it forward. Then we'll lock it
off. Try again. As you can see, that's
not quite right. Push that the other way again. That's slowing down now. That means we can push it even
further in that direction. We lock that off try again. As you can see, that has perfectly stuck where
it needs to stay. However, I'll show you what will happen if we took it too far. If you push that too far
forward and we lock that off, it would go the
other way like this. You want to make sure that
you adjust this so that it doesn't move in
either direction. I guess that's still
too far forward. Make a small adjustments.
There we go. We balanced up and just check in all directions that this
isn't going to move, that it's staying perfectly
way it needs to stay. Now you just want
to unlock all of the axes and then just make
sure that nothing moves. If it moves, then you need to go back in and make an
adjustment to that area. But if not, then you're perfectly balanced
and ready to go. Now, all you would need
to do is just power this up and begin the
calibration process. So as you can see, I've powered the gimbal up now that it's doing exactly
what it needs to do, It's not vibrating too much. If I put it down and
it starts to vibrate, it's wobbling a little bit, but that's about
where it needs to be, and that's because we've
balanced this up correctly. If it wasn't balanced
correctly and it was falling over then it would be wiggling around and
the camera would be knocking around
all over the place. It's really important that
you get that balance correct. Then once you have balanced that you can just go
through your menus. If I just scrub through
these menus here, you'll find an
option that should say gimbal settings and there should be a
calibration option in there, or it could be in more. But you basically want to find some variation of calibration. Then once you've
found that option, you want to place the
gimbal on a steady, hard surface which
is nice and flat, and it just wants you
press calibrates. Then you leave your gimbal
for a few moments for it to calibrate the exact
configuration that you have. Once you've completed
that process, your gimbal will be perfectly balanced and you can go
ahead and start filming. As you could see, I haven't
calibrated my gimbal. This is the exact
demonstration of what it would do if it's not
calibrated correctly. This is where I would
need to go through the process of
calibrating this gimbal. But like I said, once you
have calibrated your gimbal. You can now go ahead and
start filming some footage.
4. How to Hold a Gimbal: Now that we've set up balance
and calibrated the gimbal, we need to actually go
through the process of how to hold the gimbal. Now, there are two primary
ways to hold the gimbal. The first way is upright mode, and this is where
you're going to be doing most of your filming. You'll be in upright mode. However, you also have
briefcase or underslung mode, which is where you hold
the gimbal upside down, and this allows you to get
really low to the ground. This creates some
really dynamic results. But let me run you through
the upright mode first, and I'm going to
talk about what you should be doing and
what you should not be doing in order to properly
film with this gimbal. My first piece of advice is
to try and avoid filming with one hand because the problem is when you're holding the
gimbal with one hand, chances are there's going
to be quite a bit of movement there and
the gimbal is going to be quite unsteady. So rather than having one hand or one point of
contact on the gimbal, try and use two hands. If you have a handle
on the gimbal, that's great because it allows a good distance
between the hands. But if you only have
the one handle, which is down here, then put both hands on
the gimbal like this. The reason why I suggest
two hands rather than one is because one will
wiggle all over the place, but two will really
stabilize that. It will make that a really strong connection
with the gimbal. Regardless of whether you're holding it with two hands down here or one hand up here
and one hand down here, that is completely up to you, but then I would
recommend leaning the gimbal into
yourself a little bit. So rather than being
all the way out there because you're just
going to get really tired and fatigued, if you lean into
yourself a little, then you can lean that
into your body weight, and that's going to be easier
to hold in the long run. Now, it's very tempting when
you're holding your gimbal to put your elbow into
your body like this. Because if you're
holding it up there, your arms are going
to get tired, but when you go into
yourself like this, you're taking some
of that weight from the gimbal and putting
it into your body. Now, this makes sense. But the problem is if you're
operating the gimbal, every time you take a step, the gimbal is going
to move as well. So that is not what we want to. We want to try and
avoid that bobbing. You want to try and
keep your elbow disconnected from your body, and then you also want
to try your very best to turn your arms
into suspension. Because if you're not careful, if you're running around, your camera and your
gimbal is going to go all over the place. But if you separate your
arms from your body a little bit more
and you try and turn your arms into suspension, it means as you're
running along, the gimbal isn't
going to move around as much as it would do if
you're more connected. Try and turn your
arms into suspension, loosen those arms off
as much as you can. Then when you're moving around, that movement won't be
transferred into the gimbal as much as if you were connected. That's
really important. Two points of contact
on the gimbal, keep your elbows away from
your body and then try and smooth out any up and
down movement with your arms. Now I am going to
contradict myself and say, if you're just standing
there and you're just getting very subtle
camera movements, you can actually lean the
gimbal into your body, and if you wanted to, you could just do a
very subtle body sway, and that is going to create a very subtle pan or
slide left and right. You have to be very careful
here though not to do any aggressive movement because that will be transferred
into the camera. So if you're just looking for a very subtle slide
from left to right, you can lean that
into your body, but be aware that you're breathing doesn't get
transferred into the gimbal. Because if you're doing
a long take and you're breathing in your hots and
you're breathing up and down, that's going to get
transferred again into the gimbal and
therefore into the shot. Just try and hold your
breath if you're doing that. Of course, there's
only so long you can do that before
you have to breathe, so just do that for as long
as you feel comfortable, pull it away for a moment, take your breath, and then
bring the gimbal back in. That is probably the
best way to film most subtle camera movements rather than having the camera
out here for a whole two, three-minute tape
because eventually your arms are going to
get too tired and you'll just end up dropping the
camera and the gimbal or you'll just have to collapse
and put it on the floor. Those are all my
tips for holding the gimbal in this option, in the upright mode. Now if you go inverted, so the underslung mode
or the briefcase mode, this is how you're going to
be operating the gimbal. Again, you want to keep your two points of
contact on the gimbal. One hand here on this handle, and then another hand here. It's very tempting to run along with the camera like this, but the problem is I find it can get a little bit wobbly if
you've only got the one hand. So keep your two hands on
the gimbal and that should iron out any vibrations
or calibration errors, and that should give
you a really nice shot. Now, when you are in
this underslung mode, it's really important
that you're quite low to the ground to really
see the benefits. You see, if you'll just doing
underslung mode up here, your arms going to
get tired and there's no real point of
being it underslung here because you could just
move the gimbal down here. So if you are going for
this underslung mode, make sure you're really
low to the ground, and that's going to give you a really nice dynamic
camera movements as you're moving across, pushing towards or pulling away from an object or a subject. Now the beauty of being in this underslung mode is we can actually get into
our vortex mode, and this is where the camera
is just going to spin. Now, not every gimbal is
going to have this feature. But if you do, then
if you go into underslung mode and
select your vortex mode, it should start doing this spin. However, if you don't, you can just go into
underslung mode, tilt the camera up, and then we can adjust the
wheel or we can adjust this joystick here to
the maximum speed, and then from that we
can just pull that all the way over to
the side and we get this really cool vortex mode. The vortex mode can be a
little bit of a gimmick. However, when done correctly, that can be really dynamic
and come out really awesome. Again, though, when
you're doing that, you want to try and keep
your two points of contact on and then adjust this
settings here on a gimbal, and that's pretty much
everything you need to know in order to get
started with your gimbal. Regardless of whether you're
upright or you're low, try and keep two points of contact on the
gimbal at all times, and then you really
want to make sure that your arms are
being treated like suspension to iron out
any of that movement. It's also worth noting
as well that when you are walking or
traveling with the gimbal, try and avoid heavy
footsteps because any heavy footstep
is going to be converted into a camera bob, and that's very difficult to get rid of when
you're in the edit. Instead, try and
walk very gently, trying to have very soft, very calm footsteps,
or if you're running, be very soft and gentle, and then try and get a
really nice fluidity in your movement to smooth
out any movements. As you can see, if I was being reckless and I was not worrying too much about what my body is doing in regards
to the gimbal, we're going to end up
with a really bumpy shot. However, if I am careful, you can see I can
smooth that out, half decent that
looks pretty good. Then of course, once you
add the movements in, you'll barely see that up and
down motion in the footage. That's everything covered on the how to hold a gimbal video. In the next video,
I'm going to talk about different gimbal moves and how these moves can add drama and excitement into your video.
5. Top Gimbal Moves: Now that you've got
your gimbal setup, it's very tempting to
just grab the gimbal, gets outside and start running
about with the gimbal. But there are a few
different types of gimbal moves that you can use to create really
awesome and dynamic shots. In this video, I'm
going to run you through that entire list. The first one is
going to be a follow, so you can follow forward, you could follow it backwards, but essentially
this is just going to track somebody moving or checking an object or something moving
through the frame. Let's say we have a
person, for example, if they're just walking down
the sidewalk or the path, you could be directly behind them and as
they're walking along, you're just keeping
the same distance, keeping them framed up the exact same throughout the shots. This creates a really
nice dynamic movement. We can flip that and you can
be in front of the person, you can be walking
backwards with the gimbal and then they're
walking towards the camera. Again, keeping them
framed up the same, keeping that same distance
and you've got yourself a really nice tracking forwards
or backwards type shots. The next step we have a orbit
or a parallax type shots. Essentially, you have a subject. Now this could be a
person, an object, something framed up in the sense of the composition and then all you do to create this camera move is you
just spin around them, so you walk a circle
around them and keep them framed up the exact same
throughout the entire shots. If I was to orbit around this and this was the
front of the camera lens, you're essentially doing this, so you're orbiting around and when you keep them framed
up the exact same, that position, the same
so they're not moving, but their background is moving. It creates this really awesome
visually dynamic shot. You can do this really slow, or you could do
this really quick. It's completely up to you and the type of shot that
you're looking for, but that is an orbit and
that looks really dynamic. Next up we have a
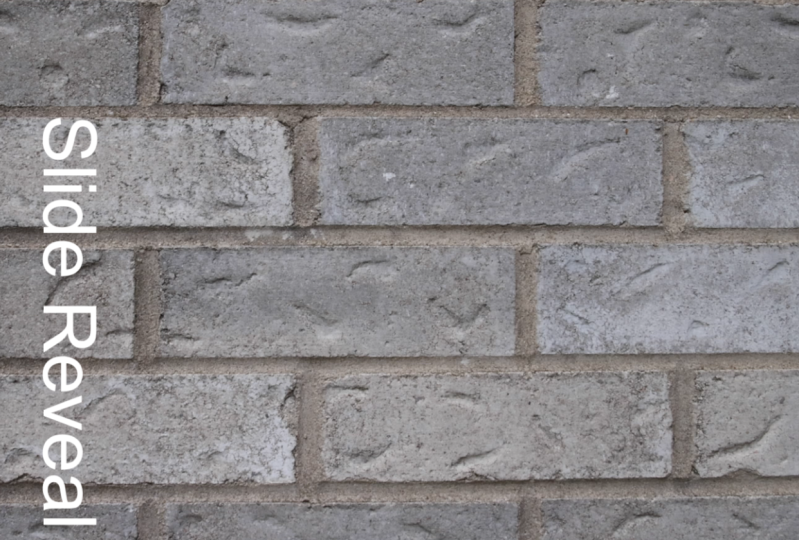
sliding reveal. In order to do this, you want to have your
subject and then you want to make sure you've got something in the foreground. Generally, if I'm
filming outside I use a wall or I use something
that I can block the lens and then I pull the camera out
to the side creating a slider type movement
and this is going to reveal that subject from
that foreground layer. It creates really nice element of depth within the frame, but if you do this gently
enough and smoothly enough, it can look really nice
and really professional. Next up we have a
profile shot or a walking tracking
shot from the side. Essentially, if
somebody is walking along a path or a
sidewalk again, instead of shooting them
from the front or the back, you're just filming
them from the side. Again, keep them framed at the exact same throughout
this entire shots. Keep that same distance
there and as you're walking, they are walking with you. If you frame them
directly from the side, you create this nice
profile shots and that can look really
nice and dynamic. Then we've got a subtle
push in and pull out or a slide in, slide out. Essentially you're just
mimicking a slider here. You just going to gently track
forward or you can track backwards and you're just adding a little bit of gentle
movement into the frame. Now, this looks really
nice when you have an object in the foreground, so maybe we could use some frame within a
frame composition here. I'm inside a room, I'm shooting through a door and I'm using that gentle
camera movement to create this really nice
elements of movements by using that doorway as
our foreground elements. That can look really
dynamic and it does help to add a little bit of wow
factor into the footage. Next up, we can
use the gimbal to squeeze through
some tight spaces. You can put the camera through something
that is quite tight, so maybe there is a gap in the wall which you can
squeeze the camera and the gimbal through
and this is going to create a really dynamic shot. Maybe there's some fencing
or maybe there's a pole or something where you can squeeze the camera and
the gimbal through. In order to do this, you might have to have
somebody behind that object, so you're passing the
camera through to them. Then there's a nice
trade-off and then the camera carries on through. This creates a really
nice dynamic effect and it can look really
awesome when done correctly. Next up we have a jib
or crane like shot. A camera crane or a camera jib are those long arms that you see and they move the camera up and down and as
you're going up, the camera tilts down and as you're coming down
the camera tilts up. As a result, when you keep the subject framed up the same, the shot can look
really dynamic, but you don't need a camera jib or a camera crane for this. It helps if you do, but you can mimic that
with your gimbal. Make sure you're in the
correct settings on your gimbal so that you can tilt and then all you
have to do is crouch down and then as you stand up, you just tilt the
camera down and then in reverse you can
start really tall. Start with the camera tilted
down and as you come down, you tilt the camera up. This creates these really
nice, visually dynamic shots. Then, if you wanted
to film from a car, you could either
mount your gimbal to a car using a car suction mount. This is one of the
suction pads that I have generally when you're filming
with a camera on a car, you want to have at least two, but three is better. All you do is you
get the suction pad, you stick it to the bonnet and you make sure that
doesn't move anywhere. Then you can mount
your gimbal onto this. You can mount the
gimbal onto the car, but the camera onto the gimbal and then as you
are driving alone, you can capture some really
nice dynamic moving shots. Alternatively, though,
if you didn't want to trust your camera
stuck onto the car, you could actually
open up the boots and drive along with
you in the boots, filming an object or an item or a car or something behind you. If you've got two
cars, for example, you can be in the front car with the boot open filming of a
car that is following you. This is a great way of
capturing 3D dynamic shots. It's really important
that you're doing this on closed roads. Don't do this in
any public roads. It's really important
that you're not driving too quick and it's also really important that
you are buckled into the car. Make sure you're harnessed in and make sure it
is completely safe because you don't
want to fall out of the car as you're driving along. This is a really great and
fairly low cost way of recreating those really
dramatic car shots that you would see on car shows. However, they would use a big camera crane
mounted onto a car, but if you're just
hanging from the boots, making sure you're
all harnessed in. You can get a pretty similar
result for a low budget, just using your gimbal to stabilize all of that
movement from the car. It doesn't just end there. There are so many different
types of gimbal shots. This is just scratching
the surface, but if you start practicing
these few shots, it should unlock more ideas
and spot more creativity and allow you to move the camera in new and interesting ways. But there you go, the
selection of gimbal moves, should get you started and
allow you to start shooting some really visually
pleasing shots with your camera and gimbal.
6. How to Pull Focus: When it comes to
filming with a gimbal, one of the difficulties
and one of the limitations is focus, because normally if you
are filming hand-held, you would just adjust
the focus ring, so you would pull the focus ring as you're operating the camera. No big deal. But the problem is, if you try to do
that with a gimbal, let me just power this up. Unfortunately, you'll see
I'm holding the gimbal and then if I try to
adjust the focus, it's going to mess up the
position of the camera, or unfortunately sometimes it could completely
throw the gimbal off and it could send the
gimbal into a lot of wobble. Unfortunately, we can't adjust the focus by hand when we
are operating a gimbal. This means we need to find
other alternatives to focus. Now the first option and
the easiest option is to just use the auto
focus in your camera. If you have a camera
with great auto focus like the Sony a7S, for example, then you just put your
camera into auto focus mode and then you just go ahead and film what
you need to film. The problem with
auto focus though, is you're trusting the camera and the lens to do what
you want it to do. If you wanted to rack focus from your foreground to your
subject, unfortunately, you're trusting that the lens and the camera is going to do that and sometimes it
might not get it right. Sometimes it might do well, sometimes it might not. Unfortunately, if you're in
a professional environment, you need to make sure that
you have full control of your focus because it's not good enough just
trusting the camera. Now alternatively, you could
just set your camera to a higher aperture
of around F20, F22, basically making sure that everything is in
focus and then you just keep a pretty
similar distance from your subject
and the camera. So if they're moving
towards the camera, you just keep that
similar distance between yourself
and the subject. Make sure the focus is
in and chances are, if there's a slight adjustment
in the positioning, is going to be fine, because
of the wide aperture, you'll be completely fine. They'll be in focus. But the problem is if you're
in a darker environments, you can't use those higher
apertures of around F22 because it's going
to get really dark. This is where we need to
control the focus ourself. Now as you'll notice on
each one of these gimbals, you'll see a wheel here. This can be used to pull focus. As you can see there's
one here and then there's also one here as well. But the problem
is, first of all, this is an added extra
that you need to buy. So you buy a focus motor and the focus motor will look a
little something like this. You buy a base plate
with a set of rails, you mount this onto the
lens and then this can pull focus when you adjust this
wheel, which is great. But the problem is, I find
the focus wheel being there, it's just a little bit awkward. Now like I mentioned
in a previous episode, when you're filming your gimbal, you want to have
your two points of contact because
that's going to give you the most stable shots. If you're running
around with one hand, then chances are, there'll be a little bit of
bob in the frame. But if you're
holding it with two, you can turn your arms
into a stabilizer. The problem when
you're trying to pull focus is you're trying
to keep the balance, you've got to lean
the gimbal into you and then pull
the wheel up here. As you can see,
this focus wheel is set to tilt at the moment, but you can collaborate
that to focus. But holding the camera, trying to take the weight
with your hand over here and pulling focus
becomes very difficult, especially if you're
in a low mode because you're going to want to
hold the gimbal over here and then you're stretching your thumb and it just doesn't
feel natural whatsoever. Yes, you can use the gimbal
focus system, Zion has one, Manfrotto has one, and you
can control it with this ring here or you could get an
external focus motor. This right here is the
PDMOVIE Live Air 2. This is doing exactly the same
that this is going to do. But rather than being there, I can mount this wherever
I want this to go. Same story, I just mount this
focus motor onto the lens. I calibrate it up with
this focus wheel, and then this focus wheel can go wherever I want it to go. I can hold onto
this if I wanted, so I could hold onto the
gimbal and pull focus, or I found the easiest
way to operate is to have your focus wheel over here because you can
take the weight with your backhand and
then your thumb here is free to pull focus. That is where you can buy a magic arm with two
clamps either side, as you can see, these are
around £20, $20 on Amazon. What I would do is just mount
this onto the handle here, make sure it doesn't get in
the way of the gimbal arms, so make sure it's not
swinging in the way up here. But I would just
mount this on here. Then I would mount this
focus motor onto this clamp, so secure this clamp down. Then I can make any fine
tune adjustments here. Then you can see I've got the focus over here on my thumb. As you can see,
I've got two hands securely on the
gimbal and then I can just adjust my thumb over here
if I wanted to pull focus. This is generally what I
do nine times out of 10, I can get the type of
shot that I'm looking for with the system and I don't have to worry too much about being out of focus or
having to strain to pull focus because
it's all there at the convenience of
where my thumb lands. Of course, the beauty of having this focus wheel on a
magic arm like this, is it can go any where you like. If you wanted it up
here, completely fine. If you wanted it down there
or if you wanted it down here so you can pull focus
with your other hand. Maybe you hold on and you have the focus wheel on
the other side, completely up to you. Or alternatively, the PDMOVIE Air has a
really great distance. You could just hand this over to somebody else and they
can pull focus for you. You can run around
with the gimbal, you don't need this magic arm, and then somebody else can use a wireless monitoring
system to pull focus. Although the problem is with
this system is this wheel is very small and if this
is your only job, unfortunately, you're
lacking that precision. If you're looking for precision, then you could use a
larger version of this. This right here is the
Tilta Nucleus-Nano or the Tilta Nucleus-N, and this is doing
exactly the same thing. You get a wireless focus
motor that goes onto the camera and the lens and
then you get this wheel. You can just get
really fine tune, make some really nice
adjustments with this wheel. You can pass this to somebody else and they can be perfectly responsible for just pulling
the focus as you're moving. The problem with this though, is you need somebody else because you can't
mount a wheel this big on and pull focus
with your thumb because the wheel is too large. But if you do have
an extra person which can pull focus for you, then this is a really solid
option because you know all you have to do is
the gimbal operator is move the camera. The focus puller can
then just adjust the focus for you and
it's going to look great. The problem is
though, this version does require extra person. So if you're a one-person crew, it's just yourself filming, I would recommend using
the PDMOVIE Live Air 2 mounted onto the gimbal because you can
operate the camera, move the gimbal, and pull focus all at the
exact same time.
7. How to Monitor: When it comes to
operating your gimbal, you want to make sure that
you can perfectly see the screen because if you
can't see the screen, then it's going to
be very difficult to frame up the shot. Of course, there's
many different ways that you can do this. But the first option
is to quite literally just use the inbuilt
screen on the camera. That's fine if you're
shooting upright. The problem is that, if
you're shooting in low mode, you got to have a
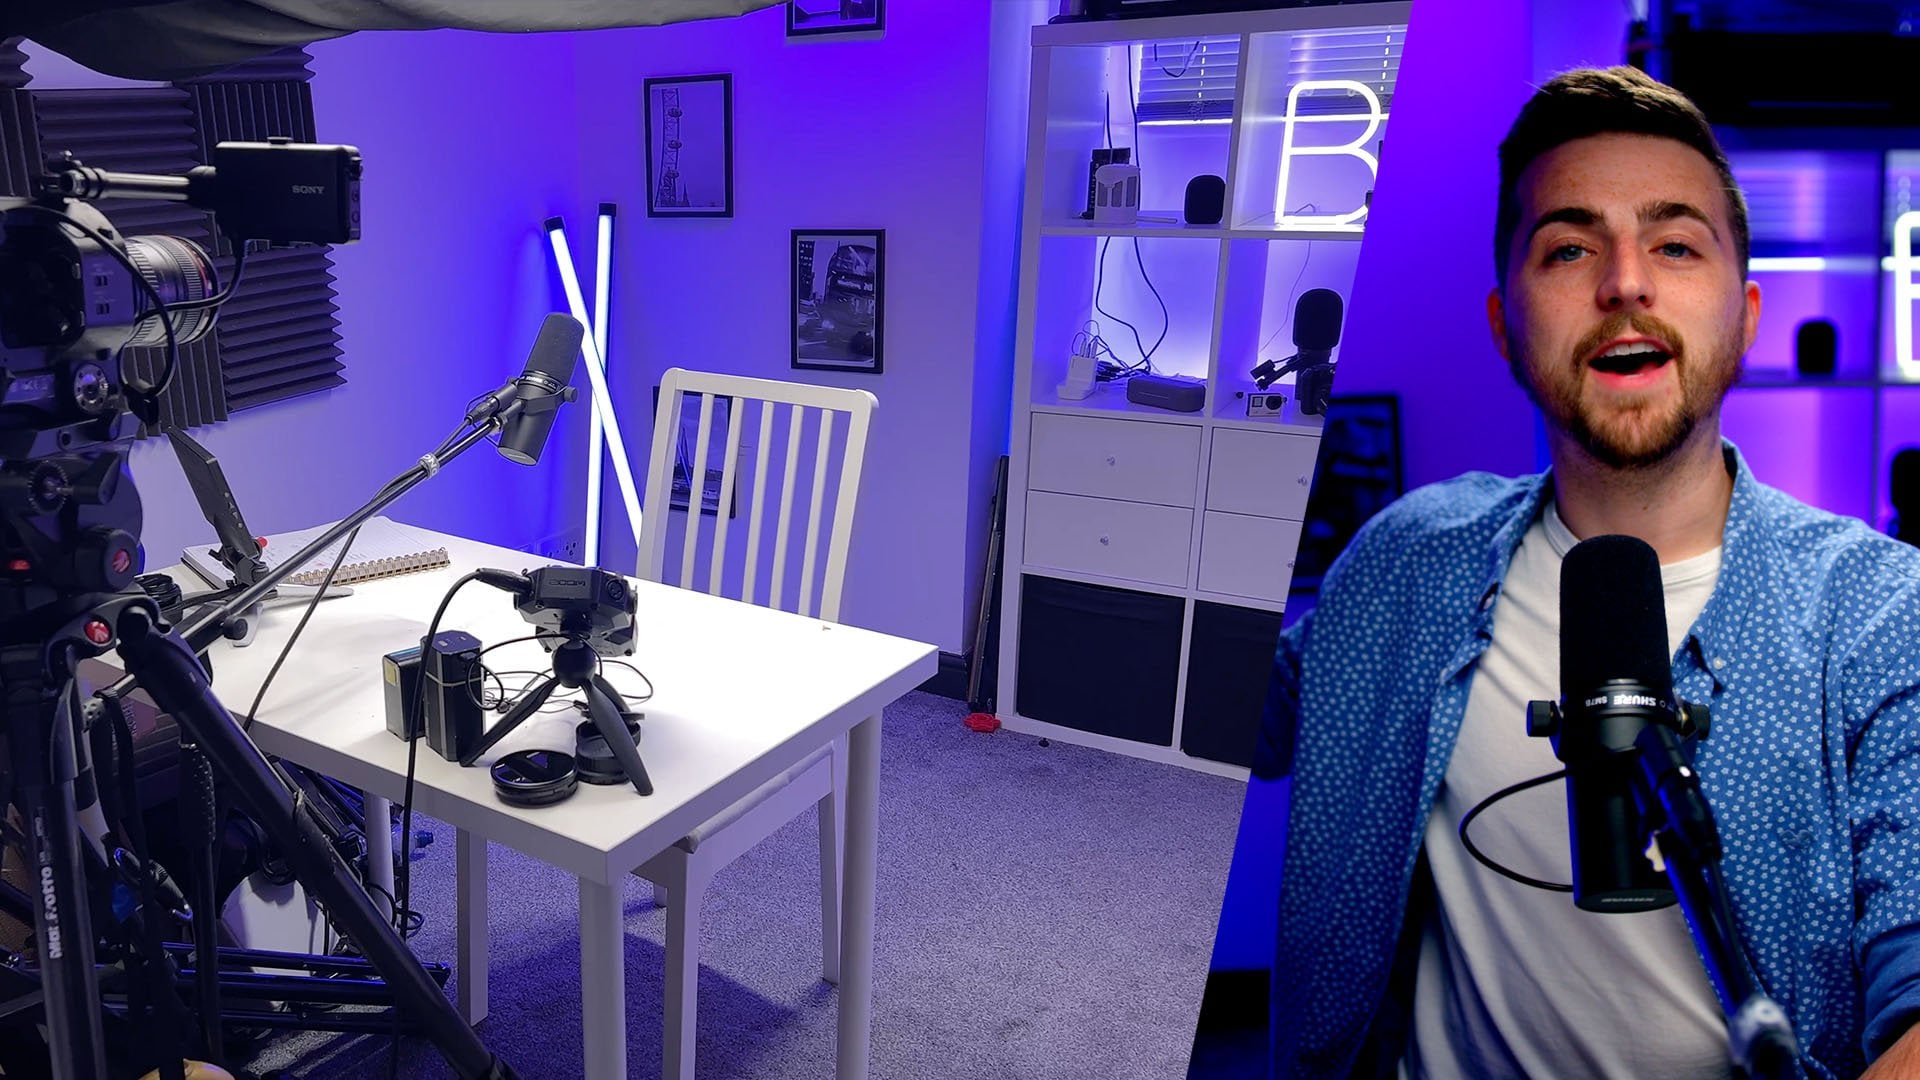
very difficult time trying to see that monitor. This is why you can use
an external monitor. You can buy an extra screen that attaches onto the
side of the gimbal, and you can just
run a HDMI cable from the camera
into the monitor. You just have this monitor mounted on a gimbal and you can see whatever you're doing
at anytime you'd like. Alternatively though, if you didn't want the wires
to get in the way, you can use a wireless
monitoring system and this is typically
what I go for. Wireless monitoring can
be fairly affordable, or it can be very expensive. That goes all the
way up from budget film-making to
Hollywood-level film-making. The top-level you have Teradek. This is a Teradek system, which is anywhere between
4-8000 pounds or dollars. But on the lower end of that
option you have Hollyland. Hollyland are making
some really awesome, good-quality wireless
monitoring kits. This, for example, is the Hollyland Mars x, and this goes for
around $200 or pounds. Then you've got
this option here, which is the Hollyland
Mars 400 S PRO, and this goes for
around six or 700. Regardless of which
option you go for, the slightly more expensive or the really cheap
option, essentially, these are going to take
an image from your camera and transfer that
wirelessly to a monitor. You just plug this into the
camera using a HDMI cable. You plug the HDMI into
the side of the monitor. Then if you're on a digital
SLR or a mirrorless camera, then you might have to
get a micro HDMI cable. You can see that's a
mini HDMI on this one, so it wouldn't work
on this camera. But you just plug
this into there, you mount this onto
the camera and then that's going to send the
transmission to a monitor. Now the Mars X can
send your image to a phone or a tablet. You could send this
to your iPhone, your iPad, your Android phone, Samsung phone,
whatever you have, this can send to a phone or an iPad or a tablet of some sorts. Whereas this option comes with a transmitter and a receiver. You can add the transmitter
onto your camera and that will wirelessly send
the image to this receiver. Then this receiver
has a HDMI out, so you can plug this
into a TV or a monitor. This means you can
have a monitor mounted onto the side of your
gimbal or alternatively, you still have the
option with this to send the image to a phone or a iPad. If you just want to monitor, you just add it onto your phone. You can mount your phone
onto the side of the gimbal, and you've got that
wireless monitoring setup. Of course though, if you had somebody that was pulling
focus for you with this, they would need
to see the image. This is where you can use the full 100 S PRO to
wirelessly send the image from your camera to an
external monitor or a TV that the focus puller has, and they can see
the image rights in front of them and pull
focus wirelessly. They've got wireless control
of the focus and then they can actually see what
they're pulling focus on. Alternatively though,
if you just wanted your client to see the
footage that you'll filming, and this is something that I always do whenever
I'm on shoots, I give the client a monitor, so they can see exactly
what's I'm filming. This really does help the collaboration and
the film-making process because any imperfections or anything the client
isn't happy with, they can instantly see it, jump in, and make an adjustment. If you just wanted to
hand the monitor and show the client what
you're filming using either the Mars X or the 400 S PRO is a really good
low-cost option. Of course, there are
other wireless monitors for around similar money, but I only have experience with the Hollyland products and
they've been really good. Just to sum up this
entire episode, you can either trust the
monitor on the camera, you can mount an
external monitor down here using a HDMI cable, or you could go
wireless and have a wireless monitor
on the gimbal or completely take the monitor
off and give this to a client or somebody that is
pulling your focus for you. It's really important that
you have a very clear view of the monitor because if you
can't see what you're filming, well, it's not going
to look great. Make sure you can perfectly see your monitor when
you're operating your gimbal and if
you have to add on another monitor
onto the gimbal, then I would really
recommend it.
8. Top Tips when using a Gimbal: Now that we've covered
everything on how to use a gimbal and why
you would use a gimbal, we now need to cover
some important tips. There were four top tips
that I want to cover because I feel like these
are really important, and if I don't say then
unfortunately you might fall into one of these
when you're out on shoot. The first one is make sure
you have spare batteries or a battery charger with you
because unfortunately, unlike steady cams,
gimbals require batteries. If you've run out of batteries halfway through a video shoot, it means you no longer
get your really smooth, really lovely gimbal shots. Make sure you have plenty
of backup batteries. Or if you can't swap
out the batteries, if it's an internal battery
built into the gimbal, then make sure you
have a battery pack or a charger that you can
use to power the gimbal. You don't want to be caught in a situation where you
need a certain shots, but you can't because
the batteries in the gimbal have
run out of juice. Make sure you're always
carrying spare batteries with you when you're
operating your gimbal. The next step is to allow time
to rebalance your gimbal. Every time you change
something on your camera, so you zoom in the lens or
you add an accessory on or, you add a filter, you're going to have to
rebalance your gimbal. If you're not allowing
time in the schedule to rebalance your gimbal,
you got to be stressed. Unfortunately, it's going to be a really stressful situation as the client is sitting there
waiting for you to film. Make sure you add in little breaks throughout
the day to make sure that you've got enough time to rebalance if you feel
like you have to. I've been in that
position before where a client sitting in there, they're looking at their watch, they're tapping their foot,
they're waiting to film, but you're there just rebalancing
up all of these axes. Just make sure that you've got that time and you won't
ever find yourself in that stressful situation
because if you don't rebalance and you
make an adjustment, you'll just go to
end up fighting the gimbal and you're
got to get really shaky, wobbly footage and it
just won't look good. Add in that time and you
won't be in that situation. Next up, get a good gimbal. It's really tempting to go ahead and spend money on one of these really cheap
knockoff brands because it's really affordable. But I promise you, you get what you pay for when it
comes to gimbals. Spend at least a few 100
pounds or dollars on a gimbal. But if you can, then spend
money on a pretty decent one. If you can afford 4, 5, $600 or pounds, honestly, it's so much better
doing that upfront rather than buying a cheap one now and an expensive one later. If you invest in
good equipment now, that equipment will
last you and it will work and do exactly
what you need it to do. Don't cheap out when it
comes to buying a gimbal. Make sure you spend
a decent amounts of money on a
pretty good gimbal. My last tip is to practice. Using a gimbal is exactly
like any other skill. You can't just pick up a
gimbal and go start shooting really awesome footage because if you do just grab your camera, throw it onto the gimbal, you've never had any
time with it before, you just go ahead and go start filming the
client projects, chances are you're going
to run into complications. You wouldn't know how to use it. You'll figure out problems
as you're filming and these can't be ironed out
on the day of production. Spend some time, put the
hours in before you get onto a paid video shoot to make sure you know
how the gimbal works, what its imperfections are, what you can do,
what you can't do, what types of mood you can get, and how far you can
push that gimbal. I'd say put at least
a few hours in, but if you can put
as many hours in as possible before you take
that onto your shoots. Unfortunately, I learned this the really difficult way before. Back when DJI launched
its first ever gimbal, the DJI Ronin 1, I bought this and
without even practicing, I just took it to a video
shoot and unfortunately, it didn't work on the shoots. I didn't balance it up
profit out in a calibrated, something didn't go right. But the gimbal just started spinning and I couldn't stop it from spinning
without powering it off and every time
I powered it on, it just started spinning and
I didn't know what to do. I looked really amateur
in front of the clients and I couldn't use the
gimbal for the entire shoot. When I got at home, I figured out it was
just a calibration issue and all I had to do was just put a few minutes of practice or a few hours of practice
in before the shoot, and I would've
avoided that problem. Practicing is really important. Make sure you spend some time
with the gimbal beforehand. Now my last tip to you is
don't overuse your gimbal. Believe me, it's very tempting. You see this really
awesome footage that you can capture
with a gimbal. You can sweep around somebody, you can travel, you can do whatever you
want with a gimbal, but the problem is a lot
of filmmakers and lots of video creators overshoot
with a gimbal. There is a time and a
place for a gimbal. A gimbal is exactly
the same as a tripod, a slider, a camera
crane, or a camera jib. It's a tool to serve
a specific need, so whenever you're
filming any projects, just ask yourself the question, what is the best
tool for this job? If you're shooting
a conversation and it's just a basic two shots, you don't need to
shoot on a gimbal. It's going to be awkward holding the gambling in that position, the focus is going to
be more difficult. You're best off just
putting the camera onto a tripod or going for
a shoulder setup. Now, if you were doing a really cool tracking shot backwards, of course you
wouldn't go handheld, you wouldn't go tripod, you'd go for the gimbal. Then of course, if you wanted a really nice booming
jib type shot, rather than trying to do this
on the gimbal and getting a half decent results,
you'd to go for a jib, put it onto the camera jib, and you'll get that really nice, high production,
really awesome shot. Just ask yourself before
every single shot, do I need this on
a gimbal or what is the best tool for the shot? Now saying that if you do find yourself on a video shoot, it's very high pace. You're having to film a lot
in a short amount of time, then it can take
quite a little bit of time swapping over
from your gimbal to a tripod or gimbal to shoulder
sets or gimbal to crane. If you do find yourself
in that environment, then do allow yourself the extra flexibility
to use the gimbal. But if you can avoid it, I would definitely
recommend using a different tool for different
shots if it's needed. Believe me, I've been in
those positions where I've had to get all
different types of shots and I've had to shoot shots which should have been on the
shoulder or on a tripod, on a gimbal and I find myself suffering because I've had
to hold this gimbal for 8, 9, 10 hours without
any real break. Every shot was a gimbal shot, and honestly it just leaves
you feeling fatigued and the end product is just not as good as it could've been. Always think what is the best
tool for this job and don't always assume that the gimbal is your first and only
tool that you have.
9. Outro: There you go. That is it
for the gimbal course. At this moment in time, you should be pretty comfortable
setting up, balancing, and calibrating your gimbal, and then going out
and filming a variety of amazing shots
using your gimbal. Much honors to you now
is to go ahead and film a short sequence
or a short video demonstrating a few
different types of skills and camera maneuvers
using your gimbal. If you wanted to do a
nice tracking shots, or a jib shot, or an orbit, it's completely up to you, but just film a short sequence demonstrating your
gimbal skills. Please upload that to the Student's Project section because I would love
to see your work. If you do, I promise
I will share my thoughts and
opinions on your work. If there's anything I
can suggest to improve, then I will give
you that suggestion and that advice as well. With that said and
done, thank you ever so much for
watching this course. If you do want to learn more about film-making
and photography, then please do check out
my profile because I have loads more courses
available to you. If not though, then don't worry, I really appreciate
your support. But hopefully, I will see you on the next course. See you there.
 Chris Brooker, Filmmaker & YouTuber