Transcripts
1. Introduction: Hi, welcome to my introduction to filmmaking course. I'm Kris and I'm a filmmaker and photographer from England. I've been making videos for most of my life and the skills that I learnt in the first few years of my career. Some of the most important skills that I've ever learned, learning what's three-point lighting is, and understanding how to use a camera and understanding how to use the 180 degree rule. It all being really important in my career, and these are the skills that I learned early on. I'm still using every single day, on every single video shoot that I did. So even though it took me a few years to learn these fundamentals, I'm going to cover all of the things that you need to know when you're first starting out. So we're first going to talk about camera settings. So what aperture means, what the ISO is, what shutter speed is. All of these other really important camera settings that you need to know. Then we're gonna move on to focus, how to manually focus and different ways of focusing your lens. Composition and framing techniques, camera movement, lighting, sound, and then just a general summary and tips and tricks that you can use in your video career. So if you've never picked up a video camera before, that's completely fine. We're gonna go from the very beginning. Anglers show you everything that you need to know in order to get started in your filmmaking journey. So join me on this journey and I'm going to show you everything that you need to know. Let's get into it.
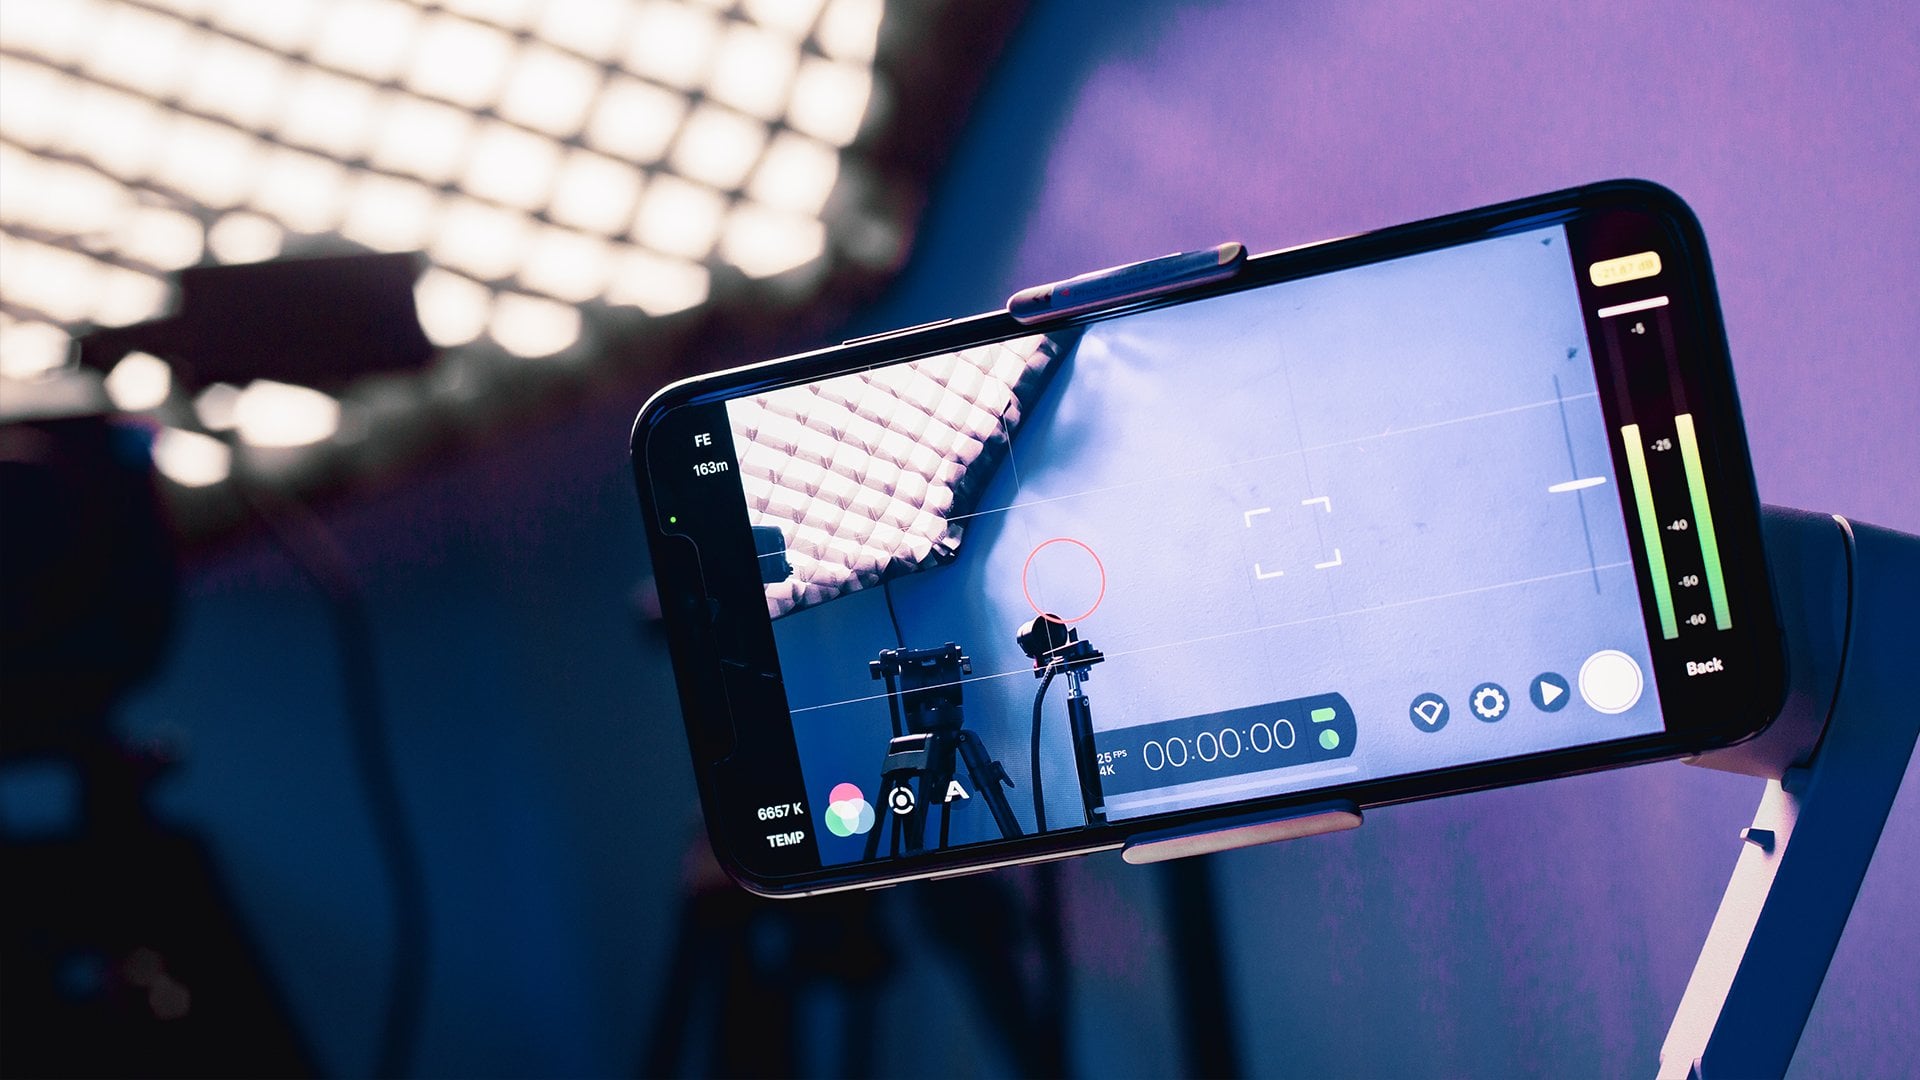
2. Camera Settings Introduction: Now before we go ahead and create an amazing video, we first just need to pull it back a few steps and figure out how to actually use a camera and what ordered the settings on the camera mean. Now most digital SLR cameras and most cameras these days have an automatic mode built in. So this automatic mode controls your shutter speed, your aperture, your ISO, your white balance. And this is fine, especially if you're a beginner, it's fine because you can start to learn the basics of composition. But the problem is you lose your control when you're using an automatic mode if you're shooting outside, but you want to take advantage of a different white balance, for example, you're not going to be able to do that because the camera's going to think you're trying to do something wrong and it will put you into the correct setting. And unfortunately, this does limit creativity. So it's really important to understand how to use the manual mode on your camera. Now, it does appear to be terrifying at first, all of these numbers, all of these settings, all of these names. It does appear to be really complicated, but there's a few basic terms that you need to know. And I'm going to run you through these right now.
3. Shutter Speed: So before we actually jump into the settings, we need to turn our camera into manual mode and every single camera is different, but generally, most cameras mock this with an m. So you just turn the dial to M and that will put you in a manual mode. So don't go for sport mode, don't go for portrait mode. Don't go for LV, a V, whatever is, make sure you select m. This will put you in that manual mode. Now once you're in that manual mode, we can start to pay close attention to the settings. And the first setting that we're going to talk about is shutter speed. Shutter speed is generally represented one slash 50. That's typically the number that you're going to say. And your shutter speed is affecting two things, the brightness of the shots and the motion blur. So let's begin with the brightness. So generally, when you open up your shutter, you'll go into, let more light into the camera sensor. This means you'll go into have a brighter video. And generally when you open up your shutter speed and let more light in, you're going to decrease that number. So instead of saying one over 50, for example, it would say one over 41 over 21 over 10. The rule here is the lower the number, the brighter the image is going to be, and the higher the number the Docker image is going to be. But it's not only the brightness that the shutter speed controls, It's also the motion blur. So if you pull your shutter speed to 1 over 10, you'll notice that everything looks really blurry. And this is because your shot is only opening ten times every second. So you're going to get a lot of motion blur in the frame. Now if we go the opposite direction and we go to 1 over 1, 0, 0, 0, 0 for example. This means the shutter on your camera is going to open one hundred, ten hundred times for every second. And this means everything is going to look really crisp. Now generally you think you want that really Chris movement. But the problem is that doesn't look natural. Of course, if you're filming something like a fight scene or something high paced and then increasing your shutter speed is a really interesting way of adding a little bit of excitement into your camera work. But generally you want to keep your shutter speed at around one over 50 if you're shooting real-time video. Now pay close attention to the fact that I just said, if you're shooting real-time video, if you're shooting real-time video, your shutter speed will be typically one over 50. But if you're shooting slow motion, that will increase according to the frame rate.
4. Frame Rate: Now typically when you see frame rates, this is going to be represented by a number followed by FPS. And FPS stands for frames per second. So generally if you're shooting real-time video, this will be around 25 FPS. Or if you're in America, this will be 30 FPS. Now the way that your camera works is it captures loads of still images and group these together and creates a video from all of those still images. Now, you don't have to stitch all of these still images together at the camera does that for you. But you have to choose how many frames or still images you have per 1 second of video. And if you're shooting real-time video, you want to be at around 25, you can have 23.97, 24, 25, or 30. This is sort of the sweet spot for real-time video. You'll notice if you're shooting a 12 frames per second, for example, everything looks a little bit glitchy. It looks a bit weird. It almost looks like you're shooting a stop motion animation or a cotton. It doesn't look quite real. But you'll notice if you take that the opposite direction and you shoot in a higher frame rate, so 60 frames per second. Everything looks really fluid, and this does work in some scenes, but generally you want to keep your frame rates at around 25 FPS. Now going back to my point about shutter speed, I mentioned that if you're shooting real-time video, you'll go into what your shutter speed to be around 1 over 50, but that will change depending on the frame rates. So generally you want your shutter speed to be double the frame rates. So if you're shooting real-time video, you want your frame rates to be 25 frames per seconds, and therefore double that to get a shutter speed of one over 50. So moving on, let's talk about slow motion video and keep that rule in mind. So when we're shooting slow motion video, we want to increase our frame rates. Because if we slow down 25 frames per second footage to 50 percent, say that's gonna take us to 12.5 frames per second and that's not going to look great. We want to make sure that when we slow-mo footage down, it always comes back to 25 frames per second at least. So let's double that. Let's go up to 50 frames per second. This means when we sell off voltage down to 50 percent, it comes back down to 25 percent. So if we double our frame rates, this means we can have our footage. But the thing is that when we double our frame rate to 50 frames per second, this means we also have to adjust the shutter speed accordingly. So your frame rate is now 50, and this means your shutter speed should now be one over 100. You'll notice if you shoot at 50 frames per second with a shutter speed of say, one over 50 or one over 60, depending on what your camera will allow you to do. This won't look correct, it would look weird. You'll get weird amounts of motion blur and it just won't look correct. So generally keep your shutter speed double what your frame rate. So if you wanted it really slow motion footage, you wanted super slow-mo. So let's say we wanted to shoot at maybe 300 frames per second. We would therefore have to change our shutter speed to 1 over 600, and then we can really slow down our footage. So if 25 frames per second is real-time, that means you've got 12 sets of 25 frames per second in that 300 frames per second video. So you can really say that for touchdown, the thing is though, if you're shooting on a digital SLR camera, most DSLRs at max out at around 60 frames per second or 120 if it's a higher-end digital SLR camera. So if you're shooting at 120, you would only really need to take your shutter up to 240. Now when it comes to your frame rates, your frame rates only actually adjust the frame rate, the amount fringe recorded per second. It doesn't affect how light or dark the images. But when we link the shutter speed and the frame rate to get that perfect look in our video, when you increase the frame rate, you therefore have to increase your shutter speed, which is reducing the amount of brightness coming into the camera. So therefore, technically, when you're shooting at a higher frame rates, when you're trying to shoot slow motion, you're losing light into your camera. So keep that in mind if you're shoots him slow motion.
5. Aperture: Next up, let's talk about aperture. An aperture is marked in your camera with an F, So you'll have F1, 0.8, F21, F22. Your aperture is controlling two things. One, the amount of light coming into the camera so you can control how bright or dark the images go into B, but it also adjust the focus plane. Now the aperture is actually a series of small blades in your camera lens that open and close depending on the number. And this is going to let more or less light into your camera sensor. Now if you open up your aperture to a low number, like f, 1.8, for example, then you'll go into loads of light into your camera because your opening the aperture and therefore the opposite if you close down your aperture. So we go to a larger number. So F22 with F0 going to reduce the amounts of light coming into the camera sensor. So the smaller the number, the more lights, the larger the number, the less light. Your aperture also controls the focus field or the focus plane. And essentially what this means is how much of your video is going to be in focus. So let's pull out aperture down to F1 0.8. What's happening here is our focus plane is reducing. So only a small item in the frame is going to be in focus. So if we place an object in the middle of the frame, the foreground is going to be blurry and the background is going to be blurry. Now we can move our camera lens to change the focus. So therefore, we can focus on the different areas of the frame. So it can focus between objects in the foreground, the middle of the frame, and then the background. Typically when people are trying to get that nice YouTube a look, they're trying to blur out the background. This is how you want to approach it. You want to pull your aperture down to a smaller number. And that means when you focus on the person in front of the camera, the background will blow outs. You can really notice a difference on these two shots. So camera a, at the moment you can see everything he's kind of in-focus. It's a little blurry, but it's not too blurry. But when we look at camera B, everything in the background is blurring a little bit more. This camera, camera a is set to F4 and this camera over here is set to F2. So even though there's a small difference in the number here, one is F4, one is F2. There is quite a drastic difference in the back of the shots. So when a smaller number represents a smaller focus filled and therefore more blur, the opposite is a larger number. So F22 means more is going to be in-focus. There is a larger focus plane. So generally if you've got an F22, you can put somebody need a camera and a can send somebody off into the background. And generally both people are going to be in focus. You can really see it in this example. There's an objects in the foreground and objects in the background, but that both in focus. Now if we change our aperture down to 1.8, you can really see that the foreground object is in focus, but the background is completely blood out. We can barely even identify what it is in the back of the shot. So your aperture is controlling the amount of light coming into the camera sensor, but it's also controlling the amount of blurriness in the frame. Now when it comes to frame rate and shutter speed, there are quite strict rules on which numbers you should be selecting. But when it comes to aperture, it's all creative choice. You don't have to have an F1 point eights or an F22. It's up to you as the creative and the camera operator to figure out which number you want to select, because each number would give you a slightly different look.
6. ISO: Now the next setting that we're going to talk about is the ISO. And the ISO is basically just a digital brightening feature. Now the shutter speed and aperture of physically letting more or less light into the camera sensor. But the ISO isn't controlling anything like that. The ISO is just digital. So the ISO is just going to increase the brightness or decrease the brightness, but it's not controlling any light. So this means if you're filming in a low-light environments and you increase the ISO, you're going to start to see camera noise in the shot. Generally you want to keep the ISO as low as possible. But if you do need to increase that, then it's better to increase that than have a dog underexposed shots. Different cameras have different ranges of ISO numbers. Different cameras have different sensitivity levels at each different ISO number. So let's compare the Canon 5D and the Sony A7 S. The Sony A7 is seemed to be a low lights King. You can increase the ISO and your image will still look really clean. But when you do the same with a Canon 5D, for example, if you increase the ISO at, you're going to get really ugly digital noise appearing in the video. So it's really important to have a look at what camera you're using. Figure out which ISO is best for your camera and try not to take it past that number. Generally, you want to try and avoid taking a camera post ISO 800 unless the camera says it can handle it, pass that number.
7. White Balance: Now the next setting is whites balance. The light that we see around us is all a specific color temperature. And generally the warmer or the more orange the lights is, the lower the number and the color the light, the higher that number is. And these are represented by numbers called Kelvins. So generally, daylight is around 55 or 56 100 Kelvins or 55 or 56 100 K. And when you're filming inside and you're using tungsten bulbs, It's a little bit warmer. You're going to be either at 4300, you're going to be a 3200 Kelvins. Now the reason why it's important to understand what color light you're using. And the same is because you want to match the white balance on your camera to the lights or the scene that you're in. So if I was filming outside, for example, in the daylight, that is quite a cool light. So that's going to be around 55 or 56, 100 Kelvins. It's really important that you set your camera to that Kelvin or that white balance number. So if you're filming outside, set the white balance on your camera to daylight, 5500 Kelvins. And that means you'll go into get the perfect color balance in your frame. You gotta get the perfect white balance. The problem is if I was shooting outside and I shot in a white balance of 3200, unfortunately, everything would look completely different. The colors would be to cool. And the problem is, that's not a problem for high-end cinema cameras because you can change all about imposed. But when you're filming on a digital SLR camera, if you filmed in the wrong white balance, unfortunately, there's not a lot that you can do to fix that in the idiot, you're either going to have really orange or really believe footage. So it's really important to have a look at the light around you, figure out the general color temperature of the room, and set the camera to that specific number. Just remember at 5500 is a blue daylight, 3200 is a warm tungsten. Of course, candlelight is going to creep into more 2000 and then fluorescent lights is going to go even further. So maybe 6000. But generally just remember, 32 is warm, 55 is called, and 43 is somewhere in the middle. This is the one that I often see them. Most people say my footage looks too orange on my footage looks too blue. Whatever dumb wrong. It's the white balance. You forgot to set the white balance. So make sure you're setting the white balance of your camera before you do anything else.
8. Picture Profiles: And the next step we're going to talk about picture profiles. Now, picture profile is a basically just a way of your camera handling color. So generally you'll either going to have Rick 709 or standard or you're going to have flat. Of course you can have custom profiles as well, but that's going to get little bit too fancy for us now. So we'll just focus on these two settings. We've got flats and we've got standard. Now most digital SLR cameras have a really good amounts of dynamic range. And the dynamic range is basically corresponding to the amount of data that your camera can capture. So if you're in a high contrast environment, for example, maybe you'll inside and you'll filming something and there's a big window in the background and you've got loads of daylight spilling in. If you're filming somebody inside, they're going to be completely underexposed or doc. And then outside might be overexposed or completely whites and brights. And generally if your camera has a low dynamic range number, so a dynamic range of 10, for example, then there's gotta be a lot of contrast there. But if you have a camera with a great dynamic range, then you're going to be able to capture the detail in the highlights. So outside the bright part and in the shadows, which is the dark parts of the frame. Generally, the better the camera, the more expensive the camera, the higher the dynamic range. And this is what you want to aim for. Now, going back to our color profiles, if you shoot in a flat color profile, what this means is the camera isn't going to do anything to this. So it's just going to leave all of this color information for you to play with in the edit. But the problem is when you put this footage onto your camera, everything looks gray and desaturated and this is because all of that color information is there. It's up to you as the editor and the color grade to grade the image or the video depending on what you want it to look like. Now, a standard profile, and this is typically what you'd see in an automatic mode. This is when the camera basically does eye color grade or color correction for you. And it increases the contrast, increases the saturation. It increases everything to a point where it looks nice, but you've got less control. So that great dynamic range is no longer because your camera has recorded in the standard profile and it's overexposed. The highlights will underexpose the shadows or edit in just too much saturation. Now if you're a beginner, generally standard is fine most of the time. But as you're starting to venture into more professional areas of video, you want to try and shoot as flat as possible or shoot in this flat color profile to capture all of that detail in camera. Because then when you're in the edit, you can decide how much data you want to overexposed or underexposed. Now your camera might not say standard or flats. It may say slope three ESL. Slope t2 is completely different on each and every camera and each and every brand. So do your research and figure out what each color profile means and which color profile is going to work for you and your needs. So they've got those all of the important camera settings that you need to note when you're first starting out and when you first grew up that camera. All of these numbers can look really intimidating at first, but if you take the time to play with your camera and experiment with all of these different settings. You go into very quickly realized what your camera can do, what each different setting is going to do to your video. And therefore, you can start to create high-quality videos much sooner.
9. Focus: So at this current moment in time, you have got your aperture set, your ISO set your shutter speed, frame rate, white balance, and your picture profile there, rogue sets you've ready to go. But the problem is that now we need to think about focus. Because if we're not paying attention to focus, everything could be blurry, which means all of this hard work could be for nothing because you don't want an out-of-focus shots. Now generally, most cameras these days will come with a really incredible autofocus option. But the problem is autofocus, even though it's great and it's really beneficial in certain areas of filmmaking. It's a little bit of a crutch and you don't want to rely on it. Using autofocus is incredible. But there's moments where autofocus isn't going to do what you want it to do. So maybe you want to pull the focus from something in the foreground to the background at a specific moments in time. Also, focus isn't going to give you that option. Autofocus will only typically focus on what's in the center of the frame or what's typically the subject. So maybe your doing a really nice gimbal shot behind a post. When this post passes in front of the camera, this is now the new subjects, apparently according to the autofocus, and it's going to shift your focus. So try getting used to manual focus because this is going to give you more control, which will allow you to have more creativity and freedom with your filmmaking. Now this is the kind of 40 millimeter lens. And this small ring here is the focus ring. Now, this is a prime lens and you can also get zoom lenses where you've got the focus ring and then you've got the Zoom link as well. But this prime lens only has eight focus ring. So when you're racking focus turning, this is what's going to change the focus. Now you'll typically see on most lenses you've got AF and EF, autofocus and manual focus. So straightaway, what you want to do is just switch over into manual focus. And now everything you have to do yourself. Another are a few different ways of controlling your focus on your lens when you're doing this manually. And the first way is to just do this by hand. So you're holding up your camera and as you're filming it, you're just adjusting this focus ring as you're filling the shot and just manually adjusting that focus. And that is fine when you're going handheld or you're on the shoulder where you are on the tripod or a slider, something where the camera is not moving too much. But the problem is when you go on to a gimbal or a steady cam. The problem is if you start touching the lens that you're going to start to affect the camera balancing. And this is going to make things really difficult. So this is where a wireless or wired focus system is really going to be beneficial to you. Now this is a wireless focus unit. This is the PD movie Alive at two. This is just one of many different wireless focused systems you can get. But this is really beneficial because it means you mount this onto your camera. And when you get this syncs up with a controller, it means this focus motor is going to live on the lens. And it means you can control the focus with this remote from a distance. This means if you've got the camera on a gimbal, for example, and you can't touch the lens. It means that you can operate the gimbal and still be pulling focus while shot over here. Alternatively, though, you can get a bigger system. So rather than using this, you can have a big hand remote. So this right here is the hand controller for the tilta nucleus Nana. Now, this is really beneficial because what you can do here, rather than controlling the focus yourself with a thumb control, you could actually hand this off to somebody else. You could focus on filming and you can give this to somebody and they can just worry all about focusing. So you've got this very nice controlled focus dial here. You could use a wireless monitor system. They can be worried about the focus while she worry about moving the camera or vice versa. Now this is the option that most professional videographers are going to use. This is a great option because you can change your focus on the go. But it means you've got to worry about filming, framing, and focusing. But this option is really great because you hand off the responsibility to somebody else and then they can control focus and make sure everything is perfectly in focus. So whether you're on the shoulder and you'll adjusting the focus yourself with your hand, maybe on a tripod, you doing that same thing. You're using one of these wireless focus systems, but the thumb controller, or you're handing off your focus to somebody else and they're controlling it with a whale. Whatever is. Having control of your focus is really important because if you get the most beautiful shot, the lighting is incredible. The camera settings are greatly actors performance was incredible. If the shot is blurry and it's because you are out of focus than the shot is just completely useless. You can't fix a blurry shots in post unfortunately. So it doesn't matter which option that you take. Pay close attention to your focus. Try and find a focusing system that works for you and make sure that all of your shots are in focus. Now if you're on a digital SLR camera at then chances are this feature won't be available to you. But if you're moving into higher digital SLR cameras or low budget cinema cameras, that you might find a feature called focus peaking. You can't actually get focus peaking in an external monitor system as well. So if you've got a small digital SLR camera and you don't have focus peaking, then I would recommend getting an external monitor to put onto your camera that enables you to get focus peaking. And focus peaking is basically going to sharpen up the edges of the frame that are in focus. So let's say you've got somebody in the center of the frame. If you turn your focus peaking on, when you focus on this person, you'll get this harsh, solid line around the person that's in focus. And this is giving you a confirmation that your shot is in focus. Focus peaking is one of those really awesome features in camera that is really going to benefit you as a creative. It gives you that confirmation that everything you're filming is in focus. So take full advantage of one of these focusing methods use that we'll use this controller. Us focus peaking on your camera if it is available to you and just make sure that they shot is always in focus. Now if you don't have the money to purchase a wireless follow focus system or if you're not shooting on the shoulder, you've got to shoot on a gimbal and you can't control a focus yourself or you're just not too confident that moving focus, then try reducing your aperture. So pull it up to around F6, F11, F16. And by doing that, everything's going to be pretty much in focus. And you pretty much just set it to one number and leave it as it is. Just try and get people too close to the lens. Failing that though you can use your autofocus, but autofocus, Even though is great, most of the time, it can mess up is a computer system, it's electronics so it can mess up. There will be moments where it will mess up and it does limit your creativity as well. So I would seriously recommend putting the time and the money into investing in some decent focus equipment.
10. Composition and Framing - Introduction: So now that we've got our camera ton on, we understand the camera settings and everything is perfectly focused that we can now move on to composition and framing, because framing up a shot goes so much further than just grabbing a camera and just filming whatever is in front of you. Using the correct shots, angles, and the correct framing can really help to tell a story and create really beautiful cinematic footage.
11. Shot Sizes and Angles: Now I'm going to begin this section by talking about specific shot sizes and angles. Now these terms are thrown around onset everywhere all over the globe. It doesn't matter if it's an indie small production or if it's a large Hollywood film, these terms are universally known. So learning what all of these are and what they mean are super important if you're looking to get into filmmaking. So the first term is extreme wide. And you're extreme wide is exactly what it sounds like. It's just a really large wide shot of a subject. Next up we've got a wide shots. And this is a wide shots again, but it's just a little bit closer. And typically if you're filming somebody, your wide shot is going to be head to toe. You're going to see everything in the frame. Next up we've got a mid shot and this is coming in closer. Your mid shot is generally above the knees. The term mid shots is used, but the term medium shot is also used as well. So mid medium, that both mean the same thing and that's framing from the knees up. Next you've got a close up and that is exactly what it sounds like. It's just a close up on somebody and this is generally from the chest up. So somewhere around here, then you've got your extreme close-up. And your extreme close-up is going to focus on details. So if we're filling that same person, the extreme COSO is going to be a close up on the side of the face or maybe just the eyeball or the nose mouth. Your extreme close-up is picking up those precise details. So you've got your extreme wide, you've got your wide, your mid slash medium, you're close up and you're extreme close up. All of these pretty easy to understand. So let's get a little bit more complicated now let's talk about angles. So a high angle is going to place the camera in a higher position and we'll look down. And a high angle is generally used when you're looking down on somebody. So you're trying to make them look inferior. So it's almost like they're looking up to the camera. And you typically see this when parents are looking down at children, or you've got a godlike character looking down on the other characters, then you've got the reverse of that. And this is a low angle. This is low to the ground looking up, and this is the reverse of that. So, uh, looking up to that powerful figure, so this is implying that the person we're looking up to, Israeli powerful, of course, though it doesn't have to mean that. But generally, when these two are used in filmmaking, this is what we're trying to convey. So high angle looking down is looking down on somebody and the low angle is looking up to that high Almighty character. Now we're going to go a little bit more fancy and we're going to talk about establishing shots. So an establishing shots is basically just a shot that is going to establish the scene. So if we're filming a video in a house, for example, the establishing shot would be the exterior of the house. So it's just a shot of the house outside. And then we can cut into see the action. The whole point of the establishing shot is to establish where and when this action is taking place. So if we just cut straight into a scene and we would just cutscene between different angles. We don't really know where this is happening, what time a day this is, and a bunch of other factors. But if we use the establishing shot to begin with, we know we're in this house and this is where the scene is taking place. It's just giving us the audience more information. Next up we've got OTS or over the shoulder. And over the shoulder is exactly what it sounds like. It's placed in the camera behind somebody showed I see you can see the back of their head, you can see their shoulder. And you've got them framed up on the one side of the frame. And generally you see this in a conversation. So let's say we've got two people in a scene here in the foreground of the shots. We've got the over the shoulder, so we've got the back of the head in the one side that's in the foreground. And then the main subject is the actual subject that we're talking. So, so generally this is used in a conversation type scene, and that takes us on quite nicely to the 180 degree rule. Now, the 180 degree will sound really complex, but it's actually quite simple once you've got your head around the idea. Now the 180 degree rule is a rule that is used to keep the orientation balanced. So we've got a conversation between two people. If we use the 180 degree rule correctly, We understand that these two characters are looking at each other having a conversation. But when it's not used correctly, people can be looking in random directions and the same will seem off. It won't look great, it won't look right. And if you don't know what it is that you might get confused. So generally what the 180 degree rule is is it's putting a line in the center of the scene. So you've got two people chatting. So draw a line down the middle of their face. They're standing opposite each other. Put a line down the middle of them and pick aside. So you can pick the left side or you can pick the right side, just stick to that one side. So if we're going to stick to the right side, stick to that side so you can get your close-up of your one person on that side. And they can get the close-up of the other person on that same side. Now when we do this, if we shoot this from the same side, it's going to look like they're talking to each other. But the problem is when we crossed that line, wishing one shot from the one side, we crossover and machine, the other shot from the other side, it looks like they're facing the same direction. So it's really important that we follow the 180 degree rule to make sure that our characters are looking at each other. And this is really important because if you neglect this, then your viewer is going to be really confused. You typically see this with comedy skits or low budget films. You have people looking the same direction, you've got this conversation seen, and people are facing the same direction. And if you don't know what you're looking for, it fills off, but you don't know why. That's why you wouldn't have a conversation with somebody at the back of their head. So don't create that effect in camera. Follow the 180 degree rule and you won't have any issues. Of course, that he's not a strict rule. If you know what you're doing and you know how to break the 180 degree rule that you can actually use that to confuse the audience on purpose. But generally, when you're starting out in filmmaking and photography, you're not trying to confuse people. You're trying to make a film that he's going to entertain people and you want people to understand what's happening. So follow the 180 degree rule and you'll avoid confusing your audience.
12. Rule of Thirds: Next up, let's talk about composition. And composition sounds complicated, but it's basically just how we're framing our shots. Now it doesn't matter if you're a beginner filmmaker and advanced filmmaker, we all have to think about how we compose our videos or shots. Composition is k, because composition can hide or reveal information that is really important in your video. Now there's loads of really advanced and complicated compositional techniques that you can use in your video. But generally the quickest and easiest and generally the most commonly used compositional technique is the rule of thirds. You've probably heard of it, or you've probably seen it before. You've probably seen the grids before. I'm going to talk all about that now because using the rule of thirds can be extremely beneficial. Now if you turn your camera on or if you look at somebody else's camera, it chances are you're probably going to see this grid. You've got two horizontal lines and two vertical lines, and these are used to help you use the rule of thirds. Now the rule of thirds is very easy to understand. Just place your objects on one of the lines. So let's say you're shooting an interview, for example, you've got somebody talking rather than placing them smack bang in the middle. Of course, if you're talking to a camera, then put them in the middle. But if they're talking off camera, so let's say they're looking over there. You wouldn't want to put them in the middle. You'd put them on one of the thirds. So in this example, if I was looking over there, you would put me on the third, on the right. Therefore, I've got all of this space I'm talking into, and there's only a small amount of space behind me. You always want to try and avoid putting large amounts and negative space behind somebody. Just focus on getting space between the fronts of them and the end of the frame. Of course, it's not just interviews and talking heads that you can use the rule of thirds for. Maybe you're doing landscape videography. So a capturing the shots of this scene, place the horizon on one of those horizontal lines, and you're going to get a really nice composition. So going back to the previous example, when we talked about the 180 degree rule, think about your rule of thirds when you're doing this conversational pace. So you've got two people chatting, just palatial subjects on those two vertical lines. And you're going to create a really even and beautiful looking composition. Now this grid, this rule of thirds grid, might not be turned on. If you can't turn it on, on your camera, then I would seriously recommend doing so because it does really help. But once you've turned off, once you're used to it, you'll still always automatically imagine those lines in your frame. It's something that I do today, even though I haven't used the grid on my camera for about five or six years. I still visually imagine that grid and every time I frame up a shot, I'm always placing people on those lines.
13. Camera Movement Introduction: Camera movement is one of the most important parts of filmmaking, because how you move your camera, it can really make a difference on how your video looks. If you want a beautiful tracking shot, use a gimbal. If you want to create a really beautiful still moments, maybe you use a tripod or maybe you get really close and use a shoulder rig. The tools that we use and the type of movement that we use in our shots can really help to enhance your story and haunt your video and tell you a specific story and a specific way. But what are the different types of camera movements available to us? And what are the tools that we need to create that specific camera movement? Let's get into it.
14. Tripod: So first of all, most you've got the static shots, which is filmed at using a tripod. So your camera onto a tripod. And therefore you can pan which is going from left to right. We can tilt, which is going up and down. But essentially you're locked to one specific points and you can move around in this space or you can keep it static. Now tripods are great. There are some people that will say you need to use a gimbal for everything or you need to use a shoulder cam for everything. But generally, the tripod is an absolute staple if you're filming interview content or content like this, or you want to put this onto a tripod, especially if this is a long form content. Now the tripod can be really useful as well if you want to create dynamic movements, but you want the precision of using a tripod. So maybe something is passing by the camera and you need a really solid whip, then you would use the tripod and have a nice fluid head on your tripod to create a really nice pan troppo that really awesome, but they can be quite limited because you're stuck to one specific points. You can tell it, you can pan, you can do what you want in that spot, but you're stuck to that specific point. So if there's more movement involved that you might want to think about, another option.
15. Handheld and Shoulder: And this brings us to handheld slash shoulder. So this is literally just holding the camera or you can have it mounted onto your shoulder. This contraption here is a shoulder rig. So you would mountain the monitor to this section. This is the handle and then you would mount the camera onto these plates up here. And then you've got the camera locked in on here. So you've got the monitor here, the camera is back here. And this means you've got the freedom of moving your body. Now this is really awesome. And typically this is the option that a lot of TV crews will use because you can quickly get what you want. There's not really a lot of setup or fluffing around. You can quickly run and get what you want and you can get really intricate with the shoulder. You can also recreate this with hand-held as well. You can get really precise handheld movements using a handheld setup. But this is quite limited as well because we are limited to our body's movements. So as we're walking, if we've got quite a faster movement that we need to do as we start to run. We're going to see more up and down motion into the shots and this might become unusable. So shooting on the shoulder or shooting handheld is actually a really simple and really easy way of capturing your video. And I do spend a lot of the time on shoulder, especially when I need to get precise shots or close ups or there's not too much movement involved. But when you need more movement, the shoulder cam probably isn't going to cut it unless you want your shot all over the place with this bumpy movement. So this is where we can talk about sliders and Gimbels and steady cams.
16. Gimbal, Steadicam and Sliders: Now this right here is a gimbal and these are available literally everywhere. I feel like every other company in the filmmaking and mystery is making their version of a gimbal. And you can get them in all sorts of shapes and sizes. You can get them with a big ring. You can get an undisclosed mode. You get more of a handheld version like this. But regardless of what they look like, the basic purpose of this is you get smooth movement, so you get smooth shots using a gimbal. So once you've got your camera onto your gumbo, you have to balance this up. So as you can see, this involves me moving all of these motors around these. I've got to try and find the perfect sweet spot to balance this up. Because if it's not balanced, the gimbal won't work unfortunately, so you've got to balance it. And then as you can see, it's quite precise. You have to make sure you get this perfect. But once you've got that balanced up, you just power this up. And then the gimbal is just going to do all the hard work for you. So as you can see, regardless of how much movement there is, the camera is barely moving. It's got this really nice fluidity to the movement. And that is generally the option. Not a lot of people go for. Now, Gimbels are great and you can get some RED in our shots. You can chase somebody with this thing and you're gonna get this route in IES tracking shots and some really smooth camera movements from the gimbal. But the problem is Gimbels or electronic, which means one, they're a bit difficult to use when it's raining to unfortunately, it is quite fluffy to setup. So if you're on a busy shoots and you've got a really urgent shot that you need to grab, setting up the gimbal, rebalancing, get every time you swap a lens or change something can be really time consuming and it can add up, and it can take up a lot of time on your shoots. So yes, even though Gimbels are really awesome and they definitely have their place in the filmmaking world can be quite a fast, and they do have that invitations. On the other side again, boards, you've got steady cams and steady cams of the more traditional version of the gumbo. It's not electronic. It's all done by balancing the weights on the top of the steady counts at the bottom of the steady cam. And this allows you that fluid and say, Now generally steady cams are seem to be more reliable because there's no motors, There's no electronics. But of course though there is a learning curve with a steady cam, and unfortunately they're just not accessible to lots of people. Now they're all smaller versions of steady cams like the glide cam. But again, that is a large learning curve. You can't just pick it up and go like you would with a gimbal. And then of course you've also got sliders as well. So a slider is basically just a mini train track that you place your camera onto. And you can move your camera from left to right. So you physically moving the camera on this beautiful smooth movements and you can pan and tilt at the same time to get some really interesting results. Now slide is a really good if you're doing close up precision shots or if you're in an interview and you want your became to have a little bit of soft movements. That looks really nice. But of course you're not going to see as much movement on a slider because you're limited to a track, then you would do on a gimbal. So these three tools are really great ways of adding movement into your shots and that really smooth cinematic movement. But depending on what you want, it will depend on which tool that you're going to choose.
17. Camera Crane: And I lost up. I'm going to talk about camera cranes, camera jigs or camera Boone's, this three different names, but they all basically mean the same thing. This is a sets up why you put a weight at one end. You put the camera at the other end. You get this really nice up and down movement in your shots. You typically see these in TV studios and you see them in movies as well, that these gigantic cranes that move up and down now you can get cheap, a smaller, more travel friendly versions of these camera cranes. And that do create this really amazing effects. When you tilt with the movement, it looked really great. But the problem is you're locked into a specific points, you'll just moving up and down. So therefore, if there's a loss of movement and you need to follow the movements, it isn't the option that you want to take. Generally, cranes are really good for establishing shots. Or if you're in a scene where the person isn't moving away from the camera that in the one space, then cranes are great option in this instance. Typically when I'm filming a dance video or a music video, I get someone to do that performance in front of the camera. And I do a few policies on the crane going up and down because it gives me that really expensive cinematic look that you see in music videos. Of course, the cranes can be big, bulky and heavy, and they're quite open to sets up and they can be quite expensive if you go for the more expensive versions. So this isn't beginner friendly, but you can get some really interesting and amazing shots using a camera crane, boom or job setup.
18. Camera Movement Outro: Now all of these tools are really cool and I also have a completely different purpose. So there's no one tool that would do the job. You'll see a loss of filmmakers running around with a gimbal and that's every single shop. They'll just run around with the gimbal. Well, you'll also see filmmakers who had just glutes with tripod for the entire shoots. But there's no tool that does every single shots really think about your shots, think about your scene, think about what you want from that specific shots and try and figure out which tool would do the job for you. Typically, I find that balance between that gimbal, the shoulder, handheld tripod, and crane is a perfect balance from my productions. Of course, though, if you're new to filmmaking, than investing in all of these different options can be quite pricey. So if you are a beginner, then I would recommend getting a tripod because you can't go wrong with a tripod and getting a good show to come. Because the balance between tripod and showed a cam can create a 3D amazing video. And then when you've got the money, invest in a gimbal and have the balance between tripod at shoulder and gimble.
19. Lighting - Introduction: In this lesson, we're talking all about lighting. And lighting unfortunately is one of those areas where most beginner filmmakers often overlook. You see lysing is actually the main difference between professional videos and amateur videos. It doesn't matter if you're filming a YouTube video at home or you're filming a Hollywood blockbuster with a $100 million budgets. The difference between a great visual and a bad visual is you're lysing. We've got to this. We're point in technology where pretty much all of the cameras that we have accessible to us can look amazing if they used in the correct way. So it doesn't matter if you're filming a video on a 50000 pound cinema camera, your iPhone, if you're using the correct lighting setup, you can create a really interesting and visually pleasing results. So even though you're probably more interested in getting a great camera or focusing on a great lens. The best thing that you can do for your filmmaking career is to invest your time into learning lysing. Now, I'm just going to cover a few of the basics in this, but I would really recommend going deep into lighting. Because if you put time into learning lighting and learn different lighting techniques and learn how to control the light within your scene you go into, helps you create some really amazing and visually pleasing results in next to no time.
20. Working with Natural Light: If you're filming a video, you don't have access to lighting than just avoid filming when it gets dark. Because you're going to have to increase your ISO. You're going to have to max out all of your camera settings and it's not going to look great if you had lighting, I would seriously recommend doing so because you can create some really interesting results. But if you don't have lighting than try and film when you've got the most available light cilia. Now natural light is great for our cameras. It gives us all the light that we need to expose our video correctly. But the problem is, it can be a little hard to control if you don't know what you're doing. So I'm just going to run you through a few different ways of how you can control the natural lights available to you. Now, if it's a sunny day and you want to shoot a video with a blurry background, pull your aperture down to F1 0.8, for example. Unfortunately, it's going to overexpose. It will be too bright and your entire shot would just tongue white. This is because there is too much light available to you in the scene. So in this case, the best thing that you can do is to invest in a ND filter or a neutral density filter for your camera. And ND filter is basically the equivalent of a pair of sunglasses for your camera lens. So essentially what this is doing is just putting a dark piece of glass in front of your camera lens, which is going to pull down the exposure. And that means you can use your F1 point a aperture to get your blurry background and you're not going to overexpose. Now, ND filters come in different strengths. You can get N d2, 468. And these are an old way up into the thousands. Generally, the higher the number, the darker the result is going to be. But I would seriously recommend getting a variable ND filter because this means for the one filter you get N d2, 468, and all of these other numbers. It gives you flexibility and that means you can take advantage of all of the settings in your camera. So now that you've got the brightness controlled, you've got the correct exposure in your camera, and it's looking great. Now we can focus on shaping the lights and working with the lights. So first of all, we're going to tackle shadows. If you're filming in the middle of the day, then chances are you've got bright sunlight staring right down onto your subject. Now the best thing that you can do is place the sun behind them and make sure the sun isn't spilling onto their face. Because the problem is when you're filming somebody and they've got some lights on their face, it's going to create harsh, unflattering shadows. And they're going to be squinting for the entire time, which never looks great. So turn them away and put the sun behind them. Or alternatively, we can soften that with diffusion. Now diffusion comes in many different forms, but essentially diffusion is just a sheet that the sunlight compose through and he's going to soften that out. The clouds basically act as a natural diffuser. So you'll notice on a cloudy day, you'll have a really nice light wrapping around your face. But on a sunny day is harsh and direct. So if we use diffusion, we can soften that Sunlight's and creates a much more flattering results. The diffusion that I use is this pop-up diffusion sheets that I bought from Amazon. This was around 15 pounds. I believe you can get it very similar price elsewhere as well. But basically all you have to do is just hold this in front of your lights and you're going to soften up that lyse. Of course, you can get much larger versions of this. This is great for close at work, but if I was doing a wide shots, then I would need something much larger in order to mask that sunlight using diffusion on your shots is one of the best ways of getting that really nice soft lighting effects you might be looking for. Alternatively, rather than diffusing the light, we can bounce light backup onto the subject. So if they've got sunlight coming in from this side, you can actually use bounce to bounce light back up onto the other side of the face, filling in those shadows. Now the problem is with bouncing light is it can get a bit intense for the subject. You've got the sunlight's over here and you've got the sunlight bouncing from this bounce down here C, but two sources of light hitting you quite hot. It can cause squinting and it can be a little bit uncomfortable. But if your talent is comfortable with this, then this can create a really nice, beautiful look similar to this pop-up diffusion. You can get pop-up reflectors, so you can get a silver reflector, a gold reflector, a white reflector. And oh, you have to do is just hold this underneath your subjects like this. And as the light comes in, it's going to bounce back onto their face. Again, you can get really large versions of this diffusion, but that really small one is perfect because it just slots into your bag and you've always got it if you need it, then last up we're gonna talk about negative fill. And this is basically just taking light away from the scene. So rather than adding extra lights or softening the lights that we're going to take the light away. So if you hold up something white or reflexive up to your subject, so you're going to get light spilling back onto them. But if you hold up something black to your subject, essentially what this is doing is blocking the reflection, bouncing back up onto your subject. So we're going to get a bit more shadow on the one side of the face. Now this is really beneficial because it's going to help to shape the lighting on your subject's face. And this is going to give us more contrast, and therefore is going to make your footage look more cinematic. Again, you can get really large sheets of negative fill. You can get a really big pop-up black sheets. You could use one of these small pop-up filters. Or alternatively, you can just hold up a jacket or something black Nexi your subject. And that's just going to remove some of that light on the one side of their face. Of course, though, if you didn't want the hassle of fighting with the sun and using bounce negative fail and diffusion. Then you can just film on a cloudy day and you're going to get really nice soft lighting. Of course, if you're filming inside, then you can also take advantage of natural lights. Don't place your subject in the corner of the room. Place them next to a window, angle them towards the window slightly, and then film them. And it's going to look great. Your camera and every camera on the planet loves lights. The more light that it can get, the better result it's going to pay. So try and avoid putting people into dot corners in room or filming outside at night where there's no daylight available to you. Take full advantage of daylights because your camera is going to thank me for that with really great cinematic footage.
21. Three Point Lighting: Now, let's say you're filming inside and you do have access to lights. What is the best lighting setup and how do I use these lights to create a really nice result? What's typically the standard go-to lighting setup is three-point lighting. Three-point lighting, as you probably guessed, is a lighting setup that uses three lights. Now in this current setup here, I'm only actually using a two-point lighting sets at rather than a three. And the reason why is because I like the slightly moodier look. If I added a third light into the scene, my entire face would be properly exposed by do quite like this slightly moodier look in this example. So even though I am going to show you the three-point lighting setup is also really useful to mix things up a little bit, experiment with different lighting setups, take lights out and move lights around and create that works for you. But with all that said, let's jump into the three-point lighting setup. So three-point lighting setup always begins with your key light. Now your key light is your main lights. This is your big light source and this is just off camera and he's the lysing the subject. It should be on the one side of their face. Next, we're going to bring in off fill light. And this is a second lights on the other side of the camera That's going to fill in the shadows. So essentially at this point you've got two lights in front of the subjects, one on either side of the camera. It's also worth noting as well that generally your key light should be brighter than you'll fill lights. So you'll first light should be brighter than the second lights. And then our third light in that three-point lighting setup is a backlight or a hair light. So the problem is if I was to turn off my back lights in the scene, as you can see, there's no real separation between myself and the background. So adding in a backlight is a really great way of adding separation between your subject and their background. So your backlight is just a light that you placed behind your subject. You place it just off camera or like I've done in my example, you can mount it slightly just above the frame and have it angled down. You want to try and avoid getting it into the frame if you can. But you basically place it outside of the shots and shine it on the back of the subject so it catches their hair and creates this nice highlights around them. This is going to give you really good separation between your subject and your background. And this is really important as well. If you're filming somebody against a dark background, adding this headlights, these backwards into your scene is going to give you that separation, which will make your subjects pop from your scene. So the three-point lighting setup consists of three lights, key lights, fill light, backlight. For three lights, you can get a really great setup nulla explained before it don't just go to 3 for every single lighting setup. Try experimenting with your lighting and taking out one of these lights. As you can see in this example, this is only using two lights and it's giving me a bit of a shadow on this side of the face, which I think works in this example. Of course, they always make sure that your lighting is working with your project. And make sure that if you're creating a really bright, vibrant video, then you're not creating shadows on one side of the facial, creating a really nice, beautiful look on your talent.
22. Working with Practical Lighting: And then lastly, I'm going to talk about practical lighting. Now, particle lysing is basically just the lighting in the scene. So in this example, practical lighting would be this light back here. And then you've got these four strip lights over here. So these are practical lights, lights that can be seen. And these are going to help you add character and depth into your scene. So practical lighting is really useful at giving your shot depth. If you place a lump all the way in the back of the shot and turn that on. It's going to give you a shot so much depth because we can now see what's back there. Essentially, you're not trying to hide these lights. You're trying to make these parts of your scene and bring carrots or into your video. When it comes to lighting with your key, your fill, and your backlight, you want to try and avoid these. Don't show these in the shot, but with your practical lighting, your lamps, your lamp shades, whatever you want to add into the scene, you're actually adding character and therefore creating depth into your scene. So lean into practical lighting and use it to enhance the look of your videos. You can see if I turn off these practical lights, this thing would look very boring. So they go, I've turned off all of the practical lights in the scene. I've got my key lights up here, I've got my back lights up there. But I've turned off all of the practical lights and the scene suddenly looks really boring. There's no character and there's no flavor. So take full advantage of practical lighting to add character and flavor into your scene.
23. Sound: As you can probably tell from all of the microphones and sound equipment surrounding me right now, in this lesson, we're talking all about sound. Now the problem is when you first start making videos, the temptation is to focus on the visuals and the visuals only, because when you see cinematic visuals, you instantly think that's professional. But the problem is that sound is always overlooked and sound is 50% of your video on site is video. One side is sound. And if you've got great cinematic footage, but the audio is terrible, then unfortunately your video, we'll look unprofessional and a fill light. The reason why a lot of amateur or beginner filmmakers make this mistake is because sound can be quite intimidating to begin with. Or at least that's what people think. Capturing great quality audio is more simple than you probably think. Essentially the tip to it is get a microphone. It doesn't matter what microphone it is. Just get it as close to the person talking as is physically possible. So that means the microphone built into your camera is not going to cut it. You can't rely on the microphone in your camera to record great audio. The microphone that is just used as a reference. So if you needed to hear something cool, if you needed to sync it up with your professional audio, then that's there for reference. But you wouldn't actually use the microphone in your camera for high-quality audio recordings. So what would you use? Well, there's a whole different array of microphones and equipment here. And I'm going to talk you through all of these options, but just remember, regardless of which option you choose, the number one rule is getting up microphone close to the person talking. It can be a shotgun mic, a vocal mic, a lavalier microphone. It can be a wireless microphone, it can be an audio recorder, it can be a phone, it can be a phone, lavalier, microphone, whatever it is, just get it nice and close. And I guarantee you'll get great quality audio. So let me run you through all of the different things I've got on this table and talk you through when and where you'd use each different one. So let's start with this one. This is the microphone that I've been talking into for this entire course, and this is the shore SM7B. It's a high-end vocal microphone, and this is used for these types of videos. It's also used for voice over work. But generally in video, this is a source of environment where you're going to see this. You typically also see this in podcast as well. And the reason why is because it produces a really clear sound. It sounds incredible. But the thing is if I was to step back and talked into this microphone, it wouldn't sound as good. There you go. I'm back here. And even though this brilliant microphone sounds great when I'm close to it, unfortunately, when I'm all the way back here, it just doesn't sound good. But when I'm this close to it, all of a sudden it is amazing microphone. It just sounds incredible. Now this sort of microphone has to be really close to the person talking. As you can see, this has been in the shop for the entire course. And the reason why luck I just demonstrated is because if we took this out of the shelter, it wouldn't sound any good. So this sorts of microphone is only great in these more casual sorts of videos. If you were doing a professional interview, for example, and you didn't want to see the microphone, then this would not be option to choose. So that takes us onto the shotgun microphone or the boom microphone. And that is this microphone here. And it's the same sort of story. When I'm this close to it, it sounds incredible. But when I go over here, it just doesn't sound anywhere near as good. Now, this microphone is really good because you can take this outside of your shots as, as you can see, even though you can see this cable in the way the microphone is out to the shop, but it still sounds great. Now, this is typically the sorts of microphone that you would use if you were doing an interview. These microphones are lightweight and they're really good at grabbing the sounds in front of them. A lot of shotgun microphones as well rejects the sound coming in from the side or the rear of the microphone. So if I'm talking into this microphone, I'm talking into the front of this. It sounds great. But the second I go to the side of this microphone, even though I'm just as close, it still doesn't sound anywhere near as good as if I was over here. So as you can see, this would be really good for location works. So if you were outside or in a studio and there was other noise going on in the studio. This would be great because it would reject some of that exterior noise, like I said before as well. You can mountain this outside the frame and you can completely hide that from the shot so you won't see any microphone in shot. So chances are I would go to this microphone and more than I would go to V6 microphone. Even though when you're this close, this one does sound arguably better. Next up is the wireless lavalier microphone. You have a transmits it with a microphone and you have a receiver, and the receiver plugs into an audio recorder. Now, the person wearing the level layer with this transmitter, they can just take this cable. They can pop it under their clothes and they can just click that on to their clothing. And you're now listening to the audio from the lavalier microphone. Now the great thing is because this is a wearable microphone. It doesn't matter where I go. So if I go all the way back here, even though these microphones weren't sound good. Now, this microphone Still Sounds great because it's attached to me wherever I go. This microphone also goes and it sounds great. So as you can tell, lovely microphones are going to be the option that you're going for. If you're subject to move around. So maybe you're doing a shot of the person walking down the road and then talking to camera. This is where I love LA would be useful because you don't have to mount one of these microphones. You can just let the subject walk and be free. The problem with these lovely and microphone's though, is because they are wireless, they can actually interfere with other signals. So you might get if dropout or you might get some interference. Or alternatively, they can rub against the clothing or the chest or the skin or the hair on the person's chest. And that sound does not sound grace at all. So you have to make sure that this is placed perfectly on your subjects. You can get something called an invisible F, which is what this love is mounted to take the sticky off. So as you can see, this is an invisible love and it's basically just this silicone wallet that the microphone can sit in. You can just stick this to the inside of your subjects taught or their jackets or wherever they're wearing it. And it's going to really reduce the sound of that rub. So lovely array of grades if you need a subject to move, but they can drop out. The shotgun microphone is a really great option and it's really good for getting it out to the frame because it reaches the sound. But if you wanted to use this on the move, then you would have to hold it and it just gets a little bit annoying. And the niche Judea microphone sounds great, but you can only really use it's enclosed proximity. Of course, though, if you did wanted to use the shotgun microphone out and about, you could use a wireless converter. See you plug this into the backend of the shotgun microphone, and therefore, this microphone becomes wireless. So you don't have to worry about cables running into a recorder. You could just wirelessly hold this above your subjects, or they can even hold it in the frame and they can record the audio wirelessly that way. Now when you do take your shotgun microphone and convert it into a wireless microphone, it does what? The same as a lavalier. So it works with a receiver and the receiver records into an audio recorder. Now, audio record is probably one of the most commonly used audio recorders on the market. It's quite an old one now. It's the Zoom hate Fortran. And as you can see, it's got these two port at the bottom, but it also has its own microphone. So you could use this to record your audio from your lab or your wireless microphone. Or you could plug this microphone into here as well. Or alternatively, you can just hold this and talk into the microphone like this. And then of course, the more budget friendly option is to use this phone lapel microphone. So this is the same as a lavalier microphone. You just plug this into your phone. And rather than having this expensive microphone box, essentially, you just plug this into your phone and then you can just use the voice recording app on your phone. This to your subjects, and you're gonna get that really nice high-quality audio. I believe this is 50 pounds. A decent shotgun microphones probably going to cost 100, this is 300. A good level S system is going to cost anywhere between one to 400. This is around 200. And then this thing here is around two hundred, three hundred as well. Of course they're, there were much cheaper options on the markets available to you. Just do a quick search, search for microphones, shotgun microphones, Studio microphone, wireless lavalier microphone. You'll find great options on Amazon or similar websites. Just the number 1 rule when it comes to your microphone's, it doesn't matter which microphone you are using. Just get them nice and close to the person talking. Now at some point in the future, I'm going to create a course or a full length episode talking all about how you get really high-quality audio, how to monitor your levels. But for now, the best thing that I can tell you is to just get a microphone, get it close to the person talking, and use that rather than the microphone from the camera. And instantly you gotta have great audio.
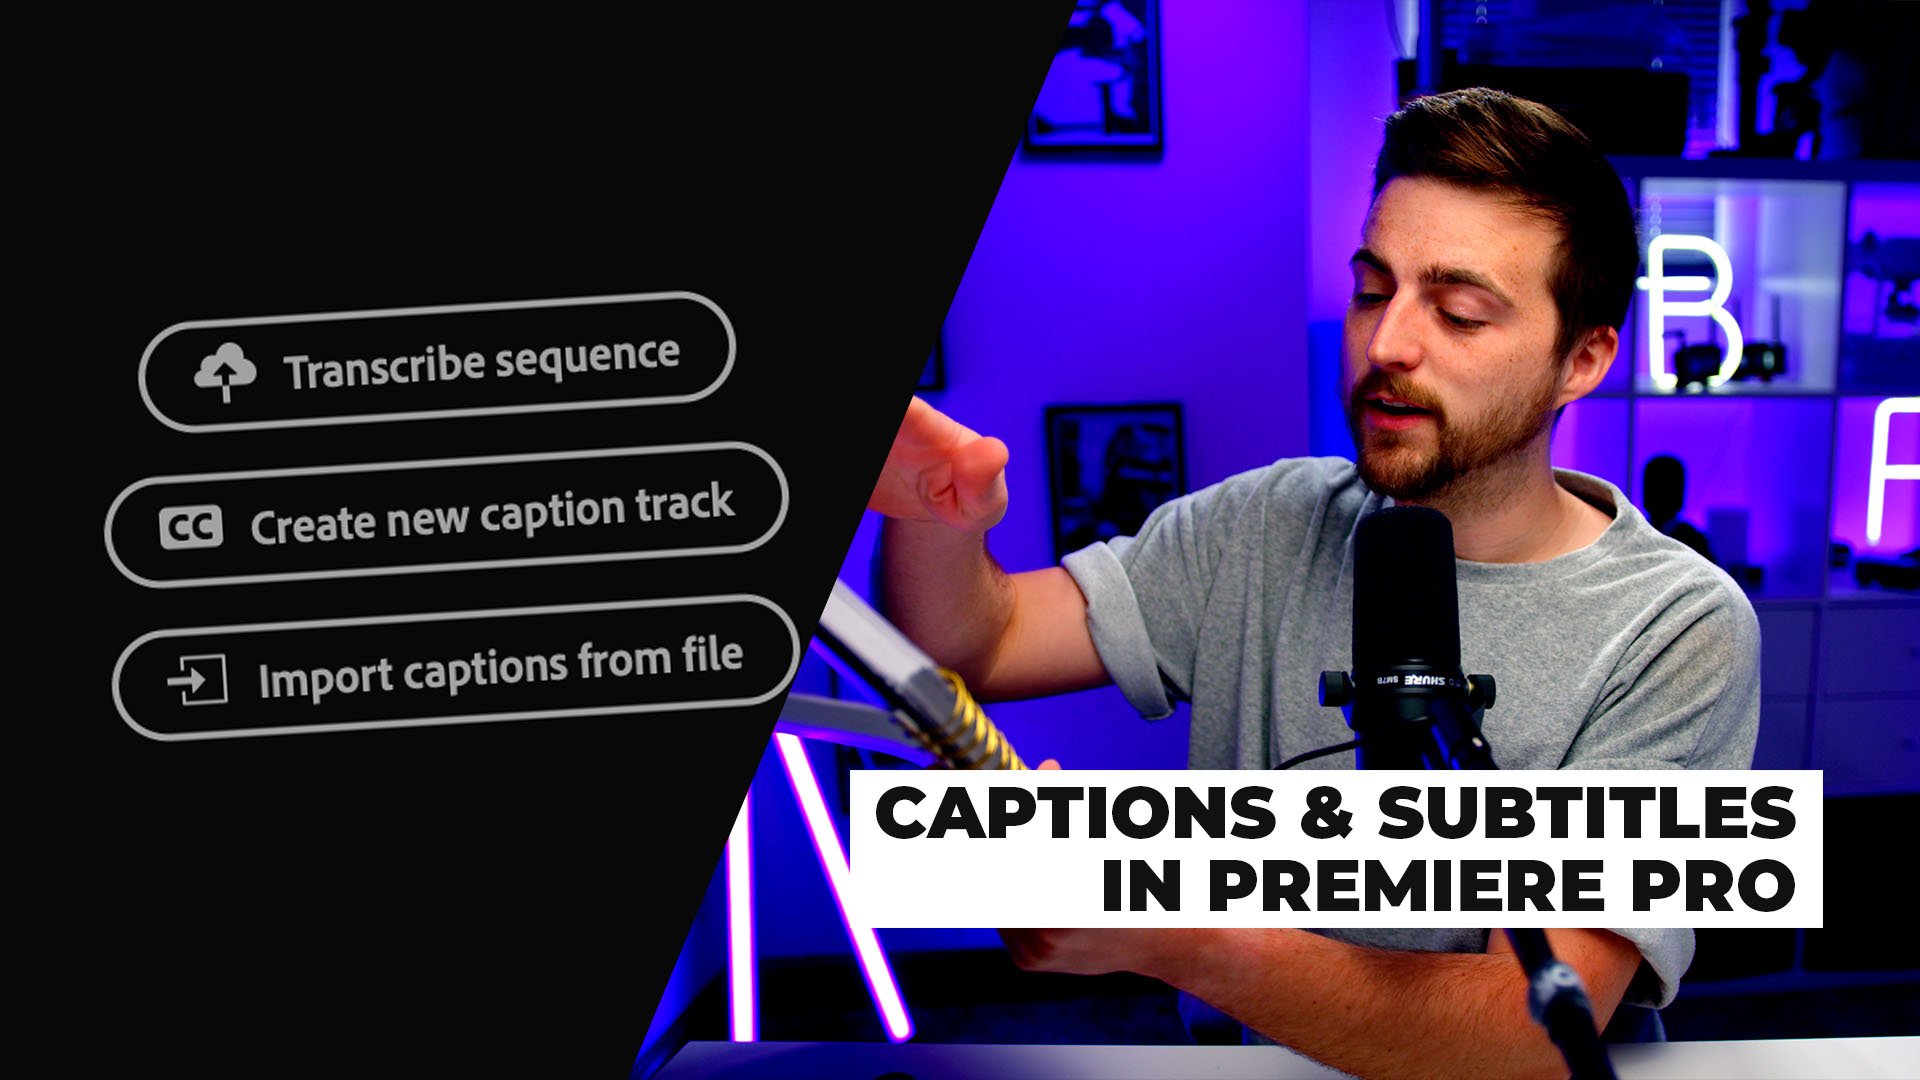
24. Summary, Quiz and Outro: There you go. We're now at the end of the course. So if you've made it to this point, then we've talked all about the settings that you should use in your camera. We talked all about focus and how to manually focus your camera. We talked about compositional techniques and framing, camera movement, lighting, and we've also covered sound. So at this point in time, you should be comfortable enough to get out there and start shooting some great videos. Moving forward, I am going to produce a more advanced version of this course to focus on some more advanced and more specific techniques. But for now, this should be perfect to get you started. Now before you click away from this lesson, I've got a quick three question quiz for you to answer. Question number 1. If I was to shoot in slow motion, what would I do to the frame rates, increase it or decrease it? Question number 2, what are the names of the three lights in a three-point lighting setup? And question number three, what is the name of their shot? If you know the answers to those three questions, then just leave your answers in the comment section. I'm also here. You might as well check out the next course, and that is the Adobe Premiere Pro course. So you follow this course, you've got your incredible cinematic beautiful footage. But how do you edit it? Well, you use Adobe Premiere Pro and if you follow that tutorial, you'll learn how to import your footage, edit that footage into a sequence at effects onto your footage, and then export that projects into a finished video file. So if you're curious about editing in Premiere Pro, that go ahead and check out that course. But there you go. That's it for the introduction to filmmaking course. Thank you ever so much for watching this lesson. I really do appreciate your support and hopefully I will see you on the next lesson or the next course. See you then.
 Chris Brooker, Filmmaker & YouTuber