Transcripts
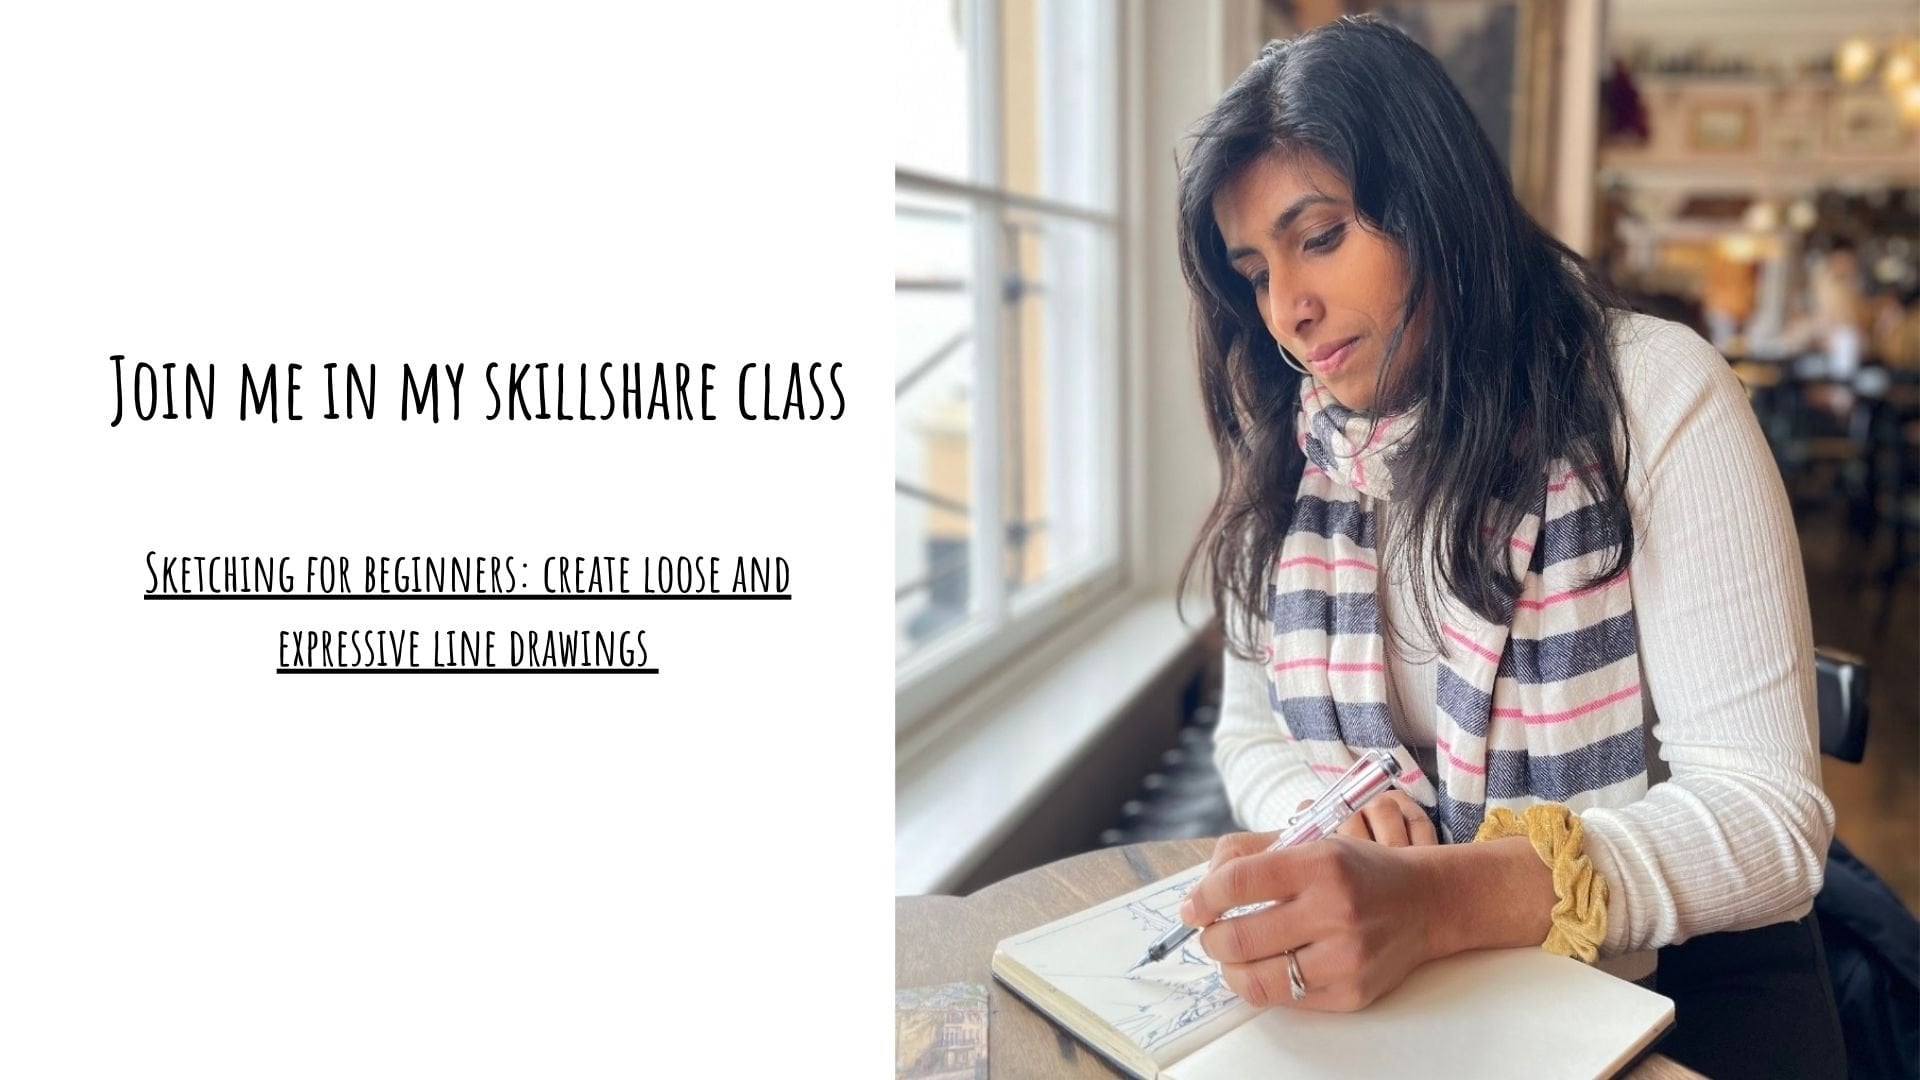
1. Introduction: Hello and welcome to a very relaxing class of fearless and experimental
ways of sketching. By capturing shapes and
textures from nature, we will be using a
range of materials, starting from the very
simple tweaks and feathers that you may see around you or while
you're on a walk. More conventional tools
like brushes and dip pens. We will also be
using Indian ink, or any waterproof ink
that you may find to go with the dip pens and
the twigs and the feathers. We will also be experimenting with some materials
that you can find in the kitchen or can be
easily bought from a market for creating homemade. Yes, you can be really experimental with the materials
that you're using today. You can also go for walks
around your neighborhood or your local park or
woodlands to collect materials that you may
want to sketch today. If you are somebody who
loves nature walks and quiet observations and also love to experiment
with new things, then this might be the
right course for you. In this course, I will help you translate the different
shapes and textures that you find in nature onto your drawing surface using
very simple materials. If this is something that
you would like to try, come along with me to my
next video where I will be explaining a little
bit more about the materials that
we may use today.
2. Suggested Materials: Let me introduce you to some of the materials starting off with a very simple
twig, a feather. I'm also going to use some traditional materials
like a bamboo dip pen. You don't need to have them. If you don't have them,
you can simply use a twig. I'm also going to use a
calligraphic dip pen. Again, if you don't have that, you can use a normal
pen or a fountain pen. I'm also going to use one brush. I'm just going to give you the different types of
brushes that you could use. One is a sword shaped brush and another one is a
round pointed brush. You can use any brush that
you feel comfortable with. These are all the simple tools that we're going
to use to sketch. For ink, we need some Indian ink or if you
don't have Indian ink, you can also use some sketch in. I prefer using waterproof
ink in case I would like to use some watercolor or
dice for wash later on. Along with these tools, we would also need some paper. Here I'm using a
mixed media paper, which means it is
great for sketching, as well as watercolor
washes or paint. The thickness of this
paper is 300 GSM, which is a great
thickness for you to try different mixed media on it. We will also need one jar of water and some
paper towels to mop up any extra spillage of dice or inks if you prefer using dice. For this class, I
will be showing you how to prepare three
different dice from simple materials
from your kitchen or something that can be sauced
out from your market. So I am going to use coffee, turmeric, and some beet
root for making dice. I will explain how to make
dice in a separate PTO.
3. Finding inspiration to sketch: Before you start sketching
and experimenting, it is a great idea to go for a walk in your local
park or woodland, or your neighborhood to
draw ideas from nature. I prefer going for
walks in the mornings and find materials
that I love to sketch, and it's usually natural
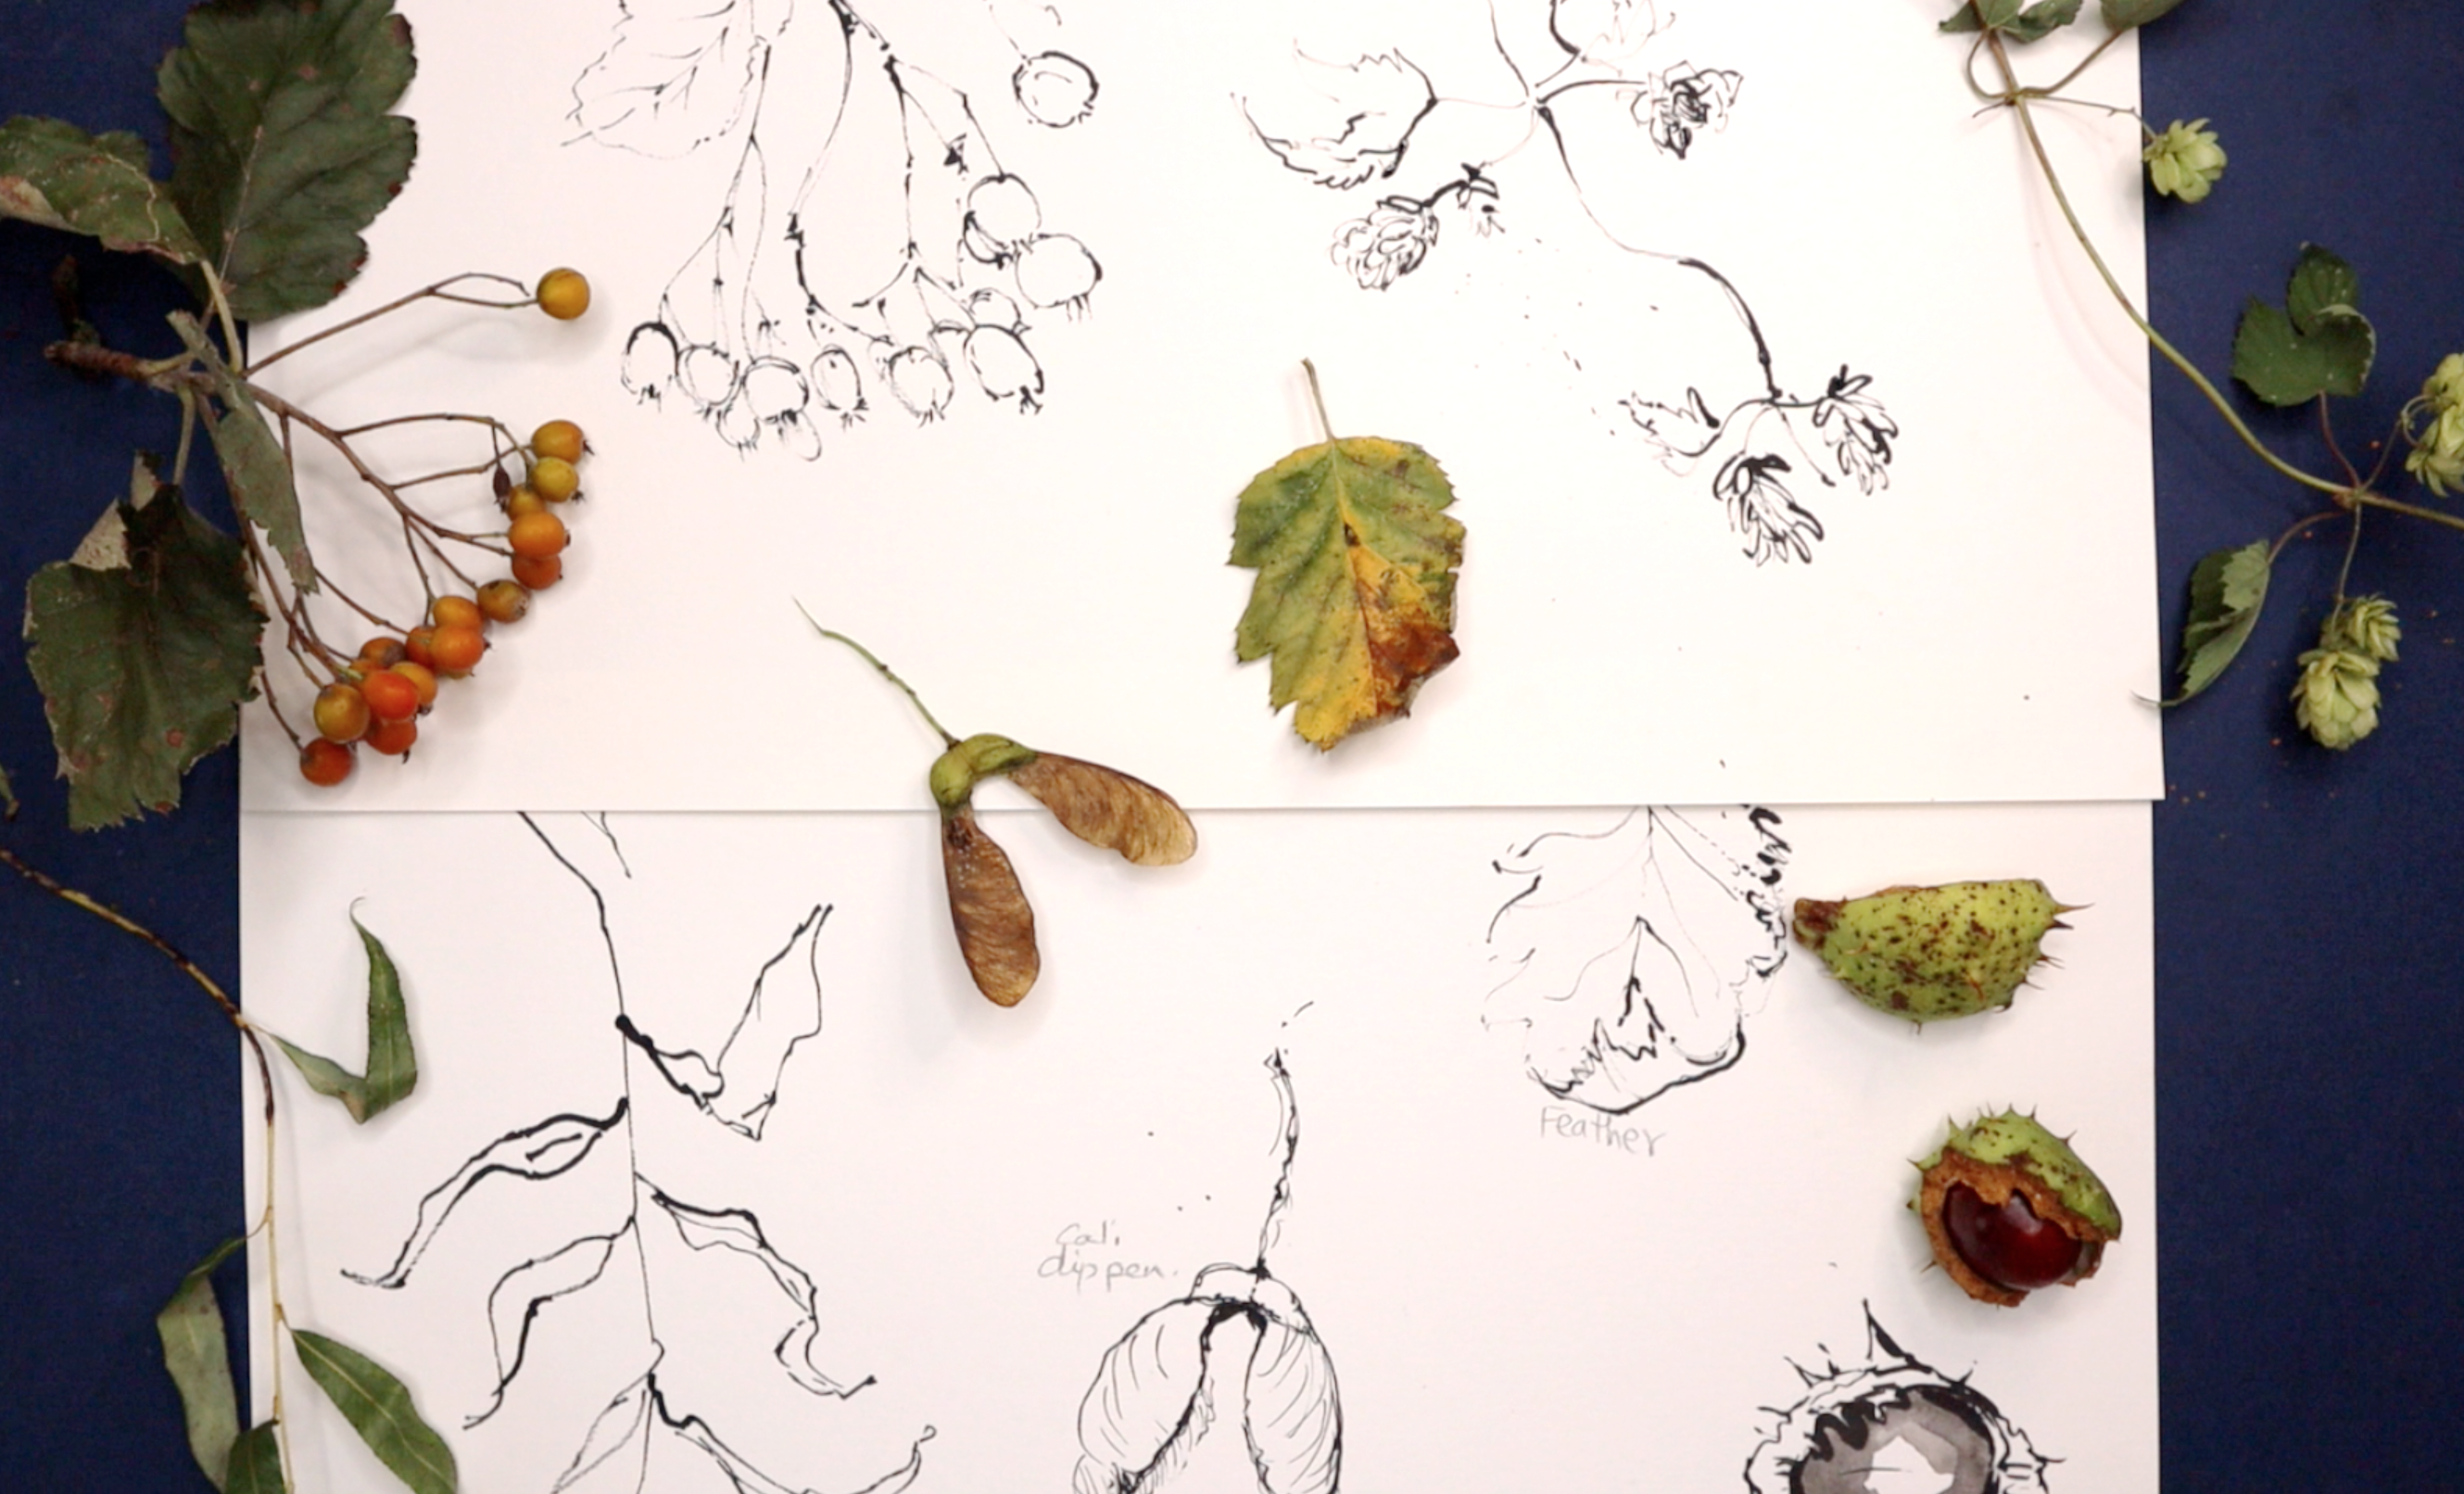
materials like leaves, twigs, concurs, and feathers. I usually bring it back home, arrange it, and decide what
I like to sketch from. Here are some of
the things that I found from my local
park for this class. Starting off with a vine
of hop, some berries, sycamore seeds,
and a fallen twig with some leaves from my favorite willow
tree in my local park. The natural materials
that you may be inspired by or you may pick out will be very local to you and it could differ
from one person to another. You could choose anything
that inspires you or you think can create some
textures and shapes on paper.
4. Explore Sketching with Twigs & Feathers: We are now going to start
exploring our sketching tools. I'm going to start
with the twig ink. I'm using Indian ink. It is a waterproof
version of Indian ink. I personally prefer using waterproof ink in case I like
to use some washes over it. I'm going to start by
dipping the twig into the Indian ink and just simply start doodling on
any piece of paper, you can just use some
rough sketch books or rough paper for this purpose and experiment by trying out different lines. At this stage, it doesn't
have to mean anything, it can just be some scribbles and simple lines that
comes to you first. This is a great
opportunity for you to understand how a twig
behaves with ink. You can also try by using
the tip of the twig, or if your twig is
slightly broader, see if you can
make broader marks with the whole edge of the twig. You can even use
just a corner of the twig to create
very thin lines. Can you try and vary the pressure you apply
using the twig as well? See what happens if
you apply a lot of pressure and see what happens
if you keep it quite light. You may also notice that the
ink blots in some areas, especially as soon as it is taken out from
the ink bottle, this is quite normal and
something that we can embrace. You can create texture using little blots
of ink on paper. Feel free to experiment with your tool as
much as you like. It is quite therapeutic
just to experiment with it. For it to mean nothing, as long as you like to make yourself feel comfortable
with the materials. Now let's move on to
experimenting with a feather. I'm going to use the tip
of the feather to dip into Indian ink and start experimenting the same way
as we did for the twig. It is a great idea to notice the difference between
the two sketching tools. I personally felt that the twig held a lot more ink
compared to the feather. I can see that the
lines that are made by the feather tip is
quite thin and fine. It might be really great for
some particular textures, or if I'd like to use a very
thin line for my drawing. You can also think about how comfortable you are using
each of these materials. Everybody has different
ways of using a tool and everybody will be comfortable with a
particular material. Feel free to experiment
as much as you like until you feel comfortable
with each material.
5. Explore Sketching With Dip pens: The next tool I'm going to
use is a bamboo dip pin. It can be quite similar to the twigs that you
can find in nature. I personally love bamboo dip
pens especially for the kind of texture and the satisfaction you get when drawing
with the dip pin. I have to say it is very to
the twig that I just used. I'm just going to quickly
doodle some lines, probably keep it
quite similar to the ones that I was doing
for the twigs and feathers. This way I can compare the different lines and see
what is best for my work. I'm going to create
the same type of lines, quick doodles, see how your hand moves
freely with the tool, and create different types of
textures using the tip pen. Next, I'm going to experiment using a calligraphic dip pen. The dip pen nibs are quite different to that
of a bamboo dip pen. They are made of
metal and you can find different types
of nibs in the market. I'm going to do similar lines with the caligraphicppen
as well. Again, using Indian ink, like how I have used
for every other tool, it is a great idea to experiment with
caligraphic dip pen, especially just to
get the look and feel of how it feels in your hand
and how it feels on paper. I must say calligraphic dip
pens are not for everyone. If this is your
first time using, I think it is absolutely
normal to feel a little bit frustrated
in the first go, as sometimes you might feel
that the ink does not flow as easily as the other tools that we have been
experimenting with. A great thing about caligraphic dip pen is
that the nib is quite flexible and it can bend and spring back into
shape very easily. This will allow you to create quite heavy and light
lines at the same time. This will depend on how much of pressure you're
applying while drawing. For example, if you apply really good pressure
onto paper with the pen, you can create very heavy lines like how you can see here. If you take the pressure off, you will create very thin lines. It is really great to
create texture and depth in your sketches here. Again, if you can see, I'm using similar lines
to experiment with, just so that I can
compare how it feels with the other tools
that we have been using. Again, feel free to experiment
for as long as you like. Although Indian is really
great for sketches, it is a great idea to
wash your nibs clean. Otherwise, Indian can dry on
your nib and ruin your nib. It is a great idea to
wash it with fresh, clean water and wipe it clean so it can be
used again and again.
6. Explore Sketching With Brushes: In this session, we're
going to explore brushes as drawing
tools using Indian ink. I'm going to show you a
variety of brushes here. You do not need to have all
these brushes with you. You can simply choose one round pointed brush or a chisel shaped
or a sword brush, whichever you're
comfortable with. I'm going to use a
round pointed brush to try out with
Indian ink right now. I will also need a jar
of water so that I can wash my brushes as soon
as I finish using ink. The process is quite
repetitive compared to what we have been doing with
the other drawing tools. I'm going to start off
with a series of lines, dots, and any marks and doodles that you
may want to create. I'm using the tip of the
round pointed brush, as you can see here. I can also use the whole body of the brush to create wider marks. Again, using similar
brush strokes, similar lines, to compare my lines with the other
drawing tools as well. Now I'm going to start using
the whole body of the brush, placing all of the bristles
down onto the paper, creating very thick lines. You can explore the different
ways you can use the brush. Let's try another type of brush. Now I have a smaller
round brush. You can use any size of
brushes for this purpose. As long as it's got
a pointed tip to make lines and create drawings, I just like to try
different sizes of brushes just to see
what works well for me. If you do have a
brushes and you would like to try them out,
feel free to do that. Again, the lines are
quite repetitive, just creating different
textures and lines, Exploring the full
width of the brush, creating very thick lines. I'm now going to try
my sword shaped brush, which is cut at an angle. I've got a pointy tip as
well as the chisel shape. Let's try that and
see how that works. The brush chokes would
be quite different, but when it comes to lines, you could still be able to create very thin lines
as well as thick lines, like how we've been doing
with the other brushes. I'm just going to
explore the full length of what I can do with this
type of brushes as well. Finally, I'm going to try a
smaller round brush as well. This is size four, which means the
bristles are really small and I can probably
create thinner lines. It could feel different compared to the bigger brushes
that we have been using. Again, it'll
completely depend on your personal choice
of which brush to use.
7. Willow Tree: Sketch Using A Twig: For sketching, I'm going to use a large sheet of
mixed media paper. This is a three size, you do not need to use such
a large sheet of paper. You can use smaller sheets of paper and do the
sketches separately. I just prefer to have all my sketches together
in one sheet of paper. If you have been sourcing out
some materials to sketch, you can start off with anything that you feel
comfortable with. Today, I'm going
to start off with some willow tree
leaves on a twig. It is one of my favorite trees. This particular tree in my local park is one
of my favorites. I love spending time
near it and love to see how the colors of the leaves
change as the seasons go by. I'm just going to
place it on my paper. You can arrange your subject
in any way you like, play around with it
a little bit and see what feels right
for you to sketch. Again, we're not looking
for any realistic sketches. We're only thinking of transferring the shape
as well as the texture. If there's any for particular
subject you're working on, I've placed it in a way
and this looks good. Let's start sketching. I'm going to get my little
jar of Indian ink out. We're going to use
twig for this project. I'm going to start sketching just by looking at
the basic shape, the direction of the stem. Just going to transfer that quickly as a very quick drawing, It will only take about
two or 3 minutes. It's all about observing and just transferring
the basic shape. You don't need to think
of all the details unless you are keen on that to start off with the first leaf and
see how that works. Again, if you remember, because we're using dip pen, it is going to create
blobs of ink on paper, which is absolutely fine because that is
something that we could embrace and create
something with it finished. My first leaf, that looks good, I'm just going to carry on and transfer the basic
shape of this leaf. The idea is to think of
this as a basic shape or an object to forget for a while that
we are drawing leaves. If we think they are leaves, we are going to
automatically create the shape of the leaves that
we are very familiar with, but we are only looking to
transfer the basic shape. Because of that, we
just need to think of it as just a shape
and not the object. You can see here that
I'm going really slow with the process just
looking at the shapes, creating somewhat similar
shapes on the paper. Also, you can see how
sketchy my drawings are, which is absolutely fine. We're not looking for
perfect sketches. Again, just a reminder
that we're only enjoying the texture and the shape of
the object in front of us. So take as long as you like. You can be very slow with it, maybe enjoy with a little bit of music in the
background as well. So I think I'm quite glad with
what I have produced here. And we're going to
carry on and do similar drawings with the
other drawing tools as well.
8. Leaf: Sketch Using A Feather : In this session, we're going to use a feather to
sketch this leaf. I'm going to place the leaf on my paper and I'm going to
sketch right next to it. I can see the shape of the
leaf and transfer it directly. If you prefer, you can also try and trace around the leaf, but I would suggest that you try this type of
sketching by looking at it and drawing the
leaf right beside it. It always helps to look at the shape and move
your hand accordingly. You can choose the amount of details you would like to
include into your drawing. So I'm just going to
get to the bottom of that leaf where there's a
small bit that is curled up. I think I've got a
nice contour drawing with the tip of the feather. I'd like to go in and
darken a few areas, so I'm going to use
a bit more ink. Just darkening a few areas
where I'd like to give a bit more focus
on Once you've got a very light contour
drawing and then you can go over it to make all
these extra details. Or if you'd like to add
some texture on the leaf, that is also possible. Right now, I'm just
going to go in and add the veins of the leaf just by adding some
very thin lines. I think it's quite good that I'm using the tip of the
feather because I'm able to make all these
very thin marks which I probably wouldn't have
achieved with a twig. Just adding the extra lines, just enhancing only where
I think it is necessary. I'm quite happy with
how it's turned out. It's been quite an experience trying to sketch
with the feather, especially because
it doesn't have a good grip compared to
a twig or even a pen. But I love the textures
that it has created. If you feel like you can also use the other
end of the feather, the soft feather, to create
texture on the leaf.
9. Conkers: Sketch Using A Bamboo Dip Pen: If you enjoyed using a twig, you might love using
a bamboo dip pen. You can get bamboo dip pens in most art shops or even online. It behaves very
similar to a twig. If you don't have one, you can always use a
twig to sketch these. I'm going to sketch some horse nuts or what is
famously known as Conc, along with the outer covering. I absolutely love
the spiky texture on the cover of the conquer, the conquer nut that is inside
is nice, smooth and shiny. So there's a lot of
textures going on here. Just like how we did
with the leaves, I'm just going to
arrange it on my paper and try and sketch the
shape and the texture. Just going to look at the shape, just getting the basic
idea of the shape. Let's try sketching. It's always a good idea to have your subject right next to
you while you're sketching, because you might be
looking at it quite a bit. It's always good to have it in the same level as
your sketch so you're able to transfer and
your hand movement just automatically transfers
the shape that you see. Just getting the basic shape. Again, the good thing
about bamboo dip pen, just like the twig,
is that you do get these heavy and light lines. Just adds character
to your sketch. Just trying to get
the spiky bits. It's absolutely fine for
you to go over the lines. It's absolutely fine to
look a little bit sketchy. I think the sketchiness to the character of
your drawing as well. Let's embrace the
sketchiness if you like. You can go ahead and add
some shadows as well. All that little dots and dashes, the spikes and
everything that you see. You can either
spend 30 seconds on this drawing or you can spend
more than two or 5 minutes, at least, on this drawing, getting all the extra details. That's totally up to you. Some people like to
just do a quick sketch, go on to the next one, but if you're
somebody who loves to observe the details and
try to sketch them, by all means, take your time. Now let's sketch
the second conquer, where there's actually
a conquer nut inside. That means there's
a lot more textures that I can capture
in this drawing. Starting off again with the outer nut and then just
adding all those details. Just transferring what I
see right in front of me. If you think you're
not getting it exactly the same
way, don't panic. Because we are not here to
draw any realistic sketches. We're just here to
enjoy the drawing. If you feel this angle is a
little too difficult for you, you don't have to do this. You can do another angle
that suits you better. Again, I think I am
more interested in those spiky ends and I absolutely love
the shadows as well. Just going to get
all the spiky bits just showing the
character of the conquer. You can also add some value, that is darkness or
lightness to your sketch by adding some darker lines or shading in areas where
you think it's darker. A little bit of shadow
here and there might just bring the whole thing
out and make it look more. Three D like that again is just a next step
that you could take. It's not a necessary step, you could just stop with
the contour drawing.
10. Sycamore Seed: Sketch Using a Calligraphic Dip Pen: There are other types of dip pens that can be used
for drawing as well. I absolutely love using
calligraphic dip pens. I'm going to sketch a sycamore seed using
calligraphic dip pen. As explained in the
materials earlier, the nibs for
calligraphic dip pens are quite flexible and lets you create heavy and light lines as you go along and sketch. If you're new to
caligraphic dip pens, I would like to tell
you that it's not one of the easiest tools
that you can use. It takes a little bit of practice for you to
get a hang off this, but after you've
got a hang of it, you will be amazed at
type of lines that you can create using these dip pens. The texture on these seeds are absolutely beautiful to sketch. The very thin lines on the brown wing like
structure is very light. Using these dip pens, you can create those light
lines with very little effort. It is optional for you
to give some shadows to the sycamore seeds
that we're sketching. So if you do like that, you can add these shadows just like how you can
see on the paper.
11. Conkers: Sketch Using Brushes: The next sketching tool
that we're going to try is the chisel shaped or
the sword shaped brush. If you don't have this brush, you can just use a round
pointed brush for this. I'm just going to show how it works with the
sword shaped brush. Let's start by dipping it into Indian ink
first, where again, using Indian ink or sketch ink, if you prefer using color, you are free to do so. I'm starting off again
with the sycamore seed. I'm using the pointy end of the sword brush to get
the very thin lines. Also because brushes are quite flimsy and not as rigid
as other drawing tools, I'm going to use very
light hand movements and not pressing down too much onto paper to get these
very light lines. So I'm just quickly getting the shape of the sycamore seed. It's quite fluid movement with
the brush compared to pen. Once I've done that, now
I can add some shadows, just trying to copy
the shadows that I see on paper just underneath
the sycamore seed. The good thing about brush
is that you can just paint it quickly and with
very little effort, quite like the shape
of the contour. And now for adding some shadows, I need to be really
careful with adding shadows with the tip
of the brush because it's quite flimsy
and it can go a little bit darker or heavier. If I'm not careful, I'm going to reduce the amount
of details I add as well. Next, I'm going to use a round pointed brush
using Indian ink. Again, I'm going to try and transfer the
shape of the conquer. Again, I'm going to use
the tip of the brush. You can see how effective a round brush can be with the
heavy and the light lines. Also, it is always
a good idea to keep your lines quite light
or the amount of pressure you put onto the paper quite light so that you can
get these very light lines. And at the same time, quite
characteristic lines. Wherever you need a area, you can gently
press down so that more area of the bristles touch
the surface of the paper, just creating darker lines. A quick transferring of
the shape of the conquer, adding some details like the spiky ends of the outer
covering of the conquer. If you like, you can
add more details. For example, the shadows. And because we're using, you can use the whole
body of the brush. And with one stroke, you can get some shadows. An extra step that you
could take using a brush is to dilute your ink,
creating mid tones. We have the very dark shadows. We have the light contour lines, but we don't have
something in the middle. I'm just going to wash my brush. Only dilute the ink a bit, just a little bit
more darker areas. But you can see it's not as dark as the first
shadows we put down. This is because I
diluted the ink, creating lighter color
that could go onto paper, just creating that three
D effect on paper. Let's just add some more
shadows. Again, if you like. You can dilute it or tone it down by adding a
little bit of water, just lightening the shadows
as you go along with this, we are done trying out
all our sketching tools. I have now completed using the three size paper that I was using for
all the sketches.
12. Project: Use Your Favourite Tool To Sketch Berries: I hope you have enjoyed using the sketching tools for
line drawings so far because we have practiced with all the different
types of sketching tools in this project, you can use any sketching tool that you personally prefer. I am going to scale up
our drawing a little bit more and try and use a little
bit more complicated shape. This is a bunch of leaves
and berries that I found. I'm just going to arrange it in a way that looks nice
when I start drawing it. That takes a little bit of
trial and error before I decide which shape or which
angle is good for me. I'm just going to
keep it beside me. On the same paper, I can see some lovely shadows
falling on the paper. On the other side, I'm going to start
sketching them. This is why it's a good idea to use a larger sheet of paper. If you are observing something, it's a good idea to place it
on the same sheet of paper. You get the right
amount of shadows, and it's a great way of observing
something as you paint. My favorite sketching tool was the bamboo dip pen or the twig. They both give me the
same effect on paper. I'm going to start using the bamboo dip pen
with Indian ink, just like how we did
our earlier sketches. I'm going to start off with a line drawing or
a contour drawing. I'm looking at the basic shape of the object that
is in front of me. It looks quite complicated
at this stage, but what I'm going to
do is I'm going to choose what I like to
include in my drawing. For example, you
do not need to add all the leaves or
you do not need to add all the branches
into your drawing. You can choose which
one you prefer. You can even change the orientation of
each leaf, please you, or to make your drawing a
little bit more easier, it really depends on what
you prefer to see on paper. Also, it's just
about trying to get the contour or the shape of the leaf or the object
you're drawing. It's fine to make it
a little bit sketchy. It's fine if it goes wrong. This is just a trial session. You can always go back to it if you think
this didn't work. I'm just going to try
and sketch another leaf. Now, these were quite
quick sketches, just getting the basic
shape and texture. More importantly, I think I like to get the
texture of the leaf, especially the edges which
are a little bit sketchy. I love the way how the
berries are placed, so I'm just going to try
and get all those details, the details that actually make this bunch of leaves and
berries look beautiful. Now, the third leaf
looks quite complicated, but I'm just going to
simplify it a little bit and just get
the basic shape. You can even do another leaf
in its place if you think this is complicated or if
you're looking at another, a bunch of leaves or
berries on your table. Feel free to change it
according to how you prefer it. By working my way down, I'm going to start sketching
the berries again. There are lots of berries
that are overlapping. I'm going to simplify it and start the ones that
I can see in full, the ones hiding underneath. I will do a bit later on, or as a second step, let's first sketch all the ones that you can see completely.
13. Project: Use Your Favourite Tool to Sketch a Vine: The last and final sketch
that I would like to do is a wine of hop. I source this out
from my local walk. Again, if you are
in another country and you do not have this
type of wines there, you can use any wines
that you see there. It could be any plant, or if you don't like wine, you can try another
material or an object that you like to sketch from
whatever the object may be. It depends on how you sketch
them and how you enjoy it. I'm just arrange the harp beside my paper and I'm going to start sketching using a
feather this time. The reason, because I like how light the lines
of a vine is, I know that the feather gave me very light lines and
very thin lines. Just to get the lightness
of what I'm sketching, I'm going to use
the feather again. You can have as many details
as you like or as little. It completely depends on what you want to transfer
onto your paper. It could look very design like, it could look very sketchy. And each and everyone's
style will depend on how your hand moves and it doesn't have
to look like mine at all. I'm being very loose
with the lines, just getting the basic shapes. I love the fact that there's
a lot of lines going on here and how I can
include lines. I can include those sketchy
lines into my drawing. Just getting the details. The main stem, little stems, and I'm going to start
doing some leaves now. Most of the leaves have begun to dry and they are curling
up a little bit. I think I'm just
going to try and add that detail into my sketch. I'm not going to
deliberately try and open those leaves or try
and sketch them that way. I'm going to sketch what
I see in front of me. This method actually
takes away the pressure of having to make my drawing
look more beautiful. We are not aiming for beautiful, We're just aiming to sketch
and just enjoy the process. We're just aiming to sketch what we see right
in front of me. The flowers of hop is quite, they've got tiny petals and their peculiar shape and texture is not one of
the easiest to get. Nevertheless, I'm just going
to try my best just sketch, just creating the impression
of those flowers. I can see small petals and
there are a cluster of petals. I'm just going to get
that effect on paper because I'm using the feather
and it's quite flimsy. Sometimes I do feel that my ink is getting sprayed
accidentally across the paper, which is absolutely fine. It just adds to the texture and beauty
of your sketch as well. With this, we are finished with all the line drawings using ink. If you would like to take your
sketches to the next step, then I can show you how
to create homemade dies that can go on top of these
line drawings as washes. If this is something
that you'd like to do, stay on for my next video, where I will show
you how to create homemade dies using
ingredients from the kitchen.
14. How To Prepare Homemade Dyes: I'm going to show
you how to prepare three homemade dice using beet root, turmeric, and coffee. I'm starting off with beetroot. I start by chopping
the beet root. You don't have to peel them. You can roughly chop
them and place them in a saucepan with a little
bit of water to boil. Once it comes to a boil, you can then switch off the hob and leave it to
rest for a little while. Once it cools down, you can then transfer the liquid into a clean jar
using a strainer. Our beet root die is now ready. You can store it in the refrigerator for up
to ten days in this jar. I'm also going to make two more dies using
coffee and turmeric. Let's start off with turmeric. I have powdered turmeric
in a little bowl here. All I need to do is add some water and mix
it using a brush. When you start using water, let's use very little water and gently mix it using a brush. And then you can top
it up with more water, depending on how diluted or how thick you
would like it to be. Turmeric does leave a
little bit of residue, which is absolutely fine. It will not ruin your brush. Next, let's go on to coffee. If you love drinking
brewed coffee, you can strain the last bit of the coffee grounds that is left after you
finish drinking it. If not, you can also use some instant coffee to add
a little bit of water into it and start mixing it
again using brushes again. Let's start off with
very little water to get a nice saturated die. If you'd like to lighten it out, you can always add
water later on. I hope you enjoyed
creating these dies. Now let's start trying
these out onto a paper.
15. Explore Homemade Dyes: Now that I have all
the dies ready, I'm going to test it
on a piece of paper. The paper that I'm using here is the same paper as that we
have been sketching all this. While I'm starting off
with testing turmeric die using a nice clean brush. Simply make a swatch
on to the paper. I can see it leaves a residue
which is completely fine. And that is how turmeric
powder behaves on paper. Let's move on to beet root die. I absolutely love the
nice roast color that I can see on paper Here,
it's quite vibrant. I wonder if it's going
to dry the same way. So we'll just have to wait
and see now for the coffee. I love the rich brown
color that it has made. If you remember the coffee
e was a little bit thicker. Inconsistency because I
added slightly less amount of water just to keep it a little bit
on the thicker side. This has allowed me to play with it on two
other dies as well. I have mixed turmeric in coffee. I love what effect I can
see on paper right now. I'm going to try it with a little bit of beet
root die as well. Just trying to mix the
two colors together. See how that works here. You can have a little play
time with all the three dice. See the different brush
roots that you can produce. See how it will create a
nice even wash on the paper. You can even drop in pigment
and see how that behaves, just like water color. The dice will also behave in a similar way as you
can see on paper. Here they are blending together, bleeding into each other, creating lots of different
effects on paper. Feel free to explore the mediums
and see how you like it. Each person will have a different way of
using these dies, and that's completely fine. So feel free to have a
little play time until you feel really comfortable
with all the three dies.
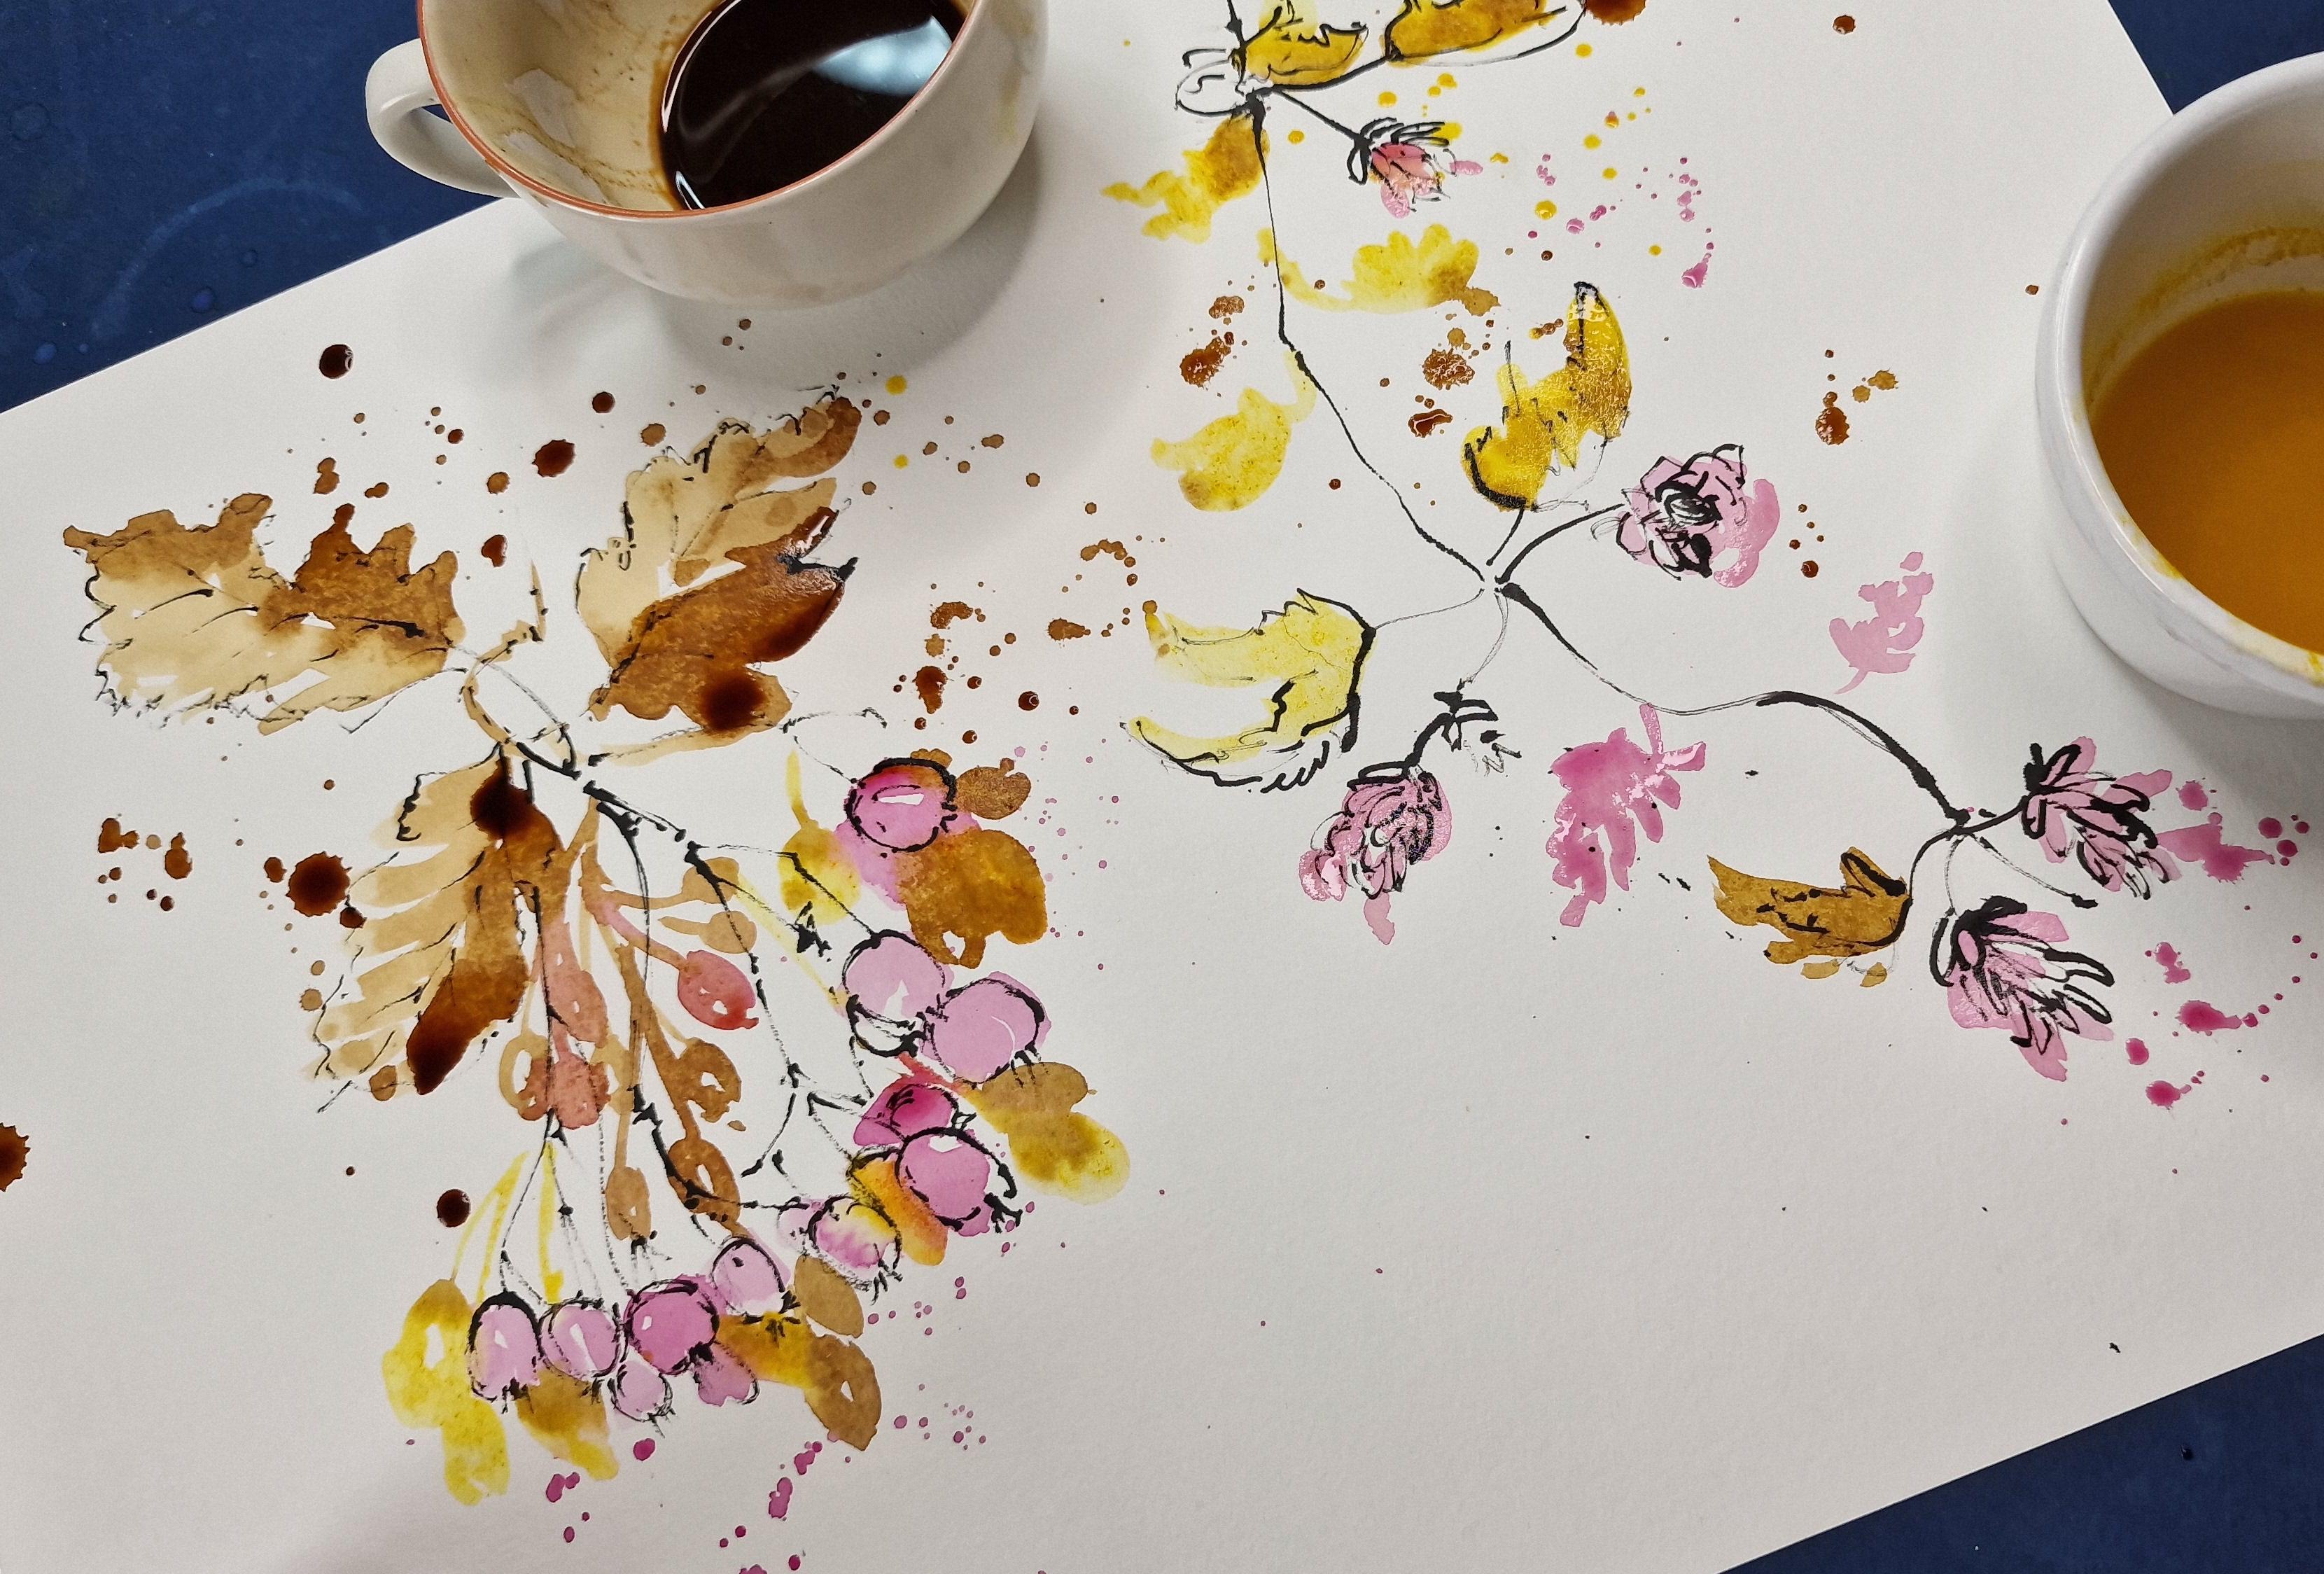
16. Project: Create A Dye Wash Over Sketches: If you're comfortable with using these dies and you feel
quite confident with it, let's start doing a
quick wash on some of the sketches that
we have been doing all this while using Indian ink. I'm going to grab a
round pointed brush. I have all my three ready. I am going to do
a quick wash for the berries and the hop vines. I'm going to use the nice rose beetroot
die for the berries. Although we know that
the berries that we worked from wear
orange in color, I'm just going to use
a nice rose color. This illustration is not
really color specifics. You can use any color that
you like if you prefer. You can even have
yellow berries or brown berries or whatever
dice that you have created. I'm going to just fill in the little shapes that I
have drawn with Indian ink. I'm also trying to leave little unpainted areas on the berries just for
a light reflection. I would also like to
keep my wash very loose. I'd like to add a
lot of spatters. Can see here, I'm just using the brush to create
some splashes of E. Okay, let me wash my brush and
let's try another pigment. Let's start with some turmeric. I'm thinking maybe I
will add a little bit of yellow berry like shapes as
well using my brush alone. You don't really need to
paint inside the lines. You can go outside
the lines and add some extra details with just
the dye alone if you prefer. Here I'm adding a few
yellow colored berries. This is quite illustrative. Not really looking for any
realistic illustrations here. Fun illustration to do actually, because you can play around with the different colored dice
that we have prepared at home. And also, it doesn't
have to really look anything like the berries
that we sketched from. I'm going to wash my
brush clean and I'm going to add some brown
with the coffee de. It's fun to work
wet in wet because the turmeric and
the beetroot dyes are still quite wet on paper. I'm just going to drop in
some coffee de as well just to see how it works and just to see how it blends together
with the other colors. Just adding a few more
berries using the brown. I've got berries in all
three different colors. You can also add some spatters if you like, as you go along. Now let's try to paint
the leaves again. Keep it quite loose and fluid. You can leave a little bit
of white unpainted areas. You can dilute the coffee de, if you like, with a
little bit more water. However, I suggest
that you don't dilute it inside the cup. Let's try and add some
water onto the paper, diluting it on the paper. Also, if you like
deeper tones of brown, you still have some deep
brown or coffee dye in the cup leftover. So you can use the deeper color
for deeper tones as well. You can continue
the same techniques to finish the illustration, leaving a few white areas for light reflection to just
bring in some interest. Really, you can create
the way you prefer. This is a very relaxed course, which means this is all about experimenting
with the dice, with the inks, with the different sketching tools
that we have been using. There's no right or
wrong in this course, it's all about
experimental sketching. I really would like you
to experiment and try the way you prefer to actually feel comfortable
making mistakes. To actually feel comfortable about experimenting on paper. Let's finish this
sketch together, and I hope you will enjoy it. If you enjoyed using
these onto our sketches. Let's try one more
sketch like that. And I'm going to
try the hop vine. I'm going to start off
by using some turmeric. As you can see, I started
off with some spatters. It just adds more fun
to my illustration. I feel I'm just going
to be very loose with my brush dogs creating
impression of leaves and the hop flowers. Just like how we did for
the first illustration, we are just going
to add some des, leaving some white
unpainted areas as well, just to add interest and to
add some light reflections. Just adding some depth
to your illustration. I'm also going to add some extra leaves
using the brush alone. Just like the first one, we are going to experiment with adding different
types of dice together. See what you'd like
to add together, what you like to mix together. I might give some roast
color to the flowers, although I know the
flowers are more white or green in
color in reality. But I feel that some color for the flowers would make
it look really vibrant. I think I'm quite
happy with the result. I love the fluid nature, the flow quality of the dice that is
working on the paper, along with those
expressive lines that we created using ink. If you prefer, you
can illustrating using dice on all the
other illustrations that we have been
doing in this course. I would love to
see how you got on and you used as your references. Depending on which part
of the world you are in, you can use your own references and whatever that inspires you.
17. Final Thoughts: How to take it further?: I hope you really enjoyed experimenting and
drawing from nature. It would be wonderful to know which part of the course
you really enjoyed, Whether it be the walks or the experimentation
with the materials or preparation of the dice. It would be great
if you can share your experience in
the discussions. The dice that we made today
were just a few examples. You could use many more natural materials to
create your dice, for example, from
flowers or berries. It could also be
quite local to you. The materials that you use could differ depending on which
part of the world you are in, can also be very experimental with the techniques
that you use. For example, you can try to do some stamping techniques to
create the texture on paper. Whatever techniques and
experiments that you do, feel free to share it in the projects and
resources section. I would also love to
see what inspired you. This can also change depending on which part of the
world you're in. Feel free to draw from
nature that is around you and see what inspires
you from around you. Again, it would be wonderful if you can share your process and your ideas and all
your experiments and even your final projects in the projects and
resources section. Feel free to use the
discussion section to ask any questions or even talk about your opinions
about this course. I would love to
hear from you and happy experimenting
with these materials by
 Suzanne Abraham, Artist