Expressive Waves in Watercolor
 Natalia Nikitiuk, Capturing Life's Beauty
Watch this class and thousands more
Watch this class and thousands more
Lessons in This Class
-
-
1.
Intro
0:35
-
2.
Plot
1:05
-
3.
Materials
2:29
-
4.
Watercolor drawing
9:38
-
5.
Conclusion
0:54
-
-
- --
- Beginner level
- Intermediate level
- Advanced level
- All levels
Community Generated
The level is determined by a majority opinion of students who have reviewed this class. The teacher's recommendation is shown until at least 5 student responses are collected.
26
Students
1
Project
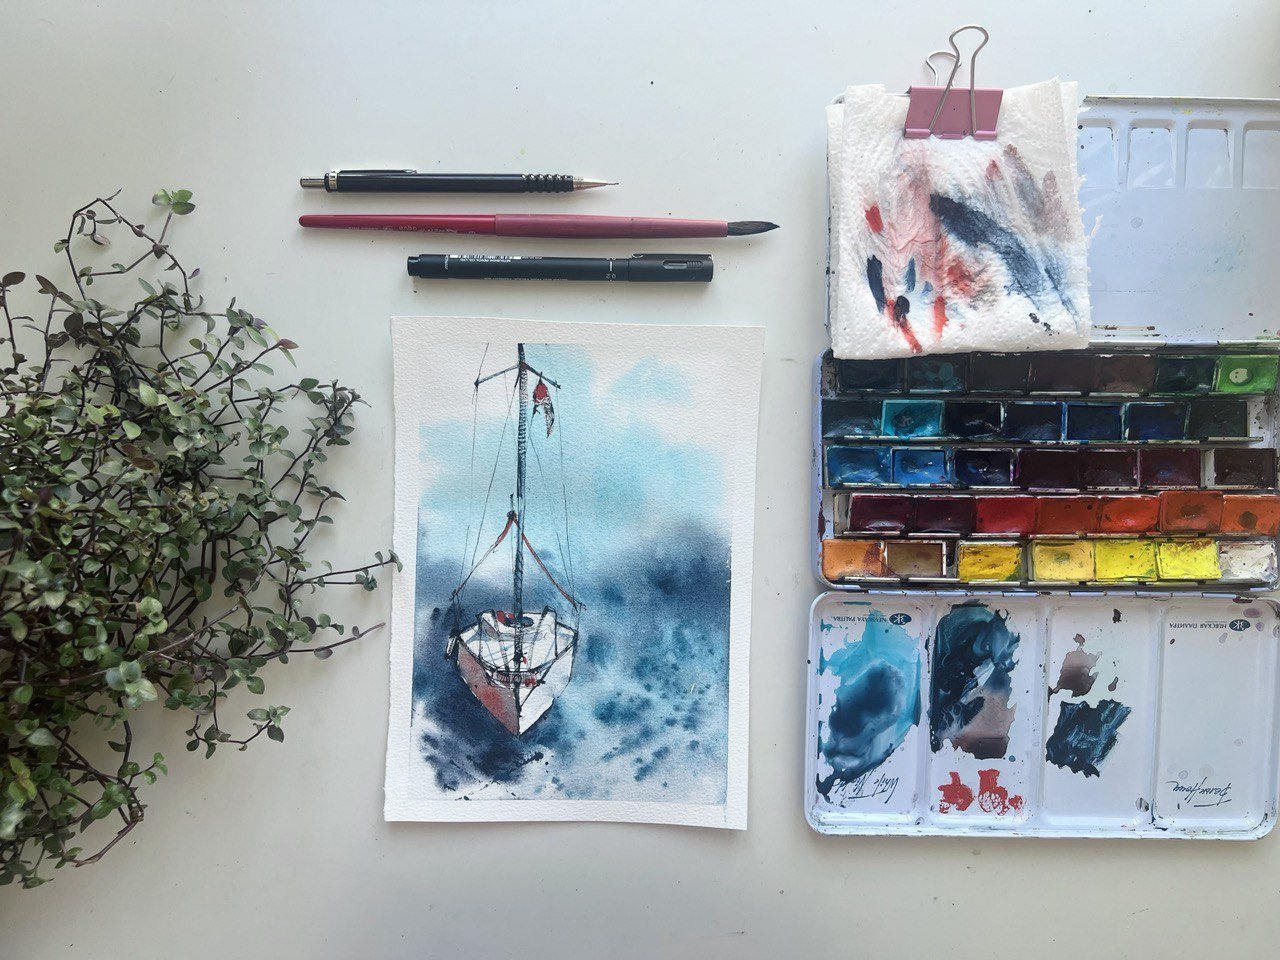
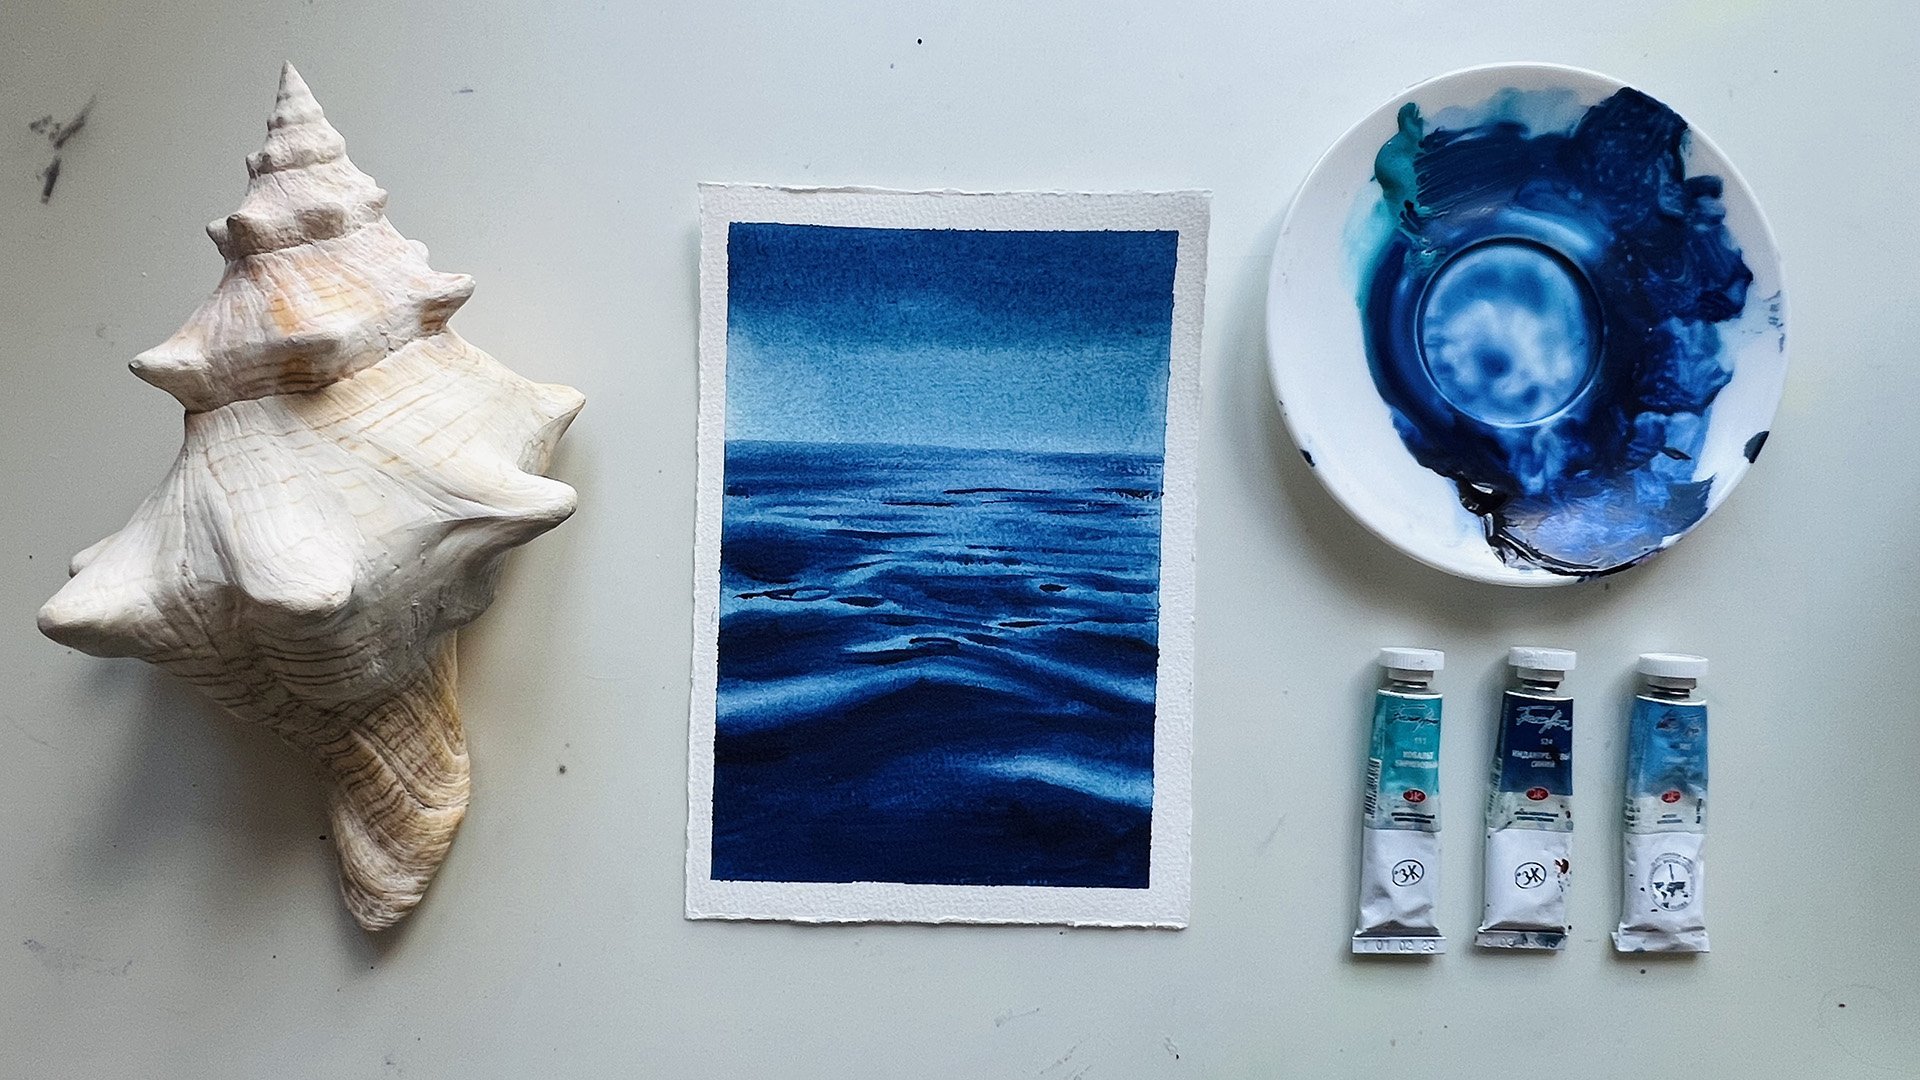
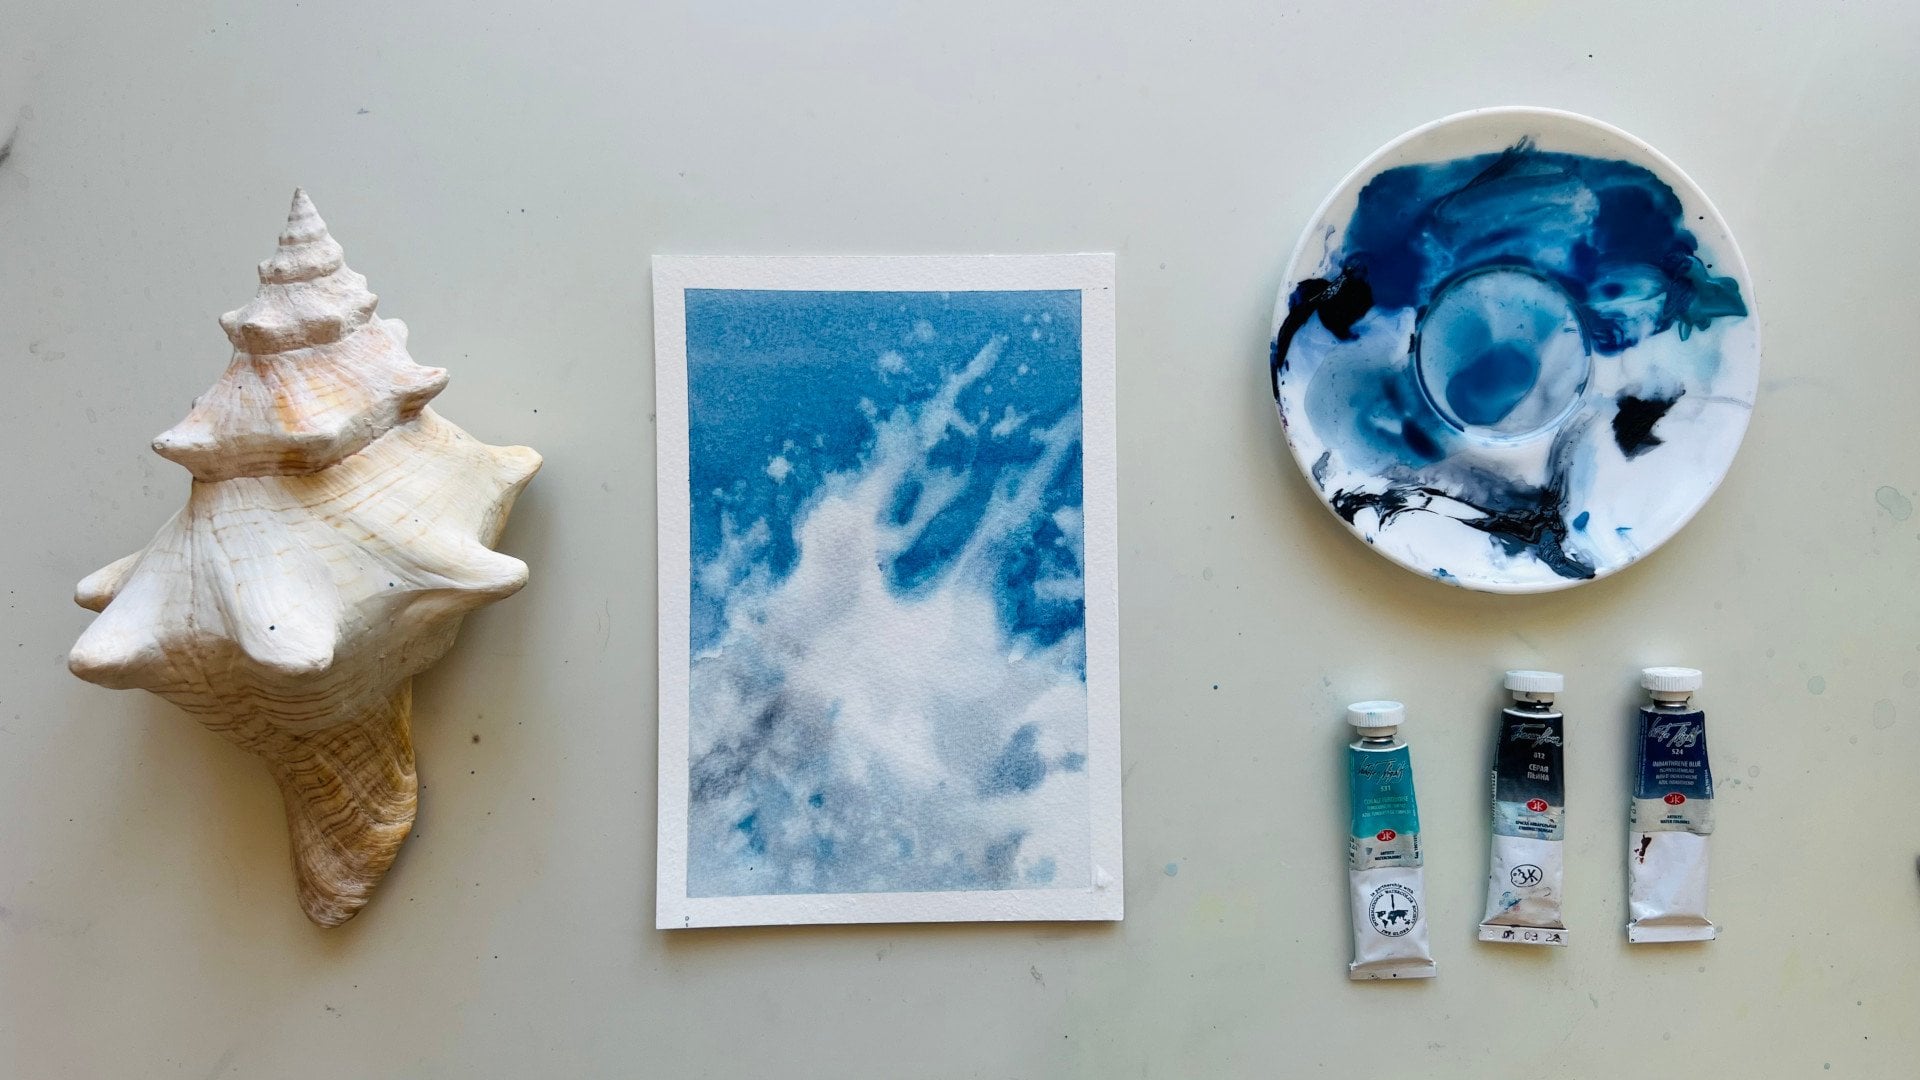
About This Class
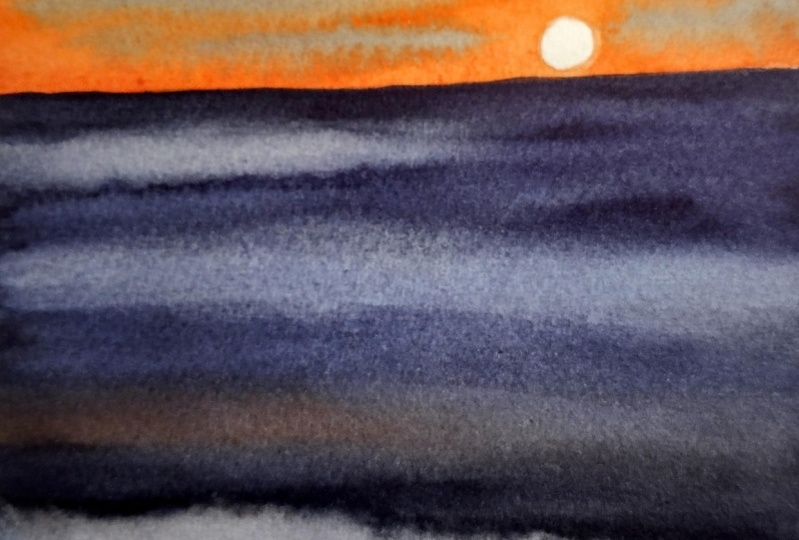
Dive into the world of watercolor as you learn to paint vibrant sunset waves. This lesson focuses on using water and color to create expressive and striking ocean scenes. Perfect for all skill levels, you'll explore techniques to simplify the scene, highlight the main elements, and achieve bright effects with ease.
In this class, you will:
- Learn Simplification Techniques: Discover how to simplify complex scenes and focus on the most important elements to create impactful paintings.
- Emphasize Key Elements: Learn to highlight the essential features of waves, capturing the essence of the ocean at sunset.
- Limit the color palette: Just three colors can convey a picturesque landscape and at the same time make the picture holistic and unified
- Create a Final Project: Apply what you've learned by painting an expressive sunset wave scene using a provided reference image.
By the end of this class, you'll have a stunning piece of art that showcases your ability to capture the beauty and power of the ocean in watercolor. Plus, you'll gain the confidence to simplify complex scenes, focus on key elements, and experiment with new techniques, allowing you to share your artwork with the Skillshare community proudly.
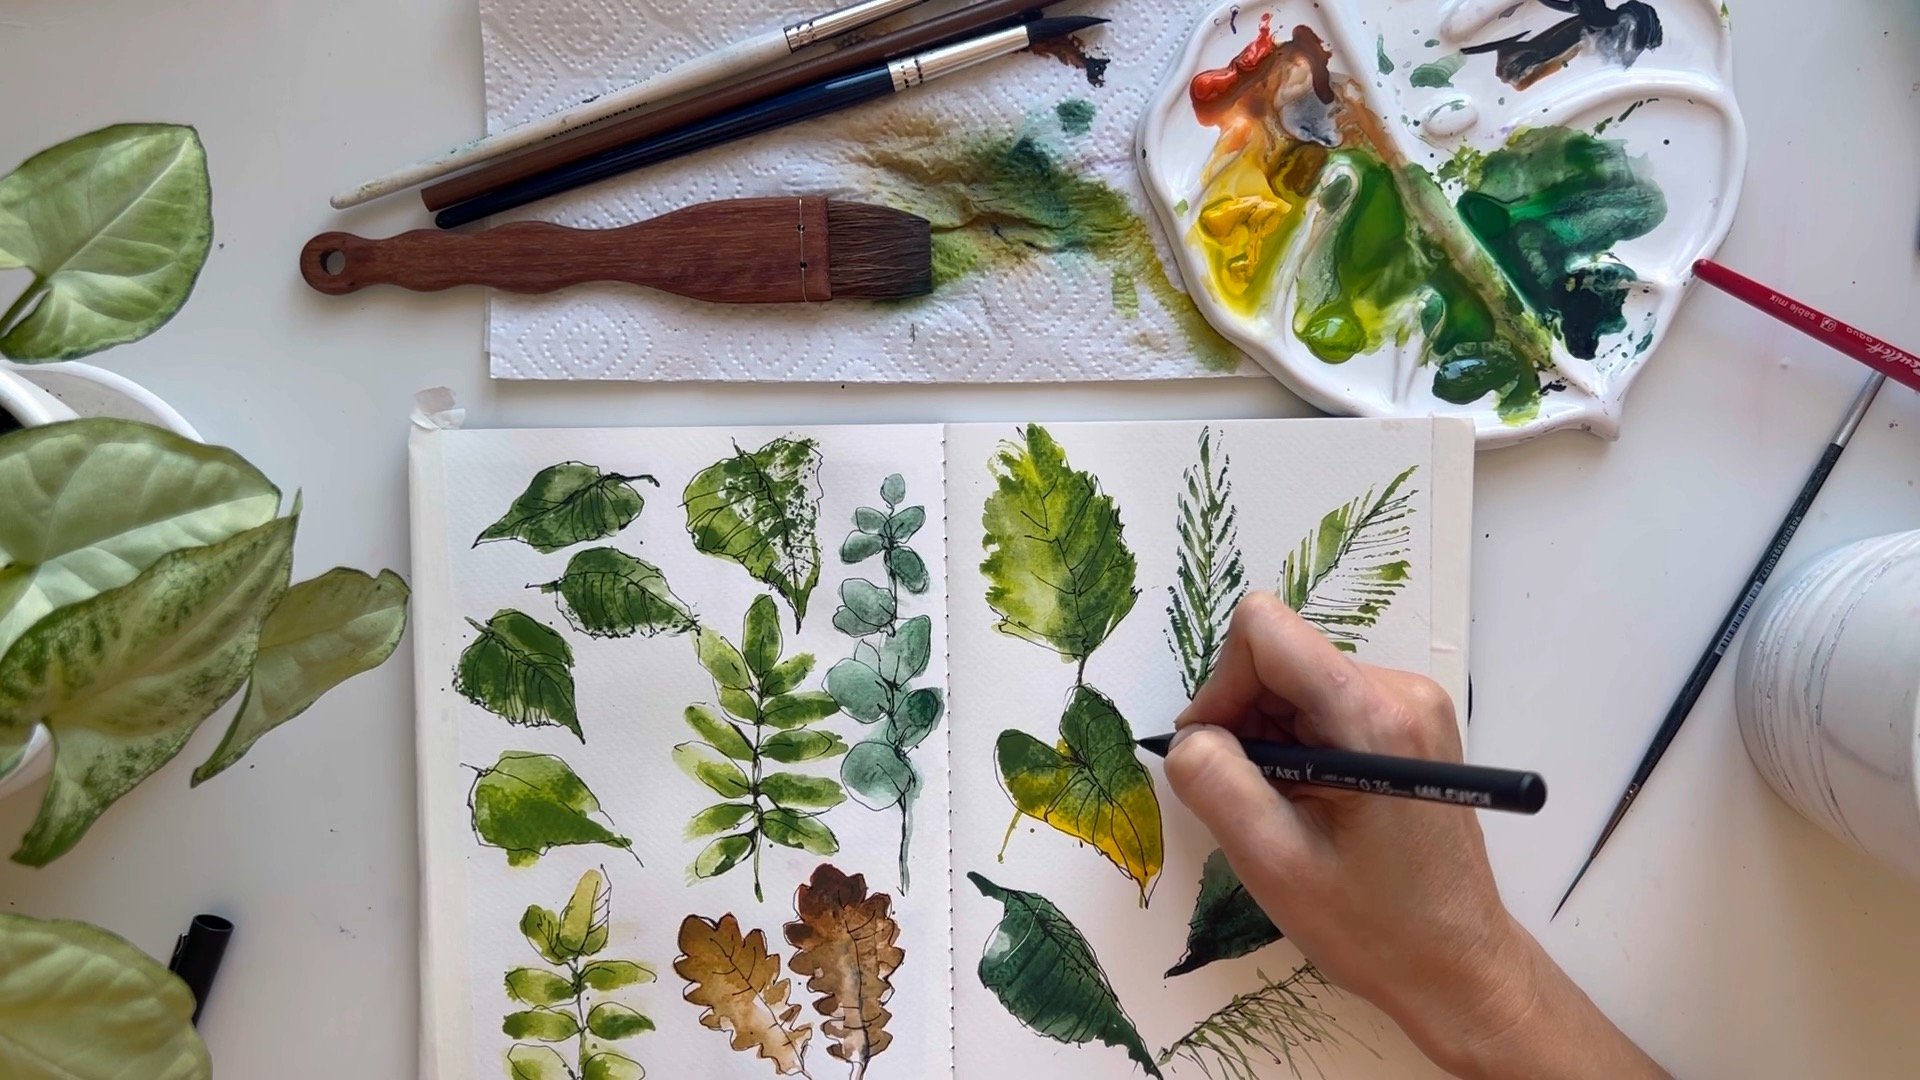
Meet Your Teacher

Hello there! I am a passionate watercolour artist, and I'm here to share the magic of this versatile medium with you. Contrary to popular belief, watercolour is easier than it seems, and I truly believe that everyone has the potential to create beautiful art.
My love for watercolour is deeply rooted in the joy of capturing life's most memorable moments in my ever-present sketchbook. Alongside these cherished sketches, I also take great pleasure in creating full-size watercolour paintings that bring vibrancy and depth to the canvas.
As a mother, I've discovered the delight of sharing my passion for watercolour with my daughter. It's not only a wonderful way to bond with children, but also a creative outlet that nurtures their artistic growth.
Let me guide you on this... See full profile
Hands-on Class Project
For your class project, you will create an effective watercolor painting of sunset ocean using the provided reference image. This project allows you to apply the techniques learned in the lesson, focusing on capturing the energy and movement of ocean waves.
Steps to Complete the Project:
- Reference Image: Download and use the provided reference image to guide your painting. Pay attention to the shapes, colors, and movement of the waves.
- Techniques and Experimentation:
Use the watercolor techniques discussed in the lesson to create vibrant and dynamic waves. Feel free to experiment with colors and methods to make your painting unique.
- Painting Process:
- Start drawing sunset sky and then filling the ocean area with paints.
- Use clean water for making waves.
- Add details and darker tones to convey depth and movement.
- Add more water to make waves brighter.
Final Touches: Add any finishing touches to enhance the overall look and feel of your painting. Ensure that your work conveys the movement and dynamism of the ocean waves.
Share Your Work:
- Once you’ve completed your sunset ocean painting, take a high-quality photo or scan of your artwork.
- Upload your photo or scan to the Skillshare project gallery for this class.
- Provide a brief description of your process, any challenges you faced, and what you enjoyed the most about creating your painting.
- Use the hashtag #natamurr_lessons to share your work and connect with other students on social media platforms like Facebook, Instagram and Twitter.
Engage with Peers:
- View the projects shared by your classmates in the project gallery.
- Give constructive feedback and encouragement to at least three other students' projects.
- Respond to comments and feedback on your own project to engage with the community and learn from each other.
By following these steps, you'll not only improve your watercolor skills but also participate in a supportive learning community. Enjoy the process and happy painting!
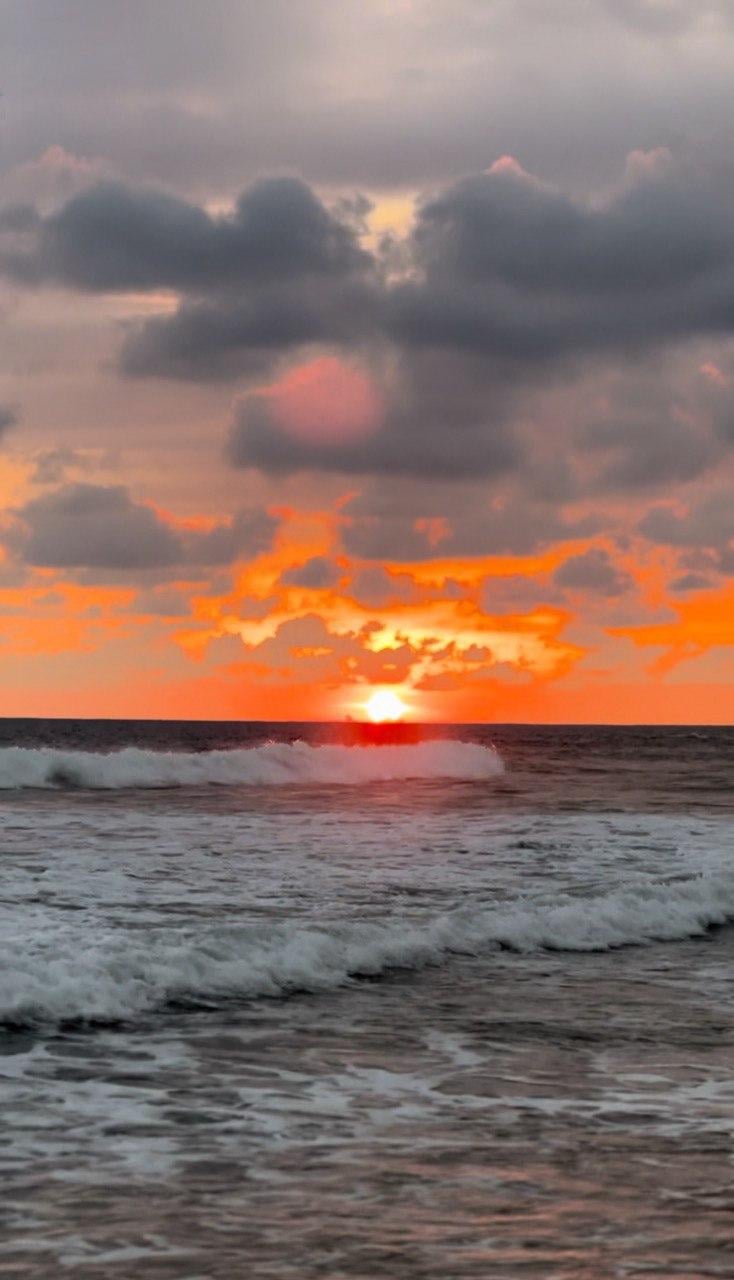
The reference:
Class Ratings
Why Join Skillshare?
Take award-winning Skillshare Original Classes
Each class has short lessons, hands-on projects
Your membership supports Skillshare teachers
Learn From Anywhere
Take classes on the go with the Skillshare app. Stream or download to watch on the plane, the subway, or wherever you learn best.