Transcripts
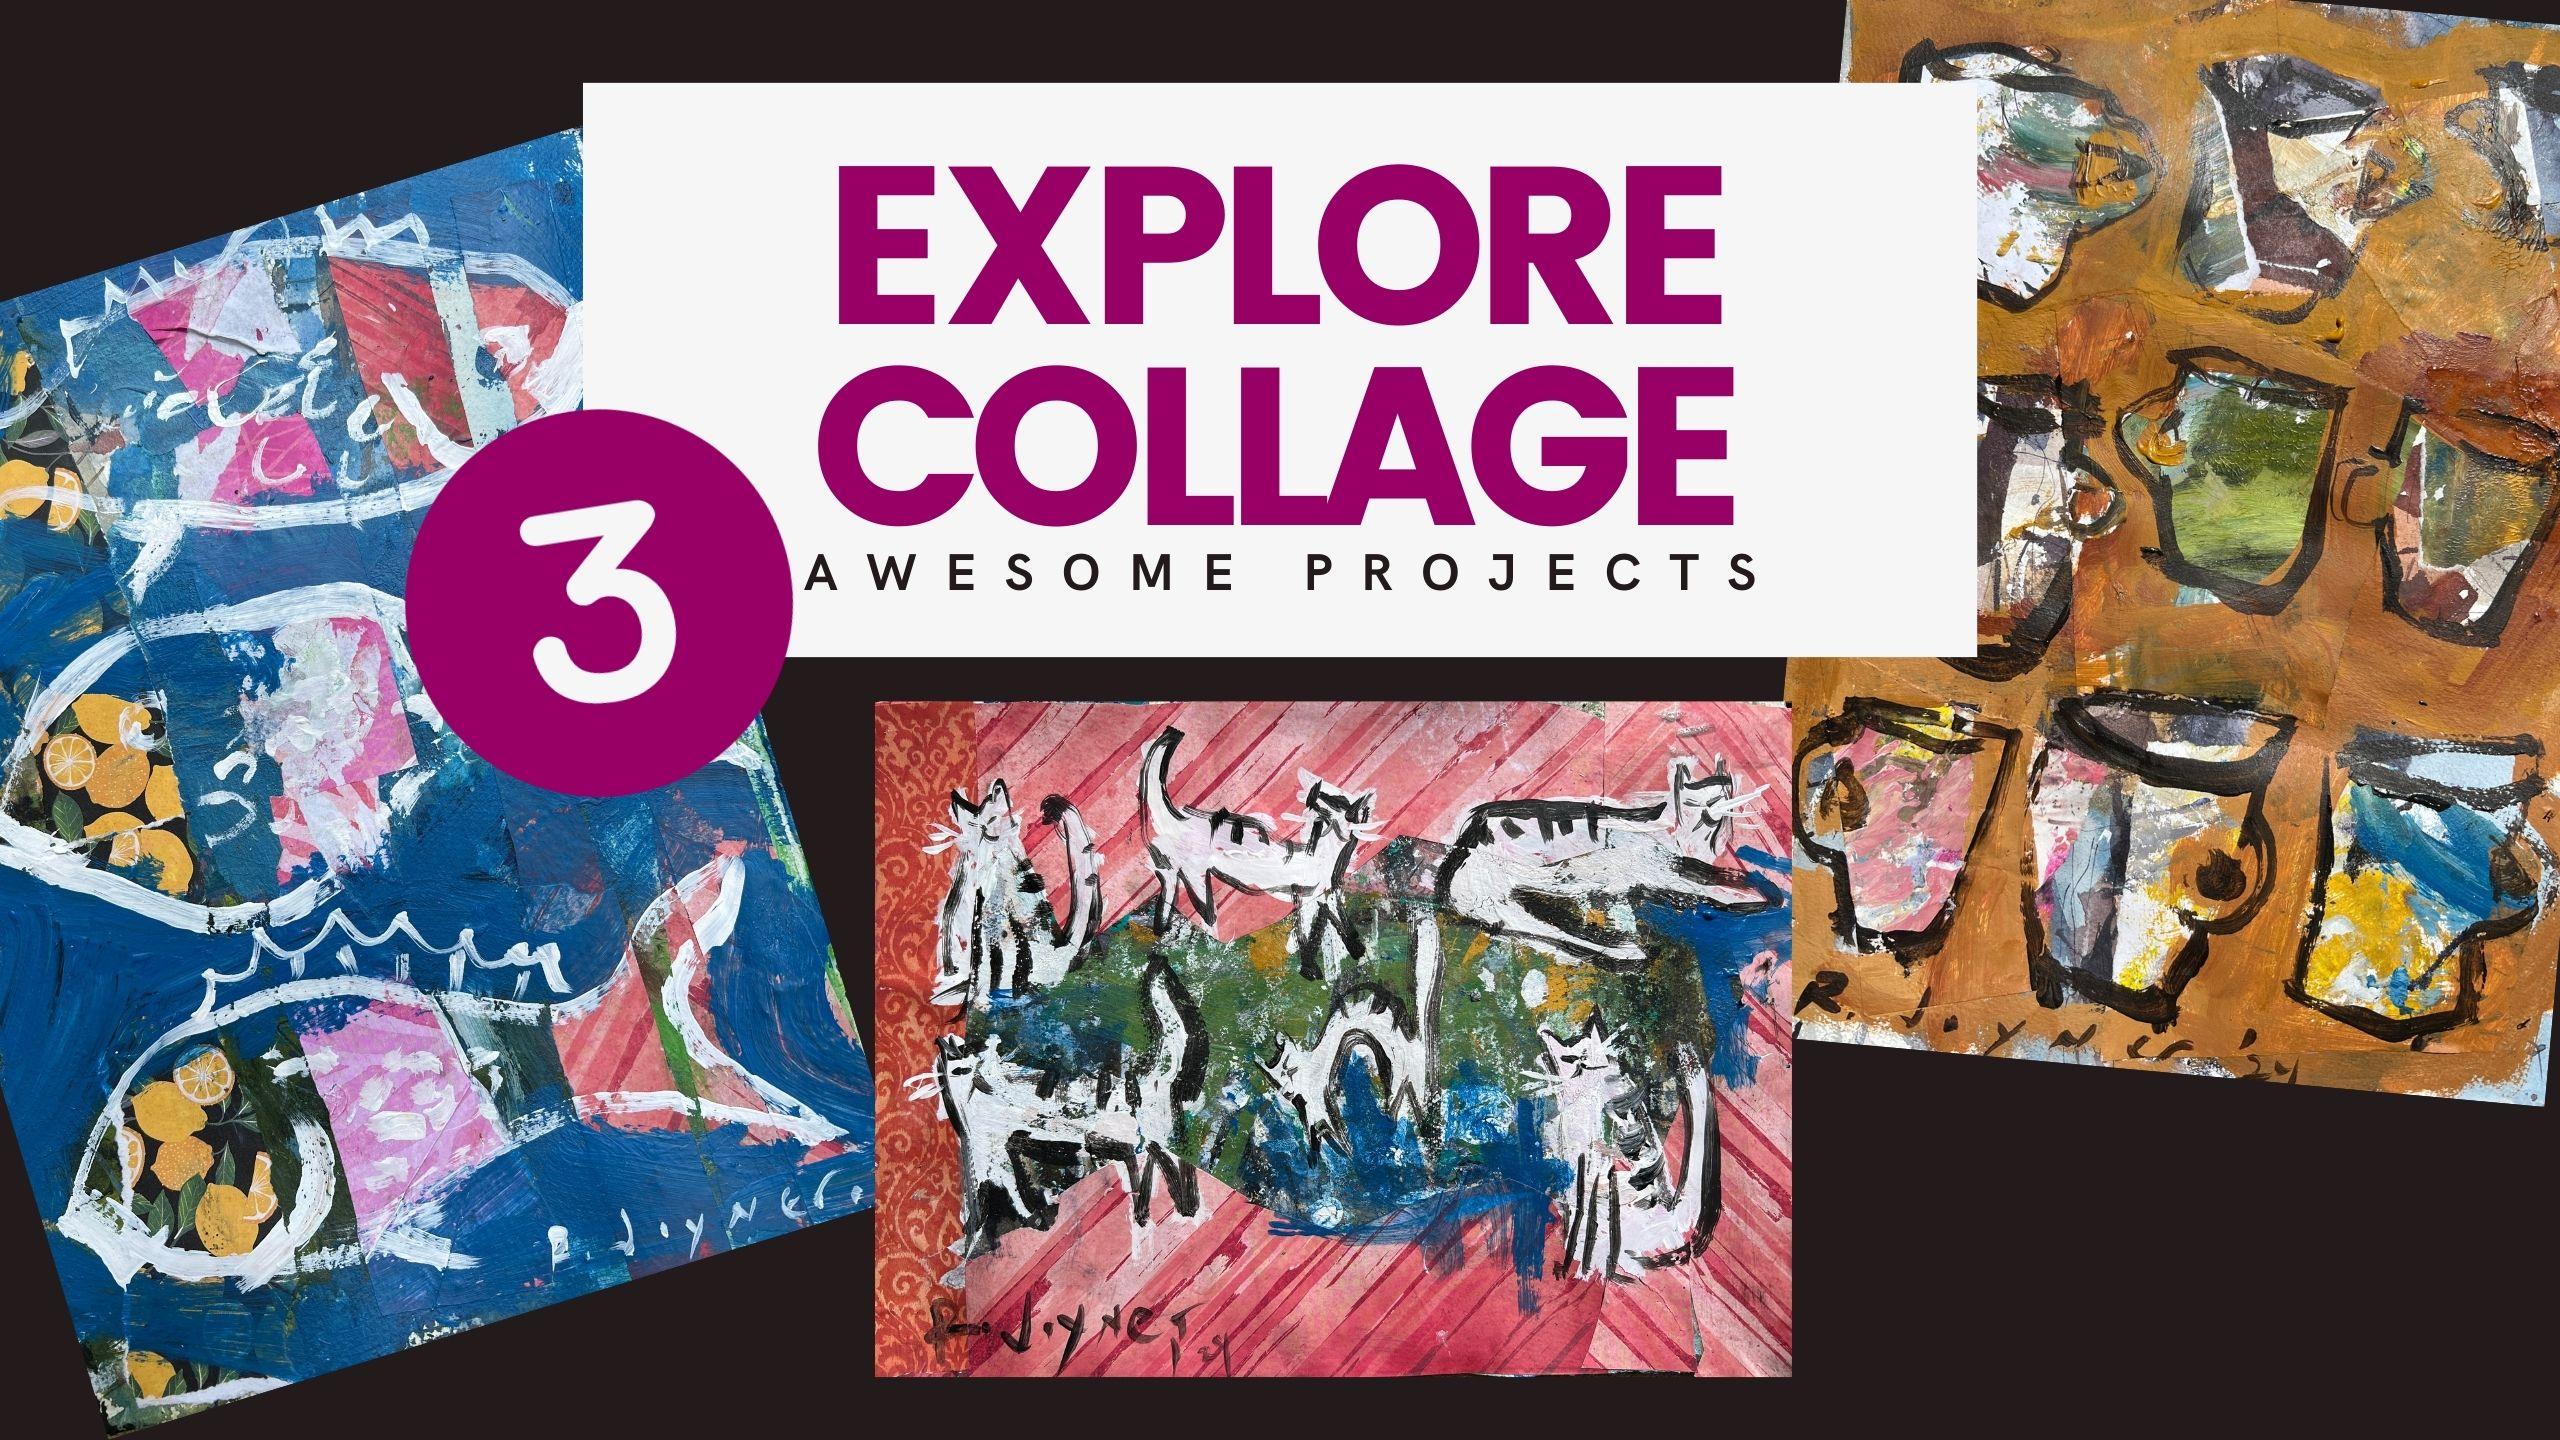
1. Introduction to Collage Class: Are you ready to break away from the traditional style and create stunning art
that's fresh and fun? If so, join me for an exciting online course where you'll explore
three awesome, creative and easy collage techniques to unleash
your creativity? Discover the art of collage and express yourself in ways
you've never imagined. This class is designed to
help you break free from the ordinary and dive into a world of vibrant,
unconventional art. Don't miss this opportunity to bring your artistic
vision to life. Enroll now and embark on a journey of artistic
exploration. Join me in creating
stunning one of a kind art pieces that reflect the unique
and creative view. Sign up today, and
let's start creating art that is as
unique as you are. See you on the inside.
2. Materials: We will look at materials,
starting with brushes. The first brush is
used for glue, only. It is a cheap synthetic
bristle brush. Perfect for that. Obviously, you don't want to use good brushes. Speaking of glue.
I will be using P 543 wallpaper adhesive. You can use Md pod,
whatever works for you. The other brushes
I will be using is a medium sized brown brush. This is good for medium size
areas, things like that. Then a liner brush. You can see that has
a nice point on it. We will be doing a little bit
of line work in this class. You can see it here
around the coffee cups. So good to have that on hand. The next thing I will cover is the collage paper in front of me here is a handmade
piece of collage paper, and this is created just
using leftover paint. I'm also using some store
bought collage paper. This can be found at
Michael's or Hobby Lobby. Usually in the
scrapbooking area. So I've got some
things like this. Obviously, it comes in a lot of different patterns and themes. So a little bit of store
bought collage paper, and then the handmade. And the handmade is created
by just using leftover paint. Instead of taking my brush and putting it in water
to rinse the paint, I simply just rub the
excess paint all over the paper when I'm
done and I'm left with this really interesting
paper that has all types of different colors and patterns and of this very
abstract sort of stuff, but it makes great
collage paper. Obviously, you can
cut this down in a different sizes,
whatever you want to do. But it's much better option than just wasting the
paint in the water, and I think that
works pretty good. So I would recommend
using 90 pound paper. So with collaging things, we'll buckle a little bit. With a 90 pound paper or
heavier works really well. Far as my setup, I have two boards that are
down on the table, and then I have a
piece of foam core. Actually that's Gator board. The Gator board is
really thick and firm that way whenever
I'm painting, it gives me a good
surface to work with. So you'll see that
as I'm working, so not a big deal there just so you know that's
the setup I have. As far as the surface, I am going to be using 140
pound watercolor paper, and I'm painting over
some reject artwork. Now, always save
my bad paintings because they are a
great way to begin art, and you can always upcycle them to things that I will
be doing in this class. Again, I would avoid really
thin paper for this class. I would say at
least 100 pounds or so is needed because again, we'll be doing some collaging
and different techniques, and you don't want that work to buckle too much once we
start putting that on. Far as the paint, I am
using heavy body acrylics. The colors I will be
using as titanium white, some ivory black, yellow ochre. Then I have some
burnt pecena as well. So those are the main colors, a little rag on the side just to clean
off and dry the brushes, and then a water reservoir, just to clean brushes in between colors and
things like that. Okay. So that pretty much covers the materials
I will be using. And now you know in case you have any questions
as we move forward.
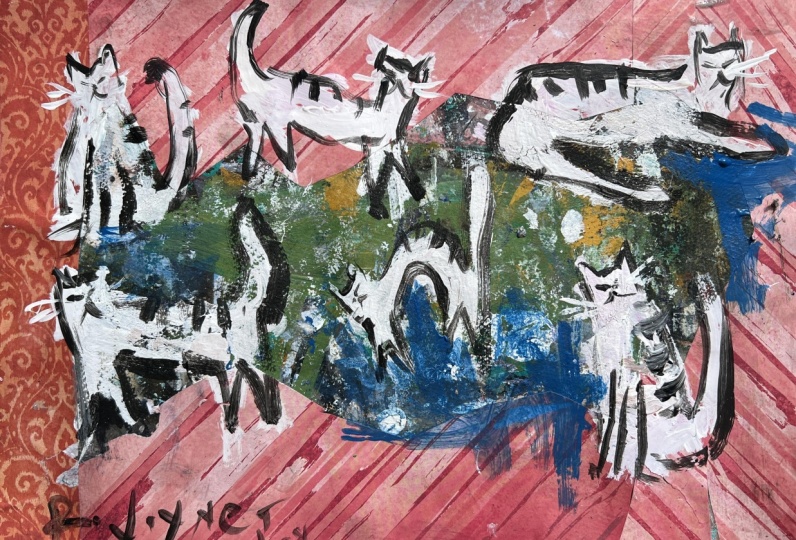
3. Collage Cats: We are going to kick things
off with some collage cats. I am going to be using the
store box, collage paper, obviously, and just cutting
some random shapes. This is going to be
used for the borders. So for this first project, we're going to do
something unique. And that's taking collage paper and putting it around the
outside edge of the paper, you don't often see that. Collage paper is typically
used a little bit differently. But in this class, I
wanted to give you some various options for using collage and not
just one technique. And hopefully these ideas
will spawn your own ideas and get you thinking creatively as you move
forward beyond this class. Once I've cut out some
interesting shapes, I will use the glue, and I will first put a little bit of glue
on the collage paper, and then I will put a little
bit on the surface as well. And that just ensures
that the collage paper will stick firmly and hold. Sometimes if you just do the paper or if you just do the canvas or the
surface you're painting on, it just doesn't hold as well. So I'll find putting a
little bit of glue on both the collage and the
canvas or the surface, whatever it is you're using
always holds really well. Any excess, I'll
just go ahead and cut off and you can see, I have a little bit of a
gap there head the top, and I'll just put
a little bit of glue down and cover that up. So just like that, that
little gap has gone, and we have a nice irregular
sort of shape there. And that's what I sort of like about using this border idea. You really end up with
some cool borders. All of these borders may not
be part of the finished art. You won't see them all,
but they'll be enough visible that it'll just look
interesting to the eye. At the end of the video, there'll be a pretty good
image of the final art, and you'll see that. It turned out pretty cool. Again, just filling in the gaps. And what's cool about this too is you can pretty
much do any subject. As I've mentioned before, I will be using cats as my muse, but you can use dogs, flowers, whatever
your heart desires. Now, I wanted to have a
little bit of variety. I feel like having all
the collage paper to look alike was a
little bit boring. So I just had another piece of collage paper there
off to the side. It's more in the orange family over the red and the pinks, and plus it has a little
bit of a different pattern. And I thought just
for variety's sake, that would give it a little
more visual interest. Now, I will start to paint and do the fill
as well of some cats. Now, again, these are
very versatile projects. You can do whatever
cat pose you like, you can do whatever
animal you like. If you want to
explore some ideas, I would go to Pinterest
and just look up like simple and cute cat graphics or something like that
or sketches or drawings, and you'll see all types
of different cat poses. And you may see some,
different ones that appeal to you that
I'm not using here. But again, just, I'll
mix it up a little bit, so I'll do a cat
standing and looking, standing up, or sitting and looking at us,
then one standing up. I've got one that I'll
be laying down here, sort of stretched
out on the floor. So cats really give you a lot of cool little poses and different
things you can work with. And I will say, as I'm painting these fills for the cats shapes, basically, I'm not obviously trying to get it too accurate. I'd like for this to be quirky, fun, almost folky looking. I'm just going to get
the general idea first, and then once this
first layer dries, I'll come back with the
liner brush and then create just enough detail
and things like that, that'll sort of bring the cats to a more
believable stage. You know, at this point, they
could be dogs or anything. But I think once it's done
with a second layer here, you'll see these things work. I really like this
pose I'm doing now when the cats are
sort of spooked looking, I think that's always kind
of fun and interesting. Typically, they do
it at a defense, trying to make themselves
look pretty big, you know, you know,
strong and all that. Look how big I am, and
then they do it as a very playful way when they're kind of playing
with each other, too. So I had to sneak that in
there because I just I love when our kittens do that. We've got one kitten, so perhaps this is where
this was inspired from. So anyway, moving on, once I get all the
cat fills in there, I will let this dry. It's important to do that. This is where it takes a
little bit of patience, but 5 minutes in the sun and this will dry really quick
since I'm using acrylics, and then I'm ready
for the second layer. Which is what I'm
putting on now. As you can see, I've
switched brushes, I've gone to that little
signature or liner brush. And just indicating. I'm not painting
things in detail. I'm just indicating eyes
and a mouth and some legs. Even a little pattern
sometimes is good, so maybe some stripes
or something like that. That'll just add a little
bit of visual interest. I think you have to be careful
with this sort of style and trying to make things
too perfect because again, the whole idea here is to create these quirky sort
of playful cats. So if you start to add
too much information and you start to knuckle down and
try to get things just so, I feel it takes away from
what I'm trying to do here. So, you can use whatever
style you want, obviously. But again, if you
want to kind of keep and theme with what's going on, then I would just suggest
just loosely paint it and you don't have to capture every little
nuance of the cat. So I think just getting those short pointed ears
or the pointed ears, get that kind of mouth. And then when I'm done with
the faces and the bodies, I'll come back and
add some whiskers. And and just sort of keeping some unity
or some consistency, excuse me with the cats by
just keeping them all white. There could have been one
yellow or one blue one. Again, you can play with color,
whatever you want to do. But I'm making all these white and then giving them a
little stripe pattern. I think that will bring the cats together and you can see the collage papers some of
that's getting painted over. The background is adding this really random color and
nothing to the painting, but it gives the cats something
interesting to be on. Again, that original painting, which was nothing really becomes
part of the final piece. Getting close here,
just carving out a few more edges and now I will use white paint
for the whiskers. I thought using black paint
may not show up as good, but I think the white
paint will pop against the darker background and even against the
collage paper as well. So that's again, you can use black whiskers
if you're doing cats or whatever strikes your fancy, so
I'm just going with it. Now just to add a little bit of variety here and a
little bit of color. That is clean blue. I'll just use that because I
really want this one cat to show that that one pose in the middle of
that bottom middle. I'll just spread a little
bit of that blue in different areas just to
create some hermony. Within the piece. But again, just a little bit,
you don't need a lot. And I think that just
added a nice pop plus some good contrast to
the reds and the orange. And always before
you're finished, go ahead and sign the
piece if you like it. And then that way, you know, whatever colors you
have in you're using, that's part of the signature, and again, it sort
of blends well. So there is the final piece. I hope you enjoyed it, and
let's move on to the next one.
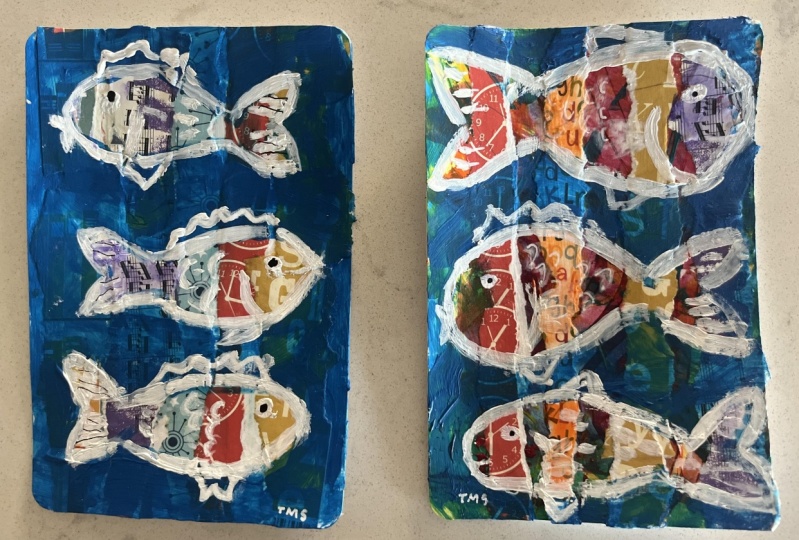
4. Collage Fish: This might be my favorite
one in the group. I just think it's so much
fun to do it this way. But I will start just by putting down glue on
the entire surface. I just think it's a
little bit quicker, especially since the
surface isn't that big. And then just a little
bit of glue on the paper. So on this particular project, the collage paper
will be strips. And again, a little
bit different then each project is a
little bit different. And the collage paper
will be used in a slightly different manner
from project to project. And mix it up. You can see
I've got some lemons there. And now I've found some
old collage paper. You can see is
mangled really bad, that sort of striped
tiger stripe, sort of pink pattern. And I just happen to
find that in the drawer. I don't throw away
any of the stuff, even the little scraps I find that are on the
floor when I'm done. I always pick that up and put it in a little box
or bag or something because I just think you can't go wrong with
pretty much anything. So by throw it away just can have paint smudges on it like this red piece here, it's got a little
bit of green on it. I think the more of the merrier, and you'll see how cool
it is whenever we're done because all of these things will become part of the finished art, at
least most of it will. Even the original
painting, though, it will think it was
an acrylic s scape or something that I lost my
way on or lost interest in. Parts of that will be
in the final piece. It's really neat to see that. It's like, all the efforts, even though the
painting didn't turn out that how I wanted, some of the paint and materials
and some of those efforts will become part
of something else. Now, just to speed
up the process, I'll remove some of
the excess glue, and then I'll take
that and put it in the sun for about 5 minutes, and then it'll be perfectly dry. I would let that collage paper dry 100% before I
go with this layer, if not, you'll start to see that the paper will start to peel
up and things like that. Now, I'm going to do contours or negative space
paint rather fish. This particular fish head on the top will be
facing to the right. The one in the middle will
be facing to the left, and then the one on the bottom will be
facing to the right. This is going to look
really rough at this stage. You'll start to probably
scratching your head, like, man, I just don't see it, where
the fish at or whatever. But it comes together at the very end when we
start doing the contours. But at this point, we're just doing
a rough outline. But look at that is so cool. I love the unity from
piece to piece as well. How you get that those strips of collage
paper that are visible, then it's painted,
then it's visible. I just think that's so cool. Anyhow, I did let this dry 100% before I started
adding these contours. So this is heavy body or titanium white
heavy body acrylics that I'm putting on now. I switched over to the
small liner brush. Keep the details to a minimum. If you put in too
much information, it'll really take away from the simplicity and the quirkiness
of that collage paper. So with fish, you
have millions of scales and all these
different fins and features, we can add. But I think just the outline by itself can be enough,
but you can add an e, maybe a top fin, there, and that's probably
not what that is, but I'm not a fish expert. Maybe suggest the
mouth on a couple, and then maybe a few fins. M gill is 92. I think the gills are
very characteristic. It's really easy. That can be done with just
like a stroke or two. But, you don't need a gill on every single fish,
maybe just a couple. Here I'll suggest
a little bit of texture with a few scales, just a few, and I'll put gill on a couple of them or
gills on a couple of them. Again, just a few dots,
suggesting some scales, but I'm not going to
cover up the whole fish because then I feel like
things get way too busy. And then it takes away
from all the collaging and the different patterns that are already in it from
the paper we used. So now I'll take a
little bit of white here and put my signature on it, and as soon as I'm
done signing it, we'll have a look at the
finished piece here. So there you go. And I think that's pretty cool. I hope you enjoyed it, and
I'll see you in the next
5. Collage Coffee Cups: Moving on to some coffee cups, and this is where I will be
using the handmade paper. As you can see, I've got all of these little pieces of paper, and here is a larger
piece as well. And again, you can take this, rip it down into
different sizes. Think that paper is
like 24 by 2018. And again, I always keep these old sketches and
studies that are I draw outs and just reintroduce them later on for
this collage paper. As you can see here, the piece from the very first lesson
that cover the materials, rip those things up and you have some wonderful collage paper to use for projects like this. As I mentioned before, you want to put a little bit of glue on the back of the paper and if you don't use it on the paper or the canvas
that you're applying it to, then just make sure
when you're done, and I'll do this later
on is that you take some glue and you go around the edges that I'm
doing right now. Again, I'll just make sure everything lays
nice and flat and hey, if you get a little piece
or two that curls up, That's not going to hurt
anything too much, either. So Anyway, laying these out. Just anywhere on the paper, there's really no
rhyme or reason. I think you just
kind of think very random when you're doing
this sort of stuff, and don't try to
overthink it easy to do. So again, just grab whatever
papers in front of you, and if you see a space on your canvas or surface
that you're using, then obviously,
you just stick it down and it'll work just fine. You'll be surprised how easy anything goes almost with
this sort of collaging. So again, just different
collaging techniques. So here, just taking the collage paper and just
placing it in different areas. And that's a little bit dif
than using it as a border. It's a little bit different
than using like strips. So again, very versatile. I will be doing coffee
cups, but obviously, you can do whatever
your heart desires. You just have to think
about the subjects and the things that
interest you and go for it. Since coffee has that
beautiful tan color to it, brown, I'm going to use that for a dominant
background color. And I think it's good to mix up the sizes of
the cups as well. You'll see as I go forward, there'll be some taller
and shorter mugs, there'll be some with handles, maybe even one without a handle. And I think just having
some variety is important. And be patient and know that as you're doing
this sort of stuff, and doesn't really come
together until the last stage. The last stage is
when you come back, hit it with the outlines
to suggest the contours, and that's really when
it comes to life. So don't be too bothered. You know if things
aren't perfect in the beginning, that's
perfectly fine. So as you can see
on that top row, I've got a oval looking cup, that's tapered at the bottom. I've got more of a a
standard coffee cup there in the middle. And I have a little short one, a small one in the top
right hand corner. Again, just some variety is what will make it a
little more interesting. You may have a certain shaped coffee cup that
you use all the time, and that's perfectly fine. You mix it up. You can even do You
know a coffee pot. If you want to mix it up, that would be a good
thing to put in there. You could even put in
a little half and half or a little spoon
near a sugar bowl. Again, it can be a theme. You can theme things out
and do whatever you want. I'm just going to keep it
simple and just do the cups, and I think that'll
work just fine. With this one, I'm painting now, it's just a little bit taller
than the rest of them. So that nice perhaps
even a travel mug, I think is good. But looking at this now though, look at how all
that collage paper and even part of that
original painting, all that stuff is
getting used now. It's all part of the piece. That's why I love starting with reject pieces because they offer these very
interesting backgrounds that we can use that will become part of another finished piece. Believe me, I throw away
nothing in my studio, I create a lot of bad
art, but I save it all. Now, I'm going to take
that and put it in the sun for several minutes
and then get it dry. Now that it's dry,
I'm going to use some black and thin it
out with water. Heavy body acrylics tend to
get a little bit chunky. But if you thin them with water, I'll come off the brush a little bit easier than not doing it. And I think that'll give
you some good thin lines. If you press down into the
paper a little bit more, the line's going to
get a little bit thicker because of the
pressure into the surface, the bristles will spread out, and that's perfectly fine. Basically, what I did
in that first layer was negative space paint. I just left the shapes
of the coffee cups. And now I'm just
thinking contours. If you wanted to, you
could go in there and add stripes to the cup or some
pattern if you wanted to. But I feel like sometimes
if you do that, it can get a little bit loud. I'll get to be too much. It also takes away
from the freshness of that collage paper and
the painting underneath. So I've done it both ways, but I again, feel
like keeping it simple is enough because
it's busy enough already. A nice simple brown background really pops the cups as well. If that's too busy, then sometimes that can get it can take away from the cups. So now, it's all done and easy. This stuff is so
easy, it's so fun. Each piece is very,
very different, and I just think it's such a cool project to do
great gift ideas as well. So there's a look at the
final piece and this move on.
6. Projects and Recap: I hope you enjoyed
the class as much as I did putting it
together for you. I hope that the techniques and ideas I shared with
you will inspire you to create art that's a
little less traditional, have some fun with it. Anything goes. I think these
projects are very versatile, so you can add your own
twist to them as well. Reminder that SkillShare
offers projects a great way for you to share the work
you created in this course. I will peruse the site
every few days or so. So if you have any questions,
comments, or suggestions, feel free to add them as well, and I will respond accordingly. If you want to learn more about painting loose,
Expressive artwork, be sure to check out my
profile here on skill share, you'll find plenty of other
classes to check out. But for now, it's a bye, and thank you so much
for your support, and I hope to see you
in the next one. Bye.
 ROBERT JOYNER, Make Art Fun