Transcripts
1. Welcome to Class!: Learning and practicing
Waco painting has never been easier. And as amazing as this is, having access to so much
information can quickly become overwhelming and make it difficult to create
finished artworks. But I think I can
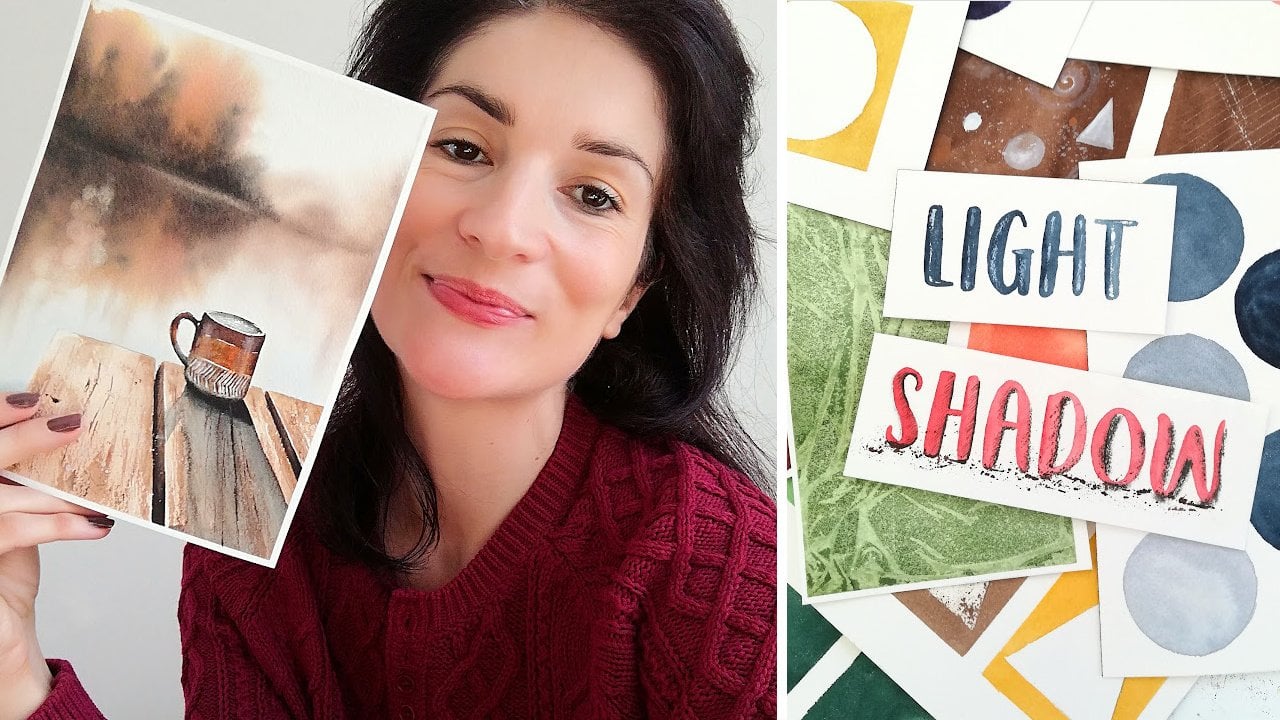
help you with that. Hi, I'm Zaza. I'm an artist from
Southern France and even though I love
all the mediums, my favorites are watercolor
and Waco pencils. I love to research, practice,
document, and teach. I learn and ever since I've started painting four years ago, I created many painting classes here on skillshare and
I managed to grow and engage community of
fellow art enthusiasts on Youtube and Patriot. I also host workshops
and classes in my town. When I notice a pattern
that I know will help others learn and improve
quicker, I'm going to share it. And that's why in this class, not only will I teach you essential modoc techniques
I always use in my art, but most importantly,
I will also show you how to piece them all together so you can start
painting on your own. Specifically, you will
experience firsthand how easy it is to create simple
yet realistic artworks with watercolor paints. Because each lesson builds
on top of the previous one, you will be able to reuse your new knowledge
every time and understand how to combine various techniques in
one simple painting. This approach will make it easy and fun to paint
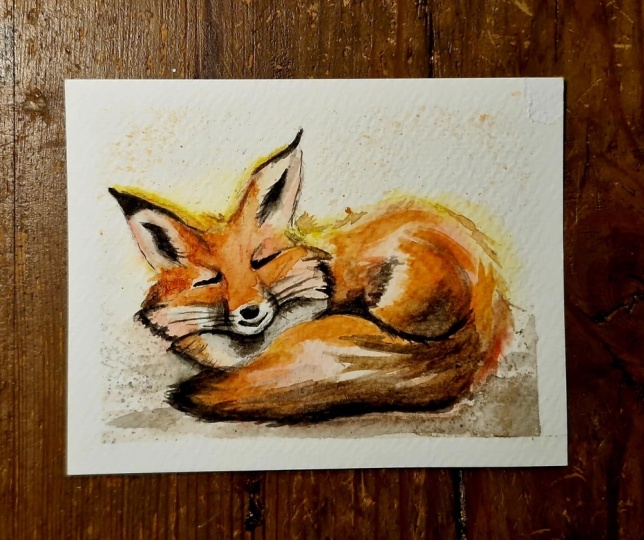
the class project, a very cute sleeping fox. This class is for anyone
who wants to learn a simple way to paint realistic
watercolors and figures. We need a structure to lean up during and after the class. It's time to get started, so I'll see you next to learn more about
the class project.
2. Class Project: Your project for today
will be to paint a fox using the techniques
demonstrated in the class. But first, we'll practice eight
different techniques that built on top of each other to learn something
new every time. And also understand
how to combine essential watercolor
techniques to go from blank page to
finished piece of art. This will give you
a structure that will make the painting
process easier, especially if you're a beginner, remember to check out
the resources section to download the line art for each
exercise for the project, and also a list of the supplies. And when you're ready,
you can take a photo of your artwork and share with
us in the project tab. I'll be happy to help and
give you some feedback. So see you next for a quick tour of the
supplies we'll be using.
3. Useful Supplies: Let's talk about the supplies and you'll see they'll
be very basic. First, you're going to
need some water coat of paper and any kind that you have will do
for the class I prefer. And I recommend the
100% cotton water Cota papers cold press because
that's what absorbs water. If that's not what you're
going to be using today, don't worry anything
will do as long as it's watercolor paper and to
practice all the techniques, you'll need 105 by 5
" squares like these. You'll need a six by 8 "
sheet for the final project. You can also grab some spear sheets if you
want to practice a little bit for
watercolor paints, you can use any basic
set of 12 or 24 colors. Whatever you have,
whether it is half pans, pants, or tubes,
it doesn't matter. I'm going to be using very
simple colors like blue, pink, red, yellow,
brown, and black. And you can even
stick to just blue, red, and yellow.
That'll be enough. I'd like to have a
selection of paintbrushes, but a minimum of two would
be enough for the class. I would recommend a round
paintbrush like these. I have a large one and a smaller one because
that makes it easier for me to paint on
various sizes of paper. But I recommend that
you use what you have. I also like round and pointed pain brushes
like these ones. Don't forget to check
out the supplies list in the resources section for the exact references
of what I'm using. I like these in particular because they're pointing
at the end and they help me get into the little nooks and crannies of the paper
and paint small details. A flat pain brush like this
one is completely optional. It's just helpful sometimes
to wet a sheet pretty fast. Remember that two
round pain brushes are going to be really
all you need to complete the projects because
I find that it really helps to avoid
and get stuck on getting the exact supplies
that the instructor has not what's going to
affect the painting, the most really masking
tape is going to be really useful to tape the sheet all around so that it
doesn't move when we paint, I really recommend that you try and find
something like this. This, for example, is
construction tape. It's pretty affordable
in water painting. Two water jars are
also very useful. One to wet the paint marshes
and one to rinse them. Can grab a few paper
towels as well. They all come in handy
during the painting process. A mixing tray, and I love these built in mixing
trays in those palettes and you'll find very
basic beginner palette with only 12 colors or 24 colors with the mixing
tray, then that's optional. But for those of us who are
not very patient to dry a wet sheet with a heat gun or a hair dryer is very useful
if you have wine and grab it. Finally, to draw the sketches that you can download from
the resources section, by the way, you'll need
a pencil and an eraser.
4. Watercolor Washes: In this lesson, we're going to talk about watercolor washes. And first of all, what
is a watercolor wash? Because that's the term we
hear over and over again, It's actually pretty simple. Think of a watercolor wash
as a series of brush chokes. We need several brush to paint something that is going to
serve as a background sky. Any large area of paints
that we need to cover, we know what a watercolor
wash looks like. There are also several
types of watercolor washes. The most common ones
are a flat wash, it's a solid, smooth
color like this. Then you have the graded wash. So you can make a graded
wash with one color and create a gradient between
that color and paper. You can also use two or
more colors and create a gradient between two
or three or four colors, no matter how many you choose. Then you also have
the wet and wet wash. In this lesson, we're going to practice the flat
and the graded wash. In the next one,
we'll talk about the wet and wet wash. Let's start with the flat wash first. To paint a flat wash, you'll need a watercolor paper. You can refer back to the
supplies lesson using this small five by 5 " paper
just for the exercise. Then we'll need
some masking tape that's going to be very useful that sheet doesn't
move around and that we can paint without
worrying about it. I'm just going to take this now. You just need a little bit to
tape the edges all around. I would recommend to
do this all around because if you leave
the sides untouched, then the water is going to creep underneath
and paint as well. If you take all four sides, the paint and water
will be contained within the limits of
the masking tape. You will need a round paintbrush and you really want to
pick a pain brush that's going to make it easy to
paint all over your sheet. If the pain brush is very small, it's going to take a longer. If it's very big, it might not help with the little control
you might need to apply. Just make sure it just
fits well, like this one. Then you're going to
need your water jars. You want to wet your
paint brush like this. Then you want to
go get some paint. Any color will do. I'm just going to keep going with blue. I'm adding paint into my mixing tray and then I'm going to add
a little bit of water. I want to make a creamy
mix because I want it to be easy to
paint with this mix. It's too thick with paint, it will take longer for
me to apply the paint, and the paint will drive fast. Then if it's too watery, it will dry very light. Because as you
might already know, water colors tend to look
darker when they're still wet. You really want
something creamy like this that looks pigmented. But still, that's
easy to move around. You're going to start
applying paint to paper and we're not going to take too
much time to do this, we're just going to
go back and forth like so pick up more
paint when we feel like we need try to cover
up everything and just not leave any specks of paper showing if you do
it pretty quickly. And that the paint consistency like the one that
I'm using now and that your paper makes
it easy for you to paint like it's the case
with mine, it's 100% cotton. Paper absorbs water really well. Then you get to end
up with something that looks pretty smooth
like it's the case here, this is a flat wasa see that? For me, it was easy to paint
because the sheet wasn't too big and my paintbrush matched
the sheet pretty well. Now we have this. We
can either let it dry, or you can grab a hair
dryer or a heat gun. And I'm going to show
you how I dry mine. Basically, when I
use my heat gun, I don't hold it too
close to the sheet. And I try to go all over the artwork in circular motions
so that it dries evenly. Because if I start drying
one side and not the other, we're going to see
some marks forming. So that's very important. You're going to see how I do it. I'm going to show you right now, and that's it. Most beginners make that mistake of drying their sheet very fast, and they think it's dry, but it's usually still
a little bit damp, I can tell because
I'm used to it. So watch out for this. Take your time and make sure
your sheet really feels dry. That's very important
with watercolor, especially when
you want to layer more paint on top of a
flat wash like this one. We're going to untape this. Now take a look
at our flat wash. I know I don't need
to be too careful when I pull that
tape out of there, but yours might tear the sheet. Be careful if you're
not used to it. There we go. We have a nice flat wash. You can
see it's smooth, it's even. And that's what we might need for any watercolor
painting for a background, for instance, for sky painting, can be very useful for
many different things. Now I'd like to show you how to paint a graded wash. That's when we try and build a
gradient into the background. Now we have this,
we're going to work with the same mix of paints. It is going to make it easier. Let's just make a
little bit more. I'm adding a little
bit more paint, a tad more water. I always try to use the same
water jar whenever I want to clean up my pain brush so that both of them don't
end up very dirty. That's why you have
to generally because you want to make sure
that one is always clean. So you can use for a clean
wash paint for instance. But most of the time when we
get started with watercolor, we forget we're in a
hurry. Don't worry. If you mix a pain brush
in the two of them, then you have to change the
water quite frequently. That's absolutely normal. I'm still working with
my round pain brush and I'm actually going
to use another one. You could also pick up
a flat brush for this because we're going to use
the second pain brush, wet the sheet first. I do this because it's going to be a lot easier
in my experience, to make a graded wash when
the paper is already wet. Paint dry less fast,
it's a lot easier. Let's just wet this
sheet with clear water. And that's why, again,
clear water is so useful to have you just wet it
pretty generously, especially if it's
100% cut in paper. The stylo papers will take a little bit of water
but not near as much. I'm really rubbing the paint inside the fibers of the paper. That's really the secret to keep your sheet from drying too fast. I try not to leave
any puddles on top, so I really try to get
the paint to sink inside. Once that's done again, I just soak my other paint, brush into the paint. Then I'm going to start
from the top once more with back and
forth movement. Right now there's no gradient. It's just a solid color of blue. So what I'm going to do
is just rinse my pain. Brush slightly, we don't want
to remove all of the paint. Just rinse it and make sure there's still a
little bit of paint on it, but not that much.
It's more watery. Now, notice that I took
some of the water off, so it's not dripping wet either. Now, I'm going to keep going, and if it's too dark
I could repeat. You see it's still
saturated with paint, so that means I should
have taken more out again. I rinse my pain brush
and I make sure to take the excess water off. I keep going and you can
see it's a lot lighter now. This is a lot easier to do
when the sheet is already wet. It gives you more time to work. I also find that the paint with just thinned in the water jar here is going to mix better with the
original mixer paint. If we want, we can pick up
a little bit more paint from our mix before it dries. We can add a little bit more on top with that back
and forth movement, then make a few lines
to really build that gradient into
the sheet here that we can repeat as
the paper dries. You can even add a little
bit of paint to your mix that's a lot thicker and add a little bit
on top like this. And here you can see we have a gradient between the top of the sheet here on the bottom, dark blue, light blue. I'm going to dry this. Now, let's remove the tape. Here you have a nice
gradient and you can see the difference
with the flat wash. Let's practice the graded
wash with two colors. Now we're ready to paint, but before we even think
about adding all the colors, it will be interesting to
prepare the second color. I always do this for all of
my paintings and that really takes the overwhelm out of
having to mix the colors. I really recommend
that you always take care of the colors
before actually painting. I think with blue, pink would look very nice because pink and blue turned
into a purple. Try to pick a combination
that turns into a nice color. Like for example, blue and
yellow would turn into green. But I really like the
blue pink combination. It's one of the
best ones for me. I'm just going to look for
a pink color in my palette. I'm going to use a color called Rodon Magenta from Daniel Smith. But any pink would work again. See, this is a little bit thick. I'm going to add a
little bit of water. I just hit my paint brush into the dirty water from
before. That's all blue. Don't worry about
that blue color disturbing your pink here, because this is just
a little bit of blue diluted in a lot of water. So it's not really
going to do anything. You just don't want to mix
those two colors together here. This looks good. Here's a little trick
that I used to make it so easy to paint with
different colors without wasting time washing the pain brush in
between color changes. Let's just use two
paint brushes, one for blue here
and one for pink. That means I'm going
to use another pain brush to wet my sheet. Because remember, graded washes. Wetting the sheet first
will make it a lot easier. I'm just sizing a flat
pain brush right now. Whatever I have and
whatever you have, wall work again, I make sure to push the water inside
the fibers of the paper. Once this is done once more, I make sure my pain
brush is full of paint. And I'm going to
start from the top again with blue again, a little bit of back and forth. I'm going to stop in the middle. And then I'm going to pick up my other pain brush and do
the same from the bottom. This time I keep up
until both colors meet and I start overlapping a little bit because you can see the difference
between both colors. The gradient is not
that great yet. I'm just going to repeat this. I'm going again with blue, then I'm going to take a
little bit of pink again. Going up here, you can see purple forming if you still don't
like the way it looks. If you feel like the
grading is not good enough, you just keep, the goal is to be able to mix both
colors where they meet. Really create that gradients. You see I'm overlapping
blue onto pink to really ease that transition here. Again, I think it
looks pretty good. Now, I'm just going to dry this. Here we go now with our
graded wash with two colors. My grade in here is
not quite perfect just because a hair got
stuck on the wet paint, I got a mark from it. That happens. And
that's not a big deal. If you can see both colors
really mixed nicely, you have a nice purple
color in the middle. From now on, when you hear
about watercolor washes, you'll know exactly what it
is and how to achieve one. I hope that helped, and
that was interesting. In the next lesson, we'll start studying the wet
and wet technique, which is one of the most
important watercolor techniques.
5. Wet-in-Wet: It's time to practice the
wet in wet technique. And you will quickly notice
when you water color, how useful that one is. Just like we did with the
graded washes earlier. We'll need to wet the sheet
first with clear water. Then we'll apply paint
with a paint brush. That's why we call
it wet and wet. This technique will be
extremely helpful for backgrounds that
look smooth colors, blend the dreamy water colors. What I'm doing now is just make a little bit more
of that blue mix we prepared earlier
because I would like to show you how to paint
a sky with clouds. This is the most basic exercise, but also the one
you'll get to re, use in almost every painting
if you like backgrounds. Now I have a nice mix of
paints that is creamy. Not too much water
nor too much paint. Too much water will
look like this. Here I'm adding water
to my paint brush. This is very watery, very clear. That's not going to
show much on paper. On the opposite, if you
add too much paint, it's going to be a
little thick here. When I add a lot of paint, you see it's a lot thicker, harder to move around, and that's going to dry quicker. You'll end up with more
blotches, more marks. That's why we really want to
go from something creamy. Actually, when I
mix both of them, now I get back to a
nice consistency of paint. It's about the same. First thing we want to do is dip a clean paint brush
in clear water. Like we did with the graded
washes and a flight on paper, we really want to push
that water inside. My paintbrush is actually
not quite clean. You can still see a
little bit of the pinks I used earlier because
it's so light, it's not really going
to be a big deal. It happens a lot when I paint. You really want to try
and be careful not to have a dirty paintbrush
or dirty water. A little is okay. I prefer to leave all the little mistakes
in so that you can really see what to pay attention
to, what to avoid. Now let's pick up that blue mix. We're going to tap
in on paper at this time to create
a sky effect. And this is really the
wet and wet effect. You see how the paint
spreads all around, how soft and
beautiful this looks. Let's say I'm painting a sky, going to create clouds. I'm going to add a
little bit of water to my brush so that the blues inside are not as strong and I'm going
to keep going. At the same time, I'm leveraging that knowledge and practice we got from the
graded wash earlier, we can see a nice
gradient forming. You see, how are we able to leave some of the white
of the paper out. But still, because of that
wet and wet technique, we're getting those soft
edges that's very useful, especially for skies
as you can see. Let's add a little bit
more blue in places. I like to do it on top. For skies like these,
it gives more depth to the painting because you have to imagine what's on
top is closer to us, While what's at the bottom
is in the much farther, much lighter here already,
that's all we need. We have a wet and wet
technique effect. Once again, you can let it dry or you can use a heat gun or a hair dryer in the
same way that I showed you earlier
Soc in the motions. And make sure to cover
up all of the sheets. We're ready to remove the tape. When you see that the sheet buckles a little bit like this. First make sure it's really dry, then place it
underneath a pile of books overnight or
just for a few hours, and you'll see that it will
flatten it really well. I want to show you how soft those edges look all
around the clouds. And this is the magic of the wet and wet technique for anything that is
meant to look blurry, where you don't want any
harsh edges showing. This would be the
technique to go for. I would use this in the
skies, mostly galaxies, even the water, even
painting the sand, at least a base layer. And then you can still
add details over the top. Generally, when I
paint landscapes, I'll start with a
wet and wet wash. I'll let it dry, and then I'll add details over
the top of that. Now you know how the
wet and wet technique works and how to
actually execute it. We're going to
take a look at the wet on dry technique next.
6. Wet-on-Dry: In this lesson, we're
going to practice another well known
technique and it's called the wet on dry technique. What is the wet
on dry technique? Is keeping the sheet dry and applying wet paint on
the sheet, wet on dry. And you can see how it
differs from wet and wet, where the sheet was and the paint was added
onto a wet sheet. This technique is really
useful when you want to paint some specific
like for example, here we want to paint a leaf. We do not want to
wet the background, otherwise colors are
going to flow all around. Be no leaf. That's also
because we're using the wet on dry here that I did not
take the sheet all around. There's no need for this. I'm not planning
for any background taping the sheet on top and
at the bottom is enough. Remember the golden
rule of preparing your paints before
actually painting, I'm going to be mix
a little bit of red. You can take any
red that you have. I'm just going to pick this one. This is actually the
center bright red, but anything will do. I'm just mixing a little
bit and we want to make it a little
bit creamy like, because once more it'll
be easier to paint with it and it will also mix
better to that second color. We'll go on to prepare. Here's the red mix. I'm just going to rinse the
pain brush real quick. Now, we're going
to pick up yellow. I'm just going to go with that. Daniel Smith hands are yellow. Anything you have is fine. I'm going for yellow here
because I want to paint an autumn leaf with the
white and technique. I know that yellow and
red turn into orange and that's going to give us
more variety in the paint. It's going to be nicer. Our mixes are ready. Now, the next thing I'd
like to point out to you is that I'm using a smaller
paint brush this time. Because imagine if I used
this large paintbrush, it was great for painting
background on this sheet. But here it's a little
bit big. I could use it. It's just not as
convenient as this one. That's why I'm
going for that one. Just pick up anything that
feels more convenient to you. Now remember we do not
want to wet this sheet. I'm going to go
with yellow first. I'm going to apply it on dry. And you can see
that paint doesn't escape because the paper is dry. And that's where it's very
convenient to create a shape. Let's just do this
spontaneously, which is going to apply
in places in the leaf. You don't have to do it
exactly as I'm doing it. Just add yellow in several
places in the leaf here, then we'll just
switch over the red. I just print brush and now I'm just going to go
pick up a little bit of red and I'm going to add it
in those remaining areas. Feel free to overlap the
colors a little bit. Look at how pretty it is now. We almost get a
wet and wet effect because the paint we
added, yellow, is wet. When you add red into it, it spreads out and it creates that new shade that's more
like an orange color. You can see that we do get
the benefits of wet and wet, but because we're
painting on dry paper, we'll still get the benefits of the wet and dry technique, which is to keep our edges sharp and our leaf
looking like a leaf. And that's it. If you want to, if you feel like there's too
much red in there, you can reach a pain brush
and add more yellow. You'll end up with more
orange spots and so on. That just paints the stem. I'm keep it bread. I don't want to
overcomplicate things but you could use
brown if you wanted. There we go. I'm going to dry this with the same technique that I always used to dry
all my paintings. Small circular motions
and we try not linger in one single area but cover up the whole painting. This was a lot faster to dry just because the
sheet wasn't wet. There was a lot less water
overall on the sheet. I'll check this out. All those beautiful colors, you can see a little
bit of red, yellow, and orange, and you can see the edges are
perfectly shaped. Feel free to share
your paintings with us in the project section. And next we'll study
the lifting technique, which is going to be
a very useful one to paint with water colors.
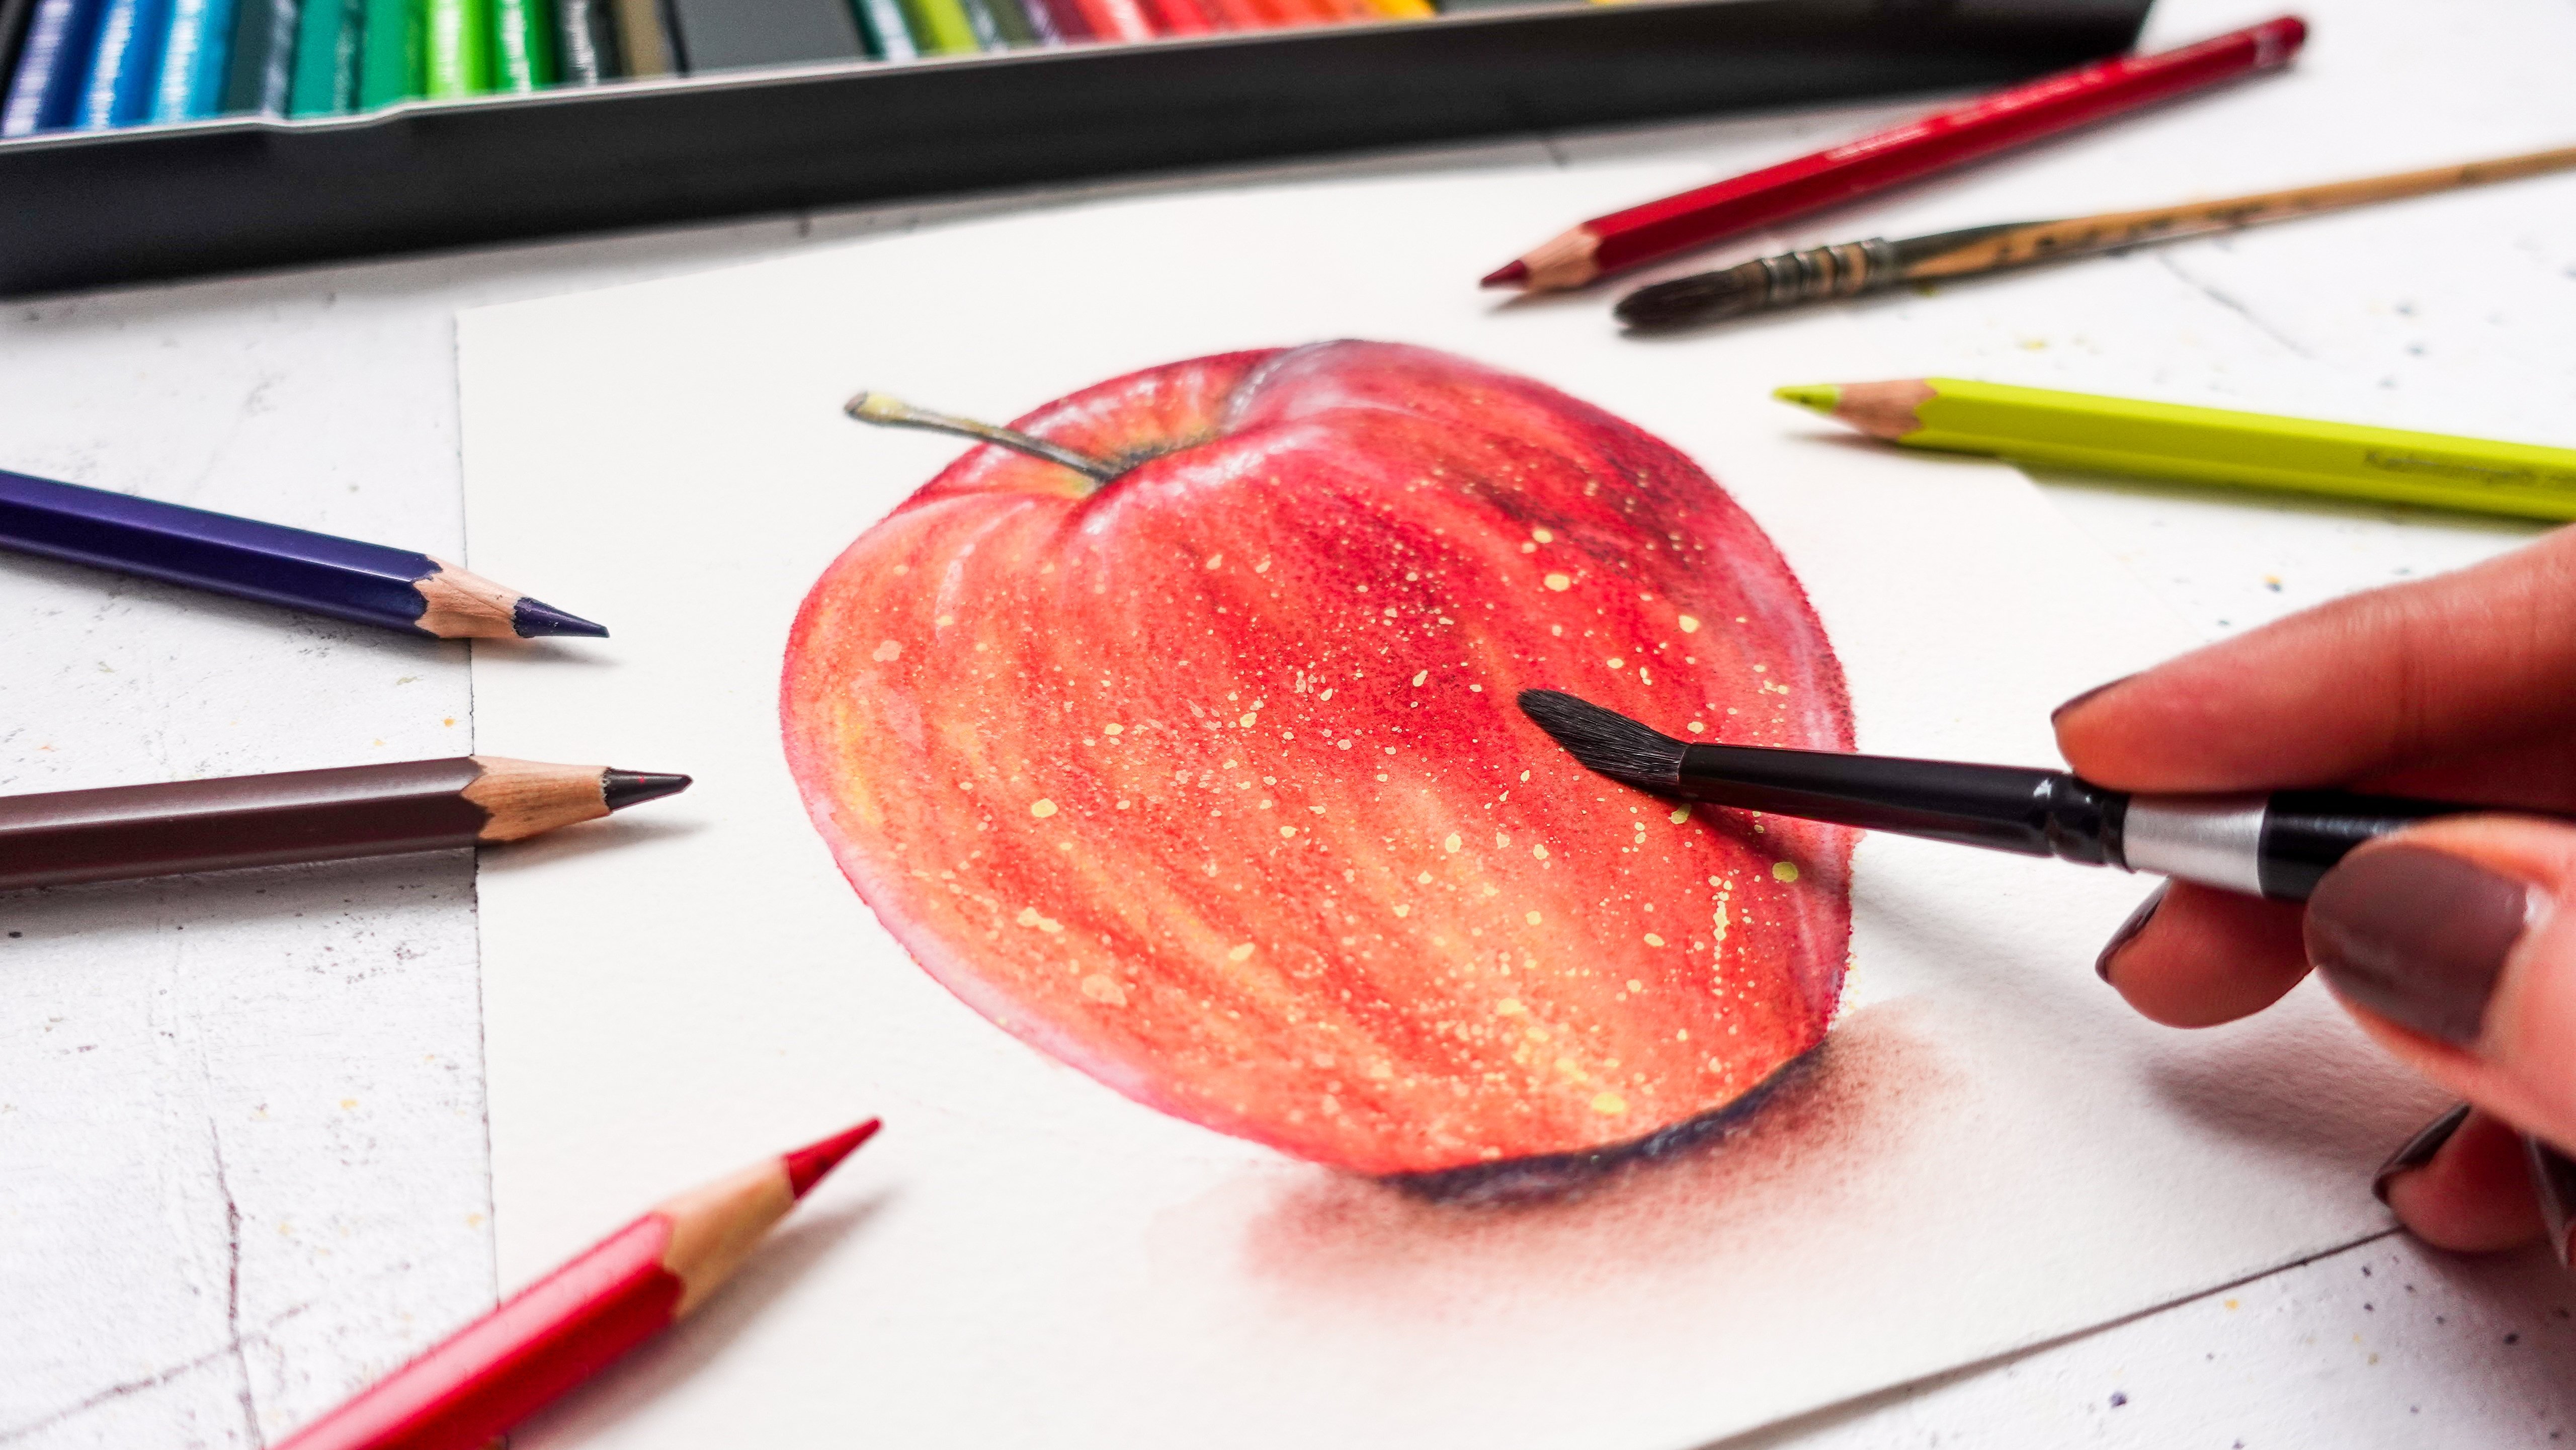
7. Lifting: In this lesson, we're
going to talk about the lifting technique and practice it in two
different ways. In the lifting technique
is actually the act of lifting wet paint or
dry paint of the paper. The side effect of
that, why we use it, is because it allows us to get some of the whites
of the paper back. That's going to be very
useful for highlights. I want to demonstrate that
with a simple apple painting, for which we're going to use the two colors we
had previously. For the leaf, we're going to be adding a brown
color for shadows. And you also get to
see how we can start building a little bit of
contrast in our painting. A little bit of realism, in a very easy way. Pick up any brown
color that you have. If you don't have brown,
you could use gray like paints gray or any
gray or even black, but just a tiny bit of black. The purpose is just to make our red and yellow paint a
little darker by adding brown. That's it. That's why you
can use another color. You could even use blue. Blue is a great
color for darkening another one once more. We're going to use the wet on dry technique because we
have a shape to paint, we want to make sure
it stays as it is and actually looks like
an apple at the end, no wetting the background here, I'm still using that
small paint brush is more convenient
for me to paint. Just pick whatever fits you. So you want to make
sure your paint brush is clean to start with. If you just mixed a
dirt color with it, make sure to clean it up. Now I'm going to start
with yellow again. I'm just going to apply
a little bit of paint. I'm really not overthinking it, just applying it in places. Let's say I want the site
to be more yellow than red. I'll add more yellow here, maybe a little bit here. Then I'll start adding some red. I'm to do this quickly because the paint dries pretty fast when
the sheet is dry. I still want those
colors to mix together. Well, now, once this is done, you can see it's
not very pretty. When we add yellow on one side
and red on the other side, you want to overlap
colors like this. You can tap your paint
brush will make it easier. You just do it wherever
you want the paint to be before this dry. Again, I'm going to add a little bit of
brown for the shadows, shadows on this side. Then I'm going to paint them. We can see it very clearly here. On dry, the stem is sharp, but as soon as I touch the wet
paint inside of the shape, it just spreads everywhere. That clearly means that if we
want the stem to be sharp, we'll need to make sure this is dry first and then
painted afterwards. I'm still going to add a
little bit of shadow over here. This will be enough. Now, this is the part
that interests us. We're going to lift the paint. Make sure to clean your
pain brush really well. Needs to be clean. I want
to a little highlight here, I want to do this
before the paint dries. It's easier to do it when
the paint is still wet. Now my pain brush is clean, I'm going to dam on
the paper towel. It's 30 almost dry. That's like this. I'm going to press it hard onto the area I want
to lift paint on. The paint actually comes off, Not all of it comes off. You can still see a little bit, but it really helps with
creating natural highlights, especially if you're into
realistic watercolor. That'll be useful because
what you could do would also be to avoid this area
altogether when you paint. But the apple will
look more cartoony. The lifting techniques
allows us to really create a soft highlight. I'm repeating this again
to lift more paint. Here I have my little highlight. There's another way
we can lift color, but first, we need to dry this. Before I show you how to
lift the paint on dry paper, this time we're going to add a little bit of round
here to finish the stem. You can see now it gets
a lot easier to paint. I'm even a little bit
of a shadow down here. Now our apple is
almost finished. I want to add a little bit
of a highlight over here. But let's say I forgot to do it when the paint
was still wet. When it was easier, well, there's still another
way to do it on trying. It can be harder depending
on the paints you're using. Some lift less
easily than others. I found that for me,
it always worked. I think it's worth trying and I'm pretty sure it
will work in most cases. Again, we want to work
with a clean pain brush. You want to make
sure it's thirsty, almost dry, When all
the water is gone. You just repeat what
we did earlier. This time the paper is dry
is the only difference. I'm going to press
hard enough here, and I'm going to keep insisting a little bit until I
see the pain come off, and I can already see it lift. Then I wash my pain
brush and I repeat, you just have to do a little bit of back and forth and insist a little bit after
insisting several times. Here I'm getting a highlight is almost as strong as this
one, although not quite. You can see the benefit
of doing this on wet. These two techniques for lifting really going to help
you get some of the whites of the paper
back whenever you forgot to preserve an area
that's really a lifesaver. Now I'm going to tape this
and show you what it looks like from up close here. You can clearly see the
lifted paint on wet. There you can see there's a very subtle highlight
that's lifted paint on dry. I hope this was helpful
and informative. I'll see you in the next lesson for another essential
technique to know.
8. Layering: We're going to practice a common technique
called layering. And layering is
really the act of overlapping several coats
of paint in the same area. You paint, then you dry paint, and then you apply
more paint on top. That is going to
help us play with water color is
transparency properties, but also build up some contrast
and realism in paintings. That's very convenient since we're just painting the book
and not the background. We'll be using the
wet on dry technique. Again, this time I went
for a smaller paint brush, one that is actually point. This is convenient because
it will help me get into the little nooks and crannies of the pages and make the
painting more precise. Try and find a paintbrush
that is pointy. If you can't, you'll still be able to paint with a round
paintbrush like this one. Or you could make this sketch a little bit bigger if you want. I'm going to be using
only two colors to make it very simple. Once more, we don't need
any more than that. I want to use yellow and brown. I'm just going to reactivate the paint that I
previously used. You just need to dip your
paintbrush and water. Just reactivate right
in the palette. I'm going to do the
same here for Brown. Remember, you can use
any color that you have. If it's another yellow, another brown, that's fine. Again, you can use black, or blue or gray in
place of brown. With layering, you really
want to make sure to start light and go
darker as you paint. That's my mixes, again, are creamy on the watery side. Not too thick, not
too watery either. For now, all we're
going to do is pick up some yellow paint,
paint our pages. If it's a little too saturated, we might want to
dip our paint brush in water and just thin the paint directly on paper
to make it a little lighter. As you can see now I managed to get something that's
a lot lighter. I'm going to keep
going, paint all pages. You can see that this very fine pain brush is really helpful to paint pages. Then it's just a matter of you experimenting with
several supplies and really finding
what you like best and what fits your
style best as well. All detailed works,
realistic works. That's very convenient
for me to use, but other people would
prefer larger paint brushes. The paint is going to dry pretty fast because
I'm only covering small areas and I'm not
adding a whole lot of water. I'm just going to
add a little bit of brown in those darker
areas of the book, just so we're able
to see a little bit of shadows are still, I insist, I'm not
using dark paints yet. They are still pretty
light as you can see. If you find the watercolor
washes hard to do. This type of exercise might be easier for you to
start with watercolors. You pick a small subject,
something more detailed, and then you can
focus on just adding tropes in tiny areas
without really brushing. We're going to add a few lines for the tip of my paint brush. So we're just
suggesting the shoes. I think that's pretty good. Just want to add a
little bit more brown over here. That's good. This is the base layer,
the first layer. And I'm going to try it completely and then
apply a second layer. This step is very important. You really want to
make sure your paint is completely dry. I'm padding the sheets just to make sure that this is dry. Then we're going to start
adding more shadow if you want. Actually also add a more color. In this case, you would
add a little bit of paint into your mix like this. You can see it's
a little thicker. Now, this is actually layering. You're just layering some paint on top of a previous layer. We're able to see, for example here, the
brown paint underneath, because watercolors
are transparent, it's really a nice property to leverage with this
layering technique. Here, I'm adding
more of the yellow, gives a little more
color to this book. We could call that second layer, dry it once more, and then add those final. So this is our third layer. Now I want once more
to add more pigment into the paint to
make sure that it actually shows on top of
those lighter layers. Remember, you start
with light paint, more water in the paint, and gradually go darker by adding more paint
into your mixes. And you make sure to dry
everything in between. Now we have something
that's a lot darker and th now we're going to
be able to layer here. I want to make sure this
hollow area shows here. We also have a very dark part in between the pages. I'm just
going to add a few lines. I'm adding a little more shadow over here because the sheets are stacked together
in that area. And notice how this book is getting more
realistic every time. That's the beauty of the
layering technique here. I'm going to add
a little bit more shadow a few lines there. And as we move up, I'm just going to leave more
of the yellow areas visible. Just add a little bit of shadow. And a suggestion for you is to use this pain bars that
is full of brown paint, dip it in water as a
way to thin that paint. Now you can paint
a little shadow underneath the book to make
it even more realistic. I don't find a light enough, so I'm just going
to add more water. And that's it. Here, finished book. You can see how
realistic this looks, even though we didn't take forever to paint it
and we didn't take great care in painting all the wines and doing
everything perfectly. But it's the act of overlapping paints on top of each other and going
darker each time. In other words,
building contrast that really helps make
this book more realistic. I hope you enjoyed this lesson, and I'll see you in
the next one for another very convenient
technique to use.
9. Softening Edges : In this lesson,
I'm going to show you how to soften an edge to improve your watercolor
paintings even more. What is an edge? But look at this book
that we painted earlier, we added a shadow underneath. The edge of the shadow
is really hard. And what's great with
watercolor painting is that we're going
to be able to soften edges to make them
look more natural and make them blend
into the layer beneath. In this case, if we had
softened that edge, it would have blended into
the white background. I'm going to show you exactly
what that looks like on this pumpkin and how to
execute the technique. First, you want to use colors we have used to perform
red, yellow, and brown. I'm going to start out with
this brown paint brush. It will be very convenient
to paint my pumpkin. I'm going to start
remixing a little bit of yellow with a tad
more pigment in them. Just again, it's a
little bit creamy, easy to paint with
at the same time. And I want the paint to
show some water in it, but not too much water. Same with the red color. Now we have this. We're
going to start painting just like we did when we
painted the apple earlier. I'm just going to apply
a little bit of yellow. And I'm doing this quickly and you can see I'm
painting wet on dry. Again, my goal is just to
cover up the whole pumpkin. I'm not really
overthinking anything here before this dry, I'm going
to add a little bit of red to give a nice orange
tone to this pumpkin. I like to leave some of the
yellowish areas visible still to build up a
variety of tones in this pumpkin and
makes it look more interesting, there we go. And add a little bit of
brown towards bottom, maybe over here on top. And now I'm going to switch over to this smaller papers that I had earlier just to
paint the stem here. And that's it for
our base layer. So now we're going to try this
layer and add another one, in which I'll show you
how to soften an edge. This is completely dry and
that's exactly what we want to apply our second layer
for softening an edge. In that second layer, you want to make sure to have
two paint brushes. One then you're going
to use to paint, and another one you're going
to use to soften the edge. I'm just going to pick
the tiny one to paint. I just want to add a
few touches of paint. Just going to make
sure it's clean. Fame for the second pain brush, that's going to help
us soften the edge. Let's make sure it's clean. Once your pain brush is clean, you want to dab it on a paper towel so it's
not dripping wet. If you want to check
you're doing it right, just brush the paintbrush
on your finger like this. If you managed to
get your finger wet without getting a little
water on it, it's fine. You need it to be
wet a little bit. Now we're going to
add another layer of paint and soften edges. In that layer, I'm going
to mix a little bit of red with yellow to make orange. I just added pigment to my
yellow mix because I want to make sure it shows on top
of this previous layer. Now I got a nice orange tone. I'm going to take it. I'm just going to paint
in this area here. I notice that if I
don't do anything else, I'm going to end up with a very harsh edge and
might not be pretty, especially if you want to go for a realistic painting here. I'm taking my other paint brush, the one that's clean
and that I just dab on the paper towel. And I'm going to
start outside of the painted area and move towards it and
gently brush that. Edge to make it soft here. And now we do have a soft edge that melts into the
previous letter. We're going to repeat over here. What I like about this
technique is that it helps us define the wedges in the
pumpkin a lot better. Here we go again. I was make sure to
wet the area I didn't paint first and then move
towards that harsh edge. And you see here, I might have added a little bit
too much water on my pain brush because the water is actually pushing the pigment. So that's okay. We're just going to
add more pigment, more paint with my
other pain brush. And since we wet this area here, the paint gently
melts into the wedge. Let's do it again here and again. Let's clean
up our pain brush. Make sure it's ping wet
because remember otherwise the pigment will get pushed
out and we'll have a balloon. I'm gently brushing the
edge that I want to soften. You can repeat on top here. Add a little bit of
brown to our mix. Make this part a little
darker right there, and then gently melt that
paint into the previous. We could also add a
darker version of our brown color
onto the stem here, just on one side of it, that we're going to soften. And now it's melting into the whole stem and
it looks natural. What I love about that
technique is that the layering becomes
very subtle. I want to show you
what this looks like. Also for a shadow, remember to make sure that papers
that you're using to soften your edge is clean
and just damp. I'm going to add brown
paint on your knees. Again, I don't soften the edge, it's going to look so harsh, but if I soften the edge, it's going to start
melting into the paper. It's going to look
a lot more natural. I can't repeat clean
my paintbrush, Diving on the paper
towel and soften that lighter edge here until
we have a nice gradient. Let's try this up, and here we have a
beautiful pumpkin. Look at those edges and really melt into
the previous layer. That's exactly why this
technique is so useful. I'll meet you in the next lesson to practice the
splattering technique.
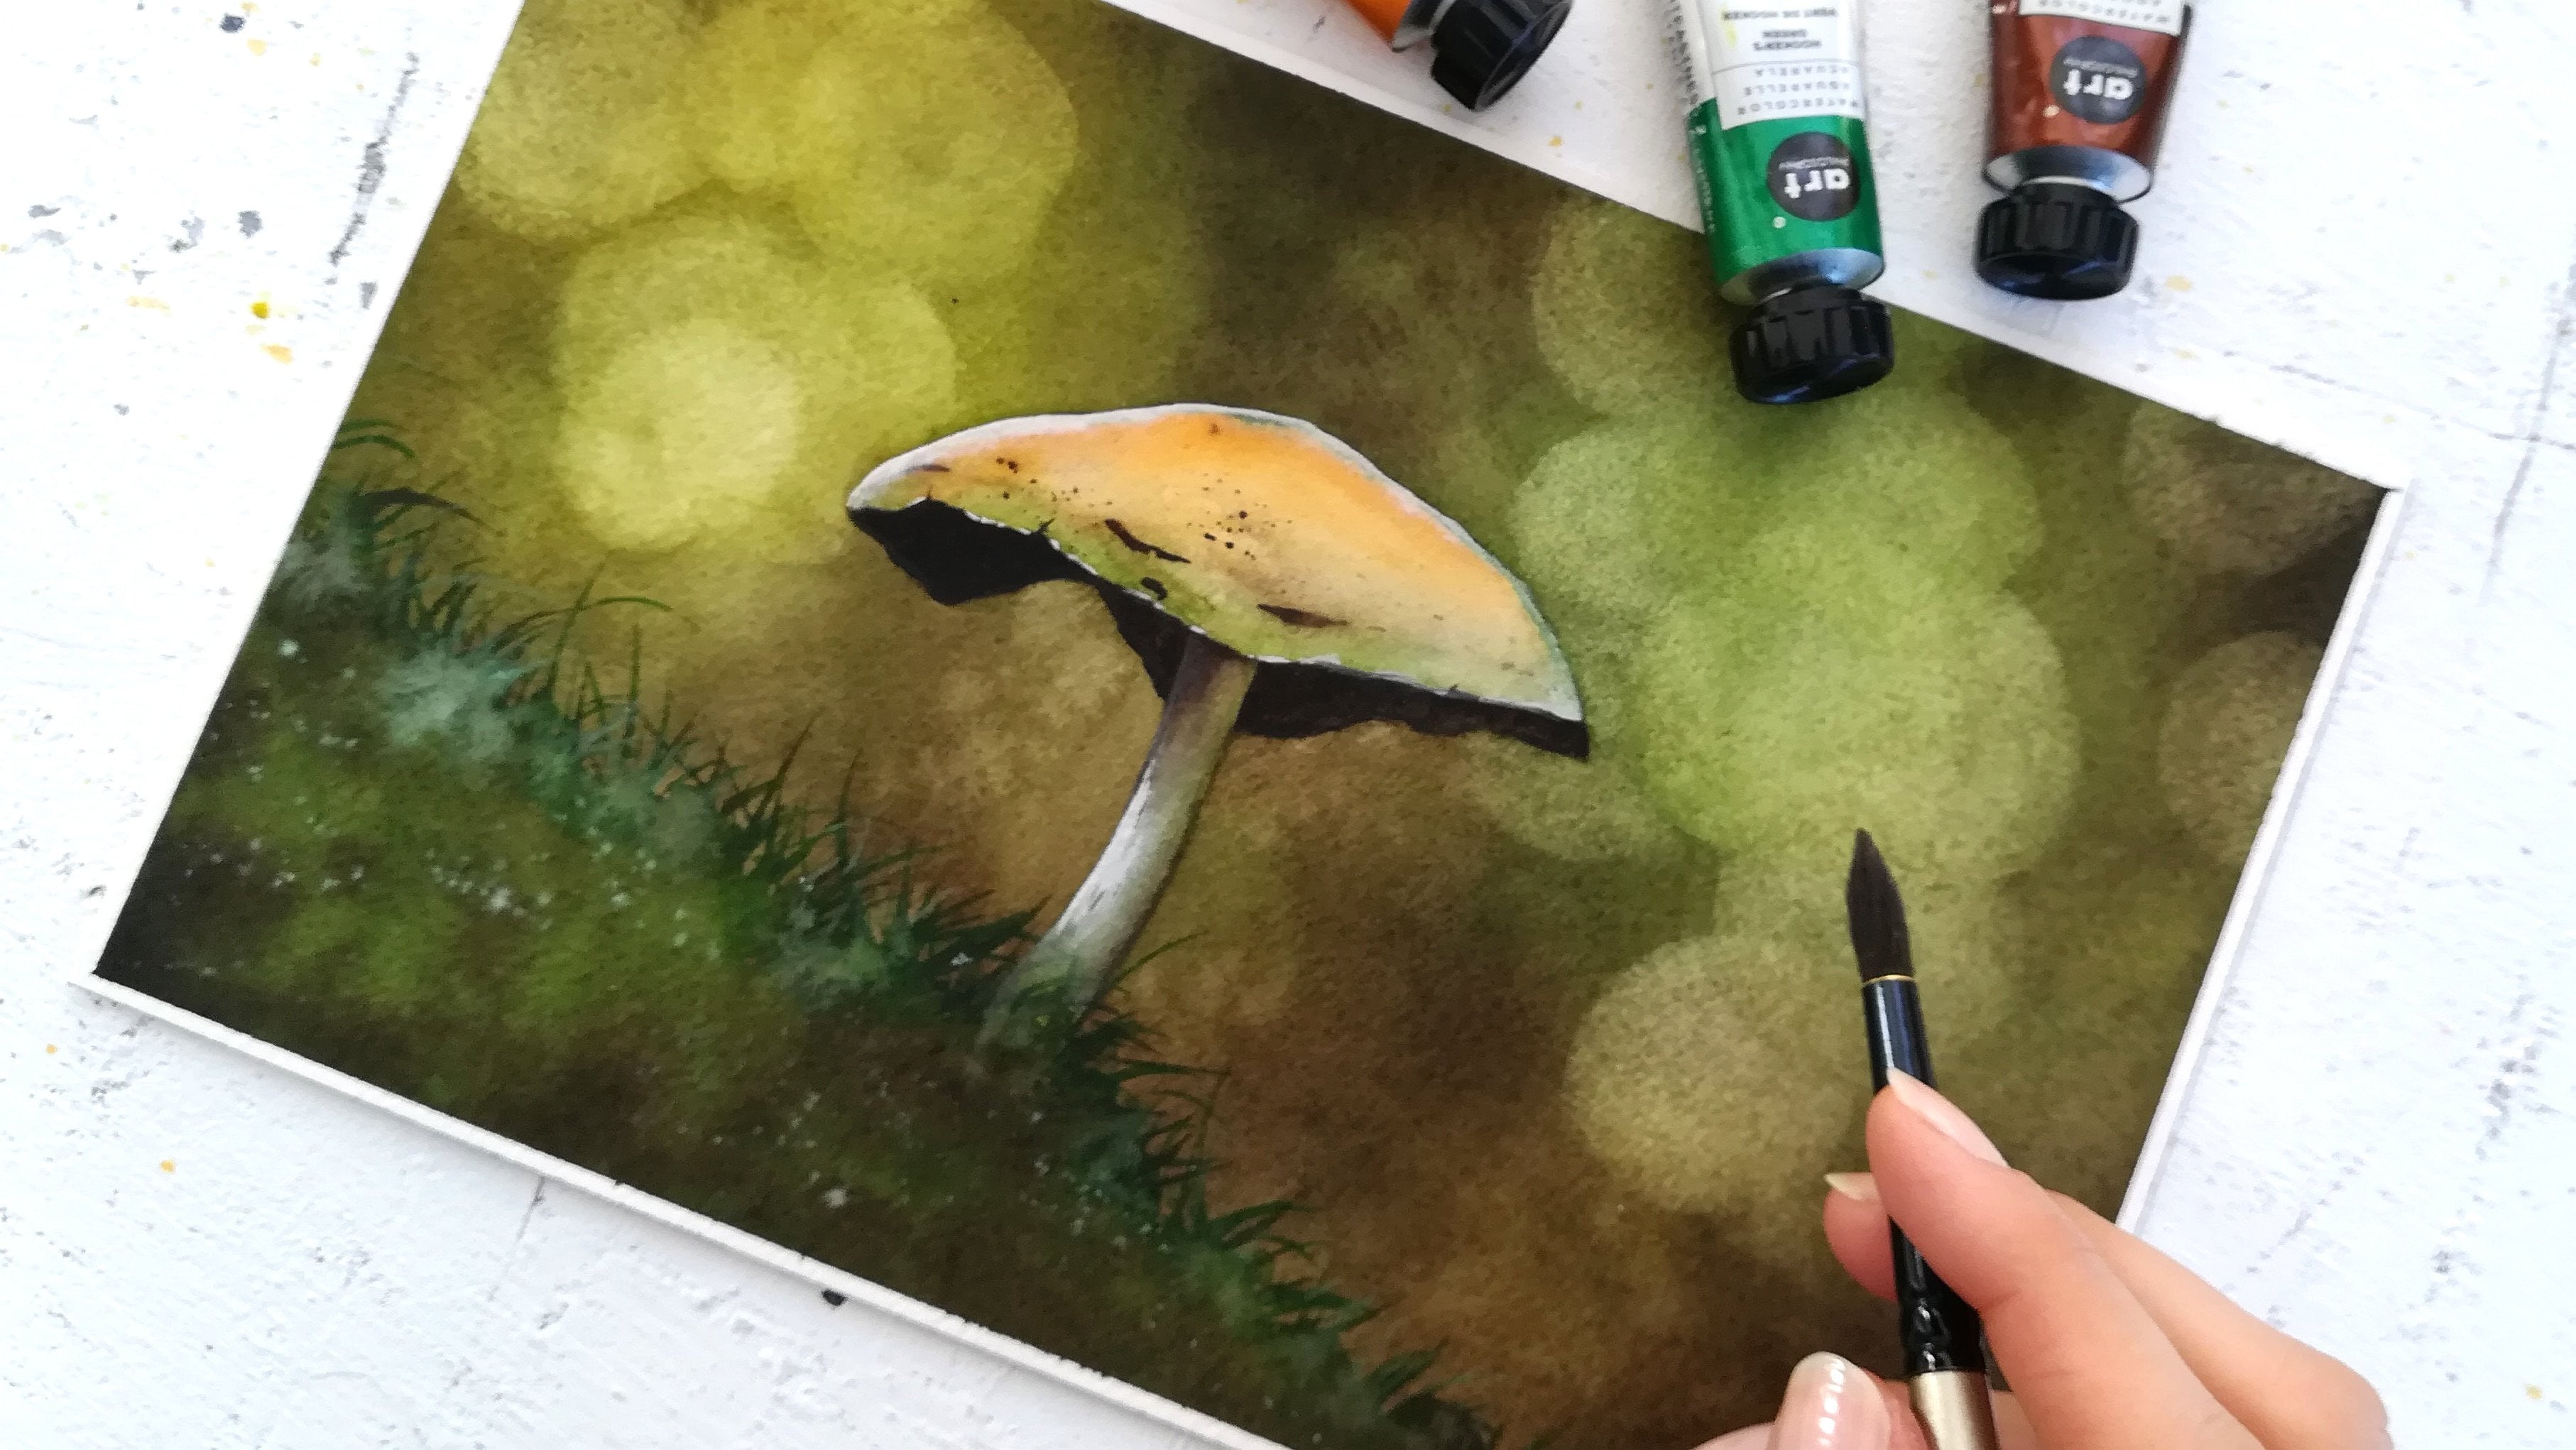
10. Splattering: The splattering
technique is fantastic. First of all because
it's super fun to do. It also is going to give some
texture to your paintings. Let's add some paint to
this mushroom first, just like we did in the
previous paintings. Wet on dry once more. I'll just go with the orange
mix that we used earlier. I'm using again, that
round paintbrush. I'm just going to add
it on the mushroom. If you do splatter
paint by accident, just pick up your paper towel and pick it up before it dries. So let's add a little bit of red just to make that
emersion middle more fun. And a little bit of brown. Why don't we use the
lifting technique. The paint is not quite dry. If yours is dry, that's fine. You know, you can use the
lifting technique anyways. So I'm just wedding
a paint brush, making sure it's clean. Then I try to remove as much
water as I can out of it. I'm just going to add a
little highlight over here. Repeating the step and adding
a highlight over there. Now let's try this completely. Now, with a smaller paint brush, I'm going to add another
layer of paint and I'm going to add pigment
to this brown mix. I have another paint brush ready just in case I need
to soften some edges. Let's clean that one up and make sure it's not
dry, not dripping white. Now we're going to
add a little bit of contrast through layering. I'm even drawing
some lines here to suggest the part
underneath the mushroom. Odd, a shadow over
here. And Denise. And we're going to soften that. I'm adding a little
bit more water because my pain ber
seemed a little dry. It looks pretty nice. I want to add a shadow
here too. Soften it. And then the shadow
that once more, I'm going to soften to remember, we always start from the
outside of the paint, which is added and move towards
it and soften that edge. Now we have a nice
space already. Let's try this completely. This is now our third layer, looking to add that
a little bit of red. I still have that
other paint brush, ready to fade those harsh
edges and make them soft. So I'm just going to add
a little bit of red here. Then again, you see
how layering is convenient because
we just get to keep some transparency in the
painting while still adding color and vibrancy going to soften this edge here and add a little bit
of color over there. And so now we're going
to be ready to splatter. To splatter, it's best to use a round paintbrush
like this one. I find that the ones that have a fine tip are not as
easy to work with. Now, some people like
to use a toothbrush. Instead, you might want
to try a toothbrush or find another type of paint
brush for oil painting. For instance, one with bristles that are a little bit more firm, you really have to experiment
with different tools. For me, this one
works very good. All you need to do is dip that paintbrush into your paint. The paint shouldn't
be too thick, otherwise the splatters will
have a hard time coming out. Once you have paint
in your pain brush, want to make sure it's
loaded with paint? You going to make sure the
paintbrush is very close to the area you want
to splatter paint on. Then with your finger to start flicking some
paint at the paper. That can take a little bit of getting used to a
little bit of practice. Don't worry if you don't
manage to get it right away. I want to show you here. I'm getting splatters,
They are different. These are actually fading into the previous layer because
the paint is still wet here. I wet the paper earlier when
I faded those harsh edges. Well, here, this is very dry, the splatters stay intact. So you really can produce different types of
splatters if you want. You can even make
water splatters. There are really a lot of
different things to do. This really helps to add
texture to a painting. If you've got some splatters
outside of Mushroom, you can try and get them out before they're
actually dry with a wet. Let's add some brown splatters. The more water you'll
have in your paints, the bigger the splatters, the smaller they will be. For example, if I
dip my pain rushing water right now and
I make this mix, very watery spotters should
come out a lot bigger. It's a lot easier
to get them out. I'm going to try this and look at how beautiful this
texture is on the mushroom. It really adds a lot
to the painting. Don't get discouraged if you
don't get this right away. You need to practice
it. And I'll see you in the next lesson to study
the driver's technique.
11. Dry Brush: In this lesson, we're
going to look at another way to create beautiful texture on your paintings. And it's called the
dry brush technique. It's a very well known
watercolor technique. First we're going to
paint a base with a wet on dry technique, and then I'll show you how to execute the dry brush technique. I'm going to start with yellow, so I'm just going to
make another mix here. I'm going to add
some water to it. Let's prepare a little bit of a brown mix with that
smaller paint brush, because that's the one I used to add those darker parts and I really need it to get into
the nooks and crannies here. Let's start painting
our base layer. Once we have that, we
can start adding brown. Notice that because this
yellow area here still wets, the brown paint gets into it, which is completely normal. Let's try this first layer, now we're going to
Mike yellow and brown together to make a honey color. And just apply that
underneath to really suggest that hello
area in the umbrella. There we go. Now I'm going to make sure I
have another paint brush that is just clean and damp and I'm going to add some
crash to the umbrella. Just soften some edges. And last, I want to add more contrast with a thicker
version of our brown mix. That means we're adding more
P to the mixed nest water. I noticed that because I got
some water in those areas. You can see those
lines here started melting into the previous
Re, but that's okay. I'm just going to add a
little definition there. Now, to execute the driver's
technique properly, I want to make sure that the
painting is completely dry, so we're going to
use our heat gun or hair dryer once more. You get to the
paintbrush that fits into these small parts
of the umbrella. Well, this one is going
to work well for me. Let's use a little bit of red. This time I'm making myself
a little mix of red paint. I'm not going to add two too much water to
it because I really want this texture to show
through the driver's technique, I make sure that the paintbrush
is loaded with paint. Now, this is what you want to do for this technique to work. Take your paint
brush and get rid of the excess paint on a
paper towel like this. I think here I got
rid of most of it. Now if I brush the paint
brush on my painting, it should create a
driver's technique effect where you can see the
grain of the paper. There's not a lot of water in the brush, but there's paint, we managed to have a texture showing and then
do it here again. You can see it feels pretty dry, but because there's pain on it, we're able to create texture. And when you run out,
you can repeat this. So you load your paint,
brush with paint, then you make sure to dab it on the paper towel and then you can run it on
top of your painting. This is it for the
driver's technique. You can see how
pretty this looks. You can, of course, post your projects to
the project section and next we're going to paint a cute fox with all the techniques we
learned about today.
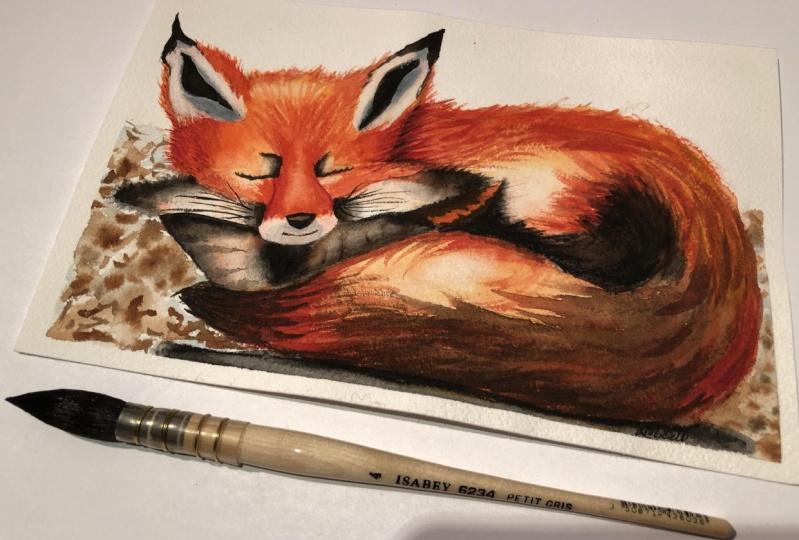
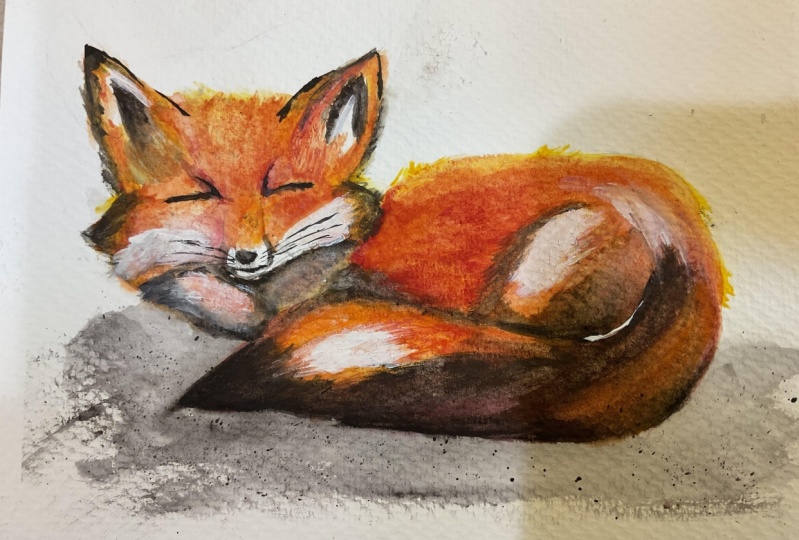
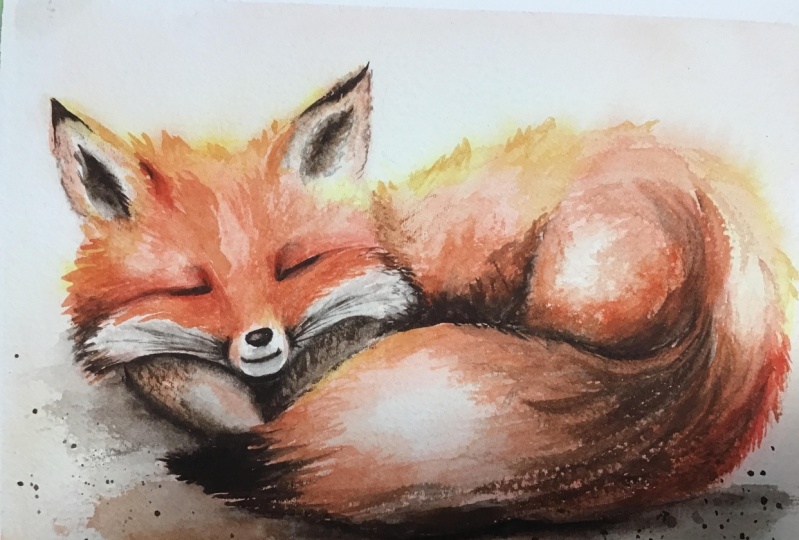
12. Fox Painting : Part 1: It is time to paint
the final project. And please don't worry, You'll quickly realize that by putting every
technique that we learned side by side and
taking each one step by step, we'll be able to paint a finished piece of art
that looks beautiful. This is a sketch.
Remember that you can download it from the resources section if you need to trace it. For this, we'll just
need some basic colors. I'm going to use yellow, red, brown, and black. You can substitute
that with yellow, red, and black, or yellow,
red and blue. Even if that's all you have, blue mixed to red can create a dirt shade and that will
be your shadow color. Well, for me, I'll use brown and black as my shadow colors. I'll be using three
paint brushes, this flat one just
to wet this sheet. Then I have a round one here
to paint the base layer. And then I have a
round and pointed one for smaller details like
the whiskers, for instance. Have some paper towels ready, your water jars,
your mixing tray, your paints, a heat gun. If you find it useful, make
sure that your sheet is taped all around with the masking tape and
we're ready to go. The very first thing you want to do when you paint
is mix your colors. Let's make this a
little bit of yellow. We're going to make it
a creamy mix once more, except this time I won't add as much water as I add it before in our
technique exercises, because we're going
to paint on the wet, and I do not want this paint
to spread out too much. I don't want too much water
in it in the first place. This will do, you can see
it is not a thick mix, but it's not very watery either. Now, I'm going to
rinse my pain brush and I'm going to do
the same with red. Any red will do. Any yellow you have, that
doesn't really matter. The techniques and how we
execute them is what matters. I'm adding a little bit of water just so it's
easy to paint with. There we go. Let's
rinse our pain brush. I'm going to anticipate the next lesson by
mixing my brown color. Remember, if you don't
have brown, just use blue. You mix that blue to red. For instance, you'll notice
it turns into a dark color. And that is all you need
to paint the shadows. And now I want a
little bit of black. Again, that's
completely optional. That will help me paint
those very dark areas, like the nose, the
eyes, the whiskers. Here are our mixes and
we're ready to get started. I suggest that first we grab an eraser and make sure to
soften those lines up here, because we're going
to paint on wet. I want to make sure
those light areas in the Fox don't show, at least the sketch
doesn't show. These areas here are
a little bit darker, so it doesn't matter as much. Same for the top of the head. This is enough. Now,
let's wet this sheet. I'm going to dip my
pain brush in water. If you have a smaller pain
brush to do this, it's fine. I'm just going to
quickly wet that sheet, not very long because I
just want to apply paint and I want it to spread
out just a little bit. I don't want it to look
like a sky effect, I just want effect. Just a little bit of water
is enough in this case. Now, I'm going to grab
my round paintbrush, make sure it's wet and clean. To get started, we can
go with yellow first, and apply this on top
of the fox's head. What I would
recommend you to do, if you see that the
paint escapes very much, that it looks like
it's out of control. I would wait for a little
bit until your paper starts drying slightly and then you'll notice
the paint will stay in the right area
a little bit better. You can see for me it's the case here because the paints
are spreading out, but they're not getting
out of control. And that's also why I had you mixed paints that
were not too watery. So we want to apply this color on top of the ears over here, and on the back, we're going to add a little bit there on the bottom of
the ears in this area. Now we can go for red. Now we're painting
the red accents and they're going to be a little more present
at the bottom. Tell here. Let's add some in this area once more. I'm really trying
to have a variety of colors showing
in the final piece. That's why I take each
color separately. And that is why now I'm going
to create an orange mix by mixing both colors
together in the pallets. And I'm going to
apply that elsewhere. Some areas in the fur are going to be wet here, for instance, we can
do to highlight, you can also leave
wood over here that already is
looking pretty good. Now what we're going to do is
use the lifting technique, and I'm going to show
you that it's going to be useful for many things. Make sure to rinse your
Pampers completely. I'm going to do this in
the dirty water, actually. Then I'm going to make
sure it's even more clean by using the clean water. Now that I think it's clean. With my paper towel, I just a, a pain brush and I get
rid of all excess water. Now, my pain brush
looks thirsty. What I can do is
remove a little bit of the paint that
overflowed too far. And don't forget to always
rinse your pain brush in between each time that you
go and lift some paint. And again dab it on
the paper towel. Because if you don't
do that, you'll create a bloom on your painting. We'll just add too much water. That excess water will
push the pigment, you add it before, it will push it away and it
will create a bloom. Some people call it col. Flower can be pretty sometimes, but in this case we're
going to try and avoid it, and that's okay if it happens. Anyways, here at the bottom, I'm just going to remove a little bit of
that excess paint. You can see how the wet and
wet technique still plays a huge part here because we have those soft edges that
are so beautiful. Now what you can use
the lifting technique for is also get those highlights back in the fox that maybe you
covered up with paint. For example, here I
would like a wide apart or there in the tel, maybe get more of
a high light back. Notice I always rinse
my pain rush when I do that and dab
it on the paper. I'm even going to make
this area a little bit light with the technique. This looks great. So now we're going to dry this
sheet completely. Now we have a nice soft base. The sheet is completely
dry and we're going to be ready to move
on to the next lesson. What will work wet on dry
this time. See there.
13. Fox Painting : Part 2: We have a nice space to go from. And you can see we already blocked in the main
colors in the fox. And that's really going to
help us work wet on dry. Now that's why I wanted
you to dry the sheet completely so that
the strokes that we add now stay exactly
where we added them. We're also going to
soften some edges here, so you can go ahead and
grab two paint brushes, one to paint and one
to soften the edges. I'm going to paint
for the pointy one, I think will be easier to get
into those tiny areas here. And I'll use the round
one to fade the edges. I wouldn't usually start
with the darker colors, but here I want to
make sure to outline the features in the
fox really quickly. Eyes, the nose here, the mouth, the ears. Very important parts of the fox. And then we'll add more color. We're going to start
with brown and black. I don't like to use black alone. I always add a little
bit of brown into it. Now, it's going to look like a very dark brown color if
it's too light to your taste. You can still add a
little bit more black. Play with the colors until you get something
that you like. I think this will do for
me, very dark brown. I'm going to start
with the ears. Use the tip of my pain
brush to paint the detail. We don't have to
soften all the edges. For instance, this one
could stay very sharp, it doesn't really matter. But here, let's say I want to create a hollow area in the ear, but I don't want it to
be too obvious here. I can wet my other pain brush. It needs to be clean, remember. Then we dab it on the paper
towel so it's barely wet. Then we come and soften
those edges here. It's going to 0, A lot
more natural this way. I found I went a little bit too far here with
the dark color. I'm going to lift at
color with a dry brush. Now I'm going to repeat
on the other side. Right now it looks a little
weird because we're adding very dark colors on top
of a very soft painting. Don't worry, the painting is
going to improve as we go. This is just a start and it's completely normal that it looks a little bit odd at first. Again, I'm going to
soften the edges here. Now let's take care of the eyes. You can see how the tip of the pain brush is
so useful here. Now the nose, I like with the wet on
dry technique that we can take our time.
There's no rush. What I can suggest here is
to the lifting technique. Remember the brush got to
be clean and almost dry. And you can lift a little bit of color on top of
the nose to create some high light That's going
to make it more realistic. And now let's paint the mouth. I chose to give that fox
at a little tomorrow. I also want to add
some color here, there to make it more natural. I want to soften edges. I rinse my paintbrush
every time and repeat it on a
paper towel and go soften another edge with the paint that's on my
pain brush right now. I'm just going to pull it over to those areas
underneath the nose. I do have a very light brown
paint, which is perfect. You can see now this fox is coming to life little by little. Now we want to add
a shadow underneath this area that will help us
also shape the face better, but we don't want to leave
it to be that harsh again. We're going to soften the edges. Same here, we're going
to add a shadow. Underneath the Pam
and soften the edge. We can even soften the
edge in places over here, too, to keep that furry effect. Let's finish outlining the face and making the shadow here in that hollow area a
little more visible. Then I soften that edge and I pull some paint
over to other areas, which allows me to have
very dark brown parts and lighter ones I'm looking at where else I could
add a dark color. Maybe above the eyes where
we're going to fade this. We really need the
paint to be very light there in that area as well. So we're going to
add a shadow here as well that helps us
build contrast. Again, I'm softening the edge that the shadow melts
into the previous layer. I'm adding a few brush strokes
for the hair in the tail. I'm going to add a little bit
of brown paint this time, less dark than what I
was using until now. I'm going to add it over
here and fade the edges on. When I say fade the edges, I mean soften the edges, the effect is the same. See how I'm pulling
paint over to other areas to look at how cute this fox
is looking already. I'm running out of
a darker mix here. I'm just going to
add more black, add more brown into it, because I think it
would be nice to add a shadow underneath here and also make the
tip of the tail darker. You can, even with
your paint brush, start shaping the fur here, but how nice it looks,
make little lines. I'm going to make sure to
soften that edge there. Even soften some of the edges and pull
the paint over here. Just again, because
I like to leverage one color to create different
shades of that color. Here, we're version of that brown by just
pulling the paint. I think it'd be nice to outline this part in the fox a little more and the same over here. I'm adding more
paint here because it's going to be a little
darker in that area. And make sure to, again,
soften this edge. Add a little bit of paint
here mimicking the fur. And now pick up just brown. And I'm going to
add some over here to create some gradients
between the very dark color, very dark brown, and
the lighter brown. I'm just softening some edges
and others I leave sharp Up to you to decide. I'm going to add a little bit of
brown in this area. This area a few lines over here and a little bit
of a shadow there. I think this looks good. So now I'm going to
rinse my paintbrush. I use the other water jar to make sure that the pain
bush is even cleaner. Why not apply a
little bit of yellow? Now I'm going to keep those yellowish areas
for the top of the painting. Again, I have the other
pain brush handy to execute that technique that
allows me to soften edges. With the tip of the pain brush, I add some hair fur, soften those edges here so they melt into the
rest of the head. You don't have to add the fur
everywhere, just in places. We're just suggesting the fur. I want some color over here too, But through the layering, you can see a narrow
building up contrast, really making this
fox come to life. I leave some of those areas paper white. Now I want to add a little
bit of yellow in this area. I think the top of the
back would also benefit from the fur showing
the mare in places. Again, for it to not look too weird, we're just softening. So this melts into
the previous letter. We can repeat that there. And why not add a
little bit over here. Now you can add a few more
yellow accent if you wish. Think about the other
color. We also have red. We don't want to cover up
everything with yellow. We also don't want to
soften all the edges. You can keep some of them sharp, like here, and soften others. It really brings some
variety in your painting. I'm ready to pick
up a little bit of red that I'm going to
add in a few places. Some people will never
really soften edges. Some cells just rely on
harder edges everywhere. And it just depends
really on what you like. I'm going to add some
reddish accents over here. As you can see, you
can layer colors. As long as the brown
color below is dry, you shouldn't have any
difficulty doing that. Of course, if it's not dry, and that was you can choose to dry your sheath at any time. Mine has already
dried By the time I added the red on top, now I added red accents. I. Orange, so I'm
mixing both colors. And this is when we add the
most color on this fox. I want to access this area here, as well as this area. So take a look at
your painting and see where you think it'd be
nice to add some color. Again, I'm overlapping colors, layering one on
top of the other. I, I want to add more color in the tail here. I think it'll be very nice. Don't forget, it's possible
to overlap colors. You can see once more
how overlapping colors, how applying layers actually helps with the vibrancy
in your works. Before moving on
to the final part, I want to add a stronger
shadow underneath the fox. I just grabbed a lot of black. Then I'm going to
soften that edge. It also helps in creating
a ground effect, pulling the paint
onto other places. Just going to add
more brown now. And that's it for
our second layer. So we're going to dry this now. We're now ready to move
on to the last part in this painting and we're going to cover the last details.
14. Fox Painting : Part 3: In this part, we're
going to take care of the final details
in the painting. We'll be using this
paint brush a lot, the one with a fine tip. This is the part where you can enhance the very important
features in the fox. That will be the
eyes, for instance, if you notice yours
are not dark enough, this is the time to make
them pop out a little. That is why I'm layering
black paint on top. We can also fix areas
that we don't like. For instance, here I find the ears need a
little more definition. I'm adding just a
little bit of black, but not a lot to
get a brown color. We're going to use the
dry brush technique here. I just soak my paintbrush
into the paint and I'm going to dab it on
the paper towel to get rid of most of the paint. Now I'm going to gently brush this pain
brush on my painting to create some texture to
really suggest a hair Paw. Notice I always try to do it in the direction the actual
hair would be going. We can repeat that over here. And we can even do it in
the ears just slightly. We don't want to add too much, just a little color to
create additional for effects if you like. Of course you can do
that with other colors. For example, yellow and stab
this color on the paper Tl. And you can add
some accents here or you can add some
in the ground, Not the driver's
technique there. I would also like to
add some whiskers. Let's pick up a little
bit of black and make very fine lines if we can. I'm barely touching the
paper when I do this. We can also check on anything that you want to
improve in this painting. Any shadow you want to add. And again, you can use the technique that
helps us soften edges. That's it for the details. I still want to add
a few splatters. You can pick the
color of your choice. I'm going to add a few
brown splatters again. I dip my pain brush in the mix and I'm going to add those splatters
on the ground here. And I'm adding nice little
splatters all around. Add a tiny accent
here for the hair and a few lines here. And of course, we
could keep working, but you get the idea. So I'm done with a
fox. I'm going to tape it so you can take look. Remember that you can share your project to the
project section. If you need any feedback
or any help, let me know. I hope you enjoyed this
painting and I'll see you in the very next part for
some final thoughts.
15. Final Thoughts: I hope you had a fun time
that you learned loads about essential techniques and how to leverage them
easily in painting. Remember that you can
share your art with me and other students in the
project tab of the class. You can also leave
a review that will help me with feedback
and that will also help potential students
decide if the class is the right fit for
them for more art. You are welcome to follow
me here on Skillshare and get notified every time
I load a new class. You can also find me on
Youtube and Patri every week. Thank you so much for
taking this class with me today and the next one.
 Francoise Blayac, Professional Artist