Transcripts
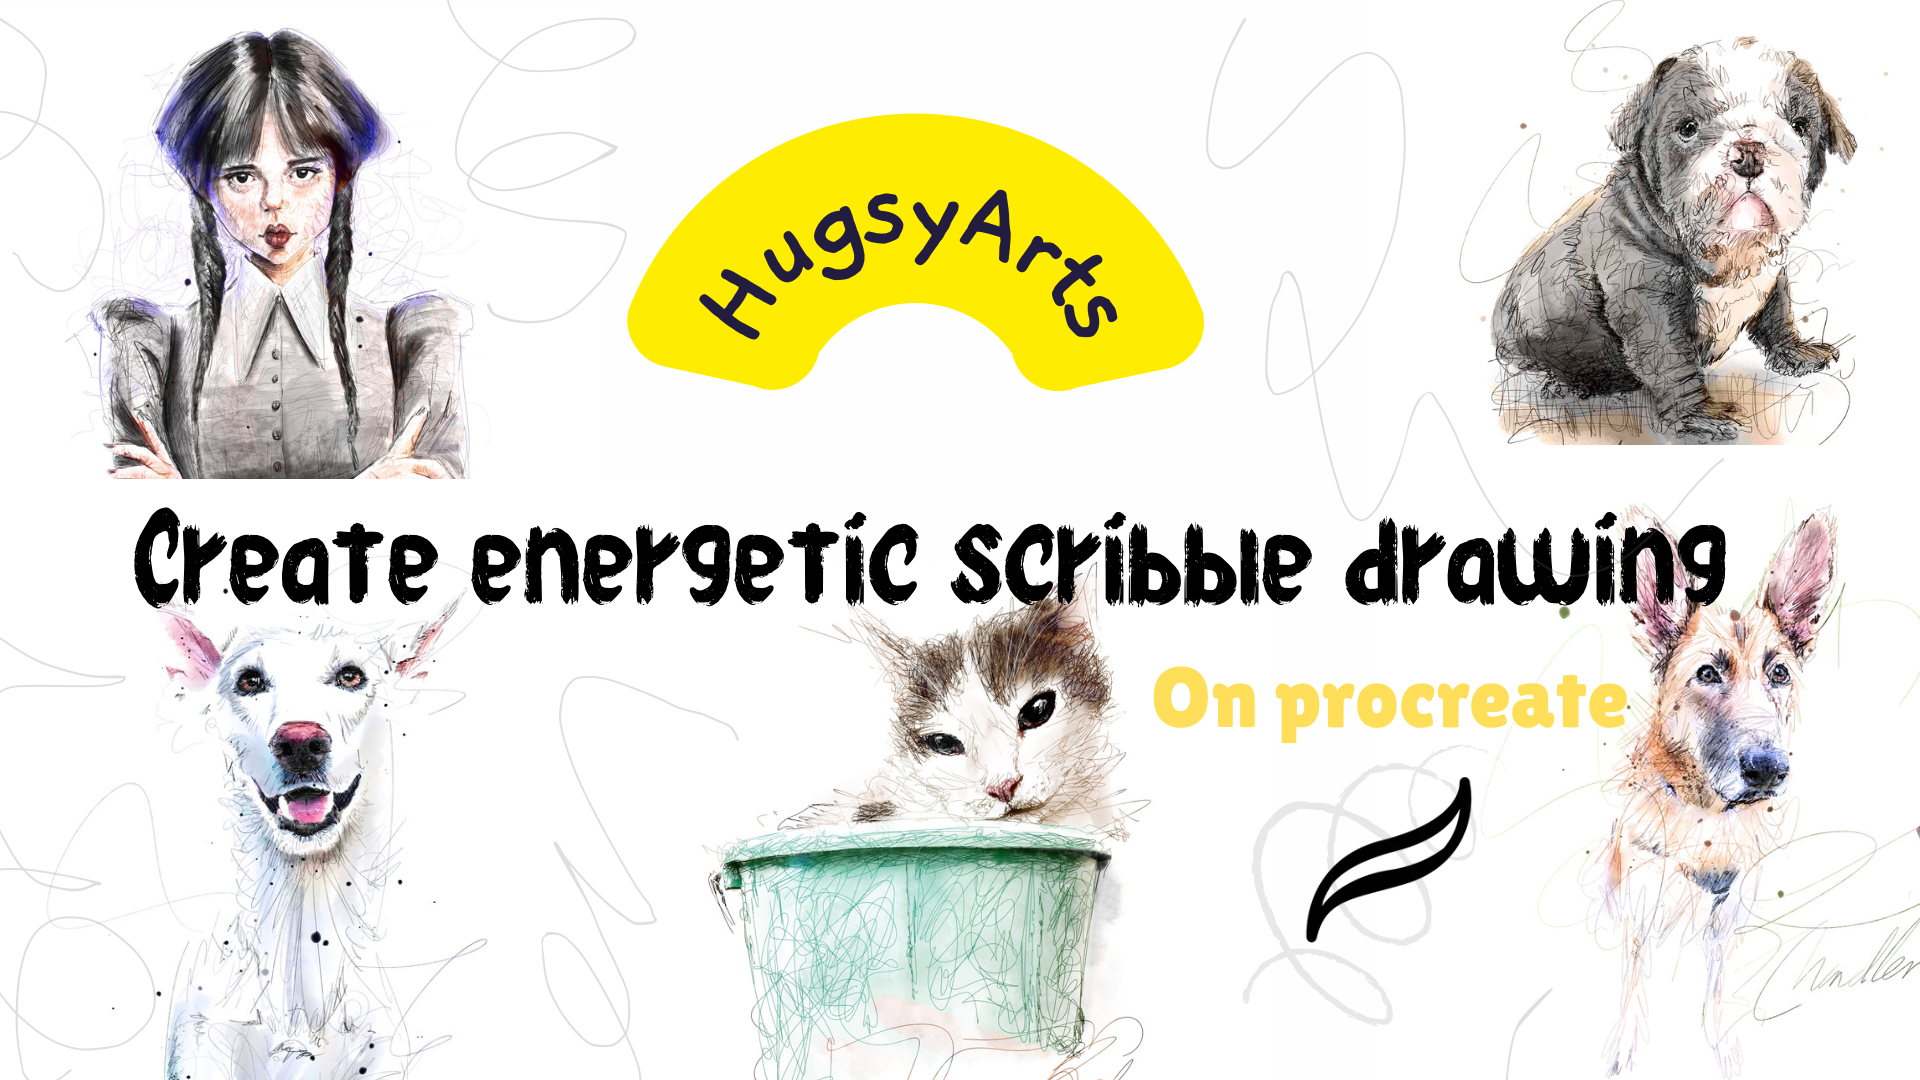
1. Introduction : Hello everyone HugsyArts here. And I'm excited to present my new tutorial called
scribble drawing. So it's a superfan, modern way of creating Art, using photographs on the
iPad, using Procreate. I'm going to be teaching you all the methods to
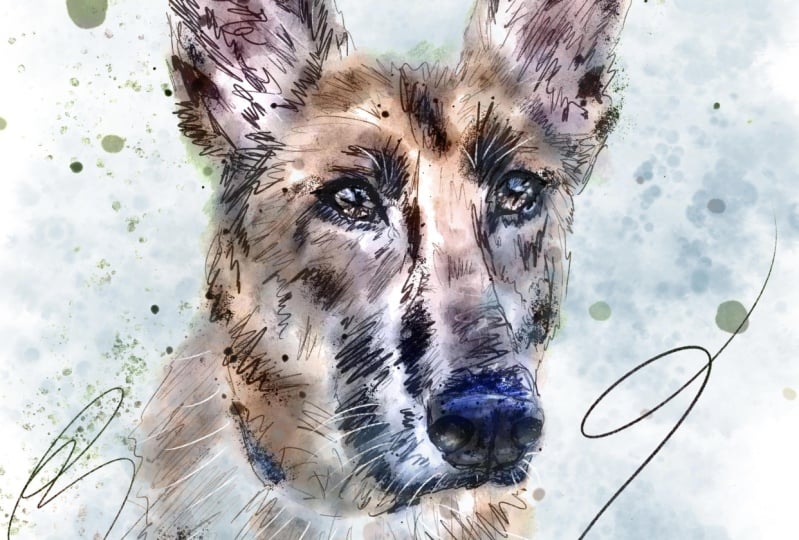
create images like so. I'm going to show you
how to hold the pencil. The techniques used to
create the scribbles like a Pro from hatch into scumbling, all sorts of
different techniques. So you see that some people, they like to hold the pencil,
write down the bottom. We've got total control. With this technique. I'm going to teach you
to break the habits. We're gonna be trying some different some
different techniques to create a really loose
and unexciting style. I'm also going to show you a
few which will appear to you magic tricks to instantly
bring colour your scribbles. And yeah, this is a good one. So so please let me know
after you've taken the class, please leave a review
if you enjoyed it. And I'm happy to keep going
and keep finding more. She's guys
2. Insight into the new brushes : So scribble method,
I have actually created a brush pack for us which you could
go and grab right away. That's called
HugsyArts, scribbles. I must have tried. Excuse me. I must have tried
in the region of 400 different types of pencil, pen by rho, fine liner brush
that there was available. And I still didn't find one
which was right for me. Now, there's a reason for that. A I'm using this temporary
screen protector still all. So that's going to
create more resistance. So I wanted something to suit that if I was just
straight onto the screen, it would be a bit more slippy. I might need slightly
different settings, but I'll show you
it's oversaw that I am to I didn't want to be too. I mean, it's alright being free. But when you think that
you're drawing on paper with pen or pencil, there's bite and
there's resistance. So you're not gonna
get the sharp, sharp, jaggedy lines which are weaving all over the place. That's not true. That's not
really how things work. So I've had to put streamline and stability on and
on some of them, even pressure sensitivity
on some of them. Just to get it how I like it, which I think I've
achieved. Now. One more thing. Before I introduce you
to the new brushes, I want to introduce you to
my settings because I've actually changed my
settings for this style. So now if you click
on Preferences, go to the pressure
and smoothing. I've tuned my app
pressure sensitivity. Just click the bottom
circle and just drag that ever so slightly
to the right. It just takes a bit of
edge off so you can get the proper flow for the thin, thin marks and stuff like that. Just takes the edge off. So I've done that. I've turned the stability
all the way off. Motion Philip filter
is on nought 0.1 motion filter and expression 29.8 just seems to
be the sweet spot. That's where it is. It works. So I just thought I'd
show you that obviously this interacts with the brushes individual stability settings to which I've taken into
account obviously. Um, so, yeah. Right. Let me introduce
you to the brushes first. Let's grab a Canvas. My canvas size, which
I work off personally, is 5,400 pixels by 6,750 pixels. A DPI of 700 is
giving me 23 layers. Obviously, if you are
older and older models or smaller RAM models, you're going to go less layers, but it's more about the
dimensions and the actual size. So another fine size to choose
for me would be like this, 133,200.40 pixels by 4,050 pixels. And that's again
at a high 700 DPI. Just bear in mind
that I can create these brushes, my canvas size. So if you get them in
their preset to a size, It's to this canvas
size that I use. So you may need to
tweak up and down. And it may sort of, as I'm telling
you, what size I'm using during the tutorial. But we may have a
different problem if you get it and thinking, well, I'm using the
same size as well. Hugs, he said, but I
just don't look wrote this probably because you are a different canvas size to me. So just bear that in mind. Bear that in mind
as easily resolved. It. Just just a case of
adjusting your so settings. So actually don't know where
I was there, but whatever. Okay. So brush pack hugs
the scribbles. Then the bottom. You can see I've created a
category holder called pens. And this is where we're going
to keep all our learners. We got the scribbles Pencil, which is what I've been doing. All these recent
ones you've been seeing have all
been with this one. So this is my main go-to one. I like it. But I am a Fiddler. I do like to play with
different brushes. So we got some other
options here as well. This one, ballpoint pen. Harder, you press, the
darker it's gonna get We got the HugsyArts Pencil, which is just my
original pencil. I've just, I've just tweaked it up for the scribbling style. Again, it's very nice
on my canvas size now. Yeah. Sorry. Frosty is when
that in the wrong, true but this morning, fine
detail and texture again, it's just a texture little. It just gives you something
different to try. If you want to, it looks good. I haven't actually created a piece of Art
with this one yet. I'll just tweaked it
ready for scribbling. I know for fact that you could make awesome out with that pen. That's why it's in the wet ink scribble exactly the same
as what I've just said. I haven't actually made
anything with this one yet. Just know when I do
is gonna look great. Old fountain pen. Again, if you're
looking for that and more inky style look. The only thing with
this is it's got a bit more pressure
sensitivity to it, so it will jump bigger, quicker. Whereas the others,
I've tone that back so we kept that can happen. Okay, if we look at our
main when Huxley scribbles, just for the record, I
sort of set it to 31. And that's on my canvas size. And I swear swear my sweet spot is that's
just what I want. You might want different. That's what I use for all these last latest
ones I've been doing. This is this brush
is not working. Why is this brush,
this brush here? Okay. Awesome, Brilliant,
excellent, amazing brush. So that's, that's
the number one. That's what I recommend
you start with. We got some splatters
which we can use. I tend to use this one a
lot at the end and just blasting a load a
little inky splotches. Again, you haven't really
even got to do this with the scribbling style. It's all about that
scribble part. I know, but I just gonna show you everything and while these brushes do. So we got, that's the one I use mainly for doing my splits. We got the splatter micah. She's gonna give us a bit
more of a crazy goal. I've used that many times too. Salty splat is really, really nice if you just want, if you've got a really dark
area with just splatter in an older a lot of ink
drops looks really nice. This is just a
single splat Mika. So pretty self-explanatory for the splatter brushes,
the blenders. I mean, again, it's gonna
be up to you as you go. I've been loving this one. This is the one I've
been using for. I mean, if I'm doing a bit
of undertone just to give my scribble a bit
of depth and value, I'm using a brush which is too hard edged to look authentic. If I bring this out,
I can just saw, yeah, you know, faded away
feedback in and it gives real texture and it just
sits nice with the style. But having said that, I've made this one since, which arguably it's going
to overtake that one. This is even more texture. And this is just as nice. So they're gonna
be my main go-tos. Obviously, we got clumpy food. We all know what that does
it because it gives us a nice a nice painted
type of blend. And the water smudge
tool, which is gonna be it's going to give us that spot bleed,
that water bleeds. Spell for the really
soft feathered edges, which is again,
absolutely brilliant for this style K. So that's
another good one. All the blenders, absolutely. Top-notch washes. Let me just quickly
go to the canvases. I mean, these are
self-explanatory. I mean, you just grab a color. You just go, whoops. Once you set that to multiply, of course that's going to be, we work underneath this. And that's gonna be our texture
that we're looking for, for our authentic paper look. K simple job done. Some of them like this. Like we could use different
colors for these, you know, you wanted a bit of a yellow. The yellow in tone Like so. But if you use this one,
I think it behaves. It behaves a bit funny
when we start changing the color with this
one, stick to black. It's just a bit of
PFK-1, this one, I wanted to put it in because
it looks so, so cool. Obviously, once you
lower the opacity down, it's the same old thing. Washes. Washes. I mean, I go through these. There's no particular
one I like to use. If anything. I liked this dirty wash. I think it's great. And as I'll show you as I start, but I like this one just for
adding a bit of texture. It's not too erratic.
It's not heavy. You know, if you've got
some under the neck or some darker on an animal, you can just kind of yeah, you can just build up
some texture there. So that's one greenie Postel
which is an awesome brush. Haven't actually used it
with this method yet. But it's there. If we need, it. Gives a real Awesome
awesome pencil effect. Scratchy wash again,
these are all really textured, scratchy ink stains. To try and give us
an authentic look. We'd wouldn't want anything
to your standard round brush. We wouldn't want
that for this style. It'll be too neat. They
were throwing all off. So we need we need messy splat wash. Eustis an awful lot as well
for dark areas. If you're wondering
why it's gray, it's because I've turned the
opacity down which is great. Great of me. Because I was just
wondering why it's gray. We've got the watercolor wash. Again. You know, I'd be slapping
them on like be lower in the opacities or up in the
brightness to get it right, All will be revealed. These work great. If you've just work Street
in with a lower opacity, safe, textured whitewash. Spends debar. Super texture. Really nice to use. Really, really nice, wet, really gives you a wet feeling. And it's got a nice bit of
hard edged texture there. So it's like a real sponge tab. But yeah, the one I used the most and I
probably reach for first is the dirty wash. I tend to go straight
in with this because I just love
the texture of it. And I can sort of, you
know, play with it, blended up a little bit, looking to clean
edge or something. And I can get nice,
nice fibers for that. So that's the brush pack. I'm just gonna put
this on charge for T2x is unlikely
to. That was good. I literally charged up for 2
min before I pressed record. Okay. So I'm just going to grab a drink and then we'll
dive straight in
3. Composition & using focus points: I'm back. So I've introduced you
to the brushes vaguely, but just kinda showed you what I use really made that clear. So let's introduce
you to the style. Now. If you think of an
umbrella term, yes. Scribbling. It's a kind of style. Yeah. But underneath scribbling comes many different types
of scribbling. You know, we can have
a really simple, totally minimal like that. All we got extra
super, super detailed. When you come down to the
crosshatching and stuff, which professional
Pencil is to use. All kinds of comes under. For me. Scribbling, loved my right hand. And I like to dive sort
of from here to here. I mean, with this
one, my Harley Quinn, I dived towards
the detailed sides because I wanted to test
it out and give it a goal. Now up-close it don't
look like I have. But you can see neat
and accurate is that is actually it's very detailed. Okay, I'm gonna be showing you how I introduce colour as well, which is just mouth, just magic. This was kind of detailed in some areas
and then I went loose. And let's dive in.
Let's dive in. Right? I'm pretty sure. That is I've got a picture
of a dog to draw for us, so we're all going to draw
the same thing if you want. Just asked me or I'll share it. So I think this guy, I think he was called chandler, Shonda meet a drawer him. Think of as chandler. Not hundred percent
there, right? So one of the most important
things is your composition. So we don't want to just go, Oh, that's just squeeze him
in ears at the top. Toes touching the floor
and go with that. Okay. Because that's bad composition. Sort of the wrong kind
of negative space where he got gaps and breaks
in the border and stuff. For this style, sometimes it's nice searches
to go a little bit smaller and try
and stay central. There's one composition
rule I stick to, and I try and make sure that I ease in one of the
rules of thirds. So if we imagine on our page, we got this broken up. And you're supposed to have eyes as a main
focal point or the main. The main focal point. By what are these
rule of thirds. And you sort of flow from that. The fan Apache rule at
the fan Apache role is it I think it's
called with minimal. I mean, I like to use the
actual scribbles to draw the attention to stay on the line of my rule
of thirds briefly. Like so. I'm just going, I mean, that's where I would go okay. By there. So that's what bad off. In fact, that's got rid of that. So there's no cut in
or anything like that. Now, we're going to be tracing. If you wanted to, any
liquefying changes to make it look a little bit
more unique to that. Now, you want to make
those years a bit bigger. Whatever. This is, the
time you do that now. And you don't do
it at a later time because you won't get it back. I don't think you want
to give him bigger eyes? Okay. So that's on Liquify
and I'm just on push. Vary the size. Distortion, momentum all the
way down is quite potent. Pressure backs. Okay,
So there we go, right? Happy without composition
and we're happy with our photograph, blah, blah. We duplicate a lot photograph. And we are gonna be
working in the middle. We're gonna be
using this top one. If we want to introduce
colour at the end. This is gonna be up to us. I'll show you how the Murray. But we're gonna be
working off this one. We'll set this one right
down the bottom luminosity, which will turn it
a black and white. Once we knocked
out one-off case, we lower that down
a bit at sweetness. See what we're doing. E2, E3, usually good. Remember we're working on
the one in the middle. I'm just gonna be using
straight up black. I'm using my HugsyArts
scribbles pencil set to 31. Start at the focal point
of where I want people. That's what I want
their attention drawn. So in this case, it's
gonna be his eyes. With most pets, I am going to be drawing attention
to their eyes. So this is the bit,
I'm going to be doing smaller hatches and squiggles and really
drawing them into that
4. Learn different pencil grips: Hatching or scumbling
techniques. Okay, scribbling if
you'd like techniques. So when we're just, there's different ways to
hold this Apple pencil. We haven't always got to hold it right at the
end really neatly. You're not gonna get a good, really good scribble like that. It may be too
accurate, sometimes. Hold it more at the top
wherever it feels right. So you can just get a
little bit more wash. I mean, there's different ways
or the pencil you've been sort of underhand pen. That's what it's doing. More better if you're upright. You can even switch
risks around and do it underhand if if you
are working upright, I'm not I like this one. I like the pen writing grip, which is really neat. I already just a bit
further up just to get a bit more little
bit more movement. So squiggles. Get used to the figure-eight. That's gonna be your friend with texture and stuff like that
when you just build it out, just lots of figure eights. I'm going to be
perfect but kinda looking so to a
figure eight. Yeah. I mean, you've
probably seen this before on other tutorials. I just wanted to go over
everything while I'm you. Scumbling, texture building. Great, lovely. There's a few more. We got sort of just your
run-of-the-mill hatching. I like to just go like this. If I wanted it a bit more lighter and
lighter area like that. One, did it extra dark? I'll go back the other way. Yeah. Catching get
used to hatch in. Obviously just using
circles is great. Spin in the brush round. I mean, especially if you've
got a curly haired animal or curly haired human. Just again, curl,
curls, hatches. Unlike the scumbling
number, eats brilliant. Obviously be free and do whatever you feel
comfortable to wear as well. Some people might really
hate going like that. Whereas others might prefer to call a guy who's
go, we're flow. But that's the three main ones. There's another one. If you're doing hair
or say even scenes, I need to grass and pushes and plants and stuff like that. And you could just sort
of just sort of finish a finish point because it gives you a sharp
cyber texture. Rather than that
curled everything curled more straighter hair. You'll find me just
hatching a lot a bit. So I called thinner. Yeah. Thus the techniques
I'm gonna be using
5. Follow along full scribble drawing: We start, I start at
the focal points. Now. If I'm doing a really dark area, I'm gonna be using
tight little curls, even little curls or little
scribbly marks like this. So the darker at the size. I mean, I'm gonna be just
typed little curls like this. Just doing little curls
all the way around. Area. Tight little curls. Lifting the pressure
off slightly. For the bits that
is a bit lighter. Let's get in dark again
with that bit there. So as we see, as
we start to come around, starting to lift, go into a different
pattern for that bit to the inner bit of the
eye, to the other one. Little tiny little ring luck curls to really
define those eyes. So we can sort the highlights out after this. No problem at all. Okay. So I mean, I wasn't too much bother and
that's what I would class. I'd class I don't on the eyes. What is going on there? My brush, yes. The case. So I've used a Curlin
clearly technique there to get in. Get
those I used to. This is my style. You
may do it a lot simpler. I do it better both. I do a bit of a detailed part where I want the focus to be. And then as we get
down so that I eggs, you probably just see me just
do a bit of that because I don't care where people look by their looking
down that part. I want the focus point to
be that it's this guy is chandler and he's
draw your attention. So got some darker marks here. So let's just go with a
flow there like that. Sure. If this is
technically correct, but I like to sort
follow planes. If there's a plane
change like this. I'm going to take it that way. You sort of introducing good top drawing skills and
to your message scribble. So you're giving yourself
a bit of a cheat. You sort of giving yourself
a standard chance of it looking great
when it's finished. Obviously follow through
as well if the firm is really clear to
follow follow it. Because dark area there. So I just pop that in. Just following these
little shadows down. So maybe go on with this size, I'm sorry, Angle, playing
for the side of the nose. Scribbling. Scribbling. Just go like that. Under the nose they're following the direction
of the first kind of easy to do paths really
humans are harder. Going to make up your own mind of the plane that
you're gonna be doing. We know the nose
wraps over there. Scribbling,
scribbling, skill that knows in it's just
really dark there. So I'm just going
to run with that. Got really bad. Loaded
it in here as well. Opening CLK, sunny outside, the screen protector, making it quite hard to
see at the moment. I don't think I got
much time left with it, to be honest, it's
done good though. I've added on for awhile. That is really cheap. I mean, the texture now, that's pretty much
gone to be fair. I've added a few months. If a paper like sorted runs
out as quick as this and then forgot paying for
your 50 quid for that is going to
bring a bit of sight. Have chitin for this
along the same plane. They're in there. Okay. Well, a little bit darker. Right? And they bits. So that's sort of my main focal point where
I want to draw people So as a sort of fiddly as all
get on the whole drawing. This is fiddly as our gap. I mean, just going to
basically follow some shapes. Again. I'm doing this,
that sort of thing. Following the just
seems to work. It looks great in some
textured further. And then underneath
people's I'll use will be drawn to where
there's most contrast to is not all about
composition placement. If you've got really
jarring darks, next two lights,
people will look back. I'll draw there, so be
careful when you get down here to start coloring
in really black, but leaving this white. Because people, I use
a start to wonder. You want all the focus to
be where you want it to be. You, you direct
people where to look. Remember darks and lights
will attract attention. Now going to start loosening up. Now as we go up these years, I'm just getting
the darker parts in the more important parts to
signify the edge of the head. I don't mind the
tension being drawn. I'm not too far away from
my main focal point. That's where people
can look at that in one scope and start
to loosen up. It's important to loosen up. Otherwise you'll end up with just drawings, know scribbles. A good way to loosen up is
to hold the pen at the end. It's sort of stops
up into two fiddly into neat little tip. And please, if you do these and you're happy
with what you do, please share it in the
procreate group because it's inspiring others and it's
definitely inspiring others, especially this methods
people are starting to like a little bit darker. Me. I can't believe I was choking
on his trustees earlier. They went in the wrong tube. Right. So you can
see I've sort of followed platens
but really loosely still a bladder block. This part yet I'm just going
to shade in this in like so to signify,
it's a dark color. I'm just going to really
I mean, it's white. Is white. Is white underbelly. Careful not to press too
hard when you're done. You know the parts
where you don't really want people staring. In fact, what I like to do, what I was just a
bit of shadow in. Just pop a little. This way you have your friend just
wrote this look where we are, okay, moment of truth. See where we go. Simple as that.
Well, I'd like to do is define this area bit clearer. So maybe just go a
bit darker around. Just to signify that. That's actually his chin. Squiggly, squiggly. You can
keep going over and over. You would give it all
another coat if you want it to. I tend not to. I tend to use the ink washes to get myself
a bit of depth, but you could use just scribbles if you wanted
to create texture that way. Just be careful when you're
done the bottom part, because you don't want to go to join up people's
eyes all over the place. They'll just get bored
with it straightaway. They'd be like, Oh yes. Alright. Okay, so that's where
we are with that. And I'm quite happy with it. It looks cool, it looks FUN. And we are bearing in mind, I waffles for awhile
with 30 min in. Okay, that's that
don't really add up, but as long the actual drawing was just a little bit on
edge and around there. Again, important parts. I want, I used to be drawn Right? So underneath that
layer we need a new layer. And this is where
we're going to be introducing a bit of a wash. So let's start with start
with the dirty wash, which I don't know why. Just my go-to at the moment. The dark areas is where
we're gonna be going. Let's lower the opacity. We don't want to go too crazy. Oh, okay. We're on gray. Okay. Didn't even know it today. Right. Let's just wash in some depth. Starting with the darkest areas, which was his nose. Just said under there, you
had a big thing there is always helps if you have a little Canvas
thumbnail at the top there, but I'm a bit too lazy for that. That's way too much artwork. Again, I'm just using
black, if you notice, I'm just using the
color block to build up a bit of shadow, bit of depth. There's a reason I'm
just using black, which I will show. You can wait to show you. So awesome. Okay, that's I'm a
bit of a wash with has put a bit of a bit of a washed wash. Again, that's too
dark for that area, so I'm just going
to bring her back. She washy where we are. Less give it a little smoke. Just in some areas. Extra texture. Will I keep that opacity? You'll notice, I don't
know. Dark, dark, light. Dark. Light is not a mile off. I probably gonna go with
our 20, gonna go with it. So now I like to go out
and add another layer. And I like to just blot in
some splotchy splatters. In the darkest parts
I like to do it just, hey, just not in texture.
Bit of interest. Keep it at FUN. Splits plots, but we
could even just go mad. If you want to put a bit of super salty splat. Okay. I think I think we've done
out there who without due to when I do want to
strong maybe, maybe not. Okay, so that's basically
I do my scribbles. They look more like
drawings in the end because if the
values we've added, we haven't got to
stay full opacity. We can, we can go down a touch. We only want to give the
impression of the value. So that's that. Now, that's a scribble drawing. You can go as
loosened wild as you want with those scribbles modes. You can even go back in. And you know, really, really scribble, really scribble some stuff
up if you want. It always depends. This is gonna be up to you, showing you how I do it. And then you could go both
ways from how I do it, you could go more
neater. More simple. Wild is up to you. I'm guiding you straight
down the middle of the road. I'm showing you. You
can either go left or right or you could just carry on straight down the middle
with me, whatever
6. Tricks to instantly introduce colour: There's one little magic trick. I thought, Oh, can I
bring colour to these because they look
good, like, like that. Some people love color. I want that color
for my, for my kids. I'm gonna do one of these
of my kids for the wall. So I want the color. Watch this. There's a few different
ways I'm going to show you the lesser way. It's just small, subtle. So where we got
our Scribble Art. If we click that on and if we clip mask
that to our line Art, it gives us coloured lines. Okay. We've now got, we've
now got colored lines. I tell you another
thing you can do. Let's just bring
that back a sack. You can even give yourself a colored wash to
if you've just tick them, come on, take that above
that and clip mask it to the wash.
Now, we got colour. And it looks good, it looks
authentic, it looks nice. We using the actual colors in the right places because we're
just using the photograph. So it's perfect. You're going up the
saturations now. You can play with the colors. You could do whatever you want. That's the subtle
way of doing it. This is the way I prefer. Go to that unclip that
is hit the Layer Mode. Wipe it down to colour. And bam, everything underneath is never going to become colour. We can play with this in such a way that we can make
perfect color drawings. But that is just a click of a button and it's now perfect. Color is amazing. I shocks me, shocks
me these things. So you can see we
got some stain image which is sort of pick it
up the grass on the dog, on the pet on the photograph,
which we don't want. So I'm going to
smudge your back. No problem at all,
just like that. I'm on my paint layer
and my value layer. I'm just going to smudge your back leg so
it's no nothing. Leave it at if you want. It's not really
causing much harm. It's just kind of but sometimes you will get grays and whatever the
background color is, which don't quite sit right. That looks fine. So what I'd like to do is
duplicate the color mode. And I like to go a
little bit mad with the saturation like this one. Take it to max. And then I decided where I want it then
that's where we were. I like to just share
that will do merge them. Okay, So How cool is that? I mean, that's really cool. Another really
awesome thing to do is actually let me
just double-check this because I think I forgot. There's a way to
really make color pop. And it is alright. I remember, I remember it one
on there. I don't know why. So once we got this okay. Well, we can do is we
can give it a bit more. We can give it a bit
more on as well. So if we clip mask to see this, with an overlay, we
can start to washing. We can wash in some depth. In fact, forget
what I just said. Forget it because clip mask is too low on the opacity
to, to have an effect. So what we could do, I suppose, is maybe see if it would
look nice up above there. That's the one I
was looking for. So we go above our color mode to make our colors pop with it. Now, sorry guys, I
should have really been doing this at cramming it in such a
short space of time. This is more of a pop or
it's not even essential. But just for some areas, especially splat, look
cool with a bit of pop. So you could just pop in a bit of texture and pop
in a bit of a splat wash See, it's going to bring some
magic colors out the eyes. It's going to bring them out. And of course, we haven't got
to use all the full force. We could go back a touch. Then right at the
top of everything, I like to go to White. Get my hopes. His scribbles,
pencil. I like to. You mean you got to have
a white highlights. You've got to separate
the men from the boys. Little bit of a maybe
that's a bit wild. They'll get you there. If course, if you add a bit
of with Scratch going on, which I don't really
think Boyer's here, Azi. Yes, actually, I will
go look at them. Go a bit lower. We'd probably not going
to see them but but they, they they, they in spirits. We go See that. So you start from
the bottom, know, when you start with a value. And then we got
some random splits, got our scribble line work. And I said withdraw it.
Quick and easy was that you can see we got a
lot of green coming in here because of the
green on the photograph. You have to have it. Now. If you delete it,
it's going to go back gray because that's the
colour of the pencil. This is gonna come down to you. It's gonna come down to
you what you wanna do. You can delete it with
an eraser like so. But like I just said, what a resume or using
their like I said, it will go green gray. So just bear that in mind. It doesn't look too bad gray. It's not really causing much
harm in this case because the green just kinda
sits nice with the red, the orange skin tone.
So that's what I'll do. And then just right at the end, I like to go back to black
and go my scribble layer. Just like to just
put the guy's name, which I know it's chandler. So scribble out in as well. Just be done with it. Hi guys. So I hope
you've enjoyed it. Hope you're excited by it. And if you've got
any questions while you know what I am
just in the group. Fire away. Fire away. Ask any questions
you want on there. And I'm just bored
waiting on the board, but they're ready to answer. I can't always be on my
on my Facebook phone, but, you know, trauma best. I'm trying to still
learn myself. You see, so It's all part of
a big journey that I'm on. I want to get to
where I want to get to character is
where I see myself. I tell you what the way I've
actually considered, think, I've thought, Could
you do these life? Could you do these
in five-minutes? And as I'm on that I'm on the case because you haven't got to go into
that much detail. See you once you've done
the eyes and the nose, the rest could just
be could you do a face quick enough
to erase all? Like I said, it's
an umbrella and it creates a lot of
different things. So this, if we zoom in, you can see it's everything
I just showed you. One as a person, not a pet. It's everything I
just showed you. It's exactly the same. I've tried to follow the planes. I mean, you haven't got
to get the right plane. You haven't got to go
with the right way. He just go a different way to the next plane to signify that it is a new
plane or a plane change? Okc. Yeah. Under the
skin, under the neck. Got this horizontal line. And for that bit, I'm
going to go more vertical just to let you know that
it's a plane change. You know, that
there's difference in value, difference in form. Again, with the clothing I got, I've gotten really vertical
with the clove in and horizontal with the
skin just to let you know that there are different. Because if we want
the colors off, I know what the
colors tell us a lot. Don't know. If we
want the colors off. And we worked the tones off. You still get an idea of form
because of these scribbles, even without the washes. That's just with
a few scribbles. So yeah. Let me Guys thanks. I hope you enjoyed
that Tutorial. Sue Sue
7. Updated method alt part 1: Hey guys. Just wanted to do a
quickie, quick video. Just showing you
some little tweaks that I've made some changes. So I don't really use the color, the color blend layer anymore. It's a bit, I mean, it's great. It adds a lot of vibrancy and
I still actually do use it, but not how I did. So I'm going to show
you, I'm not going to do a big full-on portrait like
I did for the full tutorial. I'm just going to
show you the changes. And one of the biggies is yeah, I use different blend modes and I use a few more
clipping masks. I'm just going to
explain it because it'll, it's not complicated. It might sound it first off. But when you see it in
action, it's not that bad. So let me start from scratch, me get rid of all this. So that'd be a good idea. So a lot of people have
been struggling with. When you got a photograph and you start
scribbling and you see the pixels and the blurring of the photograph depending
on the quality of it. Especially when the
edges where you've got the sky color coming through
and things like that. So that's an easy fix, that's no problem at all. I'm gonna show you this is
also the method of how I do like the colored pencil way, which is pretty much the same. Just using different strokes, really been a bit
more careful and using more hatching rather
than the scribbles. But it's using this
exact same way. So let me show you. Let's get to photograph. This girl's name. Was this girl's name? I can't remember a name.
I'm so crap. We're names. Excuse the language.
Wasn't name. Give me one. Mba was the last one I've done. I don't know, but I
am going to find out that name field because
it's doing my head now. So she'll get the
name. Composition. As you remember, I'm just
going to quickly show you rule of thirds. We go. Last not the best colour
the shoes as a to be fair. Rule of thirds our pages
divided into threes. One, so roughly one to roughly, we want the focal point to be on any of these thirds really. Unless you've got something
really dead center. But this is kind of the way
that you draw people in. The luck to flatten
symmetrical and perfect. You want to give something
interesting about it. So, yeah, so as you imagine, focal point is on his nose
and then it spirals out. You can spiral out. Anyway you want I'm sort of coming year so you get
attention drawn that way. That's different
layouts as well. I just use this when in general, nearly all the time. So that's the one I'm showing. So we've added our photo. Let me get rid of that. And that's the only
layer we got there. Now at the moment,
we're gonna do is before I used
to duplicate that, and I would set that to Luminosity and we'd sort
of crack on that way. But this time we're going
to leave it at normal. We're going to drop
the saturation off. Okay, so we still got our original photograph
at the bottom. We've got duplicated
version above it, normal, but it's desaturated and
we're going to duplicate that and set it to hard light. And this is going to make,
it's gonna make tracing things a lot nicer
for any style. For everything. It's gonna make you see shadows and see the values
a lot clearer. So we're just going
to drop the layer down a touch to about there. Not that off will drop this down a bit so we
can see where we're drawing. And you can see we've got we can clearly see
how it dark areas. If you have a little squint, you can see them even clearer. So we're gonna be working
on the layer above. And I'm not going to
draw this whole thing that's not doing that I'm just doing just
going to show you apart. So I'd probably do his nose in his eyes and our few squiggles. Just to show you the new Way that I do the
coloring method. So just a quickie, I have actually got my streamline set.
This at the moment. This is personal preference. You can have it
however you want. If you need a bit of support. Then yeah, put the streamline up a touch and the
stability up a touch. I'm just enjoying the crazy look at the moment and going
through my crazy stage. So I've got pressure
at which stops it from going too big and
too small to quick. That's all that
really does sound. Yeah. I'm starting to hold
my pencil as well. Because I was found always
get into neat and too precious with everything
holding it down like this. So now I'm kind of pretty
much the whole thing. I'm just free myself up a
bit. So let's get going. Just going to scribble in
scribble in a few details. I'd like to is
tighter strokes on the not so much
the darker areas, but certainly, definitely the, the more interesting areas and the bits you want
people to focus on. Because obviously that's where
you're gonna be bringing more photo through as well. So as this will be
our focal points, straight, straight at
the nose and the eyes. These are the bits I'd be
sort of hatching a little bit tighter, if you will. Whereas on the body I'd
be kind of whatever. That's why I don't mind
this photograph is used a portrait filter thing which is blurred the body of I don't really matter
because that's fine. I will focus point is,
is the face anyway. This, I'm doing the scribble
method because that's kinda the vibrator on
colored pencil method. We'd be just sort of
going like that instead, you know, hatching
different planes in different places like that. But it's all along
the same lines. Really. Just using
the color black. Good, old fashioned, straight
down to the bottom, black, digital black, they call
it and you're not never, ever supposed to
use digital clock. But obviously we're going to
be Blend Mode and above it. So we're not actually
using Blackberry. This helps us see
wherever go in. Yeah, squiggly, squiggly. Quickly do this nose and then
I'm just going to show you some nice tight
ringlets like this. So I think just yeah. There's not really
that is a method to it because I'm not
going need an in it. I'm trying to draw a little number eats
and little circles. And then I'll make
to a few squiggles. That is a scumbling
is why they call it. It looks crazy, but
there's a method to the madness buildup. They're staying quite
tight because a value and inside they're just
going to go a bit bigger. The top. See, I'm holding the pen now it's
giving me more freedom. One thing I should point
out is I've actually taken my paper
like off for this, for this little mini video
because I feel like it affects the visibility and
more you can see quite badly. So just took it off. It's not really making much
difference to be honest. Tightening up as we get to the darker parts and
then really tightened, pressing firmer on
the darkest parts. So that's where our
focus is gonna be. So this is gonna be the
most time-consuming part. If the whole drawing, and that's why I like to start there and crack on,
get it out the way. And then it's
downhill from there. How I like to work. Finish this off a bit of camera. Obviously, you got it
looks dark but anatomy. So we'd be sort of I mean, I'd be helping myself afterwards with going back in
without getting wash To solve that. But obviously the fault
was going to help us a lot because the values are
already there in the fall. This is purely for effect. You see we get an lighter,
so squiggles looser. Probably going to leave
it there for now. I think. So. Apologies if you wanted
to see me finish this. But it was only ever going
to just pop on with tips. I'm going to do
it quite regular. I'm going to pop on with updates and tips, anything, brushes. I come up with things like
that just to keep things taken along rather than having the hassle of doing
a full-on tutorial, which we call a
plan and get right. We start to move out focus. I'm gonna do a better
the outer bit actually. Especially I'll put the
year because Andrew, Andrew Parks was having
difficulty with that area saying becomes quite pixelated or there's a change of
color because of the photo. So we're going to sort I
don't know, elsewhere. I'll do a bit there
just to address that. Let's leave that there. So Scribble is done. According to looks
at that stage. What we're gonna do
now is we're gonna go, we're going to go
below the scribble and paint in a bit of depth. But before we do that, we're going to grab our
original photograph, drag it to the top. We're going to
duplicate another one. We're going to drag it
underneath our line at the top one, It's gonna be set
to clipping mask, which is going to know clip
onto our and our logo. Now we just created this one is going to be turned on and
set to clipping mask. And we're going to open up a
layer underneath a hit home. Always do that is so annoying. So it looks like that. Yeah. You've got your photograph
clipped to your line that we've got another
photograph exactly the same. Clipped to a blank layer which we're going
to use for wash. So if I was to go
ahead and do this, it just brings the photograph
rule. So it's no good. If I was to lower the opacity. Just bring some parts through. It gives a whole new,
whole new thing. Whole new idea. I did that
by the way, with my chest. The original clumpy for brush. Just check you got out and yeah, I think I think I put it in. Yeah, of course you have. Okay. So now we using the
same clumpy for brush, I'm just going to smudgy
smudge some of this out. So it's not true. It's on a dead harsh lines or
anything like that. Just bleed it out of there. So it looks genuine. Like so and I'm going to bring somebody over there actually
because I want to try and grab those colors
Andrew was on about. It looks like it I
haven't really haven't happened maybe as this method than the already
sorted it. Possibly. Let me add a few more to try and trying to find the
wait one there. No. Okay. Maybe this photo just
hasn't got over there. Green over there. Okay. So I'm just gonna
leave out I just to show you how I deal with it. So we got this far
and we'd like, Oh, I don't know. Is it a bit falter? We look really closely. You can see bits of firm. This is where we use
our technique from the pet portraits or false to pet portraits tutorial
in the very beginning. Simple because all we actually need from these photographs is the colors in
merge sort places. I said, we don't need
to every detail. We're not just obviously it's
going to look photograph. And when I look going
for realism here, we're going for, for Art. So click on the one you just did your work where you're Washington a
lot of the photograph. Blend the blend. And let's do what we
used to do on pet STA, pet photos, a pet
portraits forever, I called it in the end
is a terrible name. And that's just
blend out like this. That's eliminate any
little fine details. All these little fine hairs. Eliminate them because
we only want the color and other detail and keep our colors and values
intact as well. Like so. Because these are the main
8. Alt method part 2: Blend the blend. And let's do what we used
to do on pet stock photos, a pet portraits forever, I called it in the end
is a terrible name. That's just blend out like this. And let's eliminate any
little fine details. All these little fine hairs. Eliminate them
because we only want the color and other detail and colors and values
intact as well. Like so. Because these are the
main focal points, the nose, the eyes. Let's take a bit
more keen on them. Make sure that we're doing
things right on brushes. I'm just making sure I'm
keeping the colors in place. So I'm just trying to eliminate now for food detail and stuff still on that here. So corners, edges. You see me pull up a lot
of green. I mean, watch. Why not? Okay. I'm stupid me basically. That's the scribble
lines, isn't it? Yeah. So corners and edges
just eliminate it. Just blend it with blend the photograph
above your layer out. Put whatever color you on there. Easier than it seems. And also you're eliminating the pixellated photograph that could be there to left sunday, look, should I wash it away? Yeah. I think that's great. I mean, obviously now, once I get to this stage and it's a bit washed
out and a bit near. It's neither here or there. This is really start
really backing in. Let me just delete the arcs one. So I did that for I only did that for
just to show you how to pull the color
out to cover it. If you've got a really
bad photograph. Another thing you can do is when you get your
original photo, just gaussian blur it
two or three per cent. And that's another
way to eliminate that pixelated thing that I know exactly what
you're on about. That allele, eliminate that. So you can build this up now, you're
going to what you want. You can put more scribbles in, in certain parts, washing
in certain parts. This is where I like to. I mean, I would probably go back in with different brushes, like see the splatter
ones I like. Quite like this
one at the moment, splatter wash, go back in. Splatter in some textures. I knew it. I knew I was
on the wrong layer. I'm so rubbish at this. And I but a stressful morning, I've been in the kid's school to have Fruit Ninja club,
whatever that is. Just done it and I
don't still don't know. That's what
I wanted to do. This is a good brushes when
this is the splat wash, it really adds texture. It's nice to break things up. It really makes it look
genuineness nice, I like it. So now if you're a
bit wishy-washy, after you still done it. This is where I will duplicate that layer there above my wash. And I'll set that
to a hard light. And I all go. So I've
put it where I want it to want to go too much. Maybe they're Gaussian blur
that to about 44 or five. Okay, then I will
duplicate this one again. Go above the heart, Hard Light. Notice though they're
all still clipped. A cup of the hard
like cartel your wow. Yeah. And I set that to overlay. And this will give us some pop. Like so see, I mean, we still got options. We can have it as vivid as we
want really. We keep going Of it as vivid as we
want to duplicate again, it'll just give you a
little bit more pop. But that's how I build it now. It's a lot more accurate
in my opinion than this. Then it just wiped them off. This is what I did show you
on the original tutorial. We set that to color
mode, didn't we? Just rested at the top, so it brought it in. The US clip masked. Yeah, that's what we was doing. There is fibrin down
together, it is vibrant. There's still a place
for this color mode. I'm just not sure
of its place yet. So leave out me. It does make things vibrant, but a little too vibrant. If you're trying to get some, some sort of genuine
stuff going on like this. So that's about it really. I think to be honest
with elimination of color modes and this
clipping method now, I think that's should
eliminate a lot of the Pixelate and problems. Give you a new, a new boost. You could carry on adding more blend modes if you want it. You can even put
a color mode you, I'm not sure how that
are called doneness. Have a lot. Even darken it yes, washed away or you could put a multiply layer on there and you put a hard light
layer back on because the hard light and vivid light
is there, the color pops. If you really want to go
crazy with the colors, you could just put
a vivid at the top. I originally put a bit of Gaussian blur on this
hard light layer to, it just gives a
little dreamy wash. The effect is we still got our accuracy with every other
layer is still still crisp. But that little Hayes, Hayes light is just going to add the dreamy look. So as that. And obviously same
with your line app. I don't really mess with
the colors too much on this one to be fair.
Don't really see much point. You could maybe add an overlay. But here or there is zero there. If you add an overlay layer, it's going to meet your
darks dog or your lights lighter whilst giving you
some saturation tool. So if you find that alone now it's going a bit
washed away in overpowered. Bring it back with an
overlay above that. And of course, you have your splatter thing which you will go back to your wash layer. If you want to do some
splatter and Crackle. The way splat. Want. Just remember that. When you splat, you're
gonna be picking up all our photograph
because we're this is literally the photograph
burning through. I mean, just in case
you didn't know. So you may after then
you do this before you add all your
duplicate layers in there for your vibrancy. Otherwise you'd have to
duplicate them all again. But let's just wipe them off. Because we, again,
we'd have to be blending colors
back out if you're not going to want black
layer, for instance, or different blending,
blending the, pulling the color from, from the photograph and one a
bit of pink on our pink up. Well, not to be liked. Also. Um, another thing
is if you want to just pop a bit more,
see the color. This is where you could, at the end, above everything, pop and overlay layer in and use this as
I'm playing Black. Use this as your,
your color Popper. If you're worried, it's
going to make things pop whatever you're on. So the white, it's
called the white. So black is going to give
you real Pearson. Deep luck. We could see he's got
greeny brown eyes, so I'd be inclined to
go down that road. So this is just
literally is a pauper It's one of the things
when you sit back, anything? Yeah. Oh yeah. Let's do that. Just give it a little pop some. Sometimes this is what
really sets it off. But I wanted to just
thought I'd come on and showing them on your method is this is why I wanted this group. I can come on and
show you new things multiple times a week and we
can all progress together. There's the cup on this group. I'm not gonna be let in
in hundreds of people. It'd be too hard
to keep, hold off. I want to keep it. Kept plus I want to keep it. I don't want this method
getting everywhere. It's going to saturate
the market so much. You could sell these. I use this sort of thing
for my, for my squirrel. I sell these as prints. I don't really want every
secret I know going everywhere, but this is this first
slot is for us guys. I'm happy to share it
with us. Little few. And we're gonna be
putting a cap on. I haven't decided
the amount yet, but it's gotta be manageable and we want to keep
it friendly and nice. Anyway, I'm robertson on low, so hope that's helped ramped. Let me just quickly show
you sorry about this. Let me just quickly show you
the coloring pencil thing. So if I go on here, finish them all together, hoping to find one. When I started the
layers open like this. So this is kind of
what you've just seen. Same thing as the only
real differences is I used I used my pencil. So one of these,
not sure which one. And I, instead of looking for the tight curls
and the type twists, like so. Kinda just scribble that
in for the bigger areas. You're gonna get
a bigger stroke. Where there's a different plane. I just go in different direction is really not complicated. The photograph which
burns through, is going to do all
the work for you, is going to add your value and everything, your texture tone. See as well. I did. This is terrific. But I did it all that in mind. So yeah, different
planes where you see the planes on the face change, then I would change angle. So if I were doing
if I was doing it this way for by here picture, I wasn't doing it
that way for by their just to insinuate
different plane change. If I was doing up for the lips, be going a different
way for by their, and so on and so
on and so forth. That's the coloring
pencil technique is just a different pencil. So let's have a look
and see. It looks cool. And the best thing
about this as you look eye-catching and good. But when you zoom in, if
you've taken enough care, you are not going to know
that it was photograph. Just trying to work out why those bits have gone really
liked pink like that. Is the overlayer
thing, isn't it? It's made the light really pop. I'm not sure if I
like that. Maybe pop down a bit too much on
the order line Art. I think I think I just
leave it alone app bit as it is. As it is, right. Thanks for watching guys. Any questions. Or if you're proud
of any attempts or you want some criticism, post your pictures in the group. And if you're feeling chuffed
with something you've done, share it in the procreate
learning share group for me. Give you the Shea.
See you later guys.
 HugsyArts, Aspire to inspire