Transcripts
1. Introduction: The Hi. I'm Elisabeth and
welcome to my artist inspired series class
about Victoria Villasana. I am a professional
artist and art educator. I work with college students these days who are
just beginning their art education journey in their senior year as they're
getting out into classrooms, getting experiences with
students and really starting to develop their own identity as the art teacher that
they are growing into. But I also teach classes
here on Skillshare, which I have been
doing since 2021. I began creating a lot of different technique classes and sharing my art
processes with you. Then I started leaning into my passion for artists and
art making and art history. Doing the artist
inspired series classes. Victoria is an amazing artist
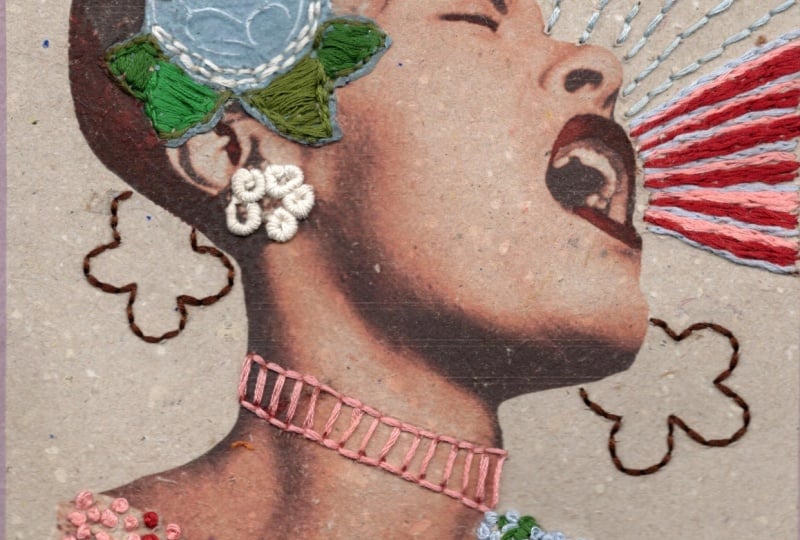
that embroidery back into vintage photographs and
different collaborative projects that she's working on with
different photographers. She is working very
large scale usually, but she's also a street artist and collaborates with
other street artists. Her textile pieces where she is sewing into images that actually began as something fun to do on the side and she would
put up her street art, these embroidered
images all over London, which is where she has
spent most of her life. She's got large scale ones where she's filling
an entire wall. She's got tiny ones
that she's putting on a small part of a
building or on a bench. I love the fact that she is incorporating embroidery
into street art. But as Victoria has gotten
more well known and famous, her pieces have become placed on canvases and then they
get mounted in galleries, still collaborating
with other artists. She does a wonderful
play of color, a lot of different things with texture and pattern
and the ways that she layers on these embroidered elements
to these photographs. We are going to be using
a resource over on the Projects and Resources
section where you can access vintage photographs that
are royalty free that you can print off and
embroidery into yourself. We are going to be embroidery into photographs for
our class project. Let's head over to our
next lesson and talk more about our class project
and what you might want to do for your imagery and get a little bit of taste of Victoria's work and how
we can get inspired by that in our own art
making. I'll see you there.
2. Class Project: For our class project in our Victoria Villasana
inspired art class, we are going to be using vintage photos that I provide for you on the projects and
resources section of class, but you're welcome
to use your own, printing those off on cardstock
or mixed media paper, watercolor paper, whatever thicker paper
you have on hand. Then I'm going to
show you a couple of very simple sewing
techniques that we can use to
embroidery back into. You're going to get to decide
the skill you want to work. I'm going to be
working four by six. I'm going to work
small. We are a little bit more limited
than Victoria is because she's sewing into canvas
and there's a lot more give there because it's
a woven fabric because of the
fiber nature of it, she can do her stitches a lot closer together and we're
going to be sewing into paper. We have to be a little
more careful in sewing our stitches so
we don't rip our paper. But we can still create beautiful mini pieces inspired
by Victoria Villasana. If you are excited about
sewing into your artwork, I have another class that's
about embroidery into paintings that you
should definitely check out. Yeah, don't worry. If you are not someone who feels comfortable sewing or you're not quite ready for that
step in your art journey, Victoria also draws back into her pieces and a lot of times incorporates both
of those things. You could go back into the
photos with paint pens, that would be perfect to create some of the bold blocks
of color and pattern that would mi the sewing details that we're looking to
in Victoria's work. You could also
absolutely get inspired by the colors that she's using, the patterns that she's
creating, the play of line, all the different ways
that she is working into her pieces without literally
sewing into your work. Let's head over to our next lesson and we'll
talk some more about the materials you're
going to want to have on hand for class.
I'll see you there.
3. Materials: These are the art supplies
that I'm going to be using to demonstrate Victoria Villasana
inspired art project. We're going to be working
back into vintage photos, just like Victoria does. These are ones that I
found royalty free. I've included several
that I think will be really great resources
for you to play with. I printed these out
on cardstock paper. I would do something
kind of thicker. So copy paper isn't really going to work for this project, but if you could print it
out on cardstock or cut down mixed media or watercolor paper, that
would work great. Any kind of thicker
paper that you have, probably even photo paper
would be fine, too. You would just
then have a sheet. Then we're going to be
sewing into our photos. I've got cardboard
that's going to be my underneath side
so that I can use my push pin and I can push in holes where I want
to have my stitches go. Embroidery floss is
what I love to use for sewing back into
paintings and photos. I've got a variety of colors that I might
want to play with. I've got my embroidery
needles or craft needles, something with a larger eye is what you're going to want so that you can feed the
embroidery floss through. Then a pair of scissors for cutting your
thread as needed. Victoria also draws
into her pieces. So you can skip the sewing altogether and just draw and add pattern and color to the
vintage photos that way, or you can do both, a combination of sewing and drawing to add
different elements. Let's head it over
to the next lesson, and we will learn more
about Victoria's life and art. I'll see you there.
4. About Victoria Villasana: Victoria Villasana is a
Mexican textile artist who is still working today. She was born in
Guadalajara, Mexico, and as a child, she would paint and make dresses
for her dolls. So she is one of those artists that was an artist
from a very early age, and that interest in textiles is definitely
something that has woven its way through
her entire art journey and is something that she's
continuing to explore now in the art that
she's making currently. She did begin
working as a florist and in fashion
design as a stylist, and you can definitely
see the play of both of those in a lot of the
works that she has created. She's been living in London
for most of her life, so she's exposed to a lot of
different cultures there. And she began making
embroidered collages with pictures as a hobby, and that has actually grown into her professional
art practice. She is sewing back into vintage photos and
her own artwork and drawing back into it and really making these beautiful pieces. So let's send it over
to our next lesson to begin talking about some
of the ways we might want to be stitching back
into our images to create work inspired by Victoria Villasana.
I'll see you there.
5. Types of Stitches: So there's some basic
embroidery stitches that we can play with that work very
well for this technique. So I'm going to get
my needle threaded, and then I want to show
you a couple basic ones if you're new to sewing
and embroidery. I also have a class that is about embroidery back
into your paintings, both watercolor and acrylic, where I go a little bit more
in depth because for those, we're adding imagery to
abstract pieces, usually. The approach is a little
bit different than adding abstract details and color pops and lines to an image that already
has something going on. Different approach to
embellishing your paintings, but you can learn a lot of
great stuff from that class, you can apply here
and vice versa. The embroidery floss, if
that's what you're using, Thread I find is because
it's a little bit thinner. It requires more to build up its mass to get
the line details, it's also a little bit sharper. If you pull too hard,
it can cut your paper a little bit more easily
than embroidery floss. Embroidery floss has six
threads within here. You can sew it full and then you'll get
a nice solid line. You can also break this down. It also depends on how you want to thread your needle too. What I like to do is I like to divide my embroidery floss in half so that I
have three and three. And then carefully
pull it apart. There might be some untangling that you have to
do along the way. It's how it goes when you've got all these threads
twisted up together. If you pull it a little bit, sometimes you can just slowly pull it and not
have it get caught. But if it gets caught, just want to grab the two ends
that you're pulling apart. It's untwist it by running
your fingers down it. You can also put your
thumb there and pull it down and have your thumb
make the divide for you, whatever it takes to
get those undone. There are going to be a little
twisty and that's okay. I'm going to set my one section
of three off to the side. Going to go ahead and
get my needle threaded. This is what we want a
bigger eye to wear a needle. The bigger the e,
the bigger the hole that you're going to be
making in your paper. You're doing a
practice one first, you're practicing the stitches. If you're finding that the holes are bigger than you
want them to be, try to size down your needle. If you want to maintain
just this much line weight, I would recommend that you
don't knot your thread, that you knot it at the end, or if you want that double line, you can pull the thread
down all the way. Then you can double
knot the ends. I like a bold line, so
I'm going to go ahead and pull my thread down all the way and then
double knot it. Now I've got the six strands back of the original
embroidery floss. If I didn't divide it and I threaded my needle
the same way, then I would end up with 12. That might be a little
much for the fact that we're working small
and back into paper. I'm just going to
knot this a bunch of times because I need my knot bigger than the hole that I'm going to be
making with my needle. Let's talk about some
practice ditches. There's a couple
different ways we can go. But to create our stitches, it's really helpful to use a push pin or an all if you do a lot of handmade
bookbinding. Then push pin will help create
the hole ahead of time, but there is a
narrow initial part to the point and
then it gets wider. So if you push really,
really far down, you're going to have
a very big hole. Not a big deal, but sometimes depending on how
much thread goes in there, you can see the holes
around your stitching. So if that's something
that you don't like where you want to try as your best to
not have that happen, try to just push smaller
with the push pin. We just need it to start creating our hole so that we don't have to
fight the paper as much. And then I've got my
cardboard behind my paper so that it can go into
the cardboard and not fight against
my work surface. So if we just do a couple
basic dots in a row, we can create a basic
running stitch. This one I would
always go in from the back and then because
I double knotted it, I can just pull it
all the way out. Then I'm going to throw back
through the second hole, and now I have the
start of a stitch. Then I want to make sure I keep it tight enough so that it's
going to hold my stitch, but not so tight that it's
going to pull the paper. This is something you
have to get used to. Now, I can jump ahead to this
hole and go back through, and now I've skipped the line and then I
could keep going and I could leave that skip or I could sew back
into my second hole. Then now I'm creating a
continuous line that way. Then I would just keep
going. I'd go back through my third hole and out
into my fourth hole. Be careful that doesn't get caught on the edges of my paper. Then here I could jump
ahead to my fifth hole, and go back to my fourth hole. That would just create
a more controlled line. Every so often, it's important
to knot off your thread. We're not necessarily
going to be starting snipping it and
getting a new one yet. This just kind of helps hold
your stitches in place. So a couple quick knots on the back side will help ensure that your stitching doesn't
get away from you. So we have a mini stitch
to create a line. We can also create a
nice long line too. So if we do a hole and
then a farther away hole, I'm just going to jump up to the nearest hole where I
want to go back through, pull that out, and
then I'm going to go all the way across
to the other hole. Then because this is a
very long single stitch, here I am going to not it off a little
sooner than I might otherwise just to help
hold that firmly in place. You can leave it as it is, or we can add another little
fun detail to it. We can also come back and do
this with another color too. So they've got this nice
wibbly wobbly line. We can leave that or we
can do a stitch across it. So to do a stitch across it, I'm going to go above
it and below it. And now I'm going to go
back to the backside. I'm going to go in through one. Oh, if this starts
rolling away on you, you can just stab it
into your cardboard. Usually at an angle,
works better. I'm coming back out one
of my tiny stitches, and I'm just going to do a
teeny little cross stitch. And that's going to
hold it in place. I could have done them
closer together, but again, we want to be careful
that our holes aren't too close together. Now that stitch is going
to hold it in place. It does add another line detail. Don't do this if you don't
like the look of this. But you can also do it
with different colors too to create some nice
overlapping line design. This one I'm going to knot off. Then let's talk about
a couple other ways we can incorporate stitches
into our images. The French knots that I did over here, they're
pretty simple. We're just going to make
a dot, make one hole. We're going to go up through
the back of that one. Then to do your French knot, you're going to hold the
length of your thread, your embroidery
floss with one hand. You're going to take your
needle and you're going to wrap your embroidery
floss three or four times around your
needle and then it's going to go back through the
hole that you made. Now, I find it really, really helpful at this point
to put my thumb down over the needle so that as I'm pressing gently down
and pulling my thread, it doesn't get away from me. And then it creates
this nice little knot. I did them fairly
large for these. I think I was wrapping
it a couple extra times. I also kind of kept
some of them loose. So this one's a
pretty tight one. And then these are pretty loose, kind of letting them be a
little bit more like flowers. But that can be a
nice way to add some dimension to your piece. So we have a running stitch. We got the long stitch with the cross stitch on top of it. We got the French
not for that one. Again, it's helpful to
do the knot on the back. You don't have to do it
after every French knot. Kind of when you're done with
a section of French knots, it's a good idea to
do them that way. And then another great one to use is just kind of
like a cross stitch. We're basically
going to make a box. Square with four holes, and then to see if I have
enough thread to do it. We're going to go up
through one and then we're going to go
across to the other. Then on the back side, we're going to go
up, in this case, down because of the
way I flipped it. Then now we're up on the top
corner and then we can go across and create an X or
across with our stitch. That's to cross stitch, create
a nice little X design. And we can look at
Victoria's work, either in the slides
presentation or about Victoria Villasana
video lesson about different and look at the
different ways that she is using thread to create
different design elements. She's also using yarn.
In a lot of cases, that's another aspect that works because she's sewing
back into canvas. She can create thicker lines. She can do a little bit more
with hers than we can do. But these are just kind
of some basic stitches. Basically, any way that you
put lines into your image, though and you connect
them with thread, you're going to be creating some really lovely embroidery. Is a piece from the other
embroidery class that I have here on seal share
that shows you what I was talking about with
the really long threads and then using tuck stitches, little mini stitches
to hold them in place. You can go around
the edge of things. You can go across it. You
can vary the line length. I've got the magenta starting at this point and radiating out. Then between those stitches, I went through with the green
and I radiated that out. Same idea. These ones I don't
have any stitches on them. Some of them agenta longer
ones over here, I do. This is that running stitch
but not doing the backstitch, leaving the space between them. These are very simple stitches, but they can create a
really dynamic effect. Again, if you're doing
it into a painting, you have a little bit more play because what you're adding is a much bigger element usually than if you're
working back into a photo. So working back into
something like these, we're just adding some
really interesting elements to take the photo a
little bit further. It's the same that I was
doing with the paintings. But here, because we're working with
representational imagery, imagery of things
that we can say, Oh, this is a person, this is a person walking a
dog in the city. We can decide how much
we embroidered into it, but we are a little bit limited because
we're working small. We're adding to the
recognizable image. You'll see that in
Victoria's work too. Sometimes it's heavily
embellished and sometimes it is much
more minimally. She also has some pieces where she is embellishing words, too. You could also play with
adding some words and text and design elements like
that into your piece too. Whether you did that
with stitching or the paint pens, either
would be great. Let's send it over
to our next lesson, and I'm going to start adding in some embroidery into
this vintage photo. I'll see you there.
6. Sewing Into Photograph: For my Victoria
Villasana inspired work, I've chosen a vintage
photograph that is royalty free from the Library of Congress of an image that I like of
this woman walking her dog. I played with this
one initially, and I really loved
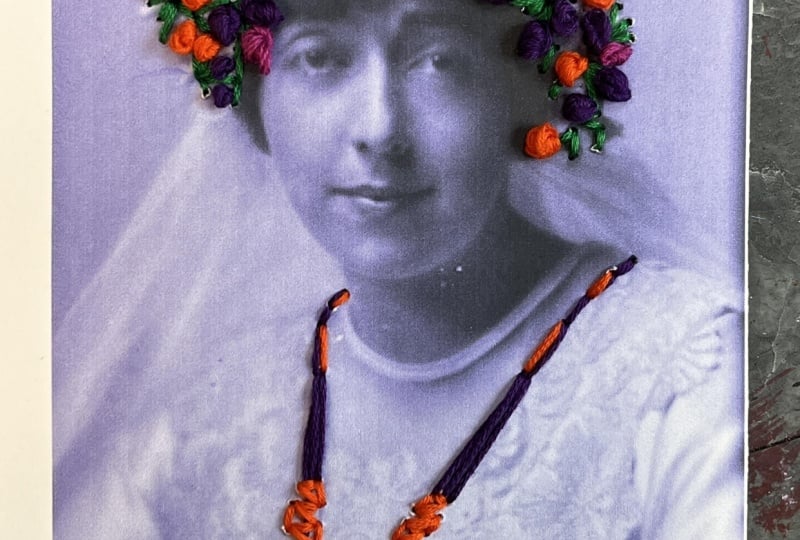
working back into this bridal photo that I
found on the same website. This one has a lot
more intricacy. I used French knots for those of you who
might be familiar with that embroidery process and then just kind of some
simple stitches there, and I did some criss
crossing down here just to add a little
bit more design detail. When I did the top initially, I wasn't sure if
I was going to do any embroidery
down on her dress, and then I decided in
the end I just kind of wanted to help bring
the color down a bit. So for this one, the difference between what we are
doing and what Victoria does is that Victoria
is sewing back into canvases and she's
working very large. So she's able to do a lot more close stitches and she doesn't
have to worry about her canvas breaking. But
we're working on paper. Cardstock, yes, it
is a little thicker, but it is still paper. So we have to be mindful of
how close together we make our puncture holes and
how much we sew back in. Which is why it's really
great to also lean into the paint markers
if you want to if you want to do a little bit more
intricate detail in addition to your sewing or instead
of sewing into your piece. Right. So now we
practice our stitches, we've kind of thought
about it a little bit. We have our photo printed.
We're ready to go. This one, the figure
is so small that I think I want to lean into doing more embroidery in
the background, which we can see in some
of Victoria's work too. Sometimes she's
focusing on the figure, sometimes it's the
background, sometimes it's both and kind of
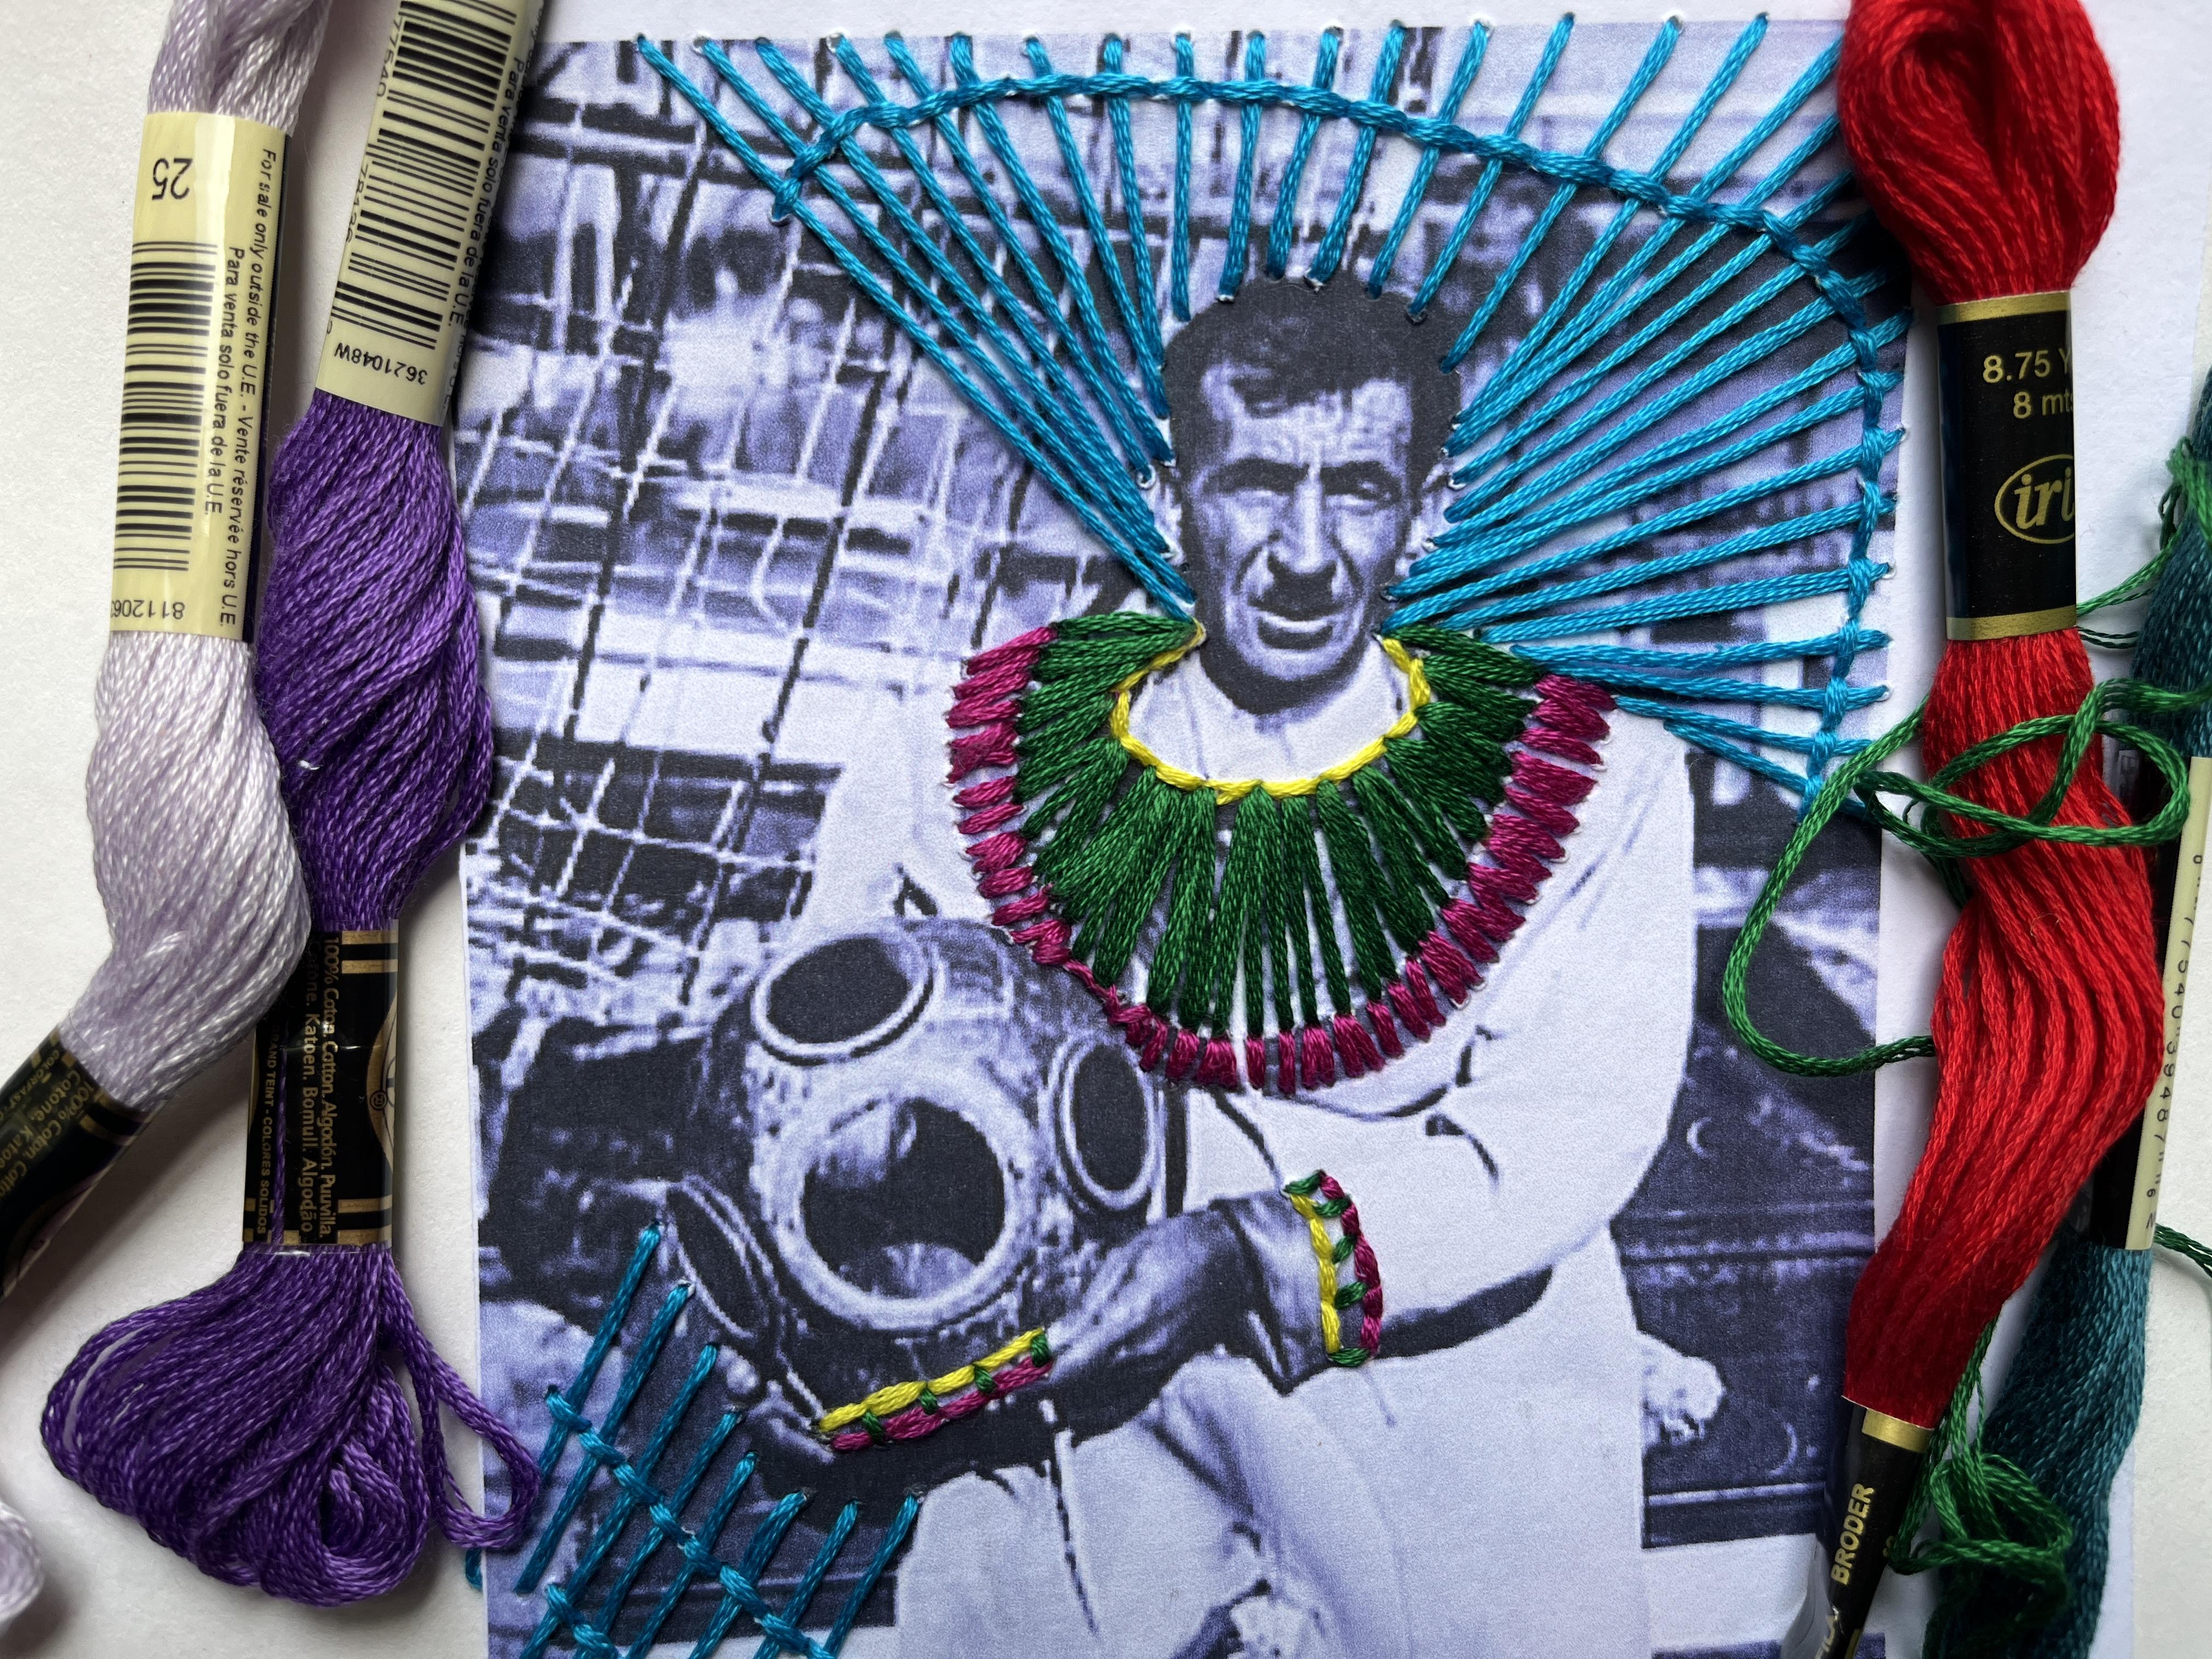
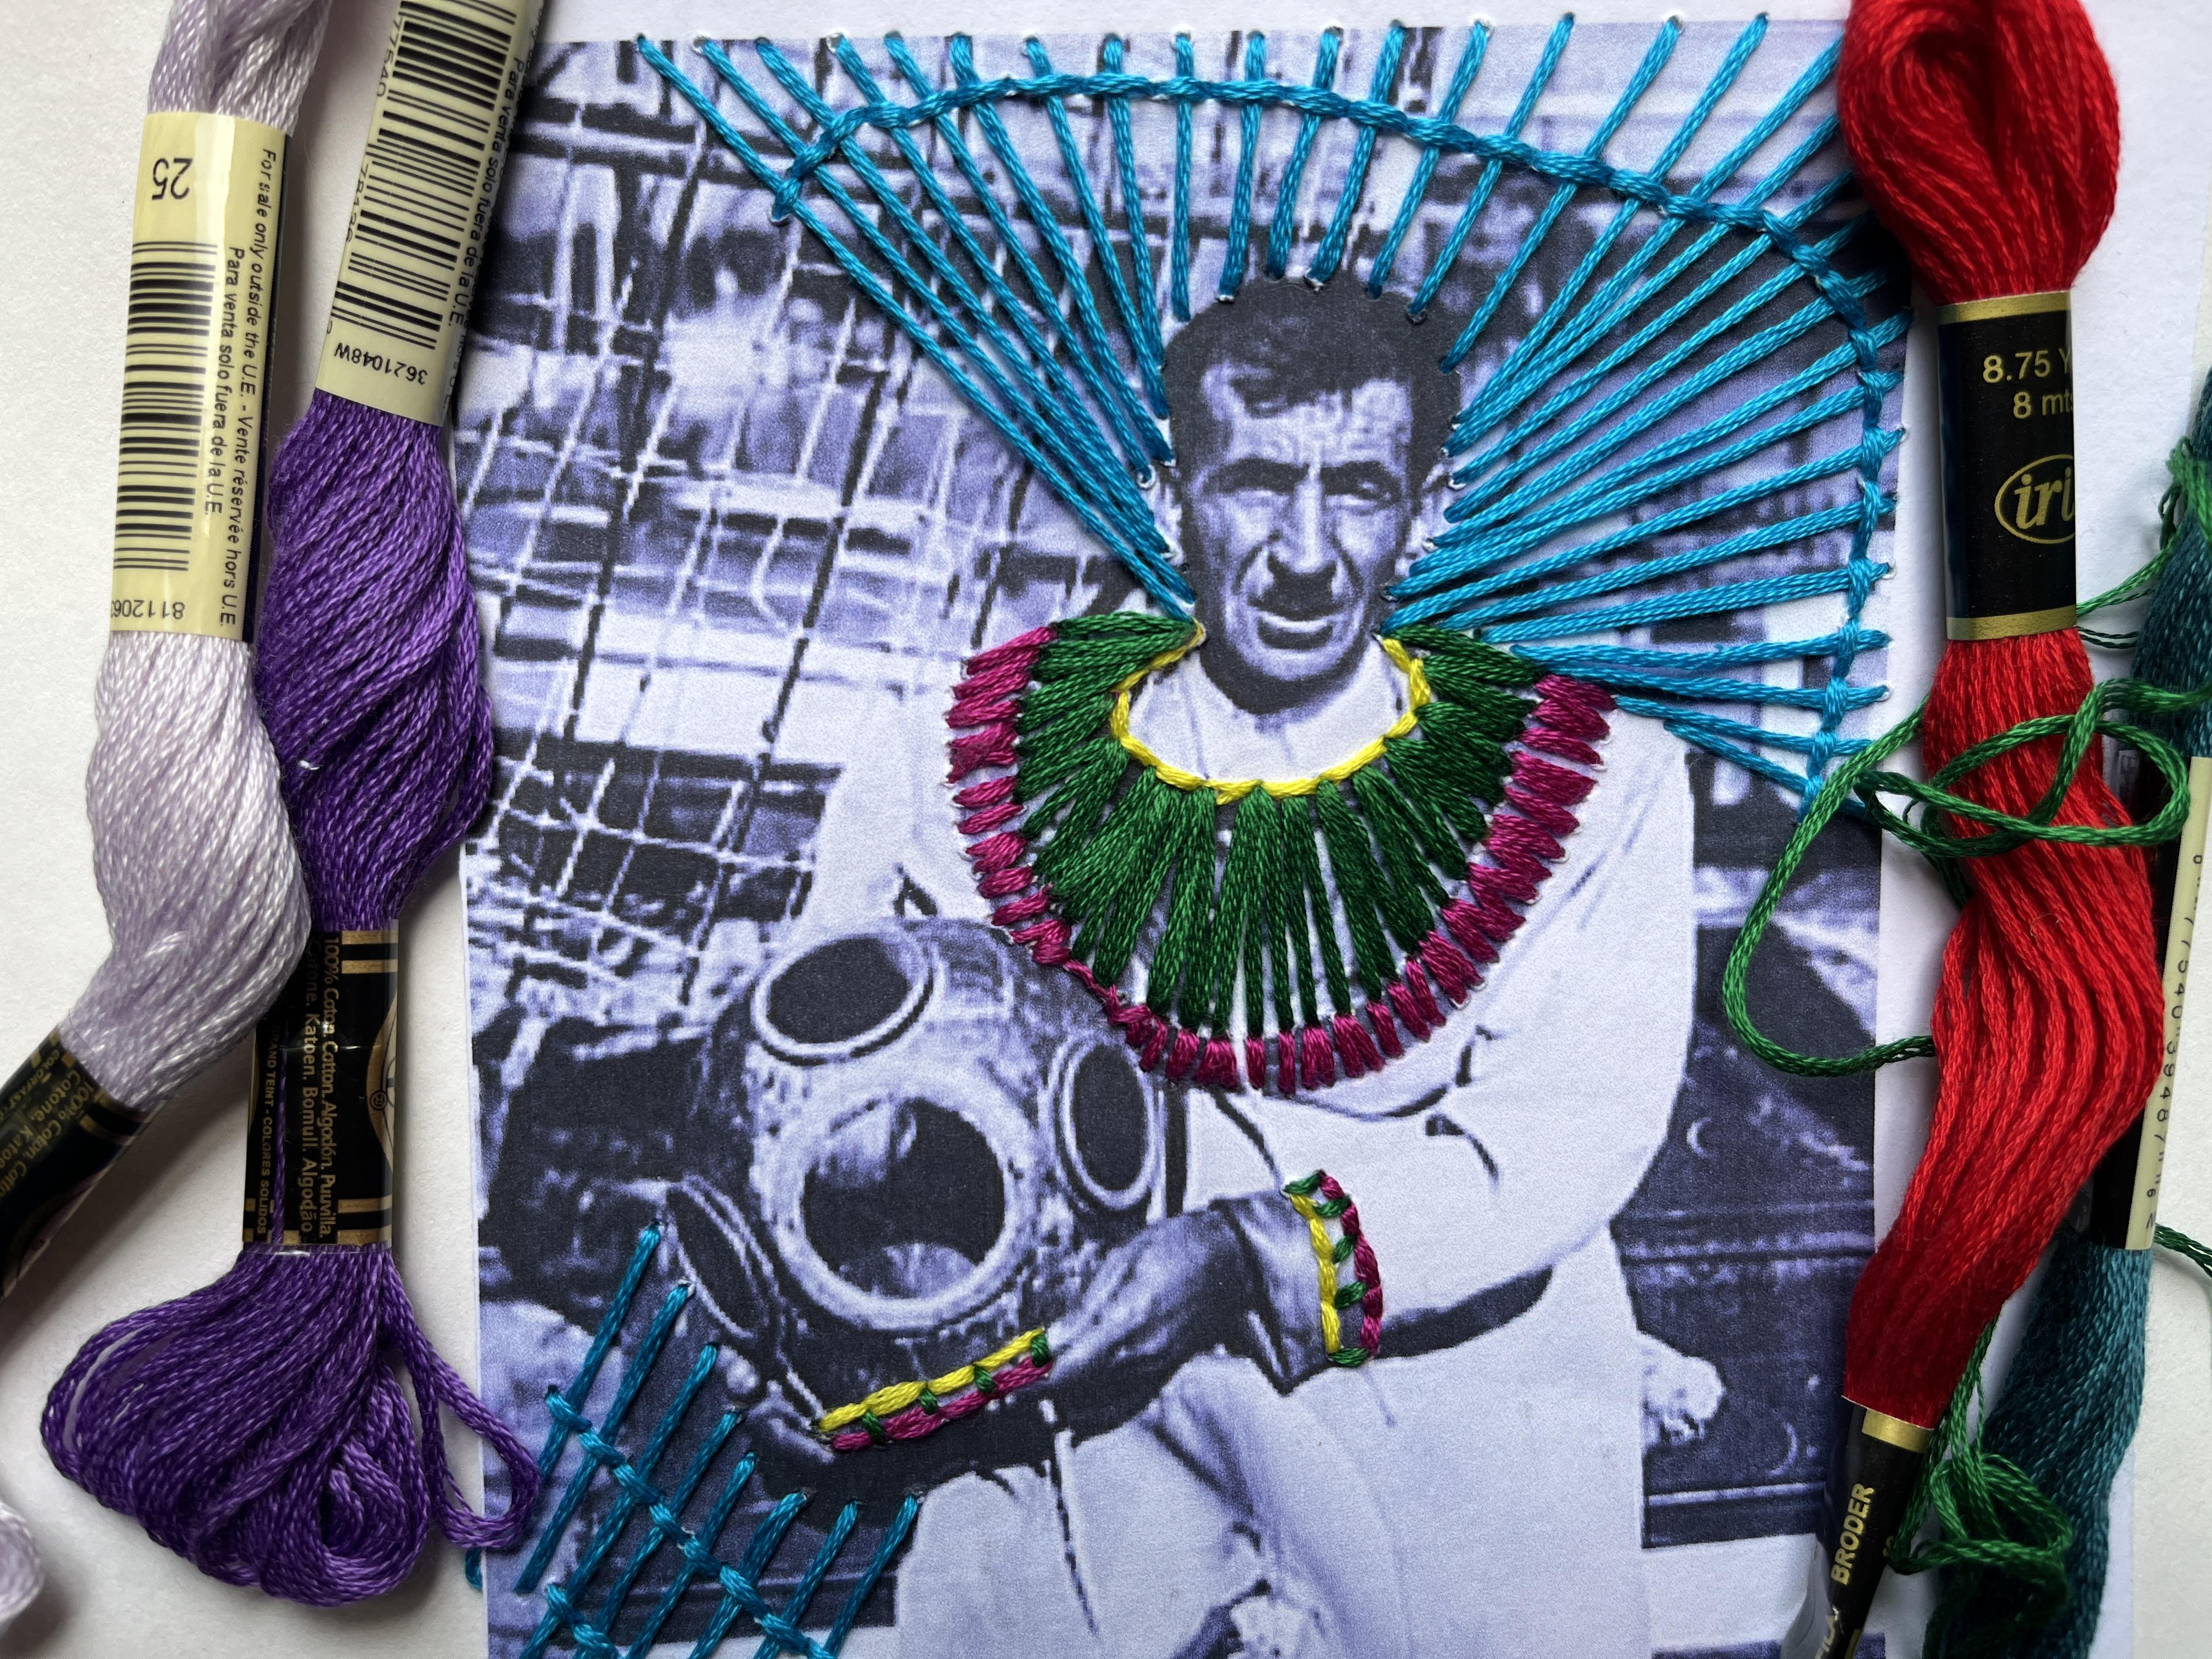
tying the two together. In the piece that I did
of the scuba diver, I focused mostly on him
and kind of got him set. And then I started working
on the background. To kind of create some unifying
elements in the piece. I love about embroidery, especially back into well, anything, embroidery
into anything, whether it's embroidery hoops or into photographs
or into paintings, is that I can pick it up and set it down as often as I need to. So I can come and do some stitches and then
I can set it aside, and then I can come back to it. So it's a very versatile
art medium that way. You can even take it
with you on the go. I need to be very mindful
of where I put the holes. I think I'm going to lean
into the architecture. So I'm going to put some
holes along the structures, and then I'm going
to stitch into them to create some initial
design and play with. You can do this
little by little, where you can really go to town mapping it out in advance. I'm going to start stitching in and see
how this develops. As you get started,
you can decide too, where do you want to begin as far as which holes you put in? I want to get the most out
of my thread that I can. I'm trying to get
the holes that are closest to each other with the color that I know
I want it all to be. So I think for right
now, I'm just going to outline the street sign
in the background. I almost went all
the way up here, but then I would have
all that thread on the back side when I
wanted on the front. So I'm going to kind of stick to the close together stuff and
I'm going to jump down to this first hole that I put
in so that I can stitch over and then go up. This can go back down. And then I know it
seems a little wild, but I'm going to go back over to the right side of the signpost so that I can go
all the way up to the top. I think the reason I
like to outline with my thread is because I enjoy
doing that with my art. I enjoy adding outline to my watercolor pictures and playing with that
bold line that way. This is very
different than what I did in my very first piece. This was very soft and very
round and clumped together. I'm playing with a
linear element that I think I'm going to contrast against some embroidery that
I'm going to do on her. Maybe because she's so small, I will do some more
with the paint pens, and I'll do a
combination of the two. I have a teeny little bit
of looseness to my fibers. I didn't pull that stitch as tight as I maybe should have. Sometimes you can when you're tightening
up your shoelaces, you can scoot your stitches, but I think it's too
far gone for that one. That's okay. Ids a
neat element to it. Then I'm going to go back up. I work my way across?
Now, at some point, I'm going to get very soon. I'm going to get to a
point where I am out us. I'm going to need
to add more in. I'm going to need to nod it off and then trim
it and then get more. Let's talk about that
right now because I don't really have enough
to keep going. I don't want to go to that
stage, I have to go all the way over to the
other side of her head. So that's probably as
close as I can cut it to getting the max out of my stitches because
I need to have enough thread to be
able to tie it off. Then I'm going to go ahead and
double knot this as best I can so that my stitches hold. I use my thumb and my nail
to hold that knot in place. You can also use tape
to hold down some of your more wily threads
that don't want to behave as much or you can put
a little dot of glue too. My bigger pieces, I'll use tape and just tape
that out of the way. I can show you that, get
some tape right here. Any kind of tape is fine. I'm just grabbing masking tape because that's what
happens to be on hand. But I want to make sure. I'm
just going to pull it off to the side for now because
I don't think I'm going to stitch
further that way. Then my thread is
just going to be out of the way. All right. Let's get some more
ready and keep going. Sometimes you'll get a knot
on the end from pulling it. So you just have to snip it off. It doesn't happen very often, but there is the chance that as you're separating your
threads, that will happen. G to go back in through this
hole so I can stitch up. And filling in the line
details that I want. Remember, at any point in time, you can add knots to kind
of secure your stitching. Sometimes your
needle is going to fall back out your
hole, that's okay. Push it through enough you
can also use your back of your finger to catch it or
your thumb on the front side. Make sure it doesn't
slip back out on you. No, I haven't sewn much, but those are two
pretty long lines, so I'm going to do
an anchoring knot just to make sure they
stay where I want them. I want to go all the way
over to the other side. No, which I can totally do. I'm just going to
simplify these posts. Because I know I can't stitch together that close over there, and then I'm going to add in
line details there and make up some details using
what's there and then also adding in some other stuff that what I'm
adding makes sense, even if it's not 100%
accurate to image. If you get to the
point where you do not have enough to make
your knot on the back, you can always go
unstitchRvers stitch it, go back through show. Sometimes it works sometimes
it doesn't it gets caught in divides into what's already there, it's
not going to work. I'm going to go ahead and
let that one stop there. Then I'll trim it, k and then I'll get
some more blue thread and finish stitching
this background piece. Then I'll jump to the
figure so you can see what I've started to figure out
I wanted to do with her. Generally, I don't
really trim my threads. I let them stay long.
You can see on this one. These are crazy. I should
probably cut this one down at the very least so it's not sticking off the
side, this one too. I don't mind. I've got a bunch of extra
throds hanging out. So what I want to do now, I really want to add
some width here. I'm going to do some of those
cross stitches and sort of in an exaggerated way mimic what was happening
in the picture. I want to be careful that
they're not too close together, and I'm just going to
start stitching across. I take this basic idea of vertical lines and give it a little bit of extra something. So then I can leave
them like that or I can stitch vertically
between these. Let's see what that
would look like. It's where you can start to see which of your
strings are Boeing. This one's Boeing, and
that's not a big deal. But if it bothers you, then you can absolutely add just a little stitch
to hold it in place. I will also say the more times you run your
needle through a hole, the odds are it's getting
a little bit bigger, and then you've got a whole
lot of thread on there. So just be mindful of how
much stitching back in you do because I have had
things accidentally tear when I've been
embroidery into paper. The radial lines are that's a tricky part about doing
those they show you that other piece
because you're going back to the center hole so much. It's not impossible. You just have to be careful. All right. Jump over into
it on the other side. Now, the other thing you
could do with this piece, you could do the
paint marker details first if you wanted to add even more and then
sew into that. And then that would give you
I could have done that here, and then I would have
something a different color other than the printed image. Behind these stitches, I can still go back in here
with paint markers, but I could get the
marker on my stitching. I'm not too worried
about it. If that was something you
wanted to do to have that control as well as play with the embroidery, be
a really great idea. I kind of like these being different, so I'm going
to leave it there. I have that stitch over here
that I need to resolve, so I'm going to
go ahead and jump over and finish that up, and then I think I'll
be done with the blue in the background
for now at least. So one more little stitch. Not it off, and then I'm
going to switch colors. When it's the last
stitch, I like to really make sure it's not going to pop back
through the hole. So to give it a
couple extra knots.
7. Sewing Into Photograph Continued: And I'm going to sew in her hat. It's a pretty small detail, but I have kind of an
idea that I could do kind of a radiating design down or something to
make it look knit. I could do the French dance. That would be really cute and
kind of mimic the texture. That she has in her hat. Victoria does a lot
of collaborations. So she finds vintage
photos that she can use, but she also collaborates with photographers and other artists, too, and does some really
amazing pieces that way. So we could say that we
are collaborating with the unknown photographers
of these pos. You can also work with
the imagery that's there or you can
add other imagery. Victoria does both, so that
you can have a lot of fun adding new lines and new
life to your pieces. Now we need to figure out
where this is going to go. I think I'm going to I really like the idea of doing
something radiating. I've gone essentially
around the outside edges, but for my sewing, this is going to be
my center point and I'm going to go out from there. It's going to go
out to this edge. Then I don't have to
go all the way back. I'm going to jump over and
then this will be that way, the line that goes that I see is going to be
on the front image, not thread that's
lost in the back. There is always going to be
so now I'm on the back side, so I can go closer. I can do that and kind of
go around either side. But sometimes you can kind of avoid losing out on having most superior
thread on the front. It just depends on how
you're putting it in. Then I have a lot
of thread left, so I'm going to jump down
and kind of add some of this green detailing
in her outfit as well. Maybe I will give
her kind of a belt. I'm going to do kind
of a linear stitch. Then maybe for this one,
I'll do a French knot, just to kind of like
a tiny French nut, maybe just two, just to see if I can put the illusion
of a mini stitch. Didn't really work
the way I wanted too. If you don't like
your French knot, you can usually undo it. It is knot in your thread. Like, there is now a
knot in my thread. I'm gonna try stitching
back through my hole. It's kind of stuck
there for good. Worst case scenario, you can cut your thread and just take it out
and then do it again. I'm just going to add some
more stitching and see if I can trick it into laying
a little flatter. I had to do this a little
bit with some loose knots, kind of add some extra stitches
to hold them in place. I was going to keep
that linear effect. Now I'm going to kind of stitch between
things to fill in. Some more to kind of
hide the accident. I'm gonna tie my thread. Alright, let's assess
where we're at here. We've got some geometric
stuff happening. We've got some color fill. I think maybe I want to add some more design
elements to her dress. So I'm gonna grab some orange, maybe just add a couple,
like, pattern stitches. I do work really
intuitively a lot of times and then problem solve
along the way as needed. I could just kind
of make it all flat and have adating
lines going down. That could be really cool. Or I could just do, little
tiny stitches. I think I want to do
little tiny stitches. So I'm just going to
start open some holes, kind of build it up as I go. Almost like confetti.
I'm just kind of working my way from
the top to the bottom. I kind of fill in these
little dash marks. I've got a fair number
of stitches in. I'm gonna do an anchoring knot. And then I think I
might switch colors. Let's see if I want to do
a different color orange. I want to make it a
differ pop of color. I like it. I think it
looks really cute. Before I do any more stitching, I think you get the idea
behind what we're doing here. I do want to go
get my paint pens, and I want to play around with adding in some of those details. You can kind of see how that
can add to your piece, too. But you can decide. Do
you want to keep it just embroidered and have it
be the photo embroidery? Do you want to have
it be the photo and the paint pen details that you add or do you want
to do a combination? So I feel like she
needs a combination. There's a lot of
different paint pens on the market, pusily acrylic ones. I love Butam. They work great. They're awesome.
They're dual tipped. They have a nice
friday of colors. I think what I want to do is
add a little bit of yellow. So I'm going to try
just kind of putting in some yellow in
between the green. Now, it is going to
paint on the threads, too, which actually
let's do that. Let's paint our embroidery.
How fun is that? We get the texture and we
get the fun papa color. I love that. Awesome. Let's see. I even have a similarish So I can add even some
highlights. That's super cool. I want to put more up in here, but I can't decide if I want
to go stick with blues. Kind of like it being
blue. Let's try it. I kind of color in
between my stitches. It is adding paint anywhere it kind of
touches the thread, but that's kind of cool too. And because this paint
pen is running out, it's kind of given you
a cool ghost effect. It's do a little
bit with some of the dark blue. It, awesome. I love that so much. I do
want to add a teeny bit more. With anything, right, it's
easy to get carried away. Alright, I love
these lime colors. So I'm gonna go ahead
and make her shoes line, that'll kind of tie into
her hat and her belt. Maybe I'll take some
similar orange kind of tie that into
her dog's collar, as well as a lice. And then I'm gonna
give her some jewelry. Over her bracelet with some gold detailing
or some earrings. She's got a bracelet
over here too, maybe. I'm loving this so much. I'm going to tie in the
yellow a little bit more. Maybe that can be in here, and then I know I want to stitch in some more on the skirt. I'll use yellow for that too. I'm not sure if I'm going to
leave her blouse as it is. It might feel incomplete if
I don't put something there, but I could put a little color. But first, I'm going
to sew in some yellow. You can see how you can
just add little pops of color to either add to your embroidery or in
place of embroidery. I'm going to keep going on
this one and keep playing. That whenever you are ready and you've finished your piece,
I would love to see it. So I hope you'll pop on over to the Projects and
Resources section of class and share what you
made in the student gallery. It's incredibly
fun and inspiring to see how everybody
is approaching this, what photograph you chose. I thought it would be
really fun at some point to do this kind of
idea with some of my own family's photos and kind of make a
black and white copy of them on cardstock of some photos that my mom has
collected over the years. I either my parents in the
60s and 70s or grandparents, great grandparents kind of play you can have a lot of
fun and personalize this as much as you want to either
to your own art aesthetic or tying in your own photographs or your own family photos. So I hope you had so
much fun in this class. I really have loved sharing the art and process of
Victoria Villasana with you, and I'll see you in the next lesson, we
wrap up the class. And and and and
8. Final Thoughts: Thank you so much
for joining me in this Victoria Villasana
artist inspired series class. I hope that you had so much fun exploring either color
line, mark making, working back into a photograph, whether you chose your
own or a vintage one, and perhaps embroidery into
those photographs as well. I had so much fun creating
my class project, and I love embroidery into things and I love
vintage photography. I have printed a lot. References that I'm very
excited to keep sewing into and drawing into as I continue to explore this in
my own art making. I hope that you'll go over to the projects and
resources section of class and upload your project
to the student gallery, check out the work
that others created. It's always so fun to see the photographs
that people chose, the ways that they sewed
into them or drew into them, and just keep getting
inspired by each other and celebrating everyone's
continual journey. August. I would love it if you would take the
time to leave a review. That is a great way
for students to get an insider's view on
what a class is like, what students are enjoying, how it's inspiring
their art journey, what they're excited
about, and it's great feedback for
me as a teacher too. If you have a chance
to leave a review, thank you so much in
advance for doing that. Would love to stay connected. We can do that by clicking the follow button below
so you get notified about future classes and anything else I'm up
to here on Skillshare. We can also connect over
on Instagram and YouTube. F I listed, Instagram, it's Elisabeth under
Square Wellfare, YouTube, it's Elisabeth
Wellfare, Instagram, I'm sharing art journeys, what I'm up to in the studio, adventures I go on
outside the studio, different things I'm
getting excited about, classes I'm taking,
artists I'm checking. Over on YouTube,
I've got a lot of different art technique videos and adventures that
I take you on. It's just another way that
we can stay connected. Thank you again for
taking this class and sharing this time with me and I can't wait to see you in another class real
soon till next time.
 Elisabeth Wellfare, Artist, Art Educator