Transcripts
1. Welcome to Class!: The allure of Loose
Watercolor florals is simply undeniable with the whimsical,
expressive strokes. There's so much to love about the seemingly effortless
look of Loose Florals. But just how effortless
is it really? This style of painting
requires a delicate balance of spontaneity and control that
takes time and practice. But in this class will
unlock a tool that adds an unexpected touch of ease to our loose
watercolor paintings. Priya from petals by
Priya Watercolor Designs. And I am a full-time
artist and Floral fanatic. If you've taken my
classes before, you know, I am a huge fan of painting Loose Florals Using
round brushes. I use round brushes for
anything and everything and they've become my
comfort zone over the years. But I recently started
exploring filbert brushes, and I must say it was
love at first sight. Filbert brushes are flat with a rounded oval edge and there's nothing
quite like the soft, loose effect that
these brushes provide. Not to mention the
incredible versatility, depending on how you hold
the brush and the amount of pressure that you apply
down onto the paper, you can still
achieve those thin, dainty lines that we typically
use round brushes for, while also getting the fluffy, expressive look to
our Loose Florals that we've been searching for. In this class, you'll learn the primary differences between
filbert and round brushes and how you can utilize
their distinct qualities to create beautiful
dynamic florals. We'll work through several
practice exercises for painting flowers and leaves, and we'll get
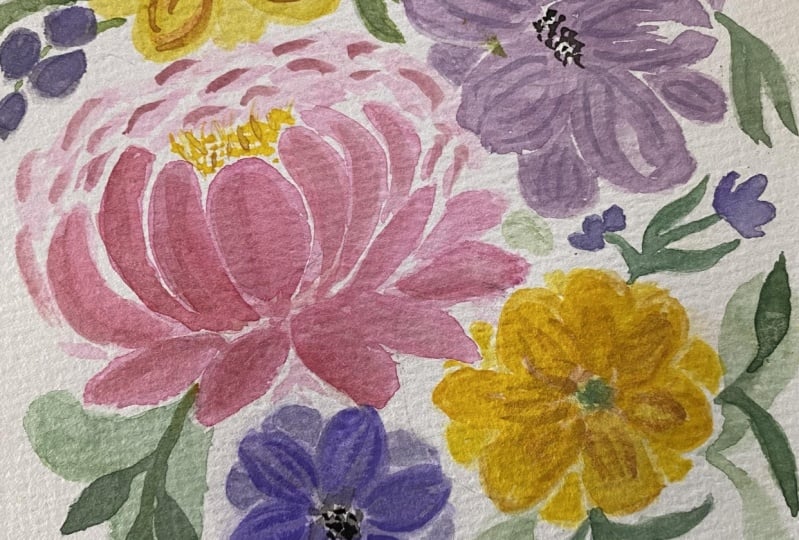
comfortable holding the brush in different ways. Then it will practice painting individual loose style botanical
elements like peonies, roses, leaf stems, and a
range of other flowers. Once we get all of
that practice done, we'll get started on
the class project, which is a beautiful
floral composition. This will give us the perfect
chance to explore all that our brushes have
to offer and put our new skills into practice. Throughout the class,
I'll encourage experimentation and
creative freedom. Watercolor is a medium that embraces
spontaneous expression. So I want you to trust your artistic
intuition and let your creativity bloom as
we paint together. By the end of this course, you'll not only gain confidence in handling the filbert brush, you'll also develop a
deeper understanding of the unique qualities that make watercolor florals
so captivating. Whether you're a
complete beginner or someone looking to
refine your skills. This class is designed for
artists of all levels. If you're like me and you
love painting Florals, you'll enjoy this class
and you'll leave with a newfound confidence using a less common and
underrated paintbrush. Before we jump in, feel free to connect with me on Instagram at petals by Priya, on my website,
petals by priya.com, or on YouTube app petals
by Priya Watercolor. I also have some other resources
for you on my website, including my Watercolor
Supply Guide and color mixing guide. If you'd like to
check those out. When you're ready, grab your
favorite filbert brushes, and let's start painting.
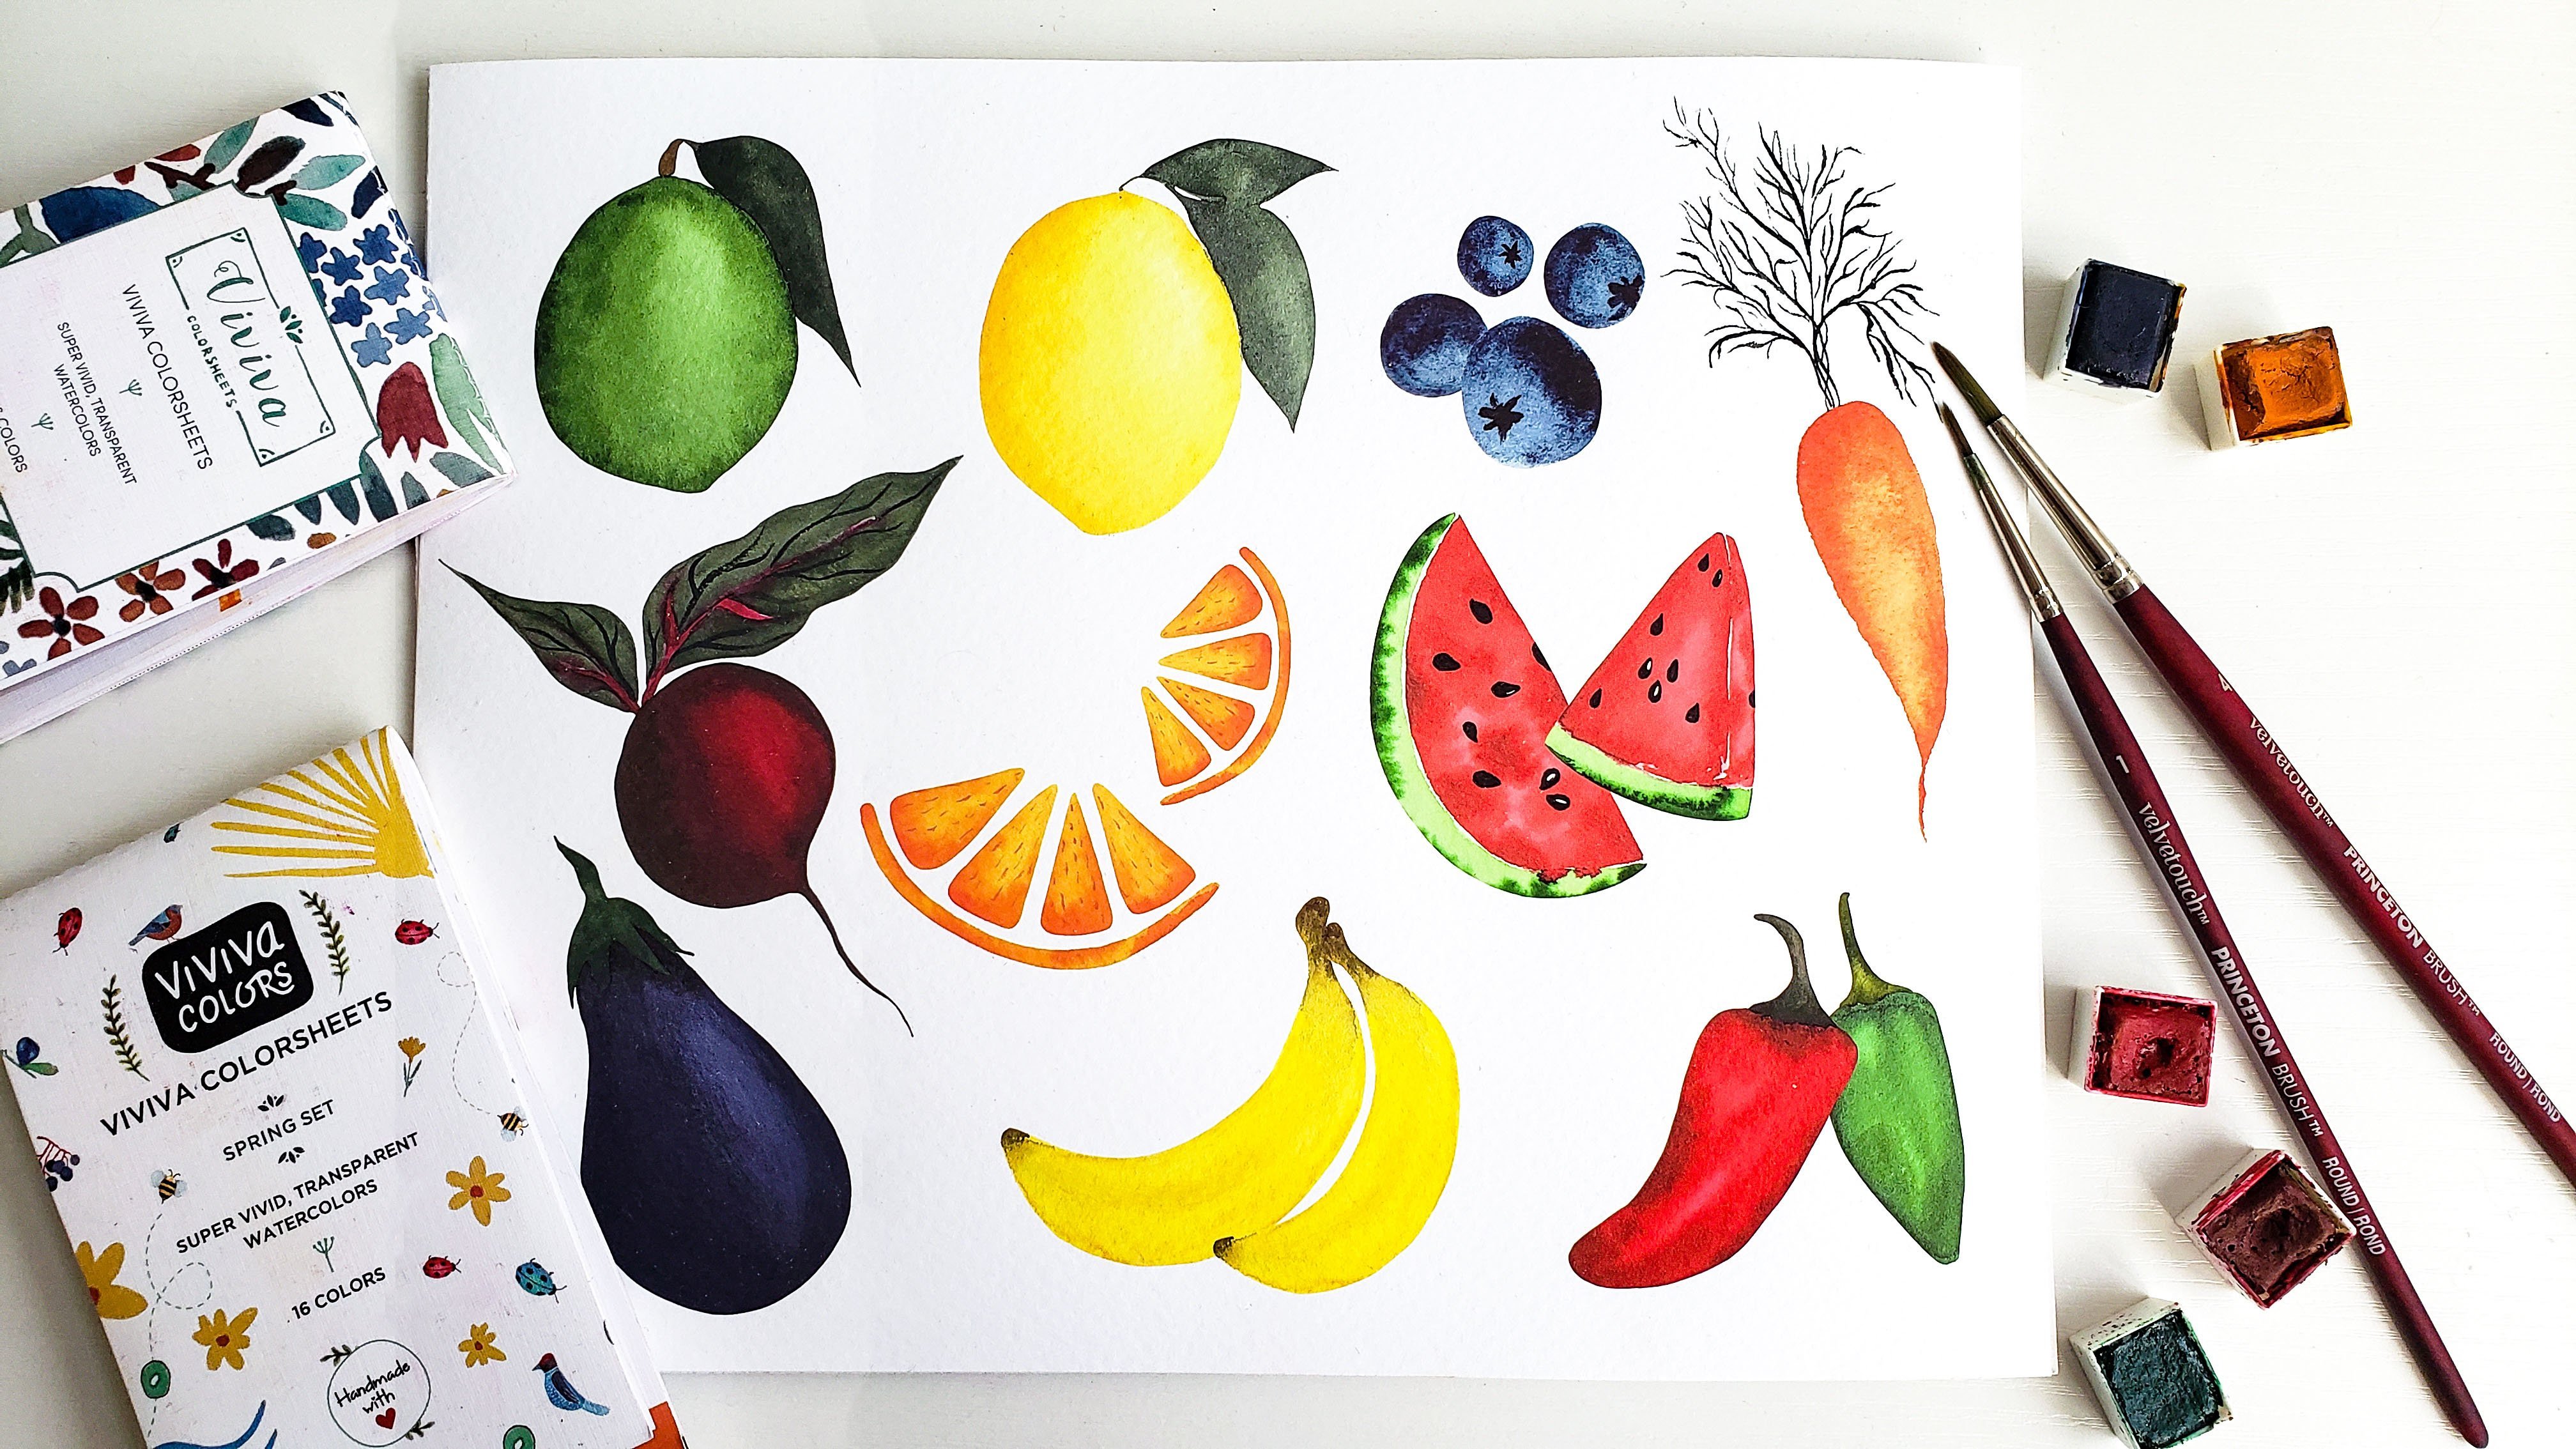
2. Art Supplies: Let's talk about the
supplies you'll need for this class for your convenience, I included a
downloadable PDF with all the links to those
supplies down below. First step is watercolor paper. I'll be using cold press,
100% cotton paper, but whichever paper you have available to you
is perfectly fine. Next step is the
most important for this class, your brushes. This class is focused
solely on creating Loose Florals Using
Filbert Brushes. But I'm also going to use a
one-inch oval brush as well. But in my experience, this oval brush is very similar to the shape
of Filbert Brushes. If you have one similar
to this as well, feel free to use it
for the filbert. So I'll be using
sizes 46,810.12. You definitely don't
need to have this many, but I wanted to be able
to show you how to use different sizes to
your advantage. I'll mainly use size
10.12 for the Florals because I wanted to achieve
those big fluffy petals. So if you can only
get one brush, I'd recommend getting a
bigger one like these. For watercolor paint,
you are welcome to choose any colors you
like to work with. I'll be using a range
of colors throughout class that'll share
with you as we go. You are welcome to select colors that are similar to mine, or you can choose your own
color palette as well. The emphasis of
this class is all about the techniques
and the brush strokes. So I don't want you to worry too much about color selection. Additional supplies you'll
need include a jar or bowl of clean water and mixing
palette and a paper towel. And again, you can
find a list with links to all of these
supplies down below. Once you have everything ready, we'll talk about the
class project up next.
3. Class Project: For our class project, we'll be painting a beautiful
loose floral composition using the new filbert
brush techniques we learned in class. I'll be painting
everything in real time. So you're welcome to follow
along with me step-by-step. Or you can make it your own by choosing your own
color palette or adding your own
flair to the piece using the skills we
practice in class. One thing I just want to mention before we get started is I don't want you to
take yourself too seriously in this class. Quite honestly, my
favorite part of Using Filbert Brushes for Loose
Florals is you can just plop the brush down onto
the paper and get a pretty decent looking Flower
nine times out of ten. So don't be afraid to be Loose. Try new things and let your
Florals form organically. If you've taken some of
my other classes before, you know that one of my
biggest pieces of advice is to try not to control the
watercolors too much. Watercolor truly has
a mind of its own. So let it do its thing, you do your thing, and most importantly,
just enjoy the process. By the time we're
done, you'll have a beautiful floral piece
that you can be proud of.
4. Filbert vs. Round Brushes: Before we dive into painting, it's important to understand
the basic qualities of the filbert brush
and how they differ from the more
popular round brush. Knowing this will
help us make sure we utilize the brush
effectively it during class. And it will also help us understand when to
use a round brush versus the filbert
brush when you work on your own Art
pieces in the future. Let's start with the basics. Round brushes have
full round bellies with usually a pretty sharp
tapered tip at the end. This makes it great for
painting leaves and flower petals that come
to a point like this. The sharper tip on round Brushes also allows you to create very dainty lines and details because of that
fine point at the end. In contrast, filbert
brushes have flat bellies with a
rounded curve at the edge. This makes it incredibly
easy to paint fluffy florals because the shape of
the brush is already pretty similar to the
shape of a pedal. So it's an easy shortcut
because the belly is flat, it also makes the brush very versatile because you can create different shapes
and marks depending on the angle that
you hold your brush. Another key difference here for leaves and florals
specifically is the direction that you'll paint your petals with round brushes. I typically start
at the stamen or the center of the flower and
paint the petal outwards. Same goes for Leaves. I start at the stem
and then paint the leaf outwards or
away from the stem. However, filbert
brushes it's the opposite because
the rounded edge is where you want the
outer part of the petal. We'll paint each petal
towards the stamen. And with the leaves, we'll paint each leaf toward the stem. If you're used to painting
with round Brushes like I was, this can definitely be a little tricky to get the hang
of in the beginning. But don't worry,
we'll get plenty of practice and the
upcoming lessons
5. Practice Strokes: Let's start with a
few practice Strokes to get comfortable
using our brush, I'll demonstrate using a mix of large and small filbert
brushes so you can follow along no matter
what size brush you have and feel free to use
any colors you'd like. This is all just for practice. First, let's use the edge to
create thin, dainty lines. When you're doing
this, you'll want to hold the brush on its side so that the sharp edge is
making contact with the paper. Try doing this exercise while applying
different amounts of pressure to the paper to make lines with different
thicknesses. See how even with this
very large size 12 brush, I can still get
nice and thin lines just by using the edge. And same goes for the
smaller filbert brushes. You can use the edge of these
to get even thinner lines, just like what you can do with the fine tip of a round brush. And this is what makes the
filbert brush so valuable. It's truly a jack of all trades. Now, let's try using
the belly of the brush, which is what will mainly
use for the flower petals. So for those very
expressive petals, I just plot my brush down onto the page like this and
drag it down quickly. This method gives you very
organic looking petals. And I've personally
found that the quicker and Loose
or you do this, the better the petals look. So again, don't try to
control it too much. Now let's see how it looks
with my one-inch oval brush. Very similar. I'm getting
those large, beautiful petals. You can even do this with your smaller filbert brushes to, of course, you'll just
get smaller petals. But this is great for
painting things like daisies, lavender flower buds are other smaller Filler
Flowers that's still have that
softer rounded edge. When you want more control or a sharper point
towards the center. You can also twist the brush
slightly at the bottom to get a more refined point
of attachment like this. In the upcoming lessons, we'll talk more about when to use each of these techniques. But for now, just
keep practicing and seeing all the
different types of strokes your brush can make. I'll show you this with a
smaller filbert as well. So I'm applying my pressure
down onto the paper and then twisting at the
end to get a finer tip. The last way to use your
brush for Flower Petals is by using the side
edge of the brush. And this is one of my favorites. This still gives you the soft rounded edge of
the flower petal, but with a much
thinner wispy or look. I like to use this stroke a
lot for adding inside petals. And I also use the side
for leaves and leaf stems. Again, I'm being
sure just to make very quick loose strokes here, do your best to not
overthink things. I highly encourage you to keep experimenting with these
methods on your own. Muscle memory is a vital part of improving your
watercolor skills. So get comfortable doing
this and then we'll apply these strokes to
some flowers and leaves and the upcoming lessons
6. Loose Flower: Let's start with some flowers
because let's be honest, those are the most one to paint. As I briefly mentioned earlier, the most effective way to utilize your filbert
brush is by painting your flower petals towards the stamen or the
center of the flower. Because of this, I
typically like to pencil in a basic circle shape, so I know where
to aim my petals. You certainly don't
have to do this part, but it just helps me
stay on track and not get too wild
with my Strokes. Alright, so let's go
ahead and get started with a basic loose Flower. I'm going to start with
my size two brush, but any of these
techniques can be done with any of your brushes. And I'll just kinda switch up which brushes I'm
using throughout so you can see all the
different brushes in action. So I started with
my circle here. And again, you don't
have to do that part, but it just helps me stay on track and I'm just going
to use one of those first pull down strokes to
create my first flower petal. Again, don't overthink it. It can be a little
intimidating to put those first strokes
down on the paper, but just plop it
down just like that. Alright, I'm gonna load
up a little more color. And I'm gonna do another
one using the side hold. So I'm using that side
edge of the brush. And I'm going to paint another flower petal
right next to it. Now I want to have
a little bit wispy or of one right next to it. So I'm going to
use the very edge. Remember when we did
that to draw the lines. And I'm just going to quickly make a stroke and
bring it all together. And I'm just going to
work my way around the flower and making
sure to switch up the way that I hold my
brush as I worked my way around and just adding
in some petals. So see how I turned it there at the end to create
the sharper point. Now I'm going to
grab a little bit of yellow into my mixture just to help make this flower
look a little more unique. And I'll just add another
little side stroke. Again. You don't have to follow these exact strokes
that I'm making. But just remember to experiment by holding your
brush in different ways, different angles, applying
different amounts of pressure. And nine times out of ten, you'll end up with
a good flower. I want this perspective to
be not just straight on. So for this bottom petal, I'm going to use the side hold. And I'm just going to paint
a sideways pedal like that. Now, while these
petals are still wet, I'm gonna go in with
a little bit of a darker color and just tap in just a little additional color just to make it pop
a little bit more. And remember, we're
just practicing here. So if you don't
like the way that your Flower turns
out the first time, that is totally fine. I'm going to just go over
this one more time with a slightly darker
value of the color. Tapping in some of that peach
color along the bottom. And I'm really liking how
this one is turning out. And that's what's so great about the filbert brush
as you can make all these different
looking petals from one brush just by the
way that you hold it. So the side hold the
belly of the brush, the side angle, they all
create such different strokes. So now that I have
the main parts done, I'm going to go in with
a smaller filbert brush just so I can control that
center part a little more. And I'm just going to grab a green color and mix
it with the yellow. Feel free to use any
colors you'd like. And I'm just going to place
down some color here. So just kinda filling it in over where I put
the pencil outline. Sometimes they also like
to go back in and just tap in a little
additional color with a smaller brush, just like this. Just to have a little
bit more control. I love the size 12 brush for the fluffiness that it
gives to your petals. But for smaller details, It's a little harder to control. So that's where I like to add in just some of these details
with a smaller brush. Now, I want to add just
slightly more detail. So the center of
the flower here, but since it's still wet, if I go in and tap
in some dots or extra details is
just going to bleed. So I'm gonna give this just
a couple of minutes to dry. Alright, so I think
it's mostly dry. So I'm gonna go in
with a darker green. It might still be slightly
wet, but that's okay. Nope, it looks like
it's pretty good. I'm just going to
use the very side of my brush almost as if
I'm using a round brush. And I'm just going to add
some dots here in the middle. Just to make that center just
a little bit more refined. Alright, there we have it. So this is kinda my go-to and
I'm Using Filbert Brushes. Just a very nice basic but
still very interesting Flower. So we have different shapes and different angles for
each of the Petals. We have a variety of colors that look really nice together. And it's also not a
straight on perspective because this bottom petal
is a little bit different, so it gives you just a
very interesting look to your Loose Floral
7. Dainty Wildflowers: The next one we're
going to do is a little dainty Wildflower. And I love to do these ones for fillers when I'm doing
my compositions. And I'm gonna be using my size six filbert brush
because I really want this to be dainty and it's
a little bit harder to get that sort of control
with the bigger brushes. So just using a size
six and I'm going to use my yellow color
from the first flower. And this will just have a
couple of Petals to it. So it won't be as
tricky as this one. And we're going to
be using the method where you place down
your Flower and then twist at the end to give it
more of a refined attachment. So I'm going to start
with this first petal. Apply some pressure
down to a step, the end, and then you get
a nice-looking petal. Now, I'm going to
rinse off some of that pigment so I can
get a lighter value. And I'm gonna do another
petal right next to it and bring that attachment
in that same area. And I'll do one or
two more petals here. So this one is right next to it, and I'm gonna do one
more here on this side, a droopy little petal that
is very light values. So I'm just going to add a
little bit more color to it. There we go. These types of
flowers look a little bit strange without
the leaf stems. So we'll go way more in-depth into stems and leaves and
the following lessons, but I'm also just going
to add one here just so you can see what the
end result will look like. I'm going to grab some
of my deep sap green. I'm using the same brush. And I'm just going to use
the very edge of it like we did to make the
thin dainty lines. And I'm just going to very
gently add a little stem. And we'll add a couple
of leaves here again, like I said, I'll
go more in-depth than this and the
upcoming lessons, but very similar to making the petals just
applying some pressure down and twisting at the edge
to get a nice little leaf. Now while these
petals are still wet, I'm going to tap in some
additional color just to give it some more vibrancy. So I went straight
into my paint palette. It's very pigmented. I'm just tapping in some additional color
here at the bottom. Like I said, these are really great for if you're
painting bouquets or compositions like we'll do at the end of class when you have some extra white space
that needs to be filled in or you just want
to add some movement. These types of Fillers are
really great for that. Let's do another
one. I'm going to start with a very light
value of my yellow. And I'm going to place
my first petal down. Once that's in there, I'm going to play
some additional ones on either side of it. Remember, you don't have to
do these exact same strokes. Feel free to experiment. You just want the edges of
each of them to be roughly in the same place so
that you can add a nice stem to bring
it altogether. And another droopy pedal. It's up to you how many
petals you want to add. And then I'm going in with my green using the flat edge of the brush and just
painting in a little stem. So you can see a little
bit of streakiness there. That just means
that I don't have enough water in my mixture, so just re-wetting my brush. In continuing on. This time, I'm gonna go back
in to tap in some additional of that peachy color. Because I really liked
that color mixture in the first flower. So I want to get a little
bit of that same effect. So I'm just tapping that in. And since those initial
petals are still wet, you'll see them just
gently bleeding together. So it doesn't make
a huge difference, but it just makes it a
little more interesting. Alright, I'm gonna show
some more examples of Filler Flowers like these just because they're so easy
to do with Filbert Brushes. And we'll be doing
a lot of these when we get to our class project. So I'm gonna move on
to my lavender color. And I'm just going to plop down some brush strokes
just like that. And this is where I'm
really twisting at the edge to get those fine tips. While those are still wet, I'm going to grab a darker value and tap
it in at the bottom. I'm going to use
the side hold here. So it'll be a slightly
more dainty stroke. Feel free to experiment here. We are just kinda getting
comfortable with our brushes, seeing what they can do. Seeing what shapes of
flowers we like to paint. No pressure at all. We are just experimenting here. So go easy on yourself. And I'm liking how
this one is curving. So now I've loaded up a light green and I'm just going to add a little stem and attaching
some of these petals here. And painting in
some dainty leaves that have the rounded edge. I'm really liking how
these are all looking together and they're
so different, they're all so different, but I use the same brush. So that's what I'm
talking about and that's why I love the filbert
brush so much. It's just so versatile and you get a lot of different
looking flowers.
8. Expressive Florals: Let's do another big flower. So these ones are great for practicing our control and using smaller strokes and
smaller brushes. So now I'm gonna go
ahead and pencil in the center of my flower. I'm going to use my
bigger brush here. So I'm going to use the size
12 filbert blooms brush. Here's the center. And I'm just going to
use the side hold of my brush and start
painting in some petals. So this will be similar to
the first one that we did. But I'm going to do just a
straight on perspective. I'm going to get a little
bit more pigment so you can see this
demonstration better. And I'm just going to start
dropping down petals, making sure to vary
the thickness. So some of these are thicker. You can even do two
strokes per petals. So sometimes I
attach it like that. And then you get a bigger petal. That's really the great part
about painting loose florals is you don't have to have a perfect
representation of a flower. So I wouldn't even know what you call this specific flower, but I like the way
that it looks. And I'm varying the petal shapes and it looks really beautiful. I'm going to throw
in some yellow here, getting an orange mixture together and just adding in my petals. And I'm making sure
to keep my risks nice and loose
throughout the process. I'm going to add
some more yellow to these initial petals. And then when I have
these white spaces, That's what I'm using
the edge just to kinda fill in those spaces
with some smaller Strokes. Alright, now I'm going
to move to my size ten. And these are still wet. So that's a great opportunity to get a little bit
of color bleeding. So I'm going to grab
a darker pigment. I'm just going to use the edge, the side edge to just tap in
some very dainty strokes at the bottom and just watch that paint bleed
out into the petal. I'm not applying very
much pressure here. Just adding in these
delicate little attachments. If it's easier for
you to just focus on one color at a time that
is perfectly fine too. I just like to mix it up just to make the flowers a
little bit more dynamic. So I'm just barely touching the page to get very
dainty attachments. Alright, now, using
that same brush, I'm just going to
work on the center. I'm gonna make it very
similar to the one we did up there using a
yellow-green mixture that's a little
too yellow for me. So I'm adding just a
little bit more green. And I'm just kind of tapping
it down there in the center. I'm gonna give it just a
little bit of time to dry. And then I'll go in and
add my final details with my darker sap green is
mostly it's still wet but I'm just going to start
tapping in that darker green using the side of my
size four filbert brush. It doesn't matter which size
you have as long as you use the corner angle of it, you can still get a
pretty fine stroke. And I'm just going to
tap in some color here. And there we go. So I'm really liking how all of these
flowers are looking. Let's try one more style. So just like the others, I'm going to start just with penciling in where I
want the center to be. And then I'm going
to use my size ten. But again, feel free to use any color and any size you want. I'm going to hold my brush at an angle for this first petal. And I'm just going to
press it down and release. I want that pedal to be
just a little bit bigger, so I'm doing my second
stroke attached to it. Now I can start varying
the strokes here. I'm gonna do some with the side, some a little bit with severe. And I'm gonna make this
first petal even bigger, just kinda wiggling my
brush while it's attached. There's just so many
different ways you can do petals with these brushes. And that's why I
love it so much. So really just get
creative here, have FUN. Experiment, see what
you're comfortable with, see what styles you like best. And while it's
still wet, I'm just grabbing a darker pigment and just tapping it in
there at the bottom, you'll start to see
a pattern here. Or if you've taken any of my other floral
classes, you know, I absolutely love
some good contrast and just tapping
in darker pigment. Then the final step will
just be taking some black on my smaller brush and
filling in the center. I want you to remember that these flowers are just starting points to help you feel inspired by everything
your brush can do. Your, the Artist
you're in charge here and you never know what you
can create until you try. And then the next
lesson we'll do some slightly more
refined Flowers, including peonies and roses.
9. Peonies: Alright, we've
gotten the hang of our basic loose florals, and now we can move on to
some more refined flours, including a peonies and roses. These are still
very loose style, but they do require just a
little bit more control. Alright, let's go ahead and
get started with the peony. Now, I've always struggled with painting peonies
with round brushes. It's always been something I
really would love to paint, but it's just been
very difficult for me. But once I found
the filbert brush, everything becomes
so much easier. I'm excited to
share my technique. So I'm starting
with my size eight. And I'm just going to create
my center petal here. And I want this one to
be a little bit wider. So you'll notice that I'm doing a few more strokes here
to make it nice and wide. Alright, now I'm going to start creating my
petals around it. So first I'm just
going to tap in a little more pigment
down at the bottom, load up some more color
and start filling in these petals and peonies have a very round, bulbous shape. I want to make sure that
I'm curving petals so that all of the tips of them
meet here in the middle. So using this side hold. And then finishing off with
a nice pointed tip here. I'm going to do the same
thing on the other side. Just kinda pulling
in those petals. And while those
petals are still wet, I'm just darkening the
center a little bit. Now comes the best part. And this is kinda the secret
weapon of the filbert brush. We want to create some petals in the back to give it a
little bit more depth. And the shape of
the filbert brush perfectly outlines what I want those back
petals to look like. So what I'm going to
do is just tap down my brush like that and you'll
see it creates a nice arch. And this really is
the secret weapon to peony is because
it's a lot harder to replicate that arch
with round brushes. But with filbert, you
just have to tap it in. So I'm adding in some
little further back. And just placing the brush down. Just like that. You'll
see me go back in and just tap in additional
color at random points. That's just what I like to
do before the petals dry. Because watercolor
pigment tends to lighten and get a bit
duller as it dries. I just go back in and
add some more pigment. Now I'm going to paint the
petals on the underside. So they're a little
bit wider and then twisting at the end to
meet the rest of them. I'm getting a little
bit darker value here. Using the side hold and always attaching right
there in the center. Now before those dry
up, like I said before, I'm just going in with a little darker value and
adding a touch of vibrancy. And now I'm gonna do the same
thing with the back petals. So just adding in a
slightly darker value. And once you like
how that's looking, I'm going in with my golden
yellow and I'm just going to start to fill in the steam
and the center of the peony. So peonies are a little trickier to do with
the smaller brushes. Again, that was a size eight. So now I'll show you how
to do it with the size 12. So again, I'm going to start
with that front petal. And I want it to
be nice and wide. So I'll do a couple
of strokes here. You can see this blooms brush is really easy to get those
big fluffy petals. You still can do it
with the smaller ones. That's why I wanted
to show you that. But it's just a little bit easier with the
bigger size 12 brush. And once I have
that initial pedal, that's just what I
like to start with, and then I build around it. So initial pedal is down. Now I'll start adding
the side petals and everything's coming
to the center point. So just keep that in mind. I'm just keeping my wrist
nice and loose here. And now I'm going to take a slightly smaller
brush to tap in some of that color down at the bottom and you
can start to see it just bloom into the petal. And that's what I like to see. So now we can start adding
those back petals again. And I want to give a little bit more room to do the center. This one was a little
bit smaller, but again, we're just going to tap the brush down and it
creates a nice arch way. I just absolutely love
that for peonies. I'm just tapping it down and
creating those outer petals. Some of them can be a little bit longer just by
pulling them down. Then the ones in the
back are further away. So they're just nice and small. And just like what I did
with the other petals, I'm just going to tap in some darker value
while it's still wet. And now those are done. We can get started on
the bottom petals. So I'm going to
mirror this big one. So I'm just applying lots of pressure down and pulling up. And I'm gonna get a
slightly lighter values. So I'm just adding water to my mixture and finishing
off those petals. So I use the side hold
as you can see to just add in some of those
little filler strokes. Then applying more pressure
on the bigger petals. So I'm just going to add a
little bit more color here. And even though I
do find this easier to do peonies with
filbert brushes, peonies are still really tricky. So if you're not getting
it on your first try, that is perfectly fine. It does take a little
bit of practice. I'm just tapping in a
little bit more color here. And I'm pretty happy
with how that one looks. So now we can go and add the
yellow part for the stamen. And I'm going to move
down to my size ten brush just because it
gives me more control. So I'm loading it
up with a yellow. And since this one we
have a little more room. I'm going to do two layers. So the first one will
be slightly lighter. So a more watery mixture. So you can see a
little bit of bleeding there because my
petals aren't dry up, but that's totally fine. I'm just adding in
this first layer. And then I'll give it a
little bit of time to dry before I add in
the final details. Alright, so this is mostly dry, so I've moved down to my
size four and I'm just going to add some wispy lines
using the very edge. Just to give it those final
little stamen details. I'm not applying very
much pressure here, just using a very light hand. And I'm just adding in
some dots and some lions. Again, the style of painting is a very delicate balance between that detail and looseness. So we're not trying to make
this look hyper-realistic, but we do just want to add
a nice touch of detail. And there we go, two very different brushes. So size eight versus size 12. But you can really
achieve a nice full, fluffy peony, which I
just absolutely love.
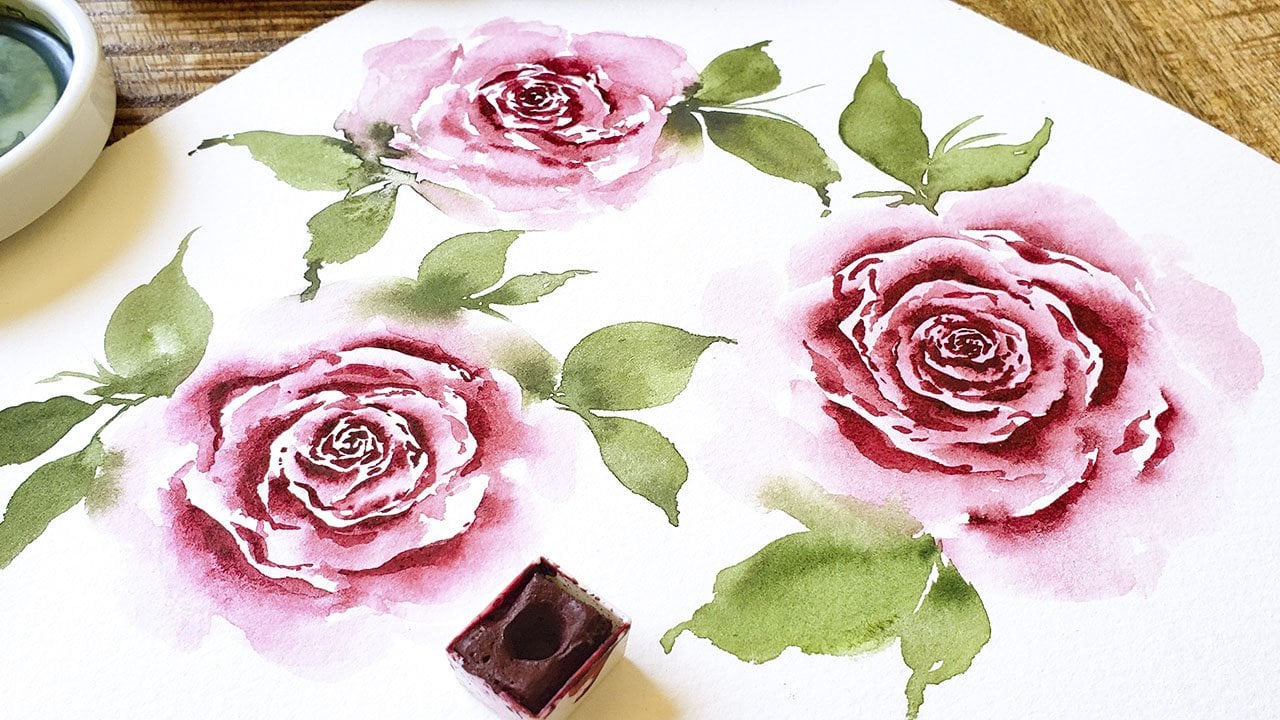
10. Roses: Now we're going to do a rose. So if you know my
style of painting, I've always loved Loose
Watercolor roses, but I've always
used round brushes. But I found some FUN
techniques to be able to utilize the
filbert brush as well. So let's get to it. I'm going to use a
size eight to start. And I mentioned this
briefly before, but I'm going to be using the side of this brush to
create the center Petals. Now, this rose is a little bit trickier
than the other flowers. So just give yourself some
grace if it's tricky for you. And I'm going to start with the center of the flower by just making very dainty lines
using the very edge. So creating some
lines in the shape of a circle and just using a
very concentrated pigment. Alright, so I'm going to
start with that and now I'm going to rinse off my brush, but make sure it's
nice and wet still. And I'm just going to apply somewhere
pressure using the side hold and just make these nice little C
curves along the edge. I'm using a mix of pressure. I'm still using the side of it, but these bigger petals, I'm just pressing down
harder and the smaller ones, I'm just easing up. Now while it's still wet, I'm going to tap in some
darker value because I want the center of the
rows to really be dark because it's tightly wound. And then we get lighter as
we work our way outward. And now I'm going to
move up to my size ten, and I'm just going to grab
barely any of that color. I want it to be very watery. And I'm working kinda
quickly because I want this to remain wet. And I'm going to
use a side hold and just add some big
a little too late. So I'm going to add some big petals here
coming off of it. Holding it at the side
angle and just pulling it down to create those really
beautiful big petals. Again, tapping in a
little more color while these ones are still wet. This is what I mean when
I say intuitive painting, I mentioned that in
some of my classes. That's just where you get in the flow of things and you know, when to go back in and tap in more color when you can
go out more Petals, it just kinda becomes
an intuitive process. That's really when painting
becomes just so much FUN. When you don't have to
think about it too much. So I'm just going to continue adding in some
petals around this side. Some of them are using
the side hold like this. Some of them I'm
using the belly of the brush in it just creates this really beautiful rose
that I just absolutely love. It's definitely a
different style than my roses when I
use round brushes. But it is still
absolutely beautiful. I've been painting roses
for a very long time now. So it's just really nice to
have a new way to do it. And to just change up
the style a little bit. Rinsing off some of that
pigment and just filling in some fluffier petals around
the edge. There we go. So it's kinda hard to
know when to stop. I could go and add
in more details, more petals, but I'm really
liking how this is looking. So let's go ahead and
practice one more time. This time I'm going to
show you a FUN way to use multiple colors
in your rows. So I'm actually going to start with yellow and
then we'll tap in some of that peachy
pink later on. So again, I'm starting
with my size eight. If you don't have these exact
sizes, it's perfectly fine. Just using a smaller one for the center strokes
and just kinda turn your brush in
different directions. Because we wanted to get these
thin dainty lines around the center because the center of the rose is tightly wound up. Those petals will be darker. And now I'm rinsing off
some of that pigment and just pressing my brush down and creating
slightly bigger petals. So it's the same hole
that's the side hold. I'm just deferring the
amounts of pressure. So some of them are
thinner strokes, some of them are thicker. And now I'm going to move to my size ten and create
the bigger petals. Again, I'm using not
a lot of pigment. I want this to be very
light value and doing a side hold and pulling
down to create big petals. I always start a
little bit too light, so I'm going to add a
little more color to that. It's better to start to light
though and then add more than to try to subtract color because that's
really hard to do. I'm just going to add some of those big fluffy petals
around the edge. And these are the
petals that are really blooming and
opening up nice and wide. So I'm not thinking
about it too much, just letting my
brush dance around the edge and create
these nice Petals. Now comes the Fun part, which is tapping in some
of our peachy pink color. So if you're not using the
exact same colors as I am, that's totally fine just to experiment with using
a darker color here. So moving back to
my small brush and tapping it into the center
and you can start to see that color just
bleed out into the rest of the yellow and
it's just so beautiful. So I'm not adding too much, just tapping it in and
letting those colors bleed. And there we go. I'm going to start to sound like
a broken record here, but my best advice is to keep practicing these
techniques over and over again until it starts to feel natural and intuitive to you
11. Leaves & Greenery: We've mastered our flowers, so now we can move
on to some leaves and Greenery to help complement the flowers and make our compositions look
more dynamic and full. We'll be using a lot
of the same techniques that we've already practiced. This lesson should start to
feel a little bit easier. I'm going to use a
size eight brush here, and I'll be using a
mixture of deep sap green. First I'm gonna show
you how you can achieve a similar effect
to round brushes. When you're painting
leaves with round brushes, you typically end up
with a fine pointed tip. So to do that, you'll
start with the side hold and then do light pressure, heavier pressure, and
light pressure again. And then you get
that nice fine tip. And with filbert brushes, the nice thing is
you can get both. So you can still get
that nice fine tip or you can get a
rounded tip like that. So really there's a
lot of options here. So the easiest to just
to pull it down and twist like we did with
the flower petals. Or you can do it like this. There are lots of ways to do it. One of my favorites to get
a very loose, organic, wispy look is to start
out with a side hold, apply some pressure down, and then just twist my brush at the end and you get
that nice wispy tip. So let's do that again, starting with the side hold, light pressure, heavier pressure and then
twisting at the end. And that gets you that
nice organic look. You know, I always say
muscle memory is important, so make sure you do
these practice drills. I've higher pressure down
onto the paper and twist. Something else I like to do, especially when I'm
painting compositions, is to create very
wispy little fillers. So again, I use the
side edge and just barely graze the paper and create these little
wispy strokes. And that's great for attaching
things like flower buds or just having some
Greenery come off the edge of your
leaves like this. Again, just very
wispy light hand, also a tips to help make your
leaves look more dynamic is I know you saw me tapping in additional color in
the flower petals. So you can do the same
thing with your leaves. So start with a nice
light layer like this and there's
a little pooling, so just make sure your first
layers nice. And even. Then, you can go in with
some darker green and just tap it in and let the wet on
wet technique do its thing. So you can see the color just
gently bleeding in here. So as you can see, there are lots of different
ways you can use your filbert brush to create
very beautiful leaves. And we'll get more practice once we paint our composition. Once you're feeling
more confident with all of your botanical elements, I'll meet you in the next lesson to start our class project, the loose floral composition
12. Composition Basics: Before we start
actually painting, I wanted to review some
of the key elements that help make up a beautiful, well-balanced
floral composition, like the one we'll paint
together and the next section. Now when I'm painting
loose floral pieces, I never released sketch out any detailed plans or
anything like that. But there are a few key
things that I like to keep in mind when I'm planning out how I want the overall piece to look. The first thing is having
a dedicated focal point. You want to draw the eyes to a main element of your piece, which is typically the
biggest fluffy just Flower. And this allows the viewer to see the standout element first. Then move on to the
additional flowers, leaves, and fillers. So it just helps turn the
piece into a viewing journey rather than just being overwhelmed with all
the elements at once. Next step is contrast, and there are a lot of parts of your composition and that
should have contrast, such as contrasting colors, size of elements
and perspectives. This all helps to
make your piece look more dynamic and interesting. We also have to
think about balance, which is another
critical part of painting, a floral composition. Now this doesn't mean having a perfectly
symmetrical painting. What it means, it's making
sure your painting isn't lopsided with all the heavy
elements on one side. Wanna make sure
those big pieces are complemented and balanced by
smaller fillers and leaves. And this really helps to make your piece more
pleasing to the eye. And the last thing
I want to mention encompasses all
things and movement. I mentioned this
when I talked about having a focal point. But you really want the
viewers eyes to go on a journey and move along the paper as they
look at your flowers. You don't just want their
eyes to plop down into the center of the page and then move on to something else. So the easiest way that I've
found to compose flowers in a dynamic way is
to place them in either an S shape
or a zigzag shape. So you can see in our piece here we'll have the
tallest part on the top right and the lowest
part on the bottom left. So it's following a nice S curve and your eyes move along
that curve as you view it. Also related to movement is
the use of your whitespace. Don't underestimate the
power of whitespace. Your floral elements
need room to breathe, so try your best not to stuff in your fillers and leaves and
every possible whitespace. Take a step back every now and then to view your
composition from afar and then fill in the space only where
it's really needed. Alright, Enough, talking with
all those things in mind. Let's start the painting
13. Project: Primary Peony: We're gonna start with a
focal point of our piece, and we want this to
be the showstopper. So I'm gonna be using
my bigger brushes here. So I'm gonna go ahead and
start with the Peony. And I'm going to put that
in the middle left section. So I'm using my size
12 and I'm going to make a peachy pink peony. So again, I'm going
to start with that first center petal. And I'm just going
to place my brush down and pull down
to the center there. And remember it's always
best to start light. Then you can add more
color as you go. And I want this just to come to a little bit more of a point. So I'm just going to twist
my brush just like that. And that's looking pretty good. So now that we have that
center petal all in place, we can start adding
our additional petals. So remember we want to keep a nice rounded, bulbous shape. I'm going to use the
side hold and play some pressure down
and bring it right together in the center. I'll do the same thing on
the other side as well, using the side hold and
bringing down the petal. Now I'll just start to
work my way around. So I'll do another petal here, make it a little bigger. Make sure you're
remembering to use different amounts
of pressure and holding your brush
at different angles. Because we want to
keep this Flower looking very interesting
and dynamic. So those petals are still wet. So I'm just going to grab a
little bit of a darker value. Hold my brush at the angle
and just tap that in there. This is really my
favorite way to get that Loose effect on
your Florals is to just real utilize the
wet on wet technique and just don't be afraid
to tap in more color. Especially on petals
that are still wet. So this is looking good so far. And now I'm going to use
that same technique of just tapping my brush down to
create the back petals. So I wanted just to
be a little archway, but I want to leave enough
white space for the stamen. Just going to gently tap
some of those petals down. And I want some of
them to be just a little bit thicker so
I'll pull them down. And others to be nice and thin, especially the ones in the back. You don't want them
to all be exactly uniform because that wouldn't
look very realistic. So just keep your wrist nice and loose and just go
ahead and tap those. And I'm also going to tap in just a little
more color at the bottom. Like I said, this is getting
into intuitive painting. So I'm not following an exact step-by-step
for any of these. I'm just filling it out and seeing where I
need to add our color. Make sure I take advantage of the petals that are still wet. So it makes sure you're doing that at your own discretion. Look at your painting. You don't need to
feel pressure to do exactly what I'm doing. Just assessors as you go, figure out what's working, what's not where you want
to add in more color? If you want to keep
things super light, you don't have to
add any more color. It is totally up to you. As I said before, I
really want you to just learn how to trust your
artistic intuition. If you want to work
with multiple colors like we did in our rows, you can do that as well and
just happened some yellow. It is up to you. I'm just going to stick
with this peach color. Okay, So this is
looking good so far now I'm going to add
the bottom petals. So I'm holding my
brush this way, so my curved edge
is angling down. That's where I want the outer
edge of the pedal to be. And I'm just going to
mirror this first petal. So applying some
pressure down and twisting in making this
first petal the biggest. And I'm just filling
in the rest as we go. So you want to keep your
whitespace in mind, like I mentioned in
the previous video, you don't want to fill
in this whole thing and just have it be
a blob of color. So that's why I want to keep those little
gaps of whitespace. So I'm going to tap
in some more color. And I'm just holding
my brush at an angle and adding in some
wispy little Strokes. And this is also where you can fill in the form
of your flower. So if any of it, like you can see that
stroke I just made with a little bit to
horizontal for my liking, I want to maintain
the curve to it. So that's where you can use these little strokes
to correct anything like that and just add
that shape back into it. So this is looking good, and I'm just going to make some final little
additions of color. Always remember to check in with your wrist
and your hand. Do you wanna make sure you're
not gripping the brush too tight or being too rigid. You wanted to just
keep your hand and your wrist nice and loose. Just remember, we're still just practicing here and having FUN and being with so
no pressure at all. Now I wanna do just
a little bit more of some finer details with control. So I am going to grab my
smaller brush, this size six, and just tapping in some very pigmented color where I want it to
be the darkest. And this is where
I really recommend using 100% cotton paper because even these strokes in
the back that we made quite awhile ago,
they're still wet. So that allows you to utilize
the wet on wet technique. If you use student grade paper, which is totally fine, just have to make
some changes and work a little faster because the paper doesn't
stay wet as long the paint just soaks
into the paper. It's a lot harder
actually to be able to utilize the wet on wet
technique like I'm doing here. So the petals are
looking good now and I want to get
started on the stamen, so we have plenty of room here. So I'm going to start
with a lighter value that's a little too dark, so I'm going to add some
more water to my mixture. And I'm just kind of
loosely placing this in because what we putting more
finer details over the top. So just placing in some color
here and blocking it in. And now I'm going to give it just a little bit
of time to dry, so then I can go back in and
add in the final details. This is mostly dry. Now I'm switching to my size four filbert brush and I'm using a darker
value of my yellow, just like we did with
the practice lesson. I'm just going to start adding
some little details here. Making very light wispy strokes, adding some dots and some
just a filler lines. So you don't want
to overthink it. You don't want your
lines to be uniform. Just keep it nice and random. And their rehab it for our Peony
14. Project: Primary Florals: So now that that's done, I'm going to move on to
the second flower that all put in this top
right-hand corner. I want to leave a little
bit of whitespace in-between the Peony
and this next one. This is going to be similar to the very first flower that we practiced with a
side perspective, big loose petals and then like a side petal underneath it. I'm going to use a mixture of
the peachy pink and yellow, so we get a nice soft pink. Now once again, I'm just
going to start by lightly penciling in the
center of the flower. And again, this just helps
me to stay on track. And I'm going to mix together
my peach and yellow, keeping it nice and light. I want it to be watery at
the start so I can tap in darker value and still
using my size 12 brush. And I'm just going
to pull it down. And I'm going to make
this one nice and big. So I'm doing to strokes. You can see it's very light. That will allow me to tap
in more color as we go. So as I worked my way
around adding these petals, sometimes there'll be
a little more yellow, sometimes they'll be
more peachy pink. And that just really
helps to make these flowers look more
dynamic and interesting. And I'm using the
side angle hold. Some strokes will be
whisper than others. It is all up to you. And this type of flower you can really just get loose with. So get creative. Vary the strokes
that you're making. Feel free to tap in
more color like that. And as I work on
that bottom petal, It's going to be that
flat side petals. So I'm just shaping it
sideways like that. If you would rather do a
different perspective Flower, you can totally do that too. You don't have to follow
my exact formula. So I'm just tapping
into my yellow and just adding in these
strokes wherever I want, keeping my wrist nice and loose and they're all meeting
there in the center area. So feel free to experiment
with different colors. Tap in some darker values
there at the center. And just let it bleed
into the petals. Again, it's a lot
easier to do if you're using 100% cotton paper. You'll just have to work
a little bit faster if you're using
student grade paper. Make sure to leave some of that whitespace there in the middle. You don't want it to turn
into a blob of color. And now I will be moving
to the size ten brush, just so I have a little
bit more control. And I'm just going to add a little bit more of
these wispy details. Making sure to use
the various side of my brush to keep
it nice and light. Again, typically this
is something that I would reach for my
round brush to do. But as I said, filbert brushes are very versatile and I can
achieve the same effect. So this is a size ten brush. It's not a tiny brush, but I can get very tiny
strokes, which is amazing. So just kinda finishing up and tapping into
more color here. I don't want to overdo it, but you just want to have
FUN and experiments. I'm pretty happy with
how this looks now. So I'm going to grab my
yellow green mixture, and I'm just going to place
some of that in the center. And now I'll just let
this dry and then we can add the final details
on our second flower. Alright, the center
is mostly dry, so now I'm grabbing my darker, deep sap green mixture. It's still a little
bit wet so you can see it just
bleed a little bit, but I'm just going to
keep tapping that in. Gives it some nice contrast. I don't want to fill
in the whole space. I want to make sure it has
a little bit of texture. So I'm just kinda randomly
placing these marks down. So now we've blocked out
two of our main flowers. So I'm going to do one more
big flower right down here. So now you can start to see
some great movement there. And once we start adding
in the Filler Flowers, you'll really start to
see it all come together. Once again, I'm going
to use my pencil. I'm just going to mark where
I want the center to be. Then this flower is
going to be yellow. So our Peony is
that darker peach. Our second flower is a mixture
of the pH and the yellow. So this one's going
to be mostly yellow I'm still going to
use this is 12 brush, but I'm just going to be
using my yellow color. And I'm going to add the
smaller petals around that left side and then the
bigger petals coming down. Just to throw another perspective
into our composition. So I'm just going to start
loosely adding these petals. Starting with the bottom. This is really your chance
to make this piece your own. So don't be afraid to use
some very expressive strokes. And just start adding
these petals in. Again, I always like to
start with lighter values. And then you can always tap
and darker values as you go. But it is a little bit more difficult to do that
the opposite way. So I always suggest starting lighter and
then going darker. So there we go. This is why this is one of
my favorite flowers to paint because it just took
a few random strokes. And now I have this
beautiful flower blooming. Again just using the
darker, warmer orange. And just happening not
in, in the center. I'm just gonna go back in and
darken some of these petals to just holding my brush
at different angles, making it a little
bit more vibrant. Now, I will switch
to my size ten brush so that I can
have more control again for these final
little wispy strokes. And this is why I really liked to work with
different color values, which means lightness
and darkness of a color. Because if this was
all one flat value, it would look very dull. But because we have
some light values, some dark values, and do the same thing
with our other flowers. It really adds some dynamic
interests to our piece. Now, before I start
doing the middle, I'm going to wait for
this to completely dry because I want the
middle of this to be black and I don't want any of that black color to bleed
into the yellow petals. So I'll give it plenty
of time to dry. Now I'm going to use my size four and I'll just use
the very edge of it. And I'll just start tapping in some of
this black pigment. I don't want it to
be fully black. I want to avoid any
blobs of color. So just make sure to leave a little bit of
whitespace in there. Alright, and now we have our main three
elements in place. So now we can start working
on our secondary flowers. I don't want to jump
right to the fillers yet because I want to save
those for the end. But we'll do some
midsize flowers next.
15. Project: Secondary Florals: Now that our main
elements are in place, we can start filling in
the rest with our Leaves, Filler Flowers and greenery. As I mentioned, we have our three primary flowers
already in place. So now we can start on
the secondary flowers, the fillers and the greenery. So I don't just want to go from these big main flowers to some really small
dainty fillers. I want to add some
kind of in-between. Now, I also want to
mention that we want to start incorporating
some other colors too, because these are all in that
same peachy yellow family. So now I'm going to add some
of that lavender color. And I'm going to do a smaller mid-size Flower right here and also one down below. These are the spaces that I see quite a bit of whitespace. So first I'm going
to place where I want in the center
of that flower to be. Now I'll use my size ten brush and I'll start grabbing
some of that lavender. I want this flower to be
very loose and organic, so I'll just start dragging
these petals down. And again, you want to
keep your whitespace in mind so you don't just want
them all to blend together. You want to be mindful of
where you're placing them. And so I'm just pulling
some of these petals down. You can also paint your flowers and whichever
perspective you'd like. I'm just going to do this one a little bit more straight on, but it is up to you. Here. I just wanted to
make sure all the edges of the petals are meeting
up in the middle. And again, that's why I like to start by penciling in
where I want the center to be just to help me stay on track and make sure all of those petals are coming
into the same place. And I'm also making sure to vary the angle and the way that
I'm holding my brush. So I get these different
looking strokes because I don't want all the petals
to look too uniform. And you can probably guess
what might next step will be, which is tapping in the
darker value of lavender. I am just using the
very edge of my brush here with a darker
value of purple. And just adding those
very dainty strokes. So I don't want to overwhelm the petals with color and water. I just want to have
enough to where it can gently bleed out into the pedal. And that really just helps
give it a Loose looked. So again, you're finding balance between spontaneity and control. That is what Loose
Florals are all about. Now I have to wait again because I want the center of
that sweet black, so I'll wait for that to dry. But in the meantime, I'm going to add my
other little flower down here at the bottom. It's going to be
the same technique and the same style as it
did for the other one. So penciling in the center
and now just starting to add in those very loose style, very light value petals, making sure to change the angle. You want some of
them to be thicker, some of them to be nice
and thin and wispy. So you use your creative
intuition here. And just plop down some petals. I mentioned this earlier, but watercolor does
get a little bit lighter and more
UDL as it dries. So this is still wet, so I'm going to tap into
some even darker value of purple just to help keep
that purple contrast. So just gently adding
that darker value. And now I can grab some
black on my size four brush. I always use the size for when I want more control
because it's very small. So I'll just start adding a little bit of black
here in the center. You'll notice I'm not waiting
for it to dry completely, but I'm just being a
little more careful of where I'm tapping
in the black. And I'll do the same
thing down here. The petals are still
wet so it might bleed into them
just a little bit, which is okay, is up to you. If you want a super loose look, you can encourage it
to blend together. If you want it to be more
tighter and more controlled, then you can wait until the
purple is completely dry. Or you can just be a little more careful with your brush
strokes like I'm doing. So we added those secondary
flowers and here's where I really liked to assess
where we're at so far. You can still see a lot of
good movement coming already. And once we add the
real Filler Flowers, that's where we can
really start to plan out how we want the
rest of this to look
16. Project: Filler Flowers: Now moving on to the
real Filler Flowers, I'm going to continue on with
the lavender theme here. And I'm going to
start to fill in this space because
this is where I noticed the most whitespace. If you'd like, you can add another midsize
Flower like that. I'm just going to go ahead and get started on the fillers. These will look very similar to the Wildflowers that
we did in that lesson. And I am going to start
with my pencil here and just kind of plan where
I want these to go. So I'd like to have some
coming off in this direction. And this is where you can really use your
creative freedom. So don't feel like
you have to follow the exact same direction
that I'm going with these. Feel free to just take a look at your piece and see
what it needs. So I'm going to have
some coming off here. And I'm also going to have a
little bit coming up there. So now I'm just going
to start creating those dainty petals and
pulling down and twisting. You can see I have a little
bit of pooling there, so I'll just dry
off my brush and let those bristles soak
up that excess water. And I'll just continue on loosely placing
these petals here. And I am not worrying too much about how each
element looks. Morisot thinking about the
direction of each of them. So the point of these fillers
really is to help add movement and direction to
your overall composition. So I want to make sure that
they're all aiming and the direction that will help
me achieve that movement. So I'm just adding some
of these petals in here. And it's up to you. You can add as many or
as little as you'd like. And just making sure
you're to change up how big and how
small each pedal is. But you can see
it's really giving some good movement to
this piece already. And that's what I like to see. Once again, I'm going to take some darker value and just
tapping it in at the bottom. Just giving a little
bit more contrast to each of these elements. I'm not going to add
the greener yet because I want to do that at the end. But if you remember from
the wildflower lesson, we'll just kinda be
connecting them. So again, these types
of flowers look a little bit wonky when
they're just on their own, but it'll start to really fill out and come together
once we add the Greenery. So that is going off into
the right direction. And now I'm going to add a
couple more coming up as well. So you can have some
with a lot of Petals, some can just have a couple. And that's looking pretty good. I don't think I'd also like
to have some coming down. So I'm going to flip my
paper upside down just so I can make sure I'm doing my
strokes the correct direction. And I'll just start
doing the same thing. I'll remind you this
is your own piece, so I don't want you to feel like you have to do exactly what I'm doing if you don't want to. Now, this is where I really
want the top elements to be to help me stay
in that S shape. So I'm going to place
some stems there. Now I'm using my
peach color and just very gently adding
in some more petals. This is where it's really
FUN to get creative. So I know I've said
this before already, but feel free here to just add fillers
wherever you'd like. See what your piece needs. See what areas need some more
movements, some more color. And don't be afraid. I want you to
experiment and really put your new skills
into practice here. So I'm now going to add in
some yellow fillers as well, just kind of coming
up on this side. Just applying some
pressure down to create those wispy petals. You can also use different
sizes of brushes here. So you want some to be bigger, some to be smaller. You can really play around with different brush
sizes and angles. And I'm really just starting
to fill in the whitespaces. Again, it looks a little bit
weird without the Greenery, but once we start adding in
the leaves and the foliage, it really starts to
help bring it together. So just kinda taking
stock of what could use a little bit more Filler
and placing that in. So this is why I like to do
it with the pencil first. Because if I don't end
up liking the direction, I can always just erase it. I'm going to speed up some of this process because it'll
just be a lot of repetition. But feel free to go at your
own pace and just kinda fill in those areas that you think need a little
bit of shaping, a little bit of movement, and just have FUN with it.
17. Project: Composition Check-in: Okay, So we have our
primary flowers, we have our secondary flowers, and we have our
fillers in place. So now is when I really like
to take a step back again, look at it from afar and
just make sure everything's feeling pretty balanced
before we go in and add in the leaves
and the greenery. As I said, I want this to be in an S shape to give the
composition some movement. Now I feel like we're
in a good spot there. We have our upper
right-hand corner, we have our lower
left-hand corner. We have good movement
in between lots of fillers to help give the
middle areas and movement. And I'm feeling pretty good
about where we're at now. If you're looking at
your ears and you see some space that maybe
needs a little bit more or maybe it's
feeling a little bit too symmetrical or rigid. Then you can always
go in and pencil and some more fillers to help
give it more movements. But I'm feeling pretty good
with where we're at now. So now I'll start
adding in the leaves and the greenery
and final details
18. Project: First Layer Leaves: Now, when I'm working
with my greenery, I usually like to have two
different layers of Greenery. So I start with a very light
value of green and then I do a darker value on top for the
final little wispy strokes. And I'm gonna go
ahead and load up my size ten brush with a
very light value of green. And I'll just start
placing some of these kind of background Leaves. I don't want to place
too many of them. I just want them to
be in the background. And I will just start placing
some leaves like this. It's very similar to the strokes that we do for our Peony petals. And I will just start finding those spaces that need
a little bit more. And just placing
those in gently. You can see it's a very
light value of green, so you can barely see it, but it does help just
add some fullness. So feel free to just figure out where
your piece needs it. And I don't wanna go
too crazy with it. And because we're doing loose style and not
everything is planned out, it can be a little
hard to not overdo it. So I think it's better
to start out with less and then you can
add more as needed. So try your best not to just go too crazy
with these leaves. Just kinda be picky, figure out what needs it, and then add in some
little subtle petals. I think this is looking
pretty good so far. I'm just going to add a few
more little leaves here. I don't want to take away from the movement that
we've already created. You just want to compliment it and just kinda filling in
that space where it's needed
19. Project: Second Layer Leaves: Now I'm going to go in with
a very dark value of green. So this is deep sap green. And I'm going to start
with a smaller brush. So I will be using my size four. And I want to start by just connecting everything
that needs to be connected first because it can start to feel
a little bit busy. So I want to make sure
all the wildflowers and fillers are connected. And then I can start adding in the leaves and the greenery. So I will just work my way around using just the very edge. Again, this is
typically where I would use a fine tip of a round brush, but because I want this all to Visa and with a filbert brush, I'm just going to use
the very fine tip edge with my dark green. And I'm just going
to start adding in these very dainty stems. I don't wanna go
too crazy with it, but just filling in and
connecting those petals. And it makes sure when
you do stems like this, that you give it
plenty of movement. You don't want a straight line because that'll just
make your piece feel a little bit too
strict and rigid. So you wanna make
sure you're giving some nice curve to these. And that will help
convey movement in your flowers and
the overall piece. So you can see I'm just kind
of giving that stem a bit of movement and giving it just
a little bit of a curve. And that really makes
a big difference. So I'll speed up the
rest of this part, but for now I'm just
adding these stems. And then I'll go back to real
time when we start adding in the rest of the
leaves and the Greenery. Alright, so now all of
the fillers are attached. Things are looking good, we have good movement. And so now is my favorite part. Honestly. I'm just
gonna go in and add some final touches and details
using that dark green. And this is where I want
I leaves to be pointed. So I'll use the light pressure, heavy pressure, light
pressure technique. And then that will
give these leaves a sharper edge similar to what you would get with
a round brush. So feel free to not do
that method if you'd like. You can continue on with
the rounded leaves. But usually when I go with
my final round of fillers, I like to have just a little
bit more of an edge to it. So I'm just adding some of
this greenery on top of that first light layer and
getting a nice sharp edge. And that's just my preference for these final
touches of Greenery. Again, if you don't like it, you can continue on with
your softer edge leaves. So completely up to you here. I don't really have a
plan when I do this. I'm just going in and assessing what could
use a little bit more. So you can do leaf stems on top of the first
layer like that. You can also add it to the
Filler Flowers as well. So just being careful here and attaching a little
leaf like that. You can have one going down. You can add some of those wispy strokes
as well like that. So we're really
just putting all of these new skills
into practice here. And it just start
filling in those spaces. Again, you don't
want to go too crazy to where it starts
to look too busy. But you certainly want
enough to really give it character and make it
look nice and fall. So I'm just kind of working
my way around here. Again. You don't want all of your leaves to just be straight, so you want to give
it some character. So for example, on this one I want to
have it moving down. So I am twisting there at the edge and you have some
nice movement coming on top. And you start to see some really nice contrast
of the light green. The dark green majority of this composition is
really light colors. And so I really like the
bold look of the dark green for the final
little touch of foliage. I also added a little
touch of indigo to my green mixture
because that helps it look more bold and dramatic. So no matter what green
you're working with, you can always add a touch
of indigo to make it darker and bolder if you
like that route. And I am just going to continue
on adding some leaves. When I get to this point, I'm feeling pretty
good about it. This is, again, when I like to step back and really
look at it from afar, I'm really liking hollow
movement that we have going on. The only part that
I'm not super happy with is the way that I
connected these leaves. It looks a little bit
too straight there. But I can mitigate that by adding some of the
side leaves and I'm just going to add a little bit
more Greenery going in opposite directions to detract
from that connection here. So if you notice any of those connections on your
piece where it just looks a little bit too rigid than
just go ahead and keep adding some more foliage in
different directions to detract from that
a little bit more. So even just adding that
one leaf really helps pull the eye in that direction
and focus less on that. I don't want this to get to
jammed up with Greenery. So I'm pretty happy
just by adding these couple of sideways leaves. And I might just
add one more here, coming off to the side. And I think I am going
to leave it up that. So feel free to keep working on more
leaves on your piece. If you're happy
with how it looks, then you're totally
welcome to stop there. That just takes some practice to not only planning where
to place everything, but also when to stop. You can keep adding 1 million
leaves if you wanted to. But sometimes it's best
to just take it step back and view it overall and just appreciate
it for what it is.
20. Resources & Final Thoughts: I want to sincerely thank
you for joining me in this exploration of painting effortless Florals Using
the filbert brush. I had so much Fine
creating these loose, expressive flowers and
I hope you did too. We learned so much
in this class. So be sure to take a moment
to just appreciate all of the new techniques
and the skills that you've honed in this class, we learn to the differences between round and
filbert brushes. We completed practice
drills to get comfortable using the
brush in different ways. We learned how to
paint a variety of florals and greenery, and we put it altogether to create our stunning composition. I'm curious, did you have any favorite flowers to
paint throughout the class? I personally loved painting the basic free hand Florals
when I'm using my filbert. But it's hard to choose a clear favorite because
they're also fund to paint. If you do have any favorites, be sure to let me know. With your new found understanding
of the filbert brush, you can be confident continuing on in your
creative journey. And if you'd like to learn more, I have a variety
of other classes that I'd love to
have you join from seasonal watercolor projects to intermediate
painting techniques, to digitizing your
artwork and even learning how to turn your
paintings into greeting cards. I'd love to have
you join me again. Thanks again for
painting alongside me today and as always, happy creating for me to you
 Petals by Priya Watercolor, Watercolor Artist & Teacher