Transcripts
1. Welcome and Introduction : Welcome to this class on easy red velvet cake with the
ILP is still in this class. You will learn to draw
and paint this 21 easy, beautiful and vibrant
red velvet cakes. This class is suitable for both beginners and experienced. I'll be explaining
each predictor step-by-step so
that if you prefer, you can join along with me. This class will help
you get better in painting with the oil
pastel and use of them. Most of the basic techniques
with this oil pastels. Don't worry if you are an absolute beginner
with the ILP still, I have covered most
of the basic of the oil pistol that you
will need for this class. By the end of this class, I am confident that
you will be able to draw near the peak
slaves as easily. As I have also covered
the different ways of adding the layer for the cake and use different combination and
feelings for the cake. And the additional
elements for the toppings, like a strawberry blueberries, theories and Mulberry will come and you put the
other paintings. I'm excited to begin this class. Thank you for joining in. We will start the class with the basic introduction to the
ILP is still like a stroke, please it and few of
the other techniques. Then we will move
on to blending, overlaying, scratching, and outlining with
the oil-based till. After that we'll be covering the consistency of the ILP
is still with the examples. Then we will move on to the
next two demonstration video, starting with the
theories and the leaves. Then we would move
on to diabetes than the list of the color that you can use for the project. After that does get just for the slices and then the
sketches for the cake. Lastly, six demonstration
of the red velvet places. Finally, we'll be moving to
the 21 main projects, IRB, why did the main
project into six parts, starting with apocrine,
with the Ford painting. This part one is
comparatively easy and will be mainly using
the stippling technique. Continuing forward. Three
paintings for the part two. For this part, I'll be adding variation for the layer
delta red velvet cake. Then three paintings
for the part three, red velvet cake with
a gym cheering, Android velvet cupcake. Then we will move
on to the platform with a five painting, mixing red velvet cake. Yellow is widespread
velvet cake. Blueberry in mulberry,
red velvet cake, Mary's red velvet cake, and four red velvet cakes. Then we will move
to the fifth part, starting with newness and
strawberry red velvet cake, a strawberry and mulberry
red velvet cake. And find me to
evade velvet cakes. Normal into the sixth
and the last part, starting with strawberry and
blueberry red velvet cake. Then moving onto blueberry
red velvet cake. And finally, strawberry
circular red velvet cake. Hi, my name is Michelle and I'll be your
instructor for this class. My profession, I am an engineer and I'm an artist based Romania. I have few more classes in
their skulls here that you can take and you can find
me on Instagram. I hope you have fun with this class and learned
something new and exciting. Happy painting
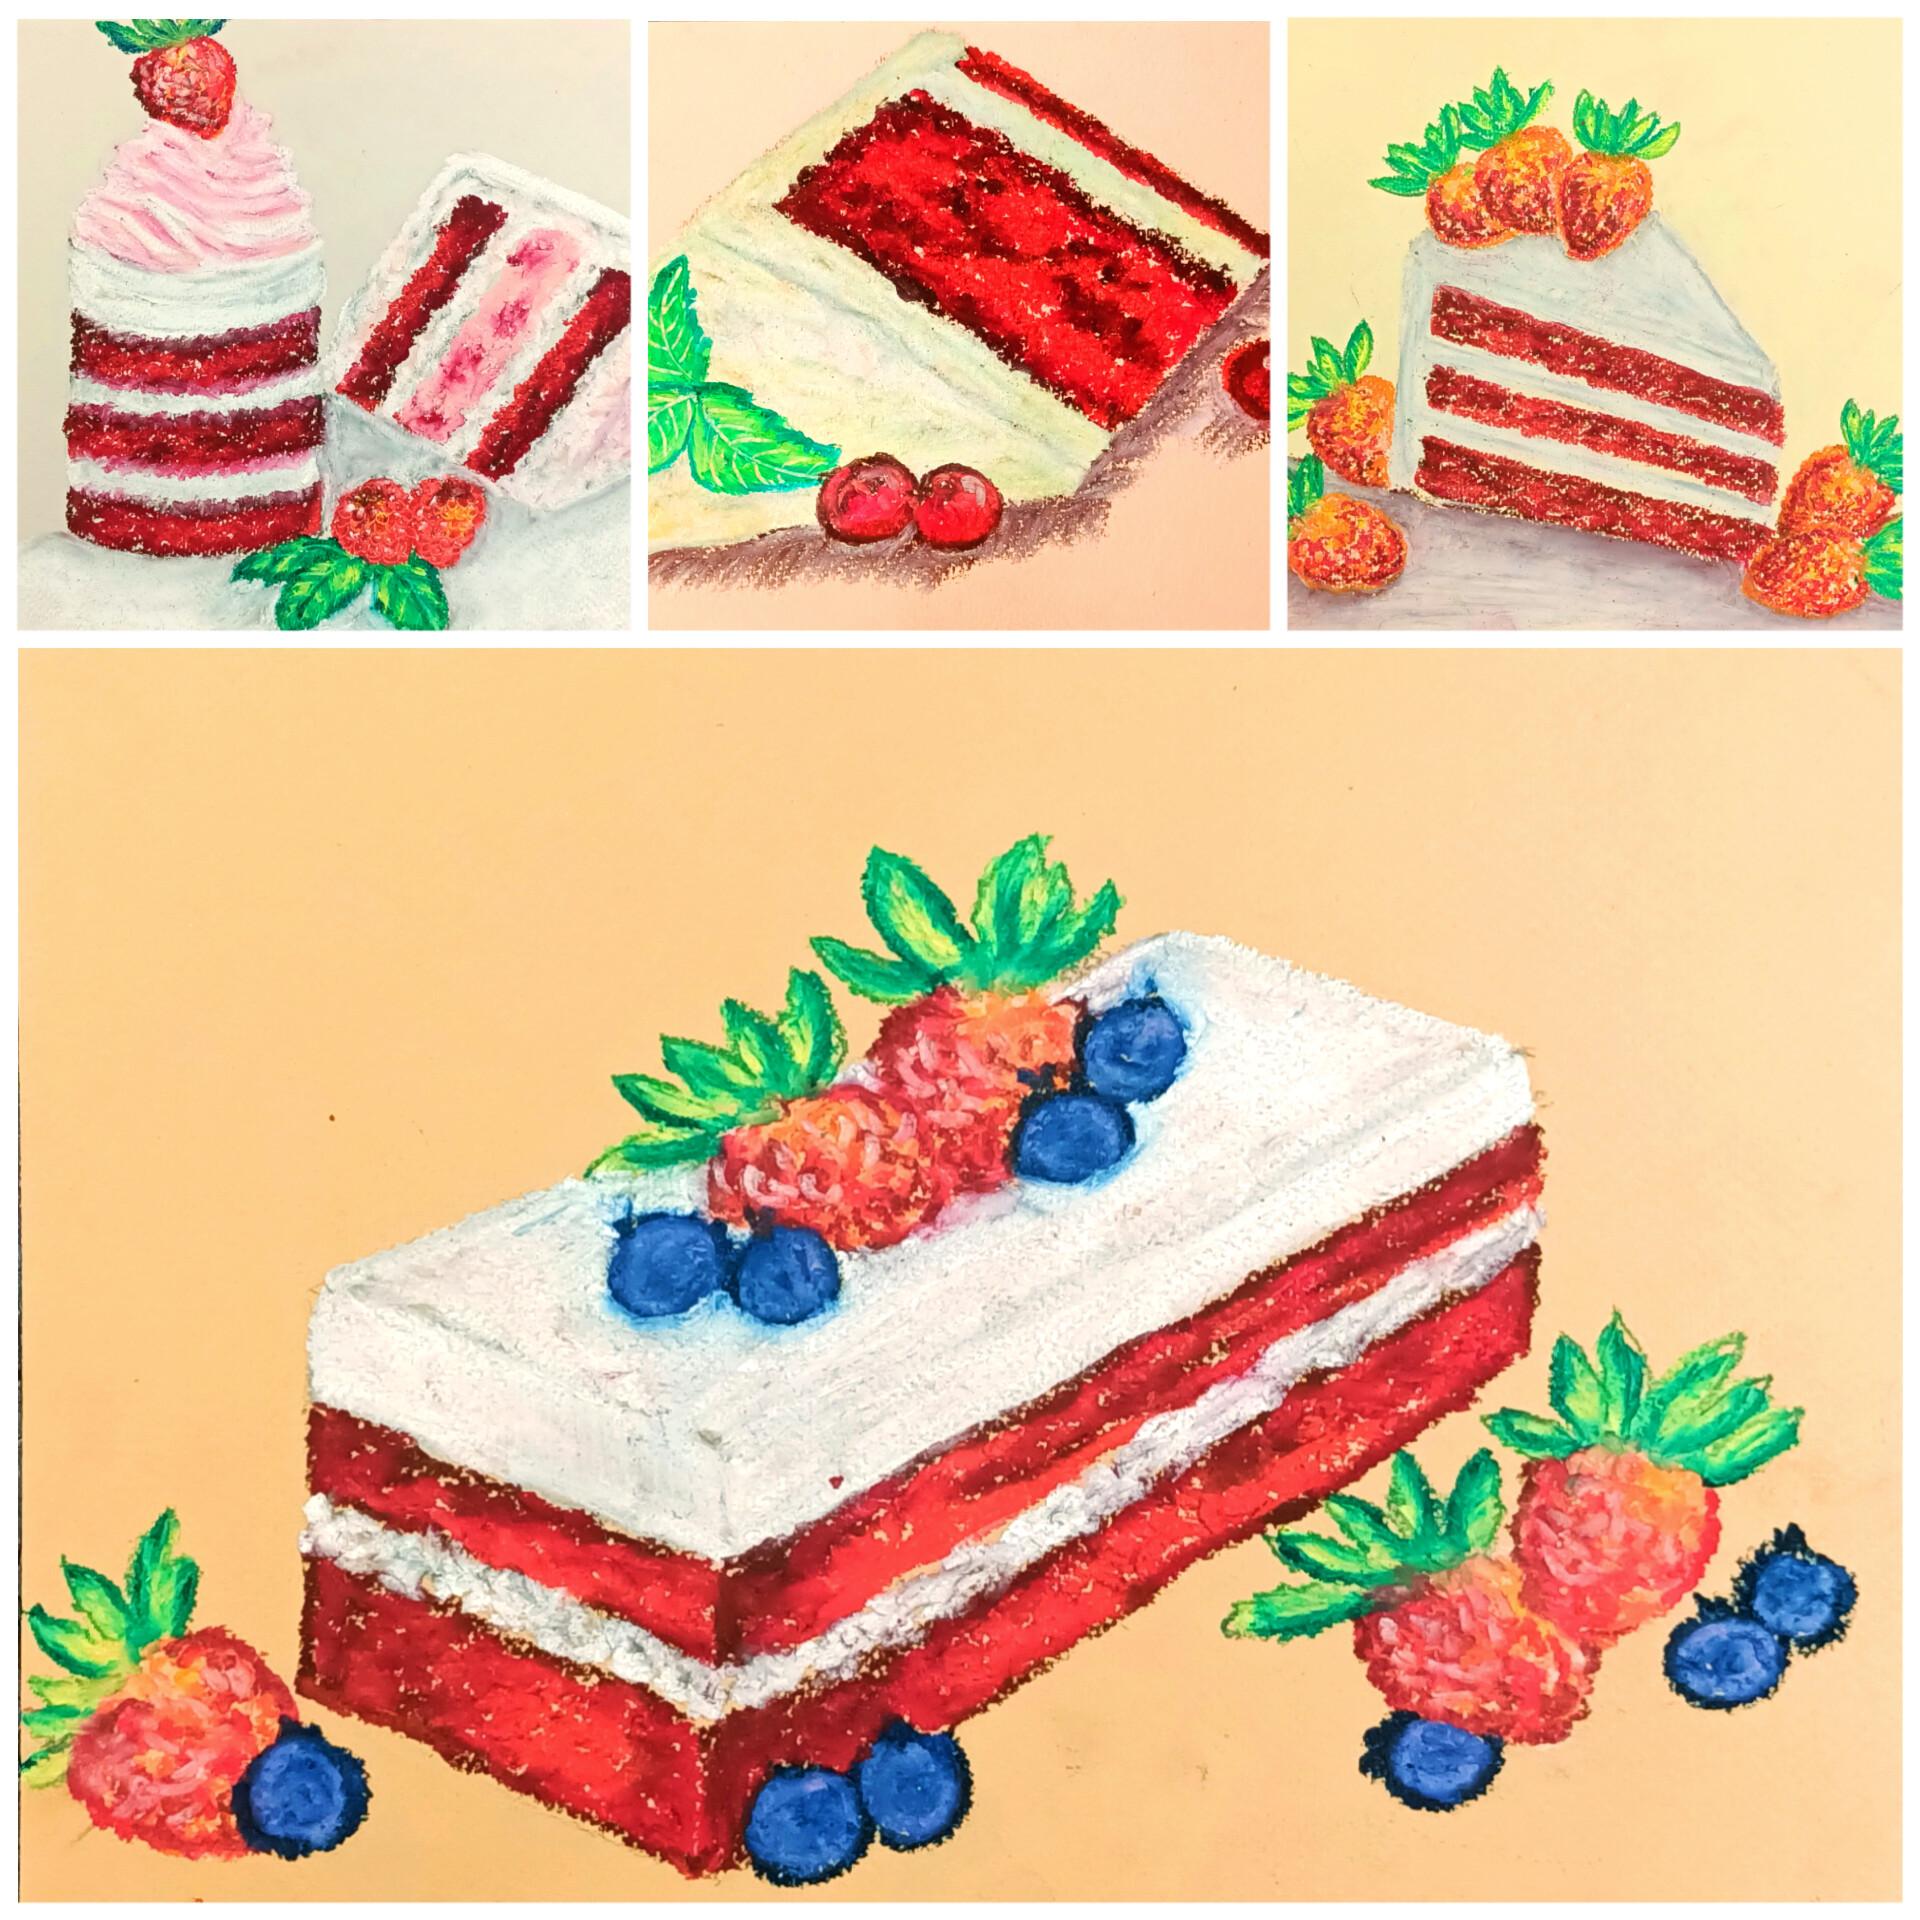
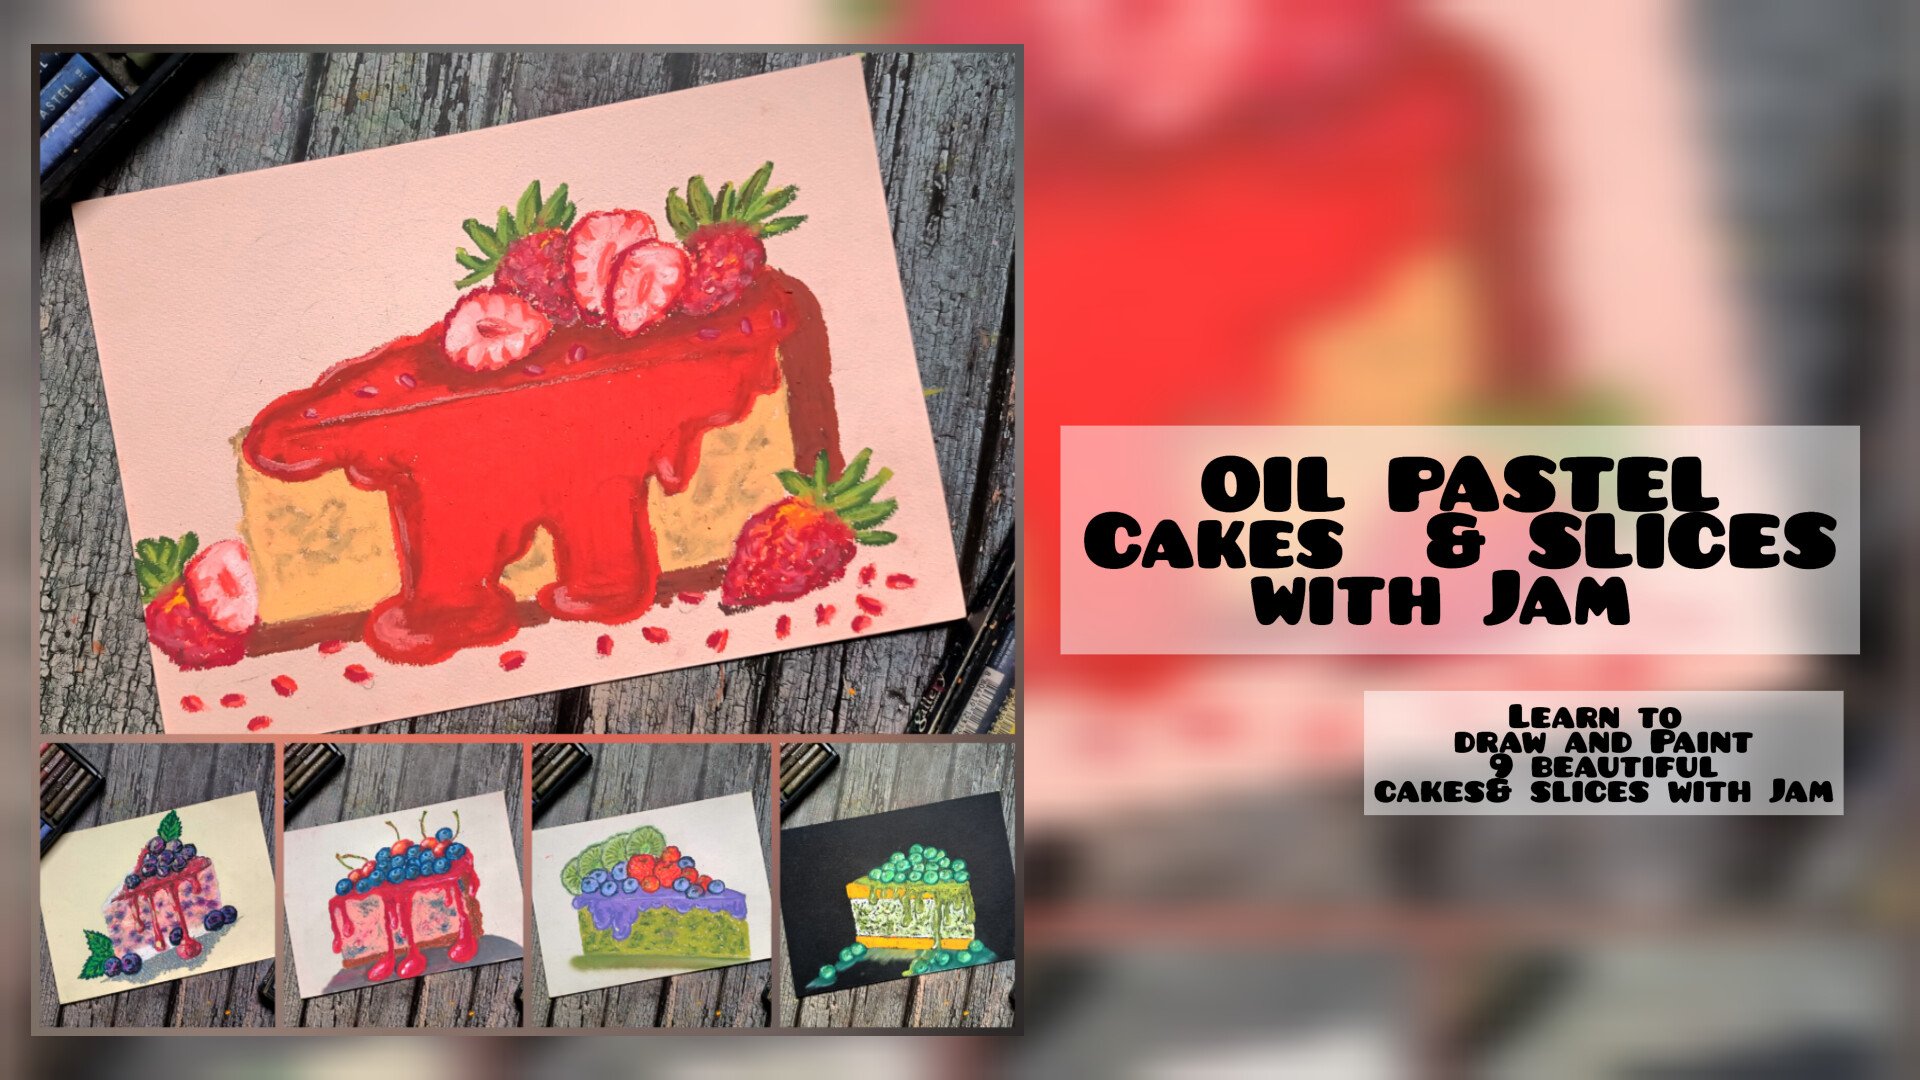
2. Class Project: For this class, the
class project will be uploading any or all of
the 21 red velvet cake. In this cluster, 21
red velvet cakes are divided into six parts. Part 123 are the small
red velvet cakes in a pipe waste will be put. In fact, one, there
are four paintings. They are easy and mainly consist of a stippling technique. In part two, there
are three paintings. We add some additional element and t in the cytosol fatigue. In part three, there
are three paintings. For this, we add more
additional element for the single red
velvet slices. Part for two sets are in
a foot pays to people. Art board consist
of five painting. They have simple big
red velvet cakes, laser's been part fight. We are three painting can we heard a lot of
toppings for them? And in part, since we have three paintings,
Leonardo Stockholm, with a lot of
strawberries, blueberries, blackberries on top of the rectangular and
circular red velvet cakes. Or you can come up with
your own unique composition of the red velvet cake. You can also upload the six
simple red velvet slices from the demonstration videos. Or you can come up
with other mosquitoes for the red velvet cake. Please upload a
project so you can say whatever you have
learned with me. And other students. Don't underestimate
leaving a project, your project, and maybe
it makes me really happy. I personally tear is
all your projects. Happy painting. See you in the next video.
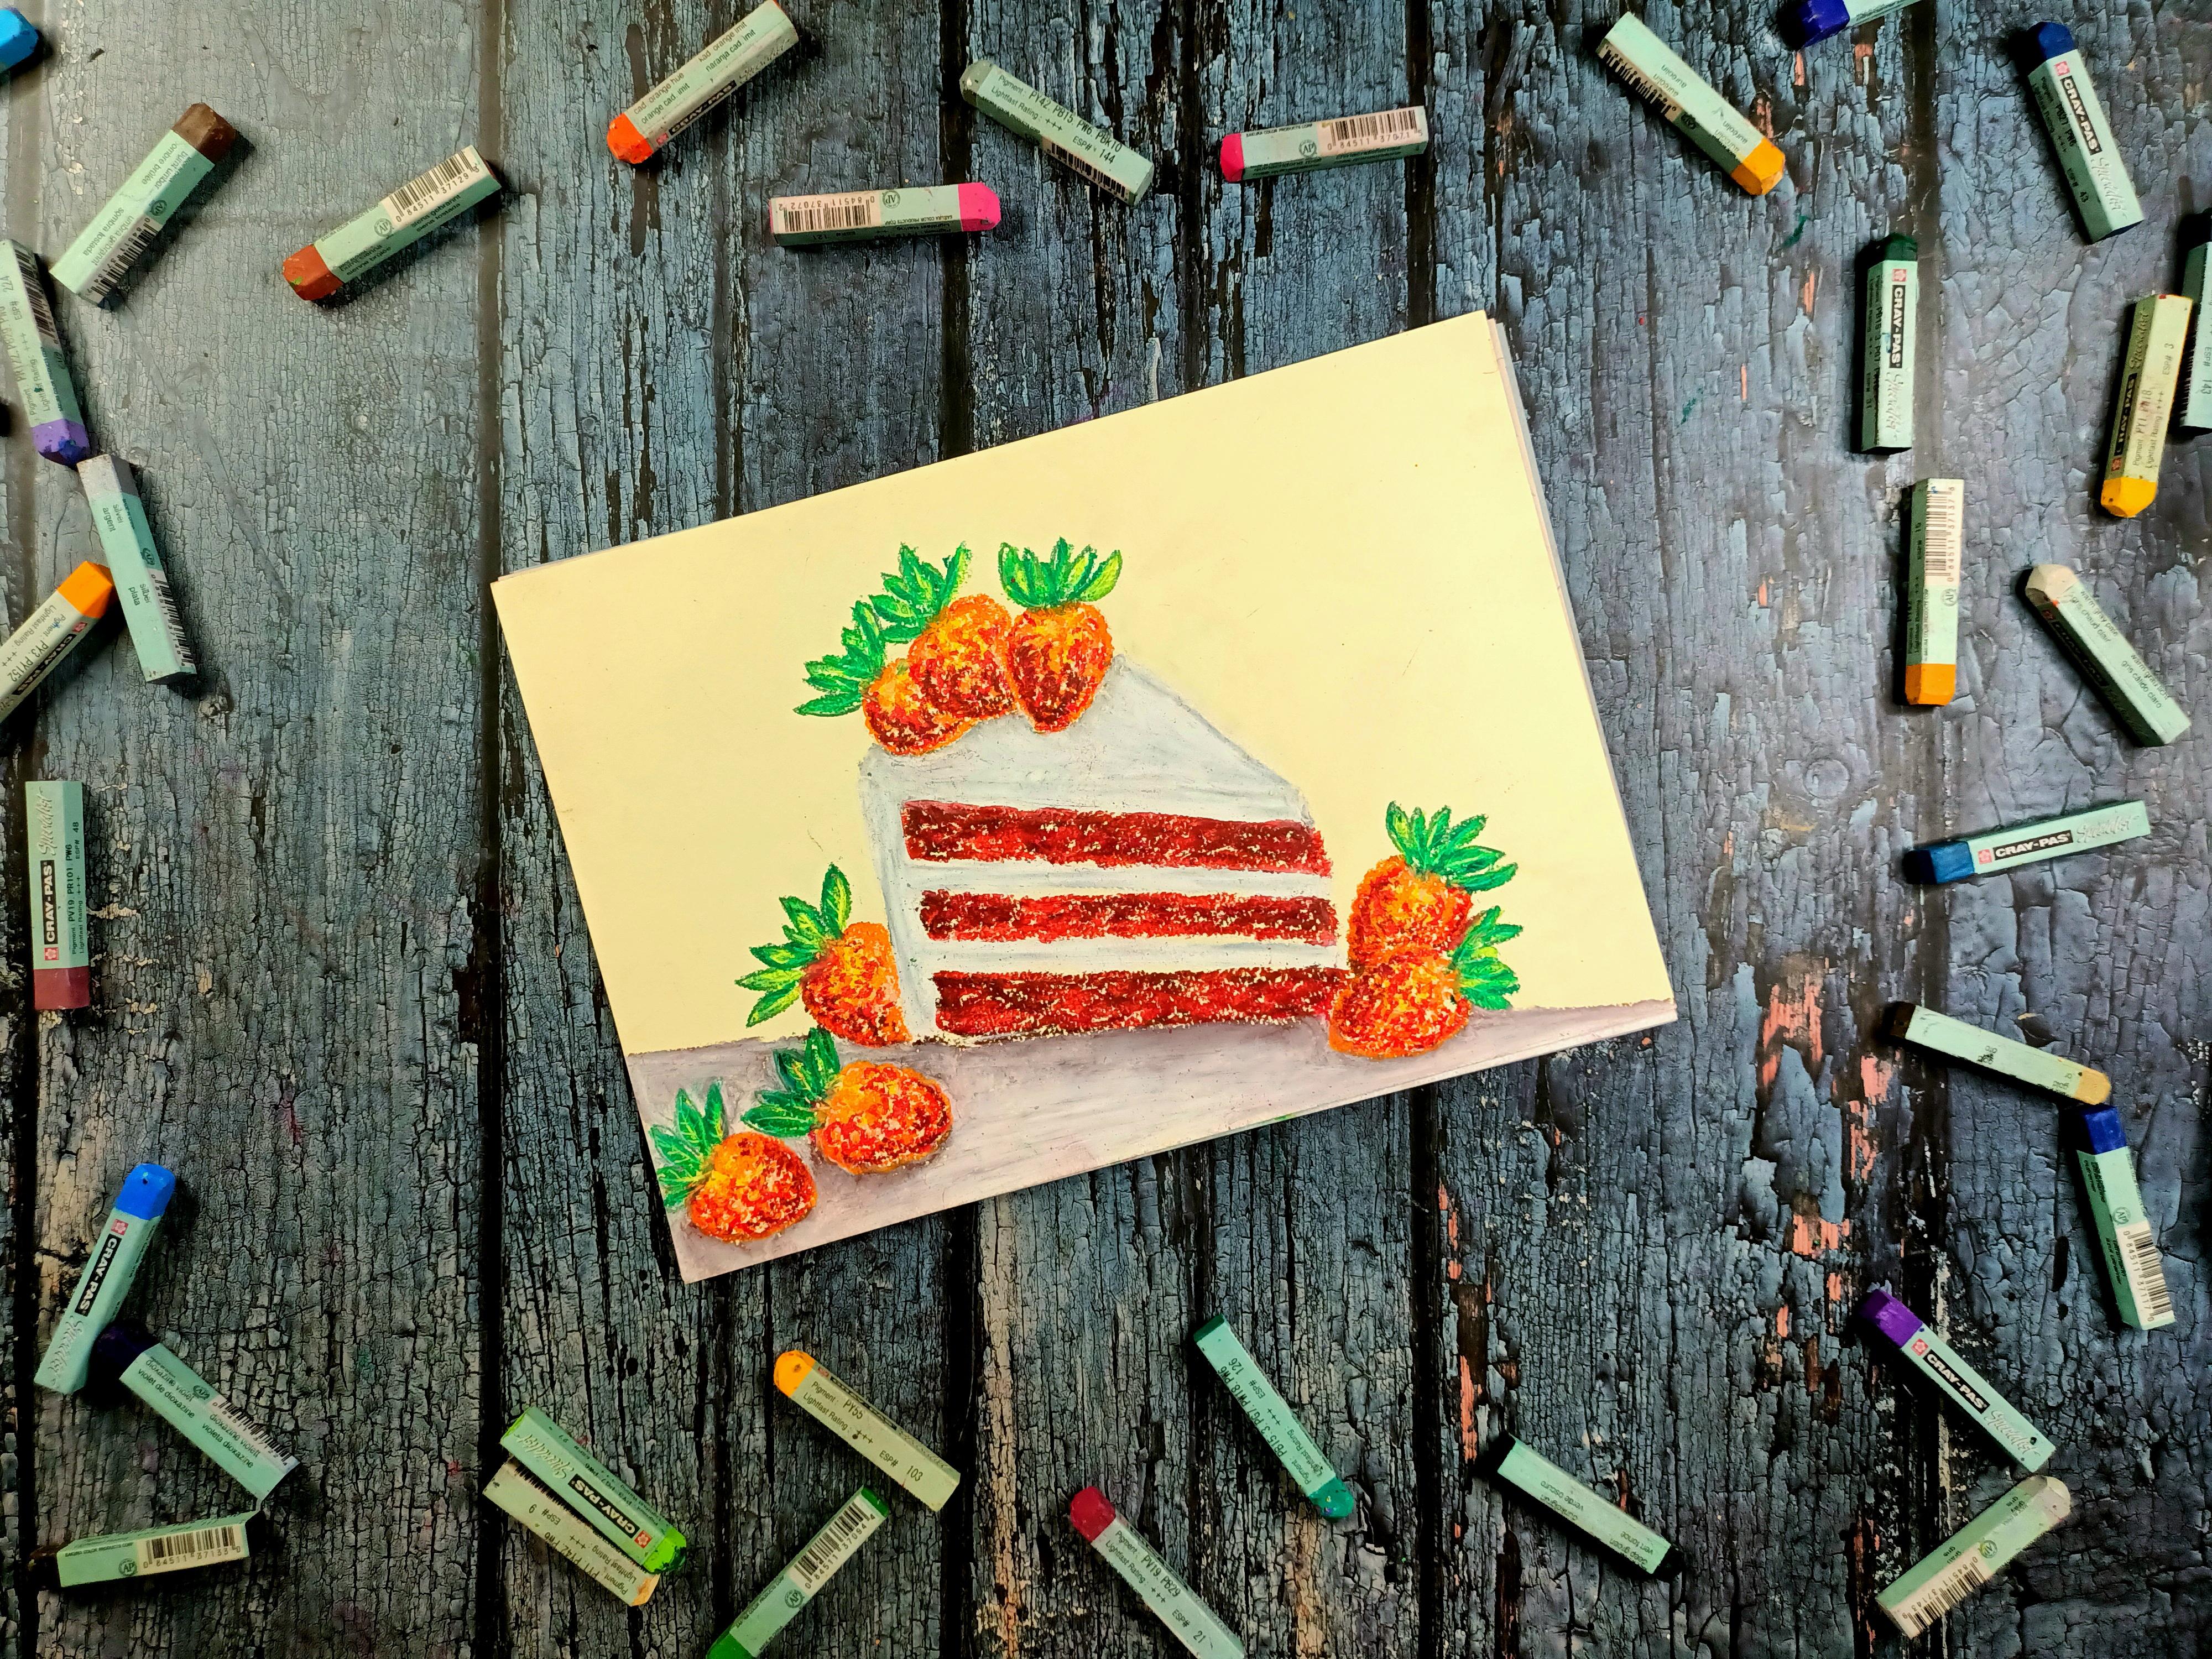
3. List of Supplies: For this class, you will need a pencil and eraser
and it's happening. Colored pencil outlines. This color pencils are optional. Abreast and remove oil Peter
does to avoid smudging, masking tape to secure that people run on paper
to practice sketches. He still paper for
me in drawing, but I need people
with more than 140 DSM will do the work. Ilp style for this class, I'm using clip-path speechless, and you can use whatever
oil pistol you have. Also for is creating. I'll be
using the scratching tool. You can use toothpick
card or white pencil. See you in the next video with the oil-based still basics.
4. Oil Pastel Basics : Let's start the class with the basics of the
oil-based still, starting with the strokes. I'll be histones
are very versatile. With ILP style, you can
easily create a variety of strokes that ending from thinner strokes
to take a stroke. My reading the side of the oral history and a place
that you are applying, you can create a
variety of his strokes. These are the few examples that I need from telescopes
to take a scope. Now moving on to the appraiser, this oil pastels
are very precise and maybe adding the
pizza from low to high, you can achieve very
different results. Here's another example
of the strokes. This time I'm creating
this too thin to thick strokes by
wearing the preset. You can see there's talks with the router increases are very
different from each other. We'll be mainly using
the thin strokes with a medium to
high presser foot outlining and adding detail and the tickets towards
fulfilling their color. Now containing fiber with
some other techniques that we'll be using with the oil
picture for this class. With this oil pastel,
you can create numerous techniques
such as hatching, crosshatching,
stippling, and blurring. Starting with the hatching, creating fabulous
treatise, more lines for the hatching, crosshatching, creating crisscross lines for the crosshatching, stippling, creating random small strokes
with the ILP still blaring, blaring the outer edge of the
ILP still with the people. They just want the flooding.
I'm using my fingers. Instead of your fingers,
you can use Q tip, blending stump, or even a clue. Now moving on to
the stippling for the cake will be using
the stippling technique with the cadmium
red BAU and not q, along with those in this manner. Here's a demonstration
of how we'll be using this stippling technique
for the red velvet cake. Starting with our Tirado? No, going in with
cadmium red dark you knew going in with
cadmium red pill, you were their top. I'm starting with my green. Low coupling.
Disagree with away. With this. We are done
with the basic of the oil butyl and some
of the techniques. See you in the next video.
5. Blending Overlaying Scratching And Outlining: In this section I
lead so he knew how we'll be using the blending, overlaying, scratching, and outlining for the
red velvet slices. Starting with the blending. By blending, I mean,
mixing two or more colors together are blending
a single color to get a smoother consistency. For this demonstration, we'll be learning two or more
colors together, starting with the
three primary colors, yellow, red, and the blue. Starting with a yellow.
Applying medium pizza. I think laid on top of it
with the same medium prison. And finally India blindly
yellow to blend it with a red. By mixing these two colors, you have got the dark
color, the orange. Now reversing the order of the colors, starting
with the red. Adding yellow. You can see
the orange has formed. Adding a little bit of red. Reversing the order, yield different view of
the same color. Maintaining the order
of the collateral. Lending is important. Now going in with the red
and the blue for the violet, starting with the rate applying low presser, adding them blue. Going back with the red,
with the loop reset. Now violet obtained is
not that consistent. Now using the same color but
applying them medium places, Nicollet open my blending it
somewhat more consistent. Finally, changing the
order of the colors, starting with a new
applying medium, preserve the color obtained by blending it somewhat
more closer to the uniform, but totally different from
the other two colors. That is, apart from
reversing the order of the color application of the oppressor also yield
different results. Finally, going in with
the yellow and the blue for the green by applying
medium pressure. For this first one,
the blending result came out somewhat greenness. The blending result
for the second combination chemotherapy,
but blue is, you've got to experiment
with the colors to see which colors work with
width and in which order. Here's an example of how we'll be using
blending for the cake. For the first example, I am starting with
this tip link. With this, we are
done with their data, those folders tripling. Now going in with
the cadmium red VPU that I'll link
that the railroads with this cardiomyopathy
view as well as partially overlaying
it on top of it. With these were done with
the cadmium red BPM. Finally going into the
cadmium red pale hue. Adding this cadmium red pale you on top of the DPU a little bit. This will be the
basic construction of the red velvet week
using the three colors. For the second example, I'm starting with a thick
layer of data rows. The second example I'll be applying heavy press
it to blend the color. Now going in with
cadmium red BTU and partially overlaying it
on top of the brown. And finally going in with cadmium red pale you in applying preset to blend it
with the cadmium red deep you as
well as the brown. This will be the
basic construction of the red velvet cake using blending technique by
applying heavy place it. So here's another example using heavy preferred
to blend the color. For this, I'm going in with
the green and the white fur, the top of that
red velvet cakes. Adding right on top of degree by applying heavy pleaser
and blending it with it. For our main project will be paying more attention
to the top, will be adding the color in such a manner that they
really contrast in-between the color as well as they'll be creating a region of the
light myths and the saddles. Since the last example using the Green
Knight for the top, using the stippling technique. Also for our main project, will not be only using
the gray and white. We'll be using other
colors like cell membrane. How good are the
lian accept crust? And with these, we are
done with the example of blending using the
stippling technique, as well as by applying a repressor continuing
quadrant with the overlaying. My overlaying, I mean, adding one color on
top of the other, either to partially
blend that color or to add details on
top of the other color. Well, this bus example
of modeling technique, I'm starting with a
yellow as the base layer. And on top of this I'll
be adding shadows. For this first example, I am using theta roles to
overlay it on top of the yellow to add detail,
but not to blend We'll be using overlaying for
the berries and the leaves. The leaves, I'm starting with the lighter side of the green, overlaying that country
to admit drifts and outline for the leaf by
me adding the veins. Here's another
demonstration of using overlaying technique
for this time of starting with a lighter shade of green for the base layer. What our leaves in the main
project we'll be using combination of overlaying
along with the blending. Now going in with a
darker shade of green, overlaying it on top
of it and adding details in the palm of the
midrib outline of the leaf. This leaf is not that
clear for our main project will be paying attention not to cross the line
with the colors. Now moving on to the scratching, scratching and new
old carving out some detail from the
oil-based layer. To use this technique, you need a sharp object like the edge of the card or a toothpick
or painting knife. I'll be using Lewis betting tool that I have got from other ILP. Still say use this stretching first dry
layer with the ILP still at another
layer on top of it. Finally, use this graphing tool to carve out the
details with it. Scratching work-based
when you are using a light color
and a dark color, Let's would be the
primary layer and the dark lettered with
a secondary layer. Here I'm kind of in the midrib and the
mean for the leaves. If you don't want to
use this clotting, you can use the
white color pencil to get the somewhat same result. So you using white instead
of the scratching, I'm starting to
draw the ceiling, starting with our title
with the state arrows. Now filling the color. Now going into the white
to add the highlight. And using the white
colored pencil to make the highlight quiz, but instead of using
a scratching tool. Finally, outlining
this outlining of the optional using
colored pencil talk Leonard details
of the drawing, e.g. and brown for the theories, really important lips or in your head for
the strawberries, blue or purple for
the various sectors. The example of the outlining, I am going in with the
brown for the cheery. Going in with the clean
food outlining the leaves. Moving on to the leaves of
the overlap section with the green outlining the last leaf. And with this, we're
done with this section. See you in the next video.
6. Consistency: In this section, I will
show you how to achieve smoother consistency with the oil-based to make consistency, I mean how uniform
the colors are. Starting this exit of the consistency in
terms of the preset, using the same color by
applying two different places. The low-pressure,
the median fissure, and finally, the high place. And as you can see, the same color with the
three different tracer, the consistency of
the color increases as we increase the pressure. Now moving on to consistency in the context of
stippling technique. For this example,
I'll be drawing three slices of the
red velvet cake using the stippling technique
combined with the parcel overlaying for blending with a different
kind of printer. Starting with a
tear, adults were the first slice applying
very low prison. Defining the outline for
the slides with the pencil. Finally sketching out the
outline for the title and the final slides. Going
back with the data. Those were the first slaves applying very low presser
with the data rows. With this, we are
done with their data rows for the first slice. Now going in with
cadmium red deep view, applying low presser with
the cadmium red deep, you particularly overlaying
it on top of the data rows, as well as surrounding
the theta roles, whether adding a little bit of more cadmium red deep
view for the inside. And with this, we're done with
the cadmium red deep view. Finally going in with
cadmium red pale hue, completely filling the inside of the slides with this cadmium red pale you. With this. We're done with the example of the red velvet slice
using where the loop is. As you can see, the consistency of the colored after
blending using the stippling
technique is very low as we applied very low Pisa. Now moving on to
the second example, the statement will be
applying media implicit. Here I've already started
with the data rows with the medium pizza and release. We're done with that data load. Continue forward with the
cadmium red deep view. Doing the same parcel, you overlay it on top of
that data rows as well as surrounding the pyranose with this cadmium, they'd be pills. Finally going in with
cadmium red pale you completely filling the inside of the slice with this
cadmium red hue, as well as adding
a little bit of the scan when they fail you on top of the cadmium red deep view and on the top of
that data rows. With this, we are done
with our second slice. As you can see, the
consistency is somewhat more better as compared
to the earlier ones. Finally, moving on
to the third place, applying medium to
high pressure with it. This acting with
their data rows, creating stippling marked
with this data rows. I will be mainly concentrating
the data rows on the corner and a little
bit further insights. Now going in with
cadmium red deep view, particularly overlaying
this cadmium red deep view on top of that theta roles, as well as surrounding
that arose with it. Earning a little bit of cadmium red deep few here and there. And finally going
in with cadmium red pale you applying medium to high pressure with this
cadmium red pale you and filling the rest of the
empty spaces for the slides. As well as adding
a little bit of this cadmium red pale you on top of the cadmium red deep you and on top of
that data rows. And with these we are done
with our third slaves. These were the three
example of the slices. As you can see, the consistency it moves with the heavy presser. Foot out to me and predict
will be a plain grease or in-between heavy to medium
with the stippling technique. Now adding the top or
the slices with low, medium, and high prices. For this first one, I am
using gray and the white. The second wetland be
using settlement pink and starting with
the salmon pink for the top of the second slice, applying medium vessel
with the settlement thing. Now we're going in with a white blank medium presser with this
fight to blend it with this element being released, we're going to be the top
for the second slice. Moving on to the third slaves, this time I'm using
heavy please. Uh, starting with the
settlement thing. With this, we are done
with the settlement pink. Finally, going in with
the white, applying high, we've listed with the
white to blend it with the sedimenting by using
stippling technique. With these, we are
done with the top for the three slices using
medium and heavy preset Moving on to the consistency
of the color in context of blending this multipath live blending that color
by our LinkedIn part of that color on
top of the other. Well, this I'll be showing
you two examples when we did the medium presser and other
with the heavy bristle. Starting with the pencil
escapes football does lysis. Adding the top for blending will be mainly
using the having in medium presser disbursement
needed with diabetes. And the second one will be
with the medium pressure. Now moving on to the second
slice with their data rows. With these, we are
done with that data rows for what does licensed. Now going in with
the cadmium red VPU, partially covering the data rows with this cadmium red deep view, as well as surrounding
the data rows. And with this, we are done
with the cadmium red hue. Finally, going in with
cadmium red pale hue, completely filling the rest of the inside with this
cadmium red pale. You applying high
repressor with it, overlaying it on top
of the cadmium red VPU as well as on top
of that data rows. Now moving on to
the second slice, applying medium presser with it. Silly overlaying it on
top of that data, those, as well as on top of the
cadmium red deep new, completely filling the rest of the inside with this
cadmium red pale hue. And with this we're
done with that can eliminate bill you
for what dyslexia is. Adding a little bit
of more cadmium red pale you for
the second slays. An a. Now let's
color the top for this license. For this post. Like I'm starting with
cadmium lemon peel, you know, going in with the white
to blend it with the, applying heavy pressure
with the white to blend it with the
cadmium lemon pale hue. And with this, we're
done with our first slice using heavy Faisal. Moving on to the second slays, starting with autoimmune and
now going into the white, applying medium pressure to
blend it with the origin. And with this, we're done
with the book does lasers using heavy paste it and
then medium piece it. Lifts on Moscow or painting. See you in the next video.
7. Cherries and Leaves: Moving on to the leaves and the theories. Starting
with a leave. He had either two of the
pencil sketches for the leaf. When a new set of three leaves. The second one you
said talk to leave. Well, the leaves we'll
be using any two sets of the green and dark
state analyte, does it? Well, this bus example, I am starting with the hookers green dark side of the green, overlaying this on top
of the pencil outline. Now going into the spring green as the lightest shade of green and filling the
insights as well as blending the insights and ideas. Moving on to the second
live with the spring being. Finally moving on to
the third and the final leaf spring being with this, we are done
with the spring green, going back with the
hookers green to redefine the edges and adding them
midriff and the veins. Finally, going in with the
scratching tool to carve out a detail for the midrib
and Nevins for the leaves. Moving on to the second leaf
with the splitting tool and release, we're done with our first set of three leaves. Now moving on to the
second set of leaves. For the second set of leaves, I'm using amigo as a darker
shade of green and yellow. Green is the lighter
side of the green. Here I've already
started with the indigo. With this, we are
done with the indigo. Now going into the yellow green, filling the insights
with the yellow-green, blend into indigo with a
yellow green. A little bit. With this, we are done
with the yellow-green going back with the indigo to redefine the edges and to add the matrix along with
the means for the leap. With these, we're
done with the list for the second set of leaves. This time, instead of using the scratching to carve out
a detail for the leaf, I'm going in with the
white colored pencil to add the midriff and
the veins were the leaf. Now for the outlining going in with the green
colored pencil. With these, we are
dealing with the leaves. Moving on to the Jerry's, Jerry's and very simple to draw the starting
with that data. Those were the outline. Adding the cadmium red
deep view for the ones I know going in with the
cadmium red pale hue, filling the rest
of the theory with this cadmium red pale hue. And for the highlight,
I'm going in with the white and going back with
the brown for the outline. Here's another sketch
for the two theories. And finalists gets
were the three Jerry's following the same procedure, starting with data without lane? This time reading a
little bit updated, those were the inside to create more variation and
saved for the color. And with this, we're done
with their data rows. Now going into the deep view
of cadmium red for one side. And with this we are
done with the DPU. Finally going in
with the cadmium red pale you for the rest
of the empty space. Now let's outline Nigeria, going in with the
brown colored pencil. Finally adding the highlight for the series with the light. And release. We're done
with the cherries. My knee moving on to combining both the cherries
and the leaves. For this first example, I have started with that data rows for the signal cheering. And I'll be adding to
leave designed it. And with this we are
done with their data, those for the outline as
well as for the inside. Now, going near with
cadmium red deep view, adding this cadmium red
dp on the one side. Finally going in
with cadmium red pale you for the
rest of the inside. With this, we're
done with the cherry going in with the hookers,
green for the leaves. I think the second
leaf. And with this we're done with
the hookers green. Now going into the spring green. With this, we are done with
this spring green lead defining the outline and adding
the details for the leaf. Finally, adding more details
with the scratching. Lastly, doing the
outline with the pencil. And with this we're
done with the first set of cherry
and the leaves. Finally, moving on to our final demonstration of the
theory and the leaves. For this, we'll be drawing three cherries along
with three leaves. Starting with the tear is going into the cardiomyocyte DPU. Finally going in with the
cadmium red pale hue. This gives you a guideline for the leaves with the pencil. Following the same
steps for the leaves, starting with a darker shade
of green for the outline, and then midrib along
with the readings for all the three leaf node going in with the
lightest shade of green, filling the insights
and blending it a little bit with a data
set of the greens. I'll be using different
rate of green depending upon the
color of the pea. But what I, what
I mean, those are finally moving on
to the last leaf. And with this, we are done
with the lightest shade of green this day. I'm not going back with
a darker shade of green as the outline and insights
are clearly visible. Now going into this graphing
tool for the insights. Finally, defining an
outline with the green. Lastly, adding the highlight
with the white and release. We're done with the
leaves and the theories. See you in the next video.
8. Berries: Moving on to the demonstration
for their babies. In this section, I will
show you how you can easily draw four different
kinds of berries with the ILP is still starting
with a strawberry. Discussing the outline
for the strawberry. Starting with the whiteboard,
the lightest again. I'll link this white
with the yellow. Some orange stuck to the yellow are listing the pistol
after blending with having continuing
forward with the yellow. Now going into the thing. Finally going in with
the cadmium orange. Cadmium orange on top of the other two color
with low presser. Now I'm going in with cadmium
red deep knew for the site, creating small semi-circles
with this cadmium red. Now I'm going in with
cadmium red pale, you adding a little bit
of cadmium red pale, you find the mean going
in with the arrows. Using scratching tool to create mark and carve out the red and the data rose from
the top layer to soda underneath,
colored by yellow. The pink and the light. Harding highlight
with the white. If I knew going in with
the orange outlines. For the leaves,
I'm starting with the dark green excusing the
outline for the leaves with this dot means no going into the light green and blending in with
the dark green. Finally going to
the scratching tool to create mark where the leaves. Lastly, outlining the leaves. Using the white colored pencil to add more detail to the lead. And with this, we're done
with this probability. Continue forward with
the blueberries. Starting with the Prussian
blue would outline. Adding a little bit
of dioxane viola, old links and
Prussian blue on top. By me blending all
the three colors together with the ironies. Put all these berries.
I'll be reading the color depending upon
the color of the paint. Adding highlights
with the white. Here's another example of
the three blueberries using the same colors and the steps starting with the Prussian blue Some dioxane violate
our new blending that collect together
with the IVs. Lastly, adding the
highlights with the white. Elites were
done with them. Blueberries. Continuing
forward with the mulberry, starting
with those kids. I'll be adding the colors in the form of conclude
of them. I'll meeting. Starting with the theta
roles for the center. Mel going in with
cadmium yellow for one side near the upper
part of the Mulberry, adding white on the other side. I think a little bit of orange. One more vibrancy by me lingering in with
cadmium red deep view for the entire mulberry, overlaying it on top of all the colored with
medium pressure. Lastly, I think the
highlights with the white. And with this we are done with the basic color
for the mulberry. Going in with a spatula
tool to scratch the cadmium red to rebuild
the underneath yellow, white, and orange a little bit. And release. We're done
with the Mulberry, watered with the BlackBerry,
starting with a skid. It will be the same as the mulberry Madrid
different color. Starting with data rows
where the sainted. I felt good to edit
detail for the control. Adding that details
with the pencil. Starting with Bruce in
blue are the ones site. I think they're saying
violet on the other. Now going in with
iris to blend there to color in the form
of small sphere. Hiding the IDs near the edges. Writing the IDs near the edges. Using a scratch into some of the curricular
from the paper. By nulling going in with my
white for the highlight. And with this we are
done with the black maybe in the main project. And depending upon the
color of the paper, I'll be using different
shades of the same color. With this, we are done
with the berries. See you in the next video.
9. Colors for the Class: In this section, I will show you the color that I'll be using. The re-development,
I'll be using cadmium red deep and wide. And sometimes when he skin
rate instead of that, they are adults who keep things simple for
our main project. Instead of saying
theta roles every time, always saying brown. And instead of cadmium red deep, you are visiting and be prayed for cadmium red pale
you, Albion using red. The top of the
cake, I'll be using different color along
with the white, light green or OEM, salmon pink, and Naples yellow. What does draw me, at least
Mulberry in the series, I'll be using cadmium yellow, cadmium yellow, cadmium red and cadmium and beat you
and being used cadmium, orange and data at all. The leaves, I'll
be using indigo, green, hookers green,
yellow green, green, green. I want to go to Manson, cadmium lemon. Pay
you for the talk. The blueberries
and blackberries. I'll be using Prussian blue. Prussian blue,
dioxazine, violet, ultramarine violet,
iris, and your trope. The green of the leaves.
You can also use Redeem new and permanent green. Dots and female beauty
occur along with the white. I'll be using the colors depending upon the
color of the pistol. People. Obese, we are done with the circling
of the colors. See you in the next video.
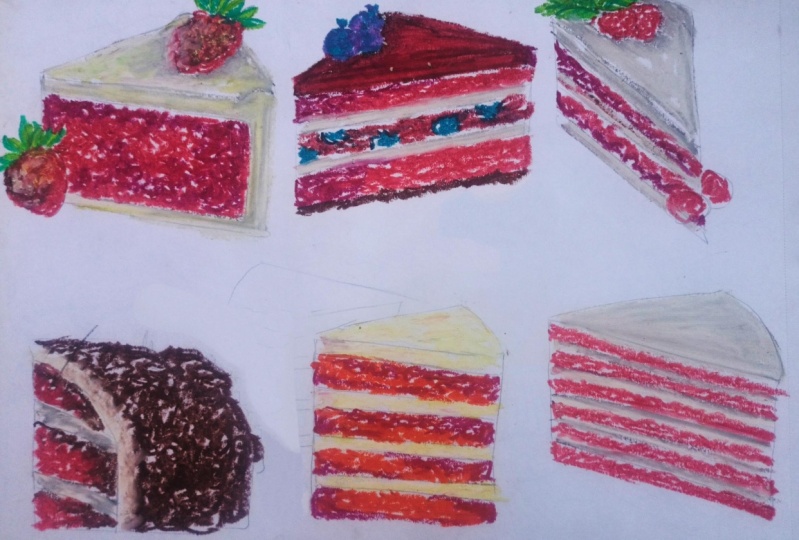
10. Simple Slice Sketches: In this section I will show you the basic escapes his fullness, lysis of the red velvet cake in different perspective,
orientation and placement. Sorry, I had to lower
the brightness as the pencil sketch was
not clearly visible. Starting with the
first simple sketch of the cake in the
form of a rectangle. Moving on to the
second. The second is key to starting with
a triangle for the top. Adding the site. No dividing
the base for the slaves. Moving on to the third
slice facing left, starting with the top, earning the other side of the cake. We're finding that nice. And
lastly, adding the sides. Keep it low key, keep it soft. Spoken with no strings
tying you to me. I'm happy in your company with no emulsion because my
lab deserves to be free. For this vote slaves. I decided to add Trulia, following the same steps,
starting with the top. Never want to lock, you know, your map mind. It's just mat turn but
we can still have fun. Now. He told me You don't really do
commend my trust me, consider your message received when you said you couldn't
take us seriously. I must admit, I was relieved because I never want to play
happy families with you, but I like having you around. The fifth one is three-layered
red velvet cake. Starting with the basics
people, this leads. We can still have fun now. So when you stop paying
so much attention. And another direction,
don't worry, I got the lead for
the insight man. What a sad when a lady, he wanted a house in God and
never want to lock you know, your mind, it's just math. We can still have fun. Now. No one will want to play happy
families where you burn. Like having you around. The sixth slice is
laying on the ground. Following the same state
is starting with the top. This time is getting the top and the difference label. The sides. Finally connecting the site at the base layer for the inside. Keep it low key, keep it soft. Spoken with no strings
tying you to me. I'm happy in your
company would know emulsion because my
love to be free. Data house and garden
and never want to lock you know, your map mind. It's just my turn, but we can still have fun. Now. Now moving to the final one. This one, you just single layer facing directly at the center. It told me you don't really
do commend my trust me, consider your message received. The side. You said you couldn't
take us too seriously. I must admit I was relieved
because I never want to play. If I knew that
basically you burn. I like having you around
fully aware this is a flush. We can still have fun. I decided to add
more test cases for the other element for
the cheese cakes, starting with a theory. So when you stop paying
so much attention, first cutting out a
strawberry reaction, don't worry about
getting a minute. What I said when I
said to them will vary You know, in my mind
it's just math. We can still have fun. Now. I don't want to play happy
families where you like having you go to the guidelines for
the leaves are flashing. We can still have fun. Yeah, we can stay. Lean, moving onto this good
for them, blueberries. And with this, we're done
with the basic sketches. And now I'm going
in with the black to darken the pencil sketch. Moving on to the second escaped, keep it softly spoken with
no strings tying you to me. I'm happy with the
pencils case for the third place is my
love deserves to be free. Nano house and garden and never want to lock you
know, your map mind. It's just my turn, but we can still have fun. Now, going on with the pencils case for
the fourth slaves. Told me you don't
really do commend my trust me, consider
your message. When you said you couldn't
take us too seriously. I must admit, I was relieved because I never want to
play happy families. When we go to the pencil sketch of the fifth slice
with this black. Fully aware this is a flushing. We can still have fun. Now. Stop paying so much attention. What are you going
to the pencil skate of six in the finance lease? Don't worry, I getting a minute. What I said when I say God, I'm never want to lock, you know, Ian map. It's just matter. We can still have fun. Now. No one will want to play
happy families with you. Like having you around fully
aware of flashing the pan. We can still have fun from now. Yeah, we can still have fun. We can still have funds and now we've gotta keep it low key, keep it soft, spoken
with no strings. Then you're moving on to
the berries and the leaves. I'm happy in your
company would know in motion because my love
deserves to be free. Nano house and garden and
never want to lock you down. And Noachian map mind it's just mattered but we can
still have fun. Now, told me you don't really do commend, trust me, consider your message received when you said you couldn't take this
too seriously. I must admit, I was relieved because I never want to play
happy families with you. But I like it is in the pencil
sketch with the eraser. Fully aware this is a flushing. We can still have fun now. So when you stop paying
so much attention, when your dad had
another direction, don't worry, I getting a minute. What I said when I said, God, I never want to lock, you know, in my mind,
it's just math. With this. We're done with the basic
sketches for this lesson. See you in the next video with more example of the slices. I don't want to play
happy families with you. Like having you around
11. More Sketches: In this second
video that's cages, I will show you different
shapes and sizes up the red velvet cake
for the main project. Starting with the elongated
rectangular red velvet cake. Starting this gates with
the front face of the King. Finding the length of the cake. Finally connecting
the line at the back. For the second one,
another rectangle. This time it is vertically long. Adding the two sides, connecting
the lines at the back. Moving on to the third one, small cylindrical red
velvet cake escaped, starting with the top,
using them protecting line to draw the top or
the cylindrical cake. Now defining the length
with another two lines. Finally, I didn't know
before this red velvet cake. This fourth is kitchens
one side up around key, starting with Brian, this
section of the circle. Now adding to another
line for the side. Adding the lead,
would the port gigs. Adding the label that cakes. Adding the lead for the cake. A new word will be crowned king. And with this, we're
done with this case. Put this board
clean velvet cake. Moving on to the ground game, you're the intersecting
line to draw the top. Adding the sites would the cake. Finally, defining the base
for this, B could own games. The sixth one is
another big round cake with one slice taken out. Following the same steps, starting with them protecting line to draw the top of the key. I think the lines for the side. Another set of two lines at
the center of the cake too. So this slice, this slice, adding the layer
for the insights of the gate by ameliorating the Iliad through all the cake. With this, we're
done with the 6 ft, moving with the seventh
and the final escape, red velvet cupcakes. This will be the same
as the third cake with frosting on the top. When these were done with the basic is good for all the kids. Bring in with the black over all the pencil sketches for
the red velvet cakes slices. Starting with the
outline of the cake as well as the basic
shape of the kick. And then adding that repeats what the
insights of the cake Moving on to the second
SKT with the black. Keep it low key, keep it soft. We spoke with no strings
tying you to me. I'm happy in your
company would know emulsion because my love
deserves to be free. Now moving on to the part
escaped with this black hair, I don't want to lock you
know, your map mind. It's just my turn, but we can stay on. Now. Outlining the fourth pencil
sketch with the black. Told me you don't really
do commend my trust me, consider your message
received when you said you couldn't take
us too seriously, though, writing the details was relieved because I never want to play
happy families with you, but I like having you around. Fully aware this is a flushing. We can still have fun. Now. Moving on to the second sketch. So when you stop paying so much, your head in that direction, don't worry about
getting a minute. What I said when I'm adding
the layer for the insights, you know, Ian map,
It's just matter. We can still have fun. Now. We go to the seventh and live by looking at the
families with you. Like having you around. Adding more detail for the
frosting of the key fashion. We can still have fun from now. Yeah, we can still have fun. We can still have fun. Keep it low key, keep it soft, bespoke
and wouldn't know. And with this we are
done with the black. It is in the pencil mark. Happy in your company with no emulsion because my
love deserves to be free. Nano house and garden and never want to lock
you know, your map. It's my turn but we
can still have fun. Now. It told me you don't really do commend
my trust me, and releasing. We are done with the second demonstration
video of this kitty. As you said, you couldn't
take us too seriously. I must have made a lot of
play happy families with you, but I like having you
12. Six Red Velvet Slices: In this demonstration, I
will show you the example of the red velvet
simple slice using different techniques,
color and layered. Starting with the
sketching the outline for the six slices. Keep it low key, keep it softly spoken
with no strings. Time, new to me. I'm happy in your
company would know emulsion because my love
deserves to be free. Natalie, about a house and
garden and never want to lock, you know, you're not mine. I think that's helpful
to sit places. We can still have fun. Now, told me you don't really do commit. Trust me, if you
consider your message received when you
said you couldn't. Seriously, I must admit. I never want to play happy
families when you burn. I like having around
the series of flushing. I decided to Adelaide for this license and then
decided to show you how to add the list even without the sketchy layer
for the slaves, as well as lightening
the hole is kitchens. So when you stop paying
so much attention, you're moving in
another direction. Don't worry, I getting a minute. What I said when I said, God, I never want to lock, you know, Ian map. We can still have fun Now. No one ever want to play happy
families where you burn, like having you around fully
aware of flashing the pan. Now let's mean starting with
the first simple slice. For this, I am starting
with the white for the top and not adding any other
color for the top. This last slides I'll be using blending by applying
heavy blizzard. Applying it to celebrate
this fight to get a uniform consistency of the color for the
top of the slaves. I'm going in with the Pareto, defining the outline
them in this data tools, as well as adding a
little bit of data, those two inside this slice. Now going with the
cadmium red deep view overlaying it on top of the brown as well as surrounding it. But any overlaying it on top of the roof as well as
surrounding the data rows. With these, we are
done with the DPU. Finally going in with the
cadmium red pale you filling the entire inside
of the slides with this cadmium red
pale you as well as overlaying it pass
early on top of that data rows and
the cadmium red DPU. With this, we're done
with the first example of the simple slice using
blending technique as well as applying every place. We went to the second
example of the slides. For this, I'm using
stippling technique. Starting with the grip or
the top of this layer is now going in with the white
and overlaying it on top of the grid by creating
stippling mouth throughout. And with this,
we're done with the gray and the white for the top. Now continuing forward
with the data rows, concentrating this
data, those mill at the top and on the left
side of this leaf Adding a little bit
on the bottom as well as a little bit for the
insights of the cake. With these, we are done
with the data rows. Now going in with the
caddy emulate VPU, adding it beside the data rows. I think it beside
the data dose and basilic covering the data
rows with this cadmium red, deep red. These we are done with
the cadmium red BPO. Going in with the
cadmium red pale you willing the rest of the inside with this
cadmium red pale you. And with this we are done with the second example of the slave. Unfortunately for the third
slice, my camera is done. For this part slice I used white and cadmium lemon
peel you for the talk. And for the rest I use when
it's in red and green codon. Moving on to the fourth one, starting with Naples, yellow
for the top and the middle. Now going in with the white
for the top and the middle. Now for the inside,
starting with a monolayer. Adding the cadmium red hue
or whether they're adults. We've gotta keep it low key, keep it softly spoken with
no strings tying you to me. I'm happy in your
company would know emulsion because my love
deserves to be free. National data house
and garden and never want to lock you
know, your map mind. It's just mattered but
we can still have fun. Now, told me you don't really do
commend my trust me, the message received when you said you couldn't
take us too seriously. I must admit I was relieved
because I never want to find me blending the rest of the inside with the
cardiac unit pay you like having you around. Fully aware this is a flushing. We can still have fun. Now. When you stop paying so much. Dad had in that direction. Don't worry, I can read these were done
when the fault lies. Moving on to the fifth place. For this, I am using salmon pink for the top along
with the weight. Then moving into the
list with this element being the right and blending it with this
element being gone. A lot, a lot. Jazz matter, we can still have fun. Now. When an adult want to play happy families where
you're like Avenue. Fully aware now for the inside is following the same
steps in the same color, starting with the data rows. With God and keep it
low key, keep it soft. We spoke with no strings
tying you to me. I'm happy in your
company would know emulsion because my
laughter serves to be free. National data house and garden I know you're not going
into the cadmium red deep. You can still have fun. Now. It told me you don't really do
commend my trust me, consider your message received when you said you couldn't
take us too seriously. I must admit, I was relieved because I never want to play
happy families with you, but I like having you around. Fully aware this is a flushing. We can still have fun. Finally, adding
cadmium red pale you. When you stop paying
so much attention, you're headed in that direction. Don't worry, I get in a minute
what I said when I'm gone. And with this, we're done
with the first example. Moving on to the sixth
and final example, starting with the
grief for the top. I think the grief or the layers. Beside this gray, I'll be using cadmium lemon peel you as well as the white matter. Now, I don't want to
play happy families when you like having you
around flashing. Now going with cadmium
lemon peel you for the top and we can still have fun. Finally going in with
the white to blend degree in the cadmium
lemon peel you. With these Wagner me the
top layer of the cake. And with these we
are learning with the top and the
layers of the cake. Well, we can do the
rest of the cake using the same color
and the same process. Starting with a rope. Keep it low key, keep it soft. We spoke with no strings
tying you to me. I'm happy in your
company would know emulsion because my love
deserves to be free. Data house and garden. I never want to lock you
know, your map mind. It's just matter and
we can still have fun. Now. Know going in
with cadmium red dots, you told me you don't really
do commend my trust me, consider your message received when you said you couldn't
take us too seriously. I must admit, I was relieved because I never want to play
happy families with you, but I like having you around. I'm fully aware
this is a flushing. We can still have fun. When you stop paying
so much attention. Finally, going in
with cadmium red pale you that direction. Don't worry, I getting a minute. What I said when I say God, I'm never want to lock, you know, in my mind,
it's just math. We can still have fun. Now. Know an adult want to play happy families where
you like gabbing, you are fully aware of flashing. We can still have fun from now. Yeah, we can still
have fun. Have fun. With this. We are done
with the demonstration of the six or eight
development cakes slices. See you in the next video.
13. 1st Slice of Red Velvet Cake: Starting with our first project, first slice of the
red velvet cake, starting with the pencil is
good in the form of a square. Finding the top. This lace
in the rest of the part one, I'll be using
stippling techniques. I think the pencil
mark with the region. Now let's mean
starting with the top, going in with the cadmium
lemon peel you for the top. Lightly going over this gate with the cadmium lemon peel you, I think a little bit of
cadmium lemon peel you, for the insight of the Lear know going in with the
white covering the majority of the lemon here
with this white by using a stippling technique. With this, we are done
with the white for now. Going in with a one-way adding it on the lower part and
a little bit on the top, blending the grid a little
bit with the white. And with this we're
done with the top one. Now, continuing
forward with the data, those things deploying mark on the bottom coordinate
with the state arrows. Hiding the data rows
below that green. Adding a little bit of more mark all the insights
with the arrows. Adding a little bit
of more marked with the stippling technique for
the insights of the cape. Increasing the concentration
of data rows for the corner. Discovering that I
talked about that later. And release we're
done with the data will continue by red
with the cadmium dark. You said owning that data load as well as partially
overlaying it on top of it. Good luck in and feel. To the other corner with
the cadmium red dark hue. Finding the dot q
for the upper part. Good, fully adding
it below the top. And with this, we are done
with the cadmium dark, you know, going in
with the white. Adding a little
bit of white with either cadmium red dot you adding some more white
over the data rows. And with this we
are done with the white by kneeling going
in with cardiomyopathy you to fill the rest of
the inside as well as particularly overlaying it
on top of that data rows, cadmium red hue and the right. Rewinding the left side
of the slides regulating texted outline him at this
cadmium red pale you. I didn't get on top of the dado. Now to take a look
carefully at your slaves and add the cadmium red
pale you wherever required. With this, we are done
with the cadmium red pale you doing Mac with a grid to create the cast
shadow for the cake. Finally, adding some
more grip on the top. If you're satisfied
with your slides, there is no need to
add any more colorful. And with these, we are done with the first letter of
the red velvet cake, as well as our
first main project. Let's unmask our painting. See you in the next video.
14. Three Layered Red Velvet Cake: Moving on to our second project, three-layer trade well-read key. Starting with the
pencil sketch for this project, defining the CBO, the top sites one is lazy. You think it's connecting the
sides and the base. Nina, please getting
the three layers. With this, we are going to be the rough sketch for the slaves. Lightening the pencil mark. For this slides, I'll be
using stepping technique. Now, let's paint
our second slave, starting with a
green border top, as well as the layer
for this laces. Definitely defining the
outline of the talk. Just fine. Moving on to the
layer with the green. Moving on to the
middle ear with the green moving into the
last layer with the gray. And with this we're done
with that report the layers. Now filling some grief
for the insights. With this, we are
done with the green. Now going to move into white, overlay it on top of degree, as well as filling the rest
of the top and the layer with its way up laying here we visited with the white to blend it with the green. Now moving on to the
layer with the white. I think now I put the middle ear just fine. And you think
it's the right one. The last layer Adding some more white
wherever required. And with these, we are done with the white and the gray for now. And now let's paint the inside, starting with a data
mining into the corner. No, I didn't give just below
the three layers of the way. I did some of this data
that was on the right. Finally adding the data dose for the bottom of each layer. With this, we are
done with their data. Those blend in with
the cadmium red dark. Surrounding repeated
rows with cardio May Donoghue as well as
partially covering it. I want him to be riddled
with cadmium red dot you as well as
partially covering it. Moving onto the last layer
with cadmium red hue. And with these, we are done
with the cadmium red hue. Continue forward with
the cadmium red hue. Preliminary list
of the insights of the layer with this
cadmium red pale you as well as partially covering it on
top of that data rows, as well as cadmium red hue. Finally adding the cadmium red pale you for the upper limb. Just fine. Thank you. With this, we are done
with the basic coloring. Now to add more definition. Adding some dark you
for the talk show. Bringing back with the grid to define the edges a little bit more and partially blending
it with the read and write. Adding some more white to
blend with the other color. Now I'm going to
separate the layers on top of the edges to create a transition from
white to the ring. Going back to blend it with the white a little bit more
with the rest of the lift. With this, we're done with that really ended velvet cakes life. No hiding the saddles.
Going in with a green. I knew going in the
right bundle saddles. And with this, we're done
with the second project. See you in the next video.
15. Red Circular Top Red Velvet Cake: Moving on to our third
grade valid slate. Slate, circular top,
red velvet cake. Following the same steps. Well, as good as I told you
in the sketching section, using the intersecting line, two daughters, kids for the top. Binding the height
of the cake with the middle lane,
adding the sides. If I knew that before the gate. Now lightening the pencil
escaped for this cake also, I'll be using this
Dublin technique. Starting with the data at once. What an outline
with a low place. Defining the rest of the
outline with the white. I'm using that data for
the top and the bottom. Lean back with the data, those starting with the top light
side with this data due to the lower text
elemental state at all. Pioneering that data goes for the bottom
layer of the cake, starting with underneath
the white, with the state. Now moving to the bottom
with this data at all. Good things in, but I'll
be saying brown instead of data rows be played for
the cadmium red dark hue. And it put the cadmium
red pale, respectively. Adding some more
brown for the top. With this, we are
done with the brown. Now going in with
their deep brain. Surrounding the brown
with this deep red and partially covering the
brown with listening bleed. Thank you. Thank you luck in and moving on to the bottom layer
with this deep brain that are running the brand
with this deep red as well as partially
covering here Pardon me, I think maybe
put it on the top. Defining that I want it
on the tablet Israel. And release. We're done
with that depleted. Finally going in with the rate
for the rest of the cake. Starting with governing
the white on the top. Willing then title the top. We're now adding it on top of the brown
and the deep red. You went to the
bottom in the red, filling the rest of the
empty spaces with that egg. No basale overlaying it on
top of the brown MLB played. Repeats. We are
done with the red. We met with the grief or them. Bring the right side as well as the lower part of the
Wide Web this way. Going back with a blanket on top of the gray as well as
the rest of the empty spaces. Blending that aid
with a little bit. With this, we are
done with the king. No, going back with the
green for the base, below degree at the
bottom of the key. Some more white
wherever required. If you're satisfied
with your painting, there is no need to
add more colors. These were done with
our pod project. Let's unmask our painting. See you in the next video.
16. White Circular Top Red Velvet Cake: Start being out
for white settler top two layered red velvet cake, following the same guidelines
as a cylindrical cake. If I hide with them
article intersection line. Adding the side, defining them is with these, we're done with
that rough sketch with a big lightning,
the pencil mark. You think that you
like and you feel. Now let's screen starting with the bite whether top and
the two left in the middle. Outlining the second layer with no eighth note outlining the rest of the
shape of the cake. No outlining the rest of
the shape of the cake. And with these, we are
done with the whiteboard. Now, know going in with the group or the contrast,
starting with the top. Adding the grainy and outline. Adding a little bit of
grief for the inside. Adding a little bit of
grief for the insight. Logging on to the second layer, adding a little bit of
grief for the inside. And with these we are
done with integrable. Now, going back with the white to create
the stippling marks, filling the insights as well
as governing megabit bar. So leave it the
writers diplomat. Good. Governing neglect as well as we live the insights of the
layer with the white. Just fine. And now adding the whiteboard, this layer governing degree as well as we leave the insights of the
layer with the white And with this, we're done
with the whiteboard, the layers and the top. Now let's mean the insights
are starting with the brown. Starting to add the brown
from the left side. Hiding a pin lane
number stippling mark below and above
the white layer. Well, you're going to them
in the layer with the brown. Adding a thin line
up a stippling mark below and above the white layer. By adding the brown
for the bottom layer. I think they're
brown for the base and reduced. We are done with them
now. Continuing quadrant with a deep red set, owning them around
as well as partially covering them down
with this leaf brain. We went to the middle
ear with the deeper in repeating the things that
I will link them around, as well as partially covering the brown with this deep rail. Finally, adding
that'd be great for the bottom layer and everything. The theme surrounding the brown, as well as partly covering
them around with this visa. With these were done
with a deep red. Finally going into the red, starting with the middle ear, filling the rest of the
empty spaces with this rate, as well as partially overlaying it on top of the deep
red and the brown. Moving onto the
bottom layer with the red doing the thing, filling the rest of
the empty spaces, as well as partially overlaying it on top of the
red and the brown. Finally adding the rate
for the top layer. I think somebody on top of
the brown and the deep red. Now I'm adding some layered on top of the other two color beer. They required release. We're done with the
coloring of the key. Removing the oil-based oldest. Finally going into the group or the side does on the ways. With this, we are done with the forward rate
development cake. Let's unmask our painting. See you in the next video.
17. Red Velvet with Toppings: Continuing forward
with our project, re-evaluate slices
with other toppings. Starting with growing
this kid for the slaves. Discussing the top in
the form of a triangle. I think the sides
defining the bees. Let's getting the
lead for the slaves. Now let's lighten
the pencil mark. Starting with the cadmium
lemon peel you for the top. Adding a little
bit more insight. Moving on to the layer with
this cadmium lemon pain, you adding a little bit of more cadmium lemon peel
you for the top. And with this we are done
with the lemon yellow. Now going into the white, a blank heavy bristle with
Debye to blend it with cadmium lemon peel you as well as we live the
rest of the inside. Applying heavy bristling with
the white to blend it with the cadmium lemon peel you to a finer, an uniform consistency. With this, we're done with
the white for the torque. Well remember the site
of the layer with the white doing the theme, applying heavy pressure with
the white to blend it with a lemon due to a finer
and uniform consistency. Moving on to the left,
starting with the solid layer, applying heavy blizzard
with this white to blend it with the
rest of the colors. We went to the two layers of the lemon you in the
middle and at the base. Moving on to the last
layer with the white. With this, we are done
with the whiteboard, the layers and the top,
removing the oil-based Hilda's. Now taking a look back
at your slaves and adding a little bit of
more white as some of the places where not that
consistent with these, we're done with the
white for the layer continuing forward
with them around, starting with the lower lip. Concentrating the brown
and the continent and a blank medium for
everybody said, but this down. With this, we are
done with the brown. Now going into
winter, be prayed. Adding it partially on
top of the route and surrounding it,
written on the corner. That eight on the side. I read this, we are
done with that. Finally going into the red
bleeding having been said, I'm blending it with
the rest of the color Overlay it on top of the
brown and the deep red. For this upper layer,
I decided to use Elman pink along with
the rest of the column, starting with the red
to create random dots. And in some brown on top of it. Now I'm going in
with this element being and covering
the red in the brown, as well as filling the entire
layer with the sibling. Gradually filling
all the empty spaces with this elegant pink. With these were done with
both the layers moving on to the top instead the top
thing with debit own beliefs they miss that got a lot of semi-circles with the brown. These were done with creating semi-circles with debit own. Now going into the
red to compete the semi-circles of the brown
to complete the toppings. And with this, we're done with
the red for the toppings. Finally going in with the
white to add highlight what the toppings release we are done with. This leaves me with a
grip on the sourdough, Laying wait on top of it and
blending it with the grid. Using my finger to blend, agree with the white to create the blurring fact with us. I do. With this, we are done
with our field project. See you in the next video.
18. Round Red velvet Cake: Moving on towards that project, nouns lights up an
environment King, starting with the pencil escape, skipping the other side. They finding them
before the slaves. Just getting the other place. This getting mixed up with a game. And with this, we're done
with the basic pencils cage. Lightening the pencil
mark where the region, the moon there it is. This does. Now let's beam, starting
with the white to draw with a pencil outline, defining their lives. What does lays? Now moving on to the other
slides with the white, I mean the Leopold,
the other slaves. And with this we're done with
the whiteboard outlaying. Continue forward with the grain, filling the green side, the
white outline for the talk, as well as the two
layers in the middle. These were done with
billing degree for the top, moving on to the leaves, moving on to the layers of
the other slice. And with this, we're
done with the green, going back with the white
to blend it with the gray, as well as filling the rest
of the inside with the white. Using the stippling technique to feel the weight as well
as blending it with the green Greetings diplomat with the Y2K over the top. I didn't. I might
put the lower layer. Then moving on to the
layers of this lays creating a stippling mark with the right to cover the top, as well as to blend
with the green. Lucky I didn't know
whiteboard the side. With these, we are
done with the white. Adding the brown for the
upper and the lower layer. I'm leaving them in
the layer as I leave feeling brown and a
yellow ocher later on. Moving on to the French slaves, earning their brown
for the upper layer. Finally, earning their
brown for the lower layer. A little bit of more brown
for the second slice. And with this we are
done with debit own. Now going into that
deeply for the layers, starting with the friends lives, I didn't get partially
on top of them around as well as surrounding
them around with it. Moving on to the bottom
layer with a deep red. Now moving on to the
second slice with a deeply knowing the theme, I didn't get partially
on top of the brown as well as surrounding
them down with this deep. They're now moving on
for the top layer. With this, we are done
within the deep red as the second color for
that we're feeling. Now continuing
quadrant with the red, filling the rest of the
insights with Israel. Completely filling the rest
of the empty spaces with the rate as well as Martele covering the brown
and there'll be played lastly, filling the lower layer of the second slice
with the rain. And with this we're
done with the red. Starting with the themes model, random stock with a brown
for the board does lysis. Now I'm going in
with the auger and filling the insides
of the middle layer as well as overlaying it on top of the brown with the
stippling technique. Moving on to the second
sleep liberating machine, filling them sides of the
middle layer as well as overlaying even pop up their brown with the
stippling technique. Now going back with the grid to add more contrast to the top of this life by
adding a little bit of green here the outline. Finally, partly blending, agree with the white background. I am starting with the green. Finally badly blending degree
with the white background. Adding some more. Wait for
the layer wherever required. If you're satisfied
with your painting, there is no need to
add any more color. And with this, we are done
with devils x product. Let's unmask our painting. See you in the next video.
19. Rectangle and Sliced Red Velvet Cake cake: Starting the seventh
project with the pencil sketch for this
will be drying two slices. One rectangle, Edwin
and other non-Muslims, starting with a sketch for the rectangular headwind hardening, that means for the
rectangular Slayer. This getting the front lays blaming liftoff for the slaves. Hiding their base,
hurting the other side. It is in the overlap part
of the rectangular slaves. These were done with the
sketch for the two slices. Finally, lightening the whole
escaped with the eraser. Now let's paint, starting with the why to draw the
outline of the shape of the slaves. Learning that rectangle. Let's leave no outlining the layers
of the slaves. Who I play, football does laces. Moving on to the French
slaves with the way I think the final
layer with the white. And with this we're done
with the outline in this case is where the tooth
lasers with the white. Now let's color the slides. Starting with a
rectangular slave, starting from the
back of the slaves, lived down on all the sides
of the rectangular slave. Well, we went to the
layers with the brown, I think comparatively more
brown for the front layer. And with this, we're done
with them around for now. Continuing forward with the red, starting with adding
the beep it on top of the ground and
then surrounding the brown with a deep pain relief. We are done with that
deep red for the top. Moving on to the two layers, repeating the scene
that starting with adding the deep laid
on top of the brown And then surrounding
it. With these, we are done with a deep red
for the rectangular slaves. Finally going to be that n, starting with billing
the top with the red, old lameness right
on top of that deep red as well as on brown. Now moving on to the
layers with that and feeling the layers
with the red and overlaying it on top of them
round and they're deeply. Finally moving on
to the last layer. Doing lithium, willing the rest of the empty spaces with a rate as well as partially covering it on top of the deep
lit and the brown. And release. We're done with that deep red LED and brown
for this rectangular slaves. Now let's paint the leaves going in with their grief or the insights of the white layer. Adding a little bit of
grief or the inside. No, going back with the
white to fill the inside and blending the gray and a little bit of brown
with the white. Earnings are more
readily in the ED. With DC, we are done with
the rectangular slaves. Moving on to the frontlines. I didn't agree for the
sites and the layered going back with the white to
fill the top and the layer, as well as blending it with the grid to as
smooth consistency. Filling the lipid a dove. Lastly, filling the
whiteboard, the side. With these, we are
done with the white, continuing forward with them
around for the three-layer, concentrating the
brown on the partner. I think the brown
for the middle ear. Finally adding the brown
for the base layer. And with these we are
done with the brown. Now I'm going in with a deep
red parts, the leaker ring, they're bound with all
the layer as well as surrounding the brown
with a deep red. Now moving on to the
middle layer of the deeply doing the theme parks, I like having them
around as well as surrounding the brown
with this deep red. With this, we are
done with that deep red for all the three layers. Finally, going into
without it feeling the rest of the insight of the
three-layer with this red, starting with the base
layer with this red. Moving on to the middle
ear with the red. By merely adding the
rate for the top layer. Adding some more red
wherever required. If you are satisfied
with your painting, there is no need to add any more colored fiber and release. We're done with number two
slices. Moving on to the base. For the base, I'm
starting with the brown. Now going back with the white
and adding it on top of the brown and applying it to
blend it with the brown. Adding little bit
of more white for the base. Oil-based or dust. And with these, we are nothing
without sound project. See you in the next video.
20. Jam Covered Red Velvet Slice: Starting on the agenda, gem colored red velvet cake. The school is in the
form of rectangle, starting with the
top of the slide, where the slaves. And with these we are done with the reference case
for the slaves. Now lightening the whole
pencil escaped with it isn't. Now, let's mean starting with delight to go but
the shape of the slaves at times. But still calves. And crazy. With these. We are done with
the whiteboard outline. No writing the
whiteboard, the layer. For this slides, I decided to add three consecutive layers. With this, we are done with
the outline and the layers. Now going in with the green for the top and for
the three-layered, adding a little bit of grip
on the top and for the side. Now moving on to the
layers with the gray. With this, we are
done with degree. Going back with the
white tuple, the top, the sites as well
as the three-layer, the starting with the
white for the top. Using the stippling technique to cover the top and blended with the gray hoses. Now moving on to the sites
with delight with you. I spend now You spin me
on the way and release. We're almost in the
middle, top in this age. Going back with a grid to
really buy into it a little bit far to leave them in
the green from the aid. Now, moving on to the layer with the white stippling with
the right hand side, as well as cover that
they'll be partially no going back and forth with
the white over the top and the layer to get a smooth
consistency of the color. With these, we are done with
the right for the top layer, continuing forward
with the brown for the other four layers. Starting with the French side of the slides, with the Minoan, mainly adding them down
near the white layer and a little bit on obesity
it and on the corner Moving on to the base layer. And with these we are done
with the brown for the French were going to
the side with them down the starting brother top layer and moving downward with them down there but on foot, olive oil layer, adding
them down for the Padlet. Finally, adding more
ground wherever required. With these, we are done with
the brown for the leaves. Now going and even
that deep red, I think that'd be bred
partially on top of the brown as well as surrounding
them around with it. I think that'd be played
for the second layer. I mean, the deep red
for the third layer. Here. I think that'd be
great for the base layer. Adding it on top of the
brown and surrounding it. With this, we are done with a deep breath for
all the layers. Now moving on to the front
side with a deep red or adding it on top
of the brown and surrounding the brand
when they're different. Just blow. This. Feels like that gauges please
calm insanely. Fast becoming the
side with a deep red by overlaying it on top
of the white outline. And release, we are
done with the depraved. Find the mean going
millimeter in. Filling the rest
of the empty space is called the layer
with the raid. Moving on to the front side
of the slides with the red, starting with the top layer and gradually moving
downward with the red, filling the rest of the empty space for the layer
with the red, as well as overlaying it partly on top of the brown
and the deep red. Hi advice. So I turn the ashes
sometimes small. But she'll still surprised if we had kept it going crazy
now, but chewed on. And now it's not slipping
the rate for the base layer, the frame, start to play. And with these, we are done with the colored for the cake. Now moving on to the gym,
starting with the ground, this case the guideline put
the jam on top of that slice, as well as unmodified With, you know, thrilling main sites of the dam with
them around a little bit. Once you feel the way you got me, call me crazy. Now, going into that deeper to pin the rest of the
insight that's been that's partially overlaying it
on top of the brown. Doing this with all their dam. The mouse's down again. This rod to just blow this. No, going back once again
to get them down to darken a jump to create contrast between the rate of
the key and the Jim's. Gauges. Please come and keep them down again. Finally, lightning
and jam with a bite. The, the white need the sides a little bit with
the jam on the top. And with this, we're
done with the jam. Moving unto the
beast for the key, going into the
grave with dummies. Take a look back at
the old slaves and add a little bit of a required. I was not satisfied
with the gem, so I decided to add a little
bit of more deep played. With these. We are
finished with our project. Let's unmask our painting. See you in the next video.
21. Cherry and Leaves Red Velvet Cake: Starting now at nine project, tearing the lethal
aid velvet cake. Starting over the sketch
for the nine project. Here I'm already starting with the pencil, this
case for the top. Adding the site for the slave, defining the base wireless lays. These were done with the
basic shape of the slaves. Know lightening the pencil
mark with the visa. Reading the tea leaves
and the leaves. A little random and painting. Now let's paint the
starting with the green. We lowered the outline for the top and the
side with the gray. For this cake, I'll be using green cadmium lemon peel you and a white for
the sides and the top. Now feeling a
little bit of grief or the insides of the outline. No going in with the
cadmium lemon being you finding it beside
the gray randomly. Moving on to the other side
with the lemon yellow. With cadmium lemon peel, you finally going
in with the white, finding a picky in
and white on the top of degree and the
cadmium lemon peel you blending the two colors together with the white
by applying, I repeat it. Hi In times and smoke, but she'll still sue price. Caps. It call me crazy now. But because you live and release, we're almost done
with the top plane. So again, this rod is moving
on to the side, repeating the same,
adding a peculiarity of white on the top of the tree
and the cadmium lemon be due Sunday with you. I spend nice. My knee, I think that
might put the bottom Texan adding a thick layer
of white on top of that to be in the
cadmium lemon peel. You blending the two colors together by applying heavy Peter with these weird delimiter white for the top and the sides. They moving the ILP style does. The garden was not, not clear, so I decided to add a
little bit of more weight. Now let's color the enzyme
using the same three color, brown, deep red, and the red. Starting with the
Brown. Said arming them right on the
side with the brown. I think some random strokes
around in the middle. Lastly, having them
around for the beef. And with these we are done with the brown watered
with a deep red. I didn't get on top
of the round as well as surrounding them
around with the blend. I think that'd be
played in the middle. Well, we look at the
bottom with that being played more deep red near the head. With this, we are
done with the deep red continuing forward with the rate for the
rest of the insight covering the whole
inside with Israel. I think a little bit of red on top of that deep
laid and the brown. Well, we look at the
bottom with the red. And with this we're
done with the basic color for the key. Now let's add the
theories and the leaf. I'm just darkening
with the whole goods mean for the outline
of the leaf. Using overlaying technique. This case the guideline of
the leaf on top of the white, sketching the midrib than
the mean for the leaf. With this, we are done with
the hookers green for now. Know going into this spring
green for the inside, filling the insights of
the all three leaves with this spring green. Just blow. This. Feels like that gauges, please calm and hoses. And with these, we
are dealing with a spring green going back with the whole gasoline
to redefine the shape of the rib as well
as to add details. Finally, using the scratching to carve out the green
to the will divide, we need to add more
details and contrast to the leaf midrib and the
veins with the scratching. And with these we are
done with the leaves. Finally, adding the theory's going in with the brown to squeezes or glyph
or move the theory, as well as adding a little
bit of brown for the inside. An ellipse set of two theories. Know going into the deep red, surrounding the brown
with a deep red. Lynne going in with the rate of militaries naming the raid on top of the brown as well as completely filling the
insights of the theories laid on top of the brown, as well as completely filling
them sides of the TV. And with this, we're done
with that red for the series. Know, going into writing
them down near the theories. No, going in with the white
to blend it with them around a little bit by
overlaying it on top of it. Lastly, adding the highlight for the theories with divide. And when we're done
with our ninth project, Let's unmask our painting. You in the next video.
22. Red Velvet Cupcake: When you're going through that
pain for a developer key, that invalid read cupcake. Acting with a cylindrical shape where the beats of the cupcake. That's good thing that
really is for the frosting. Well, hi and attend
times and smoke. But she'll still surprised. We kept it call me crazy now, but chewed on coal and now I'm adding the colors in this manner to
bring the contrast and tablets to the frosting. Nice to know, lightening the pencil
is good to the region. Is fire hoses gleaming with OPIA wrapping for the contour of the frosting. I didn't appear up link on the top of the
earlier this gives Blaine Blaine medium visit
with this OP rubbing. No, I didn't copy this
for the frosting. Some more up here, up
in here and there. The D3, we are done
with the OP wrapping. Know going into it. That's Elman thing
for the salmon pink or whether we'll
be wrapping with thick strokes and medium prison. Adding this element
being on the top. And with this we're done with the salmon pink and
open it up ink finally, going in even the white
right on top of this element being and now be wrapping as well as covering the
rest of the frozen. But despite while following
the contour of the frosting, red, really moving
upward with the white while following
the contour of the posting. With you. Spend now you swim me. Feel for how you've gotten me. Go crazy. With these. We are done
with the basic coloring for the processing of the gig. Later on, I'll be adding
toppings on top of the frosting, as well as this thing.
Note strawberry. Continuing forward with
the rest of the key, starting with going
over the outline for the tub, but this down, filling them around
for the enzymes. But these were done
with debit own. Continuing further
with that deep rail. I think this deep
they'd particularly on top of the brown as
well as surrounding it. I think a little
bit to be played on the other side. Release we are an enemy. They are deeper in the lingering in with
the rate for the K, filling the rest of the
insides with that aid and release, we are in London with their tablet, that egg. For the middle, I'm using
a combination of brown, salmon, pink, and the red. Here. I already started with them
around. A little bit of red I'm going in with a
settlement thing, but the stippling technique, we went to the base. Unfortunately, I cannot
record a little bit. I started out with their
brown for the base may find outline and fill a little bit of brown on the left
side and the right. Now going with a deeply, moving onto the right
side with a deeply. With this, we are done
with that deep red. Finally filling the rest of the inside of the
beads with the red. Now going back with the
white for the middle. Filling. That might
wonder when del, by extending the reds
and browns are born. Doing the same, extending the colors downward
with the white. Finally, extending
the sedimenting to meet with the extended
break along with the white. Doing the scene with
this element pink and the white board,
the lower half. And with these two are delimit the basic color for the key. I didn't the toppings
for the frosting, starting with the brown moving there does. I decided to cover the up, down a little bit more
on the right side. Now completing the
toppings with the red. Lastly, adding the
highlights with the white. You can leave the cupcake acid, or you can continue forward with me to add a strawberry on top. Starting with a sketch
for the strawberry. Following the same steps as I showed in the
demonstration video. Starting with a wipe
that are meaningless, right with the cadmium yellow. Now going into the
cell, limping. Now going into the audit. So don't mean this
element being with the already know going
into it that way to create a small semi stuff goes with these. We are done with the Red new book contrast going in with
the Minoan for the site. With this, we are
done with the basic color for the strawberries. Moving on to the leaves,
starting with the reading, you know, going in with the permanent green to add the
volume to the leaf. Adding a little bit
of cadmium lemon tail you for the strawberry
and insulin. Finally going in with the white to add details for the leaves. I think some highlights for the strawberry with the white. Lastly, defining the
outline of the strawberry. And with this, we're done with
the strawberry in the key. Now moving on to the base for the cake, starting
with the brown. Let's Moscow at bending. Know going in with the white
to blended with the brown, completely filling
the bottom part of the piece with the white. And with these we are done
with the base for the cake. These were done with our
teeth are in velvet cake
23. Big Simple Red Velvet Cake: Starting now in
11th grade velvet cake mix, simple data value. I pick this money easy
to sketch in beam, starting with the top of the
slice where they escaped. Adding the sites for the slaves. Now, defining the
baseboard, the slaves. When I'm wrong. Yes. But when you question,
I'll let you I'm saying, you know what I want I'm
supposed to do when you question how much I'm
saying You're making me so I don't want
I'm supposed to do what I'm supposed to do. And with this we are done with the basic use case
for the slides. Lightening the pencil mark, moving their desk
from the eraser. Now let's paint starting
with this L1, pink. Boom, over the outline for
the top of my list, L1 ping. I don't want I'm supposed to do billing a little bit of
solvent being for the top. Now moving on to the
side with the cell, one thing I don't want
I'm supposed to do, moving on to the layers
with the cell when ping. Adding this element being
for the second layer. I mean the sediment being
put the third layer. To combine these, we are done with this
element being for the top, the site, as well as this layer. Now I'm going in with the white using heavy pressure with the white to blend it
with the salmon pink, as well as coating the
entire top with delight. Tell me what I do when I'm
walking down the street. When I'm when you question, I'll let you I'm
singing making this up. I know what I'm supposed to do. When you question, I'll
let you read these. We're going to be the
right foot, the top. Moving on to the
side with delayed. I don't want him supposed to do with these. We are done with the
white world assign adding a little bit
of more right near the edge. Pardon me? I'm going in with the
layout for the weight, turning the whiteboard,
the first layer, as well as blending it
with a settlement ping. Now moving on to the second
layer with the white. Lastly, adding the
whiteboard, the third layer. And with these we are
done with the white one, the sides, and the top. Now let's paint the
rest of the cake. Tend to new flooded with them around for the
insights of the key. Typing with a top
layer with this brown, I'll be adding this brown along with a deep red and red on the top plate and the base
layer with other Juliet, I'll be using a combination
of other colored. And with this we're done with the brown for the top layer, moving onto the base
layer with the brown, starting with adding the
bone below the white. Now outlining the whole
base with them around. A little bit of brown
for the inside. And with this we're
done with the brown containing
forward with a detail. Starting with the top layer. I didn't get on top of the
brown and surrounding it. I don't want I'm supposed to do What I'm supposed
to do with this, we are done with that deep
red for the top layer, moving onto the base
layer with a deep drill, partially covering
the brown with a deep red as well
as surrounding it. For this base layer, I'm adding comparatively more deep red. And with this we are
done with a deep red. Finally going into the
red for the rest of the empty space for the
base and the top layer. I don't want I'm supposed to do. When you question how much
I'm saying I'm making myself what I'm supposed to do. And we'd need to add determine the rate for the top
and the bottom layer. Now let's add another color
for the other layers, starting with a little bit down, overlaying on top of it. By kneeling going in
with this element being to blend it
with the wrist. What I'm supposed to do, I don't know, going in with the ocher for the third layer, adding a little bit of
Albert Warner insight. Winging of this element being to blend it with the alcohol. Now going back with the Y2K?
Yes. In between the layers. Typically at a white over the previously or unblind naked with being a peculiarity
of white or whether previously it and blending
it above and below layer. I don't want I'm supposed to do what I'm supposed to do. I didn't little bit of
white put aside list. But these were done with them. 11th grade Velvet tea. I don't want I'm supposed to do. When your question
moving on to the means, going back with the same AKA
what I'm supposed to do. Finding blurring the
ocher with my fingers. I don't want I'm supposed
to do going back and forth with mapping API layer TV smoother to Alice
random loading effect. And with this we're done
with the big symbol, red velvet cake and
mosquito at painting. See you in the next video.
24. Yellowish White Red Velvet Cake: We're starting this case
for our 12 project, too. Yellow is light red velvet cake. He alive already started with this kid's got the first place. Now moving on to
the second slice, starting with us getting their
top for the second slice, hurting the other
side for the slaves. I think the Leopold does lays pellet back and put the
layer will be completely uploaded for these
slices when we'll be starting with the red and the yellow is why don't you tell me what I supposed to do when
I'm walking down the street. When I'm making my friend me. When you question how much
I'm seeing him making me so I know what I want
I'm supposed to do. When you question,
I'll let you in. I don't want us
to do with these. We're done with the
sketch is put the slices. Now let's paint. I'm going in with the white to
cover the outline. If you prefer, you can erase the outline of the
pencil is kids. I am not erasing it as I used colored pencil on the
dark pays to people. So it will be
difficult to erase it completely and some
smudges may appear. So I decided to cover
it with a color. I don't want I'm supposed to do with this. We are done with the right
foot outlines, know, going in with the green, adding a little bit of grief for
the top and the side. Moving on to the side with degree and release, we are done with the green
know going in with the white, starting with the
top of the slave filling the bubble that's
laced with this fight. Covering the agree with it, applying hair
replacement with this white to blend it
with the green? I'm using a different
technique with the white to blend
it with the drain. Gradually moving
towards the right to fill the rest of the
talk with this white. And with this, we're done
with the white-footed, the top moving on to the
side with the white. Doing this in applying
heavy pressure with the right and
creating a stippling mouth to cover the gray. And with these we
are done with the white for the sites and the top. Mel going in with the
cadmium lemon pay you, applying medium presser
with this cadmium lemon pay you and adding it on top of the white for
that upper part. Now moving on to the side with
this cadmium lemon paying you back once again on the top with this
cadmium lemon peel you. And with this, we're done with the cadmium lemon peel you
for the top and the side. Going back with
the white to blend it with the cadmium lemon paleo, using stippling
technique with the white to blend it with the
cadmium lemon pay you mean the cadmium lemon peel you on the side
with the white by using the same
stippling technique. And with this we're
done with the top, with academy and lemon peel, you gray and the white. Now moving on to the layers, starting with a white
to outline the layer. Now going into the
cadmium lemon peel, you applying medium pizza and appealing the
insights of delirium in this cadmium lemon peel, you finally adding this academy and live and pay you
for the bottom layer. Now going into the white using the stippling
technique and overlaying this white on top
of they can mainly when you Moving on to the second
layer with the white. Finally moving on to the bottom here with the white
doing the same, using the stippling technique took over the
cadmium lemon peel. Finding a little
bit of more white wherever required for
all three layers. With this, we're
done with the top, the site as well as the
layer for the slice. Continuing forward
with the other three, we're starting with a
brown for the top layer, I'll be using the same color
for all the three layer, the brown, the deep
red, and the red. I'll be using them
in the same manner as struggling with them around, then going in with
that deeply to partially cover the brown
and surrounding it. And finally going
in with a way to build the rest of
the empty spaces, as well as learning
a little bit on the top of the other
colors to blend it with them and to achieve a smooth transition in
Britain, the tricolor. And with these we are done
with the brown for the lift. Now going with their deeply, starting with the top layer with this deep red fatale covering the brand with the
steepest as well listed, I will link them around with it. Now moving on to the middle ear. I don't want I'm supposed to do by nearly there be
played for the base layer. Doing this in partially covering the bone
and surrounding it. With this, we're done
with that deep red. Finally going in with the rain, starting with the top layer, filling the insights of the lip completely with this rate. Moving on to the second layer, repeating the same feeling main sites of the
layer completely with the rate as
well as covering a little bit of the
brown and the deep red. Moving to the base layer with the rayed with these weren't
going to be the rate, but all the layers adding a
little bit of red on the top. When you are done with
this license plate. Moving on to the French slaves. For this, I'll be using the same color but
in reverse order. He had already started
with their own for their dark brown knee and
back garden and on the thigh. Moving. Remember the other
training with them in our outlining the
side with debit. Feeling a little bit of
brown for the insight needs. We are done with
the brown for this lays now going man with a deep red partially covering them around and
surrounding it with a deeply to tell me what I posted
to be bred for the signs. When I'm walking down the
street. When I'm wrong. When your question I'll let you I'm seeing him making this up. What I'm supposed to do when you question
how much I'm singing making me so I know what I want. I'm supposed to do. Quite an elite going
in with the red, fill in the rest of
the Talmud, the red. Now, moving on to the same. What I'm supposed to do Doing the theme for the older, starting with the
ground and then going in with their leaflet
and finally filling the rest of the empty
spaces for the layer with the moon to the second
layer with the brown. Finally adding the brown
for the last layer. With this, we are done
with the brown for the layer now going in with
a deep red for the layer, starting with the top layer, partially covering
the brown with this deep red as well as
surrounding the brown with it. Moving on to them in the
layer with this deeply, moving to the last
layer with this deeply. And with this we're done
with that deep red. Now going into the red, starting with the top layer, with the red, filling all
the layers with the rate, as well as adding a little bit of laid on top of the brown and the deep brain when we go into the middle
ear with the red. Lastly, adding the rate
for the base layer. Doing the same, filling the rest of the empty space if the rate, as well as adding
a little bit on top of the brown
and the leaf break. And with this we're done with the rates and the
brown for the layer. Now I'm going in with
the cadmium lemon, pay you for the
other three layers. I'll be following the same
steps as I did earlier. Adding a little bit of lemon
you for all the layer. Then going in with a
white dwarf planets, moving on to the final layer. And with this, we're
done with the lemon. You. Finally going in with the byte,
starting with the top, blending it with the lemon, You by overlaying
it on top of it and fill in the rest of the
empty spaces with delight. I don't want I'm supposed to do. Moving on to them
in the layer with the white doing the theme. What I want I'm supposed to do. Finally moving on to the
bottom here with a wipe. I don't want I'm supposed
to do with these. We're done with the light
with the board does licensed. Going back with the
rate for the top, as I was not satisfied, finding a little bit of
red for the other place. And with this, we're
done with the two yellow is white,
red velvet cake. Now, going into them down, put them is going to tell me what I supposed to do when I'm walking
down the street. When a Mockingbird friendly? Yes. When you question, I'll let you I'm seeing
him making this. So what I want I'm supposed to do when
you question how much am saying You're making me so I don't want to wait on top
of the brown for dummies. And what I'm supposed to do, what I'm feeling a little
bit of more white. I don't want I'm supposed to do and will lead to a delimiter
to wealth project. See you in the next video. We're going to tell me what
I do when I'm working.
25. Blueberry and Mulberry Red Velvet Cake: Starting our 13th project,
blueberry and malware. Malware take this
bulbous get into cakes when with the blueberry little
bit them already on top. This just lets us,
well, we simple red velvet cake with two layers. Here. I've already started with the sketches
for the slices. Be finding the sea border top. I think this item the meat
would mode does lysis. You tell me what I posted too. Don't you tell me
what I supposed to do when I'm walking
down the street south. Me. When I'm wrong. When you question, I'll let you I'm singing weakened muscle, guarding the Facebook slaves. Do. When you question, I'll let you understand you're making muscle. No, excuse me for the blueberry. None of that FSK
toward the mulberry. And what I'm supposed to do earning this aids border slave. What I'm supposed to do, finding the middle ear
for both this later. I don't want I'm supposed to do. And we need to add
element that sketches, lightening the pencil mark. Can you tell me
what I supose to? Tell me what I do when I'm
walking down the street, when I'm removing their
desk from the reason. When you question how much
I'm singing making now. And it's been starting with a male clean while loop called the outline of the berries, as well as adding a little
bit further insight. No going in with the blue
ocean blue color insight. This time I'm using different color as I told you in the bed is demonstration we knew as
the paper color is light. Finally going in with the utero, put all the three
Mary's supposed to do what I'm supposed to do filling the heliotropic,
the last we re going back and forth
the laity with smoother consistency
and release. We're done with the utero. Going back with their
dioxide violet to refinance happened outline
for the blueberries. And with these, we are done
with the three blueberries. Moving on to the mulberry, starting with the
cadmium yellow. Cadmium yellow with
this element being. And with this we're done
with the solvent pink. Now bringing new
directory define the seat than to tell me
what I saw posted too. Don't you tell me what I supposed to do when
I'm walking down the street. When I'm wrong? I'm seeing him making me so I know what I want
I'm supposed to do when you question how much
james senior making me so I know what I want
I'm supposed to do what I'm supposed to do. The deep red for the insight. And a little bit on
the top of the rail. With this, we are done
with the deliberate. Finally going in
with a brown for the center and outline
to create the contrast. Using this grad
input to reveal the yellow and the settlement
pink underneath. Using this grad
input to reveal the yellow and the settlement
pink underneath some of the brown
to reveal the read. And with these we are
done with the mulberry. Now let's paint the slices, starting with a
blueberry slaves, doing with the cadmium
lemon pale hue. Defining the outline
of the sides. Moving on to the middle with
this cadmium lemon pale hue. Moving on to the mulberry slides with this cadmium lemon peel, you doing this in defining
the outline of the site. Now moving on to the middle with this cadmium lemon pale hue, adding a little bit for the
insights and going over the pencil is good for the top that site as
well as the middle. With this, we are done with
the cadmium lemon pale hue. Now going into the green. In this group are the top, the side, as well as the
leader board, the board, the slices, and bring it
near the blueberry too dark in the region for the
cost side of the blueberries. Moving onto them will be
replaced with this gray. Earning it near them omega to represent that can be done
for the Gauss-Seidel. With this, we are
done with the green. Finally, going in
with the right, starting with the top
of the blueberries lies covering the entire
top with the white. Applying heavy blizzard
with the white to learn it with the three and the
cadmium yellow and pale hue. Fully adding the right knee, the blueberry To
avoid the smudging. Now filling the entire top the
repressor with this white. I'm supposed to do I don't want I'm supposed to do moving on to the side with
the right, doing the same, covering the other two colors, cadmium lemon peel you
and agree with the white. To tell me what I supose. Going to tell me what I do when I'm walking
down the street. When a good question, I'll let you I'm
singing making this, so moving on to the other side. I know what I want
I'm supposed to do. When you question, I'll
let you I'm singing, making muscle, finally going
and doing the whiteboard. I don't want I'm supposed to do adding a little bit of
white board, the age Now moving on to
the mulberry slays, doing this in applying, have you place it with
the right to blend it with the green and the
cadmium lemon peel. You do good full year adding it near the
mulberry towards Medina. Not filling the entire
top with the white. I don't want I'm supposed
to do with the question, how much am senior
making myself? Moving on to the side with the white what I'm supposed to do. Moving on to the
medulla with the white no. Lastly, earning the
whiteboard design. What I'm supposed to do? No earning the
white, we'll debit the consistency of the
weight is not uniform. What I'm supposed to do with these, we are done with
the right moving the ILP senior making myself going in with that eight
and number around, starting with their brown
for the blueberries lays, hiding it put aside and
then below the weight. I don't want I'm supposed to do adding a little
bit for the inside. I don't want them moving on to the base layer
with this brown. That's how you deal
with the brown. What I'm supposed
to do willingly. Little bit further insight. Moving on to the
mulberry leaves, starting with the upper layer, adding the brown for the both the sides and below the white. Adding a little bit of
brown for the middle. When your question on what
James Singer making mischief. Now moving on to the
base layer with the brown doing the theme, adding this down to the
corner and below the white. What I'm supposed
to do with this, we are done with the brown
foot board that's lazy, is now going in with a deep red. And in this deep red
partially on top of them around and surrounding
them down with it. Moving on to the base layer with this lady doing the theme. I think it partly on top of the brown and surrounding
them down with it. Moving on to the mulberry slave. Starting with the top layer with this deep nodes doing the theme, adding it partially
on top of the brown and surrounding
them run with it. Don't you tell me
what I do know? Moving on to the base layer, adding a little bit more. When I'm walking down the street When I'm when you question, I'll let you know what I
don't want I'm supposed to do when you question how much
I'm seeing him making me so I know what I don't want I'm supposed
to end with this. We are done with their deep
red for both this laces. Continue forward with the raid, filling the rest
of the empty space with therein as
well as partially overlaying it on top of the deep red as well as
on top of the brown. I don't want I'm supposed to do what I'm supposed to do. Well, remember the base
layer with the red. I don't want I'm supposed to
do when you're pushing them, what James Singer
making mistakes. These were done with
the color-code. Them Blueberry,
red velvet slaves. Moving on to the mulberry
slave, doing nothing. Filling the rest of the mp3
syllabus lays with that, as well as partially overlaying this late on
top of that beeping, as well as on top of the brown. Now moving on to the
base layer with the red. I don't want I'm supposed to do. When you question how much I'm
saying, I'm making myself. Lastly, adding a little bit
of red here and there to a T refined inconsistency and release. We're done with mothers laces. Moving on to them. Is it starting with the
brown for the wave? And release? We're done with
them around for the base. Know, going in with the white, overlaying these white
on top of the brown. And with these we are done with the blueberry and the
mulberry red velvet plays. See you in the next video.
26. Berries Red Velvet Cake: Moving on to that
for team project. Mary's red velvet cake. For this, we'll be painting
strawberries, cherries, blueberries, and the mulberry, along with the three different
tops, all the slices. Here, they've already
started with this kid for the first layer.
Adding the sides. Defining them is adding the inside layers. When I'm when you
question the legitimacy. So what I want I'm
supposed to do when you question how much I'm
singing making me so I don't want I'm
supposed to do. Moving on to the
second escape for this lays replicating
the first slice, just cleaning that I'd action. And what I'm supposed to do. My name is getting
their thoughts lazy. I don't want I'm supposed to do adding the leaves
for the second slaves. So starting from the left
will be our pustules. Then the middle one will
be our second slaves. And the last one on the right
will be our third flavor. To tell me what I saw posted to. Tell me what I do when I'm
walking down the street. When I'm writing, james
singing making me. So I know what I want
I'm supposed to do. When your question I'll let
Jim singing, making the soup. And I don't want
I'm supposed to do this, getting the outline, put the theories for
the second slays. And what I'm supposed to do. Moving on to the first life, but that Apple's kids
for this probability. What I'm supposed to do. And finally moving on to the blueberry in the Mulberry
for the third slaves. I don't want I'm supposed
to do with these. We're done with
the basic sketch. Now lightening the
pencil sketch. What I'm supposed to to me. Tell me what I saw posted to know Let's means starting with the strawberry
for the bus lanes, going in with the wine, surrounding the right
with the yellow. Now going in with the Naples yellow ones that
are mainly yellow No blending with the
identity, find this evil, the strawberry, as well as
covering the other colors. With this, we're done with
the orange know going in with that red on the top of the orange coat one side and a little bit
toward the middle. With this, we're done
with the red binder, me going in with the brown eyed in this brown on
the left side and at the bottom of the strawberry
for more contrast. With these, we are
done with the brown. Going in with the white
for the highlight. And release. We're done
with the basic color for the strawberry. Moving
on to the leaves. Starting with the deep printed rather reference for the leaves. So going in with a spring green to define the shape of the leaf. With this, we are
done with the greens. Now going in with the
splitting tool to scratch the leaves
through the details. No God ring their details
for the strawberry by removing the top colors
to reveal the white, yellow and the Naples
yellow underneath. Adding the outline for
the leaves and release, we're done with the strawberry. Moving on to the theories, starting with the
brown for the outline. And with these we are
done with the brown. Now feeling the
insights that the read and read this, we are done
with the red for the leaves. I'm starting with
that big green, starting with the middle lips with the leaf and
then adding them means now going into the spring green to define
the shape of the leaf. When these were done
with the spring green. Going back with the green to redefine the outline
of the leaf. Finally, carving on the details of the leaves with
the stretching tool. And with this we're done with the theories
and the leaves. Now moving on to their bodies, starting with a brown
for the malware. That owning that Brown
with the yellow. Know going in with this
element being with these, we're done with this
element being defining the shape of the Mulberry
with the orange and adding it on top of the
yellow and other colors. Singing, making this up.
What I'm supposed to do. When you question, I'll let
you I'm seeing him making me so I know what I know. A little bit of red
on top of the orange. Do what I'm supposed to release. We are done with the red.
Lastly, adding that deep red And with this, we are
done with the mulberry. Moving on to the blueberry, starting with the brown know, going in with a needle. And release, we're
done with the indigo covering the Amiga
with the iris. I don't want I'm supposed
to do with the question. How much am saying
you're making myself? And what I want I'm supposed to new garden negative for the berries. Moving back with a mulberry, exposing the yellow, white and this element
being underneath. Now going into the white to
add dilate with diabetes. Lastly, adding the highlight
positive is with the white. And with this we're
done with the berries. Now let's paint the slice is starting with this
element being four-thirds lays out length as well as billing the
insights a little bit. The outlining the leaves
and the site with this element being released, we are done with
this element pink. Now going in with the right, starting with the
top with this wide, I'm feeling the top with
the white and covering this element being by
overlaying it on top of just adding them, I told the side
what I'm supposed to do. Lastly, adding them right
for the three layers. Moving on to the second
layer with the white. With this, we are
done with the white. Moving there does continue
forward with the middle slays. The starting with the indigo
is that only the Inigo with the iris being another
indigo and iris. Now going into winter, deep red, adding a little bit
of yellow on the top. Now let's blend the colors. Starting with this element being blending the colors with the
sedimenting by surrounding. Last link going in with the
white token is the blending, overlaying this layer on top of the other colors by using
a stippling technique. And with these, we are
done with the middle ear. Moving on to the
other two layers. Well, this I'll be using
the same three colors, that deep red and the red here. I'm already started with the
brown for the top layer. Moving on to the base
layer with the brown. With these, we're going to
be around for the top layer. And with these we are
done with the brown and now going into the deep red, partially covering
inside our main number on with this deep red. Now moving on to the
base layer with this deeply Christian know
much him singing, I'm making myself what
I'm supposed to do. A little bit more yellow in
there wherever required. And with this, we're done
with that deep fried. Finally going into the recto
*****, both the layer. Now moving on to the
base layer with the red Filling the empty
spaces with that in, as well as partially
overlaying it on top of the brown
and a deep red. And with these, we are done
with the third slaves. Moving on to the second slaves. For this, I'll be using
the gray and the white. And for the insights,
I'll be using down deep red and the red. Here they've already started
with a grip on the top. Shadow mean the theories
and the leaves with the green outlining the
top and the sides with negative outlining the bottom
with the green. Filling a little bit
of grief or the sides. And with this we're
done with the green. Now going in with
the white to cover the top sites as
well as the bottom. Blending this white
with a green. Good fulfilling the
right knee that series. Now moving on to the
sites with the white. Finally, adding the
light for the bottom. With these, we're done
with the white for now. Removing their dusk.
Defining the theories. Since I was following the
same steps for the insights, I did not record it outlining their middle slice a little bit with the pencil. Now moving on to the last layer. For the top, I'm starting
with the audio lean, dividing the outline
for the leaves. And that's our
instrument is audio only using a thicker stroke. Defining the outline
for the release. We are done with the audio lean. Now going back with the
right to blend it with the audio Lean,
starting with the dove. That owning this strawberry. Not feeling the rest of the tub with the right release. We're done with the
whiteboard, the top. Moving on to the
site of the bite. And with this, we're done
with the Whiteboard design. Finally adding the
whiteboard, the layer, hiding the whiteboard, the last layer, removing the dose. Now let's paint them in the lid, starting with a deep red. Now going in with
the white to cover the red fox delete and billing
the rest of their lives. And with this, we're done
with them in the layer. For the last two layers, I'll be using the
same three colors, the brown bread and the red. Here I've already
started with the brown, adding the brown
for the base layer. And with this we are
done with the brown. Now going in with a deep red, adding this deep red parcel, you're on top of the brown and surrounding the brown with it. I'm going to tell me
what I saw posted. Don't you tell me what I do when I'm walking down the street for the base layer.
When I'm making Hey, when you question, I'll let you I'm
seeing and making me so I know what I want
I'm supposed to do. When you question how much
insulin you make and release. We are done with the deep red. Finally going to fill the
rest of the empty spaces, as well as adding a
little bit of weight on top of that deep
red and brown. What I'm supposed to do. Lastly, adding the rate
for the top layer. What I'm supposed
to do with these, we are done with
the three slices. Continuing on with the
grief or the beef. I don't want I'm supposed to do governing named
database with me. You tell me what I supose to tell me what I do when
I'm walking down the street, when I'm removing the masking
people to add the green. When you question how much
I'm singing, making this up. What I'm supposed to do when you question on
what James Singer making me so I know what I want
I'm supposed to do. And what I'm saying, these
were done without 14 predict. In the next video. What I'm supposed to do
27. Four Red Velvet Cakes: Starting our first team
project for red velvet cake, starting with escape
for the first slice. This project, we'll be
drawing the poorest places. This one will be multilayered
red velvet slice. The other two will be rectangular
and a-squared slaves. And with one layer two,
layer two respectively. And the last one will
be single layered. The middle rectangular slides, I'll be adding the blueberries. And for the square,
when I'll be adding the cherries, leaves
are optional. You can add other berries
or toppings or frosting, or you can leave
it simply whatever you prefer. From now on. I'll not be detained me
about the colors that much. It should be clear
by now how we will be adding the colors
in which manner, when to use this deeply
and mental blender colors. I'll be mentioning the
name of the color, as well as the order in
which I'll be adding them. Apart from that eval be doing something different
or use another color. I'll be mentioning them as well. Let's get this out in real time so you can always
join along with me. And that's what the
painting most part of the paintings
are in real time. Just getting the last lace. Don't you tell me
what I supposed to do when I'm walking
down the street. When I'm making when
you question how much. So what I want I'm supposed to do when you question how much
I'm seeing you making me. So with this, we are
done with the sketches. Now let's be starting
with the first lays, the multilayered
red velvet plays. I'm starting with the brown
for the top and the side. And what I'm supposed to do, what I'm supposed to do. No. Going to be the deep red. I don't want I'm supposed to do. Moving on to the sign, following the themes
div with a libri. To tell me what I
supose stuff to. Finally filling the entire top
and the side with the red. When I'm working. When I'm friendly. When you question, I'll let
Jim singing they can do so. I know what I'm supposed to do. When your question no much
in singing, making muscle. Moving on to the same
what I'm supposed to do. Learning the first way it
clear, starting with the green. And what I'm supposed to do, overlaying the
white on top of it. I think another layer using
the same three color, I'll be adding another
layer of white and agree, and below them, the red layer
of the brown, the deep red, and the red quadrant with a consecutive alternative
layer of the color. Continuing with the consecutive alternative
layer of the color. Continue forward with
the white layer. Tried to maintain a straight
edge of the sidewalk riding a different layer than to tell me what I supposed to do when I'm walking
down the street? To me, when I'm wrong. Yes. When you question how much
I'm singing making me so I know what I want I'm supposed to do when you question how
much insulin you making me. So I, I want I'm supposed to do gardening white over all
the alternative white layer. Removing their desk
to avoid smudging? What I'm supposed to do. What I'm supposed to do. I don't want I'm supposed to do hurting the white
and the gray for the last white layer. Command. To tell me what I
supose stuff too. Don't you tell me what I do when I'm walking
down the street? When a Mockingbird,
when your question, james singing, they can do so. I know what I want I'm supposed to do when you question how much
James Singer making me. So I'd invite over all
the alternative layer. I don't want I'm supposed to do what I'm supposed to do. What I'm supposed to do. With these. We are done
with the white and the gray for now
with the slides, starting with a brown
for the bottom layer, that the pigments for this layer will be the same
as the top side. Leads. We are done
with the brown now going into that deep red. But the leading this deep red on top of the brown as
well as surrounding it. With these were done
with a deep red. Lastly, during intimidated defining the base
with them around. With these, we are done
with the first lays. Moving on to the second slice. The starting with
the group without lane nodes getting the outline for the blue marry
within dioxane myelin. I have added for
blueberries, if you prefer, you can add more or
less and release. We are done with the outline. Adding a little bit of blues
in blue for the inside. Finally going in
with the utero for the insights and to blend it
with the violet and the blue Going over the outline
once again with the violet and release, we're done with the blueberries. Moving back with their
grief with the top layer, adding it beside the berries and on both edges of the slides. Now going in with the right to cover the top as
well as the site. I don't want I'm supposed to do when Christian know much him singing making me
so what I want, well, we go into the print
side with their body. They might put other thing. And with these weird
delimit the right for the top and the sides, going back with the
grade to redefine the edges and adding it a
little bit near the berries. And with these, we are
done with the top layer. Now pulling the
color for the rest of the cake with the brown, that deep red and the red. He had already started with
a brown for the front side. Adding the brown for
the other thing, defining the outline
for the base. And with these, we are done with the brown quadrant with
a deep red circling with the French side having this
deep red parcels layer on top of the brown
as well as there are Linda Brown
with this deep red moving on to the other side. And everything that's
in partially covering the brand with a deep red
as well as surrounding it. With this, we are done
with that deep red by Lily going in with the rate of wilderness of
the empty space. Moving on to the other
side with the red, filling the rest of the
empty spaces with this raid, as well as adding a
little bit of red on top of that deep red and brown. And with this, we're
done with the red, redefining the outlines a
little bit further ways. Adding a little bit
of white for the aid. With this, we're done
with our second slaves. Now moving on to
the slice and back, starting with a grid to define the outline for the top and assign filling a little
bit of gray for the top. Filling somebody for design. With this, we are
done with the green. Now going into the
cadmium lemon pale hue, adding a little bit
on top and the side. And with this, we're done with the cadmium lemon peel you for the top and the side by Emily
going in with the right, starting with the
side, governing nella cadmium lemon peel you
and agree with the white. Moving on to the top
without repeating the same, governing the cadmium lemon peel you and agree with the white. What I'm supposed to do? I'm supposed to do. I thought it would to add the
color for the other side. Going with the same set
of colorful design. And release, we're
done with the top and the side containing flattered with the rest of the slides. As usual, I am starting with the browns and below the
white and on the other side. What I'm supposed to do, I think a little
bit for the inside. Now going into that deep red, I think this deep red
bars on top of the brown as well as that
arming them around with it. And with these, we
are done with Addie paid by Emily going
in with the red, starting with defining the ED, filling the rest of the
empty spaces with the rate, as well as adding a
little bit of red on top of that leaf
blade. And the brown. With these, we're
done with the slaves. Moving on to the third slaves. For the top and the layers, I'll be using the same
color combination of the color gray, cadmium lemon peel.
You and nobody. Here, I've already
started with degree four, an outline on the
top and the side, feeling a little bit of grief
for the insights as well. And with this, we're
done with the grapes. Now going in with the cadmium
lemon pair you with this, we are done with
the cadmium lemon. Tell him finally
blending the colors that are in the
yellow and filling the top and the sides
with the white. Moving on to the front
side of the green. Finally adding the
whiteboard the other side. Now moving on to them in
the layer with the green, starting with the outline, hiding the cadmium lemon peel, you finally going
in with the right, earning the right
for the other side. Defining the scope of this
slice like this, right? And with this, we are
done with the white. Now let's finish the slides, starting with the brown. Adding the brown
for the other side. Moving on to the bottom
layer with the brown. Moving on to the bottom
layer with the brown. And with this we're
done with the brown. Now going into that deep red, starting with the front side, adding this deep red bar
cilia on top of the brown, as well as surrounding the
brown with this deep red. Now moving on to the other side, adding this deeply and on top of the brown as well
as surrounding it. With this, we're done
with that deep red. Finally going in with
direct openings, the coloring of the slices, starting with a base layer, filling all the empty
spaces with the rate, as well as adding a
little bit of weight on top of that deep
red and number down. Moving upward with the red. I think that aid
for the other side with these weird enumerate
and never round. Going back with
the white folder, white layer to sharpen
the edges of the layer. And with these, we are
done with the third place. I was, I was not satisfied with
the consistency of the second and afford slaves. So I decided to add a
little bit of more red, adding a little bit
of more rare to get a uniform consistency of
the color for this slide. Moving on to the fourth slice. And with this, we are done with the basic coloring
on the force lasers. Now looked at the base. The base, I'm starting
with the brown, removing the masking
tape on the site. So add the brown, filling the
entire base with the brown. You can use the bedding
investigators move consistency for the
base and release. We are done metallic
open project as an example for ideas. Now I have either Terry's
for the third slaves. You can do the thing
or leave as it is to you in the next video.
28. Numerous Strawberry Red Velvet Cake: Moving on to the 16th project, numerous strawberry
red velvet cake, starting with the pencil sketch. For this, there will
be single slice of the red velvet along with the three strawberries
on the top, when a strawberry on behind and for the strawberries
at the front. So we'll be drawing, ate
the strawberries in total. Since the colors and the stay put all the strawberries will be seen and not be repeating the same instruction for
each individual strawberry. I'll be using the
same steps as I soon in their baby's sex and
for the strawberry. So I'll be only
mentioning the steps and the color for the
strawberries once or twice. Continuing forward with the
last layer for the slice. Now it's getting under
guideline for the strawberries, starting with the three
strawberries on the top. Adding this case for one
strawberry on the front. Adding another strawberry
behind this layer, adding monomer on the left. Lastly, it's getting to more strawberries
at the front trade. Since I've used a light
colored pencil for this kid, I'll be covering
it with a color, so I am not lightening this kid. And with these two are
determined the rough sketch for our 16th version. Now let's paint starting with the cadmium yellow
for the strawberry. Adding yellow wound
up at section of it, individualist strawberry adding yellow for the
last two strawberries. And release. We're done with
the cadmium yellow for now. Now going in with
a settlement being folder strawberries that are running the cadmium yellow
with this element pink. Moving on to the front toe, strawberries with
the settlement pink. Lastly, adding
this element being for the top three strawberries. And with this, we're done with this elegant pink for
the strawberries. Know, going in with the orange, define the schema of
the strawberries, as well as adding
a little bit on top of this element,
pink and the yellow. Moving on to the strawberry behind the gig with this orange. I think the RN for the
front tooth strawberries. Finally moving on to the last two strawberries
with the audit. With this, we are done with
the orange color style. Maybe it's continuing forward
with the deep rain today, mainly adding the sleep
debt on the sides of the strawberry as well
as on the bottom. The league having the orange
with this deep red thinking. Wow. No. Because Sean, It's been laid down Moving on to the other
two strawberry juice. To finally moving on to the last few
strawberries on the top. Two or five. And release we are
done with a deep red. Now going over some
of the strawberries 1 s when the deeper it, wherever the originalists
contrast in between the color. And with this, we're
done with that. Be paid for the strawberries. Now going in with a brown
for the strawberries, many adding this brown on one side of the
strawberries so as to add more contrast between the lights and the
cytosol, the strawberries. I think they're brown for
the strawberry and behind. Finally moving on to the
last three storm at this, at the top with this brown. And with this,
we're done with the basic color for
the strawberries. Now, going into when
that beam green for the leaves and adding the basic guideline for the
lease with this deep green. Now moving on to the other two strawberries with
this deep green. Finally adding the guideline for the three strawberries
at the top. With this, we are
done with the dark green for the leaves guideline. Defining the shape of the leaves with the
Spring Green Bay surrounding and overlaying the earlier outlined with
that deep green, adding the leaves with
all the strawberries. Hello, Thomas. Even when you go Now, moving on to the strawberries, I had a talk with
this spring green. Even if you've gone, I will know what ******* way down
to 0. That's all. Finally defining the leaf, or this is strawberry. Going over some of
the least 1 s to get a better representation
of the leaf. Adding a little bit of deep
green for few of the leaves. Going make once again with the spring green to blend it
with a daydream and giving finally touches to the shape of the leaves and release. We are done with the
green for the leaves. Now continuing with
the scratching to add details for the lease by carving out that means
to reveal the color of the people in the form of
the veins of the leaf. Adding a little bit of
spring green ketamine forward with the scratching. Moving onto the top three strawberries with
this creating tool. Now moving on to the
last three strawberries, carbon go into details for
the leaf of the strawberries. Going back and forth, foot all the leaves till you are
satisfied with the level of the details for the leaf.
Green separate acquired Even in your home, even if you've gone all the way down to nothing really matters. That's all I have to say. For this middle strawberry, there must a little bit gap. Filling this gap
with the orange. With these, I am satisfied
with the level of details for the leaves and
the color for the strawberry. And he's finally going in with the orange colored pencil for the outline of the strawberries. Gotta bring out
some details with the orange for the insides
of the strawberry. Moving on to that, to
strawberries at the right. Finally moving on to the
strawberries and the top, the cadmium yellow us too bright for the top
three strawberries. So I decided to
cover a little bit of that cadmium yellow
with the orange. Doing the same for
this strawberry adding a little bit of orange. And with these, we are done
with the strawberries. Later on, I'll be adding
outline for the leaves. Now moving on to the slice
of the red velvet cake here, I've already started with
their grief for the top, roughly going over the
pencil sketch with the green and feeling a little bit of grief for the layers. I didn't agree for
the two middle layer. And with these we are
done with the green. Now going in with
the white coating the top with the
white applying heavy, but instead of with the white
to blend it with the green. Some of the colors
most on the paper. So going in with the
eraser to remove it, you can easily
remove the lighters, Madison, the oil-based
still with the knees in. Now continue forward with
the white for the top. Marine over the top
once again to get a smoother consistency
of the color. Now moving on to the sides, adding the pink
layer of white for design and blending
it with the green. Now moving on to the
other side with the wife. Finally adding the white
border to middle layer. Bring onto the whiteboard
the last layer. Adding some more white
wherever required, delegate a smooth consistency and uniformity for the color. Moving there does release. We are delivered the
top and the layer with the white and the gray. Now, moving into the
insights of the slides, starting with the brown, I think they've known for
each individual layer Even if you've gone, I will. Now moving on to
the base layer with the brown ******* laid down by outlining the base with the brown to choose. Secondly, Thomas Thomas relief. We're done with them
around. Now I'm going in with their deep red, silly adding this deep
layer on top of the brown as well as surrounding them
around with this deep red. Moving on to the middle layer. Lastly, adding may be
prayed for the base layer. And with this, we're done with that deep red for the slice, continuing further with the
rate to finish the slides, starting with the
middle ear filling the rest of the empty space for this mini-lecture
with this rate, as well as adding a
little bit of red on top of that brown
and a deep red. Now filling the entire
layer with the red. Now moving on to the
base layer with the red, filling the rest of the
base layer with a rate, as well as adding a
little bit of red on top of their
deep red and brown. Finally adding the rate
for the top layer, filling the rest of the
top layer when this rate, as well as adding a
little bit of red on top of the brown.
And then the praise. And note to finalize the slaves adding the
red wherever required. Oh, that's all of these. We are done with the
rate, what does life? Now moving on to the base containing quadrant
with their brown for adding them down here. All the strawberries, shocking to know going in with the white painting,
the white on top of it. It's been like to ******* told us to do to filling the entire
base with the white. Afraid to fall asleep. Well, I know that Joe you
should know for way too long. Thomas, to go now. I think they're brown
for the right side. Now I blame everybody is a little bit to blend
it with the brown Thomas to oh, that's all I have to choose. Thomas. Thomas. Extending them around for
diabetes for the left side. Thomas. Now I'm going in with the
white to blend it with them. Carefully blending the white and the brown near the leaves. And with these, we are
done with the maze. Defining the scope of some of the strawberry with the awning. Now going back to that deeply
into add more contrast for the lame god being out more details by scratching. No, blending the abuse
to a final consistency wherever required to know. Because Shauna, here,
it's been way too long to do to choose say, Thomas. And finally, adding the
outline for the leaves fall to fall asleep. Well, and I know that
Joe and I believe, you know, moving on
to the leaves on top, three strawberries with
this colored pencil. That's all. I can tell. You. All. These we are done
with our 16 project. Gone. Tom. Oh, that's unmask our painting. I'll see you in the next videos.
29. Strawberry and Mulberry Red Velvet Cake: Moving on to the 17th project, strawberry and mulberry,
red velvet cakes life. For this, we'll be
doing a cupcake with the strawberry and
a simple slice with the mole berries
and the leaves. And continuing forward with the sketching using the
intersecting line to draw the top for the cupcake is getting both the sides for the cupcake. Adding the base. Now, moving on to the slides, It's getting that I've outlined for the three-layered frosting. Adding this strawberry and
decked out this cupcake. And the slice mode
will be three layered. I'll be using the
stippling technique along with the blending
for both the cakes. Finding the content
for the layer from the thrusting. Much time. Thinking about your
dog. Don't know. Sean. It's been way too ******* Thomas to choose. Just getting Melia sees now adding the malware
is have to fall asleep. And well, I know that. No *******. Moving on to the leaves. Thomas. And with this, we are done with that basic reference sheet. Lightening the pencil mark. You on hold for kids. Even if you've gone all on. Tom, but that's all I have to choose. Thomas. Thomas. Now let's paint starting with
a white for the strawberry. Now I'm going in
with cadmium yellow. Continue quadrant with
the sediment being surrounding the cadmium yellow
with this element pink. And release. We're
done with this element being the noun going
in with the orange, redefine the sweep
of the strawberry, as well as covering
some of the white, cadmium yellow. And
this element being And with these, we are
done with the orange. Now I'm going in
with that deep red. I think they can do for the
strawberry with this deep played silly covering the orange on monocyte and at the bottom. And release we're
done with that be played and finding going
in with the brown. With this, we are done with the mesocolon for
the strawberries. Continue water with the
white to add the highlight. Later on, I'll be adding their lives for
the strawberries. Now moving to Austin
for the cupcake, I'm starting with
the OP wrapping, going over the earlier
pencil sketches that we do for the contour
of the clustering. Even if you've gone to 0. And with this, we are done
with the obeyed wrapping. And now I'm going in
with a settlement being in this element
being on one side of the Oprah pink release. We are done with the
settlement being finally going in with the white. Using this white to fill
the entire frosting, as well as blending the
two colors evenly you go. Now, even if you've gone to 0, That's all of these were done
with the frosting. Now they're moving the dust. Now let's paint the
rest of the cupcake, starting with the grief
for the top there, finding the outline
of the cupcake. Now I'm going in with
the white to fill the inside as well as
blending it with degree. Found love to fall asleep. Well, I know that. No. Wait till the other two layers. I didn't get for the last layer and choose a non-defining
that we use for the layered. Going back with nobody to
finish that two layers. Moving on to the second layer, I can find reviews. We are done with
the white for now. Filling the insights
of the layer, starting with the brown
for the top layer. That's all. Moving on to the middle
ear with the brown. I think they're brown
for debase Leah. Finding the outline for the base And release. We are
done with the base. Now continuing
forward with a deep played this deep red on top up their brown as
well as surrounding it. Now moving on to the middle ear, adding there'll be played
for the base layer. If I need the separating line
for the other two layers. These were done with a deep red. Now going in with the red to fill the rest of the insight, as well as adding a
little bit of red on top of the deep
red and the brown. Moving on to the middle
layer with the red. Lastly, adding the rate for the base layer, doing the same, filling the rest of the
empty spaces with the rain, as well as adding
a little bit of red on top of the
deep red and brown. With this, we are
done with the rates and the brown for the slides. Going back with the white
stippling techniques to extreme the brown and
the red for the layers. Moving on to the upper layer. Using a stippling technique to extend the browns
and the rate for the leaves and release. We're done with the cupcake. Moving back to the
strawberry for the leaves, starting with a megaphone
outline of the leaves. Now going in with a spring
green to define the same. Using this crashing to
cardboard retail for the leaf. Lastly, adding the
outline with the pencil. With this, we're
done with the first gig with the strawberry. Now moving on to
the other slave, starting with the settlement being roughly going over
an outline of the slave. With this, we are done
with the settlement pink. And now I'm going
in with the green, adding a little bit of
gray above and below the cell mapping as
well as for the talk. Finally, going in with
the white to blend the two colors and
build all the layers. Here, Amos, starting with
the top stippling technique to cover and blend the colors. I sleep. Well. I know
that you should know. Now moving on to the side with the white ******* Thomas. Thomas. You go now moving into the
bottom layer with the white All right, For the other side. And finally ending the
right for the two layers. That's all of them, right, for the last layer, adding a little bit of more
white wherever required. And with these, we are done with the top and the layer
for the slides. Moving on to filling the
color for the inside, starting with the rate
for the Medellin. Buffy overlay in surrounding that aid with the
settlement ping? No, filling the rest of the layer with the
settlement pink. It's free. Love to fall asleep. Well. And I know that when these were done
with the middle layer, adding a little bit of
white for the site. At the site was not straight. Now moving on to the
other two layers, starting with them,
don't put vote. And with this we are
done with the brown. And now going into
that deep red, I think this deep red bars on top of the brown as
well as surrounding it. That's all I'm now moving on to the deep red
for the other lane. Doing the theme parks, really adding it on top of the brown as well as surrounding it. With this, we are done
with their depraved. Finally going in with the red, fill in the rest of
the empty spaces for this layer and adding a little bit of red
on top of that deep red as well as on
top of the brown. Moving on to the last layer with this raid, doing the same, filling the rest of the
empty spaces for this layer, as well as adding a little bit of red on top of the deep red, as well as for the brown. Now adding a little bit afraid wherever required for
the final touches. No blaming the red
we added earlier. And with these, we are
done with the slides. And now let's paint the mulberry,
starting with a yellow. Now going to live
with the orange, partially covering the cadmium
yellow with this orange, bending them known
for their middle. Now I'm going to define
the shape of them already and parceling covering
the orange over there. Now moving on to
the second mulberry and partially covering
the order and inventory Now going to be the
whiteboard, the highlight. Finally going into
the scratching boom to goddaughter detail and two, so the yellow and
orange underneath. Now moving on to the limb, adding the details
for the leaves, I did not record it the
sex and for the leaf as I follow the same steps
and Nicollet for the leaf. And as the painting
was becoming so alone, I removed the leaf section, finally outlining the leaves. Now I'm going in even
degree for database, starting with adding negative side of the cake and the leaf. Now feeling the grief
or them riddle. Thinking. Wow. No. Because Sean, It's been late. Thomas. Thomas. Finally going in with
the white phone number is blending with the green. Sock. Love to fall asleep. Well, I know that. You should know
for way too long. Fulfilling my whiteboard
there middle. That's all surrounding
the leaves in the middle. Very shocking. Now moving on to
the other slaves, even if you'd gone, I will. Finally covering the entire
bees with the right shoe. That's all I'll say for Thomas to choose between 17 product. See you in the next video.
30. Three Red Velvet Slices: Moving on to the 18th project, three red velvet slices. Starting with a sketch
for the first life. For this project,
we'll be doing one, learn to lead and three-layered
read well-read places. This first one will
be two layered. Also for this first one, I'll be adding series
and the leaves on the top for the other two Alvin leaving them back and
you can add other Marys. Frosting are topping
if you prefer. Now in defining the CPU and
the slice, adding the meat. Moving on to the second
slide, the sketch. This one will be three layer
and put all these lasers. I'll only be using
white and settlement being further top and around the brain
and rate for this or that slice thinking. Wow, I don't know a lot. Because Sean, It's been
way too ******* job. Finally is getting
the last lasers down to I think this
aid in the liver, as well as increasing this
idea of the second slave to fall asleep. Well, I know that
because you should know. And release. We are done
with the basic shape for the slightest lightening
the pencil mark. Shocking to you called out even if you've gone. Oh, no, let's paint starting with the cherries point,
the fourth slice, the sketching the outline for
the three candidates with the brown going in with the median for the
sketches, for the leaf. Sketching the three, adding
the mean for the leaf. Now, moving back
to the theories, but there'll be
played with this, we're done with that deep red. Finally going in with the red for the insights of the theory. Now moving back with the loose, with the spring green, filling their lives with
their spring green. It's been way too long to do. Writing this being lean for
the last leaf, node two. And with this we're done with the basic color for the leaves. Now, moving on to the
slides of the cake, with the solvent being
outlining the top of the slice, the sides, and adding a little bit of
solvent for the inside With this, we are done
with the settlement pink. Now going into the white. Now I'm going in with the light. I deny late for the theories. Now moving on to the slice with the white cap covering the top and the
sides with the wipe. Starting with the same blending
the settlement ping with a white kid fully adding
them right near the leaves. Now, moving on to their top, covering the top with the white. Redefining the editor of
this laser little bit. Thomas. Thomas. Mel going into this
stretching tool to add detail for the lean. There's nothing much to
do when thinking about. Wow, I don't know. Because Sean It's been late. And release where nullable
the top of the first life. Lastly, adding outline
for the leaves. Adding a little bit of
more white to blend as much to green to the rest
of the top and the side. Now moving on to adding
them in the lid, starting with the
settlement being roughly outlining the
layer with the pink and release, we're done
with the settlement ping, no going in even the white, filling the white
for the inside as well as blending it
with this element being released, we are
done with the white. Finally moving on to
the other two layer, starting with them, don't go no. I didn't never own
for the other side. Even if you've gone, I will go to the bottom layer
with the brown Tom, but that's all I wanted to say for a second. Defining the beat
for the other side. And release, we're
done with the brown. Now going into that deep red, I'm in this deep right
on top of the brown, as well as grounding it. Now moving on to the bottom
layer, repeating the same, adding this deep
red partially on top of the brown as
well as surrounding it. And with these, we're
done with that depraved. Lastly, going in with the red, starting with the bottom layer, filling the rest of the
empty spaces for the layer. Moving on to the upper layer
with the red doing the same, filling the rest of the empty spaces of the layer
with this rate, as well as adding a
little bit of weight on top of the brown.
And then he prayed And with this, we're
done with the red. Now going back with the white to blend them down
and the rate with the middle ear by extending the white and using the
stippling technique. Adding their sibling
mark with ascites. Now blending them Medallia. Do you defining that garbage Thomas to go now hold. Even if you've gone, I will know what I'm done. With this. We are done
with the past life. Moving into the second
slice with degree me finding an outline for
the sides and the top. That's all of us. Adding a little bit
of gray for the top. Now moving on to the two layer, I think a little bit of me
adding more grip or the side. And with this we are
done with the gray. Now going into the
settlement ping. Adding this element
being for the layer, moving onto the top of the slicer with the settlement pink. And with this, we're done with this element being continuing with water and with the white starting with the
top of the slice. Filling the right
for the top and blending it with the
salmon pink and the green. Thomas. Thomas. Moving on to the adjacent side with the white writing that white for the two layers. Yeah, afraid to fall asleep. Well, and I know that Joe
finally adding the way toward the side going forward once again for the top and
the side for all Elliott. And release, we're done
with the white and release. We're done with the top, the
siren as well as the layer. Removing the ILP style does. Now moving on to the insides of the Lean, starting
with the brown. Moving on to the middle
ear with the brown. Finally adding them
around for the top layer. And with this we are
done with the brown know going in if that'd be prayed. Starting with the middle ear, ending it partially on top of them around as well
as surrounding it. Now moving on to
the top there with a deep breath and release, we are done with
that deep grade. Lastly, going in with the rain, starting with the middle ear. Moving on to the top layer, filling the rest of the inside of the layer with this red, as well as adding
a little bit of red on top of the
deep red and brown Finally adding the rate for the bottom layer,
repeating the same, filling the rest of
the empty spaces for the layer with this rate, as well as adding a
little bit of light on top of the knee
played around. With these. We are done
with the red for the space. Now going back with the right to blend it with a two layer. Then the saints with that second dose, This site of us a
little bit groomed, fixing the side with
another layer of white. And with this, we're done
with our second slaves. Moving on to the third place. This will be simplest of all, starting with the
brown for the outline, the top, and the side. I think a little bit
of brown for the sign. Adding a little bit
of brown for design, adding some more
brown for the top. And when these were done with
them around for the slaves. Now going in with a deep red, adding this deep
red bar cilia on top of the brown as
well as surrounding it. Moving on to the
side with the detail going over the
outline with that, then that's all off. And release. We're done
with that deep brain. Finally going in with the
red, filling the top, with the red filling the rest of the mechanism is best
for the top with this red, as well as adding a
little bit of red on top of that deep
red and brown. With this, we are done
with the top and the side. Now I'm going in
with the settlement being marked with
the salmon pink, adding the outline
for the layer. And with this we are done
with the settlement pink. And now I'm going in with the
white to blended with the solvent being told no. Thomas. Thomas. And with these we are
done with the white and this layer going back with them around learning and below the layer and creating
the outline for the sign. Adding a little bit for
the corner and the middle. Now going in with
a deep-learning, I didn't this deep
red parsley on top of them around as
well as surrounding it. And with this, we're
done with a deep red. Finally going in with the red, killing the rest of the
empty spaces with this red, as well as adding it partially
on top of that deep red and the brown release, we are done with the
red for the slice. Lastly, moving on to the music because starting with
the brown for the myth, writing them down near
the site of the slaves. Even if you've gone to 0 That's all. For now, filling the entire
maze with them around Thomas. Thomas. Thomas. Finally going in the right
to blend it with the brown. I blame Harry, but
instead of it, the vital blended
with them around. Gradually blending all them
around with the white to get a smooth consistency and
uniformity of the colored. Thomas. Chill. Free. Love to hear your files. Sleeping well. And I know that you should
know for way too long. That's all I'll say. Thomas, Cole. And I hope that even if you've gone, I will we be squared and then
whatever a team project, Let's unmask our painting. See you in the next video.
31. Strawberry and Blueberry Red Velvet Cake: Moving on to the 19th, predict a strawberry in a
blueberry red velvet cake, starting with the
skateboard directory. And let's keep up the cake. Finding their friends or
you have the key. For this. I'll be adding
five strawberries, two on the top,
one on the front, and the other two on the side. And then blueberries
for on the top, one on the front along
with a single strawberry, and two on the side of
the slice of the cake. And the last three
beside the strawberry, continue for the
rest of this kit. With this, we are done with the music People of the slaves. Gammas are starting with a
two strawberries on the top. Hailing the blueberries decided, defining the type
or the top layer. Hiding them in the Lyn? No, adding the strawberry for the site along with
the blueberries? I think if I know the
strawberry for the front, I think the blueberry. And lastly it's getting
the last two, No worries. No lightening the pencil marks. Now let's paint starting with a yellow borders
drama series. Adding the yellow part
or less strawberries. For the strawberries,
I'll be using six color, the yellow, settlement, pink, raid, be plain brown, and the light and release
we're done with the yellow. Continue forward with
this element being said only in particle lemon
yellow with the salmon pink. Now defining the one side of the outline of this
chrome element, this element being and release. We are done with the
settlement being. Now going in with the orange, defining the whole sweep
of the strawberry with the iron and Martele covering this element
and the yellow. Now moving on to the top, boost co-varies with this orange And finally adding the orange for the last two strawberries. And with this we're
done with the orange. Now continue quadrate
with the ribs, mainly concentrating this rate for the inside of this tube. Finding the rate for
the other strawberry. Moving on to the friend of
strawberries with this red, adding a little bit more red
on the other side as well. Finally, adding the red for
the last two strawberries. Before we are done with the
red for the strawberries. Now going with the dark grade, starting with a
strawberry at the bone. Moving on to the other
two strawberries. But this dark grade mini adding this deep red on the
left side over that. In. Finally, we learned that Bob, whose job it is with this deep fade out blame for the right side a little
bit with the theme played. With this, we are
done with a deep red for the strawberry. Lastly, going in with the brown, adding more contrast to
the strawberries with this midtone brown for
the other strawberries. Moving on to the front
discovery with them around adding the brown for the last two strawberries on the top. And with these who had
done with them around. And the basic coloring
for the strawberry isn't. Moving on to the leaf
of the strawberry. Starting with adding the
guideline for the leaf of the frontal strawberry
with this deep green. Moving on to the two
strawberries on the side. Finally, and England
guideline for the lease were the
last two strawberries. With this, we're done
with that big green. Now going into the screen, remember define the
theme of the leaf. Adding this green, green
for the other strawberries. I think this brings the mean for the friend of strawberry. Finally moving on to the
strawberries and the tops Adding some water spring
green wherever required. Release, we are done with the
music color for the leaves. Continue forward
with this crashing to Colorado detail
for the leaves. Adding the midriff in the
green for the leaves. You can use a toothpick or
white pencil if you people moving on to the
strawberry at the front. Moving on to the
strawberries at the top, gardening older
detail of the leaf. And with this we're done
with the scratching going in with a pencil for
the outline of the leaves, outlining the lead for
these two strawberries. Finally outlining the leap toward the front of strawberry. Now to finally the strawberries going in with the white
to add highlight. Adding the highlight, put
all these probabilities with the way this time I'm not using
or threatening to carve out the rates
to reveal the yellow, That's Elman pink as well
as the other colored. As I am satisfied with the
strawberries as the art. If you prefer, you
can go with this grating to throw some of
that underneath colored. With these, we are done
with the strawberries. Moving on to the blueberries, starting with the illegal border outline or the blueberries, outlining them
blueberries and adding a little bit of
amigo boiler inside. Moving onto the top
of strawberries with the outlining the
pod blueberries. Finally, moving on to the
last three blueberries. And with this, we're done
with the outline for them, blueberries with the ambiguity. Now going in with
a little bit of Prussian blue for the
insights of the blueberries. Finally going in with the
heliotropic Elaine site of them blueberries
and blaming the Inigo, the plus in blue together with this allotrope by
overlaying this, Hey your truck on top of them. Now moving on to the
single blueberry. Adding the color for
these two blueberries. Finally, moving on
to the last word, blueberries at the top. And with these, we are done
with the YouTube going, met with the Prussian blue
for some of the blueberries. And with these, we are
done with the blueberries. Now let's color the
slides of the kick, starting with a grid, adding negative beside the
strawberries and blueberries. Now outlining the top of
the cake with them green. Adding a little bit of
grief for the inside. Outlining the faint
when they agree Adding a little bit of
grief for the inside. And with this, we're done with
the tree now going anyway, this element being a little bit of solvent being for
the top and the sides, covering some of the green
with the cell and pink. And with this, we're done
with this element being, now going in with the white, using the right to blend us element being
integrated together. Filling this eta divided by covering the
other two colors. Now, moving on to the front side with the white dust. Moving, went to the
top with the light. Lima meetings with the white. Don't worry about some lemmings with them losing their age. Later on we'll be adding another layer of
white to cover it. Now covering the entire
top, Linda White. Going over the white me, their bellies once again. Adding the light between
the strawberries. Tiffany adding the vital between the leaves
and then blueberries. And with these, we are done with the top of the teeth with this fight. Moving their desk. Gammas are going to be new, watered with debit own, starting with a friend Collin, handing them down
below the whites. Adding a small speaker
brown for the middle. Moving on to the
bottom layer when this brown outlining the theme of the layer window around adding them around in their corner. And when these were done with
the brown for this side, moving on to the other side when the brown starting with outlining the feet of the
layer, wind them around. And with this, we're
done with them around. Now, going in there
with their deep red, starting with the bottom layer, adding this deep red part, cilia on top of the brown
as well as surrounding it. Moving on to the
other side of that deeply doing the theme, adding it partly on top of them around as well
as surrounding it. Now moving on to the upper
layer with a deep red, I think that'd be blamed
for the other side. Going back to the
bottom lip of adding adding a little
bit more deep red. And with these we are done
with there being bred. Know going in with that
end, starting with the top, spelling, the rest of the
empty space with disarray, as well as adding a little bit operate on top of the leaflet and for the bottom layer. Finally adding the red for the front side of
the bottom layer. Go master. And we leave we are.
After the raid, I added a little bit of
grief for them, We believe. Now going in the middle right, to blend the ugly
for the middle ear. These were done with
the 19th project. Unmasking our project.
For this project, I'm not adding the base, if you prefer, you
can add lobbies. Adding some finite that
is for the project. And release, we're done with our strawberry and the
mulberry red velvet cake. See you in the next video.
32. Blueberry Red Velvet Cake: Starting now at 20,
blueberry red velvet cake. This little bit too
late life for starting this kid with a straight line as the guideline to draw
the top of the cake. The sketching an ellipse in
settling the straight lane. I think the line for the
slice section of the game, hiding the sites and
defining the bees. She goes, she does. John Snow is getting the slaves, doesn't release. We are done with the
reference gate for the gate using the guidelines. Now adding this case for the top and the bottom
layer for the cake, for the leads of the
key can be using green, cadmium lemon peel
you and white. Good evening. This gives me the clock. Now let's paint starting with the Prussian blue
for the outlines. Sorry, I forgot to show
you the placement of the blueberries is getting them blueberries with the pencil
on the top of this leaf. I think this
blueberry beside each other for the entire
aid of the cake. Some of these
blueberries are behind. And now that I didn't show that, lightning, the pencil
marks once again, removing the dust, going back with the processing
load to outline them. Blueberries. You don't have to exactly draw with the
same pencil escaped. Make a dispute as you go We went to the other thing. Finally, connecting both the
site for the blueberries. I decided to add few more berries and release. We're done with the outline. Continuing forward
with the illegal, adding a little bit
of indigo Paula, insights of every blueberry. And with these, we are
done with the indigo. Now going in with the
heliotropic or the inside. Blending there in big 0 of the inside with this whole
YouTube by covering it. All the blue babies with
this hand your toe. I am adding the senior
drop in a circular motion. By doing this, I
am also blending the Christian view of the
outline a little bit. Hey your Drupal, them
blueberries that are behind me. And with this we are
done with the hinging your truck, removing their dusk. Going back with Amy, go over some facts about lanes. I think this indigo and earlier outline of the proof is in blue for them, blueberries. Adding main legal for
the last bearing. If you prefer, you
can add white for the highlight for
this blueberries. And with this, we're done
with the blueberries. Moving on to painting the key, starting with cadmium
lemon pale hue. Adding the cadmium lemon peel, you pull the inside of the top, defining the outline for the adults and release. We're done with the
cadmium lemon peel, you know, going in
with the green. So starting with the rounding of the cadmium lemon peel you with this leaf or the
sides of the top? No, I didn't agree for the top. Adding this gray beside an in-between the
cadmium lemon peel, you going over the outline once again with the green With this, we are done
with the green know, going in with the white to blend the two colors to get them. Starting with willing
to wait for the site. I think now wait
for the bank side. No, moving on to the top or willingness right
on top of that. And again, when lemon peel you starting from the center and moving outward
with the white, adding the light in-between
them, blueberries. Blueberries on the
top with this white filling them right
in between them, blueberries for the inside. Continuing forward
towards around the blueberries with the white. Now feeling the top
with the right. Adding another layer of white to lighten the loony other berries. We're busy, we're done
with the white polar talk. Today moving. They're going over the three outlining with
the white ones again. These were done with the top. Now, moving on to
the middle layer, like at near the starting with the cadmium lemon peel new, defining the outline
for them in the layer. And with these, we are done with the cadmium lemon paying
you for the middle ear. Now going in there with a green feeling a little bit of
grief for the insights. Finally, going in with the
white to fill the layer or willingness white on top of the tree and the cadmium
yellow and pale hue. Moving on to the other
side with the white. And with these we are
done with them in the layer, removing the dust. Now going into the brown, starting with the left side, gradually moving
towards the right, defining the base of the LEA
little bit with this brown. Moving on to the other
ligand binding there be from the LEA
little bit with this down a little bit for the ages? No earning a little
bit of brown for the insane. And release. We are done with the brown
continue water with a deeply starting with a deep
red for the top layer. Adding this deep red
partially on top of the brown as well as on
top of the deep red. Moving on to the other side. And release. We're
done with that deep red for the upper limb. Moving on to the lower
lip, repeating the same. Adding this deep red
part for me on top of the brown as well
as the rounding it. Moving on to the other side. And release we are
done with a deep red. Now continue forward
with the red, filling the rest of
the empty spaces with this rate as well as partially overlaying this on top of that deep red and brown. Moving on to the other
side of the lower layer. Moving on to the upper
layer, liberating the theme, filling the rest of
the empty space with this rate as well as
partially overlapping, but on top of the deep
red and the brown. Moving on to the other
side of the upper lip. And we need to we are
done with the red. Now I'm going in
with the white and using a stippling
technique to extend some of the reds
and the right to create an even texture
for the layer. Doing their thing
for the upper lid, that is using the
stippling technique with the white to extend our aid and the white booklet uneven texture for the layer. Going over the layer
one the other day. Now moving on to adding
the final layer, starting with the
cadmium lemon peel, you finding the outline
for the bottom layer. And with this we are done
with the cadmium lemon peel, you going in with the green, adding a little bit of
grief for the inside. And release. We are
done with the green. Finally going in
with the weight. Starting with blending with the rate Our by using
stippling technique. Now feeling the rest
of the layer with the white covering the
cadmium lemon peel you and agree with the white. Now moving on to the other side. When these were done with
the slice of the cake. Moving on to the beef,
starting with the brown shoe, not willingly entire
base with the brown. Removing the masking
tape to add more color. Now going with the right to
blend it with the brown. Applying heavy, but instead with the right to blended
with the brown. Good job. Released when nobody
red velvet cake. See you in that it's medial
33. Strawberry Circular Red Velvet Cake: Moving on to the 21st in the
last project for this class, strawberries have
chlorine well-read game, starting with this
Keith for the top of the QI site and defining the beef was getting there WAS, this
will be the layered cake. No police keeping the
strawberries for the top. This will be similar
to the last predict, blueberry, red velvet cake. Adding this term and it's for
the whole side of the key. I'm just thinking
allows the strawberry. Now let's paint starting with the white outline of the
strawberry with the white. I have not lived in
the pencil escape, except really simple escaped. Also, there is no middle ear, so we'll be mainly using a dark color and a dark
color will completely cover the pencil sketch and ask for going over the outline on the strawberry
with the white. I'll be adding that deep red and brown to cover this outline. Continuing to add outline for the strawberries with
the wife and release, we are done with the outline and the strawberries with the right. Now going into the
cadmium yellow. This yellow on the top right
side of the strawberry. For this project or less, strawberries will not
be that much detail. It, if you can make
them more detail. This will be fairly
simple strawberry. And with this we're almost
done with the cadmium yellow. Now going in with this
element being said, I mean the cadmium
yellow as well as overlaying a little bit of
salmon pink on top of it. I think the cell limping for the strawberries and the back. And with this, we're done
with this element being no going in with the orange
lid binding the CBA, the strawberries, as well
as partially filling this element pink and the
cadmium yellow with orange. Continuing to add the autoencoder
or less strawberries. Me if I knew the people,
the strawberries with this orange as well as partially covering
the cell membrane and the cadmium yellow. For the last three strawberries And with this, we are
done with the orange, going over some of the
strawberries with the orange. Instead of the rate
I am going into the brown to add that distinction
between the strawberry. I didn't listen down
on the left side of the strawberries to create contrast and to fill
the distinction between those strawberries ending never own for the
strawberries in the back. We're almost done
with the brown, adding a little bit of more brown for the
printer strawberry. Now going into the red, overlaying this right on top of the brown and yellow
endless element being partially covering all the
strawberries with the red. Moving on to the strawberries
and the backward rate. And with these, we are
done with the red. Finally going into
that deep red, adding a little bit of deeply for the sides of
the strawberries. They merely overlaying this deep laid on top of the
red and brown. Moving on to the
strawberries at the back. With this, we are
done with the basic coloring for the strawberries. Going into the deep green for the guideline of the leaves. Starting with the
strawberries at the back. Adding four to six weeks of
being green for the leaves. Moving onto those
probabilities at the front. And important to city streets of being green for the leaves. And with this, we're done
with that deep green. Know going into this brings me to define the
tip of the leaf. Using deep green as the dye
to draw the of the leaf. Gradually moving towards
the right with the spring. The mean adding the leaves by overlaying is bring them in
on top of that big green. Moving on to the
strawberries and the back, whether
the screen lean And with this, we're almost
done with the spring dream. Now going over some of the nice ones are going to
define the shape of the leaf. And with these, we are
done with the green going into this graphing tool
to add detail for the leaf. Adding detail for
each individually. Hello. Moving on to the strawberries at the back with this veteran tune. Adding details for
each individual leaf. With this, we are done
with the scratching, going in with the pencil to
add outline for the leaf. Ok Lane put all the leaves. And with this we are
done with the leaves. I am keeping things
simple for this painting. You can go in with
the white to add highlight what the strawberries. Now going in with the
white border top, filling the whiteboard,
the front of the cake in-between
the strawberry. Filling them right in
between there strawberries. Now moving on to the middle
of the cake with the white, carefully peeling the white
border top of the king. Moving on to the
side with the white applying a repressor with the
bipolar side of the cake. Gradually moving
towards the right. A blank area to achieve smoother consistency and
uniformity of the white. And with this, we are
done with the top and the side of the
cake with the white. Moving on to the
rest of the key, starting with the brown. Starting with adding the
brown for the right side. Now adding a little bit
of down for the insane. Moving on to the other
side of the road. Outlining the layer
with the brown. I think they're more
known for the middle. And with this we are
done with the brown. Now going in with a deeper, adding this deep red bar on top of the brown as
well as surrounding it. Starting with the left
side with this deep red. Finding the deep brain called
the base over the bone. And adding the deep
red for the middle. Moving on to the
other side of the different repeating
the same parts. Are we adding this
deep red on top of the brown as well
as surrounding it? Finally adding a deep
red for the upper part. And with this we are
done with that deep red. Now going into the red, filling the rest of
the empty spaces with the rate as well as part
in your link that's on top of that deep red and the
red lead for the left side. I think this raid on the top
and repeating the theme, willing the rest of the
empty spaces with this rate, as well as partially adding this on top of that deep
red and brown. And with this, we are done with the cake and the strawberry. Moving on to the
base for the cake, starting with the brown. Now going into the white
of blended with the brown, a blank paving. The way to blend
it with the brown. And release. We're
done with the base for the strawberry red velvet cake. Moving the dust. Let's unmask our painting. With this, we are done
with our last project.
34. Thanks and Conclusion: Congratulations on
completing this class, and thank you so much
for taking my class and taking your time and
creativity with me. I hope you had fun with this class and learned
something new and exciting. Please leave a review
so you can help me and let others know how you
feel about this class. You can do this by going to the review section and then
taken the liberty we went. And I did really
appreciate that. If you have any
doubts or queries, you can always ask me in
a discussion section. Also, if you have done any
of the red velvet cake, please upload it in
the project section. Don't underestimate
leaving a project work or reveal your
reviews and predict what makes me really happy and also helped my classes
to reach other students. Thank you again, and
I hope to see you in my other classes. Happy painting
 Vishal Munshi