Transcripts
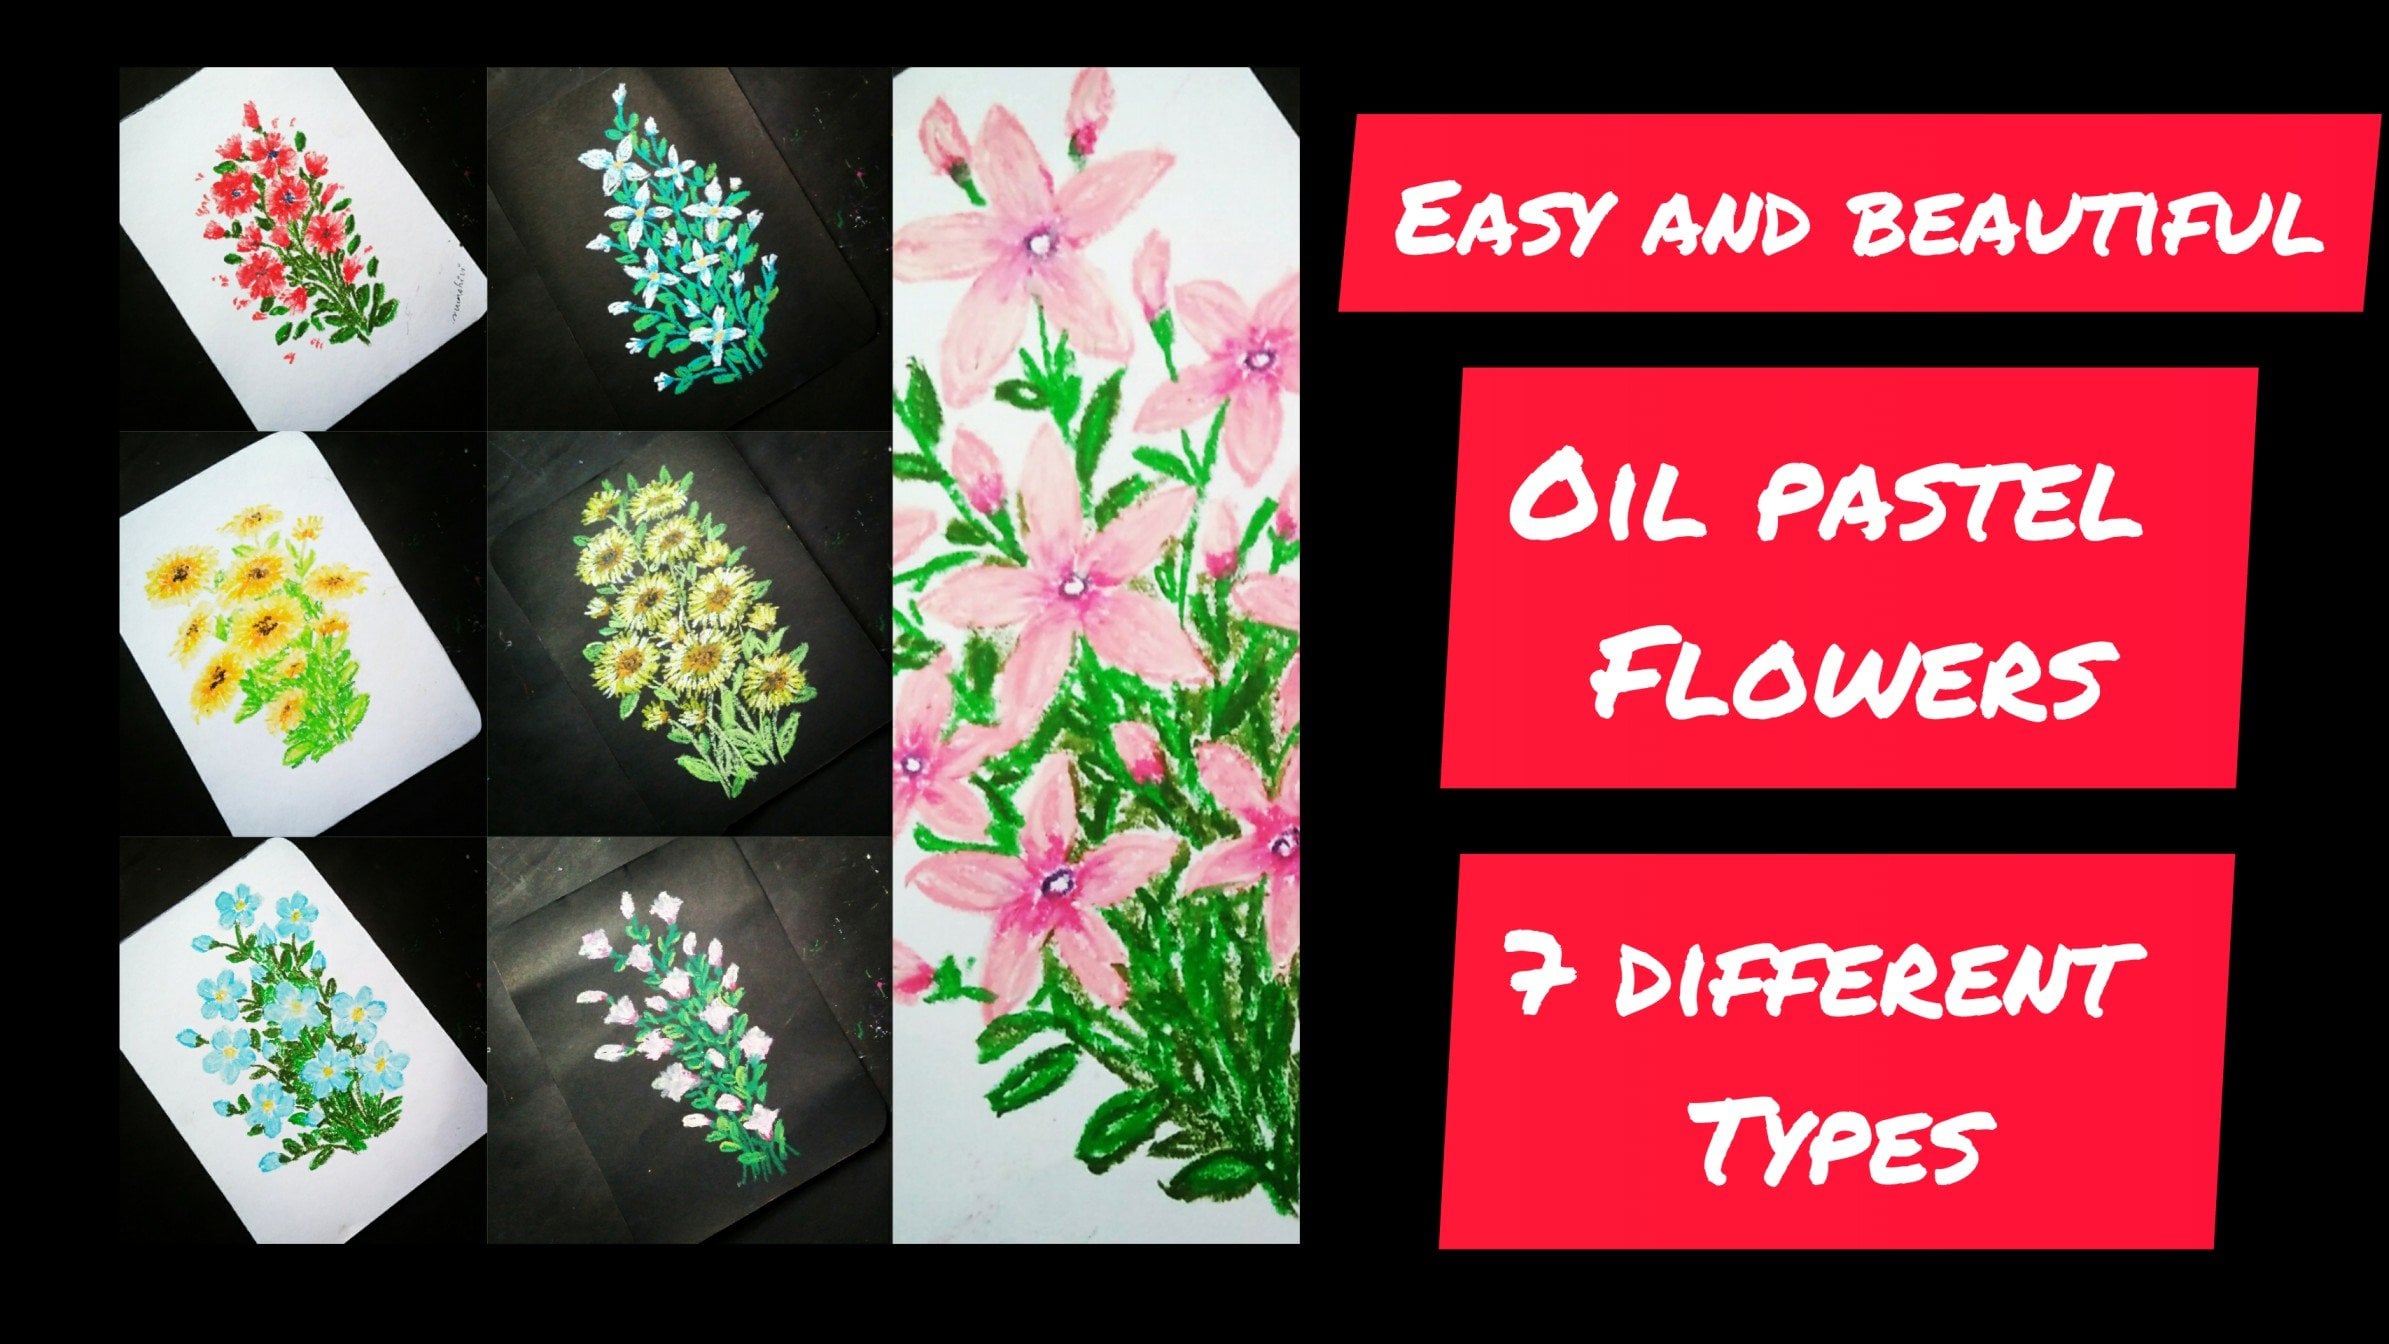
1. Introduction : Welcome to this class on easy medical flower
with oil pistol. This class, you
will learn to drop six simple and easy miracle
flavor of different colors. We will start the class
with a simple demonstration how to paint three different
color Marigold flower. And then we will move on to how to paint the leaves
for the flowers. After that, we'll be taking
each flower separately. And finally, we'll be painting
the six main competitions. Join me in this class
and let's paint some color for radical flowers.
2. Class project : The class project,
I encourage you to paint any of these
Marigold flower. Come up with your
own competition. If you wanted to say area, please upload it in
the project section.
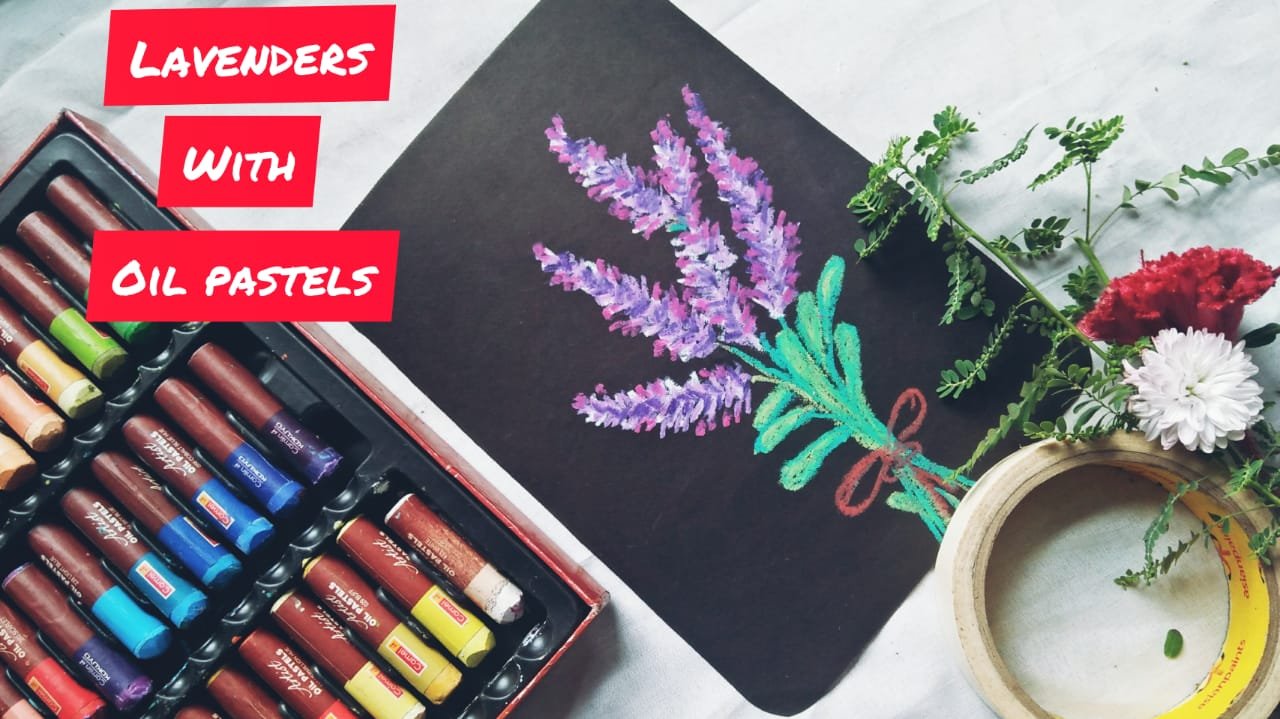
3. Supplies : For this class, you will
need a pencil and masking tape to tape the people's papers or any paper both in the
DSM will do the work. Steals your tips for blending. To remove the dust
from that oil-based.
4. Flower demonstration : In this video, I
will demonstrate how I approach drawing
this medical flowers. For this first Marigold flower, I'm starting with lemon yellow and drawing out the
outline for the flower. Then I am filling in the
color with circular motion. On top of this, lemon yellow, I'll be adding yellow. Now I'm done with that
lemon yellow part. Now going in with the yellow, I'm adding yellow this course earlier on top of
the lemon yellow. Adding this yellow on top of the lemon yellow in the form
of petals of the flowers. Adding some more yellow on
top of the lemon yellow. And after this,
I'll be adding deep yellow on top of it to
finalize the flower. I could complete the flower. I'll be adding stem. Now going in with BP, yellow, deep yellow
petals here and there. Now with the green, I'm adding in the stem. For the second medical flower, I'm starting with a DPI loop. I'll be following the
same procedure as I did earlier with the
plasma to gold flower. But in this case I'll
be using yellow beep, yellow and orange, adding in the color
in circular motion. Going in with the PLO VPL on top of the yellow that I
painted Ru by maintaining the Kaltura while maintaining
the contour of the flower. Now to complete the
second medical flower, I'm going in with the audit, adding it in,
adding it on top of the yellow that I
painted earlier in the farmers small petals. Finally adding in the
stamp of the flower. For this third and the
final vertical flower, I'll be using BP yellow, yellow, red, and orange. I'm standing with VPL to draw
the outline for the flower. Then I'll be filling in the rate near the edges of
the outline that I'm going in with the red near the
edges of the petals. Now going with the Auden and
adding it on top of the red. After this, I'll be
adding yellow for the center and adding the same yellow on top
of this orange. Going in with the
yellow that I used earlier to draw the
outlines for the flower. For the center of the flower, I'll be adding the
brown on top of this yellow going in with a deep node to add the
center of the flower. Now to finalize the painting, I'm adding in the stem
with the deep ring. This part is optimal. To add more volume
to the flower. You can use the same yellow
that I used earlier to drop more metals to the flower
following the same procedure, biting rate and then yellow
to make it more fluffier. Now we are done with the
flower demonstration. The next section
I will, so how I approached drawing the
leaves for the flowers.
5. Leaves: In this section,
I will show how I approached drawing the
leaves for the flower. For the leaves, I'll
be using three colors. Green, light green,
and sap green. For the first leaf,
I'm starting with the lightning for
the leaf salad, drawing the main stem and then attaching six to eight
weeks on top of it. With this light green,
I have drawn out the outline as well as fill
in the color for the leaves. Now, I'm almost done
with a light green. To complete this leap, I'll be adding beep
green on top of this. Now going in with a deeper going to add the
boundary so the leaves. With this deep
green I am drawing the outer edges of the
leaf with rough edges. Now the first leaf is complete. For the second leaf,
I'll be following the same procedure
as I did earlier, but I'll be using a
different color here. I'm starting with a sapling. Sapling, I'm drawing
the main stem and then I'll be adding
leaves on top effect. And to finalize
this second leaf, I'll be using peep going to add rough edges for the
outline of the leaves. Now going in with a deep
green to add the outer edges, as well as adding it
up to the leaves. For the second leaf,
I'll be adding deep green only for the bottom
edges of the leaf. For this part on the final leaf, I'll be using light
green and green, starting with the deep winter, draw the main stem and then I'll be attacking leaves
on top of it. Following the same
procedure as I did earlier with the first
and the second leaf, I'm going in with a
light ring to draw the outer edges of
the leaf as well as adding rough edges to the leaf. Third and final
leaf is complete.
6. Yellow marigold : In this video, I will
show how I approached drawing flower and connecting
stems and leaves to it. Starting with the lemon yellow. On top of this lemon yellow, I'll be adding yellow and
a little bit of DPLL. I have drawn out the
guideline for the flower, and now I'll be filling in the lemon yellow color inside it. I'm using circular motion, will repeat it in the
petals of the flower. Adding yellow on top of the lemon yellow in
pharmac circular motion. Then the petals of the flower. It is the painting
I'm drawing the stems and then I'll be adding
leaves on top of it. More dimension to the
leaves and the stems. I'm going with a deep green
to add to the leaves. The first Marigold flower with leaves and the
stem is complete.
7. Orange marigold : Just like the previous section. In this section I will
demonstrate how to draw the orange
colored golf club. Here I'm starting
with light yellow. Light yellow, I have
drawn out like a flower and then I'm filling in the
color with circular motion. On top of this light yellow, I'll be adding orange. Connecting stem to the flower. Here I'm using sap green. I didn't little leaves to get more dimension to the
leaves and the stems. I'm going in with a deep bring to draw the outline
for the leaves. I'm finally going
in with the orange. Here. I'm starting
with a light orange. The second Mary
gold is complete.
8. Red marigold : In this video, I will
show how I approached drawing that it colored
Marigold flower. Starting with BPI
local and defining the outline for the flower.
I have known a circle. Inside the circle
I'll be drawing in the outline for that
medical flowers. For this red color Marigold
flower, I'll be using VPN, yellow and brown,
drawing in the outline for the petals of the red color medical flower with
that BPA loop. Here I have eight petals. I'm going in with the red, adding this rate near
the edges of the petals. I'm almost done with the red. After this red, I'll be
going in with the audience. This on and on top of it. And just below the red. I didn't get into all the
petals of the flower. Mel, blowing it
with a deep yellow. For the center, I'm adding
small dots would be brown. I didn't VPL on top of the
audit and to blend the colors. Now for the stems and the
leaves, I will starting with B. And then I'll be using sap green to add the
edges of the leaves, as well as define the stems. Adding small leaves
with a deep green going in with the
sap green to define the edges of the leaves
as well as the stem. Adding deep yellow wherever required for the final touches. Now, our third Marigold
flower is complete.
9. Single marigold flower : In this video, we'll be painting a single Marigold flower
with two small buds, starting with white to
draw out the guidelines, as well as laying
the primary layer for the flowers and the leaves. Getting old. But
guideline of the flower. Sketching the outline for
the leaves and the stems. Starting with the mainstem, redrawing the leaves as well. Let's modes. Mode steams coming out from the main
stem of the flower. Drawing in the timing leaps. Laying out the primary layer
for the flower with white, using circular motion to depict the where clause of the flower. Moving on to adding birds, are we adding two birds? One on the right side of the flower and other
on the left side. Adding in the second word
as well as few more leaves. Now we are done with the
outline of the flower, as well as laying the
primary layer for the flower. Let's
paint the flower. I'm starting with lemon
yellow at the second year. What my flower, using the same
circular motion to depict the petals of the flower while following the contour
of the flower. I am done with the lemon yellow going in with a deeper yellow. Yellow on top of lemon
yellow in the form of semicircle to represent
the petals of the flower. Now, I'm done with the DPR look, moving on to the
stems and the leaves. Well, the stems and the leaves
I'll be using to green. Starting here with a
light cream laying it on top of the white
that I painted earlier. On top of this slide green, I'll be adding
deepening to represent the outline for the leaves
as well at the stem. And to define the
edges of the leaves. Good, fully adding
the light on top of the white that
we painted earlier. I'm almost done with the light green moving onto the deep ring. With this deep green, I'll be adding the rough
edges of the leaves, as well as defining the outline for the stems and the leaves. This deep green on top of the bud that we painted earlier. Defining the outline
for the leaves, as well as adding
edges to the leaves. Doing the same for the rest
of the stems and the leaves. Adding some yellow
on top of that deep clean that we painted
earlier for the bud. Adding some light green and
the green wherever required. For the fourth and the
final layer of the flower, I'm going in with the light orange drawing in
the same circles to represent the petals of
the flower on top of the three layers of the yellows and the white
that we painted earlier. Our flower is complete, willing in with the
yellow for the buds. Now to complete this painting, I'm going in with the green
to add the finite that yes. Outburst main thing is complete.
10. Yellow marigolds (5 flowers) : In this video, we'll be painting five Marigold flower
on red pester paper. I'm starting with white
to draw out the outline for the flowers as well as
the leaves and the stems. Here, I'll be sketching
out the outline for five bad equal flower buds and to Halftone Marigold flower, as well as the leaves and
the stems for the flower. Shapes and sizes of
the Marigold flower. Getting out the outline for the madrigal flower right
behind this flower. Moving on to drawing
the leaves as well, Let's link the primary
layer for the leaves with the white filling in white inside the first
Maddie corn flour. Connecting the stems to the
Marigold flower with a white. Moving onto training that
stems for the leaves. Now, adding buds to that status. Finding, adding
leaves to the stems. I didn't leave
throughout the stems. We're almost done when the leaves moving
on to the flower, the flower, I'll be filling in the white with
circular motions. Filling in the white for
the rest of the flower, this flight will act
as the plane with him. Now we're almost done
with this slide. We sketched out outlay
for the flower, it as well as laid out
the foundation for the primarily for the
flowers and the leaves. After this, we will
move on to the yellow, always starting
with a lemon yellow as the second layer
for the flowers. Adding lemon yellow on top of the white photo
Marigold flower in circular Muslim to represent the shape of the
petals of the flower. Adding this lemon yellow
on top of the flower bud. Going into the white to
expand this flower bud, I decided to make it a
half balloon flower bud. I decided to do the
same for this flower. Return into the half
bloom medical Flavel. Now moving on to the rest of the flower with my lemon yellow. And now you're done
with the lemon yellow at the secondary
layer of the flower. Moving onto the DPLL, I'll be adding
this VPL on top of the flower in circular motion. Now, for the final layer, I'm going in with
a light, orange light on and on top of your
flower in circular muscle. It does have the
flower following the contour of that level. Now we are done with the flower moving on to the
leaves and the stems. I'm starting with light green, adding it on top of the
white as my secondary LIATE, what the leaves and the stems. This light green, I'll
be adding, deepening. I'll be adding a slight green
on top of average stems, leaves, as well as the
parts of the flower. Adding this light green
throughout the leaves, stems and the bugs. Now we are done with
the light green. Moving on to the deep cleaning. This deep green, I'll be drawing the outline for the leaves, the stems, and the bulk of the flower would
outline of the leaves. I'll be adding up to
the leaves. The leaves. I think outlined throughout the leaves and the
stem of the flower. Now we're done with the green. Moving on to the VPL look, I didn't get on
top of the flower buds using the same beat, yellow for the half
blooming flowers. Now, to differentiate
between these two flower, one behind the other, I am adding orange to act as the outline for
the first flower. On top of this origin, I'll be adding bP yellow. I'm going in with that
VPL loop and adding it on top of the audit and
blending these two colors. Now, our painting is complete.
11. Orange marigolds (7 flowers) : Last video. In this video we'll be painting
multiple madrigals. Instead of yellow.
Marie goals will be painting orange MET equals. We'll be painting seven
madrigals goals in total of various ideas. Like the last video, I'll be following
the same procedure, starting with white to draw out the guidelines for the flowers and the leaves and the stems, and laying out white as the primary layer
for the painting. I have already started
sketching out the outlines for the marigold flowers that we
deal. It didn't real time. So I encourage you to
follow along with me. Wearing the sizes of
the medical flour, making some of them bigger
and some of them smaller. Now I'm almost done
with the flower. Moving on to connect new
steps to the flowers. Now it's getting the
guidelines for the buds. Now moving on to adding
stems for the leaves. Bottom right side of the
painting appeared kind of dull. So I decided to smaller
medical flower. Moving on to filling the white as the primary
layer for the platelets, as well as the leaves
and the stems. Filling all the flowers with white color using
circular muscles. Now I'm done with willing
white for the flower. Moving on to adding
used to this tense. Adding tiny lift
throughout all less dense. I didn't write
wherever required to finalize the sketching
section of the painting. And after this, I'll be
moving on with our yellow. Now I am done with the
light moving into with the lemon yellow to lay the secondary layer
for the flowers. I'm using the same
circular motion. Secondarily, I thought
that radical flowers, I used a circular Muslim as represent the
petals of the flower. Now I have applied lemon
yellow on top of average, Marigold flower moving into with the light orange layer for the flower using the
same circular muscle. That's it represent our
depicts petals of the flower. Adding the light
on and throughout all the medical flower
of the scraping. Nomadic or flowers appeared kind of null because of
the black background. So I decided to add VPL
on top of this orange. We're done with that BPA. Moving on to the leaves
and the stems part, starting with olive green. With this olive
green, I'm laying out the second lead further
strengthen the leaves. This olive green, I'll
be using the green. This olive green on
top of avidly leaves, the stems, as well as
the March of the flower. After applying the
olive green as the secondary late for the
leaves stems in there. But I will move on
to the deepening. With that deep green, I will define the outlines
for the birds, as well as the leaves
and the stems. Now, I'm done with
the olive green moving in with a deeply, with this deep green, I'll redefining the outline
for the leaves, stems as well as the birds. And I'll be using
the same we bring to add rougher edges
to the leaves. Adding that beep green crew out all the leaves and
stems and the bottom, the flower of this painting. Now we're almost done with the leaves and the stem
section of this painting. Because of the black background, the flower does not
appear to be on. I decided to add p
bar and on top of it in the form of
a semicircle to represent or depict the shape of the petals moving in
with that deep orange. I'm adding this deep aren't scarcely all about the flowers. Good enough. This nomadic appears
to be orange. Using white black note, there is no need to
add the steep audit. These delicate painting of auditability corner
flower is complete.
12. Red marigolds (6 flowers ): In this video, we'll be
painting rate Marigold flower. I'll be following the
same procedure as I did earlier with the demonstration of an eight medical flower. I'm starting with BCPL loop to sketch out the outlines
for the flower. Here I'm drawing ellipses and circles inside this
ellipsis in circle, I'll be drawing the outline for the petals of the
medical flowers. For this painting,
I'll be drawing six Marigold flower
for the colors. I'll be using BP,
yellow, red, orange, light yellow and dark ground for the leaves
and the stems, I'll be using light
green and sap green. But this same BP
alarm sketching out the outlines for
the flower buds. Moving on to define
each individual, but the flower inside the ellipses and the
circles that earlier, after defining it
petals separately, I'll be adding red for the
outer edges of the petals. Now, let's get in part of
lab flowers with a beep. Yellow is then moving
onto the green screen. I'm connecting staff to
the flowers and the birds. Connecting every flower
and bads to the stems. Sketching outmoded stems. On top of this stems,
I'll be adding leaves. I'm almost done with
this, getting the stems. Now moving on to adding leaves. I think this tiny leaves
throughout the stems. I'm drying fibrous its
leaves on top of it, stems. We are almost done
with the light green for sketching out the leaves
as well as the stems. Moving on with the olive green. With this olive
green, I'll be adding the outline for the leaf
as well as the stems. Apart from this, I'll be using this olive green to add
refer to the leaves. I think this olive green for the bottom section of the birds that I'll be adding light green on top
of this olive green. I think this olive green throughout all the
leaves of the plant. Now returning back to the plow, I'll be administrate the
outer edges of the petals, as well as I'll be
adding some part of this red top portion
of the budget. Adding that a2, all the
petals of the flower. The outline for this flower. I'm going in with the
DPLL to rectify it. A background, this flower, I'll lead to multiple hours
is left after this rate. I'll be going in
with the audit beep, yellow and yellow for the
center of the flower. I'll be using the brown know carrying forward with this rate. Now, we are done with the red moving in with
that beep yellow. I decided not to use the aren't, but moving forward
with a deep yellow, adding this deep
yellow on top of the red and blending
these two colors. For the center of the flower, I'll be going in with a
yellow top of that yellow, I'll be adding deep brown. Going in for the center of
the flower with yellow. We're done with the yellow
moving in with that deep down, I think on top of the yellow. Our flower section of this
painting is complete. All that is left is the buds. I'm going in with the light green to complete these words. With this light green, I'll be completing the birds. And then with a light
green and the sap green, I'll be adding few more leaps. Now, I'll at Fort marigold
painting is complete.
13. Big red marigolds : Continuing forward with where we left off in the last video, starting with a deepening, adding the outline for the
leaves as well as the stems. I'll be adding
this deep green to each an average stems
and the leaves. This part is also in real-time. So I encourage you to
paint along with me. I decided to add up, but just below the
central problem. Morning I had with
adding the outline for the rest of the leaves and
the stem with a deep green. It's cool. We are almost done with deepen
only fuel leaves and the stem side left after
completing the sleeps. And we will be
painting the flower. And that's what the
flowers, we'll be using, red, yellow, and brown. Now the leaves
understand sex alone. The plant is complete.
Moving on to the flowers. I'm starting with that red. I'm going in with that red
to the edges of the petals. I'll be adding
this added to each and every petals of the flower. Being read throughout
the outer edges of the petals of the flower. The paper is white. I
decided not to use Allen. I'm going in with
a deeper yellow, adding this deep yellow
on top of that red, I'll be ending this
deep yellow on top of red for each
flower petals. And with the addition of this
deep yellow on top of it, I'll be getting somewhat
of orange color. Hello. Continuing forward with
addition of deep yellow on top of each flower petal. Now we are done with
that deep yellow. That's what the
center of the flower. I'm going in with
the light yellow pulling the center of the
flowers with the light yellow. Centers of the planet are now completely filled
with light yellow. Now going into meter deep brown and adding it on top
of the site then. Now to finish the painting, yellow to blend them down
with the rest of the flower. Now our painting is
almost complete. All that is left is the bots. That's what the
buds, I'm going in with a light green adding it on top of the yellow shirt. I'm going in with
that deep green to add outlines for the buds. And after this, our
painting will be completed. I didn't beep yellow on top of the center flower painting. With this, our fifth
painting is complete.
14. Big red marigolds ( flowers and leaves) : In this video, we'll be
painting big marigolds. Like the previous video, we'll be painting
Rain marigolds. But instead of A5 paper
will be using A4. Like the last video for
the red medical flower. I'm starting p BLM
with this deep yellow. I'm drawing the circles
and some ellipses. Inside these circles
and ellipses, I'll be sketching
out the petals for the flower. This time. I'll be painting
it rate marigolds. This painting he
didn't two-part in the first part will be escaping
out the guidelines for the flowers as well
as the leaves and the stems with the greens when we're painting the
leaves and the stems. Video in real time. So I encourage you to
paint along with me. Now moving onto adding that. But for the flower inside
these circles or ellipses, I'll be drawing the
petals for the flower. For this painting,
I'll be earning six to nine petals for
each marigold flowers. I think it's external betas for all the medical platelets. Yellow, what the lower
portion of the bird. I didn't board but
throughout the painting. But left side of the Beta
appeared kind of belt. I decided to add
one more flower. Now I'm done with the
sketching part for the flower, moving on to the
leaves and stems. For the leaves and the stems, I'll be using sap
green and deep green. We're starting with
sap green to add the stems and connecting
this stamp to the bot, as well as the flowers. Adding maintenance
team in pedophilia stamped throughout the
painting with the sap green. For the leaves and the
stems and the birds, I'll be using beep green, sap green and light green. I've already started
with a sapling. And with this sap green, I'll be adding the
leaves with a deeply, I'll be adding the
outline for the leaves. And with a light green, I'll be adding
highlights to the buds. Continuing forward with the
sap green, adding more stems. Now, we're almost
done with the stems. Moving on to adding leaves. That's where the leaves, I'll be adding five to six
leaves on each stems. That hello. Continuing with
adding tiny leaves throughout all the steps of this painting with
the sap green. Okay, in we are almost done with the sap green. In the next section, we'll
be painting the flower, as well as adding that.
15. Mixed marigolds : For this final painting, I'll be painting the
three madrigals together. Loman, not anyone that aid. Well, I'll be painting
11 flowers in total, three orange ones for yellow
and red ones as well. 16 to 17 birds. Like earlier, I am following
the same procedure, starting with white to draw
the outlines for the flowers. Now, I'm almost done
with the flower, moving on to adding
buds with white. I'm sketching out the
guidelines for the buds. We are done with the flower
and the flower buds. All that's left is to connect these flowers and the
birds to the stems. Now adding stems to the
flower buds and the flowers. Almost all the
stems connecting to the flower buds and
flowers are sketched out. All that is left
is to add streams. Now adding the pericardial stems coming off
the main stance. Now let's add leaves. I'm adding this small leaves
throughout all the steps, like the last painting. This painting is also
divided into two sections. The first section will be sketching out the guidelines for the flowers as being the
primary layer for the flower. Let's do apply white for the flower as well
as for the leaves. And in the next section, we'll be painting the flower
as well as the leaves. It's now almost all the leaves
are sketched out. After this, I'll
be applying white. That's the primary
lead for the flowers. Moving on to adding white as the climate
really at what the flower yellow and Maddie, I'll be completely
filling in the white. For the rest of
that red madrigals, I'll be sketching
out the petals. And after that, I'll be
filling in some way. Escaping out the outlines
what the marigold flowers filling in the right for
the rest of the flowers. Now, the first section
of the painting.
16. Mixed marigolds colors : Starting with lemon yellow, applying it on top of the
white as the secondary layer. And using circular muscle assets represent the petals
of the flower. On top of this lemon yellow, I'll be applying deep yellow. Now, our first flower, lemon yellow, a secondary
layer is complete. Moving on to other
stuff, the flowers. Moving on to audit. Very good. I'm starting with
my secondary layer. I'm adding this on top of
the right circular motion. First flower is complete, moving on to the rest of
the orange colored flowers. And the red color and Marigold flower. I'm starting with me PLO, laying it on top of the white
sketch that I drew earlier. After finishing the
outlines that BPA look, I'm moving in with that red, adding this rate on the
outer edges of the petals. Reapplying that VPL on top of that red and blending
these two colors. Filling the centers of the red Marie goal with the git log. Removing the accumulated
dust particles up the oil-based erythematous. Now, revisiting the
yellow Marigold flower, adding on top of it. Now I want to get a
nomadic Goldstar complete. Moving on to the aren't dramatically on
top of this audit. Anybody gold I'm adding aren't. Instead of using
circular muscle, I'm adding semi-circles. Ended up atlas of the flower. I like first I didn't.
Marigold flower is complete doing the same to
the rest of the flowers. I was not satisfied with
the yellow madrigal, so I decided to add some
more color on top of it. Now other flowers
are almost complete, moving on to the
stems and the leaves. The stems and the leaves, I'll be using light green,
green, olive green. I'm starting with a light green. I forgot to collect marigold. I'm going in again following the same procedure
as I did earlier. Exactly. Mount of forgotten flower
is taken care off. I'm going in with the green. This time. I am going in
with the olive green. Find me going in with a deeply for the rest of
the leaves and the stems in madrigal appeared kind of bulk. So I decided to add more yellow on the edge
of the flower. I think for the final touches. With this sixth and final
painting is complete.
17. Conclusion : Congratulations on completing easy Mary goals with
oil paint still. I would like to thank you
for taking this class. If you have any questions asked me in the
discussion section, if you've painted
any of this painting and you would like to see it, please upload in the
project section. Apart from the six paintings
of medical flower, here are some more examples. Maddie, good flavor
that I painted earlier.
 Vishal Munshi