Transcripts
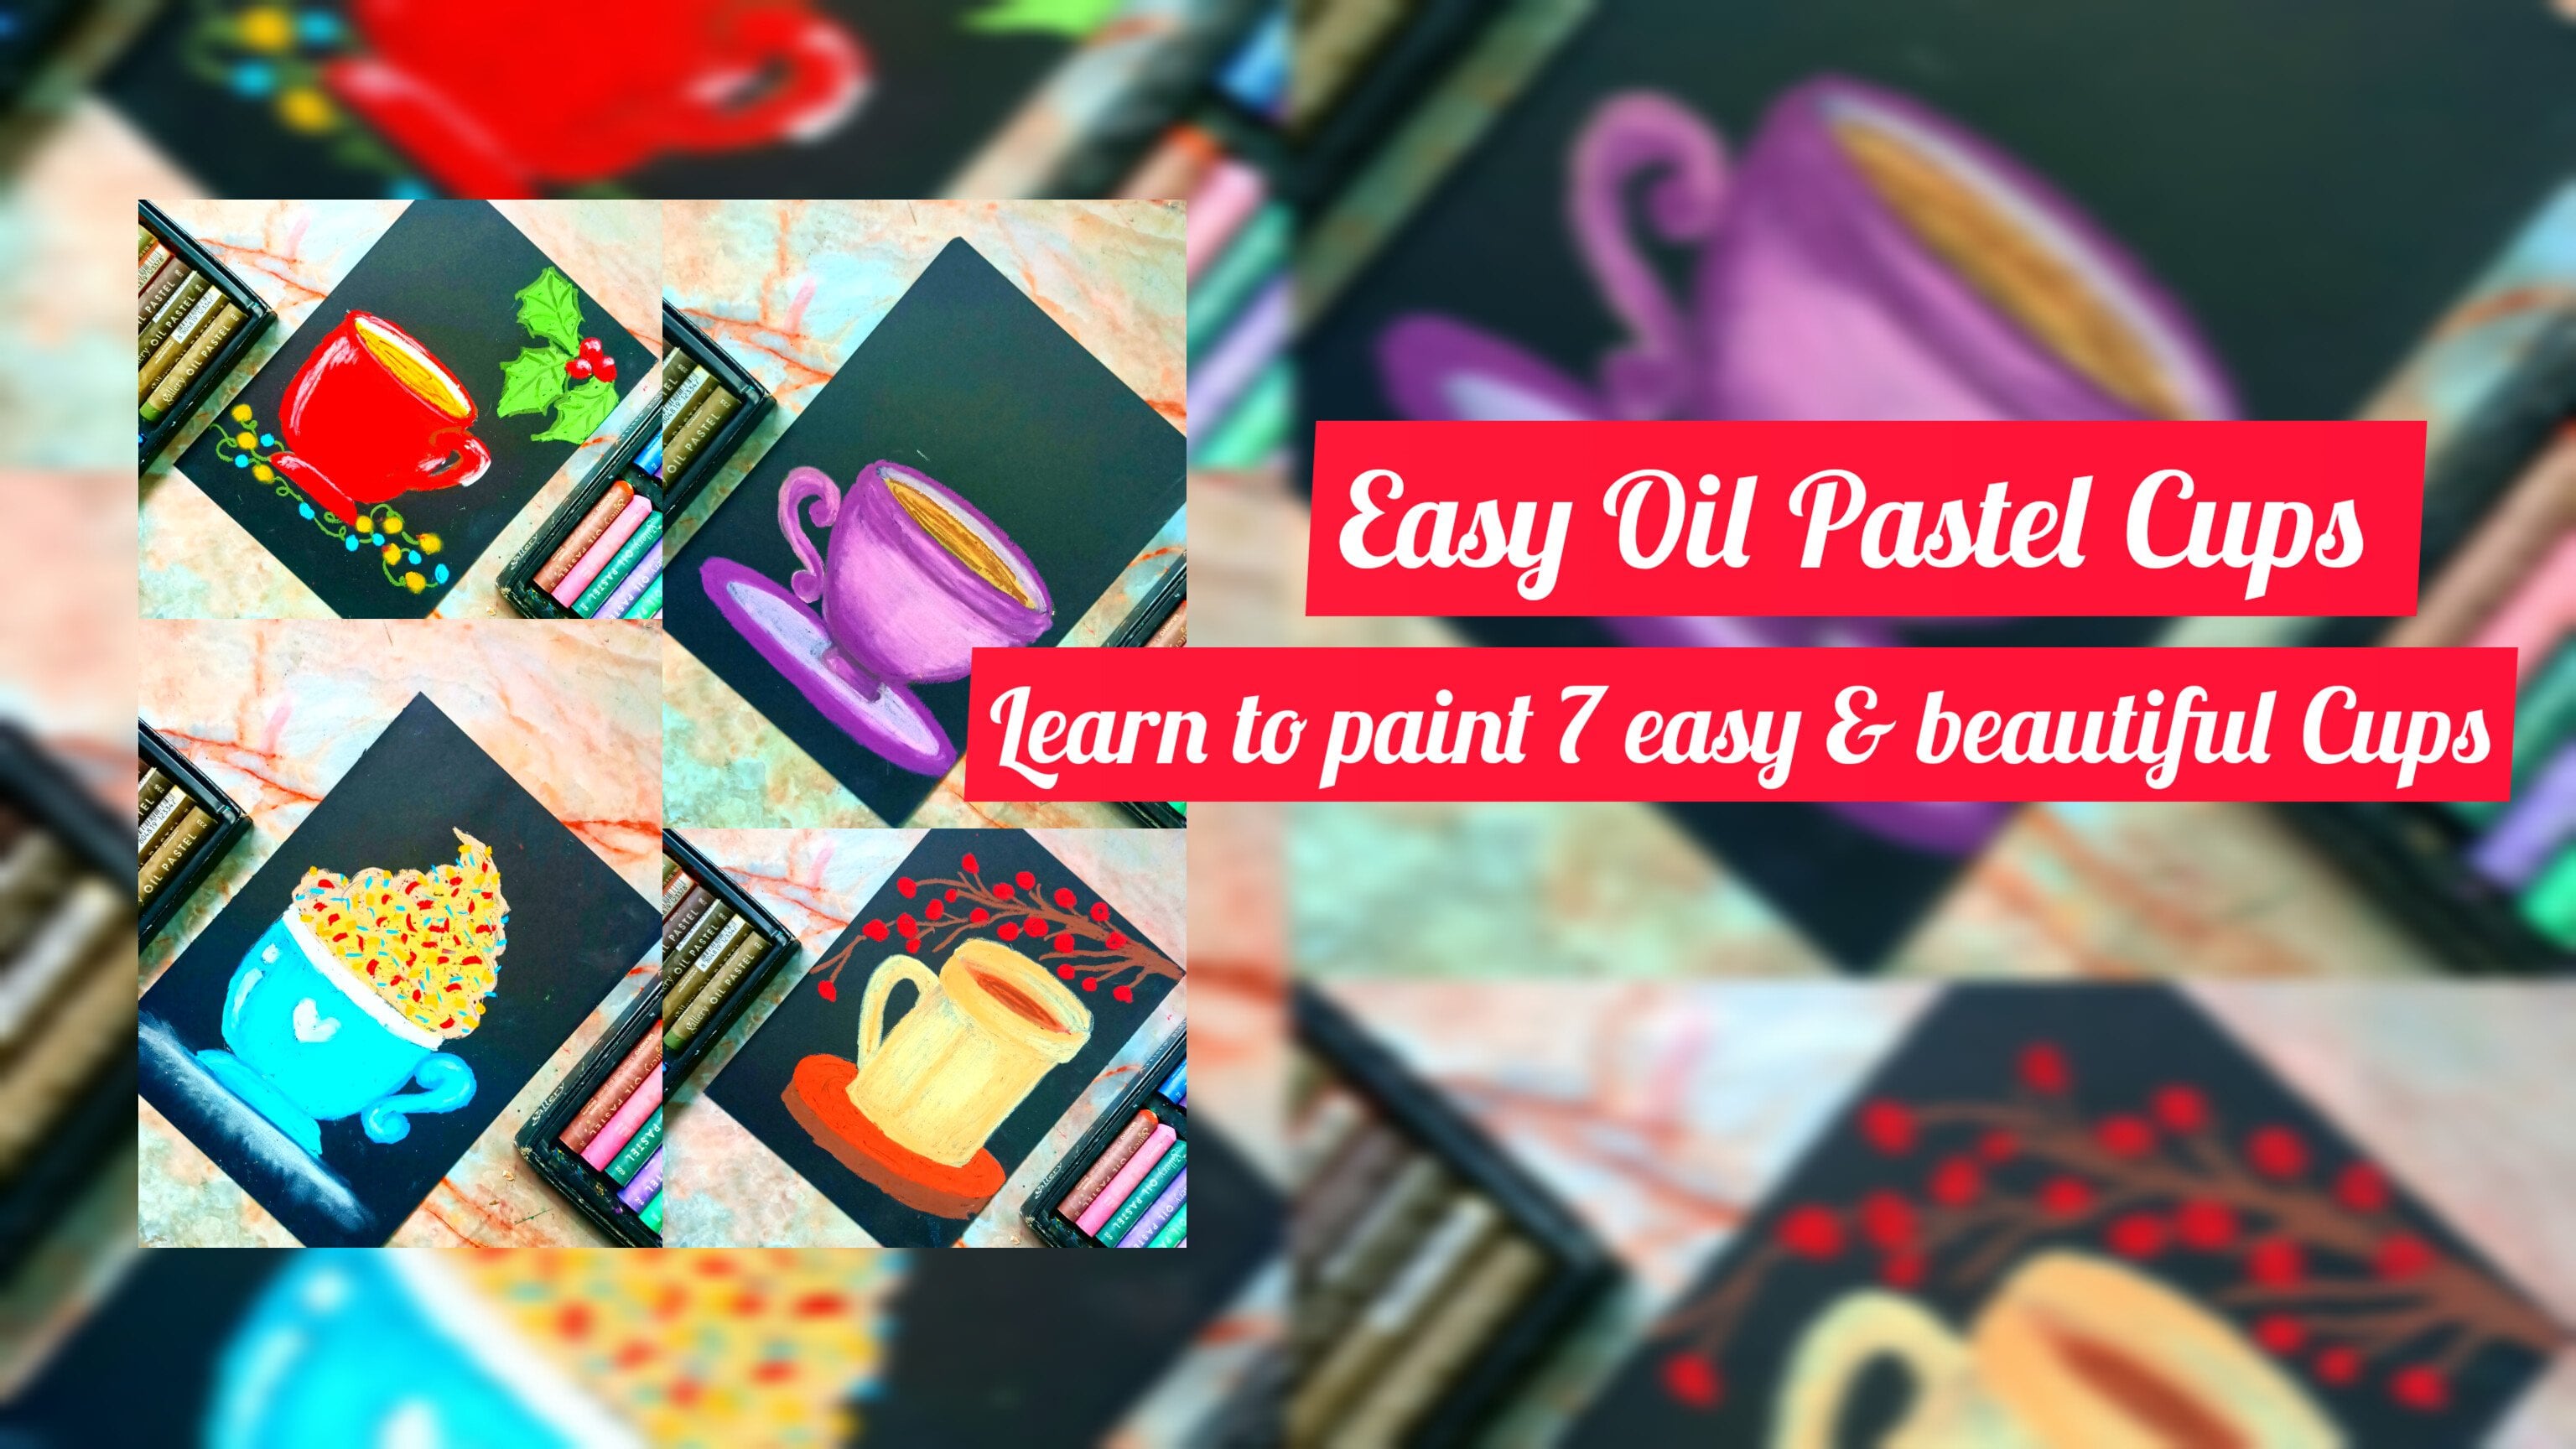
1. Introduction and overview : Welcome to this class on
easy flowers with oil-based. In this class, you
will learn to ignore seven beautiful and easy
oil-based two flowers. We will start with going
through the list of supplies, then some basic techniques for drawing flowers and leaves. After that, we'll be
drawing seven flowers, starting with drawing
a single flower. Then finally we will move to
trying a bunch of flower. Let's paint some flowers.
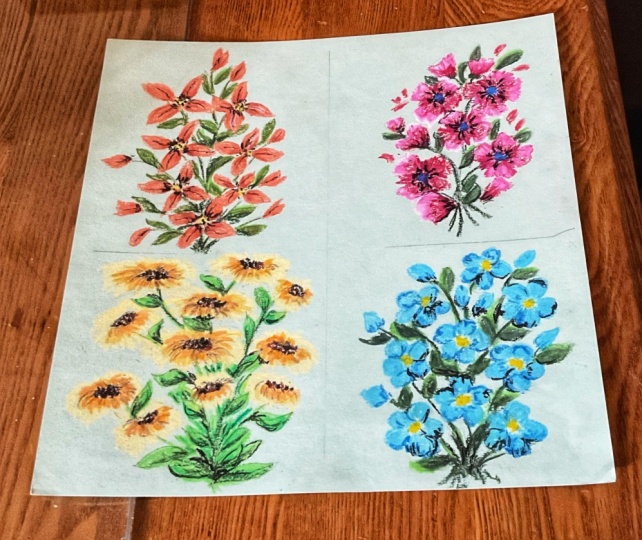
2. Class project: For the class project, you can draw any of the
following plummets.
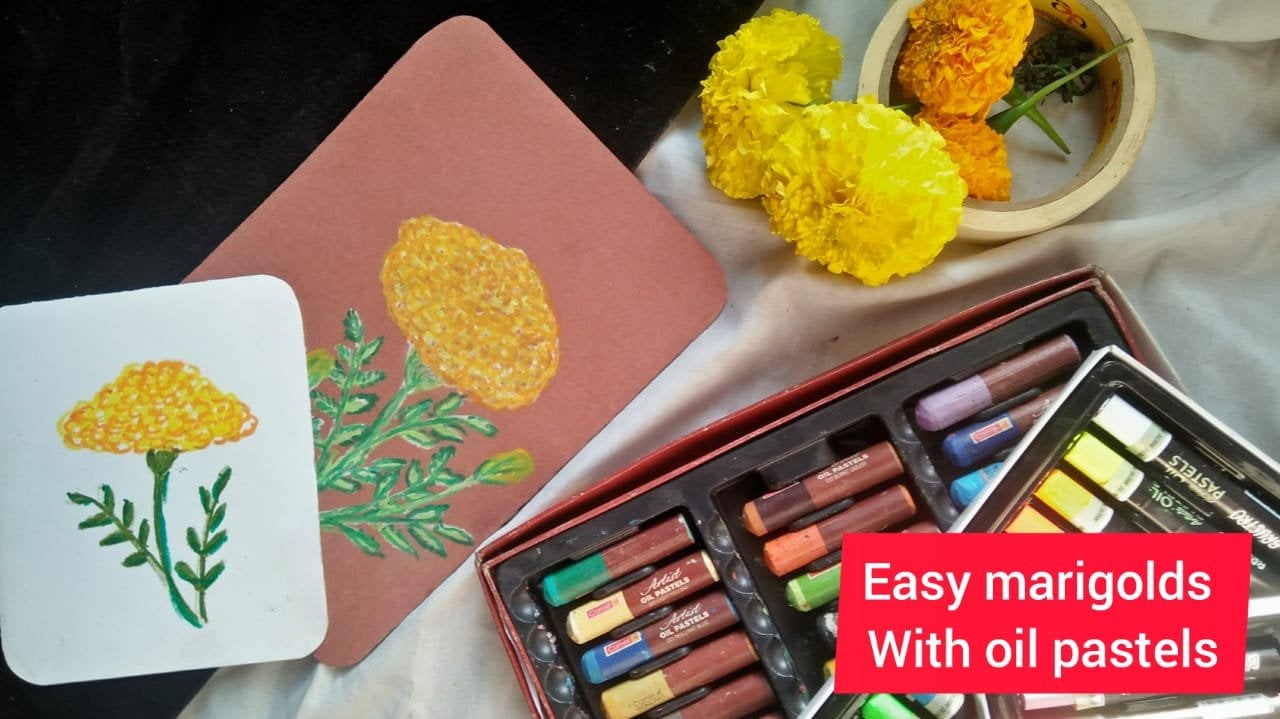
3. Supplies : For this class, you will
require a pencil and an eraser, a cardboard and masking tape. Bristol paper or any paper
up more than 140 DSM-5. They do their work. Good
nips, blending stump. An oil-based us. As watercolors. You will need red,
pink, white, yellow, orange, brown, and blue, black, white and greens.
4. oil pastel techniques: In this section,
how you can draw starting with the flower
and filling in the color on the bottom part
of the flower. For the next flower, I'm using light blue flower
and then filling that blue. And on top of that. And that's what the sunflower, what I'll be using for starting with the sunflower seeds. And that's what I'm
using one Dumbo. Adding black on top of the following, the same as if
we're starting with SQL. Then adding a darker
shade of that. I am using light yellow color, being white on top of
that egg and blending it. Asks for the leaves and
stems of the flower. Starting with this
gifting the main stem, and then adding
leaves on top of it. And to add highlight
and contrast are adding another of
green on top of it. In this case, I'm
using light green, not covering the whole abortion, but adding the light green on the lower portion
of the leaves. For the second example, I'm using a darker
shade of green. Starting with executing the
stem, then adding leaves. I'm using olive green on
top of the darker green, not covering the whole person. But in this case, I'm using a lighter shade of green
leaves and the stems. I'll be using the same
techniques for drawing flowers.
5. Red flowers demonstration : Before this date correct flow, but I'm just typing with a lighter while living in the space between
them and a speech. After that, I'll be adding
small flower and a small bug. In between this piece I left. That's what the stems and
the leaves of the flower. I'm starting with the
sap green stems and the leaves. The leaves. And now I'm using light green adding light. And now painting is complete.
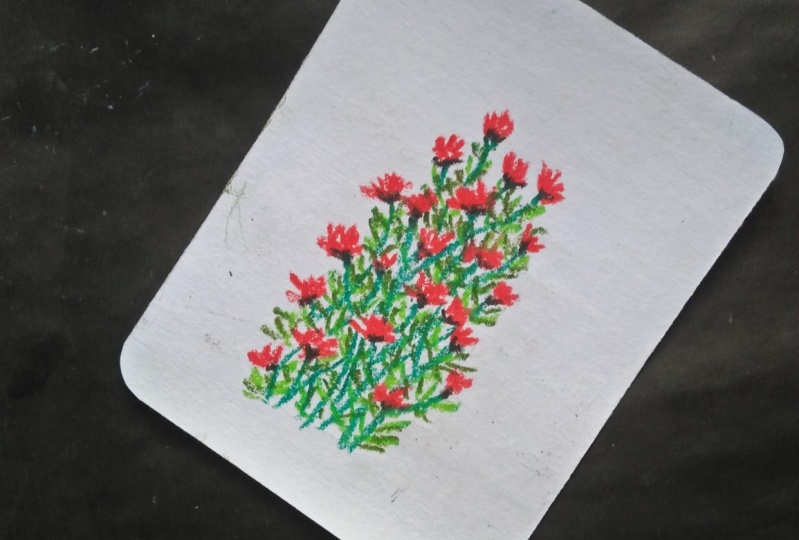
6. Red flowers : For this flower, I'll be
using repaid the scarlet eye, primary blue, sap green, grass, green and white. As I absorbed, only labeled start with drawing the
petals of the flower after deck using Ramadan due to add the same
part of the flower. And finally with the
sapling and olive green, I'll be drawing the stems
and the leaves or flowers. And for the finite digests,
I'll be adding white. Now videos recorded in real time so you can
draw along with me. It's time to eat. Great. Okay. Hi, class. We live in and we can same that. Hi.
7. White flowers demonstration : For this White
Black Sea took me. I'm starting with the
sketching the shape of the flower. In this case. Now the center of the flower. And adding right on top of the
blue color and blending it for the leaves and the stems
of the flowers I'm using. And for the highlights, I'll be using light green. Now, the white
flower is complete.
8. White flowers : Put this white flowers. I'll be following the same
steps as I absorbed at islets. Start with drawing the
flower to be applied. And then I'll add, after that, I'll be adding blue flower. And on top of that I'll
be applying white. And finally for the leaves and the stem cell
enough love words, I'll be using greens
that we deal it didn't. So you can follow along. It's time to eat. Three. Okay. Hi. Okay. Three. And so on. Hello. The last three months. Hi.
9. Sunflower demonstration 1: Put sunflower, I am a stacking with the lighter
stained up yellow, defining the outer scope of the sunflower and living in
some space in the middle. You can draw a sketch
with a pencil, but here I am radically
Skyping with a color. For the middle portion, I'll be using a darker
stained up here. Look, you could use orange
or some other color, darker value, following the same stapler,
the second flower. And now what a very
small sunflower. And now again, leaving some space in the
middle of the flower. Same goes for the second. And now I'm defining the
outer edges of the sunflower. I'll be blending this
white with yellow. Now put our seats, I'm using black, but don't
worry, you do the work. And now for the stems
and the leaves, starting with drawing
the main stem, and then I'll be adding
leaves on top of it. Embedding the sequence.
I just want the leaf. And now I am filling
in the color. I'll be using two different
colors of greens. I'll be drawing the main stem
and filling in the leaves. And with the second color, green, I'll be adding highlight
or pop off the leaves. And now using and I
didn't get on top of the white flower is complete.
10. Sunflower 1: For the sunflowers,
I'll be using the same techniques as
I have soon at the ILS, start with light yellow to define the shape
of the subclavian, then I'll be using R in to define the inner ages
of the sunflower. On top of that orange, I'll be adding white, put the center of the flower. I'll be using burnt
umber and for defining the outer
edge of the flower, I'll be using white to add
seeds. I'll be using black. And finally, with olive
green and light green, I'll be adding
leaves and stems to the flowers that we do it in real time so you
can follow along. Hi, hello. And so on. Okay. Hi. Hi, class. Hi. Okay. Hi. Match. Three times. Hi.
11. Sunflower demonstration 2: For me, but I was
starting with a light. And I am drawing this sunflower. I'll be drawing some
flowers and CTO. Just below that yellow. I'm leaving some
space and then we're adding like the sunflower, adding more yellow on top of the white and blending
it with the light. Pulled the seats. I'm not
adding black abundant, but as the black
paper does double. And asks for the leaves and
the stems of the branches. Using light green to
sketch them in a stem. And then I'm adding
leaves on top of it. And what highlight
I'll be adding the putting on top
of the light green. Now, I would send
flowers is complete.
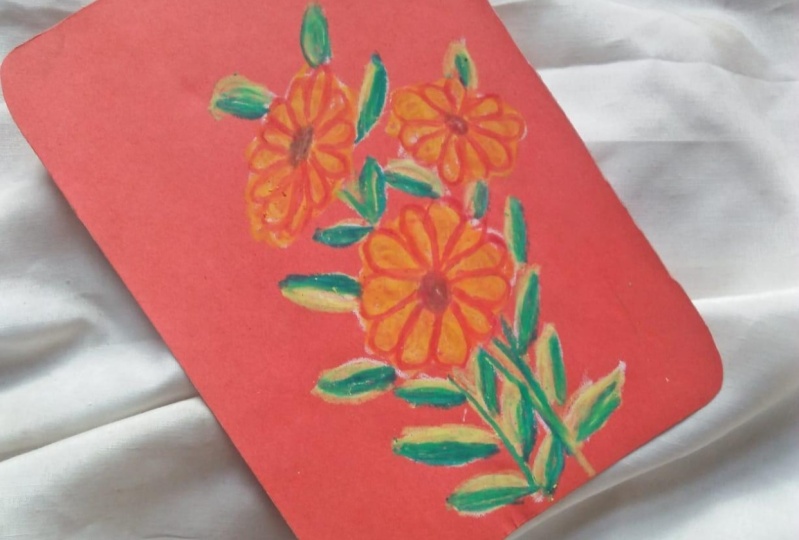
12. Sunflowers 2: For sunflowers are using the same steps that I
have shown earlier. Let's start with drawing
the main yellow. Then I'll be using orange, unfold the center
of the sun flower, I'll be using burnt umber, then using a whiteboard, define the outer edges
of the sunflower. And on top of that,
I'll be using yellow. And for the leaves and
the stems of the flowers, I'll be using yellow
green and light green. It's time to eat. Okay. Okay. Hi. Okay. Great. And so on topic, sentence.
13. Blue flower demonstration : I was starting with
a light blue color. And then I am leaving a space for the center of the flower. I'm using a light, shining light on top of glutamate stem cell of the flower. I'm going in with the sap green. I think leaves, just
to add variation to the leaves and the stems. And now it is complete.
14. Blue flowers : For this blue-colored flower, I'll be using the same
method as I epsilon idea. I'll be starting with defining
the edges of the flower, then filling in the color, adding in yellow for the center. After that, I'll be
applying right on top of W. And finally, I'll
be using sap green and grass green to add
leaves and the stems. It didn't go down so
you can follow along. Hi, incidence rate. Okay. Hi, three. Okay. That was good. Topic sentences. Sentences, right? And so on. Center.
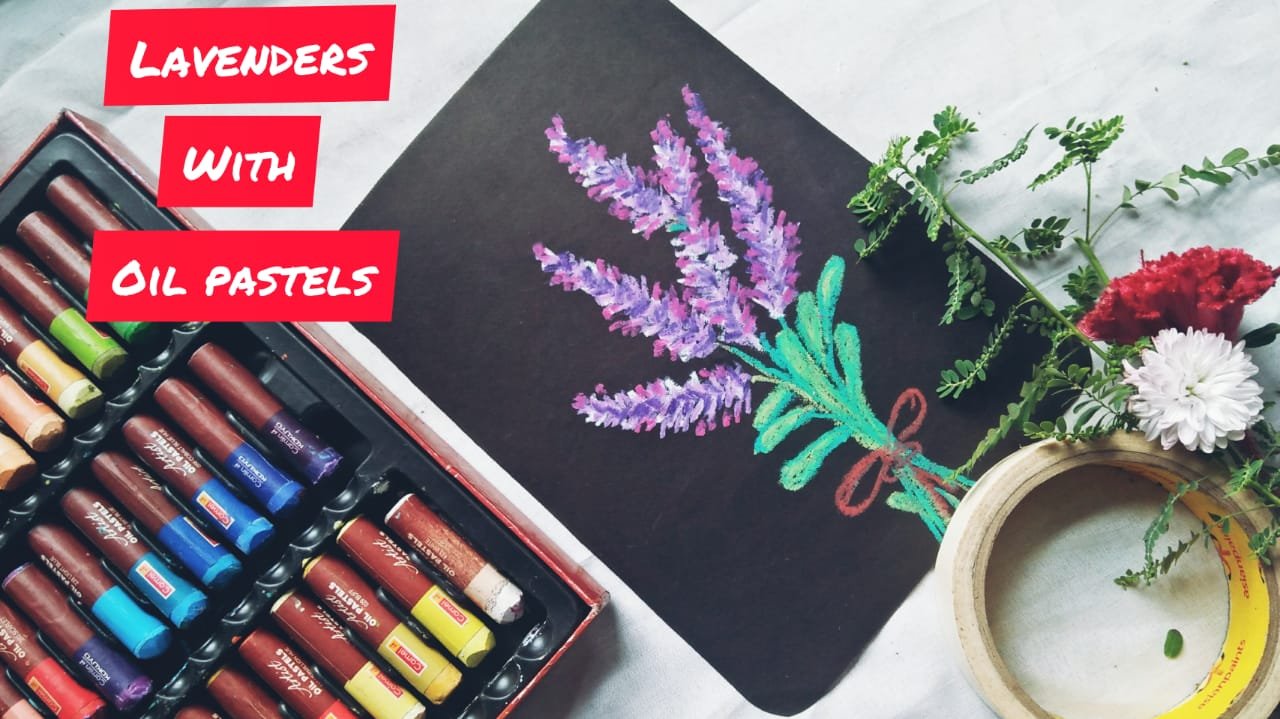
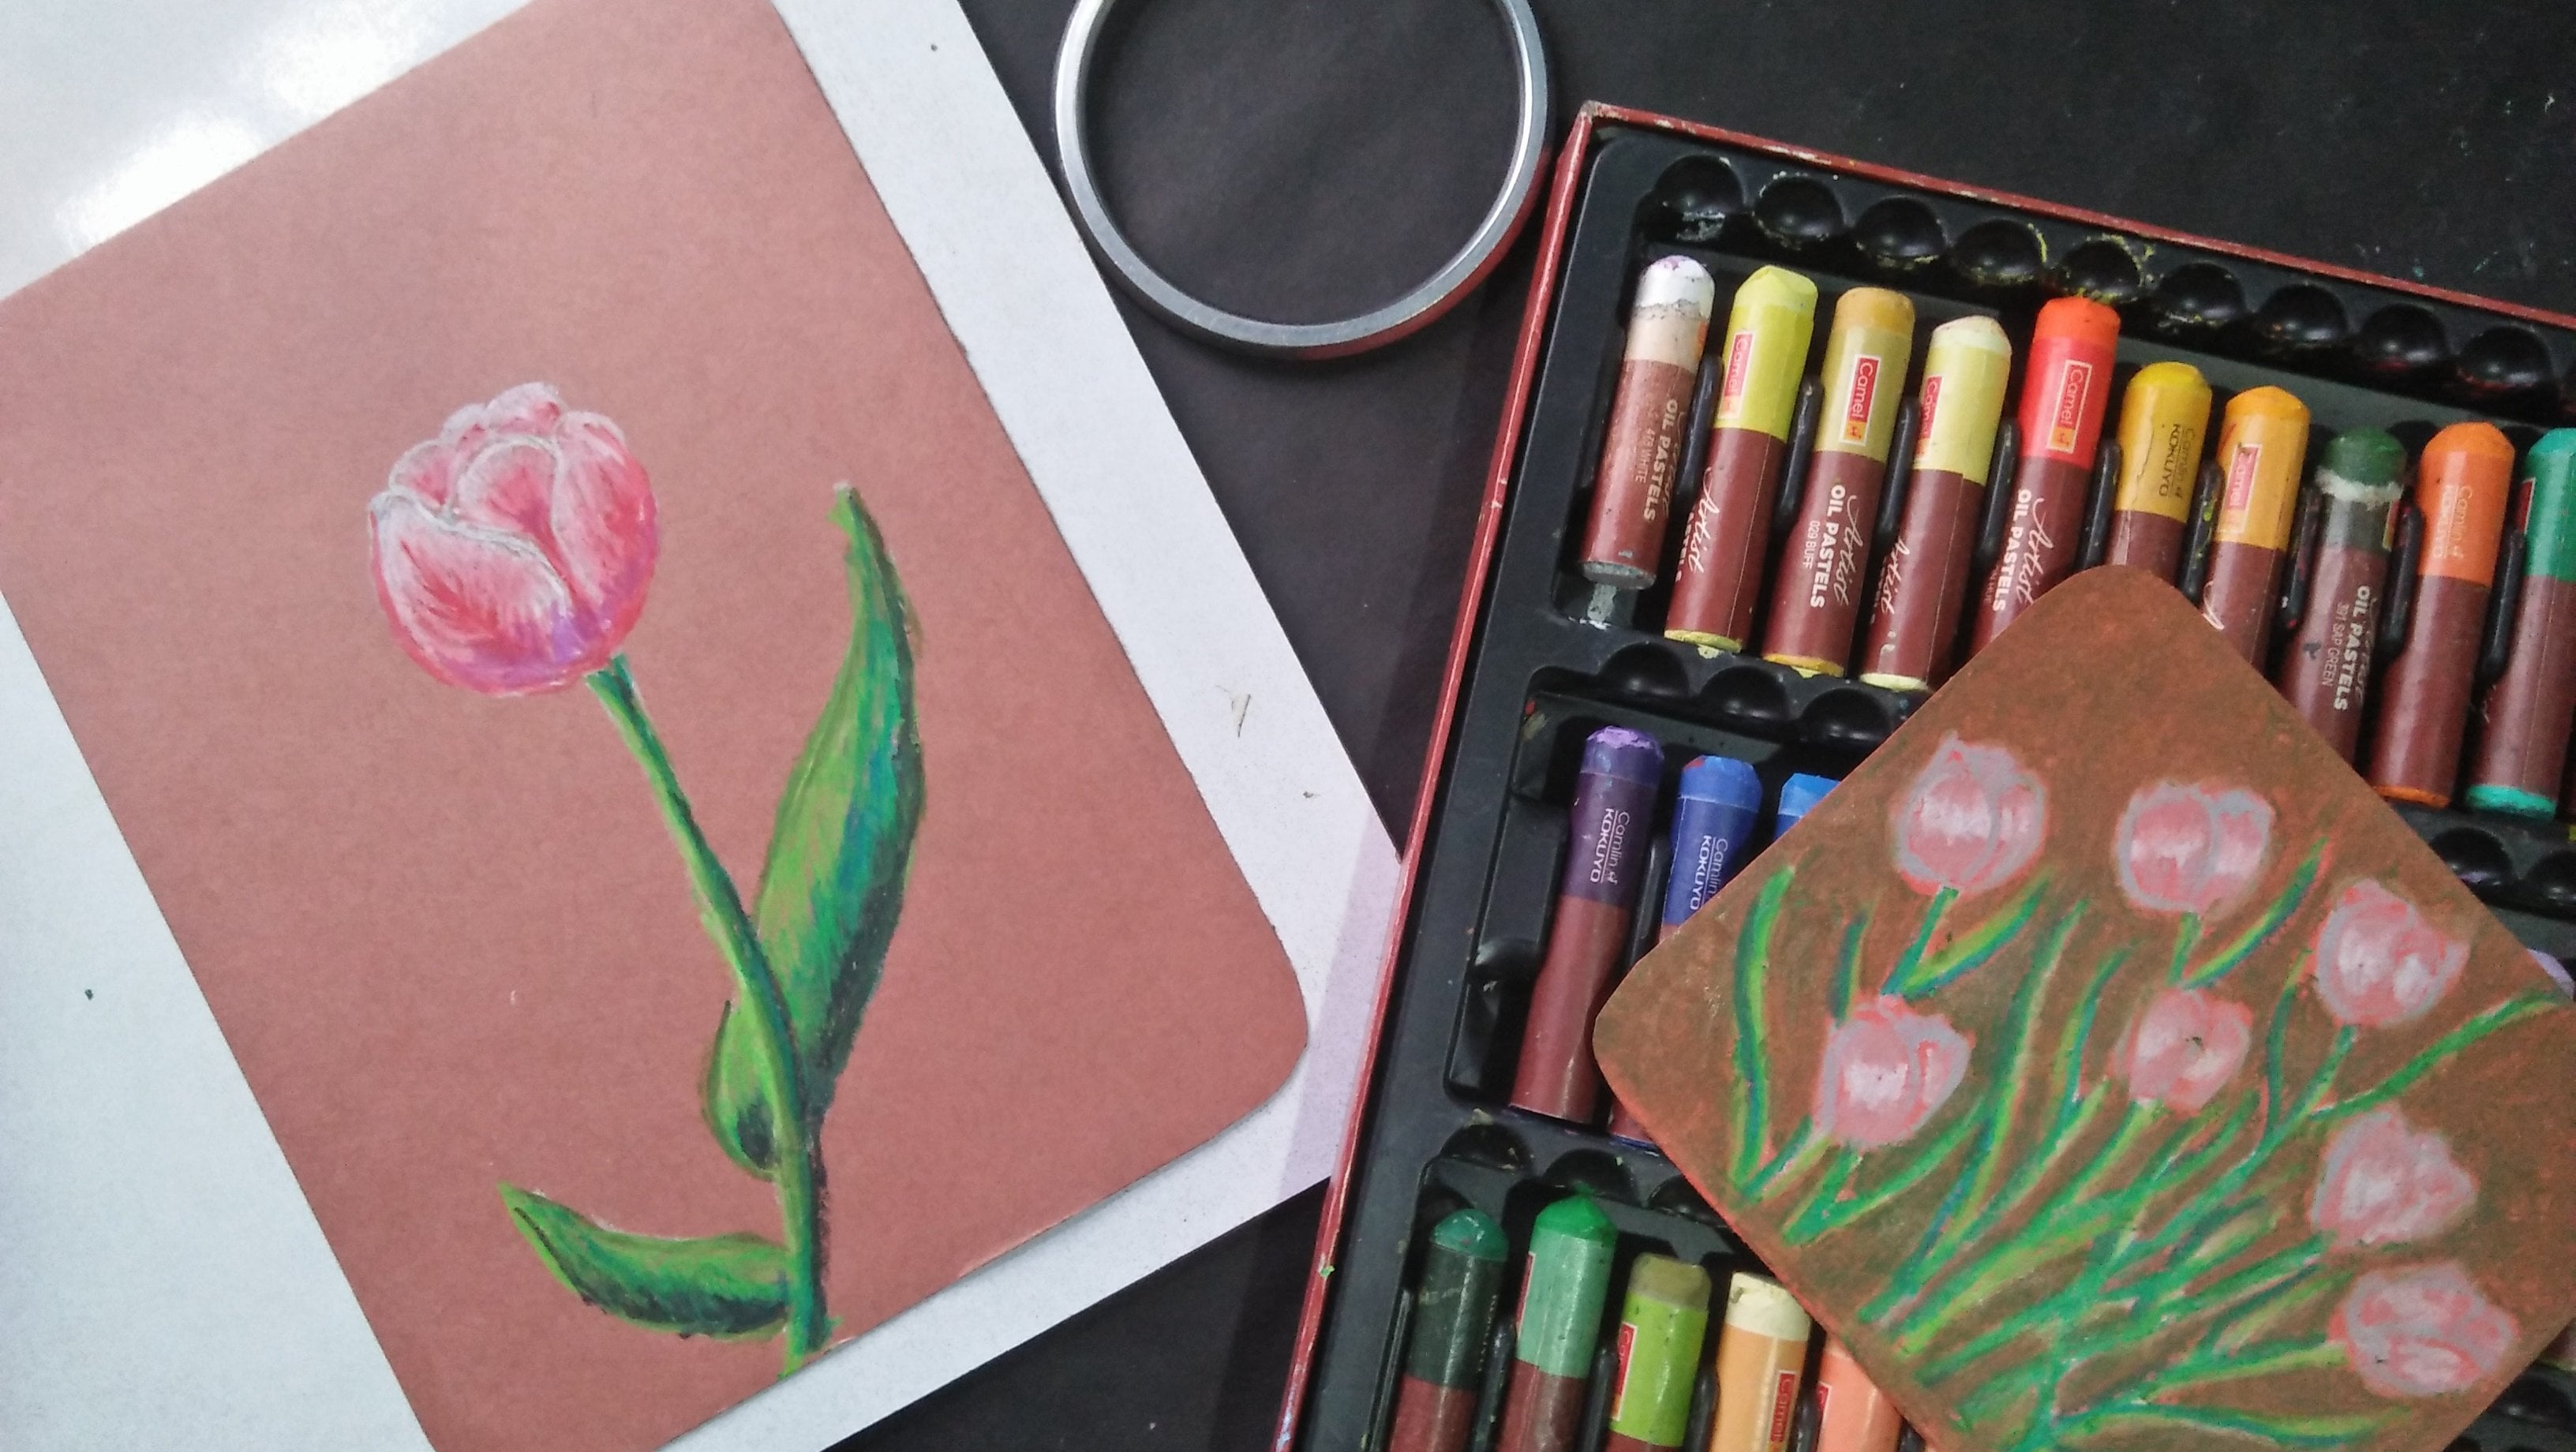
15. Cream colored flowers demonstration : For this green colored flower
on black sheet of paper, I'll be using skin color. Pink might own and write the starting withdrawing
the CBO of the flower, but the skin color, then I'll be adding pink on top of it. And for the bottom, I'll be
adding my own. After that. I'll be using blending
stump to blend the colors. And ask for the leaves and
the stems of the flowers. I'll be using deep
green and olive green. I am mostly the upper
part of the flower. This dark thing with this
getting the minister. And then I'll be adding
leaves on top of it. I'm using deep link color, and after that, I'll be using
olive green on top of it. Green colored flowers
are complete.
16. Cream colored flowers : For this cream colored flower, I'll be using the same steps
that I have shown earlier. I will start with
drawing them into it, but the flower, then
I'll be using pink. And for the bottom
of the flower, I'll be using my room. And for the leaves and
the stems of the flowers, I'll be using deep
green and olive green. And the next part is optional. You could use white
near the edges of the flower and blend
it with the pink. Let me do it in real time
so you can follow along for the class. Great. Okay. Right. Hi, great. And so on. For a second. Hi. This is assistances. Three times. Hi. Second.
17. Pink flowers demonstration : For this flower, I'll
start with this, getting the shape of the flower. I'll be drawing type.
Afternoon. I'll be adding a small bug. After that. I'll be
filling in the color. If we linked in that color
while leaving some space for the writing center with a violet color on top of the pink color. Now as for the stems
and the leaves, I'm starting with
drawing the steams, but the light green
color in some leaves. I think in more details to
the stems and the leaves. I'm using sap green. Now our painting is complete.
18. Pink flowers : For dumping flowers, I'll be
following the same steps. I'll start with defining
the shape of the flower. Then I will fill the
color for the center. I'll be using violet and then I'll add being close
near the center. What are blending? I'll be using white. And finally, I'll add stems and leaves with
the sap green and light green lit review it in real time so you
can follow along. Hi. I prefer that we do is the following. Okay. Let's see. So in this instance, okay, so let's delete that. Hi. Throughout the week. Sentences. To make a point. Mm-hm. Hello. Consistency. Consistency is really nice. We're now at a point, right?
19. Conclusion and thank you : Thank you for taking this class. If you have any questions or ask them in the
discussion section. And if you have brought
any of this painting, he's uploaded project
section. Thank you.
 Vishal Munshi