Transcripts
1. 1 introduction: Hi, I'm Emma and a graphic
designer and artist. In this class, we will
learn how to make holder for phone or tablet. It's a very simple project. You can use it for Zoom
meetings, online classes, when watching a movie
or a TV series, looking at the recipe
while cooking, or reading a book
on your Kindle. I also use it a lot
when I draw or paint and I need to look at a
reference photo on my device. We will learn how to make the
whole day out of cardboard. You will also learn
too simple but interesting techniques
for decorating. So that's it for this
short introduction. Let's move on to the
next video and I will talk about the tools that
we'll need for this class.
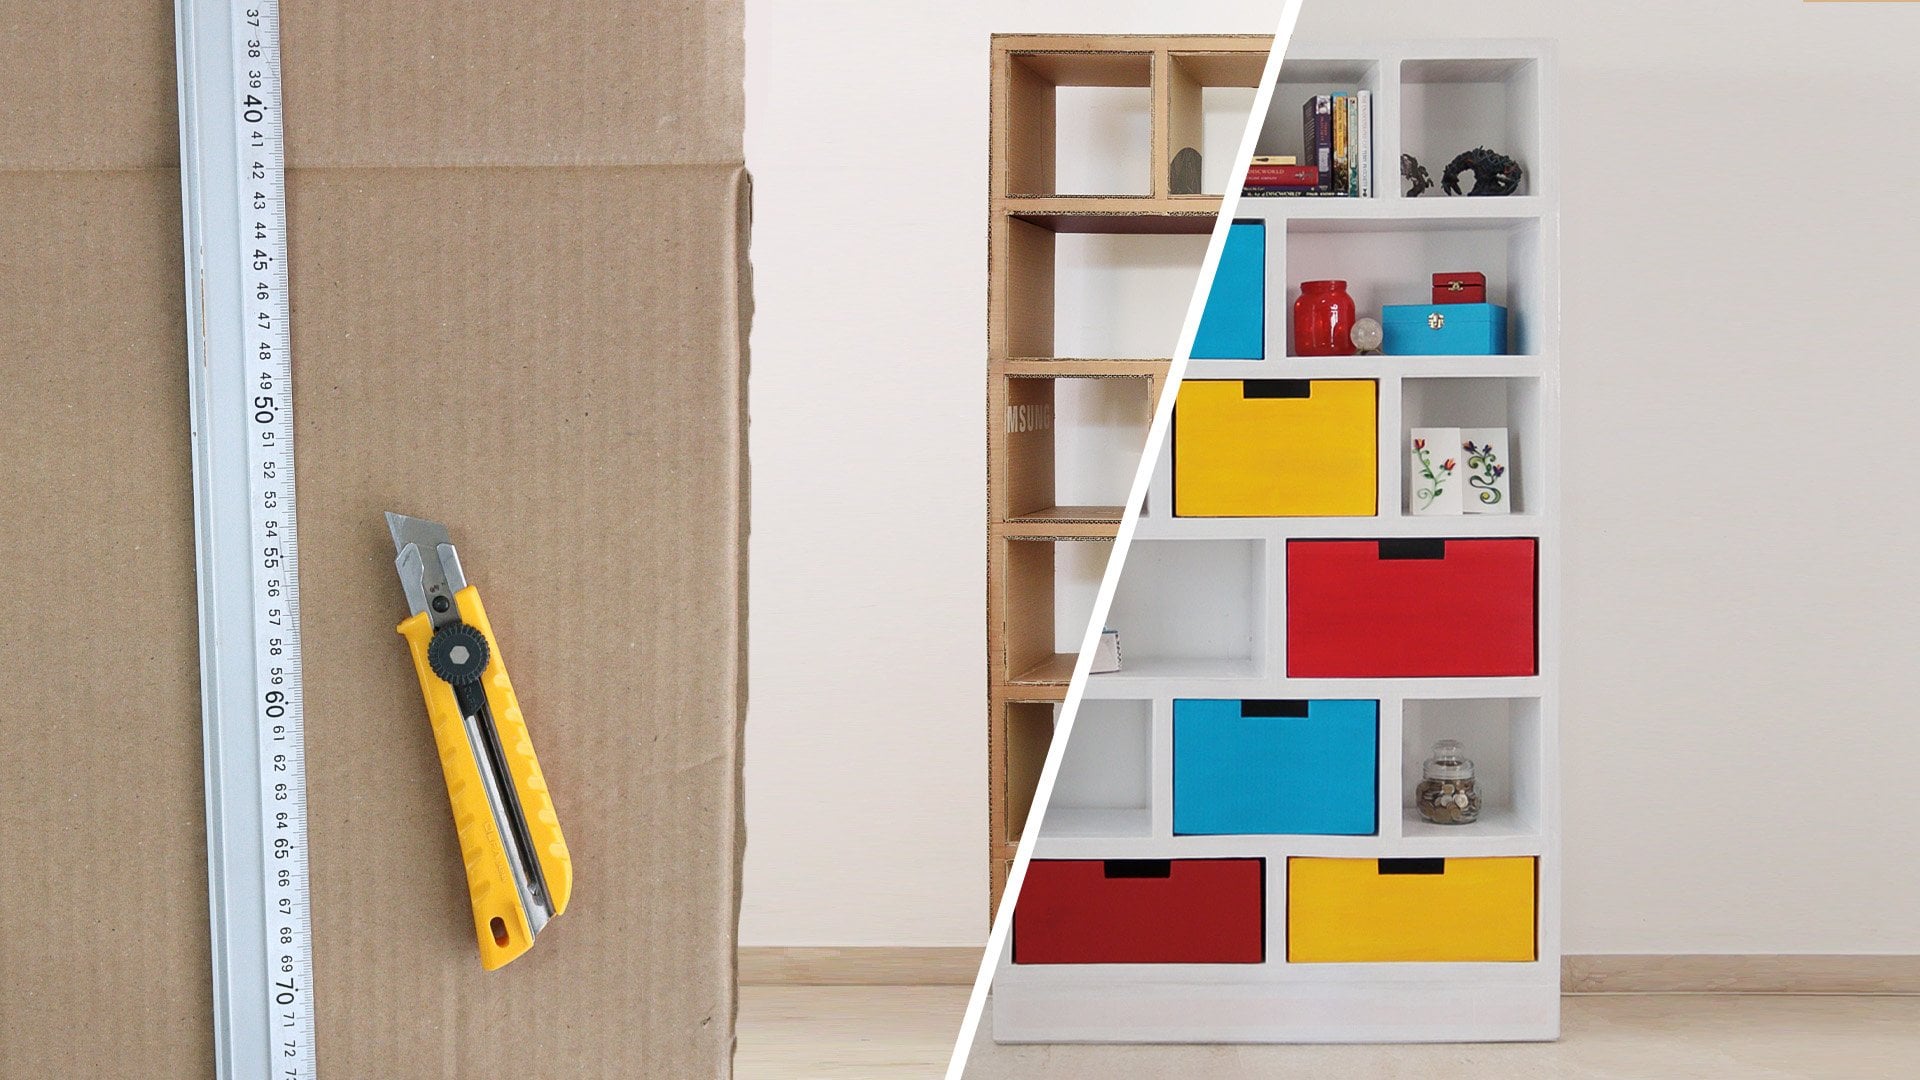
2. The tools: In this video, I will talk about the tools and materials that
we need for this course. We will need double walled
calculated cardboard. You can also use
single-walled cardboard, but we need it to be thick. So just glue two
pieces together. Use PVA glue and spread it evenly all over the
surface of the Kabul. After that, press the
two pieces together and put something heavy on top
until it dries completely. We need to good cutting knife. There are all kinds of cutting
knives that you can use. High, highly recommend using a broad one that
has a school look. While we walk, the
blade gets a bland. So we have to renew it. We can break the blade. Now we have a new
shop played again. So we also need a snap of
blades and the player, we need a ruler for making straight lines
and cutting them. We also need a cutting mat. It is a self-healing cutting
on it will not damage it. The reasons we use
cutting maps are one, it protects the table walking
surface, and the two, it protects the blade because the tracking mark
is relatively soft, the blade can last longer. If you don't want to buy
cutting mat at this point, you can simply use another cardboard underneath
to protect your table. The glue that we will use is the simple PVA glue
or school glue. We will also need the
masking tape because it can be easily removed without
damaging the cardboard. The last thing we need is
water activated paper tape. The glue gets activated
when it gets wet. But if you don't
want to buy this right now or you
can't find it now. You can simply use strips of
plain paper with PVA glue. For the correction. We will need some acrylic paints in
whatever color you want, and some napkins with
interesting prints on them. And that's it.
Let's get to work.
3. How to cut the cardboard safely: Before we start to cut, we have to talk about
some safety rules. Even if you have experienced
with cutting knives, please pay attention to
this very important rules. Maintain a sharp knife so you don't have to
struggle with cutting. Sharp knife is
safer. When you cut. Stand. Don't sit down. You don't have enough
control on the blade. When you sit, the
cardboard is very thick. Don't try to cut it in one. Go. Stand in front of the
ruler along the line. When you start to cut, don't just start cutting because the knife may get out of
line and cut your finger. So hold the ruler firmly. Feel the ruler with the blade. When you feel it, just then start to cut. Don't use a lot of false. Again, feel the ruler
and start to cut. When we made this, we can put the ruler side, hold the cardboard firmly, the hand in a respect
and respectful distance. Respect the knife and
don't get too confident. Repeat these steps
every time you cut cardboard is if it's
your first time. Even if you are
very experienced. To find a straight line, we use the natural
lines of the cardboard. Sometimes it's very easy to see the lines in
cardboard like this. The lines are very obvious. But when we use
smooth cardboard, sometimes it's harder
to see the lines. If you don't see them. Hold the cargo hold
in all kinds of angles to the light
until you see the lines. Lock the first
point on the line. We lack the next point. And then we can base all our
lines on that first line.
4. Cutting the parts: I find the first line using the natural lines
of the cardboard. At this height of the camera, it's hard to see the line, but I see it when I cut it. I put the ruler right
next to the line. Hold it firmly in one hand. I'm right handed, so I hold
the ruler with my left eye, connect the knife to the ruler. And only then I start to cut. It's very important to attach first the
knife to the ruler. Really feel the ruler with
the knife inserted to the cardboard and only then start to cart when
it's safe inside. I don't try to cut it
through in one go. I do several cuts. The next step is to
cut the rectangle. The width is 15 cm. I measure 15 cm at one end. And again, somewhere
along the line. I mark the line with the pen. Because if I cat and
the ruler will move, then I could place it again and continue to cut from
the same place. All we need is one rectangle, at least 63 cm long. Now cut the first
piece, 12 cm high. This rectangle is 22 cm high, and the third one is 17 cm. And now I will cut three
now pieces 1 cm wide. Again, I use the grid, but you can measure
1 cm with a ruler. I will lead one more rectangle. That one would be
the little shelf. The phone or tablet, 3 cm wide, support
the little shelf. We will need two triangles
with a 90-degree angle. The sides next to the right
angle on one side is 6 cm. The second is 3 cm. Mark the diagonal
line. And Cathy. The next video, we will
connect all the parts.
5. Assembling: In this video, we will
assemble the parts, lay down the three
large parts like that, with the backside facing up. Put the short one in the middle. To attach them. You can use paper tape or just plain paper. I cut the strip of
paper about 5 cm wide and brush some
PVA glue on evenly. I placed two of the
paths together, make sure they are aligned and hold them in
place with the paper. A smooth it to get rid
of all the wrinkles. It's important that the
glue will be smeared all over the piece of
paper from edge to edge. I use a piece of cardboard, but you can use
brush if you want. Just remember to rinse
it through when you're done so the glue
won't ruin the brush. Now I turn it to the right side. On this side that will attach
them a bit differently. So the parts could bend event two of the paths like that and attach them this way. The paper on one side, small date, make a sharp corner. Smooth the spine. And now on the other side, and smooth all the wrinkles. Now the two parts
are glued together, but they can still move. I do the same thing
with the third power. Now we have one long rectangle. I flip it again to the backside. I will attach the
three novels traps. I glue the first
right on the edge. I glue the second one next week with a gap of 1.5 centimeter. And the third one
in the same way with the gap of
one-and-a-half centimeters. And I will let that dry. After it's dry, I flip it to
the front. On the long path. The one that is 22
centimeter high. I measure six centimeter from the base. And the marker line. The little shape, the path
that is three centimeter wide and blue that
just above that line. To support the shelf, I
glue the two triangles. I spread glue on the edge of the sites that are three
centimeter and six centimeter. The tools that are next
to the right angle. The side of the six
centimeter is on the wall and he's
reaching to the base. And the sides of the
three centimeter is supporting the shelf. I use a bit of masking tape
to hold it in place for now. I straighten everything
before I let it dry. Now that it's dry, I remove the masking tape, and basically it's done. Now I will demonstrate another method this time and we'll use duct tape
instead of paper and glue. It's important to fasten
the dark thick well, so it will not feel off. And I glue all the other
pieces as I've done before. First, the three
steps on the back and then the shelf and the
supports on the front. Now the standards ready
in that can use it. But I want it to be pretty. So in the next videos, I will show two ways
to decorate the stand.
6. Prepare for paint: Now my will prepare the
standard for painting. This step gives a final
finished with the product. I use a Gantt paper tape. It's the ideal option. But you can also use simple
paper with PVA glue. Instead. I measure and
cut the piece I need. Wipe the glue side with water. I like to use a sponge for that. I place it and push
with my fingers the smoothie and make
it stick better. First the center than the sides. In the corners. I push it with my fingernail
to get it into the corner. And I will do that on all
the corners and joins in my other course on Skillshare about how to make
furniture from cardboard. I use that paper a lot
to give the furniture I clean finish and to make all
the connections stronger. Gummed paper tape
is very strong. It's glow is met,
especially for cardboard. When you cover now
spaces like these steps. It's important that the paper
we'll get into the corners. So use your fingernail
or other objects to get it into the corner. So the corners will be straight
and sharp and not round. The phaco will be attached
firmly to the cardboard. The next videos, I
will pay the stand.
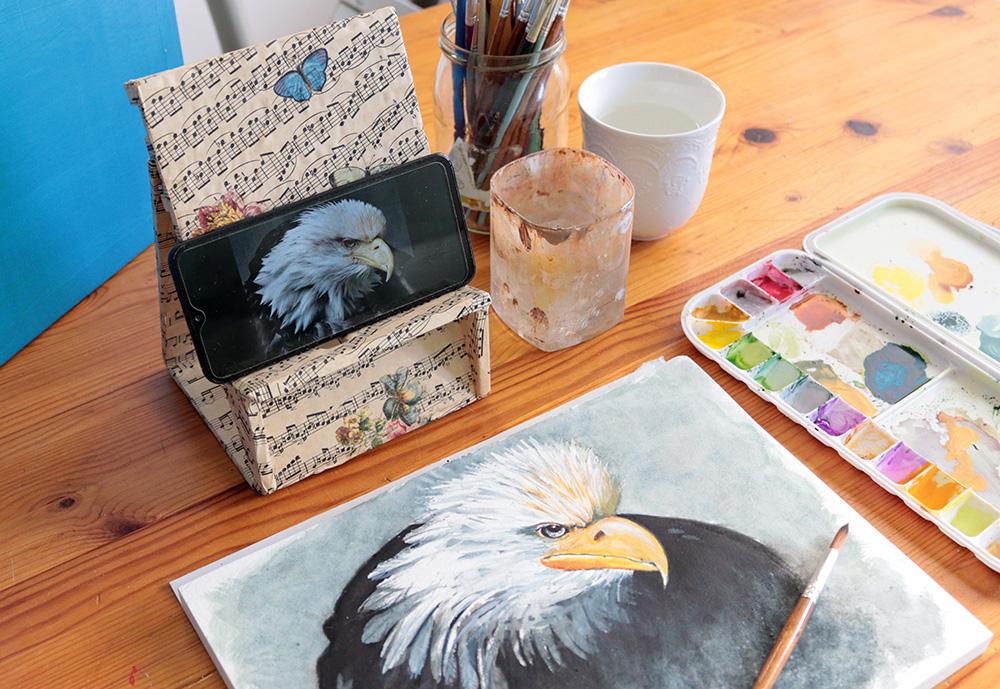
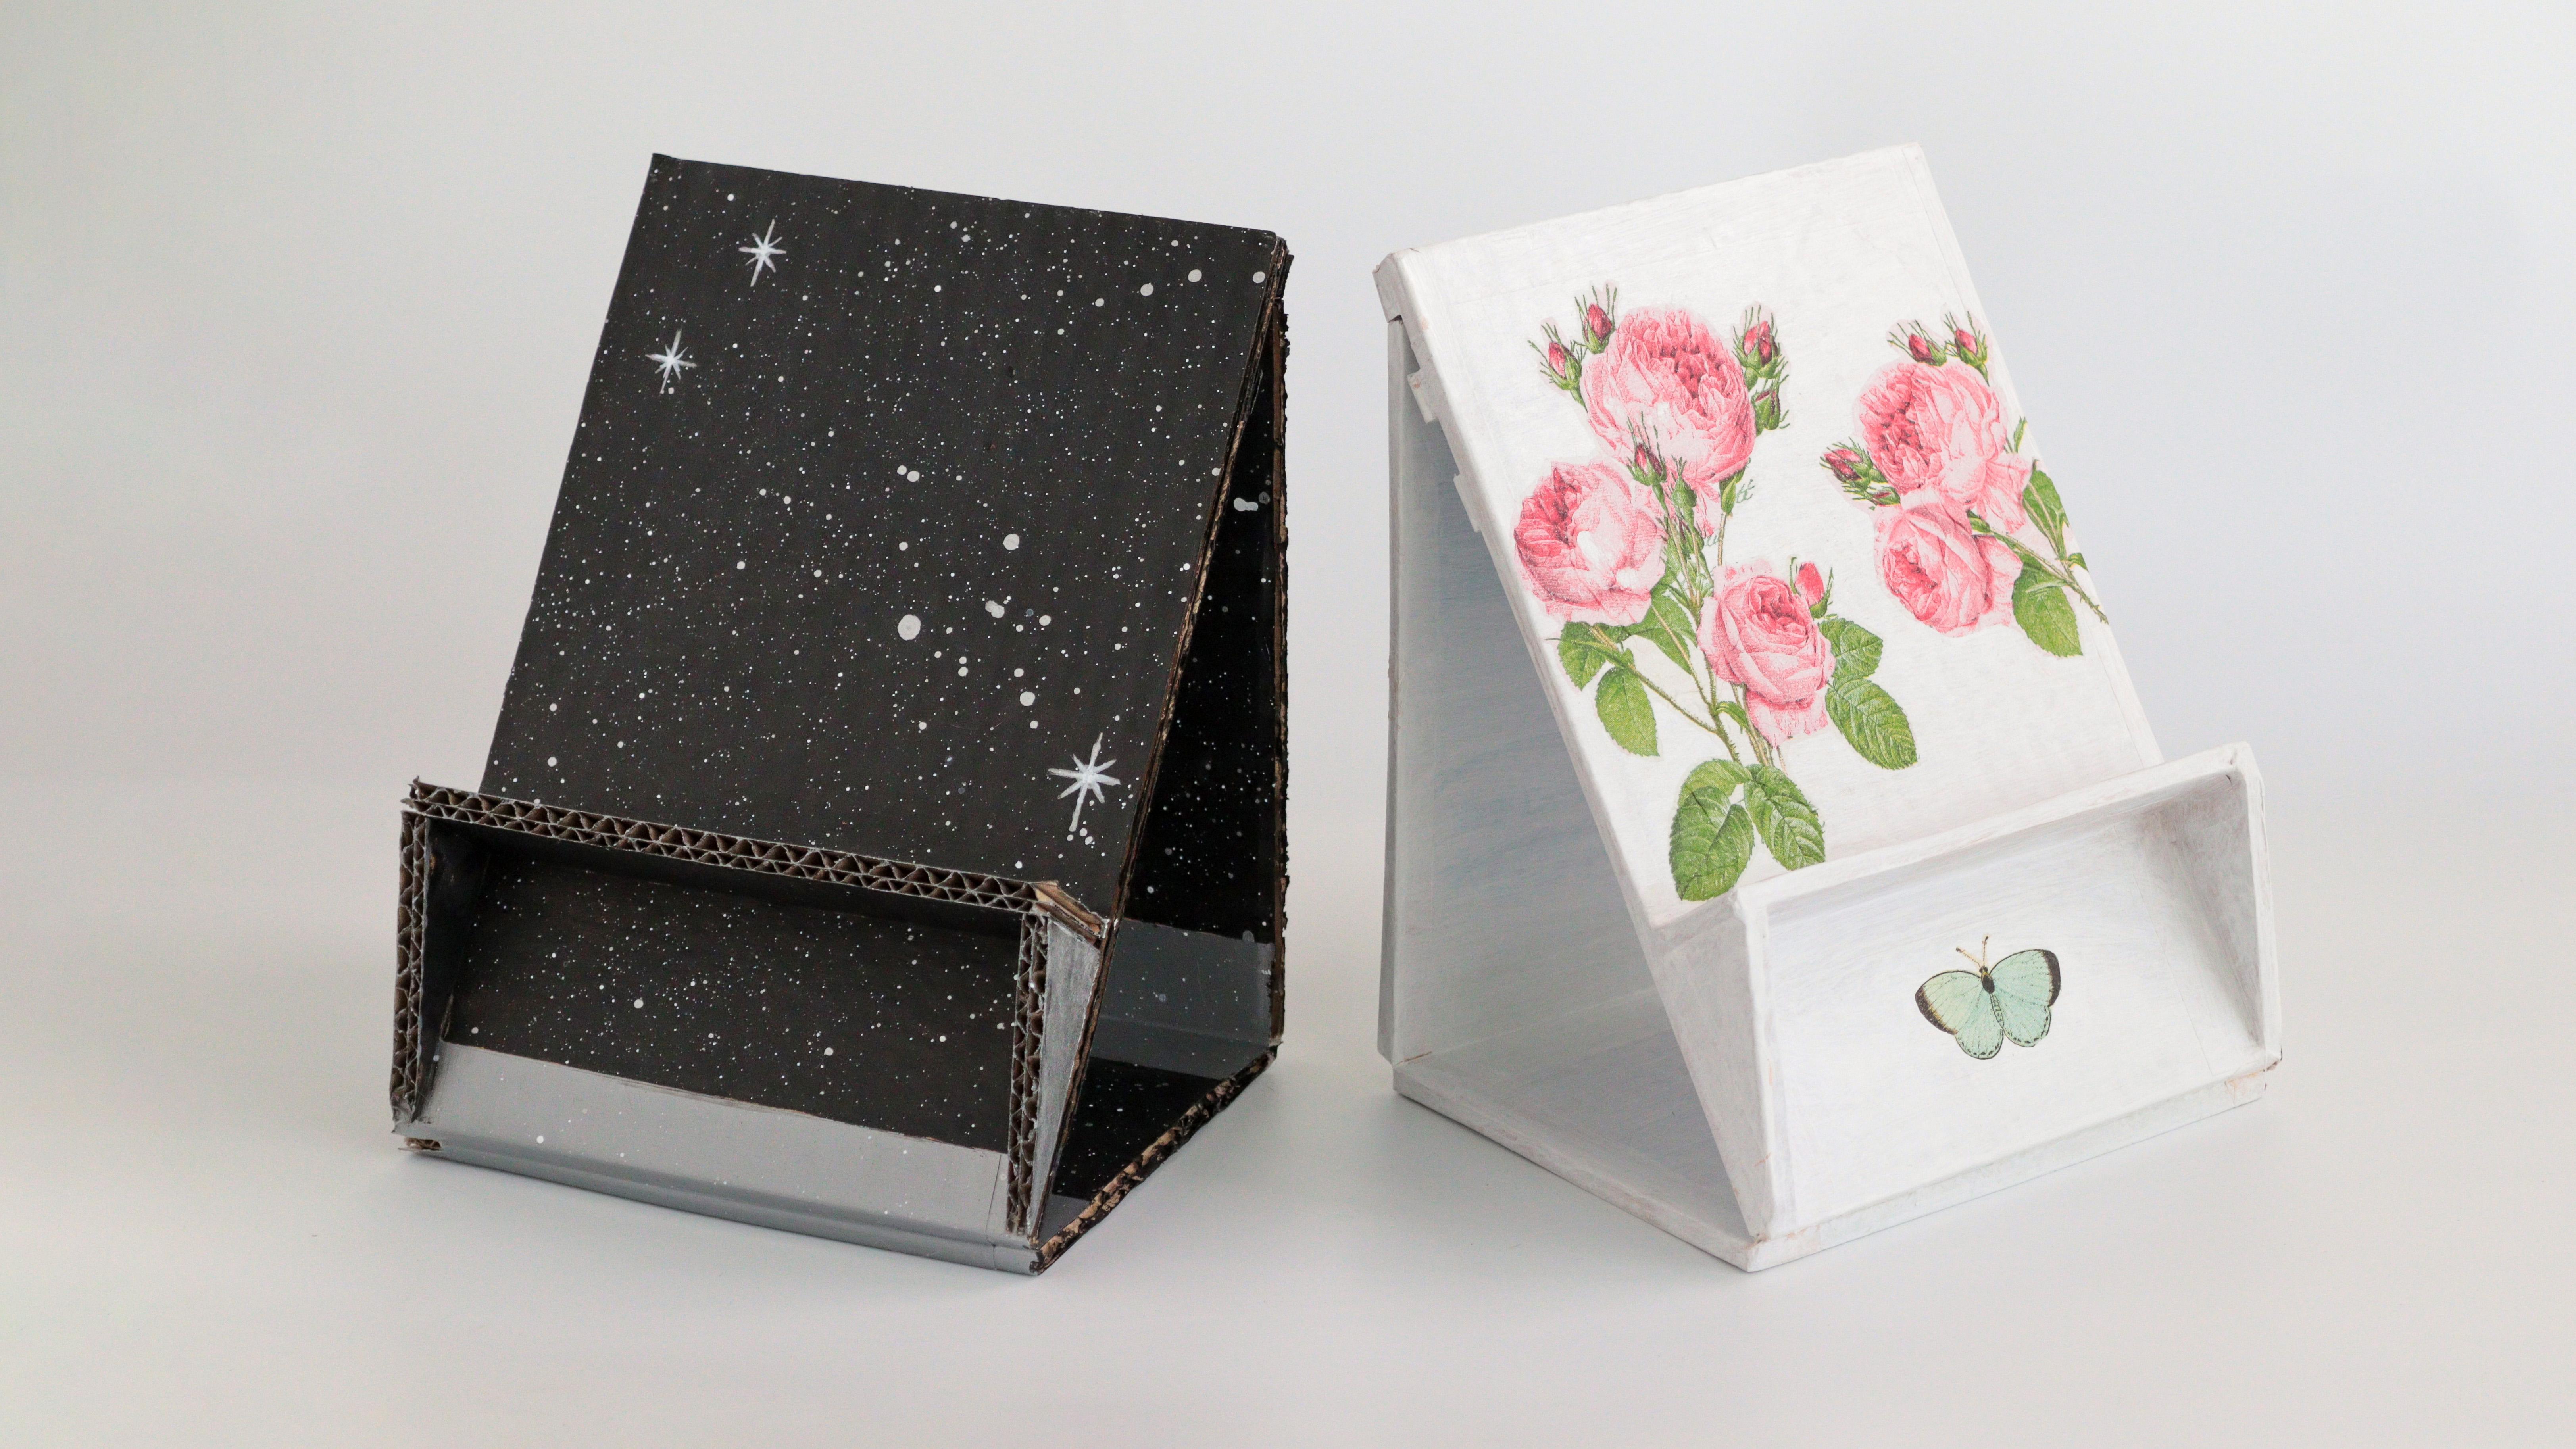
7. Decorating I - Printed Napkin: In this video, I will
show one method of decorating using paint
and the paper napkin. Because I want to use
a printed napkin. I start by painting the
stand with a light color. In this case, I chose why. But it can be light blue, green, light green, yellow. If I will paint with dark color, it will be hard to see
the print of the napkin. After I painted one
side, I like to eat, to dry and then flip it and
paint on the other side too. To glue the napkin,
you can use mod podge, but you can also use
simple PVA glue. I put some glue in a small container and I
will use a soft brush. If the brushes, how'd it will likely tell the gentle napkin. Use soft one. Shows a napkin that has an interesting
print that you like. I like that one. I plan to design
and what parts I need to start cutting
the parts with scissors. I cut close to the print method, don't have to be very
accurate because all the white areas of the
napkin will be transparent. First, I arrange the parts and decide on the
design that they want. But before I glue that, I need to separate the print
layer from the other two. The napkin has three layers. The first layer
comes off easily. Now although it looks like there are no more
layers to remove, there is always 1 mol. I just need to find it. I find the layer and very
carefully separate them. The layers are very thin. So doing Genki, I put the roads in
place and they use the soft brush with some
glue to flatten it. When I put glue on the
front side of the rose, the glue gets soaked in the design and
attach it in place. And it also serves as
a protective layer. I smooth out the wrinkles always from the center
towards the outside. If it gets very wrinkly or speak somewhere,
it shouldn't be. Then just build the napkin
off and cut a new piece. I put the little rose on
the backside as well. And the little butterfly here. And this one is ready. In the next video, I will show another method of decorating.
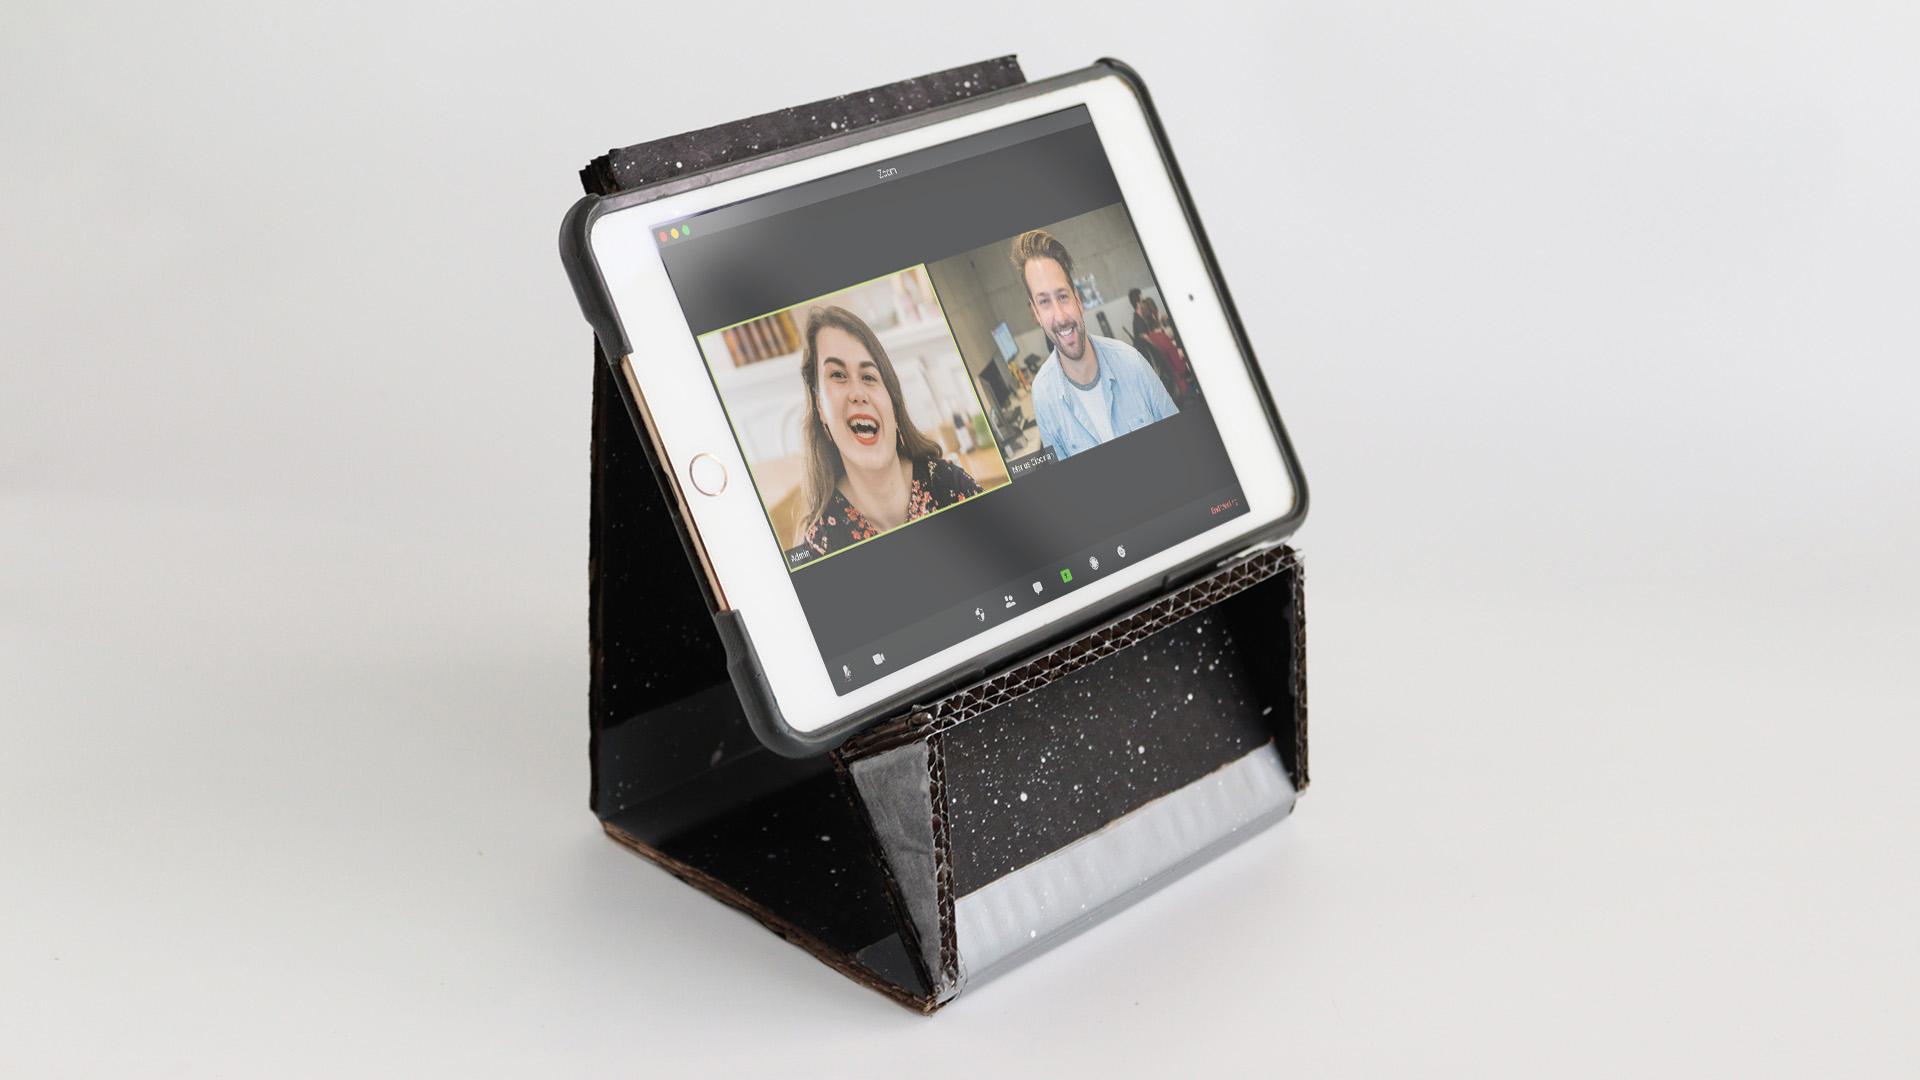
8. Decorating II - Cosmic Splatter: In this video, I will show a very simple and
cute way to decorate. I use duct tape to
connect the parts. And I decided to use that
as part of the design. So I paint the whole thing
with black acrylic paint, but not the duct tape. I paint one side, wait for it to dry, and then paint the other side. The next step I will use
silver acrylic paint. I load the brush with paint, and I start to brush on some
Stieg to make splatters. I recommend to try that first on a piece of paper
to try their fit. I use the same syllable paint to paint the three steps here. And that makes them more
splatter with white paint. And then on the front side, always begin on the bag to try the technique before you
go to the front side. I also painted the edges of the cardboard and
the little shelf. After that is dry. I will paint with a thin
brush, some single styles. To make a thin line. I take some paint on the brush and I twist the brush
to get a point. In the middle of every style I paint with white to
make it brighter. And well done.
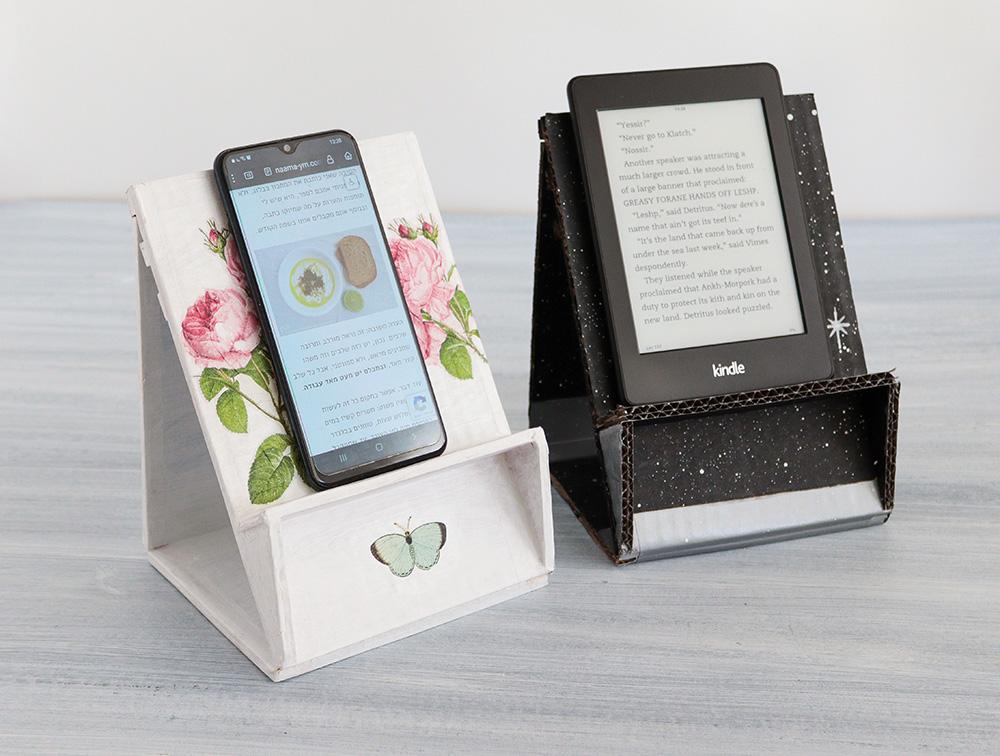
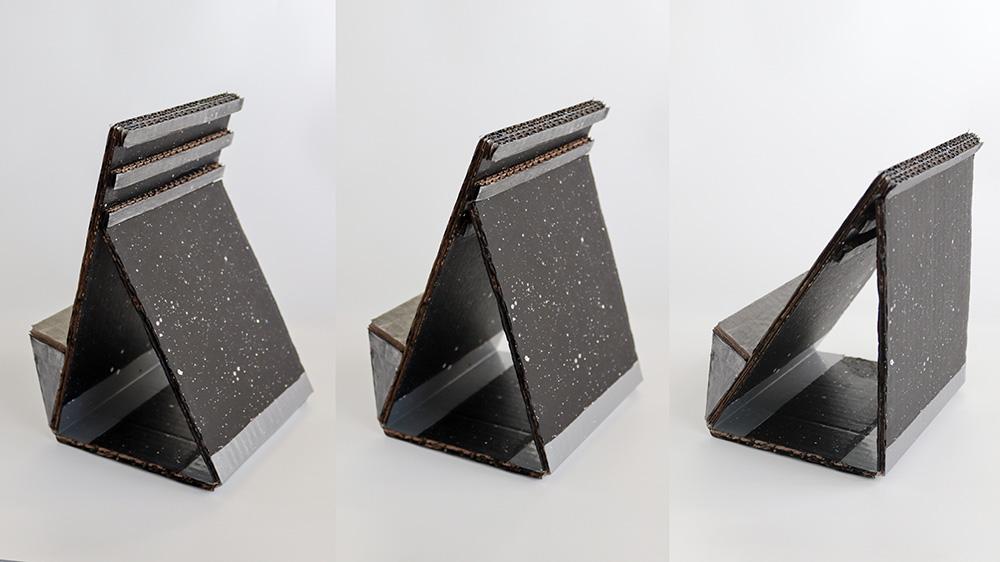
9. Conclusion: So I have now the two
strands that I made. I can show you now
the difference between the one that
I glued the paper on, the one that isn't. They both have these three
steps on the backside. And now I can use it in three
different angles like this. And like that. That way it's not
completely straight. There's a bit of an angle so
the device can lean back. I wanted to show you
two more examples. This one, I covered it
completely newspaper. I used all the music
sheets for that. The paper was relatively thick, so it was a bit hard to use it. I just cut strips of paper
and glue them with PVA glue, like we did with the napkin. After that, I added some
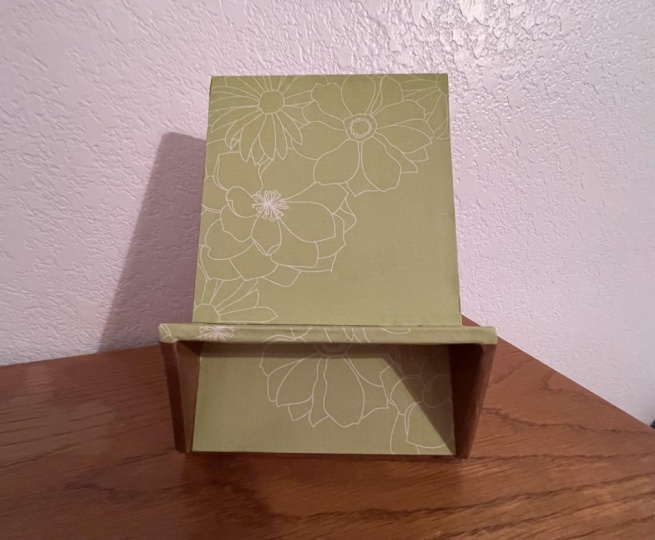
flowers and butterflies. This example I didn't
cover with ****** at all. I just painted it
with light color. And they faded the steps and the shelf with a
light blue color. Here, I just use a piece
of wallpaper that I have. So you can see, you can
decorate this tense with all kinds of ways to
paint it, to draw on it. You can use magazines, stickers, whatever you want. I really like to see your ideas. Your project is to
make one of these. You can use one of the
techniques that I showed, or use one of your own. And please write
some words about what you did and what
techniques did you use. So we could all learn from that.
 Naama Yaffe Mendelboim, Graphic designer and artist