Transcripts
1. Intro: Have you ever wanted
to learn tonight, but we're discouraged
by borrowing long and frustrating
to complete projects. Or maybe a thing that meeting is good only for autumn and winter. And you're putting
off learning to knit from season to season. Then I created this
class for you. Hi, Isabella, culture back. I'm an artist, designer and
teacher under my brand. While Barry, I've been
designing living patterns for modern makers, both
independently. Collaborations with yarn
companies and publications. Knitting brings me
lots of joy and calm and I'm happy to
be sharing my passion now are sets with teaching in this creek and sweet class
for absolute beginners, you will learn five fundamental
knitting techniques in just one afternoon through
a small and quick project. As crunchy. It's crunches or
practical her accessories that you can work
all year round. Knitting is a relaxing
and practical craft. It can add to your
mindfulness practice or allow you to make your dream Ireland pieces from quality materials
that will last for years. This is a class for
absolute beginners. So you don't need any prior
knowledge of knitting. You will only need some yarn,
knitting needles, scissors, and neither a tape measure
and a simple hair tight, you can get in the penny stock. You can use whatever yarn and needles you maybe
already have at home, or choose necessary tools using the materials guide I
created for this class. And then we will jump into
creating our project. We will figure out how many
citizens need to cast on. Then we will learn
the custom technique, how to do the little
further stitches, and how to finish ours crunchy, how to bind over the stitches. So together they're
crunchy cover clothes. Then we will look
at a few ways you can customize your
next crunches, play with colors and textures.
In the first lesson.
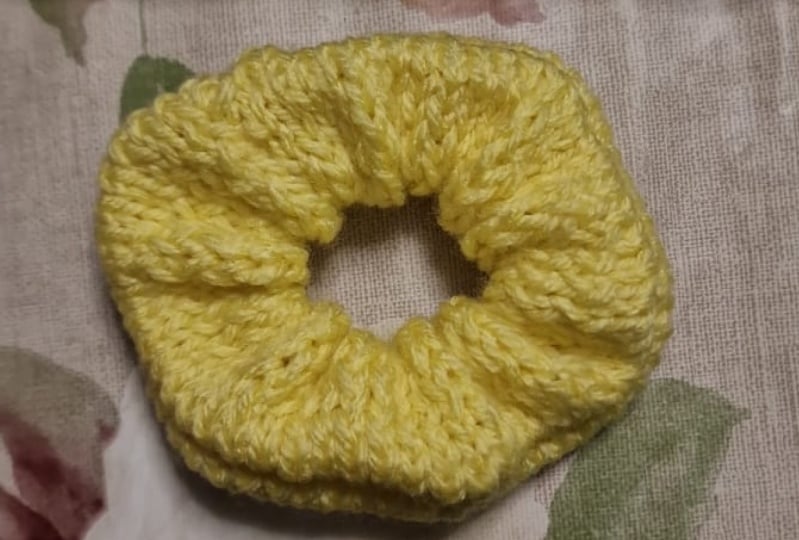
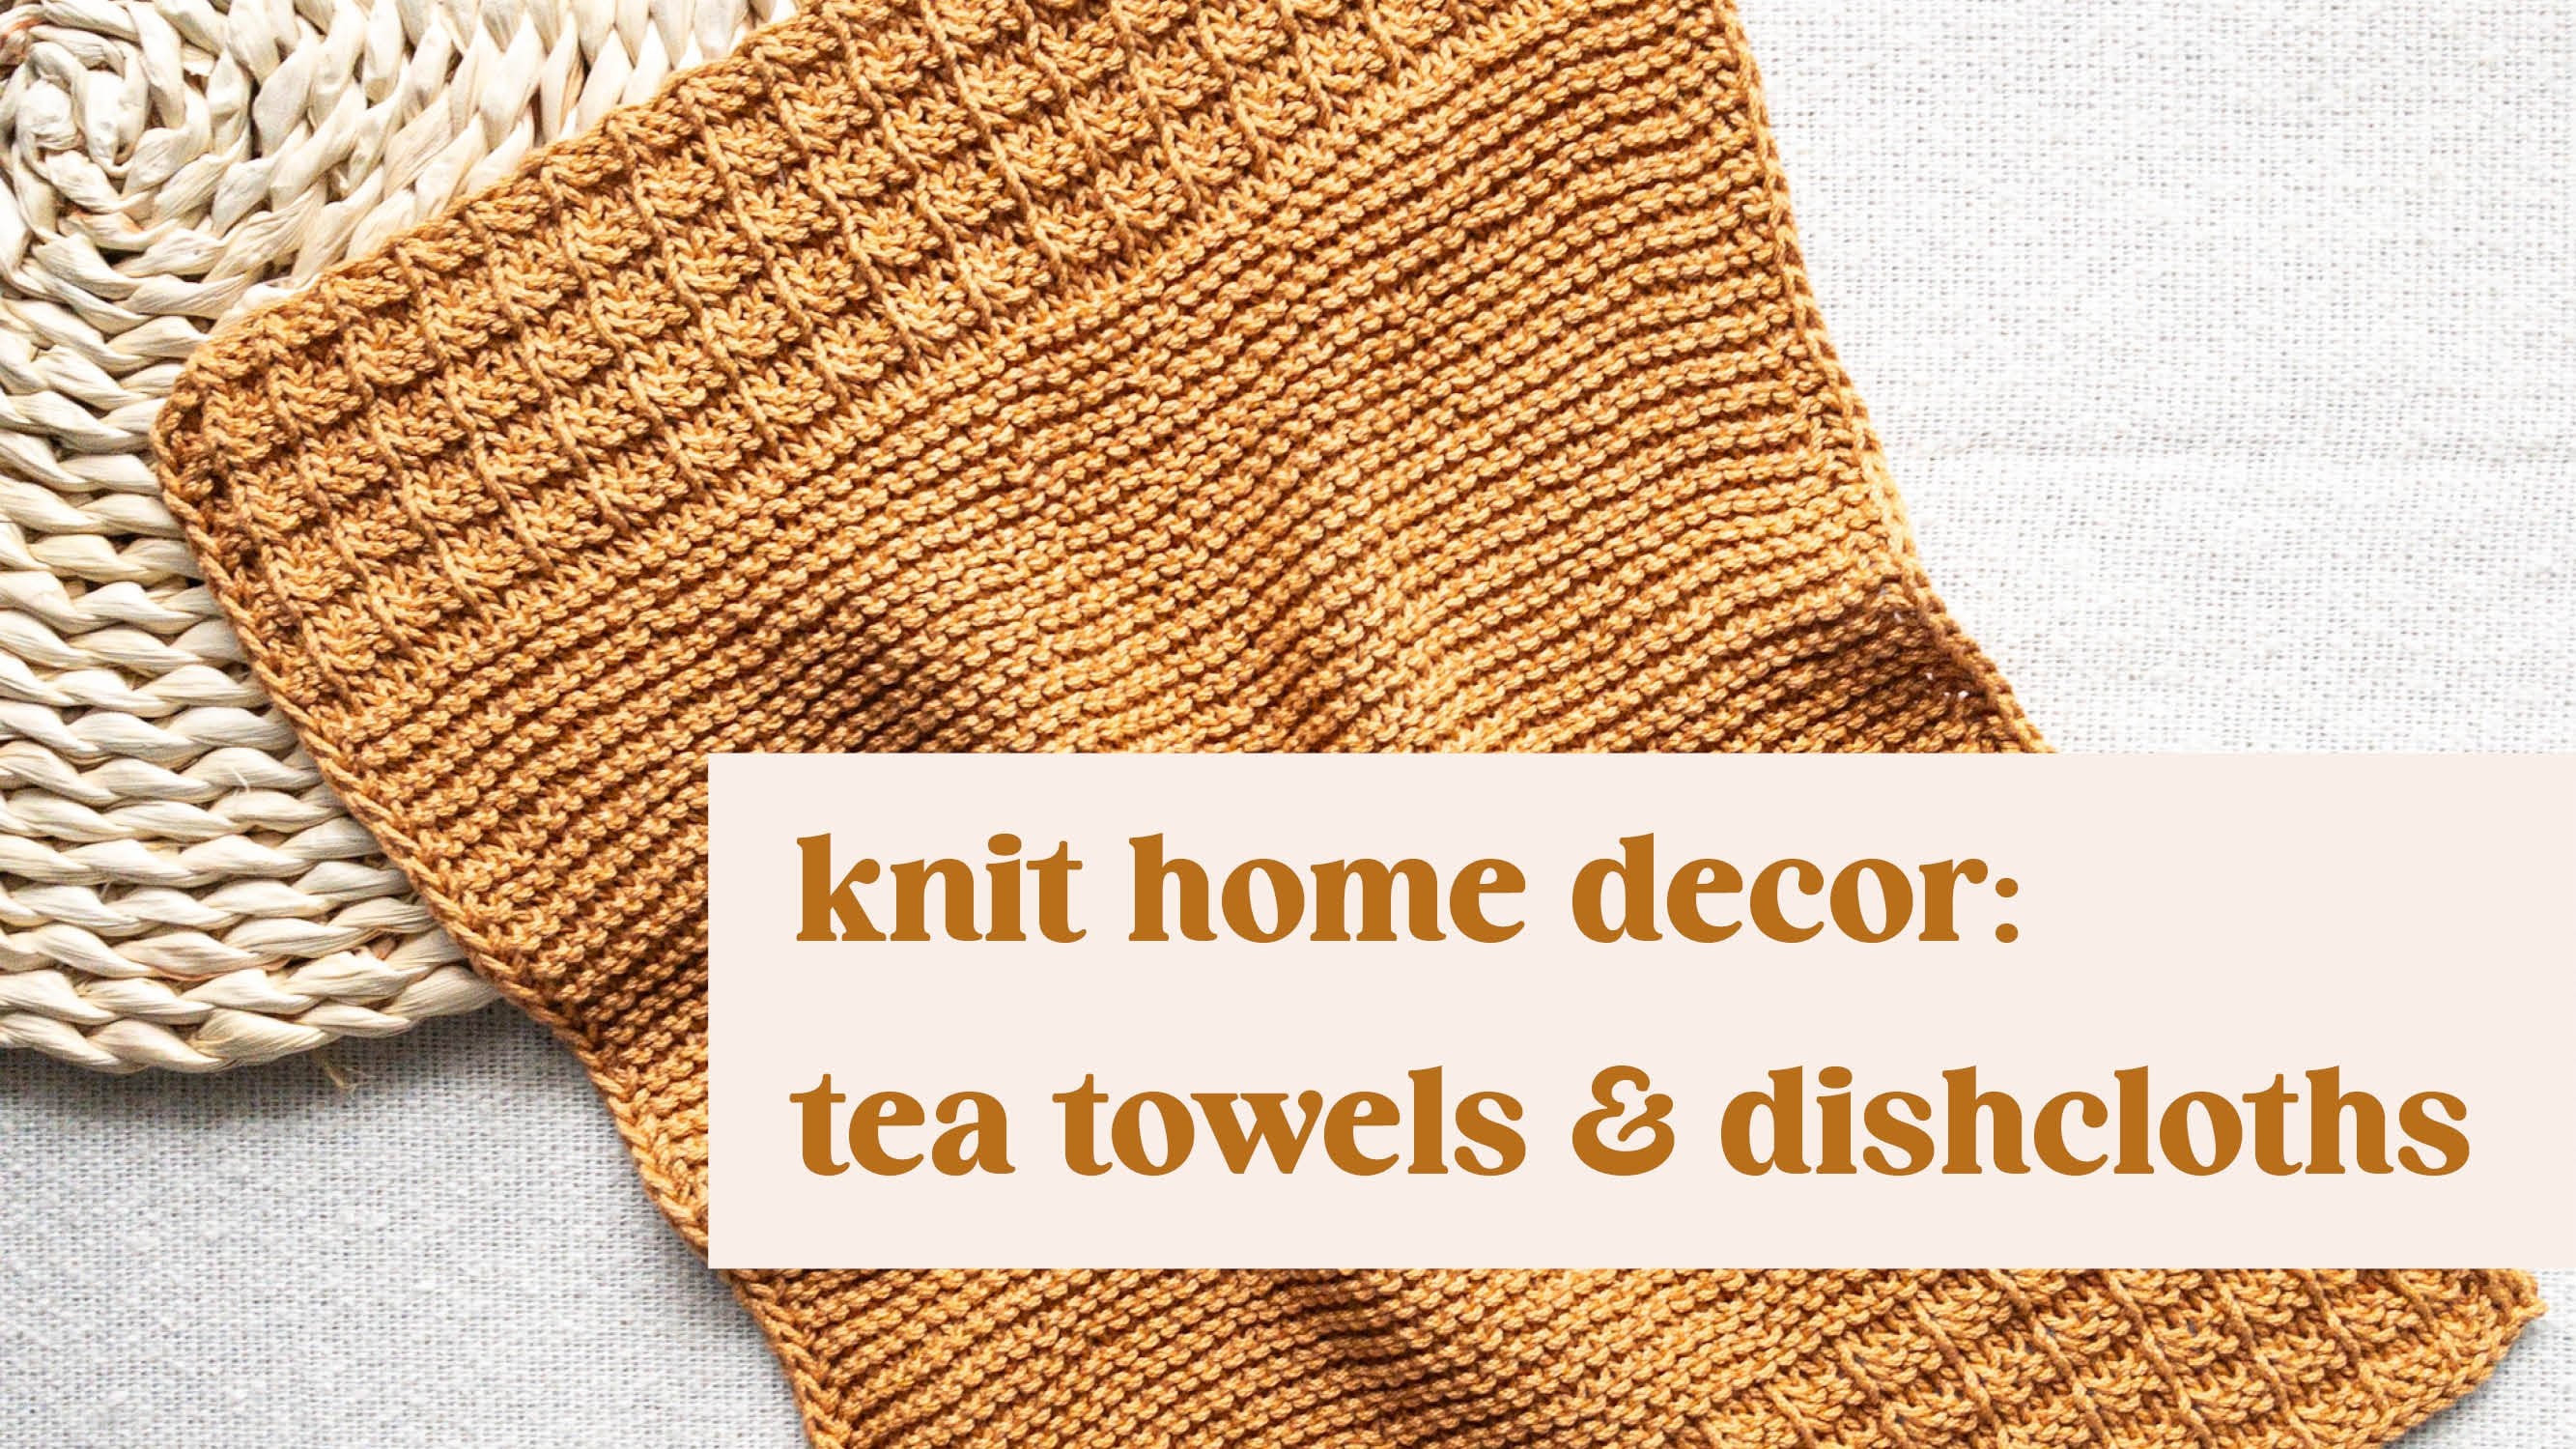
2. Class Project and Resources: The project in this class
is still need this crunchy. This can be the basics
crunchy within together are ascribed to have
customized style, texture, color variation. Now limits here. Download the class guide I
prepared for this course. It includes a
materials list with a few more popular
options linked. The quick reference for
planning your screen two-dimensions you
can use to follow in this class or afterwards. It also comes along who a
few is a stitch proposals. If you want to modify the
texture, reverse crunchy. Post a picture of a
finished scratchy, or even a working progress
in the project gallery. Sharing your mix is really
inspiring for others. Also, if you have
any questions or run into any issue just
noted in the project, and I will be happy to help you. In the next lesson, we will go over the
needed materials so you can prepare
for your project.
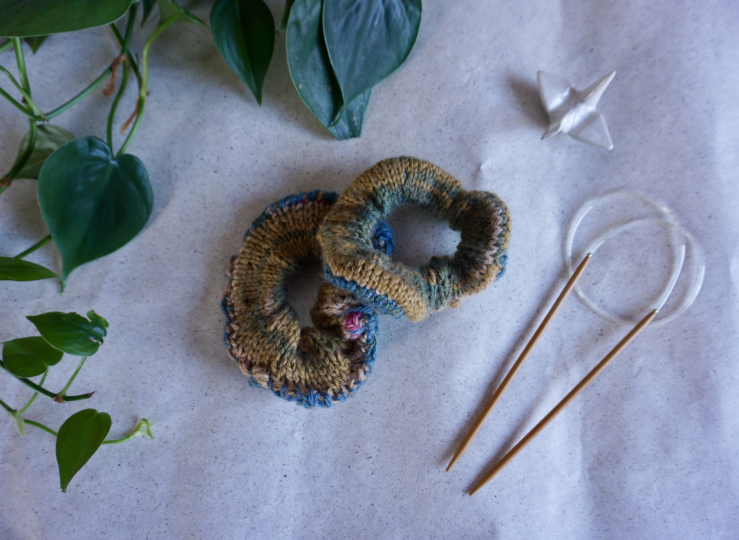
3. Materials: Okay, Let's have a look at the basic materials
for hours crunchy. And if you can't get
a hold of the ones exactly like mine, No worries. I propose a few options for
each of the material in the materials guide that you can download in the projects
and resources section. So first, for hours crunchy, we will need the hair band
or heard Tai already one. You can get it store. It doesn't matter how
it looks exactly. It just has to be elastic. So you will need at least one to follow with me to
create a basic screen too, but I recommend
at least a couple so that you can also use some of the modifications I
propose to experiment with those crunchy and
create some new styles. Then you will need
to get some yarn. So choose a more stretchy yarns. So like cool or acrylic, because they will
help them better than cotton or other
plant-based yarns. The Scranton is to
be elastic and also hold the shape for
a longer time. So this is why I recommend that so that it looks good
for a longer time. So I will be using this beta
seven brothers nature yarn. It's worsted weight or add-on. And it's a blend of
wool and layer cell. You can also choose any
yarn that you have. And I will show you how to adapt the customer
stitches for your yarn. Exactly. So you don't have to use exactly, they are like me. What I can only recommend is that you don't go
with it too thick yarn like bulky because then this grant itself will
be also bulky and heavy, maybe not staying
on for too long. So that's one consideration
to have in mind. Then we will use the basic
yarn for our basics crunchy. And then I will also show you a few modifications that you
can use for your scratchy. And one of them would
be using fluffy yarn, like more hair or
brushed alpaca. You can also get some more
fuzzy urine to try it out. So I would recommend it as
a second project or if you have completed your first and thinking
project before that, even as crunchy because it's
fuzzy, so it's beautiful. But it also a little bit harder to see
the statistics clearly. Any on your chest, one bulb will be enough to
make a few scratches for sure. If you will want to
experiment with color, of course, you won't need
more than one ball of yarn. So however many colors
you want to use and that many of balls
of different colors. However, when anything
with a mohair on or other brushed alpaca, we will be using two strands, so two threads at the same time. And while definitely
you can take one end is always
very easy to find. It's on the outside, but the second one is hidden, so we're inside and you
can definitely find it, but it just takes a
little bit of time. So if you are not that patient of a person, just get to both, can get the strands
from the outside of each to make your life easier. Then we will also need
some knitting needles. So I will be using five
millimeter needles, both for this worst, that way too young, scratchy and for the two strands of hair or brushed alpaca, you can use either circular
needles like mine. So if the card, but this can
also be straight needles, if you would be getting
another yarn than me or you, you would like to understand
what kind of needles you wouldn't need to
use with your yarn. On the yarn label, you always have recommended needle size. For this one, it's
a five millimeter. We will also need scissors. Tapestry needle, which
is a sewing needle, but it's thick and
planned at the end. And also some tape measure
to measure our Scranton. Okay, now that we
have gone through all the materials that we
need for this crunchy. Let's start doing the project.
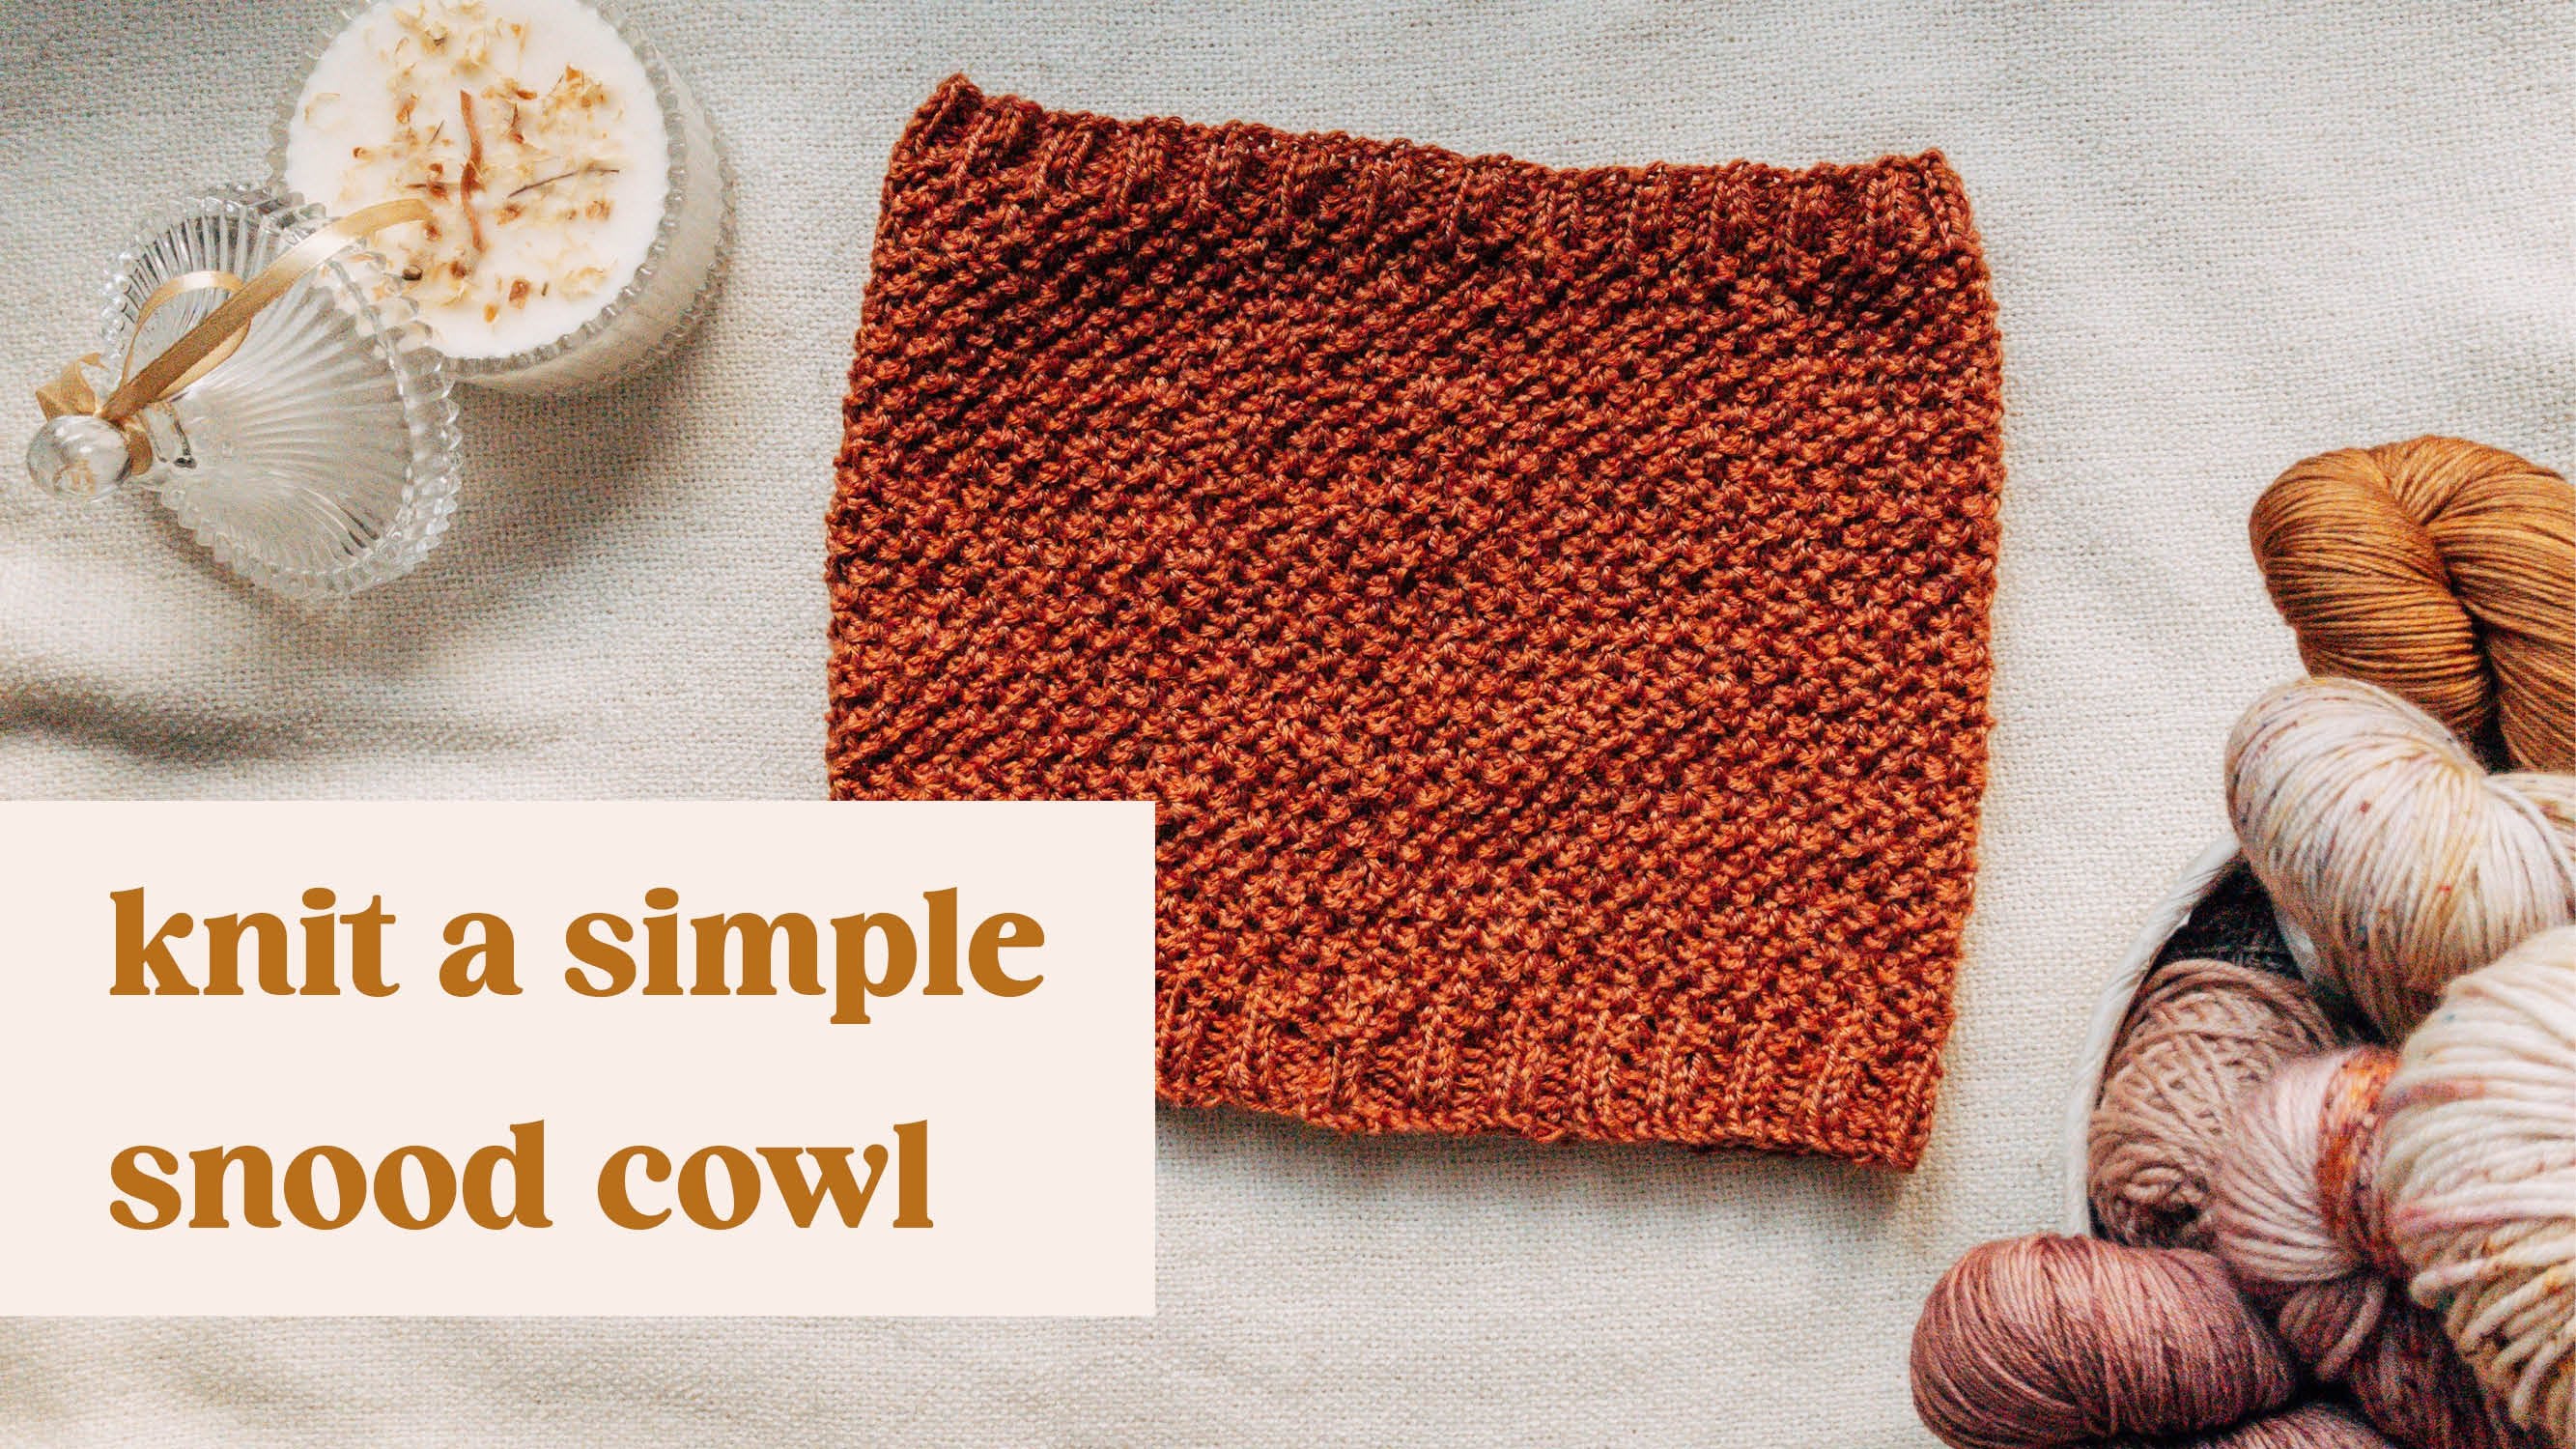
4. Knitting the Scrunchie: Let's get started
with our scratchy. First, we'll need to know how
many citizens to cast onto. Start working our
scratchy cover. For my scratchy to get
kind of like this. Or that effect will want
to make my scratchy cover two times bigger in circumference
than my actual heart. I can measure the
circumference of your hair tie with
a tape measure. Mice crunchy is 15 cm, 15 centimeter circumference,
so it is around 6 ". So I will want to
make crunchy color that is 30 centimeter
long or 12 ". The easiest that you can
calculate how many stitches focused on is actually
referenced, the yarn label. Each yarn should give
you information. What is the recommended gauge. So how many stitches per 10
cm or 4 " you should cast on? Of course. It all depends on how unit. So it's very important
for clothes like sweaters or even hats, etc. However, first crunchy, it's
not so critical and you can just use the yarn
label guide to start. So for this year and the recommendation is to
have 18 stitches per 10 cm. So I wanted to have 30, so I need to multiply
it by three. I'm getting 54. But just to have is you're counting our
customers 62 custom. Let's unwind our yarn a bit. And first we will need
to make a slipknot. So take the yarn end and laid on top of the
strand like this. Then take your feet, your fingers through the loop and grab the longer
strength and pull it up. You have a loop and the
slipknot once more, so you are just a
little bit longer one. So we have a longer tail
reached through the loop. Grab the yarn and
pull up the loop. Grab the longer yarn tail, the one that is going
to your bulb and spread it over your
fingers like this. Again, the yarn and
spread it like this. Now to cast on stitches
will simply take our needle inserted under that strand next to your thumb, and pull up. Once more. Thicker yarn, spread it. Our fingers. Take the needle under the strand next to your thumb
and pull up a loop. Yarn. Needle under your next to the camp
and pull up a loop. So continuous casting
on the status until you have 60 or whatever number
you calculated for your yarn. The way we are counting, we will be counting the first slipknot as a state as well. So I finished my studies. And now our turn them around so that the strand of yarn leading to the boat
is on the right side. And we will grab
the second needle. Take a bit more yarn and
wrap it around your finger. Will wrap it around
the finger to get some tension because it's really hard to work with the
yarn when it's solutes. So we do it, so it's helpful. Then we will need the first row. So the first row, we will learn how to do that. Let's stitch. To do the Knit Stitch. With our right hand CDL. Insert the needle into the
first loop from left to right, into the front loop
from left to right. And wrap the yarn around the needle and pull up
the loop for the stitch. Then we can sled the
word stitch off. So again, taking the
needle inserted from left to right into
the front loop, stitch, wrap the yarn
around the needle, pull up the loop
through the stitch. Slide of the word stitch. I can take the needle, inserted it from left to
right into the stitch, wrap the yarn, and pull up
a loop through this stage. That's more insert
from left to right. Wrap the yarn around,
pull up a loop. Don't work too tightly, so don't pull the stitch just to match because it will be more difficult
to work into them. So continue working this
way until you have worked. All of this suggests
that the end. Okay, So finish work in my row. And now we will again turn
the needle in that way. So the working end of the
yarn is on the right side. In this row we will
work for all steps. So another type of
stitch to work that stitch take your
right hand needle, inserted from right to left into the frontal
lobe of the stitch. Like this. Then take
the yarn and wrap it around and pull it
through the stitch. So once again, the urine
should be in the front. Insert the needle from right
to left into the stitch, wrap the yarn around the needle, and pull up the loop
through the stitch. Again. Insert the
needle from right-left, wrap the yarn around, and put through the stitch. So again, make sure the honest and upfront insert the needle from right to left. So we'll work this stitch
out till the end of the statistic to
complete the road. Okay, so we finished a row and always at the end
of the row we have to turn the needles around so we can again start from
the right side. This row, we will
start working again. The knit stitch pertinent, it's digital Yan is in the back. We insert the needle from left
to right, pull up a loop. And that's it from
left to right. Prolapse group work, all of
the row in the knit stitch. Okay, so we've finished. Now we've turned
it around again. We will be working
the pro stitch. Make sure the youngest
in the front. Insert the needle
from right-to-left. Wrap the yarn and
pull up the loop. Continue working the knit
stitch on the right side. So the side with
the V looking loops status and the parallel
stitch on the wrong side. So the side that
has this texture or the portal bumps until you reach a desired width
of the crunchy, I will be needing my
screen takeover until it is around 8 cm long, so around 3 ". See you in the next lesson.
5. Bind Off: It's time to do some finishing. So to do the binder will
knit the first stitch. Then we will need
the second stitch. And we will take our needle and inserted on the
first stitch on the needle and pass it over the second one and
take it off the needle. This way we have
one stitch bound off. For the next stage. Let one stitch again insert the needle
into the first stitch and pass it over the second one and rebound
off another stitch. Once more with them
more close up maybe. So when let one stitch and insert the needle into the first stage and pass
it over the second one. Then again, let one stitch
over the second one. Let one stitch and pass
it over the second one. And pass over. We will continue this until we bind off almost all
of our stitches. There will be only one
stitch left at the end. Okay, so we have
one stitch left. And what we'll do, we'll pull up a loop from
the urine under this, going to our ball. Then we will cut the yarn. But let's be mindful to cut
a little bit more around the maybe three times the
length of your screen to cover because we will be using that yarn and so
together ours crunchy. And then just put it onto
the thicket. And prototype.
6. Finishing: Okay, so now we will be summing together
hours Quantico over. So turnaround your
screen takeover. So that this wrong
bumpy side, this app. Then just fold it together. So first we will be summing
together that edge. So it can make a
cylinder that we will use this cast on edge tail. Okay, so for showing up, we need to identify the first column of
stitches on each side. So the first column where
I see the full stitches, the VCE is that one. Then we have a little
bit of the border. And also on the other edge, here we have the first column of the status and here
is the border. So we will be stitching between
those borders of each ad. So to start, we have the Yan
connected to the right side. So also from the back. Catch it through strand
at the bottom and pull. That will start the stitch. So for solving vertically, we need to pull a little apart between the ad and the first
column of the stage to find a horizontal bar and just
take our needle under it. So here it is
between the edge and the first column of stitches. Then we need to go to the
other edge and also find the first horizontal bar. So thank you. So next we'll come
back to the right side again and find the
next horizontal bar and take our needle
under it and pull yarn. Then we come back
to the left side, you find another horizontal bar. Also. Again, Scratch is a very small project
and it's going to be scratched the
most of the time. So really don't be
stressful about if this is looking perfect or is
there some small mistake? Because it will realistically not be that much visible
with this kind of projects. So just enjoy it. Have fun, learn some new skills. And with every next
one that you make, it will just become
better and better. So this is like a
no stress projects. When you sell together a few. First, rose, you
can see that it's closing up really nicely
so you cannot see the seam on the visible side, only on the wrong side. Okay. And when you end
there is no bar left. Then just take your needle
straight through the bag. We will reveal the end is
just a very simple operation, just to secure the
tail a bit more. So we will be doing
this on the wrong side. So the one that is not visible. When you look at the structure
of the lead at the back, you can see that there are some upward facing loops and it looks like a sad
face, like a frown. So we will be cutting
this France and also downward facing
lobes, like a smile. And we will be
counting those smiles. So smiles and France. So I will insert the needle into the frown and poor yarn into the smile on the right. Okay, then we'll be going
around that frown into the smile on the left and
the frown on the bottom. Now we'll be going
around that frown. Sorry, that smile. So into
that frown. That's mine. Now we'll need to sell
together our scientists. So it's actually span two. So how we will be doing that? So first of all, it's
turnaround our cover so that the wrong side is outside. Let's take our Scranton put it inside because we
need to hide it inside. Okay, the first thing
that we will do is insert the needle
to the right of our state column on the other side so we
can pull it together and start serving
more comfortably. Okay, So this is our first
stitch column on the top. And to start solving, we need to take our needle and inserted under two
legs of this stage, of this V for yarn. Then when the technique and
inserted under two legs of the top stitch yarn. Okay, so now we need to identify
the next stitch column. So it's that one. Insert either under
both of the legs. And then here in
certainty though, below the two legs of the
stitch and pull again. On the top. The
next stitch column, insert the needle
under the tool x. Then the same. At the bottom. Insert the needle under the
two legs of the stitch, most close to the border. So continuous certain together
the edges of this crunchy cover all the time makes sure
that your actual her tie, her band is inside
of this cover. Then continue until you
close it up all the way. I have finished saying together
all of the statistics. And now to finish it off, I will just close this
gap by taking the yarn. Needle ways. I will also make a small
note just to have it secure. And to finish it up. I will take the
needle inside this crunchy and take
it always inside. Just a little bit. Take it up here. Hold the yarn, and cut
off the tail so that the script is done. In the next lesson, I will share with you a few ways to customize.
There's crunchy.
7. Customizing Your Scrunchie: In this lesson, I will want
to show you how to make some modifications to the basics crunchy to make it
even more your own, more in your style. The first modification
that you can do is to make a different size of this crunchy and so
it is more scratch, so there is more fabric. That modification is
actually really simple. So for hours crunchy
that we just made the ratio of this crime to cover the actual her thigh
circumference is two. So my hair tie circumference
was around 15 cm, so 6 ". And we made the cover That was approximately 12
" long. So 30 cm. If you want to have
more strangeness than just make a longer
Scranton over, you can try that
three-to-one ratio so that the crunchy covers
three times as long. And then just modify
the stitch count. The second option is to have the scrum team or fluffy using the mohair yarn or
brushed alpaca. So the easiest and
fastest way to do it is to use two
strands of yarn. A yarn or brushed alpaca. It can be in one color. So two strands of the same color are two strands of
different colors. So you can have
this marble effect. It's, it's really nice and
definitely interesting. I will show you quickly how to work with two
strands of yarn. It's actually really simple. So you would work this quantity exactly as we did previously. It's just that you would
be using two strands of yarn instead of
one at the same time. So I'm holding two strands
of yarn at the same time. And I will make a slipknot exactly the same way
as we did previously. I will insert my needle and start casting on our custom just a few stitches
to show you a quickly. But every time I catch
both strands of the yarn. Okay, to start with, I insert my needle
into the first stitch, catching both of the strands. And said Go and the same here, catching both of the strands. However, when you have
the stitches because of the halo of the Hurst, It's a little bit more tricky to see individual stages
just a little bit. So this is why I recommend to first try with
some smooth ER, just to get some experience
in finding stitches and then moving to
the more fuzzy yarns. Next modification that you can make is using a
different texture, a different stitch pattern, then you can use
different colors. Again. Working stripes is
actually really easy. So our cast on just
a few stitches. In this way. We start working with one color. For as long as you want. You can have very
narrow stripes, like just one row or
wider ones. Here. I worked two rows
with this white yarn. Now I will join the green one. So after you finish working, you can cut the yarn it
You will not work with it. The next row, leaf a little
bit of tail to even later. Just start working
with the next color. I can live at the beginning. A little bit of tail, because if you work
with multiple colors, then you will have multiple
yarn ends and you will need to weave them in as
well at the end. Just start knitting
with the next color. The first stitch may
be just a little bit loose because it's where
we're doing the yarn, but you can just take the
yarn and pull it a bit. So you can see we
have a stripe of white and then a stripe
of this light green. So this is how I do the stripes. You just finished
work in one color, then started working
in the next. These are a few very
easy modifications that you can apply to your next crunchy with the skills that you
learned in this lesson. So now it's time
for the wrap-up.
8. Wrap Up: Thank you so much
for choosing to spend your time
watching this class. Also congrats on finishing
your knitting project. To recap, you just learned five basic knitting techniques. Castilian Nathan, prestigious,
binding of answering. And remember, practice
makes progress. Don't be discouraged if your statistic look
a little wonky. And even at the moment, every letter started
with just one state and 21 little project
at the beginning. With practice your statistic, we'll get more, even. Have patients and Castile your next leading
projects and have fun. I truly hope that you enjoyed the class and spend
quality time of it. I would appreciate your
feedback so I can make the next class is better and more suited to what you need. So don't forget to
leave a review. See you in the next class
and happiness thing.
 Izabela Grzybek, Knit & Crochet Designer