Transcripts
1. Intro: Hello, I'm Izabela Grzybek. I'm an artist,
crafter, and designer. In the last years, under my brand, Whileberry, I've been designing
knitting patterns for creating cozy socks
and other pieces, both self-published and in collaboration
with yarn companies. During the process, I
have learned a lot about what knitters need
to start up quickly, and I'm also drawing from
my own learning experience to show you my webinar
tips in this class. In this class for
absolute beginners, I want to show you how to use basic knitting techniques and the very simple math to
design your own headband. First, I will show you
how to cast on net and cross stitches,and
bind of inflatmating. Next, we will look
at how to use net and cross stitches
combinations to create various textures and cover
the basic math needed for planning dimensions
of simple snip designs. During the class, we'll create a set of small
square nets to practice the basic techniques and then our final
class project, a twist headband that
fits your personal style. Whether we are looking for
an outlet for creativity and more sustainable
way of living or creating something that fits your personal
style perfectly, this class will
be a great start. This class is an intro
to flat knitting and you will be able
to take the techniques and the design logic
behind the headband to create your next simple rectangular products
after the class, like dishcloth,
scarves or blankets. When you watch this class, you'll receive a
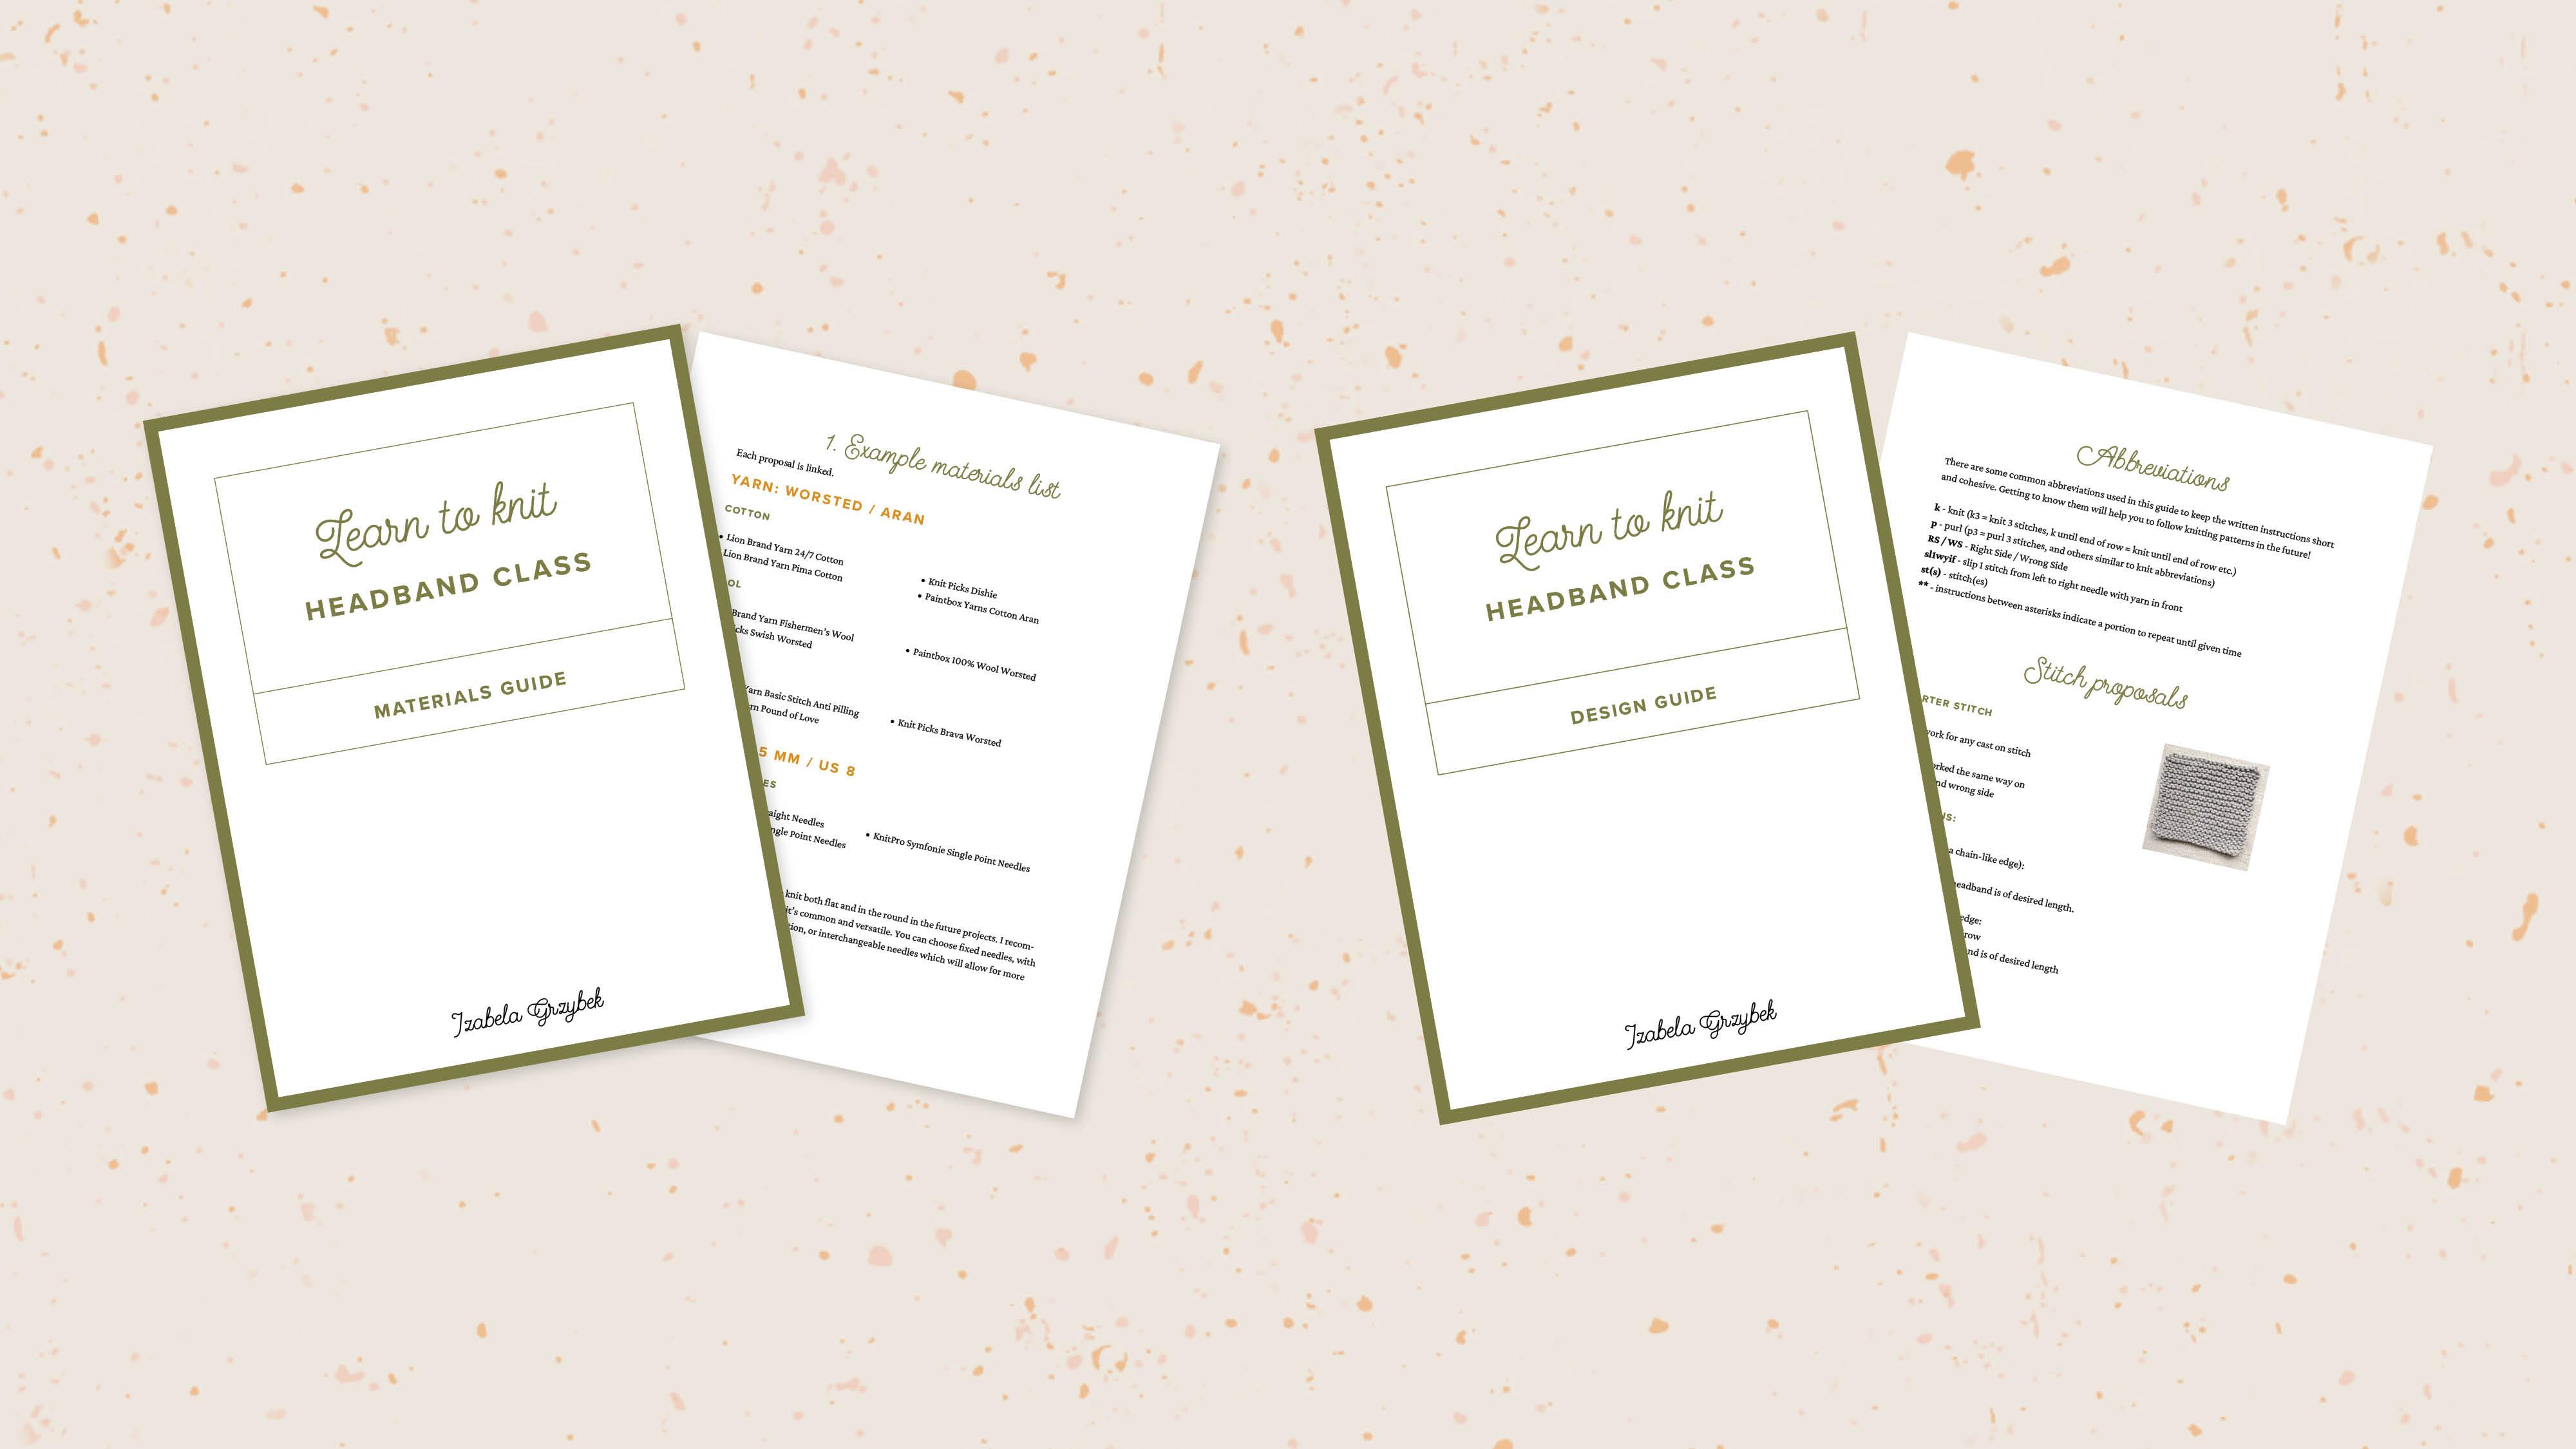
couple of resources. I have the materials list and
a headband design planner. The materials list will help you choose necessary
materials to get started with knitting without
hours of research. The headband design planner
is a helpful resource which will make calculating your start stitch
count a breeze. I will encourage you to
use worsted weight yarn and five millimeter or US Size 8 living needles to
follow this class. But you can use any yarn and matching knitting
needles you have at home. Let's get started.
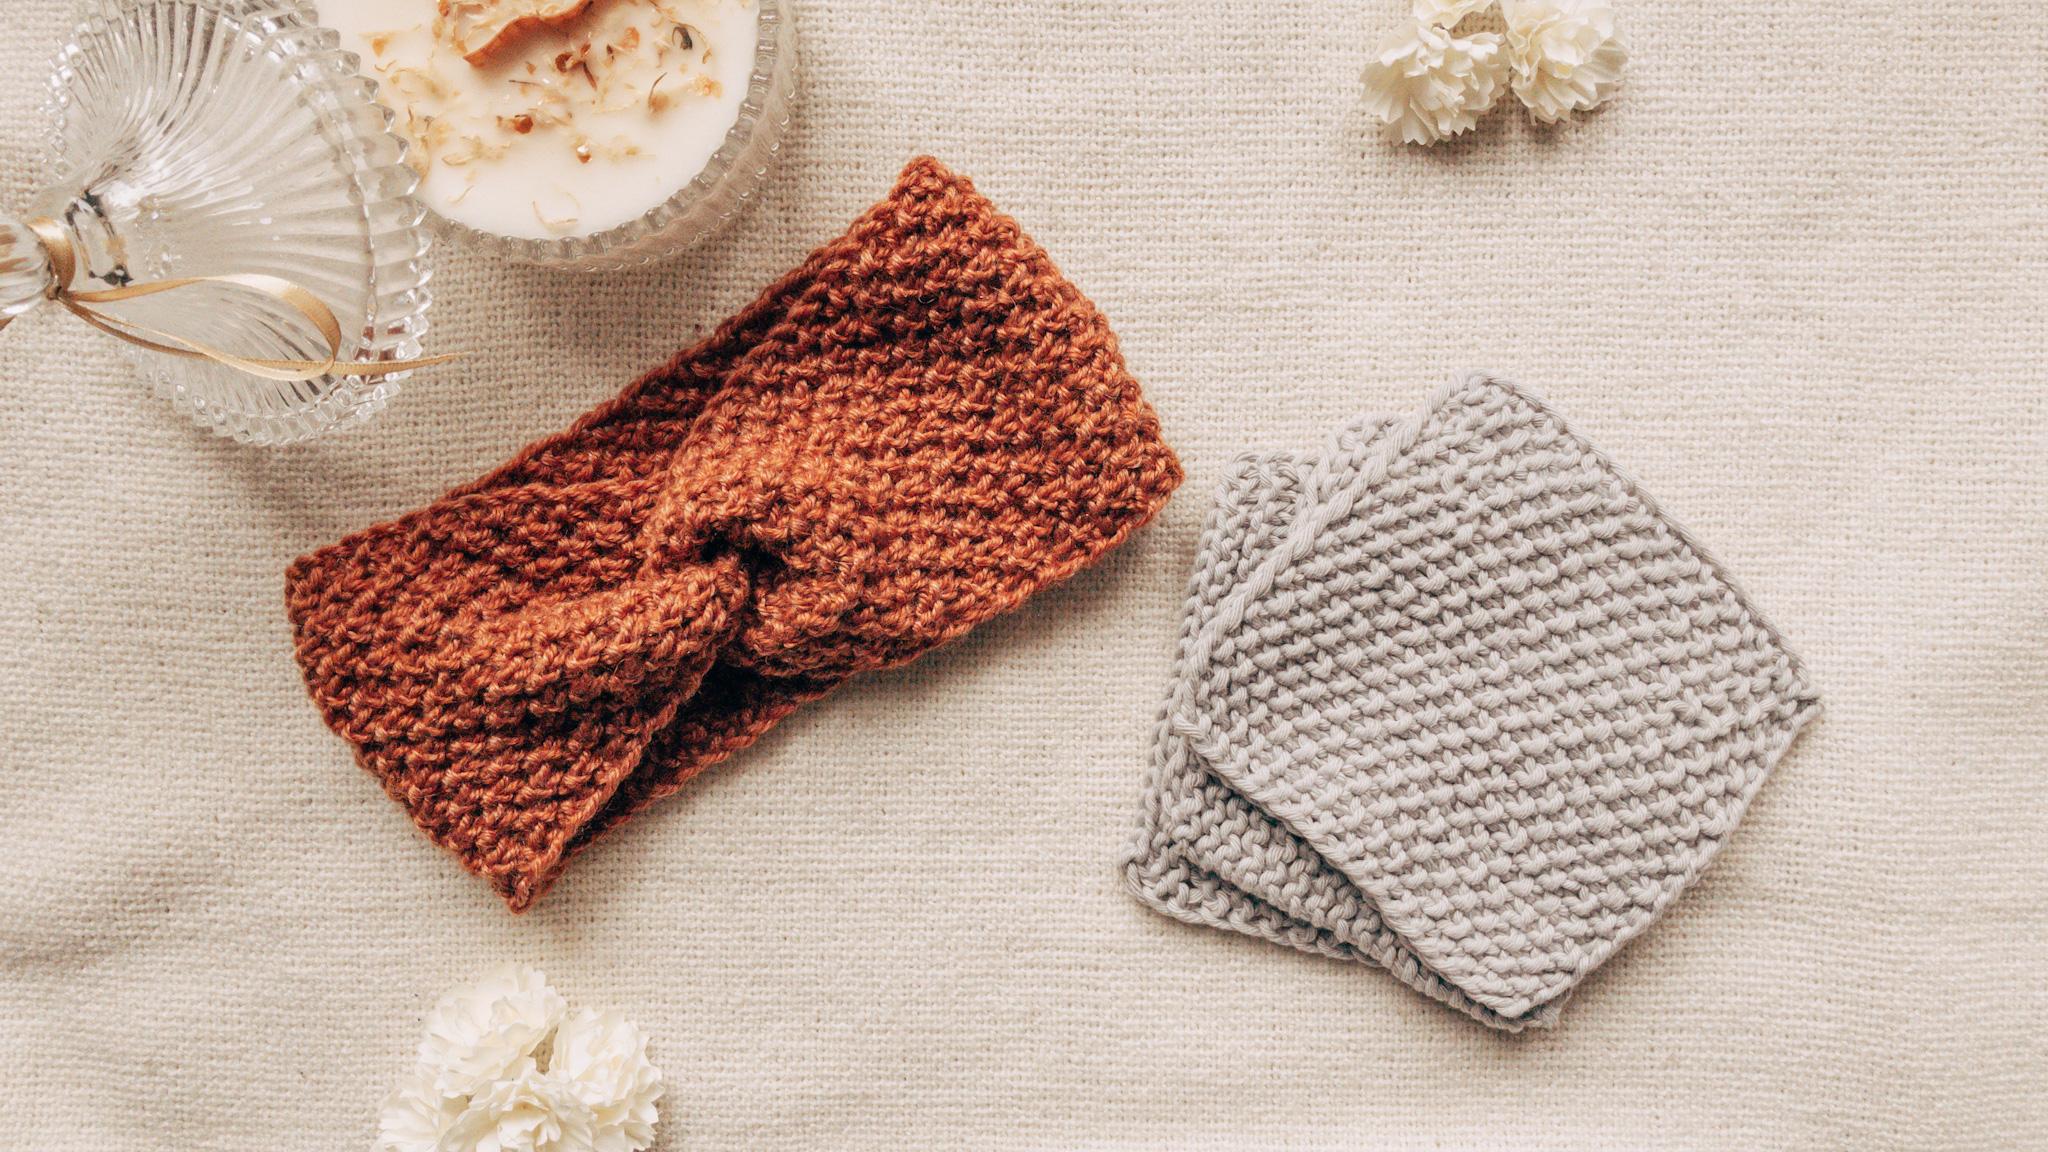
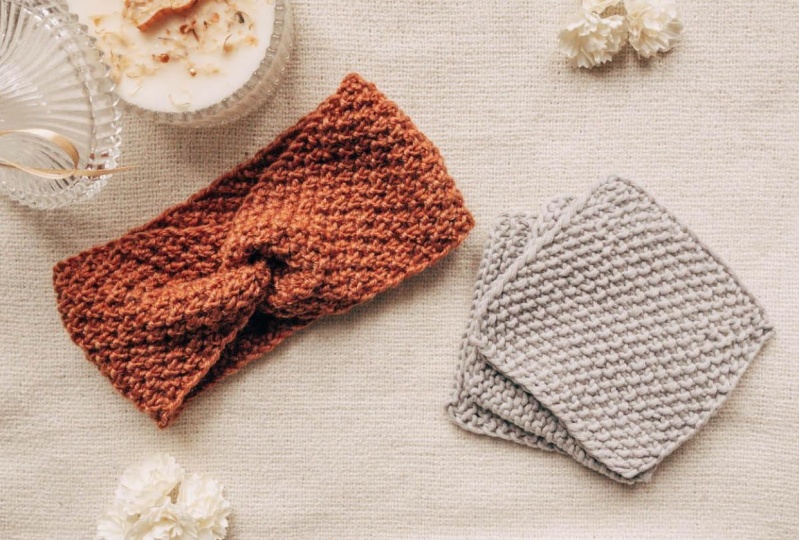
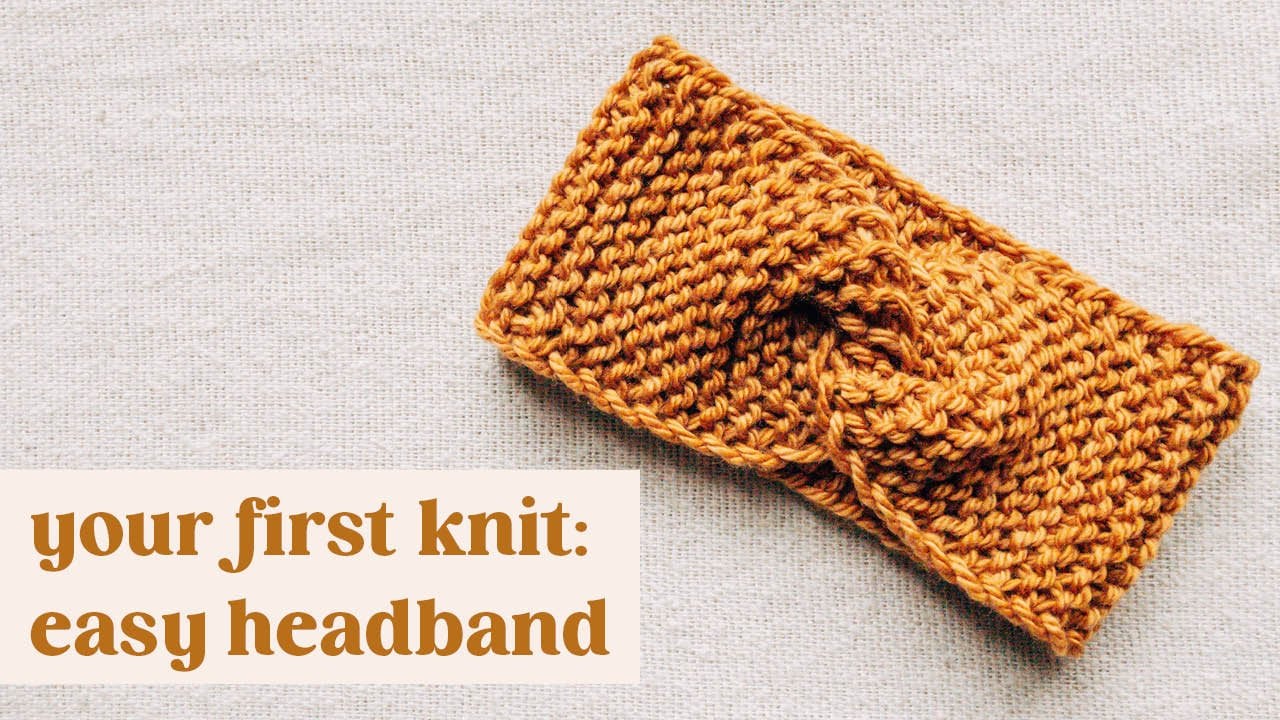
2. Class Project and Downloads: The project in this
class will be to design and knit your own
headband with a twist. This can be a headband
covered in one of proposed stitch patterns
or own stitch combination. You only need to
share a photo of your finished knit headband
as a class project. But I encourage you also to
share your work in progress. To share your project, scroll below the class video
and go to the Projects and Resources tab then click on
the Create Project button. Don't forget to
upload a cover image because this is what will
appear in the project gallery. I have created two resources for this class which you can download in the
resources section. The materials list with a
few links recommendations, so don't need to spend too
much time on research. A quick guide for
designing your headband, which outlines the simple
math needed to design the piece and a few stitch pattern
proposals to get you started. You can print it out and
fill by hand or fill it out directly on your computer in
a free Adobe Reader program. If you have any
questions for me, you can type them in
the discussion area. Next, we are going to cover the materials needed for
your knitting project.
3. Materials: Let's go over the materials that you will need
for the class. Remember that I prepared
the resource list for you to give you
a few ready options. If none of these are
available where you live, I will give you a few tips on how to choose the right
materials to start. First, you will need some yarn. I recommend that you get
a medium-thick yarn, which is called worsted
or Aran weight. Look for smooth ply
strands without fuzziness, so it's easy to work with. Regarding colors, lighter
shades will make recognizing and counting
stitches much easier than blacks or dark navy. Another important
point, fiber content. For the first part of our class, because it will be
a great choice. It is steepened,
easy to work with. For the headband,
wool will be great as it has thermal
regulating properties. If you are sensitive,
it's a good idea to get a feel of the yarn to check
if it won't be itchy for you. Merino wool is usually a pretty safe choice
in this matter. If you don't want to
use animal fibers and rather go for
vegan friendly yarn, you can choose acrylic,
cotton, or bamboo. However, they don't have the same thermo-regulating
properties as wool. During the class, I will
be using drops Paris, which is 100 percent cotton
for the practice part. One ball should be enough for
the three practice squares. However, you may want
to get an extra ball if you want to practice more. For the headband, I've got Novita 7
brothers nature yarn, which is a blend of
wool and lyocell. This is a big skein, 100 grams, which is double the
usual size of a skein. One regular 50 grams
skein should be enough for a swatch and headband
in similar size to mine. However, if you can, it's always good to get a bit
extra in case you run out. Next, we'll need some
knitting needles in five millimeter USA size. For these projects,
you could use either straight knitting needles or circular knitting needles
with any cord length. If you will be purchasing
your first needle pair, I would recommend getting circular needles as they
are more versatile. They will allow you to knit both flat and circular
knits in future. Circular needles come as fixed with cord
permanently attached, and that's interchangeable
where you can attach the cord and
needle to mix and match. The needles can be made of
metal, wood, bamboo, plastic. A really great option
for beginners is wood. It's easy on the hands. It's warm and not very slippery, so it helps with
managing the stitches. If you already have some yarn at home you would like to use for this class and you don't know what size of needles
to use with it, I included a few tips in
the resource list download. You will also need a
few other materials. Tapestry needle, which is a
blunt needle with a big eye which can fit yarn,
scissors, measuring tape. We'll watch to take
care of your knits. I'm using a soak brand, but you can choose whatever
is available where you live. Now that you know what materials are needed and how
to choose them, we're going to dive
into the first exercise and custom a garter
stitch square.
4. Garter Stitch: Now we'll get to
our first practice square in garter stitch and learn how to cast
on knit and cast off. Garter stitch is reversible, so it looks the same
on both the right and the wrong side. Let's cast on. Take your ball of yarn
and unwind it a bit. Then, take the end of your
yarn and make a loop. Just lay the strand
on top of itself. Then take your fingers to the loop and pull from the end that is going to the ball
another loop through that loop and you can see
you have a slip knot here. Insert needle into the loop
and pull it more tight. Not so much so it's stiff. It has to be able to move
a bit on the needle. Next, to cast on stitches, we will need to take the
working end of the yarn, which is the long and that
is going through your ball, and spread it over thumb
and the index finger. Then take your needle, insert your under this
thumb that is next to your thumb and go up,
pull up the loop. Not tight again, it
has to be able to move so again, spread your yarn. Take your needle under this strand next to
your thumb and pull up. Tighten the loop, once more. Again we are working only with the end that is
going to your ball. Take your needle under
the strand and up. Again you can help yourself with your finger
if you need and again. We will need to cast on 20
stitches, the first slipknot, I always take it into account as a stitch so I
counted as the first so continue until you
have 20 on your needle. Now that you have all
the stitches cast on, we'll need to turn our needle around so that they're working and leading to the ball
is on our right side. Take your other needle
in your right hand and take the working strand
and wrap it around your finger twice or three times just to
have a little bit of pull because it's more
comfortable to have some tension while knitting. Then toward the knit stitch, we'll need to insert
our right needle into the first stitch in this front
loop from left to right. I'm inserting, then wrap the yarn around to the needle and pull it through the loop. Once you have it worked, you can slide the left-hand
stitch of the needle. Now to the next one. Again, we'll take
the right needle and insert it into the front
loop from left to right. Pull up a loop and take
it through the stitch. Don't pull the
stitches too tight. They need to be able
to move on the needle. If you pull it too tight, it will make it really
uncomfortable and hard to work the stitches
in the later rows. Again from left to
right in the front loop and pull it through the loop. Slide of the work stitch. Once more. From left to right wrap
your hand around the needle and pull up a loop and
slide off the work stitch. Again, insert your needle
from left to right. In the front loop wrap the yarn, pull it through the stitch and
slide the work stitch off. When you finish working the row, turn your work again so that the working yarn
is on your right, and knit all the stitches. They're just the
same for every row. I want to share a few tips
with you to make sure that your knits look as good
as possible so always pay attention to work through
the stitch loops only. The stitches that you have
on the needle try not to work accidentally into the
bar between the stitches because it will
add a new stitch. Additionally, pay
attention not to accidentally wrap the
working yarn around your needle between stitches because it will
create a new stitch and distort the
shape of your knit. When we are working
the stitches, make sure to work in
the front loop only so the side that you can
see that's in front of you. If you drop the stitch
for example like this and you want to return to
the needle make sure that the right leg of the
stitch is in front of you and that the legs are not
twisted here in the middle of the stitch so right leg in front and this is not the
correct position because we have the left leg in front and the stitch will be twisted. If you make some mistake or maybe you want to
re-purpose the yarn, you can easily slide the
stitches of the needle and just take the working
yarn and frac your work. If you unraveled your work and you want to place the
stitches back on your needle. Let's start with the end. Pick up the stitch and look that the right leg is in front. Same here. You see the right
leg is in front and just put them back slowly without pulling too much or you will frog it further. As you can see, knitting
is really, let's say, non-destructive so
even if your work row and it doesn't turn
out as it should be, you can simply unravel it and try again so keep
working the knit stitch until you have a square and then we'll learn
a new technique which is bind off and finishing.
5. Bind off and Finishing: Okay. I finished working
up my square and now we need to bind up
the stitches so that we can take the knit safely off our needles without
the risk to unravel. For binding off, I will share with you the technique that
I'm using the most. We'll start with
knitting two stitches. Knit one and knit another one. Now, we'll take the first stitch and move it over the second one. To do that, insert your needle into the loop of the first
stitch on the needle, move it over the next stitch
and slide it off the needle. Now we have one
stitch bound off. To continue, now
we'll knit one stitch and pass the first stitch over the next one on the right
needle and slide it off. Now, it just bound off
the second stitch. Again, knit one stitch, pass over and slide. Knit one stitch, pass over and slide. Knit one pass over and slide. You can see that we have a really nice border coming up when we do it
with this technique. It's really neat and tidy. Let's continue to bind up the next stitches until we have just one left
underneath though. [MUSIC] So we knit the last stitch, pass the stitch over. Now we have just one loop left
on our right-hand needle. What we'll do is
we'll pull up a loop, wrap the yarn around,
and pull it over. Then we will take our
scissors and cut the yarn. Take into account,
leave around 10 cm, so around four inches so we have some left
to weave in ends. Just pull it off and tighten. We have our first square done. We have our square with two yarn ends that we need to weave in. We will weave in the ends on the wrong side of
the work usually. However, since this is in garter stitch and it looks
the same on both sides, you just needs to decide which one would be
your wrong side. We have both ends
on the same side. I will be using
some contrast yarn to show you how to even ends, just so that you can
follow and actually see how we will work
it into the stitches. To weave in the
ends, you will need to thread your tapestry needle. Let's have a look
at this fabric. Our fabric consists of some bumps and there
are different bumps. We have this downward
facing bumps like here, which we'll call frown. Upward facing, which
we'll call smiles. So smiles and frowns. To start weaving in, take your needle and insert it into under one frown
and then one smile. Then we will be going around that frown into that smile
and the frown underneath. Now we'll be going
around that smile, into that frown and
then smile above. Again, around that frown into
this smile and this frown. That smile into that
frown and the smile. Again, around the frown
into smile and frown down. Around the smile, into the frown and smile again. Just one more and it
should be enough. Around the frown into smile
and frown down. You're done. Just trim the remaining
yarn and this is it. Here you can see it a little bit because it's in
contrast yarn but when you weave in your
ends in the same color, it will not be visible. Your first query is done. You have learned so
far how to cast yarn, [inaudible] stitch,
and finish your knit. Next, we're going to work
our second square in stockinette and we will
learn a pearl stitch.
6. Stockinette Stitch: In this lesson, we will learn how to work a polo stitch while knitting a square
in a stockinette stitch. Stockinette stitch is created by knitting on the right side and pulling on the wrong side of the work in flat knitting. Here I have a swatch. Inside the swatch there
is stockinette stitch, which is probably the
most popular stitch that you've come across
in your t-shirts or store-bought knitwear. Let's get started. We'll start with custom
again, 20 stitches. I will go over it
quicker this time, but if you need a reminder, you can go back to
the previous lessons. I'm making a slipknot and
then our custom 20 stitches. When we have 20 stitches custom, it is time to knit
our first row. Remember to turn your work. Working on, is on
the right side. Wrap the yarn here
around your finger and let's knit the whole row. We will knit all the stitches. Again, I will go over
it quicker this time. But if you need a reminder, you can have a look at
the previous lesson and work-up another
square and projects. After knitting your first row, turn your work around and now we'll learn the polo stitch. Take some more yarn if needed. Wrap it around your finger. As previously, through
out the polo stitch, you need to insert
your right-hand needle into the stitch
from right to left. Then wrap the yarn around the needle and pull up the loop. Slide off the work stitch. Again, insert your needle from right to left in the front loop. Take your right yarn and wrap it around your needle and pull up. From right to left, wrap the yarn around the needle, help with your finger
and slide off. Be careful to wrap the yarn
in this particular direction. It's not very comfortable
at the beginning, but you will get used
to it with practice. Right to left wrap the yarn. Be careful not to work only with your needle and wrap
it around in other way because then you
will get it twisted stitch and pull this way all the stitches in
the row until the end. Again, right-to-left,
wrap the yarn. As you can see
with every stitch, they are naturally comes to the front to make
it easier for you. After we have worked
the full row, again, let's turn the work around and we're back
on our right side and we'll work the knit stitch
again for the full row. Let's turn the work around and we'll be working
the polo stitch again for the whole row. Insert your needle from right to left into the
front of the stitch. Wrap the yarn around and pull up the loop
slide of the stitch. Insert the needle,
wrap the yarn the around and pull up the loop. Now that we have a
few rows worked, let's have a look
at the texture. On the right side, you can see the fabric consists
of all knit loops. It's all knit stitches. While on the wrong side, we have the texture
of polo bumps. This is how we distinguish
the net and polo stitch. The polo stitch is
showing as the bumps and the net stitch
as those loops. Let's finish our square working the net stitch
on the right side and the polo stitch
on the wrong side and then we will get
to the bind off. When your square is ready, just bind it off using the
same technique as previously. I will knit those
stitches and then slide the first one over the
second one of the needle and knit one and pass the
first stitch over second off the needle and
continue binding off until you have all the
stitches off your needles. When you bind off
all the stitches, it's time to even ends
so we weave them in on the wrong side
and actually the same process as for
garter stitch is applied. Let me show you very quickly. I will thread my needle
with the contrast yarn so that you can see and the
same as in garter stitch. We'll start by
inserting our needle under one frown and one smile. Then we will go around the front into the smile on the right and the frown below. Then around the smile into the frown on the right
and the smile above. Again around the
frown into the smile, and down into the frown. The process is exactly the
same as for garter stitch, except that the polo bumps
are closer to each other. Continue within ends for few
times more so it's secure and then just trim your yarn. This is our square in stockinet
stitch, as you can see, it's a bit curling on the edges, on the sides and awesome the
custom and bind off edge. This is the characteristics
of stockinet stitch. It's always curling and when
it's close to the edges. If you want to use it alone in a dish cloth
or for your headband, it's best to enclose it in some borders similar as how
I did it with this swatch. As you can see, the
stockinet on itself, it's curling and it's not
keeping the square flat shape. However, if enclose it in
the garter state border, you're good to go to have
a flat and neat net. Now that you have learned
how to do the polo stitch, in the next lesson, we're going to create
our third square with a totally different texture using the techniques
you learned so far.
7. Combining Stitches: In this lesson, we will combine the techniques from
the previous ones to achieve a new texture in
fabric with sieve stitch. Sieve stitch looks the same on the right and the wrong side, and it's just a
combination of knits and pearls that are
alternated in each row. As well of this project, I want to show you
a simple technique to make your edges neater. As you can see, we will be working
an edge that looks like a chain of loops. Let's get started. Let's cast on 20 stitches the same as for previous squares. To work our neater edge, we'll be always slipping
the first stitch in the row and always knitting the
last stitch in the row. To slip the stitch,
insert the needle as if to pass from right to left
with the yarn in front, and simply move it from the left needle to
the right needle. Then move the yarn to the back. Now we will be working, Knit 1 and Pearl 1. So we will knit the first stitch and then pearl the next stitch. Again, Knit 1 stitch, and Pearl 1 stitch. In the first row after custom, it's always a bit tricky
to work the stitches, however, in the next
rows, it's much easier. If at any point you forget
which stitch is the next, you don't have to count, just look at the
previous stitch. If it's a pearl, if you see the problem, the next stitch has
to be a knit stitch. If you can see a loop
of a knit stitch, then the next stitch
has to be a pearl. Here Here have a pearl, and the next stitch should
be the knit stitch. Remember to knit the last stitch so we can have this knit edge. Let's turn our work around. After you turn your work, remember we will need to
slip the first stitch. So with yarn in front, insert a needle
from right to left, and slid the stitch from the
left to the right needle. Then in the second row
of the seat stitch, we will need to change
our stitch pattern a bit. So we will need to work
pearls over knits, and knits over pearls. Here, this stitch
is a knead stitch. So we will need to pearl. The next stitch is
a pearl stitch, so now we have to knit. So pearl stitches
over knit stitches, and knit stitches
over pearl stitches. Let's work this
way until we have one stitch left on our needle. We have one stitch left, and we will need this stitch. Let's turn our work again. We'll be working the same way. So I will slip the first stitch. Now, the first
stitch is a pearl, so we will start with
a knit, and pearl. So knit over pearls
and pearls over knits. Continue working this way
until you have a full square. To bind off, you can either needle the stitches in the binders
as we did previously, or you can follow the stitch
pattern in the seed stitch. Here I will follow the pattern, so I will slip the first stitch and then the next one because
here we have pullback, so now another work flow, pass this stitch over, and then I would pearl the next stitch to keep
the stitch pattern going. Again, knit and pass over
and pearl and pass over. Then I will follow
the same pattern until end of the bind off. Now that we have the
square finished, let's weave the ends. I will be using my
contrast here again, just to show you a little
bit on the diagonal. Take your needle
and insert it under two pearl bumps in
the column and pull. Now we'll be going down, so we will insert the needle into the pearl
bump on the right, a little bit above, and into the next one below. Now again, we will be going up, so let's insert into the next
pearl bump a little above, and into the next one. Let's do it a couple more
times just to secure the yarn. Each time, we'll be going
into the pearl bumps that are a little bit
above the previous ones. In this lesson, we learned
how to do the post edge and a slip stitch edge. With this knit and
pearl stitches, you can create a lot
of different textures. You can refer to some
stitch dictionaries or the Internet, or even design your
own stitch patterns. Next, we're going to start our design process
of the head month. We're forking a swatch.
8. Swatching: Now we will get to planning
our headband design. First, the fun part, choosing the texture, so the stitch pattern
for your design. You can choose any of the stitch patterns
proposed in the guide, or decide on your own
knitting per combination, or find the stitch
that interests you on the Internet
or anything book. If you're a beginner, look
for small stitch repeats, so 4-6 stitches wide. Then it's time to work a swatch. Swatching is an
important part of either designing or following
a knitting pattern. It's crucial to get
the finished item of intended dimensions and
not be disappointed. A swatch is just a
square created in the yarn in which you will
be knitting a finished item. The gauge is measured over 10
centimeter or four inches. Keep in mind to knit
a swatch bigger than this to get
accurate measurements. To estimate the stitches
to custom for the swatch, you can have a look
at the yarn label. Many brands include
recommended tension there. I've got the Novita
DRM label here. They recommend eight in stitches per 10 centimeters
of four inches. In this case I would
custom more around 24. It's good to factor in the stitch repeat into
the custom stitches. For example, if you have
a five-stitch repeat, choose a multiple of five. Now it's time for you to work up a square squat in
your chosen pattern. I will be knitting my
headband in a more stitch and I've got my swatch prepared
already right here. After we knit this swatch you should block in before
taking measure. Blocking is basically
the process of washing your knit
for the first time. It evens the stitches out. The yarn may expand a bit. Some yarns are stretching
after washing. Blocking this which
will allow you to avoid unpleasant surprises
and then gauge measurements according to how this knit will look like
after washing the car. To block your swatch, and also your finished knit in the future fill a
bowl or sink with water add some wool wash and let this swatch soak for
around 10-15 minutes. Then really gently remove excess water by wrapping
it into wet towel, then lay it flat on
a towel or a mat. Give this one to proper shape with your hands
and leave to dry. When it's dry, you can
measure the gauge. I will show you how to check it on a few stitch patterns now. Here I have my stockinette
swatch I created. I will take my tape measure. This what is obviously
not big enough, but I will show you the
concept in a smaller scale. I will take five centimeters. See where you have
the five centimeters. Now count how many stitches wide are fitting
into that measure. Here we have the first
stage. This is the loop. The second one, second loop. Third one, fourth, fifth, sixth, seventh, eighth. I have eight stitches
in five centimeters. Then we will need to count
how many rows we have. Again, use the tape measure
and again count the loops. Here we have the first stitch, the second one, the
third one, fourth one. We are counting
basically these stitches which are in stocking
at very well visible. Now to the garter stitch. Garter stitch may be
a little bit more tricky because we are
alternating some rows. It's easiest to count on the state gauge on
the pool bumps. Take our measure and
count the frowns. This looks facing downwards. 1, 2, 3, 4, 5, 6. It's really easy to count the pool bumps in the
stitch wide gauge. Now for the rows. For the row gauge it's a bit more tricky because
we have the rows with pool bumps and
also the rows with knit stitches which are
a little bit hidden. Here we have the first pool bump and then the knit stitch. It's 1, 2, 3, pool bump, 4, 5, 6, etc. Now I will show you how to
count it in the seed stitch. For the stitch gauge we have alternating pearls and
knits in each row. To make it easy, you can count just the pool
bumps in different heights. Here we have the first
pool bump, the second, third, fourth, fifth, and so on. If you look closer, you can also count the pearls and knits. For the row gauge you can
follow the same logic. Either just the pool bumps 1, 2, 3, 4, 5, 6 or look closer for the pool bumps and
the knit stitches below. Pool bump, knit stitch. Now that you have your swatch ready and know how to
measure your gauge, we're going to do the basic math for your headband design.
9. Headband Design: In this lesson, we will do the quick math for
our headband design. To give you an understanding
of the construction, we will name the headband
as a long rectangle and then we will sow together both
edges to create the twist. The cast on edge will be
the width of our headband and the length will become
circumference after sowing. Open your design planner
on the math page and note your gauge from
the swatch in Section A. My gauge is 18
stitches and 24 rows. Next, the size of the
width of the headband, I usually choose 10 centimeters, so four inches for an adult, and seven centimeters, so around three
inches for a baby. For the length, you'll
want the circumference to be a bit smaller than the
actual head circumference, so it's pretty snag on your
head and doesn't slide off. Measure your head and then
subtract 0-5 centimeters, so 0-2 inches depending
on your preference. You don't need to make a
final decision just now. You can just try on the
headband as you work on it. Note your width and length in centimeters or
inches in Section B. I will be making a 10
centimeter white headband, and I want it to be
47 centimeters long. In Section C, we will calculate
the width stitch count, so the cast on stitches. To do that, take the amount
of stitches you had in your stitch per 10 centimeters
or four inches multiplied by your desired headband width
in centimeters or inches and then divided by 10
centimeters or four inches, whichever format you use. If you want the headband to be 10 centimeters or
four inches wide, obviously, you will
need to do that. That will be exactly 18 stitches for me,
as in the swatch. Then we need to take into account the stitch
repeat that's Section D. Over how many stitches do your work your stitch repeat, Check if the calculated starting stitch count is a
multiplier of this number, if not, run the cast on to the nearest multiply
of your stitch repeat. I will be working a two-stage
repeat of mass stitch and 18 stitches is a multiple
of two, so I'm good. If you rounded up your
stitch count in Section E, check quickly if the change hasn't affected the
width too much. Multiply your revised
stitch count by 10, and then divide by your
gauge in stitches. If you're good with the result and it's not too big
or small, perfect. If not, try another multiple of this stitch repeat
and repeat the check. Sometimes it won't fit perfectly and then you will
need to consider if you want to go with
the initial desire, headband width and deal
with partial stitch repeat, or change the stitch pattern. Last, decide if you want
to add the neat edge. If so add two statistics
or revise stitch count, and then you have the
cast on stitch number. While it's easiest and most convenient to measure
the length as you work, instead of counting rows, you can do the same type
of calculation for length, which is especially helpful
for dish gloves or blankets. The logic of calculations
is the same as for width. You'll just be using the
row gauge as the reference. In Section G, we can
multiply our gauge in rows by desired length in
centimeters or inches, and then divide by 10
centimeters or four inches, whichever format you
measure your gauge with. For my gauge, 24 rolls and desired length
of 47 centimeters, I would need to work 112.8 rows so I will round it up to 113. Then in Section H and I, you can verify your row
count with your row repeats over stitch pattern in the same way
as for the width. That's it. Now that you know how
to do the quick math to plan out your simple design. In the next lesson, we're
going to need our headband.
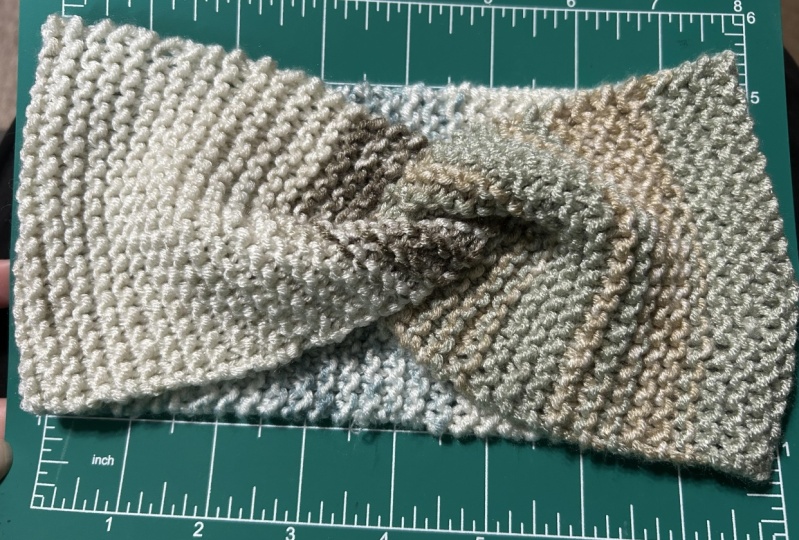
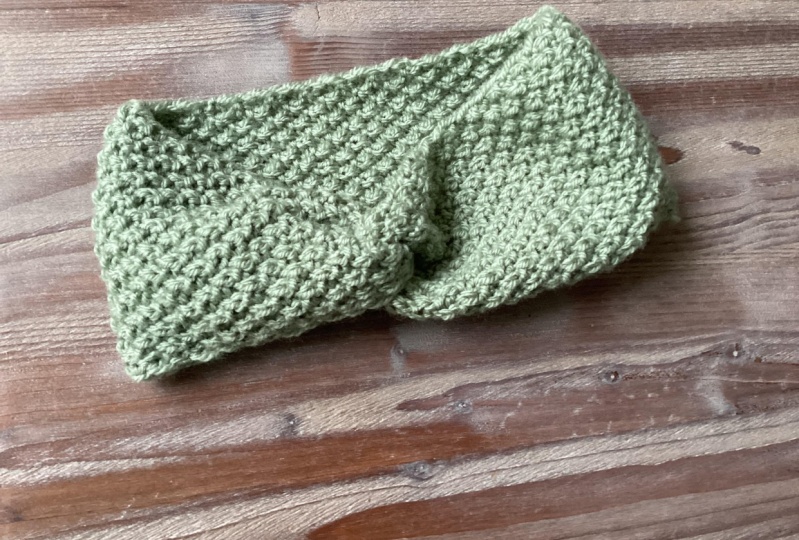
10. Knitting the Headband: Now it's time to
knit our headband according to the design brief. I have chosen mustard
for my headband. I calculated I will need 20
stitches for the custom. You can start by casting an [inaudible] stitches as you calculated in
the design planner, or you can follow along with the same stitch pattern
and the custom as me. I custom 20 stitches and I will be working
on moss stitch and I will be making
a slip stitch border. I will slide the
first stitch off and work knit one, purl one. Then at the last stitch. In the second row
of the moss stitch, I need to follow
the same pattern. I'm starting with a
knit stitch then purl. Knit and purl until end of the row with knitting
the last stitch. I work two rows of
the moss stitch and now in the third row, I need to switch up the pattern. I will be working
purl stitch over knit stitch and knit
stitch over purl stitch. I'm starting with a purl and then knit until I have one stitch left on the needle and then I will knit
the last stitch. In the moss stitch, you
always work two rows in a set stitch sequence before
switching the sequence up. This is my first row, and I switched just
in the previous row, which you can see. We have two purls then
we have one knit, so it means that we need
to work another row in the same sequence as
the previous row. I have my another
two rows worked. I can see here I have
two knit stitches, so I need to switch up this row. Knit and purl. Continue to work your headband until it's as long as you need. You can either follow
the calculated length and then check if it's
fitting well around your head or just work and try
it on as you go. Finish your headband
and bind off and then we will get
into the sewing part so we can create the twist. When your headband is
as long as needed, bind off all the stitches and cut the yarn with a
longer tail than usually. Around 40 centimeters
or 16 inches because we will use that end
to sew together our headband. You can weave in the yarn
end from the custom edge.
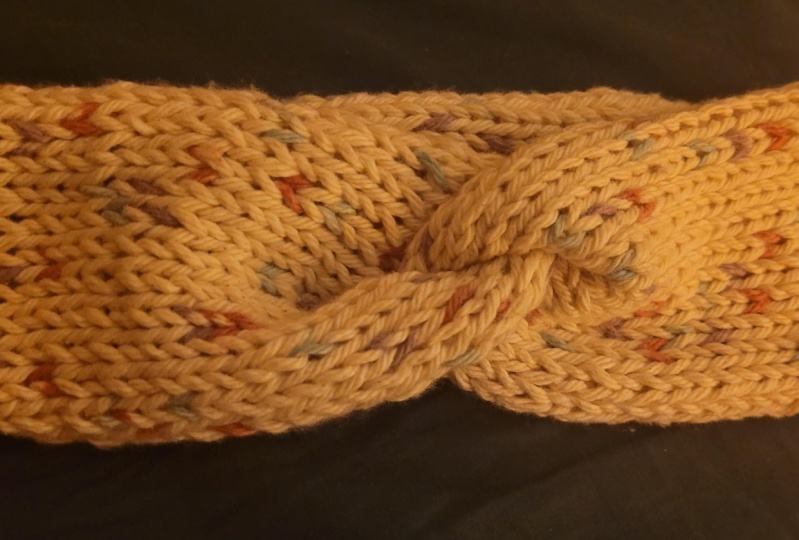
11. Sewing the Headband: Now we can sew the
headband together using the longer tail
from the bind of edge. I left my end from
the custom edge, woven in this funky, very visible way just to
have a differentiation between the right and wrong side because the moss
stitch is reversible. I will weave it in
properly later on now I just want for you to have this point of reference. To start the sewing, we will need to
place our headband with the right side facing us, so I will turn it around. This is my right side. Thread the needle with
this bind off long tail. Take both edges of the headband, pinch them together
so they fold in half and place the halves between each other
like sandwich. To make it easier, make
sure that the side, the corner with the
tail is on the outside. We stitch together and put
it together like a sandwich, making sure it's all even. You can see we'll be
sewing on the wrong side because here is my front tail. Take your tapestry needle
and now we'll start sewing. We will need to insert our needle under
the bind off edge. Then guide it through all
of the layers also under the bind off edge and
pull and then back. Take extra care to
make sure that each time you're guiding the needle through all of the
layers for stability and so that some funky edge is not picking through
on the right side. Do it a few times until you reach the other
end of the edge. Now weave in the CRM tail a bit. You can do it in the
same way as the sewing. Just for some extra safety
that it doesn't unravel. Now you can cut the tail off. Again, we did the sewing
on the wrong side. Now we have to flip the
headband and it's done. All that is left now is
to block the headband and you can enjoy wearing it. Remember to handwash
your knits in lukewarm water so they
last a long time. Now it's time for a wrap-up.
12. Wrap Up: You made it. Congrats. To recap, you learned
certain techniques as casting on, knitting for
stitches, and binding off. You also design
your own headband. Now that you've got your
first project done, you're probably wondering how you can apply your skills next. With the same design logic, you can calculate other
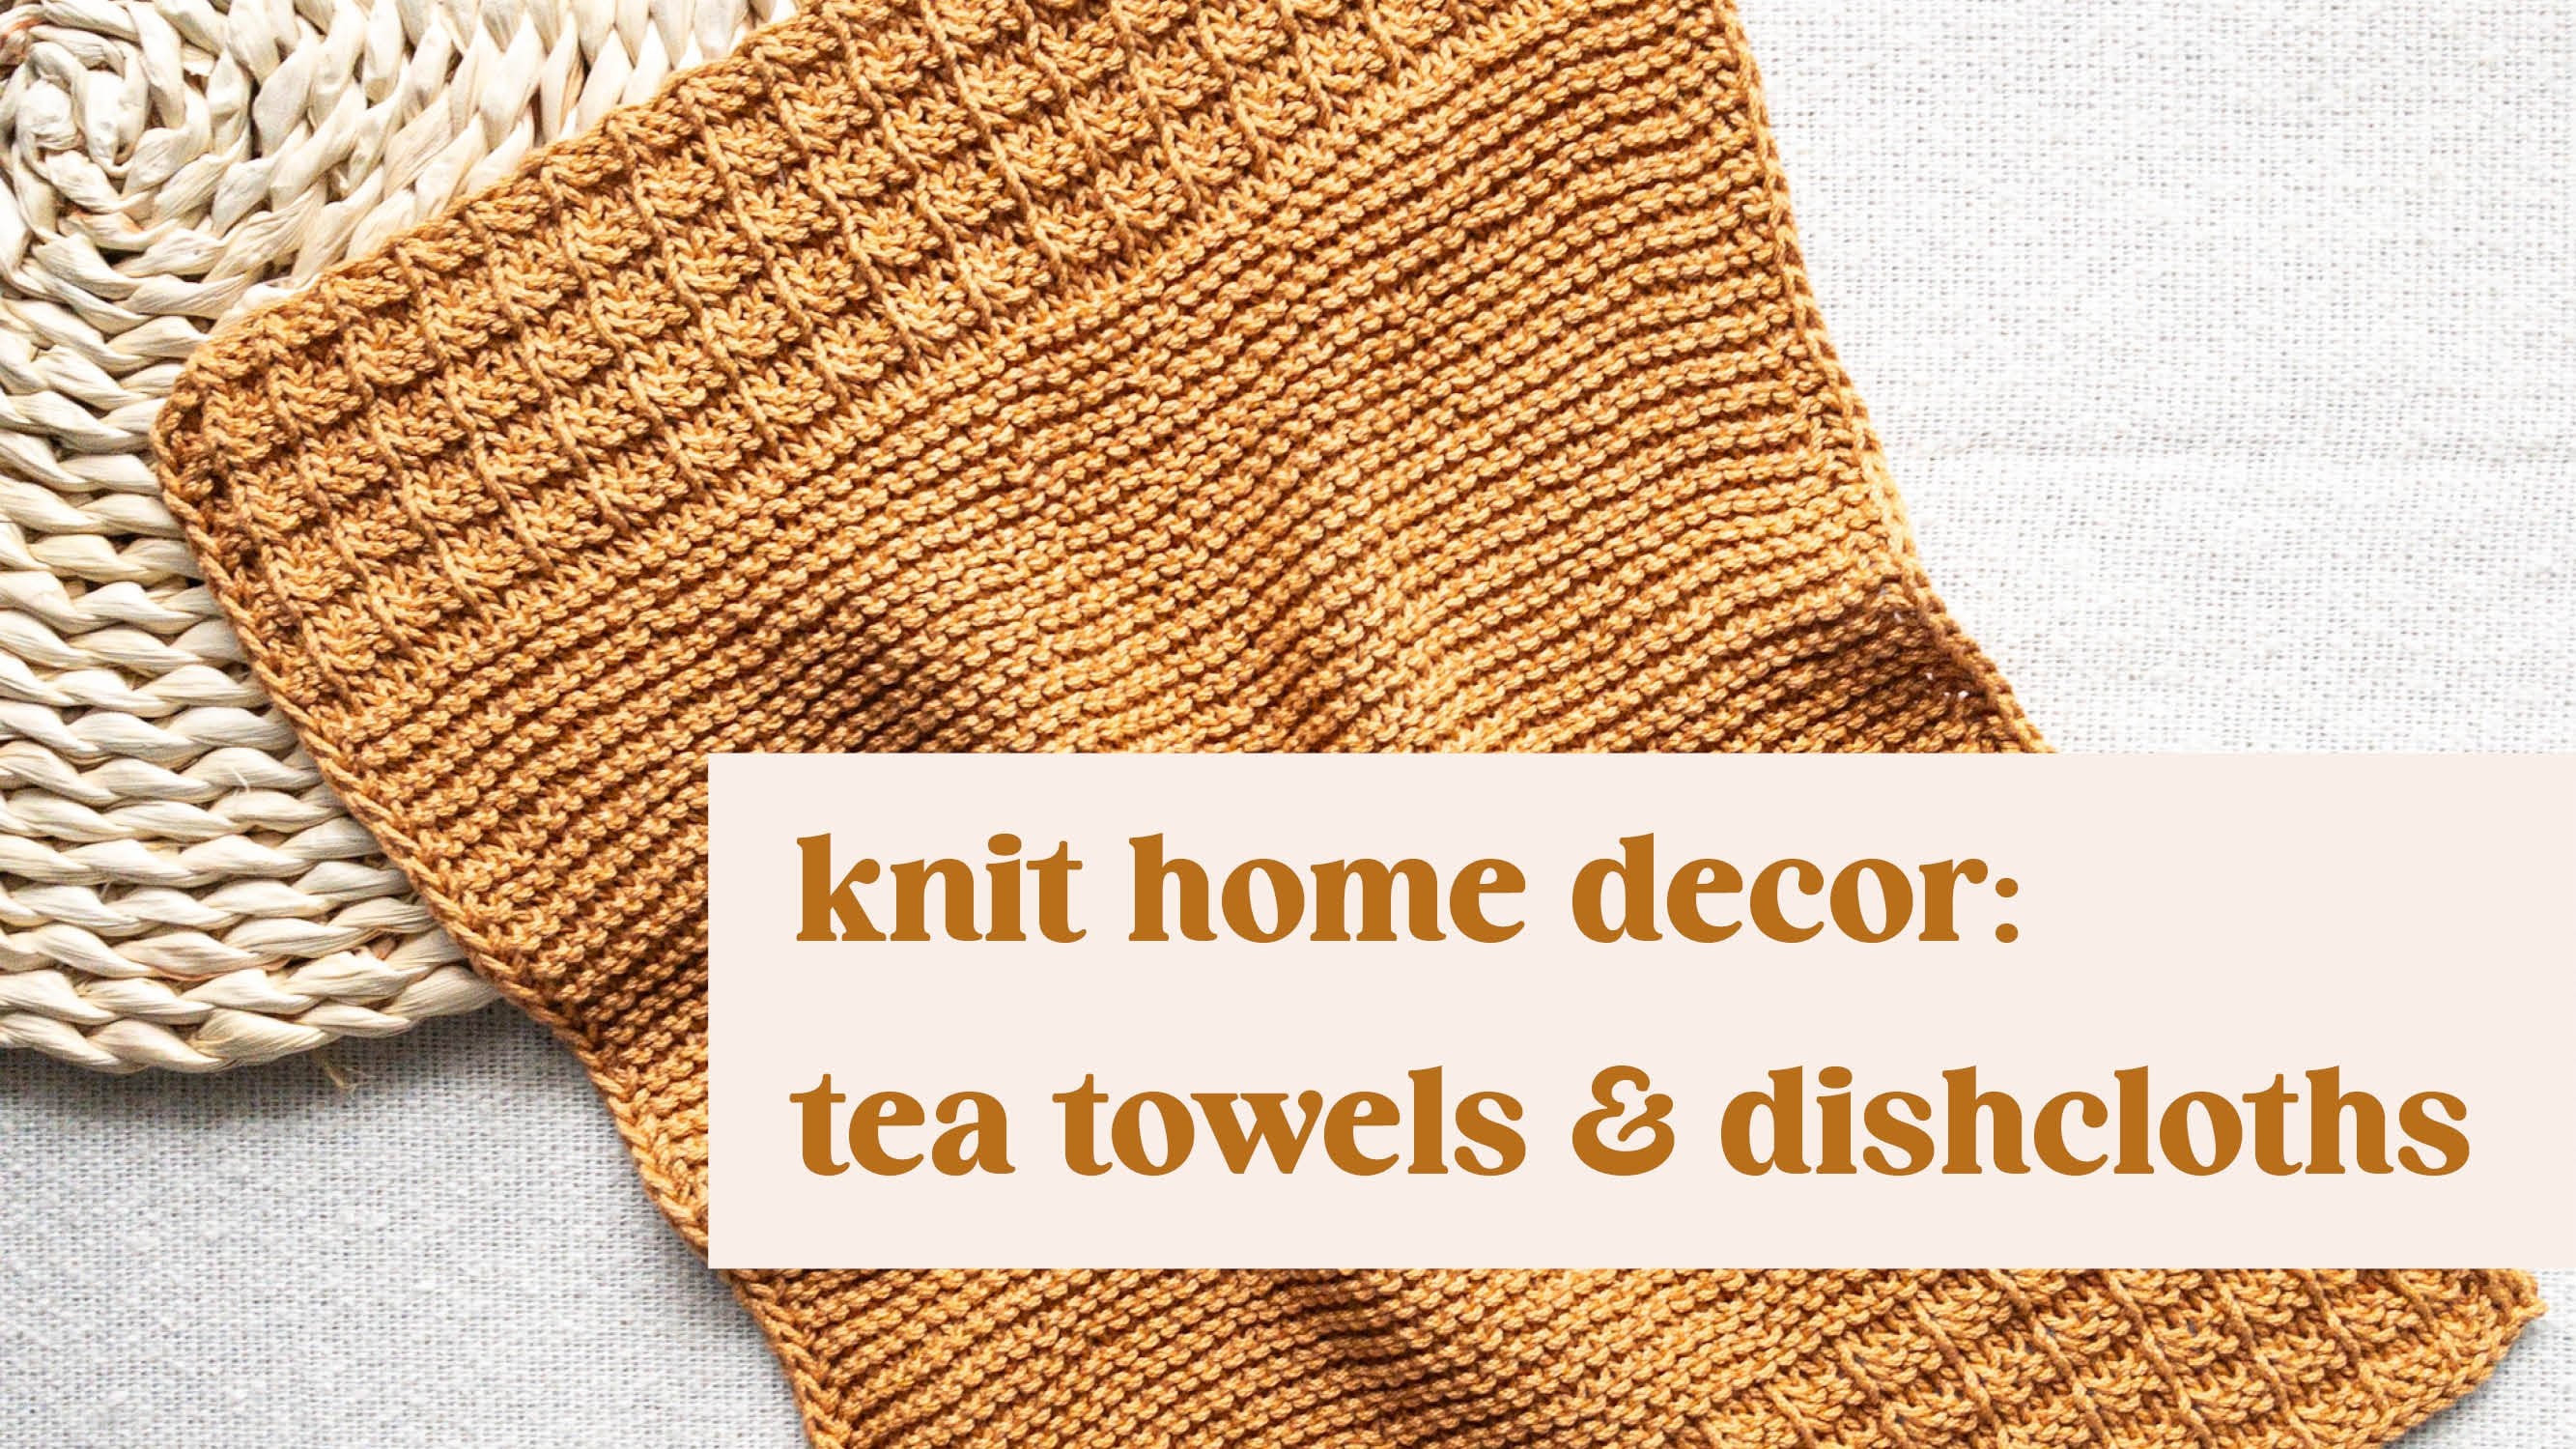
rectangle-based designs like a dishcloth, a
scarf, or a blanket. Simply, plan the dimensions
of your project, create a swatch, and follow the same math
as for the headband. I can't wait to see
your creations. Remember to post your
project in the projects and resources tab on Skillshare. If you share your
knit on Instagram, please tag me as well so I can see your
beautiful headband. You can also follow
me on Skillshare and Instagram to be in the loop when I release a new class. Happy knitting.