Transcripts
1. Welcome!: Welcome. I'm so glad that you're joining me for this
course because you are going to learn to make some pretty
incredible landscapes out of watercolor and
just your favorite paper. You can do this
in your notebook. You can do this on really
nice watercolor paper. You can do it, it really as small as you want or
as large as you want. So just have fun. And remember, we're
going to learn some really new techniques here that you probably will
be using for a lifetime. This is my absolute
favorite way to paint. I'm so excited to be
teaching it to you today. And it's so much easier
than you think you will get up and running on
this kind of technique. So, so quickly, you'll be
mixing up colors and just experimenting and just going
with your imagination, which I love to encourage because what are we
without the imagination? So in any case, I love this
technique because it is so simple and it is not
really thought out. It just kind of
go with the flow. It's very organic and
you use what you have. That my friend is like the
essence of watercolor. It's not making it that hard. It's just making it natural and something that just
comes from your imagination. Now, even if you don't have
a great big imagination, you can still do this because literally things will appear
before your very eyes. And I'm going to show
you how to get there. I hope you come in and
take the class with me. We're gonna do a few
different kinds of these. And I think you're gonna be
really happy with the result. So I'm really excited to
get started. Let's go.
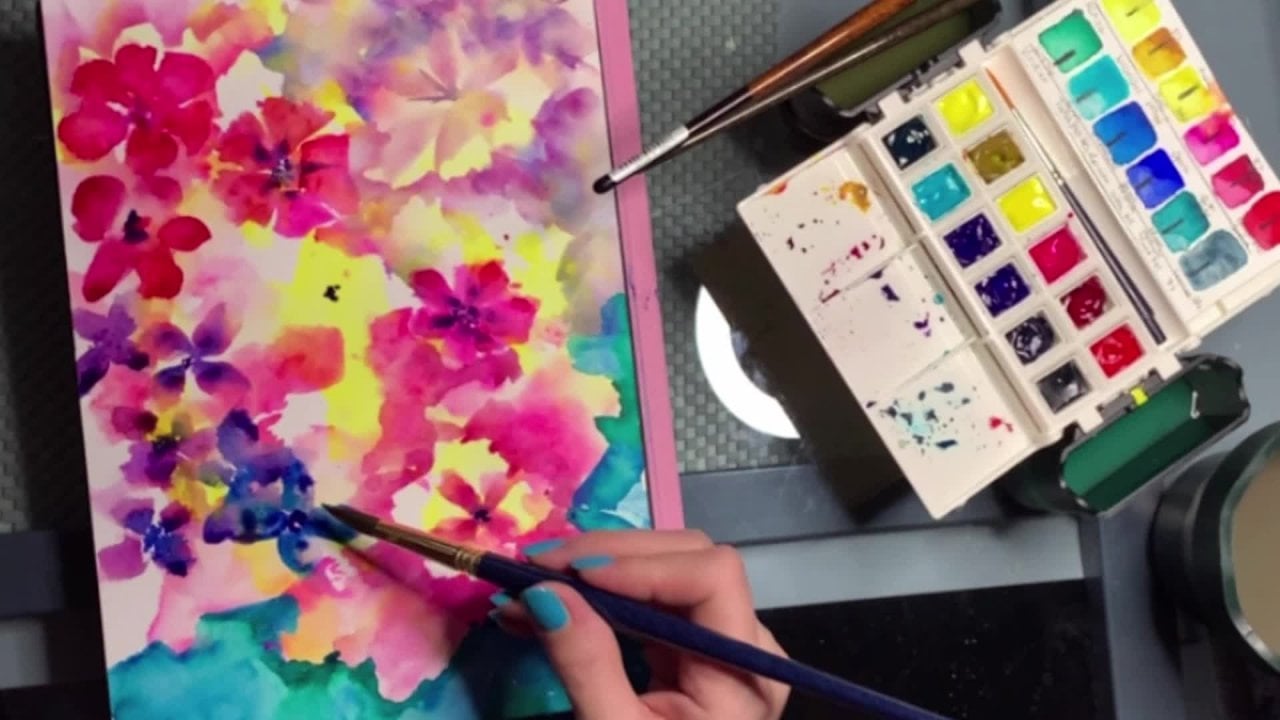
2. Materials and Supplies : So for this course, it's going to be pretty simple. You don't need a lot
of fancy things. I just love a flat brush around
brush and a plastic card. If you have a palette
knife that'll work too, you're going to
need some to paint and some really nice paper. Now, you can use your
watercolor notebook. You can use a £140 paper. But I also recommend if
you're gonna do what I want, a heavier paper, so
I usually use £300. This is actually a block
of paper that I have, and it is by Paul Rubens, so it's not really
that expensive. I think it's really
great quality paper, it's a 100% cotton. So always try and use a 100%
cotton for these if you can. But again, if you just have your watercolor notebook
or your sketchbook, that's fine too for right now, just use what you have. You're gonna get a feel for how much water you can
actually use on these things. And versus the paper, I find that if the paper
is not a 100% cotton, it doesn't really
like the water can bounce off of it a little bit or it can warp a
little bit more. But again, that has to do with the kind of
paper you choose. The price of the
paper sometimes does reflected and what
the paper is made of. At the end of the day, just use what you have at first because you're just
getting used to things. And you're going to find
that you're going to have some favorites and some
not-so-great favorites. I even recommend getting
a paper sample pack from a company that
specializes in watercolor papers or going
to your local art store and seeing if they have a paper pack so you can try out
different things. Or you can also buy
smaller versions of paper, like maybe paper cards or things like that
that you can just experiment with just to get a feel for what papers are like. I also recommend if you
are in an art class, maybe your art teacher will put together some sample
cards for you to use and that will
be really helpful in sampling out
different papers. If you find that you
really want me to talk about paper further, I can always do that
on another video. Just let me know and it'll be a suggestion that I will
definitely keep in mind. As far as paints to paints are going to
work the best for this. Pans are a little hard
because you've gotta get parts of the paint
onto the surface. So if you're just using a brush, you can do it with a brush, but it works better if
you have some depth of color and pans are
going to be a little more difficult to get
the depth of color. Not that you can't do it, you can, but it's much
easier to YouTube's. And also the palette knife or the plastic card is
going to be essential because the more
rough it is as far as not being a
specific paintbrush, then the easier it
will be just a smear that paint right on the paper and see what you get after that. You'll also want to use a spray, water brush was
really, really handy. Two glasses of water. And maybe even see what
colors you feel like using. I suggest just starting
with one color at first. For this, you don't need
a big variety of colors. But if you want to choose, maybe a blue is really, really nice and each
shade that you want, and perhaps we'll go
with a yellow down the road or a green just to kind of shake it
up a little bit. But you don't need a lot. Just start easy
and just remember, you're just going to get
in there and have fun. If you want to tape
your paper down, you are welcomed to. That is just done
with painter's tape. Or you can use like
craft tape or something. This is me just establishing a border on mine
because I wanted to use a really big
sheet of paper and break it up into blocks
in order to paint this. But you don't really
have to do it that way. You can use little paper
cards and you feel free to like not tape them down if you feel really
comfortable with it. But again, the 300
GM paperweight is better if you're not
going to tape it down. A block is always great because blocks obviously don't warp. They stay put. But I also take the
border down just as a preference for
things like this because we're going to use a lot of water, it's going to bleed. And it's kinda nice to control. Have a little bit
of control over where your paint is going to go. All right guys, let's
get in and get started.
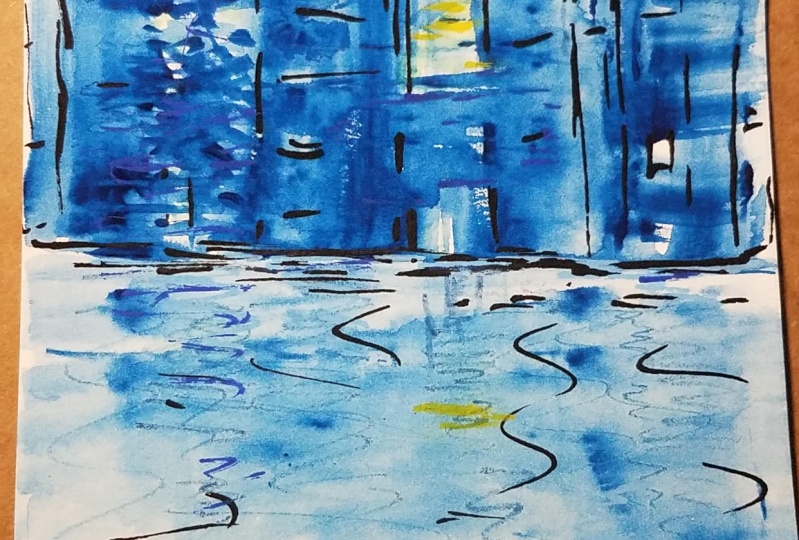
3. Demo 1: Painting Abstract Watercolor Landscapes: Sheets. So for our first sample, we're going to be painting in an abstract landscape that
it's a really simple, just one color and
choose one color, a brush, and a plastic card. And that's pretty much all
you need with some water. You can either do this on your watercolor paper or you can tape some sections out on your larger pieces
of watercolor paper. It is up to you. First, we're gonna
take a plastic card and just kinda get it wet. Now this can be a palette knife, a plastic card, or
your paintbrush, but I'm just adding a
little bit of water to the paper with my
paintbrush right now, just so that I can kind
of the surface started. Now if you notice, I'm
just painting one line across in order to get this effect and just
doing the top wet, the rest is gonna be dry. And that is so that we can
control where the paint goes. I'm using a decent
amount of water, but just to get a nice gloss and I'm rubbing it in really, really well without
fraying the paper. Then I'm taking the card
and getting some paint. This is to paint watercolor. And now I'm just going to
press the card onto the paper. Now remember it's
slightly wet, right? It's not sopping wet. And you can tell because it's
traveling but not too much. If your paint is traveling too much and you don't like it, then you just have to
let it dry a little bit. I used it damp. You can still see the sheen
but it's not sopping. And I'm staying pretty close to that line where I
didn't have it wet. Now I added a little drop
of water so that now I can start blending it out a little bit and
playing with it. Now remember there's no right
or wrong way to do this. You're just gonna
go with the flow. Just start making some marks, either horizontally
or vertically. Like I'm doing whatever it is that you feel like
doing with it. Just kinda play. As you play, you're going
to get a feel for what actually works and
how things look. Now to me, I'm seeing trees. I'm seeing kind
of a streaky sky. I don't wanna go too
crazy in the sky, so I'm leaving a lot
of white in there. And I dipped my flat brush in some water just
to blend things out. And I'm gonna go ahead
and get really brave and just blend this up to see
what happens with it. If you notice, the paint didn't entirely blend together
because it wasn't overly wet, but there is some dampness
on my flat brush. Now I'm just dabbing through. If you notice that
this is the area where I did not make it wet and the reason why
is because I didn't want everything to
bleed in together. I wanted to have a
little more control so that I could actually
bring the paint down. Then I can always
water like this. If I add water, I have the ability to blend out and kinda get different
variations of color. Now, some of this, I'm leaving some whitespace. And some of it, I'm not, I'm just doing some just kinda
playing with some really, really light shades
of the same color. And that's kinda why I encourage
you to do just one color at first because this is like a first layer for me right now. And it's kinda fun
to not have to worry about how colors are
mixing together or not. So right now I'm just
taking a little cloth and I'm just going around
as things are drying, I'm letting the first base
layer just kinda dry up because if I added
more paint to this, it wouldn't necessarily
get darker. Sometimes it can
just kind of cake up and not really do anything. If you're like that base
layer is already wet. If I just add more water to it, it could just bleed out. And I like what
I'm getting here. Now. I'm using the paper towel to remove some of the
paint in the sky. This is a technique I do often
when I want to just have some variety in the sky if it
didn't get streaky enough. Or I want to control how much whitespace
maybe even create some depth of color where just by removing
some colored areas. And that really helps
me get that dimension, this different dimensions
within the paintings. I'm taking the
plastic card, again, adding some more concentrated
paint in the same color. And I'm going to try and
enhance some of these areas where the color is actually
pretty dark already. But I want to start working in some shapes and seeing
what I come up with. Maybe this is going
to be a building, maybe this is gonna be trees. What do you see in
that at this point? That's really what we're striving for you to
see as an artist, as you're going through this
and you're doing yours, what did it do? Depending on the
pressure that you used, the paint that you use, how much water and the paper. Depending on your
materials really, they're going to
shape differently. So this is the time when you get to play and just have fun. Now remember, if at
anytime you don't like it, you can always take
a paper towel and literally just kinda blotted out or what your paintbrush like I just did and blend
a little bit more. I'm looking for texture. I think that texture is
amazing and watercolor, and it's one of the reasons
why I love watercolor, because they can literally just kinda play with the water, add a little more paint, and then go back in and remove some with a paper
towel if I wanted to. That to me is just
like it's organic. It's amazing and it's
so much fun to do. So I'm taking the flat brush. Again. It's kind of tacky damp. It's not super, super wet. This is a flat brush
from Princeton. It's one of my favorite from the Elite Series
because it doesn't hold too much water and it's great for a more precise
things like this. I'm actually smearing the color on just to see what I get. And I'm seeing some
like building shapes, like maybe a house
and some trees. Or maybe something a
little more industrial. It could even be mountains, the startups mountains, but
definitely a structure there. And I'm just bringing
some pieces up playing with the fact
that the flat brushes making these nice little lines. And that's kinda giving me a little more structure
in the painting. But like I said, this is, I did not use anything
to get this picture. I literally I'm just putting paint down and I'm
going with it. Maybe stand back from
it if you don't see anything yet or add
a little more paint, you can always start again. So don't be afraid of
what you're doing here. I think the big thing that
we wrestle with as artists, especially when
we're experimenting, is the fear of messing it up
or not liking what you get. But you're going to have a
lot of times that you're not going to like what you get before you like what you get. So just go with the
flow and just play. That's what I want
you to do right now. So in this part
we're establishing the foreground or the
lower part of the drawing. The painting now has
a structure of top that's abstract and some
of a C and an O paintings, buildings or maybe
structure, right? And trees. But the bottom
part is not yet developed. Maybe it's going to be water. Maybe you're looking at
this and it looks like a reflective surface or maybe you're looking at it
and it looks like ground. Remember we're doing
one color here, so the blue doesn't
necessarily mean it's water, but I'm just experimenting
again with the shapes. Now you'll notice that I am
playing with depth of color. So as the color is more
on the horizon line, It's deeper as it goes up towards the top of the
painting. It's a lighter. As it comes more forward, it's getting slightly lighter. I didn't really worry about
mixing it with water. You could even mix
your foreground, your real foreground with more water and see
what that looks like. But I'm just playing with my imagination and just
doing what feels right. It's really hard to, to tell you what's
right and wrong in an abstract because there
is no right and wrong. There's only what you
see as an artist. And I think when you
really embrace that fact, you'll realize that whether somebody likes a
painting or not, that's really subjective. It has to do with the subject
and how they feel about it. But in any case, that is my
abstract for the first one, I hope you guys enjoyed it. It's pretty cool and I
think we did a good job. I can't wait to see
what you guys do next. So before we go
into the next one, should give this a
try and leave me a sample in the comments so
that I can see how you did. I'm excited to see it.
4. Demo 2: Painting Abstract Watercolor Landscapes: So how did you do, for
example number two, we're going to just start like we did on
example number one, wedding the top with
our flat brush. Just a little bit of water here, but as you can see, I kinda tinted it
so that you can see how much water I was putting on. It's just a nice glaze and
I let it sit for a minute. I'm not too wet to dry. I'm adding a little
bit of paint with my flat brush instead
of the card this time. And I'm just kinda deciding where I want
to put the paint in. Now this is entirely up to you. You can do my example or you
can just choose on your own, but a good place to
start the horizon line. Because right on
the horizon line is kinda like where you can
establish the depth of color. It makes the most sense. Probably depending on how you are with your color
or what color you chose. Probably it's going to be the strongest in the
beginning, like This is. So I'm just gonna go ahead
and go straight across and just establish some kind of
horizon line is a good start. You can start with this guy, you could start with below. You can start with
the foreground, whatever you want to do. But for this one, I'm just going to start with the horizon again. It's really simple way to start. I feel like I get my
inspiration from that point. Now in the last
one we started up, this one I'm going to start down and I'm just kinda playing here. This is wet on dry. If you noticed, I had What the top and not the
bottom on this one. This is wet on dry. Now the reason why
I'm showing you this is because you're going to see I have a lot more control
in mixing the colors. This is just adding a
little bit of yellow to my blue and it makes
this amazing green. I love to mix my own colors. It's really, really fun. As I add a little more blue, it makes a little
more teal blue as it mixes with the green
or the yellow. It just kind of gives me
a nice range of colors. So I'm just kinda playing here. I'm playing with the
idea of I know nothing. Not looking for anything. I know nothing. I'm hoping it turns out. And I'm feeling one with
nature in a way, right? Because you've got
the greens and the yellows and the blues. And this could just be what the Earth
looks like underneath. It could be a foreground, it could be anything. But remember it's abstract, so don't worry about it. We're going to see what
it turns out to be later. There's never a picture in
my mind when I do these, I just kind of look in
play and then I'm like, Oh, I got an idea, and then we start shaping it. So this is just what
it is right now. I mean, what does it
look like to you? It could look like
blobs of color, I don't know, but to me, it definitely looks grounded and earthy and like lush
spring is happening, which is happening
right now where I am. And that just inspires me. It's just a great thing. So now I'm taking the brush and adding more blue, same blue. And I'm kinda trying to decide what I'm gonna
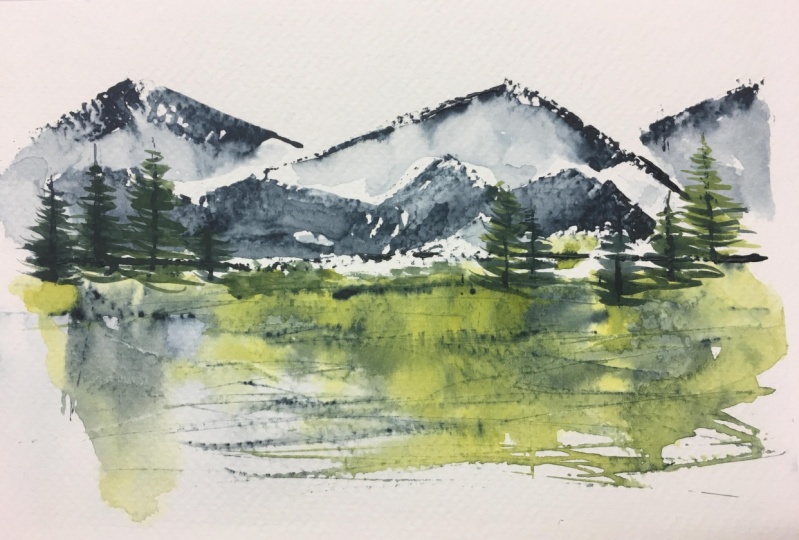
do up the top right. Probably landscape, I would say since this is a
landscape tutorial, will it be more abstract? Well, this is entirely up
to you for this example. I think I'm gonna go ahead
and shape in some mountains. And I'm just taking this side of the flat brush and I'm just kinda shaping out what I
think would the mountain. I shook the brush
just a little bit so that I could get like a
little bit of a drag. And now I'm just
kinda getting some of the more diluted color
and adding it in, trying to decide where
I'm going to put it. You can't really do it wrong. It's just really up
to the artist as to what you want these
mountains to look like and how you
want to add texture. I'm using the side
of the brush in a fan shape to add texture. And I'm trying not to
be perfect with it. I'm trying to kind of blop
it on a little bit in some areas so that it's
lighter and darker. And again, remember that
top of the paper had dried a lot even
though I dampened it. But if it were all the way wet, this would not leave whitespace. It would bleed in. To get whitespace. You went to leave those areas dry and then just
paint around them. If you don't care about
the whitespace or you want to lift the color
to get whitespace, you can do wet on wet. I've just dampened
the paper because I like the paper is slightly
damped and then dry. It just has a better effect
for me than bone dry paper. I like to work
somewhere in-between. That is just my preference. I would highly recommend
that you try both. Now I'm adding more layers of color as the background dries because it's a very light wash. I'm just picking up some more of that tube paint fresh
out of the tube. And I'm my paintbrush is very, very dry at this point. It's just got a little bit
of water still left in it. It's not a highly absorbent. Paintbrush. I'm using it like I
would if I were using a plastic card or
a palette knife. I'm just using the shape of the actual flat brush to establish some
additional shapes. I'm gonna do some lines up, some lines across and just kinda playing and see
what I end up with here, trying to sporadically
do them if I can. I tend to like paint. I don't know. For some reason I tend
to try and paint evenly. It's just not a good idea because you just don't want
everything to look the same. Now we're going to
let it dry just a bit and see what we're
gonna do next. Maybe with a round brush, I would say let's pick up the
round brush and see if we can turn those stubs into
something, maybe trees. That's what I would think. Teresa be nice to anything. There are so many
ways to lay in trees. I'm using a very thin, round brush and I'm
just kinda roughly taking some paint and forming some pretty basic Christmas
tree kind of looking things. This is a lot less
abstract than normally, but, um, it's kinda like
somewhere in-between, right? Because you look at it and you definitely know those are trees. And now you're starting to
see there's a horizon line, there's a mountain, there's
there's some specific things. What's going on underneath
that's up to you. It could be the
section of the Earth. It could be the reflection. We could actually paint some reflections in there
if you wanted to. But I just love how
it looks so far. I'm actually playing right now. Remember there's blue
lines for the trees. So I took the yellow paint and I'm now making
the trees with the yellow paint just because I think it looks
really cool and I know that it's going to
mix together and make this yellowy green luck. And that kinda goes
with the whole theme. So basically remember I'm still just using
to paint colors. I'm using a blue color and
I'm using a yellow color. And as I mix them together, it makes this really amazing green and all the
shades in between. So you don't need a lot of pink colors in order
to do these abstracts. A lot of times in fact, especially when you're
just getting started, I don't recommend that you use more than three pink colors because three painkillers will definitely mix to give you such a huge range that you literally can't
control yourself. You will be out of your depth. So, so quickly with all the shades of
three colors can make. So be really careful with that. The limit is, it's great to have convenience
colors in your palette, but you really don't need them. You just need three
amazing shades that you love to work
with and that can really take you
everywhere. One day. If you want to talk
about paints and colors, then certainly just
asked me and I will give you some information about how I mix my colors and how I do granulation and all
those crazy fun things. And I really have a
great time with color. I love using it, but I still pretty much
stick to the same three. The rest that I use are just convenience colors
just when I want to live in something up or play a little bit and just get
out of my comfort zone. Right now I'm just basically
taking a nice It's a Neptune round brush that holds a decent
amount of water. It's not overly saturated. But I love how this just
mixes color on paper. This is a technique
that a lot of artists use more advanced stages where
they mix color on paper. That happened as a result of the blue being there
first and then taking a second color and mixing it together as I went
along and then adding little more of one or the other just
based on my eye, that's mixing on paper. And it's pretty cool. It's a fun thing so you'll learn something else here today. Now remember in your
shape of your trees, they can be any kind of trees. I'm just doing these trees
because I don't know. I guess I just kinda felt
that way at the time. But you can do round trees, you can do bare trees,
you can do what? Ever you want, bushes, flowers, whatever
makes you happy. I suggest that you try it and do it or do the trees
that I'm doing. If that makes you happy
and you like it and it's easy and you want to practice
these trees than Awesome. Now remember when you start
to layer paint over paint, it will mix together. So if you want to get the
result that I'm getting, I'm not using this same
combination of those two colors. I noticed on one of them, I mixed more yellow. I used the yellow a
little bit brighter. Another one, I mixed a
combination of the blue and yellow and I mixed it on paper. And that's what's giving me these different
colors in the trees. And then sometimes they go into the another tree and I
actually add a little more. And that just helps me not
have everything look the same. I think one of the things
that we do with trees often in the beginning is we paint the trees with
the same color. And that's what that
second color is for. It's to add depth of
color and it's to add variations like
a little variety. Now just a little
splash of color here, and we are finished
with our second sample. I hope you guys enjoyed it
and learned some things. And hopefully you will show me what you
came up with soon. Happy painting.
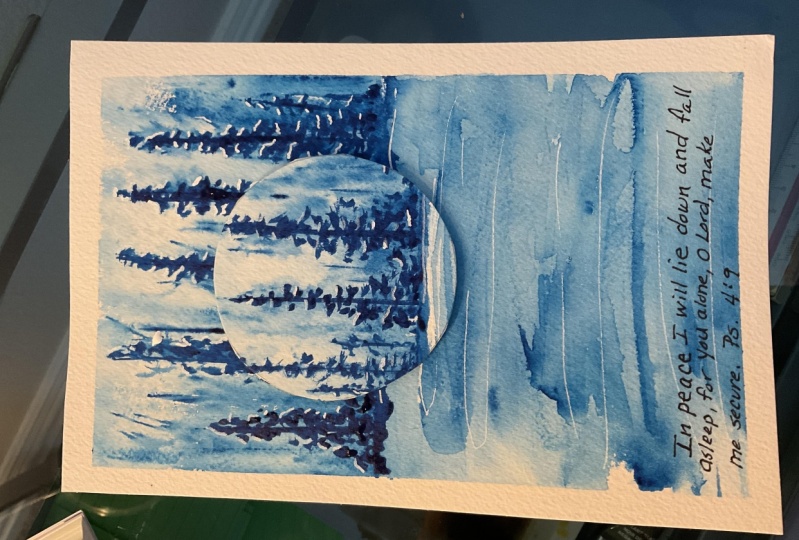
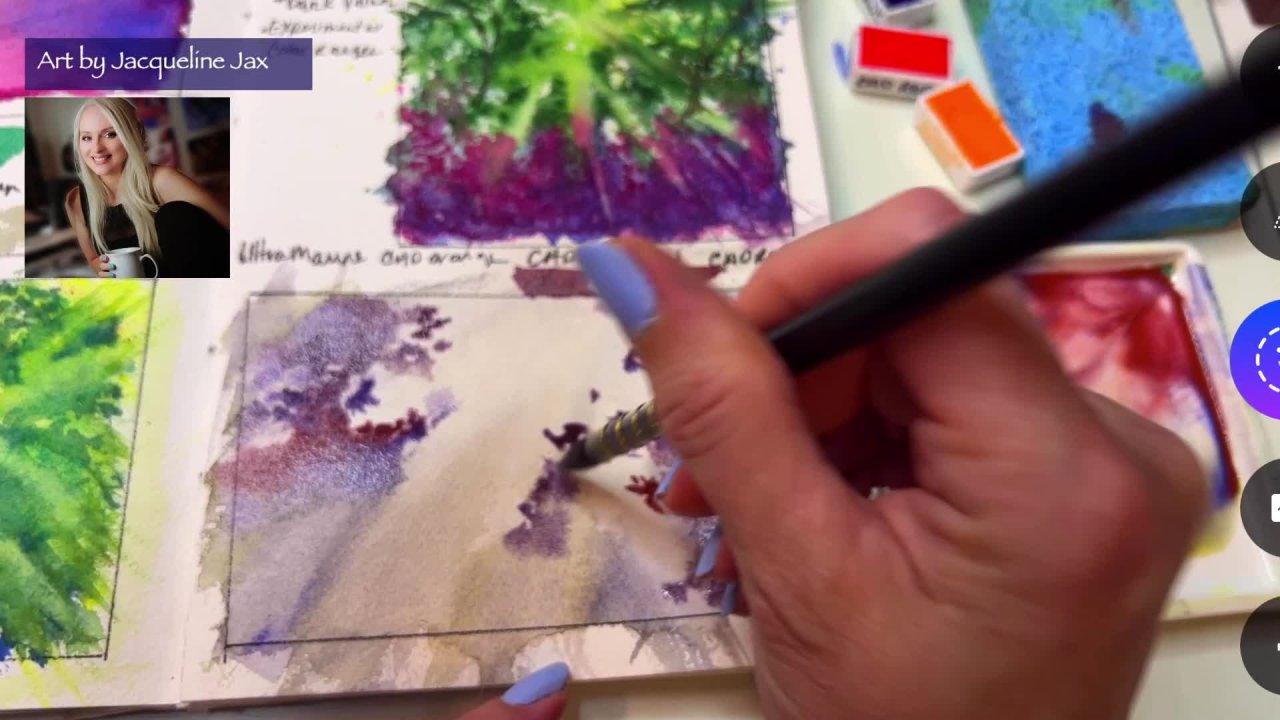
5. Demo 3: Painting Abstract Watercolor Landscapes: So for our third sample, we are going to be
using a flat brush and painting mountains
with a moon. So the easiest way to
paint a moon is just to load a really nice juicy flat
brush and go in a circle. So let's just do it. Ready? Are you daring? Here we go. That's my easy way to do it. Adding a little bit of water
and just do it a circle. It doesn't have to be a
perfect circle because you can always go
back in and kind of just shake it out like I'm
doing this is wet on dry, meaning wet paint
on a dry surface. I didn't not wet
this because they didn't want the circle
to just disintegrate. I'm using an indigo color. You can also use a
Prussian for this. This is a beautiful, beautiful color to use for like moonscape and those
kinds of landscapes. But this is, I just,
I love doing this. It's really fun. I would just do a whole practice run of circles. If you really wanted
to get good at them, you can shape these, not just for moons,
but also use them for roses and flowers and
petals and everything. So now I'm just using the
flat brush again and it's kinda roughing in
some mountain shapes. Now, I'm purposely
leaving white-space because our mountains
don't always just, they're not always one color. You want it to have
different melting colors. You just want it to have
action and activity. And in order to get that, you cannot just
slap on one color. That's where it just
becomes flat and lifeless. So if right away really quickly, you want to get
depth and dimension. Leave as much white-space
as you can and use different weights
of color, right? So some of it is
darker and then I wet the brush and I let it
get a little lighter. And then I skipped spots and
I use different angles on my brush in order to get
different shades from my color. This is the beauty of painting
with one color is you don't have to focus
on what color should I paint next and
where should it go? You're just leaving the light. And it's a great
way to learn how to control your painting and control what your
outcome will be. Because now you're
literally doing layers. You're waiting for things to dry and you're seeing
what that does. You're experimenting with
some wet on wet paint on wet. You're experimenting
with wet paint on dry. And now I'm just able to go back in and
just kinda enhance certain parts of the
painting just based on my eye and what I think
it should look like. Now there's no right or wrong. There definitely is not. Remember, this is your painting. So you do it exactly
the way you want to. You cannot do it wrong. You just just do it. Just do it, let it
fly, let it go. Why not? Who's watching?
Nobody's watching. You're just in here with me. Painting. We're just
painting together. Alright, so now I'm doing
the, the reflections. Now if you noticed, I didn't go through and paint water in. I just left to dry and just
left the white of the paper. I'm just doing something
really simple. I'm painting and painting
some reflections. It's slightly lighter
than the original. And my brush is very wet
doing it very roughly. Because if you looked
at reflections, they're not all one color, they're kind of spotty, right? It looks more natural fits body. If it were just perfect, it wouldn't look right. This is a good example. We want it to be spotty, we want it to have white
through it because that would be the reflection
of the light on the water. You have to leave
all that stuff. Otherwise, it's going to look
really flat and you're not gonna be that happy with it to get a more professional look, even though this is a
beginner professional look. Just don't try to be
perfect because the imperfect is the most
interesting thing. Now I just took some water on my flat brush and I
just basically wiped it around the bottom so that
I could simulate water. And I think it worked
out really good. I also took the
exact same thing. And I just kinda
went through and smeared it as a sky like a, an evening sky, more
like a twilight. And it really did work. I was surprised. I thought maybe I wouldn't
like it that much, but this is a great way to
add in a sky after the fact. And a lot of times you'll think, how do I add in this
guy before that, this is a great
way to do it now. Alright guys. So that's
our third sample. I hope you guys enjoyed this class and you had
a good time with me. If you want more samples, happy to do those for you. Just leave me a comment and let me know that you
enjoyed the class. Be sure to come and join me for another one here
on Skillshare very, very soon and happy
painting to you.
 Jacqueline Jax, "Creativity brings peace into your life"