Transcripts
1. Introduction: Hello everyone.
I'm Sylvia Spina, but you can call me
Sylvia if you want. I am an artist and
designer based in Barcelona and born in
Colombia. Guess what? I absolutely love
drawing and painting birds without even realizing I've been sprinkling
the better prints into my botanical designs, murals, and using them to
decorate my space for years. I am very excited to share
my passion with you in this class where
you will become a pro at drawing
birds in procreate. But here's a secret, you can totally use a regular
pencil and paper two. We'll delve into key
drawing concepts such as ankles, guiding
lines, proportions, breaking down complex
subjects into basic shapes, and touch on advanced concepts
such as negative space. You will learn tricks
for drawing eyes in different expressions to give your birth distinctive
personalities. And to wrap up, we will apply these concepts and draw a king fisher from
start to finish. By the end of the class, you will master bird
drawing skills. And I bet that you
will be able to even sketch realistic
birds from memory. There are lots of
things that you can do with these bird drawings. As a bonus, I will briefly
show you how to start decorating designs
straight away using Canva. For this class, you will need an ipad and an apple pencil. And no worries if
you don't have them. A regular pencil and
paper will work too. You might have to tweak
some of the exercises, but you will still learn the
concepts to drawing birds. Having previous drawing skills will be beneficial
to take this class, but I also want to welcome
beginners everyone. Welcome, heads up. This class assumes that you're familiar with procrit
interface and tools. If you're new, I'd suggest taking my first class,
Digital Illustration, A beginner guides to
Master in procreate, where you will build
a strong foundation. Let's create together and
unlock your drawing skills so that you can infuse
your artworks with the beauty of birds.
2. Your Class Project : Let's talk about your
project for this class. The most important thing
that I want to see in your final project is a refined bird drawing full
of texture and volume. Your class journey will begin
learning and practicing fundamental drawing
techniques that will highly improve your skills. That's why it's so
essential to download the folder I have
left for you in the project section
of this class. This folder will
grant you access to the different images that I have designed for each lesson. In this class description, I have left for you a link
where you can download a few paper high
resolution textures that I have photographed
myself by downloading them. You'll be joining my newsletter. You're welcome to publish these exercises if you wish
to showcase your progress. Moving on to the second
part of the class, I will demonstrate how I put these concepts into practice
whilst drawing two birds, a part and a kingfisher. It is in this second
part of the class that your project will
truly come to life. And I encourage you to draw at least one bird and document your journey
from start to finish. I want to see how you break down your bird into angles
and basic shapes. How you check the proportions
and refine your drawing. And how you bring it to life by adding various layers
of volume and texture. Because I have
designed this class to guide you through
each step so you will understand and internalize every
part of the process. At the end of each lesson, where I demonstrate how I
draw my Kingfisher Bird. I will ask you to take
a screensheet and keep it on your ipad until
the end of the class. When it comes to sharing
your final project, I would love you to upload them in order so I can
see your process. In this class, I have
added a lesson where I teach how to draw ice
in various styles. If at any point during
the drawing process, you decide experimenting
with different ice styles, take a screenshet as well as I would absolutely
love to see it. As I mentioned in the
introduction of this class, I am an artist, but
I'm also a designer. One of the things that
I truly enjoy is using my handmade drawings and paintings to decorate
or compose designs. As a special bonus
for this class, I have included a few
lessons demonstrating how I import all these drawings into Canva to design stuff with them. If you make any
designs in Canva, I would absolutely love
to see them as well. In your final project, just in case you don't
know what Canva is, Va is an amazing online
graphic design tool. It is free and it's
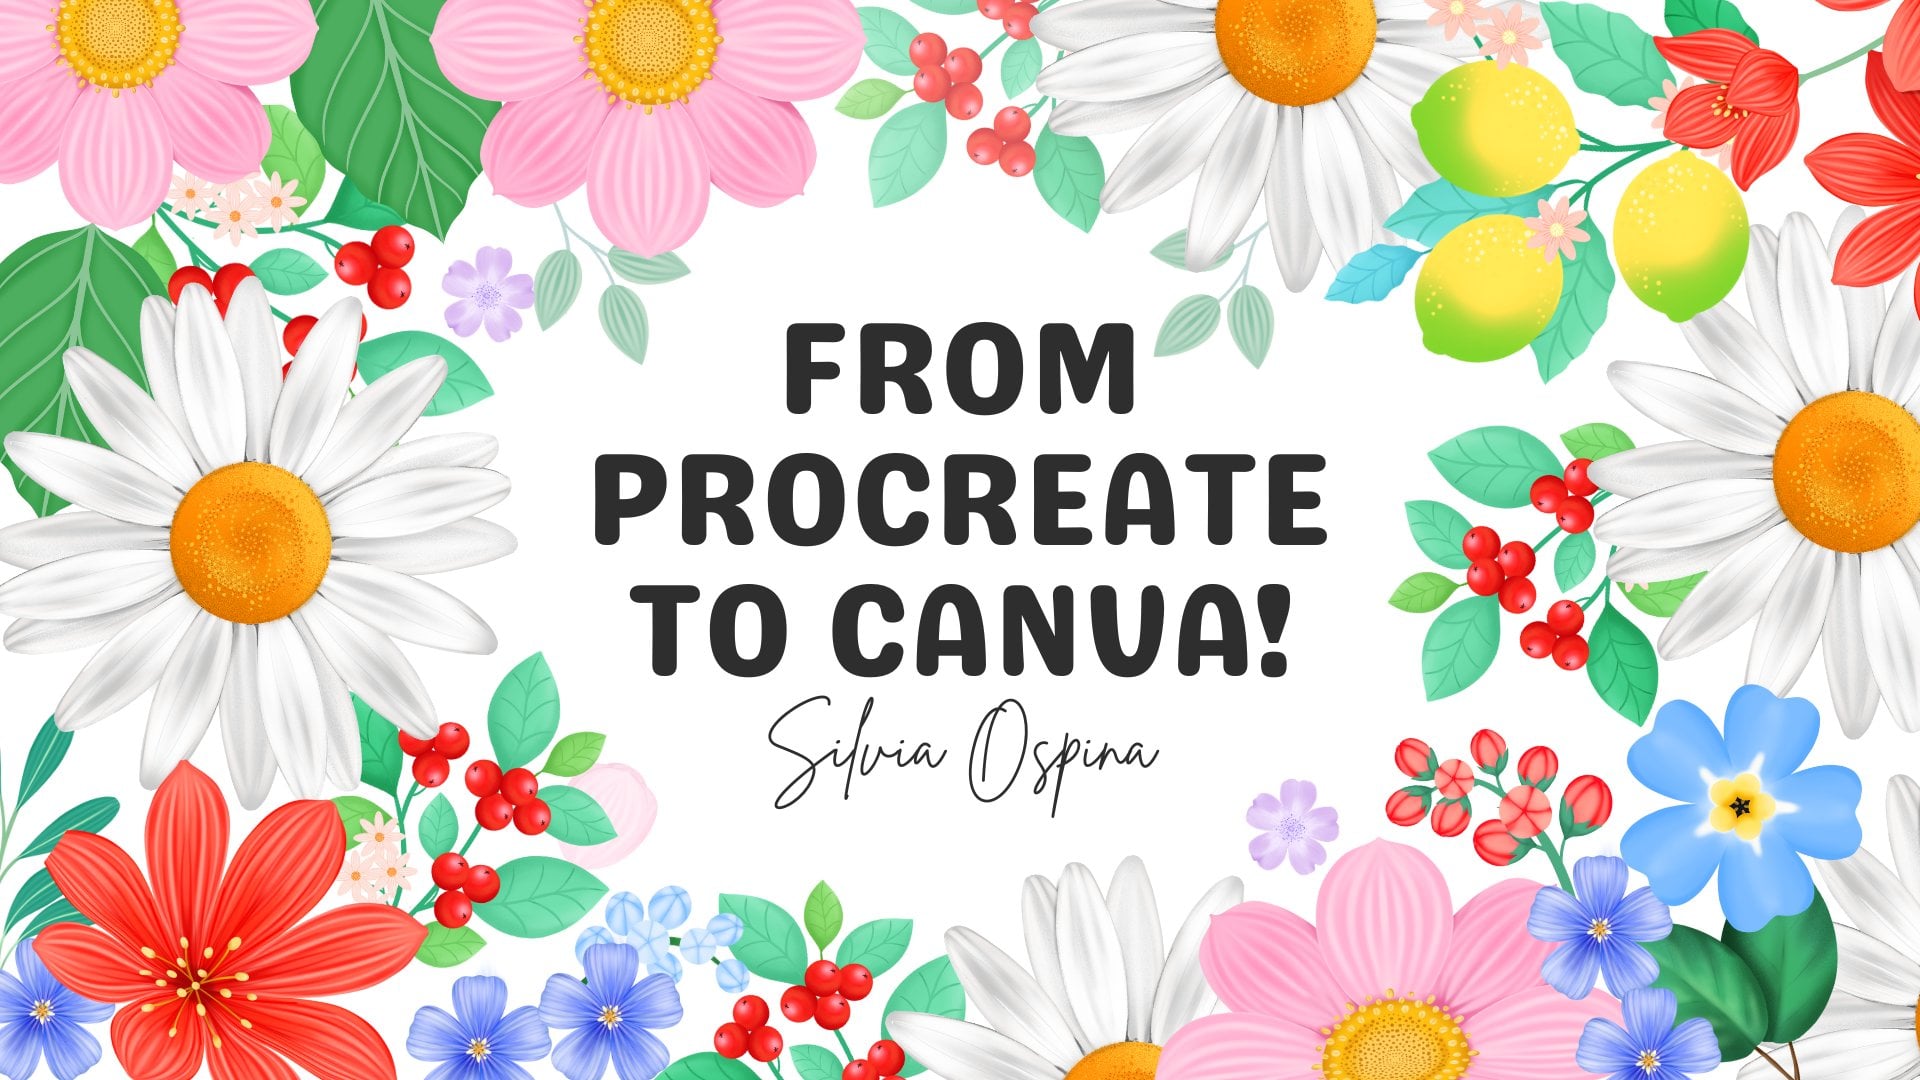
super easy to use. Earlier this year, I published a class called From
Procreate to Canva. Turn your digital illustrations
into botanical designs. If after finishing the class
you enjoyed the workflow, I highly recommend
checking that class out. You will not only learn
more tricks to use Canva, but you will also
learn how to draw beautiful flowers and foliage
to complement your designs. Decide to share your
project on social media. Please tag me at Sylvia's Pina so that I can see it and share it with my
followers as well. Just so you know, once in
a while I like to feature student projects in my
newsletter and Instagram. If you want me to
feature your project, you might want to leave me your Instagram nickname so
that I can tag you. I'm very excited to get started and I can't wait to
see what you create.
3. Gathering Inspiration: Let's see a few
inspiration sources that you can use when it
comes to painting birds. Inspiration can come from
all sorts of places. And I'm going to start
with my favorite source, which are books or stationery. And things that I
can basically grab with my hands and observe on my free time when I'm sitting on the sofa and I want to
get away from screens, I often find inspiration
by browsing in bookstores. A few years back, I had a
mural commission near Monsan, a natural park near Barcelona. At the time, I needed
specific images of the local plants and
animals for the mural. I tried searching
online for inspiration, but I couldn't find much that would truly spark my creativity. So I decided to go
to a bookstore. There, I found a
book that turned out to be a complete
game changer. It was filled with illustrations
and explanations of the plants and animals
from the Monsane region. Not only, it played a crucial role in bringing
my mural to life, but it also taught me things of the species that
I was painting. It also reminded
me of the magic of bookstores when it comes to
searching for inspiration. A few years ago, I couldn't resist buying this
book that contains 100 on 30 images made by an artist called
John James Audubon. He's a French American
self trained artist, naturalist and
ornithologist who completed a pictorical record of all the bird species
of North America. The original book is called
The Birds of America, and it presented 435 large
hand colored illustrations, of which this book contains 130. I will leave a link to this
book on the description of this class so that you can have a look at it
if you're curious. And lastly, I have this absolutely stunning
book which I love, which is called
The Wall of Birds. This book shows the
painting process of a 2,500 square foot painted by an artist
called James Kim at the Cornell Lab of Ornithology
in Ithaca, New York. This book includes
narratives of her process such as how she created
her custom mixes. It delves also into the unique challenges she had while painting
the mural such as, and this is a fun fact, making sure that the
artwork wasn't completely dominated by the more
showy male birds. There is a website where you can interact with this epic mural. You can zoom in really closely and really appreciate
each of these paintings, which are marvelous in a
behind the scenes video. Jane shares that
she likes to create detailed Polish
drawings for each of the birds before she
paints them on the wall. Once you have drawn bird once, it is almost by muscle
memory that she can draw them again
on a large scale. This way she doesn't have to
figure it out on the wall, but rather while sketching it. That is why I'm putting an emphasis on learning how
to draw birds in this class. Sketching builds
your confidence and familiarity with
the subject matter, in this case, birds. There is this page at the end of the book that you can spread out and you can see loads of the initial drawings
that Jane did. They are absolutely stunning. Now let's not forget about
Internet when it comes to searching for reference
images and inspiration. Pexels.com is a fantastic
source of creative inspiration. It offers a vast collection
of high quality, free to use images and videos, making it a go to
resource for artists. On this search bar, I'm going to tap on birds and straightway, I can find thousands of incredibly beautiful photos made by very generous photographers who share these photos
in here for people like us to use them for our projects
or to take as references. I'm going to share a link to this stunning bird
collection that I have put together
for this class. When you download the
resources for this class, you will see some of
these images in there. But if you want to
search for more birds, you're welcome to use
this to find Inspiration. Com is another that contains
royalty free images as well. In any of these two websites, you will find a ton of images which are absolutely stunning. And that can serve
you as inspiration, not just for the birds, but ideas for backgrounds. In the upcoming lesson,
we will begin practicing some sketching fundamentals that will enhance your
drawing skills.
4. Sketching Foundations: Guiding Lines: In the next few
lessons will practice essential sketching
fundamentals that will level up your
bird drawing skills. For those who aren't
using an ipad, you can print the exercises that I have left on
the folder that you downloaded for this class and use tracing paper
to follow along. In this lesson, we're going
to start by exploring the power of analyzing
angles in your birds. These angles will serve
as guiding lines, helping you to place
the body parts correctly before creating
a more refined drawing. If you open your procreate
birds class bonus, you will find these
four files in there. For this and the
following lessons, we're going to be using this
sketching practice file. If you tap on it, this
should open in procreate. Alternatively, you can also open an four file and just import these images
which are in here. It's your choice. I'm
going to start by opening the layer panel and lowering the opacity of the bottom
layer called directions. I'm going to also lock this layer to prevent
myself from drawing on it. I'll create a new layer
and for this exercise, you can use any
brush that you want. I am going to select the six B pencil from the
sketching collection. Let's start with this
first bird image. I can see that this bird has a very clear one diagonal line. If I was to draw a vertical
and horizontal line, I can very quickly see that this diagonal is at 45 degrees. If I was to start drawing
this bird without tracing it, this can already serve me as a guideline for
positioning the beak, body and tail of this bird. Let's move to the second image. In this case, the head has a different
angle from the body. I'm going to start by drawing
the line of the body, which in this case is
more like a 20 degrees. The head is looking slightly up. I'm going to draw
this line here. If I make the bottom
layer invisible, I can now, with these two lines, set direction of each
part of the body, which will help me capture the gesture of this
bird properly. Let's move on to
this third bird. For this bird, I can do a curve, Just so you know,
you don't always have to use super
straight lines. Or I can trace a diagonal
line for the body. Since the legs play quite an important role on this image and this
bird position, I'm also going to
draw a line for them. You can see that
they are almost at a 90 degrees angle
from the body's axis. Lastly, I'm going to trace a line to set the
direction of the head, which is not completely straight but rather
looking down a bit. Some birds are
simpler than others. For example, this part I'd say, that's composed by a very
simple straight diagonal line. Unlike this one,
where the tail and the body are clearly marking
different directions. I'm going to start by drawing
this diagonal for the body, and then it is almost at 90 degrees that the
tail is positioned. If you want to go even further, you can draw some
lines for the legs. I hope that by doing
this exercise, you can start developing your drawing skills
in this little bird. For example, I can
see that the body and the face could be
represented in parallel lines. This yellow bird can also be
represented by a curvy line. This cute woodpecker is almost at 20 degrees facing
the trunk of this tree. Forgive me if my calculation
of angles isn't very good, I'm definitely better at drawing that at mats and logical things. But I think you're
getting the point of what I'm trying to explain. If you're up for it, download this image from the Project
and Resources tab of this class and take some time analyzing in which direction
the head is pointing, the body, the tail, and the legs are pointing to. If you want to
share this with me, you can export this image as a Jpec and upload it
along with your project. I am sure that this
exercise is going to help you a lot developing
your drawing skills. In the next lesson, we're going to talk about proportions.
5. Sketching Foundations: Proportions: In this lesson, I will share
with you how to analyze the proportions of
your birds so that you can get them right
from the beginning. Now I'm going to open
the layer panel, make visible the second image which contains
these three birds, a parrot, a token,
and a flamingo. I have chosen these three
birds specifically because of how different their proportions and
characteristics are. When drawing a bird
from a reference image, you should pay close attention to analyzing its proportions. Ensuring accurate
proportions is key to creating a lifelike
representation. Let's start with the parrot. I'm going to open the
layer panel once more. Lower the opacity of this layer, lock it, and create
a layer on top. I'm going to start by
measuring the head, and then swipe three fingers down to duplicate
this measurement. I will start moving each of these down and see how many of these measuring
units which equals the head of the part I
can fit in the body. It's like three and a bit. The tail one and a bit. Now in this case, I
can see that the wings are almost as long as the tail. They start just below the head. If I now duplicate one of
these lengths and rotated, I can also calculate how wide
the different parts are. I can see that the body
is two head lengths wide, The head is 1.5 If I
divide this half into, I will know where
the peak should start or at least its proportion
in relation to the head. As a beginner, using a
part of your subject as a measuring unit might
seem a bit abstract. But don't worry that you'll soon discover why this
is so important. Measuring a part of the subject helps you draw accurately. It keeps sizes and
proportions, right? It simplifies
complex subjects and reduces mistakes making
your drawing look better. Before moving on to the Toucan, I'm going to open the
layer panel and either merge or group all these layers with the
different measurings. Let's move on to the
Toucan. This time. I'm not going to use
the head to measure the rest of the
elements but the beak, because this is the largest or most prominent
feature of this bird, I want to get it right in relation to the other
parts of the body. Instead of just making it up, I'm going to create
a new layer and create these lines
to measure the beak. If I duplicated, rotated and put it where the body starts, I can see that the beak is huge. Is almost as big as the body. If I duplicate this again and
place it where the tail is, I can see that these
three body parts have a very similar length. In this Tocan case, if the beak is long
and big enough, you might end up with a
final illustration that resembles a different bird
rather than a toucan. I don't know if you've noticed, but whilst measuring
these different parts, I have also started to
understand the angles. If I draw a line on top
of these three elements, I can also start
paying attention to the angles of each
part of the body. Going back to the
proportions in this case. You can also have
in mind things such as where does the beak starts
in relation to the head? It starts right on
top of the head, and it goes down to almost
where the head ends. It's not just very long, but it's also very wide. And finally, I'm going to
move on to this Flamingo. If I was to get the
head as a reference, then I would have to
multiply this head so many times that it would get
very boring very quickly. Instead, I'm going
to take the head and neck as the measuring unit. I'm going to duplicate this and see how
long the legs are, so I can see that
they are almost as long as the head
and neck together. I'm going to also measure how wide the body of
this flamingo is. It is almost as long as the
head and neck together. If you want to go further, you can check how
wide the body is, which is more or less half of the measuring units
that I've created. It is really good
to start practicing these sketching concepts and fundamentals with
different birds. And just so you know, you
can use these methods to analyze how to
represent objects, other types of animals,
and even people. Whilst looking at these
proportions, you can also, as we did with the Tocan, start just paying attention to the different angles of the
different parts of the body. When copying an object or animal from real life or from
a reference photo, you can start
having these things in mind and they will be tremendously helpful to
get the shapes right. Before finishing this lesson, I wanted to show you why
it's so important to pay attention to the proportions of each reference image separately. With this blue heron, you
can see that the proportions of each of these images
are completely different. The same bird's proportions can change drastically
depending on its position. In this right image, the bird is more in a
resting position and its neck is down the
length of the body, and the wing is much longer
than the length of the leg. If I duplicate the
length of the leg, I can see that it's almost as long as the beak
and head together. Now on this left, I measure
the head and neck together and start duplicating
this measurement and place it on the body legs. You can see that the
proportions of the same bird in different positions
are completely different. In the next lesson, we're going to break up different birds into basic shapes and start putting all these
concepts together.
6. Sketching Foundations: Basic Shapes: In this lesson, we
will explore how to simplify the bird's
anatomy into basic shapes. This method is great for laying down the
main structure of your subjects right before creating a more elaborate
and polished drawing. Try not getting too
obsessed with getting the shapes right and have
fun with this exercise. Let's start by making visible
the basic shapes image. I'm going to start by
lowering the opacity of this layer and I'm
going to lock it. I'm going to create
a layer on top. For these exercises, you can use any type of
brush that you want. I'm going to start by zooming
into the two can image. And I'm going to start by breaking up the different
parts of the body. Let's start with the head,
which draw a circle. Now I'm going to move onto
the body with an oval. The tail could be
a long rectangle. Then you have the neck. I'm going to draw
these two lines to join the head and the body. Before moving on to
drawing the peak, I'm going to show you a trick that will help you understand where does the eye is located and where
does the peak starts. You can break up this
head circle in four. I can see that the eye is on the top right quarter
of the circle. Then I can see also that the peak doesn't
really starts in here, it starts inside the head. And you can represent
this, for example, with a long rectangle and then almost like
a triangle here. Without getting too tight to always using
geometrical shapes, you can start breaking up
these shapes even further. So this could be, for example, a straight line looking down
and then this curvy line, which could be a part of
a circle for the feet. Can use, for example, a
curvy line and an oval. Or you can also use two ovals. You can also see
that this bird has these yellow contrasted feathers here that you can
represent with an oval. If you were to copy
this image on the side, analyzing its basic
shapes first, getting the overall silhouette
would be much easier. Once you get the oval
silhouette properly, then you can start moving onto painting or
drawing the details. Now let's move on to this eagle. I can see that the
head is not completely round but it's more
like a flat oval. The body, which I
think starts here, it's also like a long oval. Wings could be represented with these very long ovals and there may be a
triangle on the bottom. The legs could be
just two lines. But if you want to take
this even further, you can start breaking
them on basic shapes too. For example, this could
be a rectangle followed by a triangle and
then some lines here. I'm going to do the neck by joining the head and the body. And again, I'm going to
break this circle into four parts to understand where the eye is and
where the beak starts. In this case, I can
see that the eye is on the top half of the
circle, towards the middle. I can instantly also see that the beak doesn't
really start here again, it starts almost
where the eye ends. I can do this with a rectangle
and then this quarter of a circle to mark this contrast in between the
white and brown feathers, you can just draw half an oval. Now let's start with
this very cute penguin. I'm curious to see what shapes can you find within
all these birds. If you find shapes
which are very different to mine and you
want to share them with me, you can upload this exercise along with your final
project for me to see them. The wing of this penguin
is really very long. I can almost use a
long rectangle for it. Then you have the
tail, which has a bit of a weird shape in this case. And then another shape in here. For these legs, I could use,
for example, triangles. Let's move ahead
with this beautiful out When you get a little bit of practice
and you understand that a wing is made by an oval
and these pointy lines, you can draw the wing
as a whole shape. I'm going to try simplifying these legs in circles
and some curvy lines. I can see that the leg
is here with a bit of Arx angle and let's
break the head in four. The eyes are on the top of
the circle and I'm going to represent them
with two circles to keep it very simple for now. And two smaller darker
circles for the eye pupils. You can see that the peak
is exactly in the middle. And these ears look
like triangles as well. From here, you can start making things a
bit more complex. If I deactivate this sketch, I can see that the owl actually does has a
bit of an expression. I can go ahead and
make these lines and then erase the
top bit if I want, but it's always
easier to start from a full circle and then go
ahead with the expression. When doing this exercise is
a lot of fun to deactivate the reference images
and start seeing how accurate the
drawing schemes can be. Let's move on to
the bottom bird. I'm going to start with an oval, another oval here for the body. I'm going to join them
together, creating the neck. The wings down below the body and they are like
two elongated triangles. And lastly, a rectangle
for the tail. If I divide this circle in four, I can see that the eye
is almost in the middle. The peak starts inside
the head and then it's like an horizontal
elongated triangle. When drawing these birds, you can also start taking into account the branch that
they're standing on. These branches normally define certain aspects of the body, such as the legs
and the position or the angle of the body. Let's move onto this bird. I'm going to draw a
circle for the head. And due to the position, the body is another circle
overlapping the head. I'm going to draw a guide for the branch and move on to
this new bird reference. The same way in here, there's no neck because of the position and the
shape of the bird. Here we have a very long neck, then there's this
shape for the neck. I can always start by drawing the line and then draw
the borders on each side. And then the beak, which in this case is clearly
not just a triangle. I can take the same
approach as the neck, the line which sets the
direction and curve of the beak. And then draw the top and
bottom which are very thin. If I break this circle in four, I can see that in
this case the eye is very clearly on the top
left quarter of the circle. For these legs, you can use some curvy lines to
understand their direction, or you can go even
further and break each part of the legs
in basic shapes too. This all comes down to what style of drawing
do you want to develop if it's something
more cartoony and simpler, or if you want to go for a more realistic style of drawing. Lastly, we have this
beautiful blue bird that is facing away from us and has this stunning
crest on top of its head. I hope that you have had
fun creating this exercise. Just so you know,
you can practice this exercise on top of all
of the other bird references. Practice makes perfect. And I do believe that the more
you create this exercise, the better you will
become a drawing birds without even needing
a reference image.
7. Sketching Foundations: Negative Space: In this lesson, we're
going to see how observing the negative space can help us in the process of
developing a drawing. What's the negative space? Well, it is the space
around and between the objects that you are drawing rather than the
objects themselves. It's like the background
of your drawing. Hello, I do, I look a bit
ridiculous doing this. But anyway, focus on
this white space. This is the negative space. When you develop a drawing, instead of drawing the bird, you can start focusing
on these spaces here. That is really useful
because you're training your brain not to
draw what you think, you know an arm ahead, these things, you think
you know how to draw them. And then you end up drawing
them as you think they are, but not as they truly are. When you start observing
this negative spaces, this white bit here,
this white bit here, then how this part relates
to that angle on that frame. Then you're drawing what you can see in the
reference photo, not the subjects in this image. For instance, the background
would be the negative space. It is this space which
is in between the legs. The space in here that
goes from the beak, all the background image, that goes until the border, that is the negative space. And see how when I start
adding this pink color, it is easier to observe. Observing negative
space helps you to understand the shapes and relationships between
the objects better. It's a bit like
solving a puzzle. By focusing on the spaces
around your subject, you can often capture their outlines and proportions
much more accurately. When it comes to drawing
the final birds. You will see how I put these
concepts into practice, even if this concept of negative space seem a
bit abstract for now, I hope that by
seeing it in action, you understand how to use it when it comes to
refining your drawings. I hope that you enjoyed
my dance in this class. I hope that you understood a little bit what the
negative space is.
8. Drawing Eyes in Various Styles: I'm super excited to share
with you a handful of Z and Asm tricks to master
the art of drawing ice. Ice are like magic. They can make your whole
animal creation come alive. By playing around with shapes, you can give your subjects
all sorts of personalities, different moods, and even explore a whole
new graphic style. If you go to the folder that you downloaded for this class, you will find this
procreate file. If you tap on it, you will import it
into procreate. Alternatively, you can also
grab these two images and import them into
the other document that you have been using
throughout the class. Again, is your choice. In this document, you'll find four different birds with different eyes and
different expressions. I've painted this bird's
head very quickly, and then I have left two
beaks that you can use, depending on which
you like the most. I'm going to create a new
layer and I'm going to lock this group to prevent
myself from drawing on it. And I'm going to start by
drawing an eye in this bird, which is going to be a circle. Extremely simple.
Create a circle. Leave your pen down, make
your circle perfect, and move it to wherever
you want it to be. We're going to develop this eye on different
layers so that you can see what happens if we start modifying them separately. So I'm going to create
a new layer and I'm going to fill this
circle with my pencil. Tilting my pen so that
I can fill it quicker. And I'm not going to fill it so that it's completely opaque. I want it to have some
texture and be dark, but not completely black. I think that's fine. Now, I'm
going to create a new layer on top and I'm going to create another circle, but smaller. This time I'm going to
drag the black color into it because I want it
to be completely opaque. There are lots of birds where the eye looks completely black. But if you zoom in or
the light hits the eye, you will see that
all of them do have a black circle in the
middle, which is the pupil. I'm also going to draw a
delicate ring around the eye. This is a feature that
many birds have and it can give a lot of depth
and interest to it. And it is a detail that you
can start using until here. Pretty standard right
round eye with a pupil inside and this little border which gives some
detail to the eye. Now here's the first trick
and the most important one. This trick will make any eye that you draw
and not just on birds, but on any animal come to life, I'm going to create
a layer on top. Select the white color and increase the size of my pencil. And look what happens if I add a few white dots to this eye. Adding just a few white dots to the eye can make
all the difference. These dots are like reflections, giving the eye a sparkle. This technique not only gives
the eyes lots of volume, but also adds depth and a touch of realism
to your drawings. You can experiment
with different ways of adding light to your eye. Always thinking about
where the light is coming from due to
the shape of the eyes. Normally the light is
reflected on the borders. You shouldn't just
start painting dots everywhere in the eye because it will lose the effect. Try to keep these areas towards the border
of the eye and you can experiment with
different shapes to see the different results
that you can get. I'm going to open the layer
panel and make the border of the eye darker by duplicating
this layer various times. Check out how the eye looks
without the sprinkle. And with the sprinkle, it makes all the difference. Without it, it looks
flat and boring. And when you add
these areas of light, it suddenly comes to life. I absolutely love this
trick. It always works. And it makes any gain a lot
of volume extremely quickly. Now let's see what happens if I lower the opacity
of the iris layer. Suddenly the eye looks quite
different, doesn't it? There are birds where you can
see the pupil really well. This owl has a very
defined, really big pupil. This part also, you can
see the pupil very well. It's not really rounded, it's a little bit
more like an oval. And in the eagle you can also see the pupils
extremely well. Whilst in small birds, sometimes you cannot appreciate the difference in
between the pupil and the iris unless you zooming or the light is hitting the
eye in a certain way. You can also start playing with the pupil size and see how the expression
of the bird changes. This one looks quite realistic, and if I lower the size a lot, suddenly that bird looks
pretty scared, doesn't it? It looks like a bit crazy. You can try giving a bit of shadow towards the
border of the eye, and this will give
extra volume to it. As you can see it. Just changing a few things with
the pupil size, you can suddenly get a lot
of different expressions. With the same element. I'm going to open the
layer panel group. All these layers duplicate this group and flatten
one of the two. So I can keep showing you
cool things that you can do. I'm actually going to
duplicate this many times. On which each layer I'm going
to show you a new thing. See the effect that enlarging
the I has on this bird? Suddenly it looks quite
cartoony and a bit scared. Now, if I lower the size, it gains a more realistic look. This time I'm going to go to the adjustment spanel down here. I'm going to tap on liquefy. The first brush is push, so I'm going to adjust the
size a little bit and see what happens if I start pushing
this top area of the eye. Suddenly the bird
looks sad. Quite sad. Now, if I rotate this eye, suddenly the bird looks angry. I put this eagle here on the left because it has
quite a mad expression. I love it. It's because the plumage is also
on top of the eye. Let's see how to
replicate this effect. I'm going to select
the eraser with the dry ink brush and erase
the top part of the eye. This is a different way
of making the eye look mad without the need of
using the liquefied tool. After this, you can create
some shadows on each side, some feathers or
some other details. Look how the expression
of this bird has been completely transformed. Now I'm going to duplicate this layer and keep
modifying this eye. This time I'm going to erase the bottom part at some shadows, some line on the bottom. Suddenly we have
a new expression. Now, what would happen
if I rotate these eyes? Suddenly this bird
looks really sad. He's going to cry. Now, I'm
going to open another eye, and this time I'm going to
put some sassy lashes on it. Look at this beautiful
bird suddenly. Now let's take this further. I'm going to deactivate the bottom shadow and
duplicate this group. I'm going to make one invisible. I'm also going to
deactivate the shiny area and draw two white dots
directly on the pupil layer. And look what happens if I start moving this pupil around. The birds start looking in different directions
and suddenly it's like this drawing
has come alive. Oh, what's there?
What's done there? If I put it really
small, the bird suddenly looks a bit scared. Now let's see what happens if I completely deform this group. Now this bird looks like
a cartoon, doesn't it? You can also add a
lot of character just by drawing an
eyebrow or slashes, or even erase the top
part of the eye to make this bird look
a bit tired or lazy. You can do lots of things, play around with your eyes, find or experiment with
different expressions. And if you like them, why not draw your birds
using a few of them.
9. Pencil Exercises to Achieve Texture & Volume: In this lesson, I
want to show you a few exercises
that you can use to create volume texture and explore different ways
to represent feathers, wings, and similar elements. In the folder that you
downloaded for this class, you will find this image, please import it into
procreate, or alternatively, you can draw a circle, something that
resembles a head and a. We're going to start by
turning this circle into a sphere with volume
using gradients. Let's start by zooming
in the circle and creating a layer on
top of this exercise. This way, if you want to
practice several times, you can create new layers. For this lesson, we're going to keep using the six pencil. When you want to represent
volume on objects, you need to be able to
represent lights and shadows. Imagine a light source
coming from one direction, for example, diagonally
from the top. As a result, the area facing
the light will be lighter, whilst the opposite
side will have shadows. Let's move into another part of the paper and practice
making a gradient. First, try to tilt your pencil and grab it
further from the tip. You can start by
applying pressure, and as you move
through the paper, gradually you can
start releasing the pressure to create
a lighter tone. If you don't have much
experience creating gradients, then I suggest doing this type of exercise on one
page, on its own, create many gradients and start seeing how much
pressure you need to apply to achieve
the different tones of grace from dark to light. Also vary your
pencil orientation. If you place it
perpendicular to the tablet, as I'm doing with my hand, you will get a much finer line. Let's move on to the circle. The goal is to create a
gradient from dark to light within the circle whilst keeping in mind the
light source direction. In this case, I'm
going to imagine that it's coming
from the top right. You can start rotating
your paper and creating a circular movement with your
wrist to make it easier. This is a great
skill to practice as you approach the area
which is in the light, which is coming
from the top right. You should apply less
pressure with your wrist. It's also a good
practice to create this gradient gradually
from dark to light. It's like building it up slowly. If you find that you're
making too much pressure with your wrist or with your hand
and it's getting tired, you can go to the
action S panel, tap on preferences and under
pressure and smoothing, you will find this
graph at the bottom. So you can create a little
node on this line by tapping on it and bring it
up to create this curve. This will relieve some pressure
whilst you're drawing. Keep filling the circle, remembering that the gradient should be more pronounced at the bottom and softer at the top reflecting the
light source angle. Adjust your hand position or rotate the paper if you need to. This gradient is
only an exercise and it doesn't has
to be perfect. You can make it as many
times as you want. But creating this
type of gradient on a circular form is
a great exercise. Experiment with
different arm movements, wrist rotations, and finger
positions while drawing. You can also experiment with applying pressure on your hand towards the tablet to release some pressure
on your fingers. These exercises are great
from improving control. Once you finish
turning your circle into a sphere full of
volume and texture, remember that it doesn't
have to be perfect. You can move on to the wing. This exercise is all
about creating volume. Once you suggest texture, in this case, this is a wing, so we're going to represent feathers by using our
pencil in different ways. I'm going to go to the
pexels board and see a reference image to analyze
how a wing is in this part. For example, you can
see that the top of the wing has shorter
and messier feathers. As you move down, they start getting longer and
more pronounced. With this information,
I'm going to go back to my procrit file and try to
represent this using shadows. I could start drawing
each feather separately, but the idea of this
class is how to achieve textures
using loose marks. Tilt your pen and start
applying little pressure, trying to think that the light source is
coming from the top. By creating shorter
vertical lines, applying little pressure with my hand so that
they are very soft, I can start suggesting that there are some
feathers there. If I start making them longer as I move through the
wing going down, this shape suddenly looks
like a wing without the need of representing
each feather separately. Also notice how I have
applied more pressure to my pencil when painting the longer feathers
on the bottom. Not only I'm suggesting that
this wing has some feathers, but at the same time
I'm creating volume, you can also experiment
with shorter lines. Tilting your brush to create different textures and really experiment with different
things in this lesson. See what happens if you make the bottom drawing invisible
and how you can mark the border of the wing with
smaller marks in the circle. We tried representing volume by creating a smooth gradient. And in this wing
we have achieved volume while representing
the feather texture. At the same time we're going
to be using these loads. When it comes to
developing and refining, our bird drawings vary the size of your brush
once in a while and experiment drawing
with very thin lines to achieve even more
volume into this wing. Once you're done, move
on to the third shape, which is meant to be a head. In this exercise, you can try representing different types of heads in different layers. To represent this one, you could use a similar method to what I showed
you in the wing. Let's see, this gray part, the base of its head seems
to be darker and it has loads of curvy feathers that have a very
thin light border. I'm going to show you how
to represent something like this using the eraser
as a drawing tool. I'm going to start by
darkening the whole shape, applying quite a lot of
pressure to my pencil, and tilting my apple pen. Then using the eraser tool, I'm going to start
erasing some curves. See how they start looking
similar to the parts feathers. Once more I'm creating texture and volume
At the same time, you can try drawing
different kinds of heads using various layers, and it's okay if
they're not perfect. These exercises help you practice showing
volume and texture. The more you experiment, the more confident you'll
become in drawing birds. Later on, I'm going to pass on to the beak and show you
how to represent texture. In here, I'm going to
sketch the lower section. Tipping my brush, I'll craft a gradient showing that the
upper part remains lighter. Since that's where the
light is coming from. I'm going to sketch these lines to imply that there
are feathers there, as this is where the head
starts using my brush. In a smaller scale, I'm going to draw
these curvy lines that follow the beaks direction. This is another way in which
you can create volume. See how you can start mixing the different ways
of tilting your pen. You can draw a first layer
which contains like, wider lines and gradients and then finish with a
more detailed texture. Finally, I will sketch
an eye applying some of the principles that I
shared in the previous lesson. I will begin by
outlining a circle, then fill it up with black, some shadows to the border
to give it volume and create a feather like
texture along the sides. I'm playing around with a brush, trying out different sizes and angles by
adjusting it stilt. Next, I will introduce light to completely
transform the eye, giving it a life
like appearance. I will also erase a portion of the bottom to imply the pupil. Lastly, using finer lines, I will add some texture on top. I made these exercises to
help you practice adding volume and texture with
your pencil if you'd like. Keep doing them with different part references for each part. You can use layers for the. By trying out various
textures and bird styles, you will boost your confidence and improve your drawing skills. You can include these images in your project
along with others. In the next lesson, we're
going to start drawing a part. You can choose another
bird of your choice. I'm going to draw
a part because I feel that it's a fun bird. I like parrots and
it's simple to start, have fun playing with ice. Try to achieve some expressions
like you can make like a mud bird or surprise
bird and stuff like that. Anyway, see you in
the next lesson.
10. Parrot Bird: Proportions & Shapes: In the upcoming lessons, I will show you how to apply all these concepts that we've
covered by drawing a part. We will begin breaking down the birds complex structure
into basic shapes. Then we will refine the sketch, ensuring the angles and
proportions are correct. One big piece of advice
that I have for you is to not judge the
result too early. You will see that when you start refining your silhouette, things will start coming. Let's go to the gallery and open a new four document on this
reference image folder. I left this part
picture that I'm going to ask you to import
into your document. Use the rectangular selection
tool and close this part. Swipe three fingers down
and type on cup and paste. This is just to make the image smaller so that I have
more space to draw. I'm going to lower the
opacity of this part, lock it, and create
a new layer on top. Let's start by
analyzing the head, which as we saw
before, is an oval. You can start with an oval. We saw on previous lessons that this head fits three
times on the body. Whilst doing this,
you can also start analyzing the angle
of the parrot's body. I'm going to draw this line. You can almost
start looking 123. The body can go until here. More or less, I can represent
the body as an oval, so I'm going to go
ahead and draw an oval below the head, not so rounded. It doesn't have to be perfect. Again, it is just
we're starting to represent the basic shapes
and proportions of our bird. I'm going to join these
two areas with some lines. I'm going to draw
this oval again and break it in four to
check where the eye is. And I can see that it's in
the middle, more or less. And then the beak
starts around here. It goes down and then it has
this other part in here. I can see that this bird also
has this blue area here. So I can start
taking into account these details to
roughly sketch them. The wing of this bird starts slightly at the
bottom of the head. I can use an oval
to get it right, then create the two
long lines in here. I'm going to use a selection
rectangular tool to bring this sketch further to the reference so I can
draw more comfortably. There is another line in here, which is this wing in here, and then this longer
tail in here. There's a line here
where the leg starts. I'm going to draw
horizontal line. Then check that these angles of the body are right
because I have the feeling that they are a
little bit more pronounced. I can just draw on
top of the reference and double check that
my sketch is correct. Then you have the leg which goes out a bit and down
with this finger, I'm constantly comparing
all the sizes of the body and trying to
simplify the main areas, the main body parts, into simple shapes, even if they're not exactly
the same as the reference. This helps me a lot to understand the proportions
of the body of the bird and always be checking if
they can be improved or if they look well in relation
to the other body parts. Now that we have all of our
proportions and angles right, in the next lesson, we're
going to go ahead and refine this sketch by drawing
on a layer on top.
11. Parrot Bird: Refine Your Sketch: In this lesson
using a new layer. We're going to go ahead
and refine this sketch. I'm going to lower
the opacity of this first rough sketch and get rid of the lines that I did
on the side of the part. Swiping three fingers
down and tapping on this is a very quick way
of getting rid of things. I'm going to create
a layer on top, lower the opacity of
this layer even more, and use it as a
reference to this part And start refining each part
I think could be improved. I'm going to start by the
head and slowly start comparing the angles of the reference image
and my drawing. I can see that
there is this angle here on the top of the beak. Then the head goes a bit flat, which is well represented
on my drawing. I can notice that this line is pretty straight and goes
all the way to the bottom. I can get rid of
this rounded area of this part of the oval that I
had done in the first place. With this new reference,
I can go ahead and draw this straight line all
the way until the bottom. Then I'm going to go ahead, take the beak in a little bit, go down and back out. You can also start paying attention to the
negative spaces. I'm going to draw this
area of the beak. I can see that it goes up first, then go in to the part, and then it goes
out on a diagonal. This will give me an idea on how to end up this
bottom part of the beak. You can start adding
details if you want. I'm going to add this nostral. I think that I can move the
eye slightly to the right and make it smaller to
add this ring around it, the pupil, and define where the light area
is going to go. I'm going to add this
detail here on the side of the eye and a little bit more of shadow
towards the nostril. You can start adding some little lines to
resemble feathers. I'm going to erase
this part in here and add the feathers
at the bottom. I'm going to move
on to the wink, which is not really
rounded on the top. I can see that there
is this angle here. If I trace a line from
the eye going down, I can then find this angle, this part of the wing, it is a little bit rounded, but it is not defined. I'm going to draw some lines
as feathers to mark it, but without making it so
defined as the left side. When I drew this angle, I noticed that there
is a bit more space in between the start of
the belly and the wing. This space is wider in the reference photo
than in my drawing. This is not necessarily bad, but it is something that I can decide if I want
to correct or not. I'm going to correct this area. Just to show you how I do it, I'm going to make this mark. And then from the top of the body I'm going to
draw a curvy line. Then I can proceed to drawing the bottom
part of the body. By looking at the reference, you can see that I am not copying exactly
what I already did, but I am refining and remeasuring the different
areas of the part. Now I can move to the bottom of the wing and follow this angle. I think that my previous
drawing this time is fine. I'm just going to
keep following it. Then I'm going to create this bottom part of the wing which I
hadn't defined before. I can see on the reference
image that there is this V shape that defines
part of the wing. I'm going to see
where it starts. It starts in here,
it goes round. If I'm not sure where to
make the end of the V, I can always trace a
line from the eye, and that will give me
a point of reference. I'm going to draw
this V line going down and finish this
bottom part of the wing. I'm also going to start
adding these details that resemble feathers by drawing
a few vertical lines, a few diagonal lines. Then I have this red
area here that goes out and finishes right
before this wing ends. Then this wing goes out, then this tail goes
out like this. I can see that
this tail also has this area here coming out. When drawing this
part of the tail, I feel that there
is something that I could improve in here. I think it has something to
do with this belly curve. There is this bottom part of the leg where the leg starts, I'm going to define
it here or mark it, at least very similar to
what was there before. But I don't really mind
refining my silhouette. And I actually quite
enjoy this process a lot. I also feel that is by
practicing the skills that you get better at
drawing and copying images from real
life references. I'm going to once more use a negative space to
check this area. As you can see, I drew a vertical line and I
feel that area in black. You can try to make
the exercise of observing the black marked
area instead of the part. This is called using
the negative space. Sometimes it is very
useful when it comes to testing certain areas and seeing if the
proportions are right. I'm just going to
erase this quickly. I'm going to move on to the leg, which I think I'm just
going to keep quite simple. There is this finger here, then there's one finger
which goes down, although I'm going to erase it, because there is more space
of leg behind this finger. That's better. Then I have space to put the second finger. Lastly, these fingers,
which I can't really see, but I'm going to draw
some lines in there too. Okay, I think this is
looking pretty good. I'm going to make this layer
invisible for a moment. And I'm going to
bring the opacity of the bottom one to
100% so that you can see how this
drawing has evolved. See how by defining
the main proportions and angles of the birds
using basic shapes, I have created an approach that ensures my artwork
starts on solid ground. This method not
only helps me draw a more accurate
representation of this bird, but it also allows me to
enjoy drawing the details. It is good to resist
the urge to start rushing into drawing
details such as eyes, feathers, or a leg, or just a part of the head. Trust this process that
we've explored today, begin with the basic shapes,
angles, and proportions. And only then refine the
silhouette and details. As I said before, try not to judge your drawing too early. Keep practicing and
in no time you will start seeing improvements
into your artistic journey. How's it going? I hope you're
enjoying this exercise. I'm going to stop the
part drawing in here. I'm not going to start giving it a lot of volume and texture. I think I'm going to ask
you to do the same instead. Why don't you play around with different eyes and bring your bird into different
personalities? Put in practice what
we saw in the eyes. Listen and see how
many personalities or expressions you can achieve
with different eyes. Have fun, please. I would love to see you publish these bird personalities along
with your final project.
12. Kingfisher: Rough Sketch: In the next few lessons, I'm going to start
a Kingfisher bird. And this time I am going to give volume and texture to
it to bring it to life. My bird is going to
look rather realistic, but just by playing
with the eye, you can have a
realistic cartoon bird. Feel free to make it bigger or change the size a little
bit or the expression. Feel free to do
whatever you want with the concepts that you have been learning throughout this class. I'm going to open an four file, but you can open a
larger file if you wish. Import the Kingfisher
image that I have left for you in the resources folder that you downloaded
for this class. I'm going to start by making
this image smaller with a rectangular selection
tool cut and paste, and then erase the bottom image, make it smaller, and
move it to the left. This image is quite dark. I'm also going to
lighten it up with the curves function under
the adjustment stop, which is the second magic
one icon on the top menu. You can adjust the
light and dark by moving the ends of
this diagonal line. I'm going to create
a layer on top. It is very useful to analyze the image that you're
going to draw beforehand. I'm going to observe and try to analyze certain things
about this bird. Before I start drawing, I can observe how the
angle of the head relates to the angle of the
body and where they cross, How big is the head and how big is the beak in
relation to the head, where does the wing start? I can see that this king
fissure is looking up, so the neck is longer. Where does the eye start? And those things, I'm going to start analyzing the angles
of the head and the body. I like to pass my hand on top of the bird first and then
draw the angle on the left. You can start moving the sketch across your canvas
to draw comfortably. Constantly check the
angles from the start. I find it useful
to pass my hand on top of the reference without
drawing on top of it. And then mimic the arm movement on the side where I'm drawing. It helps me see if the
angles that I'm drawing are well placed or
they could be amended. I'm going to lower
the opacity of these angles and
on a layer on top, start developing the body of
the bird using basic shapes. Keeping it simple as
we're just focusing on the overall structure
of the bird and not worrying
about the details. I'm going to draw an
oval for the head and move my drawing to the top so I can draw
more comfortably. The beak starts inside the head. I'm going to make a mark
to where I think it should start and draw the
rest of the beak. The eye starts on
top of the beak, and it's located on the
top part of the head. I think it could be in here. These guides are only
to get you started. All of these areas will be amended and polished
in the next lesson. The bottom part
of the head below the beak starts at the
beginning of the oval, and it has this angle. By drawing it, I get an idea
of where the body starts. I'm going to start the oval around here without
worrying too much. I'm just going to place it because I can always
change it later. At this point, I can start checking that the
proportions are right. What's the length of the body in relation to the
head and all that? The angle below the
beak isn't quite right. So I'm going to fix
it a little bit and erase all these inner
guides because they're quite distracting because of
the position of the body, the wing this time
starts quite low. I will draw a novel and then
these two bottom lines. At this point, I don't care about transforming my drawing, It might get a
little bit blurry, but this is only a guide. I would rather make sure that
I'm comfortable throughout the drawing process without worrying about this
getting blurry. Then the tail, I'll move to the legs and I'm also observing the negative space in between the legs and the
leg and the tail. Lastly, the trunk, right? This first
approach is fine for now. If you struggled
with this exercise, remember that you can trace this first sketch on top
of the reference image. To help you, once you
finish this lesson, remember to take
the screen sheet. You do this by pressing
these two buttons here button at the same time. There you go, you've
done the screen sheet. Now if I go to my photo gallery, a screen shet will
appear in there. Upload the screen sheet with
the rest of your project. In the next lesson, I'm going
to show you how I polish this sketch and amend the areas that I feel
that aren't right.
13. Kingfisher: Refining The Sketch: Now I'm going to show
you how I polish this drawing before I start
adding all the textures, volume, and all those things. So I'm going to
lower the opacity of this drawing quite a lot because I'm still going
to take it as reference, but I want to redraw this and start double checking
each part of the body. I'm going to create a layer on top and lock this bottom one. In this lesson,
I'm not just going to refine the silhouette, but I'm also going to delimitate all these different areas and details that this bird
has within the body. I'm going to adjust the size of my pencil because I
don't want it to be, but I also don't
want to have like a super detailed line
somewhere in the middle. It's fine. I'm going to
move my sketch a bit nearer to the reference because I want to see
it whilst I draw. Have in mind that this video
is played at a speed of 150. I'm actually, in real
life, going much slower. You should take your time
to develop this sketch. I'm going to start
checking each angle. Start on the bottom of the beak, the lower
part of the head. Basically, this process
is about checking that all the angles
seem right to you. If there's anything
that could be amended, then you can do it before you start adding shadows
and details. I'm going to start
with this angle on the bottom of the head, which I think goes
in a bit more, and then start creating
the curve of the body. At this stage, I'm
going to be paying a lot of attention to
the negative space. By observing and analyzing the gray area which
surrounds this bird, I can gain clarity about the angles and proportions of the different parts
of this bird. The big seems all right to me. And I'm going to leave my pen down just to make
this line straight. It goes in a little bit more
at the bottom of the eye. I am also taking care
of these inner details. There's an angle
here, for example, then a straight line is actually
going down a little bit, and that's where
the body starts. I can see that this head goes further and there's this type
of angle towards the end, and then it goes down. I'm going to erase
these areas of the initial sketch because I'm finding them a
little bit distracting. I also want to be
able to place the eye properly without the destruction of the one that I
drew previously. I'm going to create a mark at
the beginning of the head, one at the end, and
that more or less gives me the idea of where
the eye should start. I can also notice that
is above the beak, it's nearer to the top of
the head than to the bottom. I'm also going to draw
these details which are inside the head and are basically the divisions in
between the different colors, in this case orange, white, and this black that also has some turquoise
details on it. Have in mind that this video
is played at a speed of 150. I'm actually, in real
life going much slower. You should take your time
to develop this sketch. I personally find very
enjoyable. This process. I'm going to move onto
the wing as I draw, I'm also creating some lines
to where the feathers are. Start suggesting these textures. There is this angle here where the wing
starts from there. There is this curve
that goes down. There is this part
in here where to create these lines and dots. This bottom part is where
where the long feathers are. I'm just trying to suggest
each area with my marks. I'm going to move onto
the feet instantly by looking at the negative space which is surrounding the bird. I've noticed that this leg has a more enclosed
angle. There you go. I can also look at the
negative space in here, in between the legs, to delimitate where
the other leg starts, equally with the space in between the leg and the
body, sorry, on the tail. In these cases, looking at the negative space
is very useful. A few details here and there. I'm going to work on, on
the legs a little bit on the feet and then this feet that goes in a little
bit with this angle. There are two fingers and
then this one on the back. And lastly the tail, which goes behind the trunk and has the inner
angles in here. I'm going to create some
little texture here and there, maybe delimited where
the shadows are. I'm going to also
create a few lines here as guides to where to put
the details of the wing. Now if I open the
layer panel and I make the previous
sketch visible, you can see the
difference between the rough sketch and
this new polish sketch, which is much better. But if I wouldn't have
the rough sketch below, then creating this
refined sketch would be very difficult. Once you have finished
refining your drawing, you can maybe zooming if you
want and take a screenshot. This screenshot
will be added onto your photo gallery and you can upload this along the
rest of your project. In the next lesson,
we're going to add the first layer of shadows to
this beautiful Kingfisher.
14. Kingfisher: Soft Volume & Texture: Before we start bringing our bird to life with
shadows and details, I have a few
recommendations for you. If your drawing is too small, you can always enlarge
the whole thing before adding volume,
texture, and details. If you think that your
canvas is too small, you can always enlarge
it Before you start, make sure that your
reference image is light enough so that you can appreciate all the details,
volume, and textures. You can do this
with the curves or by lowering the opacity
of your reference image. If the drawing that you did in the previous lesson
is too thick, like this one that
I'm doing now, and the lines are too dark, it might be better if
you redraw the king fisher on a layer on top with
thin and delicate lines. You will be able to integrate
this drawing better. When you paint the
shadows and details, try to avoid enlarging
your image too much. As you will lose perspective
on the overall drawing affecting the way that you see the shadows, volume and texture. Think about it. In real life, there's no option for
zooming in, right? If you avoid
enlarging your image, you will also cultivate a more natural and realistic
drawing experience. Much like you would do when
you're drawing on paper. Build the volume and shadows
of your drawing gradually. Instead of focusing on one
part of the bird at a time, try working on multiple
areas simultaneously, build up the shadows and volume gradually across
the entire image. This approach helps maintain a balanced and cohesive look
throughout your artwork, ensuring that each
part harmonizes with the others as you develop the
overall form of the bird. Lastly, you use layers. It is beneficial to
develop shadows, texture and volume, and the eye, for example, in
different layers. This approach
provides flexibility as you can easily
go back, discard, multiply, or modify each
layer independently, giving you more control
of the overall image. Lastly, tilt your
brush when drawing. Grab your apple
pencil further from the tip and tilt your
brush when you want to cover larger areas and hold
it close to the tip using the pen perpendicularly to the tablet for smaller,
more detailed spots. The first thing
I'm going to do is bring this reference
nearer to my drawing. I'm going to select
the king fissure with the rectangular selection
to tap on cut and paste. And then get rid of
the bottom layer which contains the border. I'm going to enlarge my
reference image and enlarge the whole thing actually to make a better use of my
whole canvas space, I'm happy with how my drawing
is looking and I'm going to start creating all
the shadows and details in separate layers. I'm going to start by lowering
the opacity of this layer and lock it to prevent myself
from drawing on top of it. I'm also going to
create a layer on top. This reference image
is a little bit dark, so I'm going to
lower the opacity of the layer which
contains it a little bit. I'm going to start with
the top of the head, drawing very softly with my pencil and always observing
the reference image. I'm going to start developing
the texture as well. If I zoom in, you
can see that it has some vertical lines that
I can start suggesting. With the way I use my pencil, I'm going to create this
shadow on the side of the eye. Since I want to start developing this drawing simultaneously, I'm going to move onto the
bottom part of the head, also suggesting the
texture with the way I use my brush Before getting too excited developing
the rest of the head, I'm going to move to the body. Tilting my brush,
I'm going to create some soft shadows on
the body and wing. See how I'm being mindful
of the way I use my brush. Creating these lines following
the curves of the wing. I'm trying to create texture. As I develop the whole
drawing down here, I'm going to draw some
diagonal lines to suggest the feathers have in mind that even if the bird
has lots of them, by drawing a few lines, you will be able to
suggest them all. Now I'm going to start developing
the body and the neck. Having in mind the division
in between the white, which in this photo looks yellow and the
orange of the body. I'm also making sure not to
darken the areas too much. I'd rather work gradually
using layers than making everything too dark and then not being able to go back. See how with the texture
that I'm developing. I am also trying to
suggest the volume of the body of the
bird, which is rounded. You can play with these
things and methods. I'm going to suggest
these two darker parts of the tail and
at this back bit. Let's not forget about the legs. Even if I don't want them
to be the focal point, I'm still going to
add some shadows to them and also to the trunk. By drawing the shadows diagonally in the
direction of the trunk, I'm not just creating
texture but volume as well. Paying attention to where
the light is coming from. You can see it here, bouncing on the trunk and on the
top part of the bird. Lastly, I'm going to
develop the beak that has the shadow on the bottom area and the light on the top area. Always trying not to focus
too much on the details. Also trying not to zoom
into the image too much. Before moving on to
the next lesson, I'm going to finish giving some shadows to the
rest of the head, trying to draw the texture of the feathers whilst
developing the volume. When adding shadows, I'm also going to
give some shadows to the division in between
the head and the body. I think I'm going to create
the eye on another layer. I'm going to leave a border
and the light comes on top, you can see it there
and the bottom is. Take your time and
enjoy developing these soft shadows on one layer. Once you have finished
adding the first layer of shadows and
details to your bird, remember to take a screenshot. In the next lesson,
we're going to go ahead and focus on the eye and the second level of volume
and texture using new layers.
15. Kingfisher: Adding Depth: In this lesson, we're
going to keep adding depth and texture to
this beautiful bird. At the moment, there's much
more detail in the head. And this is great because I want the focal point to be the head
and specifically the eye, which I will probably
enlarge a bit later. But since it is
important to develop the different parts of the
drawing at the same time, I'm going to move onto the body, making sure that I keep
taking into account where the light is and try not to darken the
whole thing too much. I'm going to start creating some thin lines to
darken the wing. Maybe creating some smaller
lines towards the top and I will elongate them as I move
to the bottom of the wing. See how this time I'm grabbing
my apple pencil nearer to the tip and using it in a more perpendicular way
to achieve thinner lines. I will make longer lines towards the bottom of the wing
to suggest the feathers. I'm going to move to
working on the tail. The body of the bird
has some shadows below the wing and it's
darker in general. I'm not entirely sure
how to represent this without darkening
the whole drawing. I'm going to develop
these shadows gradually zooming out once in a while to see the
drawing as a whole. Zooming in, because that will
make me lose perspective. This area now is too dark and I think it's grabbing
too much attention. So I'm going to grab the
eraser and make it lighter. In the reference photo, the difference in
between the wing and the body is clearly represented by two different
colors occur, and turquoise. But in this case, we need
to use the same tone of gray to suggest the
different parts. Which is more challenging. But learning how to
represent volume with just one tone will make using colors in
the future easier. Pay attention to how
I'm using my pencil, constantly using it in a
way to create texture. Whilst I'm creating shadows, always looking at the reference to mimic what I see in the bird. Sometimes I will draw with
a pencil to darken areas, and sometimes I will grab the eraser to create
shiny points. I feel like the body
is getting darker, so I'm going to move
on to the head and darken the areas which
have a darker color. Also spotting the areas which
are in the shadow nearer to the eye and darkening them gradually to create more depth. The wind has a beautiful
texture that I'm going to try representing by
darkening certain areas. Since I am not using colors, it is a bit more challenging to create these differences
in between tones. Let's not forget about the legs. Even if I want the focus
to be on the head, I'm going to keep
working on the shadows, always representing
texture at the same time. See how I'm using shadows to divide the tail from the body, Not drawing a line with
the shadows on light, you can divide the
different areas. The cool thing about using
layers is that you can make them invisible or
change their opacity, reduce or add more contrast. I'm going to send the eye layer
to the top and rework it. Since I already built
the whole body, I'm going to allow
myself to zoom into the eye to
clean its borders. I really want this eye to be
the focal point of the bird. And that's why I'm going
to make it bigger. But instead of redrawing it, I'm going to use the move and transforming tool to enlarge it using the white color. I'm going to redraw the border and then with the pencil, I'm going to work on
the shadows afterwards. I am trying not to
draw too many details, but rather paying attention to where the shadows
and light areas are here. I'm going to
darken the center of the eye to suggest
that the pupil is there Using the eraser tool, I'm going to lighten the
border a little bit, even if you can't see this area of the eye on
the reference photo, look at how by darkening
the pupil and leaving a lighter area towards the border has brought a
lot of life to this eye. Take your time developing
the shadows of your bird. Gradually work on
the different areas. And when you feel
almost ready to finish, move on to the next lesson, where we will work on the final, final details to make this little bird
even more stunning. Once you have finished this
layer of polyumon texture, remember to take a screenshot, upload it with the
rest of your project.
16. Kingfisher: Final Details: Using a smaller pencil, I'm going to start working
on the texture of the head. I can see that this bird has
some lines in these areas. And with that information, I can move onto the bird
and draw them as I want. Since all the areas of
this kingfisher are already developed in terms
of texture and volume, I can give myself the luxury of zooming in to
work on the details. I apologize for
rotating my paper and I hope I'm not
making you feel dizzy. I find that rotating my paper
makes drawing much easier, and as a result, I end up putting less
pressure on my wrist. Remember that you can
change the size and opacity of your pencil when
working on different areas. Now I'm going to move onto
the wing with thin lines. I'm going to start
creating some details. I still want the focus
to be on the head. So I'm going to rework
this bottom area. I am constantly looking
at the reference image and see how I am analyzing
the shadow areas. Whilst I draw these
lines to represent this vertical texture that this king fisher has on
its cheek and its head, I'm going to grab
the white color and with some lines also create these beautiful feathers that are overlapping
with the dark area. I'm constantly changing
the color of my brush. Sometimes I use white or
sometimes I just use the eraser. Now I keep paying
attention to the angles. I can see that there
is this angle here. I'm going to erase
this area and lighten up this contrast in between
the ocher and the black. This area here is not as light. So I will add a bit
more of shadow. Then I will move on to the beak, which has shadows on the bottom. Once more, I feel more
comfortable rotating my paper, even if I want the focus to
be on the eye of the bird. I still want to
suggest this texture, that the wings have these little turquoise dots with
a white color. I'm going to go ahead
and on a new layer, just in case I don't like it, I'm going to create these dots and why not? I'm also going to create these
feathers in here. First, starting with
the white color and then adding a bit
of shadow on top of it. The trunk has some
texture that I will create by drawing some
thinner lines here and there. It also has some
shadows below the bird. I'm going to darken this area. When working on areas
of light and shadow, you can zoom in and see the contrast in
between these areas. In this case, the tail is
much darker than the trunk, so I will darken
it a little bit. I'm going to make this detail lighter and with a white color, start giving some contrast
to certain areas. This bird is looking
really beautiful. I'm very happy about it. I'm going to open the beak
and clean it a little bit. Since I'm very happy with
how this is looking, I'm going to open
the layer panel and group all of these layers. I'm going to start making
them visible and invisible. Seeing which of the layers and which layers could maybe
be a bit more transparent. This layer, for instance, which contains the light areas
in the wing, is very nice. But I feel it's withdrawing the attention from
the focal point, which I want to be on the eye. I'm going to lower its opacity, which in my opinion,
looks better. I feel that the beak is
also a little bit dark, so with the eraser tool, I'm going to make
it lighter equally. This part of here of the cheek, I really love creating
different levels of shadows on different layers because then I can play with their opacity. And the rest I'm happy with. I'm going to
duplicate this group, flatten one of the two
with the eraser tool. I'm going to tidy up the border. This is how you
develop a drawing from the rough sketch to
the final drawing. Once you finish your
bird completely, please take a screenshot and
upload all of these images, sharing your process of
how you painted your bird. In the next lesson,
I will show you a few very cool things
that you can do with these drawings using canva.
17. Now it's Your Turn: I have an exciting
challenge for you. Would you be up for drawing at least one more bird different from all the ones
that we've covered already. Here's your chance to put all
the learning into action. As we saw in the
inspiration lessons, there's an incredibly
vast collection of birds peels to use as
reference and get ideas. Remember to play
and keep it fun. If you see that you struggle, know that it's
absolutely normal. And you can help yourself by tracing part of the exercises. You will still be putting all
the learning into practice. This class has a bonus that
I'm very excited about. In the next lesson,
I will show you how to prepare your bad drawings and introduce you to the
marvelous world of Canva. You can download the app on your ipad before we
start the next lesson.
18. Prepare Your Drawings to Use on Designs: I have my birds in layers, but you see that when I make
my background invisible, this bird has no background. Because I painted
sometimes with white. Like this doesn't
look that good. I'm going to create a layer. And using the studio pen, which is on the inking
collection, there you have it. I'm going to basically create a background for
this bird quickly. I'm basically creating the
outline for this bird. I'm going to fill it up
with this solid color. I'm going to do
the legs as well. Now I want this
bird to be standing sometimes on things
from the top image. I'm going to duplicate it and I'm going to get
rid of this trunk. I'm going to actually
select it because it's a bit quicker. And tap three fingers
down and tap on cut. Then with the eraser, I'm going to go ahead and erase the rest of
the trunk because I want this bird to
be able to stand on things. That's fine for now. I'm going to export this bird with a
transparent background. I'm going to tap on
Share and tap on PNG which preserves the
transparent background. I'm going to tap on save
image export successful. Just so you know, I have
done that with other birds. I'm going to this white heron and this little one in here
always ask PNG save image. In the next lesson, I'm
going to briefly introduce the Canva interface if
you want to follow along, make sure that you download the Canva app before
starting the next lesson.
19. From Drawings to Designs in Canva: This is a very brief
explanation of how to decorate designs with
your stunning birds. This is a demonstration and
I am going to go quite fast. If you have never
seen Canva before, you might get lost. But I would suggest
that you stay and see how this works and the
possibilities that it offers. If it excites you,
you can go and check my previous class from
Procreate to Canva, where I explain the whole Canva interface from the
very beginning. After you download and create
a free account in Canva, you will enter this window, and this is basically
the home pitch of Canva. Your account settings
are going to be stored in the icon
here on the top right. On the top left, you will have this vertical menu where the first icon is
the home pitch. Anytime that you
want to come back, you will have to tap on here, or you can tap on this
Canva word up here. And you will return
to this window. If you don't see this menu, then you will have to tap on this three lines
icon to display it. I am not going to go into detail of what these folders contain, but you're welcome to explore
the interface a little bit. Now we're going to go
and create a design. In here, you can create
any type of design. Let's go ahead and create an Instagram post,
a squared post. I'm going to start by giving a background color
to this canvas. I'm going to tap on the square, and you'll see that this rainbow color square appears in here. In here, the first one. And I'm going to just
pick this pink color. Guess where I made all these
slides for this class. I think you're starting
to get an idea. When you create a design, you have this
vertical menu here. I'm going to tap on text. In here, you have some pre made texts or you can add
text separately. For now, I'm going to keep it simple and I'm going to tap on this first recently used text, which is love, peace, and joy. I think we need more of that
in this world nowadays. You can see that when
I select my text, this top menu appears and it contains all the options
to edit this text. I also get this menu here that
says Magic right or group. I'm going to tap on group. I'm going to edit
this bottom text by double tapping on it and simply writing my name
with the keyboard. Whenever you tap on anything
which is in your canvas, a bounding box will
appear surrounding it. And you can make it bigger or smaller with one
of the corners. Or you can adjust
the bounding box by moving the marks on the horizontal or sometimes
vertical edges. This is very practical with these three lines icon you
can justify your text. I'm going to put
it in the middle and make it a bit bigger. This is how you adjust your
text around the canvas. I'm also going to be adjusting this bounding box because it's
way too big. There you go. Whenever you have anything
selected in your canvas, you will find this
position word here. If you tap on it, you
will find that you can align these pieces of
text to the canvas. Or here you have this
layer up in here. You will be able to send your items to the
front and the back. And you will see how
practical this can be when it comes to adding your
drawings to this design. I'm going to put this in the middle and I
think that's fine. I'm going to tap somewhere
else to go back to this menu. Now to import our
birds into Canva, you have to go to Upload. To tap on upload files, tap on photo library in here. In here you can
select your birds. I'm going to select these
four birds and tap on Ad. Your drawings might
take a few seconds to upload to your
uploads folder. It's in here where
all the images that you ever loaded into
Canva will be stored. Which is very practical
because you have a library of images
ready to be used. Here are all the images
from my previous class, which I have been
using very often. In my previous class,
I teach how to create these beautiful
botanical acids. If you're interested, you can
check that class as well. Anyway, I'm going to
focus on birds right now. I'm going to tap on my
first bird, the Kingfisher. And now it has been
added into my canvas. I gave this bird a
white background for it to be opaque and cover
the words behind it. You can also adjust the bounding
boxes of your drawings, which is very practical. When you export these drawings, the canvas is taken in account. The image is as
big as the canvas, and you can adjust it with the boundary box
with the corners. You can make your images
larger or smaller. When you want to edit text, you will have to double tap on the text and just write
whatever you want. I'm going to erase some of
these texts and put peace and love because it's shorter and it adapts better to
what I want to achieve. You can start moving your bird around, enlarging its scale, or making it smaller, and placing it on different
letters to see how it looks. Play around with it
and have some fun. I'm going to tap on a
second bird to add it to the canva and see how the
top horizontal menu changed. If I tap on the text, all these options are
related to the text. And if I tap on an image, I get several
options to edit it. I'm going to tap on flip
and tap on horizontal. Move it to the corner
and make it bigger. I'm going to keep
adding birds and having fun placing them around
in different places. You can also add elements
such as rectangles, circles. With the elements
in this search box, you can search for a
square or rectangle. I'm going to search for a line. I'm going to tap here line
and tap on the first option, and it's been added
to my canvas. The top menu now gives me
options to edit the shape. And with the second icon, I can change the line
thickness here and even turn on the switch
to have rounded edges. My phone died, but what I did in my design was
change the font. To change the font, all
you have to do is tap on the text on the top options, tap on the first one,
and choose a font. In here, you see that
in here you have the collections of
handwriting corporate. If you slide, you have headings, paragraphs, things like
that, which is very cool. Canva has a vast collection
of beautiful fonts. So take your time and
choose one that you like. Play around with the top menu to change the different
aspects of your text, such as the space in between
the line or the letters. If you go to these
three dots in the end, you will have some more options such as underline or this. I can here to turn all your
text into capital letters. One really cool thing that I wanted to show you before ending this lesson is ways in which
you can edit your drawings. In Canva, I'm going to zoom
on my Kingfisher Bird. And when you tap on an image, the top menu changes. I'm going to tap edit photo. And you will access this menu. If your menu looks different, you should find a blue box with a message saying that
there is a new editor. Check it out, so you
should tap on that. Alternatively, you can go to the old experience of editing images, and
that's also fine. In this menu, you have
the filters second tap. So I'm going to up
on CL and you can find many options by swiping
your fingers left and right. Check what happens if I tap on this sandy filter if it doesn't work twice on it and start seeing different ways in which you can color your drawings. I really love this.
You can change the intensity and I'm going
to go back to filters. Once you've done this, you can go to adjust, and in temperature and tint, you can modify this color and adjust it to something
that you really like. Cool, right? I think that's a very nice way of
using your images. I'm going to tap on edit photo. I'm going to go to the filters and see what filter I like. You have these ones
which are a bit crazy, but they're also very cool. I'm going to leave it
this color as well. I'm going to go to that
just and maybe increase its vibrance. And that's it. Once you have
designed your asset, like your social media post
and you want to share it, you can tap on this arrow
looking up in here. On download From here, you can select any
of these formats. I'm going to tap
on Jpeg download. You will see this message here. I'm going to tap on Safe Image. Now if I go to my photo gallery, I can see that my image has
been saved onto my ipad. So this is a really nice way of designing pieces
with your drawings. If you're interested
in learning more, I highly recommend taking my
class from Procrit to Canva, where I explain all
these menus in depth. And show how to design
various items with botanical assets that look
a little bit like this one. It's a very cool class. So if you make any
designs in Canva, I would absolutely love to see them as well in
your final project.
20. Design Your Project in Canva!: Here's a quick
tutorial on how to lay out or diagram your
final project in Canva. It's really easy
and if you're like me and enjoy things
being well presented, then you're in for treat. I have already sent my images to my computer
using ear drop. But just so you know, you can also do this from your ipad. As you can see, I
have the screenshots of my drawing process. This is my final bird with the vintage paper
texture on top. Here are two exercises with different eyes
that I'm going to show you how to display so that you can have
something like this. I love these images
where the birds look as if they were
having a conversation. I also decided to import the sketching
fundamentals exercises just in case you want
to share them as well. When you create a Canva account, you will see the create a design purple button up on the top right
side of your screen. I'm going to create a design, we're going to use the
presentation template, but just in case you cannot
see it on this board, you can also search for it. I'm going to tap
on presentation. I'm going to select
the first option which says 16 pin nine. On this left vertical menu, you have this tap here
which says uploads. You should tap on that
and grab all the images that you want to share and
drag them into this folder. Alternatively, you can also
tap on these upload files if you're on your ipad and select them from
your image gallery. You can choose a background
color for your presentation by tapping on this rainbow
color, a light pink. And I'm going to
start tapping on the images that I want
to share in order. You can import them
into your presentation by clicking on it
or tapping on it. If you're on the Ip, I'm going to start by importing the sketching fundamental images and display them on
this presentation. I don't mind if the top one is covering
the ones on the back. If you want to add
a title to it, you can tap on this text button
and add a text box here. Increase the size to 30, and in here you
can choose a font. Great, now I'm going to create a new slide by
tapping on a page. And I'm going to keep
uploading my exercises. I'm going to import
the first screenshot I took, Just so you know, with this bounding
box you can also adjust image so that
it enclose your bird. This is the second one.
I'm going to do the same, going to showcase only the bird. You can place them as you wish. I'm going to place them so that the four images
that showcase the four different
lessons on the left and place the larger
bird on the right. I'm going to create
one more slide and add the drawing ice. In various styles, exercise flip one of these images so that these two birds are
facing each other. When you select a photo, you have this flip
option up here. Going to flip
horizontal and adjust the bounding box so
that they are together. Looks great for now. Finally, my final bird. If you drew a part, you
can also share it in here, or if you use another
of the paper textures, you can also share it. This could be the class cover, I'm going to add a text, can put my name in here, and maybe choose
a different font. If you drew more birds that
you can also share them. I have loads of
birds in here that I did throughout the class. Feel free to share them as well. Lastly, if you did
any design in Canva, you can show it in here as well. I would absolutely
love to see it. By the way, if you want to
learn how to do more ups or visualize this design
across different products, I highly recommend taking my previous from Procreate to Ba. If you want to
organize your project, you can tap and
change their order. And once you finish
your presentation, you can go here and tap
on where it says Share. Tap on download and select Pec, which is best for sharing
from the drop down menu. I'm going to tap on download, and here's a project ready to be shared in the gallery
of this class.
21. Uploading Your Final Project: Now it's the time to publish your project in this class
project and resources gallery. I would love if you can share your final word along the
rest of your process. If you remembered to make any screen sheets
throughout the class, now's the time to publish them. Let me walk you through the interface and show you how you can publish your project in
the gallery of the class, on this class Project
and Resources tab, you will find a button
that says Create Project. Tap on it and you will
enter this window. You can add a title to
your project in this box. It is important to add a cover image because
if you don't, your project will appear with a gray rectangle on the
gallery of this class. We want all the
skillshare community to be drawn into your project. That's why it's important
that you add a class cover. Tap on the button
that says Image and start selecting
them from your ipad. As I said before, you
can add your final bird. Your process and your designs. You can mix images with text. I would love if you can share some thoughts with me,
you can let me know. What did you enjoy the most? If there's a favorite
bird of yours that you would love to learn how to draw and you struggled with, you can let me know if you like the class or just like
whatever you want. You can also not add
any text at all, and that's also fine. You can make your project
private by ticking this box that says make
this project private. Lastly, add some text. Procreate Drawing, drawing birds would be fine for this class. Once you're ready, you can hit the green button up
there that says Publish. And your project will appear in the gallery
of this class. Once in a while,
you can check on other students projects
to see what they made. It might give you some ideas
on birds you want to draw, leave them alike if
you like the project and share some love with
the skilltarre community. If you post your project
in social media, I would love if you
can tag me at Sylvia Spina Art so I can share it
with my followers as well. In the next lesson, I will
share some final thoughts. Give you some ideas on how
you can keep expanding your drawing skills and design
skills and say goodbye.
22. Final Thoughts : Thank you so so much for getting this far and for
completing this class. It has been an absolute pleasure to share
this time with you. Remember to keep practicing the drawing fundamentals often, and you will see how much your drawing skills
will improve. I have a big, huge
favor to ask you. Please review this class, even if it's a brief one. Your feedback is immensely valuable for me and it
can help me improve. As a teacher, reviews help
my class gain visibility. So by leaving one, you're also supporting me in
creating new classes. I have some exciting
news for you. I am preparing a class on how to paint birds in procreate. If there's any specific bird
that you want to learn, you can drop me a comment in the discussion panel
of this class, and I might include it there. If you want to stay
in touch with me and get updated on the new
classes I publish, please stop on the
Follow button, somewhere around the screen. Otherwise you can
go to my profile and do it there once in a while. I like to send messages
to my followers, highlighting some
students projects, share Youtube videos, pre art resources, the occasional one year
Skillshare membership, and behind the scenes, All these things are exclusive for my skillshare followers. Be sure to tap on
that follow button if you want to hear from me. I've got two classes I would
love to share where you can start using your
drawings to create designs. If you enjoyed the canvas
section of the class, you should definitely check out my class from
Procreate to Canva, turn your digital illustrations
into botanical designs. You can either skip to the Lesson 19,
Introduction to Canva. You will learn how to create social media posts,
a botanical poster, and how to decorate weekly and monthly
printable planners with your hand drawings. Or even better, you can take the class from the
beginning and learn how to create stunning flowers and foliage to complement
your botanical designs. Now if you're interested in the world of fashion design and you want to start creating repeating patterns
with your drawings, I have an amazing class
where I will take you from the very
beginning to being a pro, making patterns in
Adobe Photoshop from hand room sketches. If you want to use your bird
drawings to take this class, I have a few
recommendations for you. An easy way is to refine
your bird drawings using the basic exercises and
draw some smaller elements. You can draw small leaves, dots, flowers, hearts,
or whatever you wish. This will help you complement
your final patterns. Make sure to enclose your drawings and try
not to leave any gaps. You can trace them using the dry ink brush
or the studio pen. Once you've done so, export
these drawings as a JP image, send them to your computer using airdrop or
using your e mail. And start the class from
the short shortcuts lesson. You will be able to take it
from there and you'll finish the class with a
whole collection of stunning bird
repeating patterns. I sometimes like to
share creative resources and freebies with my
newsletter subscribers. Sometimes I include behind the scenes or projects that
I'm currently working on. In this class description, I have left for you a link
where you can download a few paper high
resolution textures that I have photographed myself
by downloading them. You'll be joining my newsletter. If you decide to share your
project on social media, tag me a tilio spina dot art, and tag skillshare as well. That way we can both comment and reshare your project
with our followers. I'm very excited to share that. I've launched a Youtube
channel in here, you will find shorter tutorials related to procreate and
other art techniques. So if you like to
hang on it too, don't forget to
subscribe on there too. And that's all my friends. I hope you enjoyed this class as much as I enjoyed
recording it. I hope that you keep growing new type of birds in the future. Stay creative and see you
in my next class. Bye.
 Silvia Ospina, Artist and Graphic Designer