Transcripts
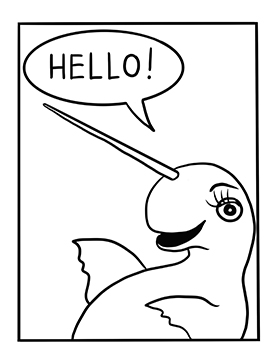
1. Hello!: Do you want to know a secret? Here's what happened
to me when I first tried to make
comics and procreate? I was so excited. All these bring ideas. He was going to
be the best ever. Love it. Everyone was
going to love me. Then I got stuck. I didn't put buttons to push. I don't know how I am, but I don't want that to
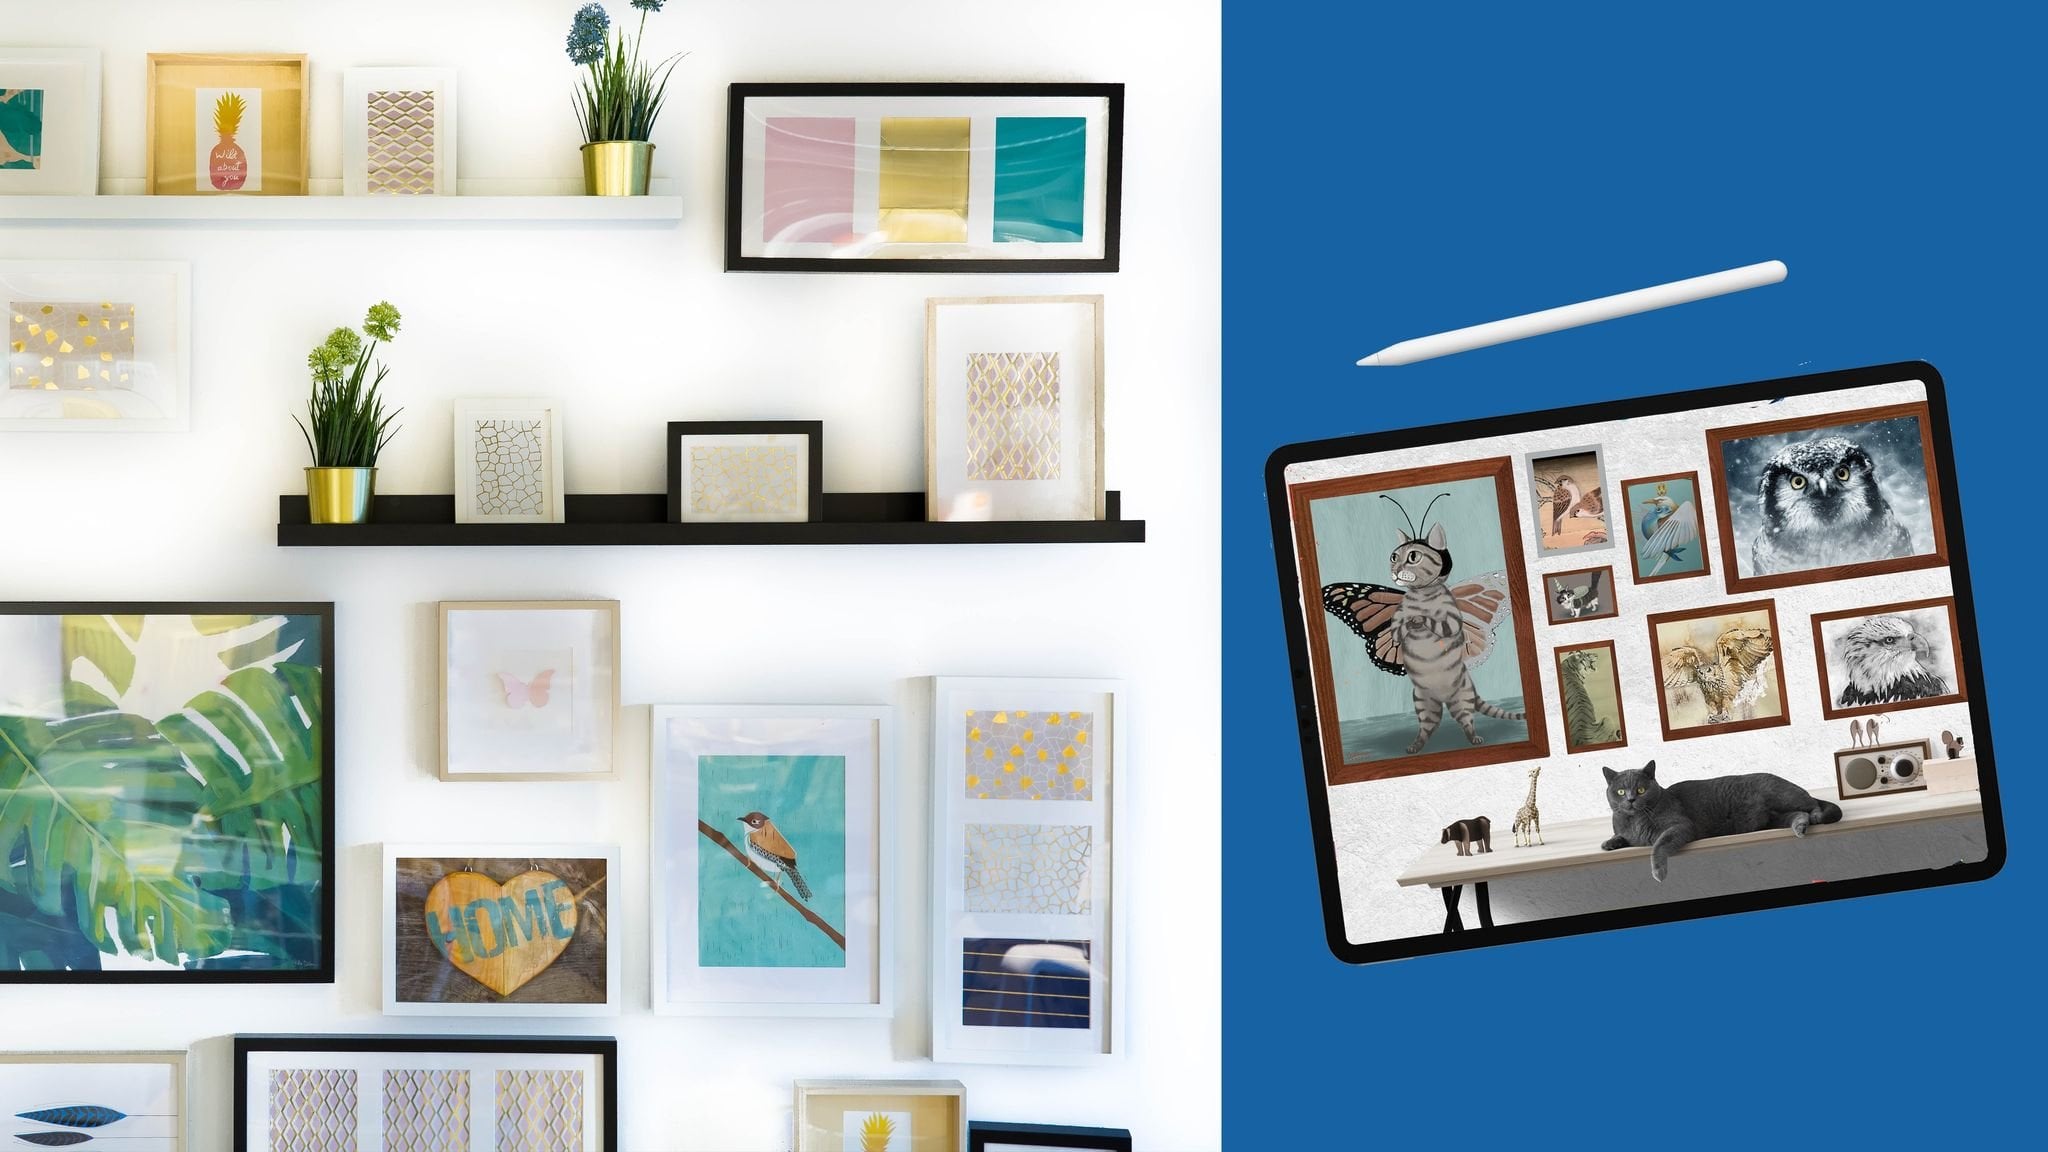
happen to you. Let me help. I can make it a lot easier. Hi there. I'm Laura are getting a writer and artist living
in loan, OK, Texas. I spend my days in my
studio by the woods, writing and illustrating
and painting. I do all kinds of art, but I love comics. I illustrate books,
paint murals, and have work in galleries. I created the comic
strips glitter, Bill and Greg, and I'm a member
of the Texas cartoonists. I illustrated the book, niche strips, the world's first comic strip knitting book. I talk about art on panels and work as a presenter
at literary festivals. And I also teach classes on
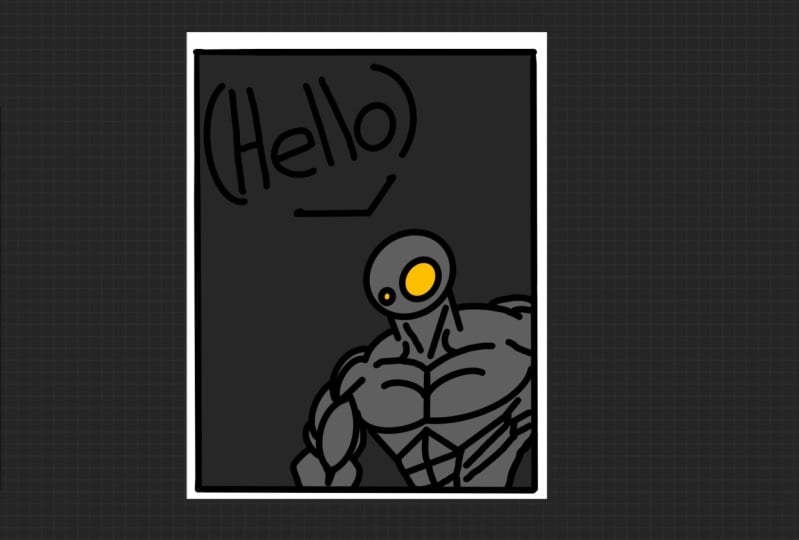
comics and graphic novels. Our class project is drawing a simple characters saying, hi. Once you can create this
basic building block, you can move on to create your own comics and
graphic novels. I'll show you how to open, Procreate and create
a project file, will talk about brushes
and which ones to choose. Then I'll show you how to make a panel which is just a box, will create texts and
I'll show you how to move it around and make
it bigger and smaller. We'll create a basic
character sketch and I'll show you tips and tricks to help you make your drawing faster. Then we'll go on to the
final black ink layer. I'll even show you how
to make sure you get your project out of
Procreate the right way. In the next video, I'll tell you all about
the class project.
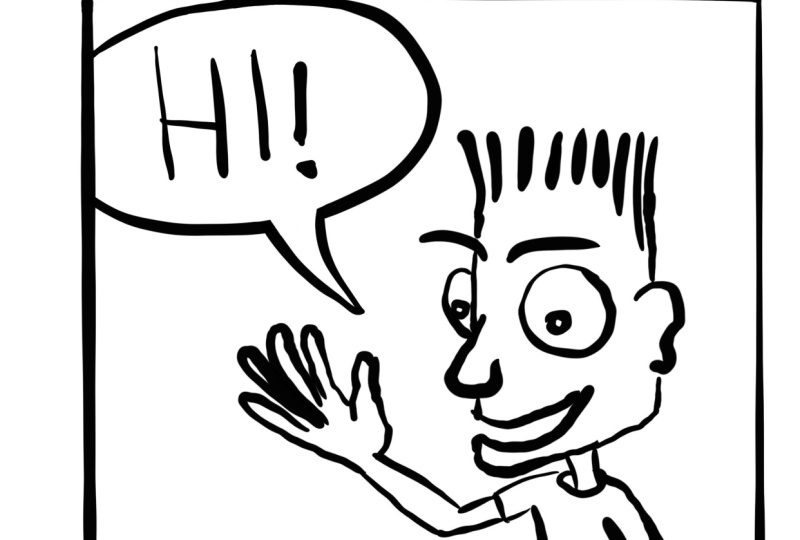
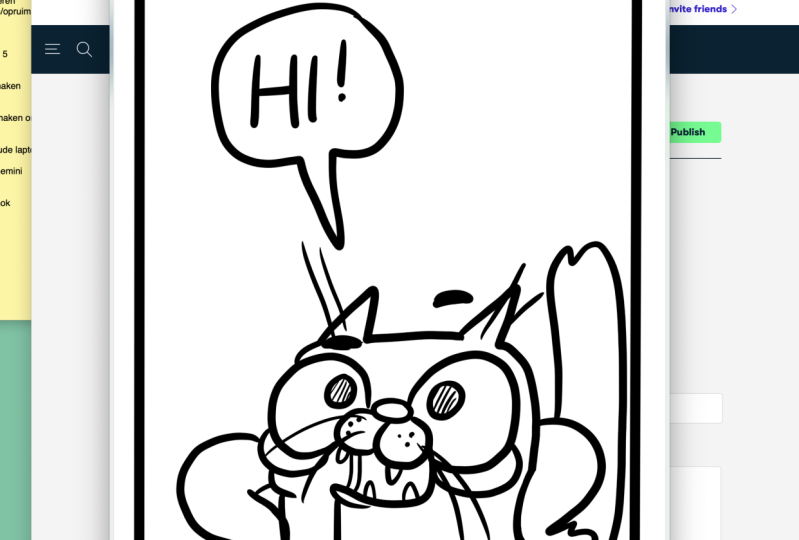
2. Class Project: Your class project is to
draw a simple characters. Say, hi, That's it. Easy-peasy. I'll show you everything
from the beginning, from how to open Procreate
to how to create a file. You can use a preset or I'll show you how
to create your own. Then I'll talk with you
about which brushes to use. I have suggestions for you
on good ones for cartooning. Then we'll work on panels. That's just what
cartoonists call a box. There are some ways you can make your lines nice and straight. I think you'll think
those are fun. Then I'll show you some tips and tricks on working with text. I'll show you how to make
it smaller or larger, and even move it in the panel so you can get it
exactly where you want it. We'll talk about sketching your characters
and why cartoon is traditionally used
the color blue for their sketch layers. We'll get everything
just how you want it before we move on to inking. This is the stage where you put black ink and this
is your final layer. I'll show you good
ways to work with that and erase if you don't like it. There's lots of little
tricks like zooming in and pinching and
twisting things around. That'll help you get started
and make your art faster. I'll show you how to get
your art out of Procreate. That can be a little tricky. Sometimes there are
several options and it's really not that hard. You just have to know
the right buttons. Then you'll share your project. This is really fun because you can see what
other people are working on and they can
see your projects too. Okay, next I'll show you how to get everything set
up in Procreate.
3. Set Up : Okay, next I'll
show you how to get everything set up in procreate. When you first open Procreate, you'll be on this gallery page. It's where all your files are stored and where you can
also make a new project. There are some preset examples. If you click the plus sign in the upper right-hand corner, you'll see what's already there. We're gonna do an
8.5 and 11 size, so you can print it out on
copy paper if you want. There you go. If you
want to get out of here, click Gallery in the upper left. If you don't have one, I'll
show you how to make it. Click the plus sign again, then choose the black
folder icon for new canvas. There are a lot of different
choices for the size as you can make it a lot of different dimensions
and measurements. We're going to
choose inches today. So click inches, then go
up to the top for width. Click on the right hand side and come down to the
numbers panel and inner 8.5 and then the aqua
button for W1 or create. And then click the height. We're going to use 11, 11 ". And also make sure your DPI is set at 300 for this project. Then click the
yellow Create button and you're ready to go. We have our first
project created. In the next video, we'll
talk all about brushes.
4. Brushes: Now we're going to
talk about how to choose your brushes
and how to use them. Let's select a brush. If you want a good
place to get started. I made a list of
brushes for you to try in the resources section. However, I think
beginners can worry too much about what
specific brush to pick. I really think you'll get the best results
if you just play with a lot of them and experiment and see
what you like best. Eventually you'll figure
out your favorite. Okay, Let's select one by
clicking on the paintbrush. It'll get you to
the Brush Library. There are many categories
that are grouped by type. For this project, let's look
at the inking category. So I'm going to pick the over here on the left, the
one that says inking. You can slide up and down
to see your choices. So click inking and slide up and down with
your pencil on the right. And the one we want
is toward the bottom. It is called studio pen. So click that one. There you go. I'll show you a fun
trick to get started. Make three squiggles. Any type of squiggle, all squiggles are welcome to
undo what you've just drawn. Tap with two fingers. Tap and lift, tap and lift. Now to redo it, hold up three fingers and tap. That handy. Now, if you want to erase, hold up three fingers like this and scrub it back-and-forth
like an eraser. Now I know it's
not always easy to remember all of
those fun shortcuts. So I made a whole video
called shortcuts. You can go back and refer to it later to help you remember these shoes, brush pen. Sometimes you'll
get on this screen and you don't want to be
there, just click Done. It just tells you
all about the brush. You don't need that information. Now we're going to
talk about brush size. Come to the slider on the left, down to one and up to 100%. We're gonna make a sample page so you can see what
that looks like. We're going to start with
your pen or brush at 100%. There you go. Now, make it smaller. We're gonna go to about 50%. It's hard to get it
exact, just get it close. I just want you to
see what some of these different size
changes look like. Pull it down to about, about 20. There you go. Now go all the way down
to 1%. It's very fine. It's very thin. Now I'm going to
practice erasing that by using my double-tap. I'm just doing it really fast. There you go. Now let's play with opacity. Start with it up at
100%, up at the top. This is how transparent are
see-through your pen is. Now we're going to make a
sample page for opacity. Let's start at 100%. And I want you to draw in a
little circle and fill it in so you can see how dark
or see-through it is. Now let's go down to about 70. There we go. And draw a circle. Good. Now let's go
down to about 0, 35 or so, and draw a circle. Finally, let's go down to, you can't do one or
you won't be able to see it really, let's try 4%. Let's see what we come up with. Great. Now let's practice
that three-finger back-and-forth scrub to erase. Now, come up here and click that icon that
looks like a wrench. It's the Actions menu
from there click Canvas, looks like a file folder. Go to the third one that's
called Drawing Guide and slide that toggle to the
right so that it turns blue. And then click the
choice underneath that called Edit Drawing Guide. It's going to give
it this nice grid here and that'll help
us draw straight lines. Make sure 2D grid is clicked right there.
Make sure that's blue. Now, opacity is
the first choice. You can go to the left
or the right, 1-100%. I like my opacity on 50%. You can have it however
you want later, but for today, put it
on 50 to try it out. Okay. For thickness. If you go to the thicker
side, it's very thick. If you go to the
left, It's very thin. I like mine to be the
max size of 100%. I just liked that the best
because I can see it the best. For grid size. You can make a very
dense packed small grid of squares or you can make it really big and only have four
squares on the whole page, you just have to play with it. But for this project, let's set it to 165 pixels to the far
right on assisted drawing, we want that off. Make sure it's toggled
to the left and gray. Now at the top of the page, this horizontal rainbow bar will give us different
colors to the grid. In the next video, I'll go over panels.
5. Panels: Now I'm going to show
you how to make panels. The first thing you
need is a panel. A panel is nothing fancy. It's simply a box. It can be vertical,
horizontal or square, or even round or a star or
whatever wonky shape you want. Okay, there is a rough square. That's fine, that'll work. But I'll show you how to make
one that's more precise. I'm going to
double-tap to erase. Okay, make a line and don't lift your pencil and it'll instantly straighten out. I'll
show you that again. I'll exaggerate it by making
a real way the line now, hold your pencil still. And voila, isn't that great? That's such a nice trick. Holding your pencil
down like we just did. You can go a step further. So hold it down, it'll straighten it out. Now you can slide it up or down to make a more
precise angles. C, Isn't that neat. Now if you touch
with another finger, it'll give you even
more precise angles. You can do this to
determine that you're straight across or
straight up and down. Alright, so let's start using
our grid is a guideline. Draw a line across, put another finger
down and check it to make sure it's
totally horizontal. Then lift your pen. Do
that for all four sides. Straighten it out. Another finger down and make
sure your ankles straight, hold it down to
straighten it out. Check your angle and do
that on all four sides. I try to line these up with the little grids in the
background for my drawing guide. Now, pinch and zoom to fix any little things to make
it as perfect as you want. It's not that big of a deal. But see on this edge I
went over a little bit. I'm going to choose my eraser. And I'm just going to neaten
that out a little bit. Most people probably
wouldn't even notice. I kinda like a hand-drawn look
for some styles of comics. But if you want it to
be really precise, you can go into each little
separate space in touch, if anything, until you're happy. Little bit there. Okay. There you go. You have a panel and
you're ready to start. Next up, we'll
discuss your text.
6. Text: Now we're going to
learn how to make your text and move it around. Before we start our text, I like to name my layers to
keep them more organized. Go up to the menus layer and click on the layer
we're currently on. That's your panels layer. Click on the word with your
finger or your Apple pencil, and it'll bring up a keyboard. I just type in the word
panel to keep it separate. Now let's make an
additional layer. Click the plus sign in the
upper right-hand corner. Then click on the layer
we're on and tap rename. It'll bring up a
keyboard and let's name this one text sketch. Now for my text and
character sketch layers, I like to work in blue. Traditionally cartoonists
would use blue because the blue pencil wouldn't
show up in copies later on. So it was a way to sketch
without it being seen. You can sketch in blue, sometimes I'll use red. The important thing is that
it's a different color from the black
you'll use later on. Ok, There are a few
ways to select color. These choices can
be used later on, but for now, let's
use the classic mode. It's a little square. If you grab this
top horizontal bar, it'll slide you through all
the colors of the rainbow. So I'm going to
stop in blue and go up to that square and pick a color that's close
to what I like, that I'm going to go back
into the brush tool and make sure I have
studio pen selected. To get out of that, I can click studio pen or on my
screen over here, or the pin icon. Alright, I like to draw
in a different color because let me show you what happens if I'm going to
sketch a simple apple here. I like to come back
on top with black. If I do that over blew, it helps me stay organized
and see where my line is. It's kind of a nice clean line. If I'm trying to
draw black on black, you can't really
tell which lines I'm drawing and which ones
were already there. Okay. I'm going to use the two
finger tap to erase that. I'm gonna go back into blue and make sure I have
studio pen selected. And I'm going to draw some text. That background grid
will help me place. It, makes sure the
lines are straight. It doesn't have to be exact. If you want to change your text, you can click the S in the
upper left-hand corner. We're going to select it. It's important
that you selected. Otherwise it will move
everything on that entire layer. So we want to select
just the text. There are a few
different options you can click Automatic, which just automatically
clicks what you just drew. You can click freehand, which lets you draw a very particular shape
around your text. You can use rectangle, which obviously draws a
rectangle or ellipse, which draws an elliptical shape. My favorite is the rectangle. I just find it easier to draw that box around
there and grab it. Once you have your
text selected, you want to click Transform. That's this arrow
in the upper left. It'll show you a dotted
box around your text. You can pick any of
those corner dots. You don't have to
be exactly on it. Just close. If you move it in, it makes your texts smaller. And if you drag it out,
it makes it bigger. You can also touch your selection in the middle
and it moves it around. Remember you have to
keep your pencil or your finger on the
screen the whole time while you're
moving the text. If you lift up your finger, the function will stop working. In the next video, we're going to make our
basic character sketch. This is really fun.
7. Character: Alright, it's time to
sketch our character. Start by going to
the Layers menu and create a new layer
for character sketch. Then I go into the
color menu and choose blue and studio pen. Now, this is my
absolute favorite part. Don't overthink it. Just draw, just have fun here. You can make your
characters super complex, are really simple,
like a Smiley face. It's up to you. Just try to really let your creativity shine
here and have fun. It's not a precious layer, we're just sketching so you
can always come back and erase or add little extra
lines like I'm doing now, just keep working until you
get it how you like it. Next, we'll move on to
adding the ink layer.
8. Ink: In this video, I'll show you
how to ink your sketches. Now we'll go over all of our blues sketch
lines in black ink. I like to do my text on
a separate layer from my character just in case I decide I want to
move them later. So go back up to the plus
sign to create a new layer, click it, choose Rename, and then type in what you want. I'm going to type in ink text. Okay, here we go. Choose my pen, working in black and I'm going to
go over the lettering. Feel free to erase
anything you don't like. That's the great thing
about Procreate. You can make changes instantly. Draw a bubble or a circle
around your texts. I'm going to zoom in here. That was a little bumpy. See how I left that little tail? I'm going to use my eraser
to get rid of that section. And I'm just going to redraw it. Remember you can
pinch and zoom to enlarge or twisted
around a little bit. I'm gonna make my
eraser smaller. Just like that. I like to clean it up
just a little bit. Remember the eraser can be made smaller and larger with
that bar on the left, just like your pin can. Okay, I'm happy with that. Now let's draw on the tail. You typically want
to draw the tail going to the character's
mouth or head. Sometimes it's not possible to get it exactly to the mounts, so just get it in the general
direction of the head. Now, I zoom in and I clean
up this little area. I erase the portion, the oval where the tail goes. Now I make my eraser larger just to make the
erasing go faster. It doesn't have to
be super careful, but I'd like to
clean up these lines a little bit sometimes I feel like that might have looked a little fat toward
the end of the tail. So I take a little off and
take a little more off there. Okay, I'm happy with that. Now I'm going to
make I'm going to erase the text sketch for just a second and I
liked how that looks. Now I'm going to
make another layer, click the plus sign, tap the layer click rename. And I'm going to call
this one ink character. I'm testing my pen
there for a second just to make sure I
liked the size and I do. Now, just start going over your sketch lines and
if you don't like it, just erase it, that's fine. Keep going until you're
happy with how it looks. Remember, you can zoom in by pinching your
fingers and you can twist it around to get it in the right direction to help you draw in the most
easy way for you. I decided I didn't
like this section, so I'm going to erase
it and redraw it there. That's better. Okay. I'm gonna look at it again by clicking off the sketch layer in blue and then take off
the texts layer. Whoops, I'm going to take
off the texts layer two. And I'm even gonna go into
the drawing guide and click that off so I have
a solid white background. Yeah, I think I like
that. I'm almost done. I'm going to fill in this
one last portion with black. Take a look at the whole thing. Yeah, I'm happy with that. Finally, we'll talk about
finishing up your project.
9. Finishing Up: Alright, there are
just a few last steps to finishing up your project. There are a few final steps. You want to get your
project out of Procreate. To do this, click
the wrench icon in the upper left-hand corner
for the Actions menu. It will show you
several choices. Choose, Share. It's a square, it looks
like a little floppy disk. It will give you different
ways to do that. For this project, I
recommend choosing JPEG. There are several other choices, but for now, click JPEG. Then you choose
where to send it. You can AirDrop, you can send it to yourself
through e-mail. It doesn't really matter. Just choose where you want to send it and then it will pop up. Next, I want you to share
your project, please. It really helps me as a teacher. It's fun to see your
work out there and it helps other students
to see projects, to see what you'll
learn in this class. Click on projects and resources within the
main class screen. It looks the same
for all the classes. Then click Create, Project, it's that green
button on the right. Then you have a
few things to fill out, upload your image. Then choose a title and you can write a project description. You can add more images
or a video if you want. Then in the upper
right-hand corner, there's the green button called Publish clicking, clicking,
clicking, clicking. Then you're done. You did it, you made your calm. Stay tuned for one last video.
10. Thanks!: Okay, I hope this
class help you get started making
basic comic panels. You really only need a few basic tools in
Procreate to get started. Once you can make that
basic comic panel, you're good to go. You can make one,
you can make 100, you can make 1,000. That's really your
basic piece to making all your comics
and graphic novels. Please share your project
in the class gallery. I would love to see it
and it really helps me if you could leave
me a review if you'd like the class, please do. And if you have any questions, ask me in the
discussion, email me. I'm happy to help. I, there's no question that's
too small sometimes, especially in Procreate, if
you get stuck on a one-step, you don't know where to go
next, so I'm happy to help. And if you have ideas
for future classes, let me know those two. I want this to be a partnership
where we work together and I'll help you with your
art because art is fun. Okay guys, I'll see
you next time. Bye.
11. Bonus: Tips and Tricks: Hi. Okay.
 Laura Irrgang, Artist, Author, Illustrator