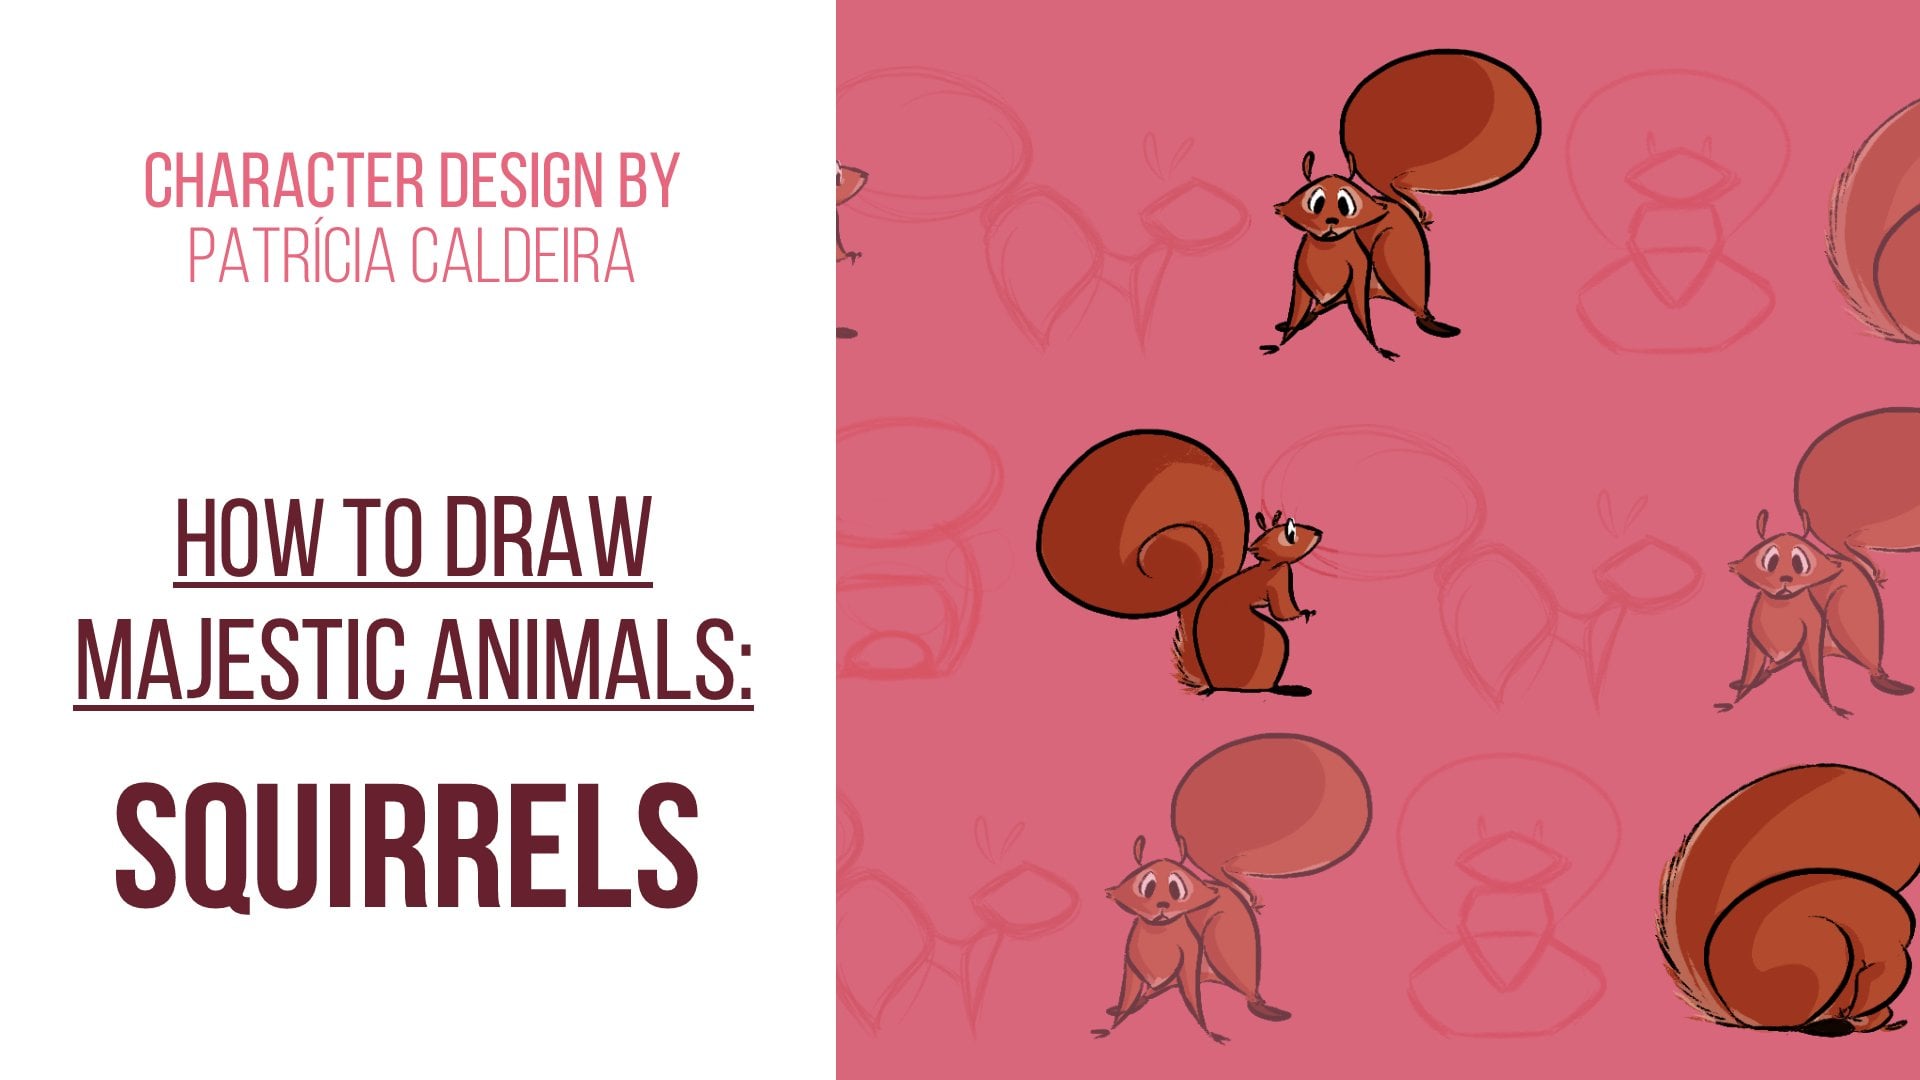
Transcripts
1. Introduction: Hello and welcome to this class. Here you learn how to draw the cute and amazing mouse. My name is pathetic, a letter, and I'm a professional illustrator. I've been drawing most of my life, and I don't work for small companies, video games, YouTubers and much more. I know that sometimes getting started, withdrawing a new subject or just doing in general consume heart and quite intimidating. I've been there, and that's why I've created this class where I'm going to show you step by step the best and simple sways to drop. This is a perfect glass for beginning artists that want to start with something fun, like animals, or for someone that just wants to try new and different subjects. I'll thank you to drawing different positions, like standing, sitting and sleeping and also different perspectives like front, back and side view. For this class, you'll only needs a piece of paper and a pencil or pen. Or if you prefer a computer with the software of your show, it's like photo shop and a drawing tablets. It's certainly after you, and either way will work perfectly. At the end of this class, you'll be able to draw this amazing animal in the position of your choice, and you'll also improve your drawing skills in general. Thank you for interest in this class. There's no reason to exit eight, so join now and I'll see you soon.
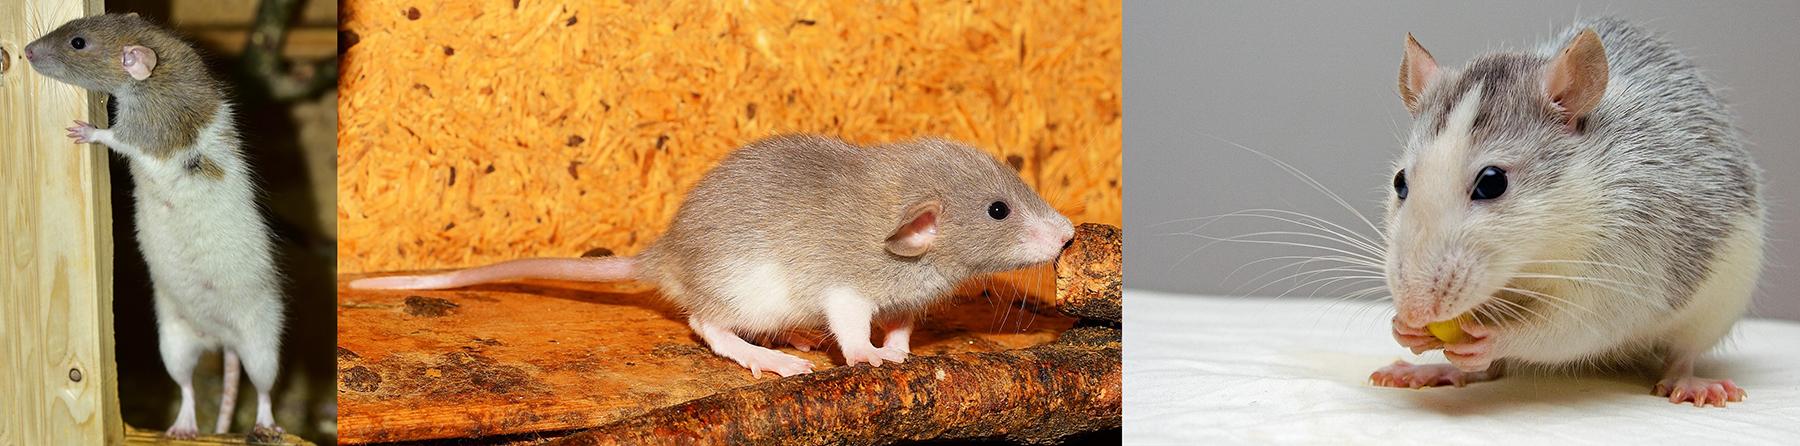
2. Using The Right Resources!: Hello and welcome back. Before starting our drawings, I want to go over some places where you can go and get references to help draw. Remember that references are always important when you're learning to draw anything. Beat animals, buildings. Are people. Be sure to find some images to help you. Alright, that are a lot of places where you can find some good reference images by forbids being pinterest.com and Splash.com, pixabay.com. And finally, pixels. Cough, simply right on the search tab what you're looking for, and you'll find what you need. If you're looking for a specific breed or species, you can always take pictures of your own plants or ask your friends if they own any bet. Taking your own photos means you will have the exact reference that you need and don't need to spend as much time in searching. Now, the challenge here might be to convince your bed to stand still. But you can do this either way. Finding references online or taking your own photo is always helpful. I also have a Pinterest board full of animal photos that you can check for inspiration and references. I'll leave the link so you can go there and give it a look. Alright, this is it for now. Let's go for the next video where we will talk a little bit about proportions. So I'll see you there.
3. Playing With Proportions: Again, in this video, I just want to talk a little bit about proportions and how you can play with them to create more interesting drawings of mice and rats. When drawing something new, I like to break everything down into simpler shapes. This can work both if a drawing something more cartoony or more realistically, breaking an object or subject into simple steps is always really helpful. Now in the next videos we'll get drawing some mice and play with, with, with their proportions. And doing this will help a lot into creating more interesting animal characters. For example, let's look at this mouse here. We can break it down into simpler shapes, but everything is proportional and nothing in particular stands out, safer maybe for the ears. So why not try an exaggerated beats, a feature of two. Let's see here an example from the rescuers. As you can see, they're lower bodies are rounder than the rest, which makes them look a bit more interesting. The same goes for the ears, which are very big compared to any other feature of the face. Personally, a reelect to exaggerate the sheer size a lot. But you'll see that beaking certain features from an animal and et cetera condemn, will give your drawing some more personality. So have fun with this. And the next videos, we'll be drawing some mice in different positions, but the principle is always the same. Fine shapes. Draw them and exaggerate its proportions. Alright, this is it for now, let's start drawing our mice. I will see you in the next video.
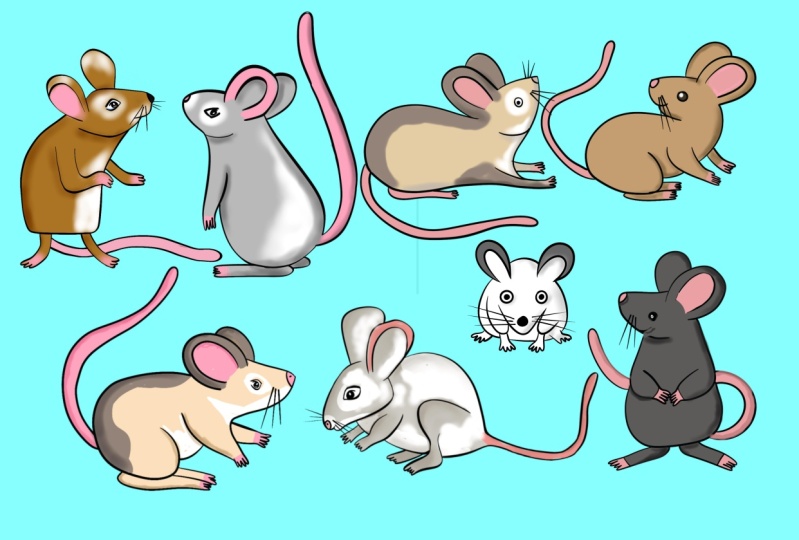
4. Draw a Standing Mouse - Side View: hello and welcome. I hope you're ready, for we're going to start drawing some mice. So we're going to start with the standing position first decide view than the front and then the back view. As always, we're going to start with our shapes. The shape part is the most important one, because this is where we're going to figure out how to draw our animals. And the best thing to do is, or at least for me, is to use shapes. It's very useful and very good for when you're trying to figure out how to draw anything. So let's start so our side view in the standing position. So we're going to start with a mountain shape kind of. Well, maybe it's call. It's a Pentagon kinda looks like a Pentagon. So, like this, Now we're going to make here. This shape here doesn't need to be very big prey. Animals in general tend to be always very. All the body parts are close to each other because they're always protecting themselves. So our ships are going to be very close to each other here as well. So now we make another line going a bit up on this now, This way and this. So this is going to be our help. Now we can go over here and make here some big years. So since we are doing this cartoonist style, let's take the advantage of our shapes and exaggerate them with sizes and everything. Now all we're missing is our tail. Here. We can make here a line. So we have here are based shapes for our mouse or Retz. So let's go now for our rough sketch. So I'm going to pick your a darker color so you can see better on. I'm going to start here with the years. You can make them even bigger than than what I did. You can just feel free to exaggerate them. Make very big years or if you want smaller ones. And now from here we have frontal going like this. And now here for the rest of her body. And now that forgets to make here the line for the back of the liquid. And now don't forget as well that the back ball is bigger and longer than the front boss. And here we have our belly. And now we have here our tell something like this and off course we can make here our nose and and I Let's see. How are you going to make our face? You can make it very simple. Just like this. Or if you want, you can give it some more personality to its and draw the eyes another way. So, for example, something like this. I think it would be cute. Look, uh, yes. And of course, if you want, you can add some whiskers. So there we go. We have, you know, rough sketch. And now we can go for final lines and then our coloring. I got a new layer here. I'm going to grab my my pen here. Okay? And once again, I'm going to start with the years. But feel free to start. Reads whatever you feel more comfortable with. And then slowly but steady, we're going to start drawing our lines. Just take your time. Don't rush. It's And there we go. We have here most of our minds. If you have your own mice at home, has pets feel free to look at them while they're active and walking around or just standing there and look at them and try to figure out their shapes, used them as your own reference. That's where I usually do. Okay, so we are done here with our, um but no, we're not done with our lines. I forgot about here are other ear. Okay, so, uh, now, yes, were then with airlines. So now let's add some color to a rat. You. So which color should we pick? They have many colors and patterns, so we just need to pick one. I think I'm going to go with same time steps my rights have. I'm going to use them as inspiration. And they have thesis Sham Ping tone. And I'm going to feel up here this bits that earned Fields Harry Co. And then they have some orangey tones. So let's do that as well. So something like this And even if you want, you can add some bits here, for example, and we are mostly than now. All we need is toe adds a pinkish tone toe. Our tail ends and bus, usually in the pinkish or cream tone. Some red scan have a darker tone in their tails. So, Derek O something like this, I think it's expected. And now all we're missing is some shadows, and we will be done with our side view of our standing reds. So I'm going to pick up this stone here and now we're going to add some very simple shadows that speak up this starker tone. Maybe. Yes, this one is better. So you don't need to complicate a lot. Just add some shadows to your rat on your mouse. A simple and the pit here in the Telus. Well, so there we go. We have here in the standing position in the side view. So now we're going to draw them in a front view.
5. Mouse Standing - Front View: So let's start bus again. Weighed are shapes. And now for the front view, we're going to start with a mountain shaped like this. And now we're going toe adds our heads here. So a shape weight shaped like this. I'm going toe raise the the lines that overlap so you can see better. So something like this we can add our big years right away like this and now going to make another round shape for the front part. There you go like this and off course, our tail appearing here so you can just make one line like this. So we have here are based shapes. And now we're going to draw our skit. So going to start here with our heads and those like this, our ice and now here years. So we are done here with our face and our head. And now we're going to ads. The front part of her body is so around. And here we make our time. Your legs. That is simple. This and now the back of our body. And it's a one off our back legs appearing here and of course oh, too. Here. It's now to our fund lines, and I'm just going to move our heads here, Pete, down the back, part of our body appearing and little bits. There you go. Makes more sense like this. So now, yes, we're going to make our final lines. So starting here with our head as always big years and out the rest of her body very round . Feel free to make some small straight lines for for And there we go. We have here are red in the front few It looks really fluffy, and rounds, which is normal, says they are always very shrunken, so they tend to look fatter and browned. It's that then they they're supposed to pay. So that sad year, some color and now our pinkish tone here on the tail and our ears and boss. So now all we need to add ISS some shadows, but it's simple. There's no needs toe. Overdo it. And there we go. We have Here are Retz in front of you. I'm going to make him a bit smaller, since it's way bigger than the other one, so it looks closer to its dairy. Go now. This is expected, and now we're going to draw back view, which, as always, is going to be more simple and less details
6. Mouse Standing - Back View: So let's to our back view and finish. This segment's off our standing reds, so it's going to be very simple. Like I said, we're going to make a mountain shape similar to what we did in the front few. Something like this. Let's bring it down a bit. Wait, work there. There we go. And now, as you can see from a front view, the back part of our body is a Staller than the head. So in the back view, we won't see the head. But we can see the years since we may. Since we made our ears very big, we can see them coming out off here and it's up. We have our years. And then from here we have our tail and this is it for a back view. We can still make our sketch as practice mostly s practice because it's going to look very similar to what we have right now. We can at some small lines for the for like this and this is it's now let's make or fund aligns and we will be done with our standing red. So as you can see, even if they're standing and well when I mean, standing is in their forelegs because that's how they usually move. They're still very close to the floor now if they are standing in on there solely on their feet. So on their back pause, it would look very different. So to your lines, slowly If you knew two repeater lines, it's normal. As you can see, I'm repeating mine a lot and would never You're done. We can go colorings and there we go. So now we can addle color toe pick up the scent owns we've been using and now here on the back we have a bit more off our dark. It's own our spots here, So going to show you how and where There we go and now once again are pinkish stone, including the ear stay Ears are everything on the years is a pinkish stone. They don't have ah there for color they don't have for in them. So it's so pink. And now, once again, our shadows very simple. So, Derek oh, we have Here are standing reds and next we're going to draw ar Retz in a sitting position. So I was you there
7. Sitting time! Mouse in Side View: Hello and welcome back. We are not going to draw our mouths sitting. So once again we're going to start with our side view and with our shapes. So let's see if you watch the squirrel videos. These shapes will be very similar to the squirrel, but it's thicker than the squirrel. So let's see. Going to start with a shape like this not going straight down here. So we have year our mind body. And now let's make the shapes for our heads, Rico. And now our big years, like we've been doing. So we can already see what's happening here. We can make our shapes even seeker. There we go. And now all we're missing is our tail, Terry, go Very simple shapes. And now we can go before going t the sketch if you want. You can have some guidelines here to know where the back leg is going to be. So circle shaped like this and also a shape for our fronts, like something like this. So now we can make a rough sketch and build up things that b two bit so that starts as always here with our with our heads with a big here, Here. No going down here for a line for the rest of the body. Our front like here and now this curve here for our back leg and the big back poor must again. And now here we have our to. So there we go. Very simple. And now we can make our final lines. And now is always for our fun aligns, that's to it. Slowly repeating our minds as many times as your needs until we are happy. We don't Troy. I'm really exaggerating our years there. You can make them bigger or smaller. However you prefer them. And remember, don't be frustrated If you need to repeat your minds a lot. It's normal. Sometimes you do your lines faster, all the times not so much it happens. It's also matter off practice, So dont orry just repeat them as many times as you needs. As you can see, I tend to repeat my lines a lot as well, until I am happy with that. And Erica, we have here are red sitting in the side position. So now all we have to do used to add some color I have here the colors that we use before going to use those. And when we're finished, we're just at some shadows. So let me pick them up here. So I have here my by stone. So now the eye here now it's adds our darker tone. So we have here this pattern going on the book and going a bit too. This leg? Yes, it was disliked. So something like this. All right. And now we are missing is a rose its own over here. So we're going toe at this here in our here. Hit us. Well kidding. No, in our ball and tell. And there we go. Now all we're missing is our shadows. So let's get them simple. Like we always to keeping everything Very simple, Eriko. So there we go. We have Here are reds in the sitting position in the side view. So now we're going to draw him in the front view
8. Sitting Mouse in Front View: So let's start out front. Feel now. Very simple once again. And once again if you saw the squirrel videos similar shapes, let's start and see how that goes. And what shapes should we use. So going to start with a shape like this exit on shape. And then here a more rounded shape like this so you can more or less see. What am I doing right now? So this is the bottom of our ball, and this is the upper body. Now we can make a shape for holy hints. Something like this are going to make our heads going a bit down. There you go. And now we can ads out years and, of course, as always, our till appearing in effect. So there we go. These are the shapes were going to be using for our red sitting in the front view. So let's now do our sketch. No, for preferred it to be closer or farther the way. Let's try this way. So starting with the head, if you prefer to start somewhere else, feel afraid to. I tend to start with the head, but you might preferred to start with another part off the body. It works. There's no wrong way to go about it. As long as it works for you. So have you, might years and my face that has. And now I'm going to draw the face so knows here and our eyes. I should be more to the sites like this. Very cool. And now the bottle is so we have here our arms, e tend to have their arms always kind of curved. And now for the back legs Very around here. Don't forget to add some for here for the Bali and of course, our back legs. And though we just needs to add are still here. So there we go. We have Here are Retz in front position and now we can make our final lines. So let's start with that. Of course, if you're doing these digitally AT T and when you're finished with your sketch or even with your final lines, you can always transform its bids and edits. You're you're drawing a bit like I just did here. I resize it a little bit. So it looked a bit better for me, for for my taste and how I want my trying to look like so feel free to use those tools. They are very happy, helpful, and they're there to be used. So let's try something different here. Let's try to add some more personality to recount. To hear I'm adding, like, hear bits off for to give these idea off hair. Play with this with these details and see what what you gets. You can add a lot of personality to your character playing with it. Think what you want. What personality does your character have, for example, and are doing this for bits over here? I would imagine that my mouth's character will be a young reds, maybe a bit triple rebellious. So these are things that you should think about when creating around character reads an animal or a person think about their trades and their personality. But off course, this is not mandatory. Sometimes you just want toe, draw some reds or some cats, but you don't want to think about. You don't want to give them a personality or just you just practicing them a bit, and that's fine as well. So curve arms here, always looking like they want to grow, grab something if they're like my bet threats. It will be food there. Always ready for some food and treats. Forget to add some bits of for. If you're doing this digitally, don't forget to play with the sensitivity of your pan. If you want your lines to look seen the and cleaner, you do less pressure when drawing. So if you're still not really used to using a tablet drawing tablets, do some exercises with the pressure tryouts, your your your pen and your tablet before jumping into your final drawings. Get used to it sometimes in my look, scary and heart, but with practice we'll go everywhere. So you just all you needed not feel frustrated and to have fun with your things. Okay, so we are done with the red here, Let's now go for our coloring. So let's speak up here having our base stone just feel up our mouths. There we go now with without rush. You love the empty spaces, so here we don't have the darker tones, so we're not going to use it. So we're just going to jump right toe a roast own here for years. Our big bus Anto feel free to try other colors. You can go to the country sport I talked about at the beginning. Or you can go to any other boards are just Google some images to If you want some inspiration for colors, look for some and shoes wherever you like and go with it. So we're adding our shadows now. Very simple is always. And here we have it all red sitting in a front position. So now all the are missing is the back view and, as always, is going to be easier and faster. And the shapes will be very similar to this one, so I'll see you there.
9. Sitting Mouse in Back View: All right. Welcome back. We are now going to troll the last sitting mouse here. We're now going to draw our mouse in the back. Few. So this is going to be shorter and very simple. So let's start with it. Let's pick up here our principal and start, as always, widow shapes were going to similar shapes that we used in our last one on your less drawing . So something like this and around shape here for the bottom. And now let's see how we have. It's so we have something like this. So this time we're going to have a less details. Thank you. Our years and to So we're going to have well s details. We're going to spacing on Lee the back part of our body. So it's just body here. We don't even really needs our sketch here. Let's make here rebellious. Hair are big years. It's make you toe has a bit smaller, and we have here our a bit of our arms showing up, and then we have the back part of our body overlapping over here. So something like this and then we have over two appearing here. So this is it very simple. And now let's to our final lines So many bits. And now we can start on to start here with this bit off for that we did. And now our ears one side and the other side our heads or what? We can see overheads, a little bits off our shoulders and arm appearing Go and now or rounded lines for the back part of our body. And now all they are missing is our to you raise anything that might be too much, three to any line that you might not be happy with. And next we're going to cover. So picking up here are based own. This time we're going to have a lot of our butter as opposed to the front few. Cesar pattern is mostly in the back. So speak up here, our caller And now we could make this part here. I'm taking inspiration from my pet rats, but you can make a different pattern if you wish to. It's so up to you what you like or what would you like your most to look like? And now we can pick up here or rose its own and add it to your ears here and tell. And now once we're finished, all we need to ads is oceans. So is always, once again very simple. I just add some bits of shadow here and there make us much or as less shadows as you want. And every girl we are done with a rat sitting. So now all we're missing is our sleeping rice, and we're going to do that next, so else you that.
10. Snooze Ball - Side View: Hello again and welcome. We are now going toe draw or funnel Retz, which is going to be in the sleeping position. If you watch the squirrel videos, we're going to make a similar position. They're going to be bigger. But I really like that position when they sleep. And I think it's really cute and really fun to draw. And also it can be very simple. So let's do that going toe create here. My drawing layer, my shapes layer and we're going to start with The side view is always so let's start with a round shape like this that goes that Pete like this, I don't need to worry a lot of parts. Your lines Right now, this is just our shapes. So we know where everything is going to be something like this. You can make it even even smaller. This spot here. So they are Even so, they are really, really curled in themselves. And now here we can make a line for our back leg like this. And here and here and, of course, here the line for our enough for shapes. We can already see more or less what's happening in here. So Let's not do our sketch so we can understand better what we're doing and add some details. Tour drawing is also this is mostly are the big part of her body. This and the here they appeared are here like this. Now here we can make a bit off our heads showing up even. And I have a bit of a ni. Now we have here or back leg. And if you want, you can have your online showing up our other arm. And now here our pop. You won't see it a lot, but that's to the sketch it away. And when we are doing our final lines, we will see how much we will see over Paul. And now, finally, our cell going here around the body there. You if you wants, we can erase here this beads so we can understand better. So they regard. And here we have our sleeping reds in a sudden position. So we are now ready to go for our final lines. So I jump onto that. All right, so that's cholera right here already have our tones from before, so are based on first. Then just fill up the spaces that aren't colors the usual. At this point, you already know what to do here, so just take your time. If you want. You can try other callers and other patterns for your mice, so feel free to play with that. Now we have here our pattern. That's not here. We don't have it. It's I know we do have a tea. It's on this side. That's how we've been doing. And now the pinkish tones for our cause. Years entail so years. Oh, till here and there we go. Now all we need to do is our shadows. So let's make your new lawyer for our shadows, make it to multiply and then make it about 50% capacity. And then you can add your shadows freely. So very simple shadows, as always, said there, Rico. And we are finished with our sleeping rats in a side view. And next we're going to do our front view. So let's start
11. Sleeping Mouse - Front View: Okay, so now let's do the front view over miles sleeping. So it's going to be a pits more simple than before. It's going to have a lot off circle shapes, so let's see how we go with it. Let's start here with the round shape like this. Now, let's have another about here trying to raise here little bit on a little bit on the sides , okay? And redo it, Derek. Yeah, This is better. This is has a shape similar to what we want and what we've been doing in the other positions as well. So in the standing position and in, well, not the sitting position. We had a bit of different shapes. So we have here the front part of our body, the back part of our body. And now we're going to have a bit of ahead. Here. We had our years here, and the first we can have also a pillar of the tail coming from here. Very simple. That's tour sketch. Now, try to understand better what's happening here. So now here. When we do our final lines specially But we can do this detail already. We don't need to make the whole line. We don't need to close our lines so we can just do something like this and even at Cem for , for example, something like this. And now for the heads, we can have something similar. So something like this very simple. And our years here Oh, it our tail coming up here and here. If you want, we can have a bit off a back ball appearing. So we have Here are sketch. It's not to our fight lines. As always, take your time. Curved lines can be a bit hard to deal with Sometimes. Sometimes they can be even harder than doing straight lines with. I recommend here is trying to do the whole line in one sits, try as many times as your knees and to you are happy with deadline When you feel like you do the good line, leave it like that and continue with your other lines that you have to do. And whenever you ready, we can go and cholera Rhett. So I think I'm ready right now, and I'm going to at the same color says that we've been adding so far, so I'm going to pick them up here. I'm adding right now toe everything, even even the parts that are going to be being just because it helps me a little bit. But I know I just prefer to work like this, but it's totally up to you. We can just adds the colors to the places that will have those actual colors and and your colors beats by Bates. So now, for darker tone for pattern. So we're not going to have a lot of the part pattern here. See here a little bit. So that's pretty much it. Now it is here where we don't need and now are pinkish stone for our tail here and years. And, of course, here are beat off the ball and now finally, shadows. So once again, very simple. We don't need toe over complicated right now, unless that's the style you're going for and how you like your drawings. Just take your time with this. There's no need to rush, and whenever you're ready, we're going to draw our final read or final mouse. We're going to draw a mouse in the back few, which, as always, is going to be simpler
12. Sleeping Mouse - Back View: So let's now start our last mouse. We're going to draw him in the back few, which, as always, is going to be very simple and way less detailed. So let's start with the same kind off shape it we've done here. So Iran shape and that's mostly it's We are done. All we are missing is making here a line for our to, and this is it for our sleeping reds in in the back. Few. So if you want, you can make the sketch. But I don't know. I think it looks pretty straightforward, Has it? ISS? So let's just skip that part and go for our final lines. So once again, a curved line. As you could see, sometimes I have problems with them. Israel. Also, if you're doing this digitally, a good thing can do is use rotates, which in here it's you have here dissed ALS, or you can just press are and turn your age however you want, and it might help you with your lines sometimes. So as you can see turning it a bit. Help me. We're doing this line here so this rotor tool can be very useful for you if you're having some trouble doing your lines digitally to try to use some off the tools you have in your program. They can help you and, well, the tools are there to be used and to help you. So feel free to use them, tend to use routes it a lot, especially when I'm having some trouble. Weeds making my lines. I just try to move things a bit, and it usually helps me. So there we go, our final lines. Like I said, very, very simple. Now all we are missing is our colors. So based on first, okay, now or butter just a bit. Here are pinkish stone. As you can see, I'm not really taking a lot of time with my coloring here, but like I said, you can. Sometimes it depends on your style. You can have a very sketchy look on your style, or, if you want, you can make things way. More details. It's totally up to you now, finally, our shadows. So once again, we're going to be very simple, says we don't have a lot off red showing. So here we go. We have Here are my sleeping in the very cozy and curled position. So I hope you like these videos. And next, we're going to talk about your resentment, so I'll see you there.
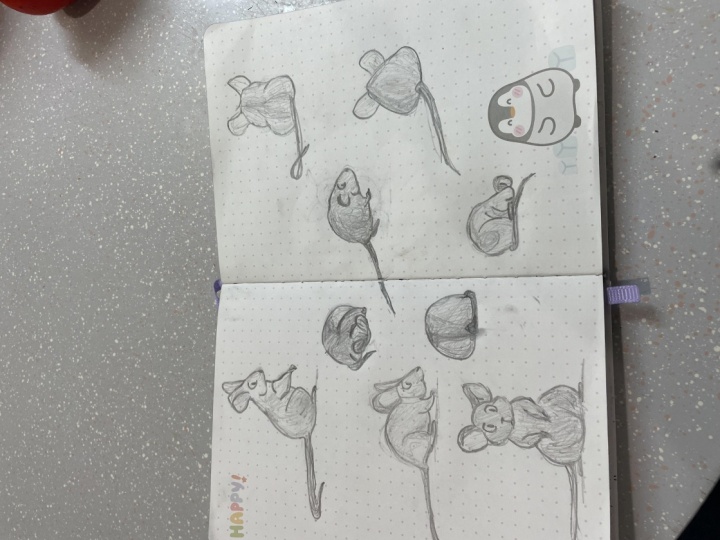
13. Time to Practice (Don't Skip This!): Hey, again. I hope you've been enjoying the view use and exercising your drawing skills in this video. I'll quickly talk about the class assignments. I do recommend you do this to put your new skills to use. Don't worry. If you don't get the results, you want it first. It's all about practice, so just keep going and relax. All right? So for the class assignments I want to true. Grab the reference photos. I'm leaving you. Choose one off the images and use it as a reference for the drawing. That's it. You can also gather your own reference photo. You feel like by searching through the Pinterest sport I've talked about before. Our true any other means online. Totally up to you. Remember to start with the basic shapes and build your drawing from there. All right, now go do it. I can't wait to see your drawing
14. Conclusion: Hello and congratulations. You finish this class and you're not able to draw more animals in the simple way, just starting with simple shapes. You have also improve your drawing skills by trying a new and fund subject. I really hope you've enjoyed this class. And if you could take some time to leave a review, it will be amazing. And it would really make my day. Also, if you still have some questions or if there's something you didn't understand, do tell me. All right, so that's about it. Thank you for watching. And I'll see you next time. Uh
 Patricia Caldeira, Illustrator | Digital Artist | Designer