Transcripts
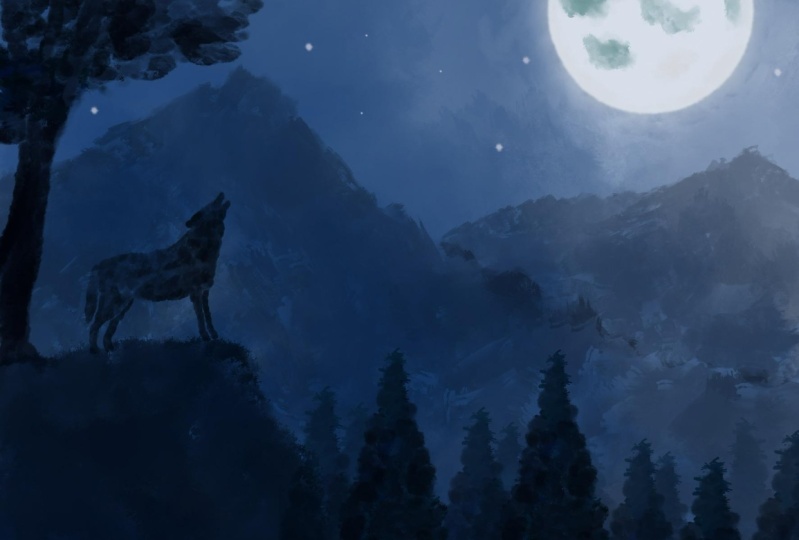
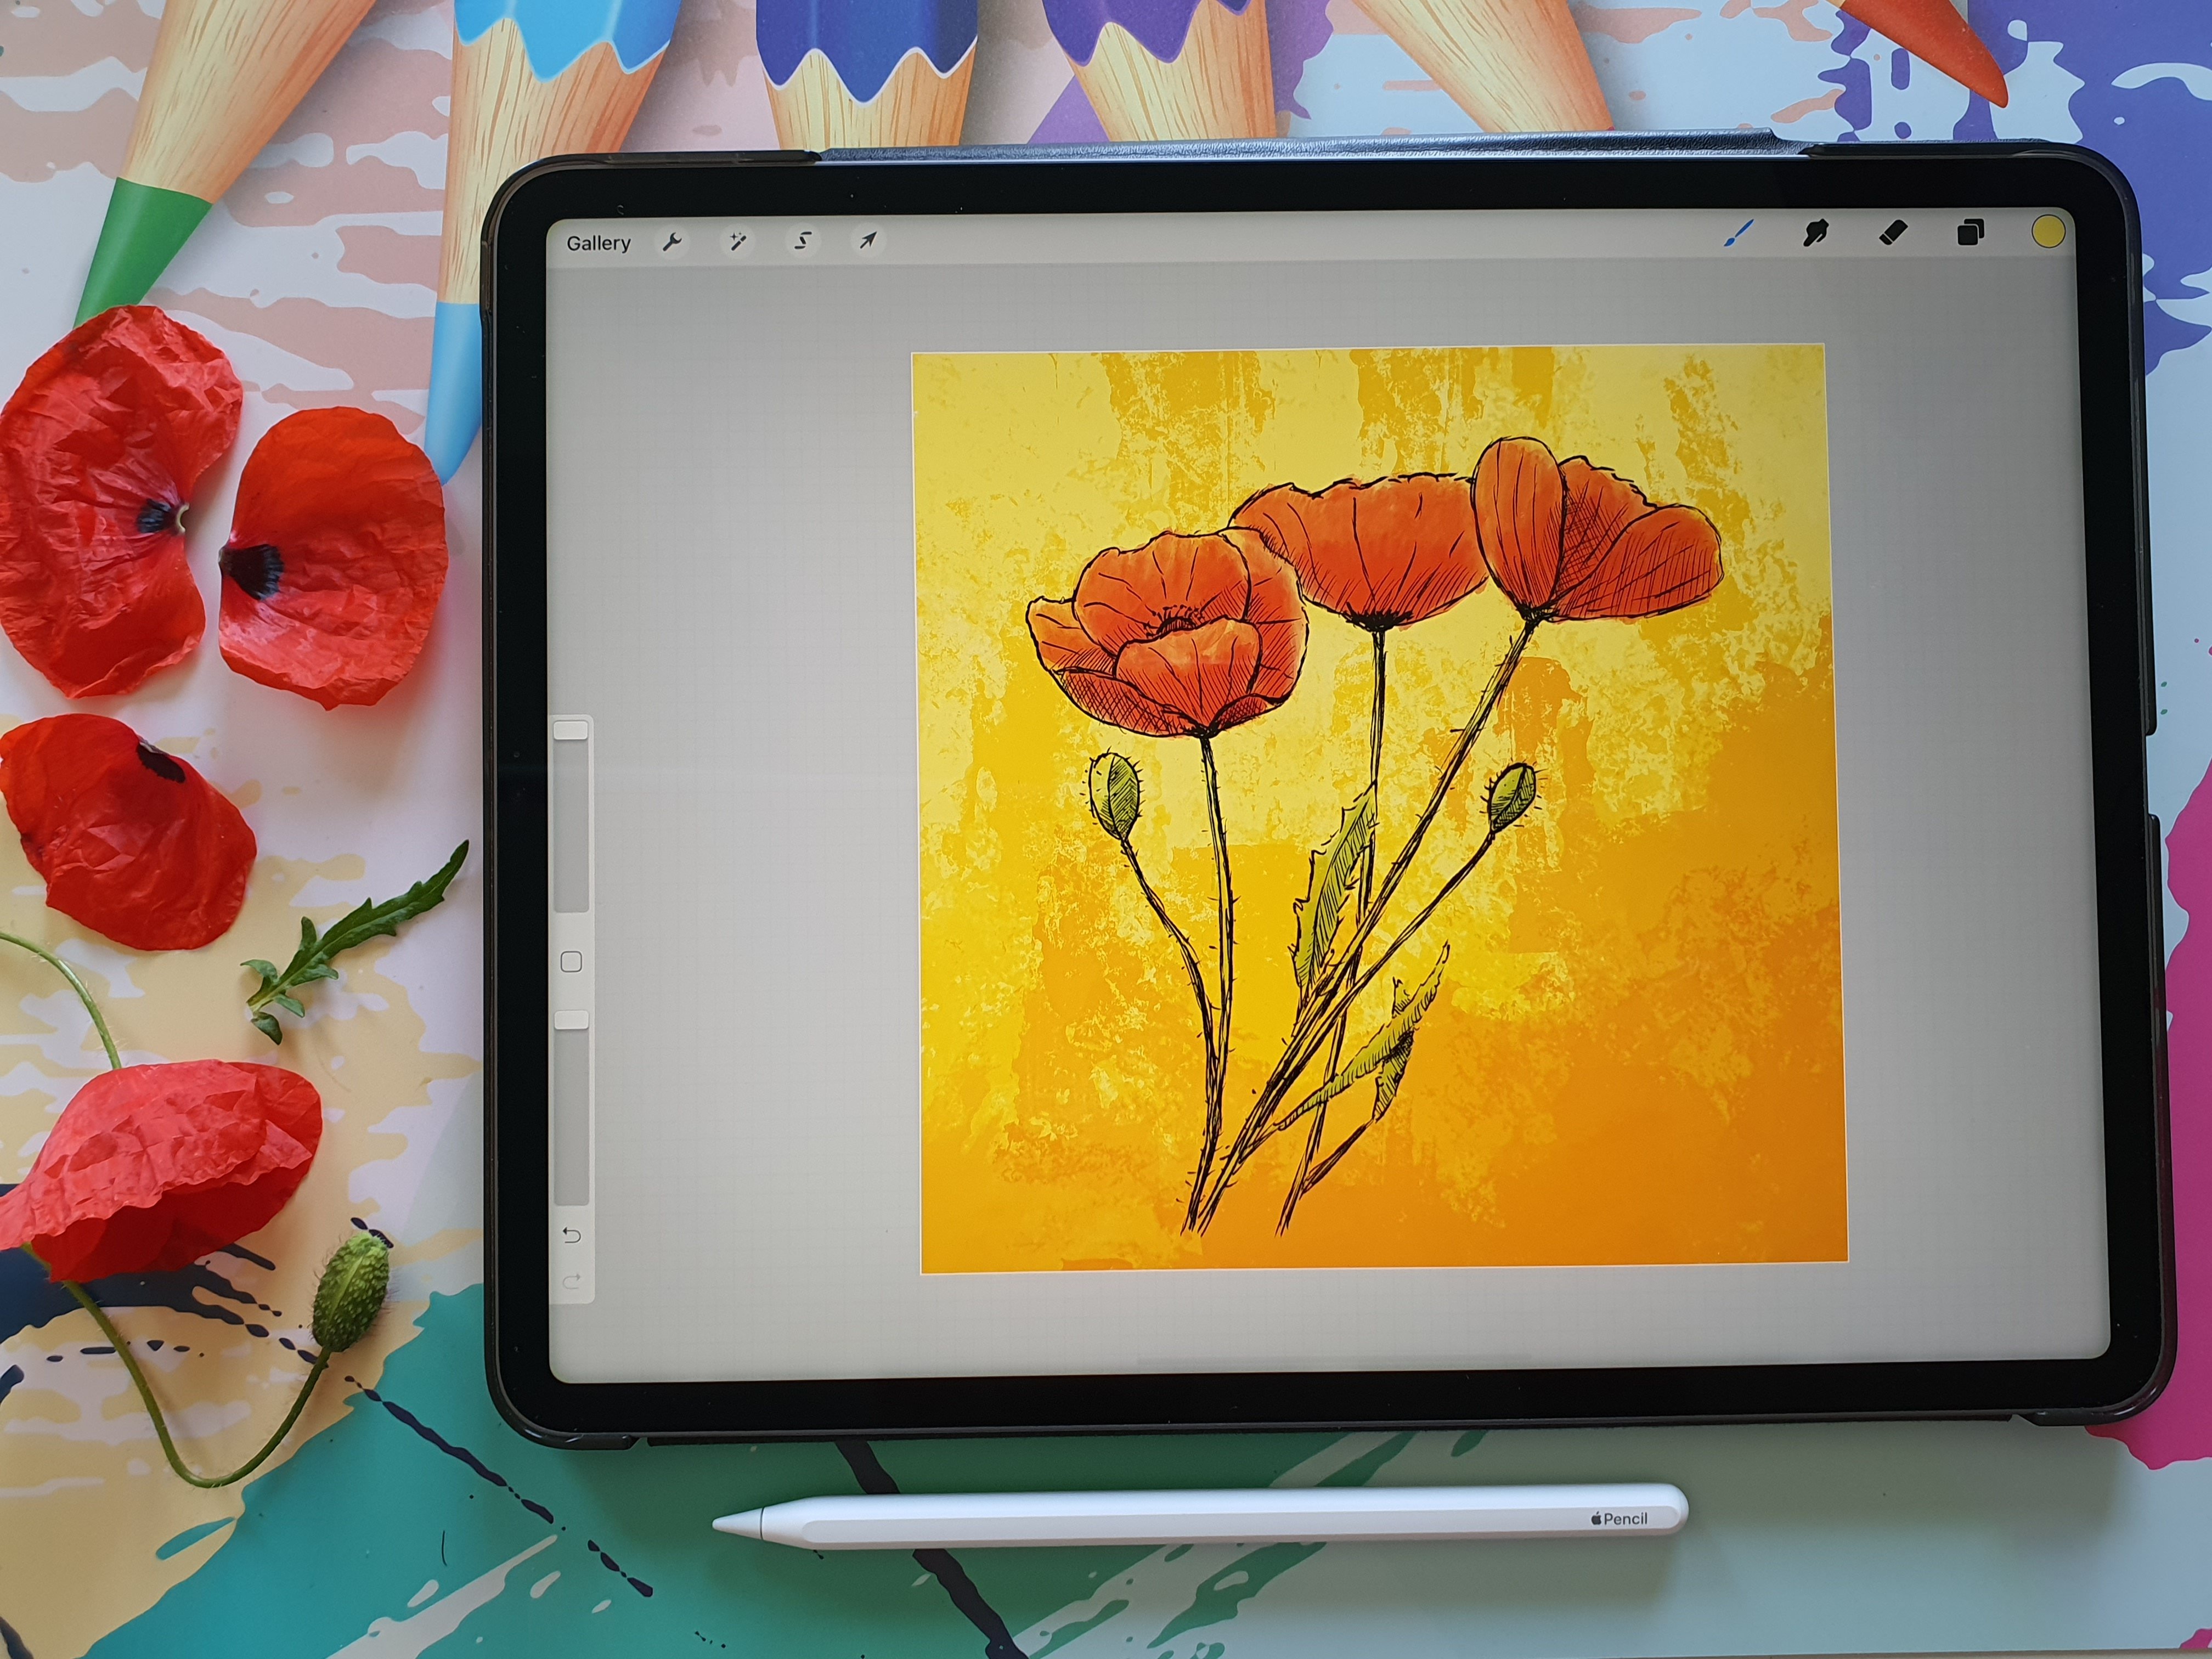
1. Introduction: In this art class,
we're gonna do some silhouette
painting in procreate. I'll show what painting
is really fun to do. A quick technique to create something really
nice to look at. I'd have fun with, and
that's what we're gonna do. We're gonna have a
lot of fun with it. Now, most of the time when
people do silhouette painting, digits create
background, foreground. And that's it. We're going to explore this
a little bit more together. We're going to create
some depth in it, create a real painting of it. Not just an image, but make a painting. For that, I'm going to use
some oil paint brushes and they're supplied
with this class. If you don't want to use those, you want to use your own
brushes, no problem. You can follow along
with every brush it's used to suggest
the principle. Once you catch on
to the principle, it doesn't matter
which brush you use. Now you might look to
this image and say how I know I'm never
going to accomplish that. I can't draw, I can't
paint. Doesn't matter. If you can't paint and draw, you can still do this class. If you can paint, of course, Andrew, you can
follow along too. Of course. I'm gonna show you some
really nice tricks in Procreate to get this done. Not using stems,
but we can really paint this whole scenery and you're gonna
learn how to do that. Trust me, it's much easier
than you think it will be. Now to successfully
accomplish this, I supply some materials, like some photos to brushes, and all you need to get
going with this class. We're making use of
some of the features of Procreate and doing some
painting ourselves. We can successfully accomplish
this nice painting. You can do it too.
I want to just take you step-by-step through it. Show you every detail you need to know how to accomplish this. I would say go to
the next lesson. I'm going to talk a little bit about the materials
we're going to use. And then once we've done that, we want to start painting together and create
something nice.
2. Using the Supplies: Welcome to this first lesson. I'm not really a lesson. I'm going to show you how
to import the brushes and all these photographs into
your iPad and procreate. If you know how to do that, I would say just
skip this lesson, go right into the next one where we start drawing and painting. All right? But if you don't know how
to bring in the materials, the supplies I have supplied. Then let me show this. Alright, let's do that. Before we can start painting, we need to bring some supplies into procreate and to your iPad. That's the brushes and
the reference photos. For that, you need to
go to Safari and go to skill share and
go to this class. Now under the class you see about refused
discussion these steps, you need to go to the
Project and Resources. And if you press on that one, you see here the resources
and there's eight of them. I'm going to just
demonstrate how to get these brushes and one of the reference photos
to your iPad. And then the rest is
just the same procedure. Let's start with the brushes. You tap on the
brushes, brush set. Then it starts ask you, do you want to
download this set? Yes, I do want to download that. I'm going to say download. And you can see here
a little arrow. Suppose a little bar under it. Now it's full and you
see an animation. Once it's finished downloading, you press on this
circle and the arrow, and then you have your downloads
and it says the brushes. You just tap on it and it brings you to your file manager. And the easiest thing
to do now is I'm not sure where your file
manager will start, but the easiest thing to
do is press on recent. Then the first thing you
will see is the oil set. You just click on it, it will import it
into Procreate or you won't see it yet until
you press the brush in, procreate and scroll up. And the first one you will
see is this brush sheds. That's the first thing we need. Alright, let's go
to Safari again. We are back at the
class in two fiery and the next thing
we're going to do is download the
reference picture. Now there's a number of them. I'm just going to
demonstrate the first one and you just tap on it. And then it just ask
you two things now, do you want a few
or download it? Now the easiest thing
now to do is to few. And I'm gonna say
I'm gonna few it. Then you get this
reference images. This is the first one. This is the one where
I've done the painting. You can use it as a reference. Now if you want to bring
this to your photos, what you do is you press
with your finger and you get a new menu and you just
say add to photos. Then you can just press on the little x here and close
that window and the rest. If I take the tree,
you do the same. You say few, and it's just one of the reference
trees we're going to use and to bring it into
your iPad, we do the same. Press and hold your finger
and say add to photos. That's it. And you can close
this window to, and now they're
all on your iPad. You have two brushes, you have all the references on your iPad. I want you to have
all those references. You can use them in Procreate.
All right, that's it. We now know how to bring
in the reference images, how to bring in the brushes. We have everything ready
now to start with painting, creating a beautiful
silhouette painting. All right, see you
in the next lesson.
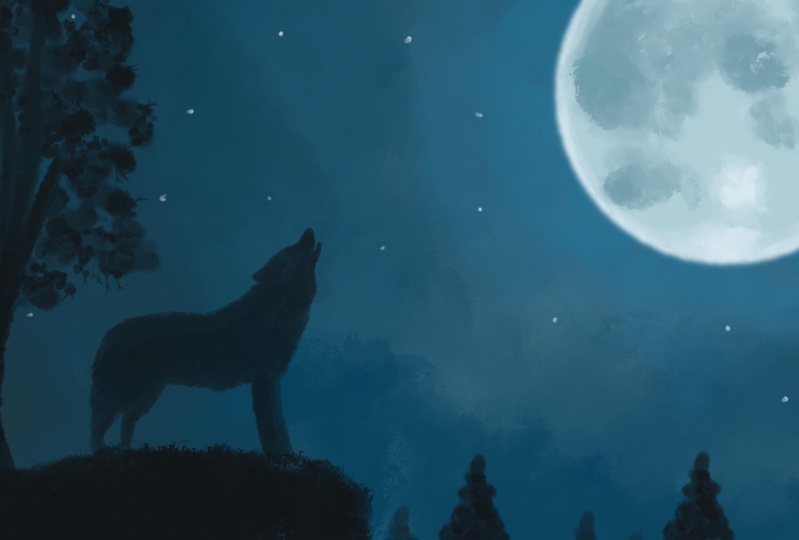
3. Creating the Composition: In this first lesson, we're gonna start
our composition. We're not just going to paint something wildly without a plan. Now we're gonna make a plan. And once we've got a plan ready, we're going to paint for that. Of course, we're
gonna need Procreate. So let's get into that. Alright, I've got my
Procreate started up already. What we're gonna do, we're
gonna make a new document. We're going to use a square. And for that we're
going to hit that. Plus we're gonna say new canvas. The size, what I
want to do is around 2500 pixels up here, and the height also 2500 pixels. Let's see the color profile. It's on SRGB. Probably you could put it on display p3 if you want to
have larger color range, I'm going to leave it on SRGB in case I want to print
the print really well, time-lapse settings
there on automatically. So and the Kansas properties, I'll leave that like this. This is the main
important thing. The canvas, the DPI I leave
on 300 dots per inch. That means if I want to print, I got a nice size and I can really print this
on a paper to give it a name. Let's call this, let's say pseudo eta, silhouette painting. And there you go. Then I'm going to say Create, and it creates a nice
new blank canvas for me. We've got our canvas setup. Well, that was the easy step. The next thing we're gonna
do is create a little bit of a composition as guide.
How are we going to paint? Later on? We have a few elements. We've got the moon,
we've cut the roof. We've got a rock and some trees. We're going to put
them in the Canvas. Once we've done that arrangement little bit as would
work the best. And from there, we're
going to paint, but let's do that
composition first. All right, a little
bit about composition. Now, this is a square. And what do you want to
afford with a square? And any painting
is really getting something right in the
middle that would be here. We're going to afford this part. Now normally, when
we're going to paint, you're going to divide
it up in squares. If just figure out
wherever you think comes. We're not gonna do that a
little bit complicated. But what I want to do, I want
to have a nice composition. And we're going to
use some focus point. I wanted to focus points
would be the moon. I'm going to place
the moon right there. So your eye will be
drawn to the moon. But because we are
going to paint in the Roof somewhere
and the trees, which can be really dark. Also your eye is going
to focus on that. So I want to lead your eye a little bit around
the composition. So if I have the moon here, I want to have something
opposite of it. I don't want it
in the same line. Now I want your eye to go
around the canvas a little bit. I'm going to create some
interest points right here. Little bit interests points
here and that moon here. The first thing
we're gonna do is I'm gonna go to my brushes. I'm gonna get that pencil. I'm just going to get myself a blue color in
the color circle. I'll slide it to blue. I'm not gonna go black, but a little bit grayish
column like that. I'll have cut a
nice pencil column. And it doesn't matter
which color it is. And let's see, the pencil
is set on 78 per cent. Yeah, that would work fine. The first thing I
want to do is create a little bit of a
horizontal line. And I want to go for a
1 third of the canvas, around one foot of the canvas to the would-be around here. I want to draw a line. I'm not going to let the
pressure go up and I'm going to hold it and I get a
nice straight line. I'm gonna put it in
there and let it go. What I wanted to do with
this horizontal line, I want to make sure my
tree stay below it. My rock stage below, but the roof I'm
going to put above my horizontal line and I'm going to put here
an extra three, which will go above that. Now it says now edit
shape, but I'm done. I'm just tapping somewhere
so that this goes, alright, That's my first step. Now the second easiest
step is the moon. What we're going to do, I'm
going to draw a circle. It doesn't need to
be perfect circle, but we'll do the
same with the line. I'm going to draw a circle. I'm on a hold it. And then it says
ellipse created. It says Edit Shape. I want
to touch Edit Shape and we're gonna say
rather have a circle. And that's it. Tap somewhere. And there's my moon. I think my moon is
in a great position. I'm going to leave it like that. Alright, so I've got now the
moon and the horizontal way, but I don't want them
on the same layer. Really strong need
to cut the moon out. What I'm gonna do, this, I'm going to hit this ribbon. Now on freehand,
you could put in an automatic or not
another medic rectangle freehand both works. What we're gonna do is
I want to just create a circle around the moon. I'm going to go to the wrench. I'm going to say cut. Tap at, say cut, my moon is gone. And I'm gonna say paste
again and follows, well, I've got a new layer. Let's rename these
layers right away. This one is going
to be horizontal. The first layer, one, horizon. There you go. The
second one is the Moon. Number two is reference. There you go. Alright, good. Next thing I want, I'm gonna
do a new layer above that. And there is gonna be my, let's do the rock. Three would be the rock. And if once I have the rock, I know where my trees will go, the rock, I want that
in this section here. I'm just going to
paint simply Iraq. I'm going to just do
that nice and easily like that and let that
rock go down nicely. That's all I want for the
rock, simple as that. All right, the next thing
I'm gonna do, the trees. I'm going to rename
this column number four trees and I'm going to
give them the same name. What I'm gonna do
with the trees, the trees are pint three, so I'm going to simply just
draw a triangle I want, I'm going to do shape of tree. Let's start there. It's not perfect. And then same Hold it. Don't let the pressure go. And then say Edit Shape. And if all is well, if I draw on something
close to a triangle, it should give me a triangle. There you go, Nice. Now, let's move the
triangle a little bit. There we go. I need a couple of trees. I want to have more, let's say about free
trees in the foreground. What we're gonna
do with this tree, I'm going to just duplicate it. I'm going to duplicate it again. And I've got three trees
in the foreground. Now you don't see
the free trees yet. Let's start with
that second tree. Let's move that. Let's
move the first 32. Let's do three. Going to move that right here. The next tree, I'm going
to move right next to it. Perhaps overlap it a little bit. There you go. And the third tree, make sure I'm on that layer. I'm gonna move, but I want to change the size of this layer. And I can do that by these
little points there. And if you have it on uniform, it just changes in
the same ratio. So every angle is changed in the same ratio
as the other angle, angle. And for now, I think I'm
fine with that small tree. Move it around. I just want to say
I'm going to cap my small tree right there. Alright, I'm gonna move it
a little bit like that. Now this tree, what I
want to do with Devin, I want to do it a
little bit less white. So I'm going to select the tree. I'm going to say free form. And now I can move
it slightly thinner. And I want to do that
with that first tree to think it's
slightly too white, still on uniform,
moving it slightly and that gives me a little bit
more room to move this tree. And to move this tree
a little bit closer. There we go. All right, good. Now that won't be default. The trees in the foreground, what I'm gonna do, I want to
have some trees behind it. So that would be a tree here, a tree, a tree, and a tree. That will be good enough. So I'm gonna select
that first tree. I'm going to duplicate
that 1234 times. I'm just gonna leave
them as they are if these layers later
on, go hide them. Let's get to that
first tree, then. Move it behind the street. I'm going to lower it in
science a little bit. Let's go for uniform again. Slightly smaller. Let's put it behind the tree. I'm fine. I'm gonna move this totally to the bottom. And there you go. The next tree would
be this tree. I want that between these Trish. Want this to be a bit
lower than the rest, since we're looking
at the distance. That's good. The next tree I'm
going to move to. And I want that lower two. And then the last
tree I want there, I want that really small, as small as the other one. Put it there and I'm fine. All right, I got that. But now it's one big cluster. I'm going to go back to that
first tree, that's this one. I'm going to move it down until
that bottom line is gone. Want to say it on free form? And we're going to stretch
it till my horizon line. I'm going to do the same
if that second tree that should be this one. Move it to the
bottom line is gone. Right? Now I only need to find that little tree
that is this one. Here. You go, this little tree, I'm gonna do the same,
stretch it a little bit down so that all these
bottom lines are gone. Now I've got one big clot mess of trees with all kinds of
lines crossing each other. We're going to fix
that a little bit. Let's do that now. All right, so let's fix that. I'm going to zoom in a little
bit. What we're gonna do. I know that this
is my first tree. This is a tree behind it, so I'm going to
select that layer. And we'll see that it's this
tree that is behind here. Now I know this is the front
tree and foreign eraser. I'm simply using
the airbrushing. Hot blend is fine. How large it is. Large enough. And what we're gonna do. I know this is the
front tree here, the lines that are not
supposed to be there. And this tree is not
in front of the rock. I'm going to just
erase like that. See, that already
clears up the part. We're gonna do the second one. The second one
should be this one. And this is behind again the street because this is the front tree
and this is a front tree. So let's move that line. Let's do the same with here. And that's why I didn't
put them in one layer. If I would've put
them in one layer, this would have been much
more tricky than it is now. This is from tree to this
tree goes in the back. We've got the last three here. That one is in front of this
one shouldn't be like that. And there you go. Now, look, now we're
having a composition. Now we're going to
have the wolf to, we're going to put the wolf here just above all these layers. I'm going to add another layer. I'm gonna remain that that
would be number five. I got my new layer for Woof. Now, I want my roof here
and I'm just going to draw a rectangle roughly where I want to move the
roof about this size. Hold it, say Edit Shape and
a few done it pretty well. You're gonna get
rectangle and now there's a nice rectangle with some
lines suddenly disappearing. All right, I'm going
to do it doesn't really matter that
these disappear. I'm gonna move this. I wanted to do
pretty much there, perhaps a little bit bigger
than that, bit wider. And what I'm gonna
do is I'm going to just add this line in, this annoying that, that
line is, that's my roof. Don't worry. We're going to create a
better offer than that, but that is for composition
just to show where the paths, alright, let's do the last part. The last one is two here. Now we've cut nice
something here. We've got this, we've
got that moon there, but we don't have anything here. So what we do later on, I'm going to add one more
layer and I'm going to add a tree data and I'm
going to just say three. For now, I would be number
six in my composition tree. I'm just going to
put a three here, and I'm not going to
worry about the shape. I'm just going to draw
a figure like that. I'm going to hold it and say
nice arc. And there you go. We're leaving it like this. We might do the wolf
later on slightly bigger, get some more attention to it. But for now, this is
our basic composition. Well, that's the first step. We've got a basic composition. We've got a bit of
an outcome position, but also with a focus in
the corner that moon. The next step we're
going to paint. All right, see you
in the next lesson.
4. Painting the Background & Moon: We spend some time
on the composition. Now we're ready to paint. What are we gonna
do in this lesson? We're gonna do the background and we're gonna do two more. Let's go for that. We've got our drawing, our basic drawing ready
now we've got to fill in these elements what we're
gonna do first of all, the horizon line above that, or should we go below that? Probably we're going
to add a new layer. And I'm on number seven, I think by now seven, that would be the backgrounds. Backgrounds. And there you go. Gonna put it. Put moved to the horizon above it by holding your tapping
it, letting it go. Now the background is
really in the background. Now I need some colors
for the background. What I'm going to
do is I'm going to find that reference of the moon and the
photo of the moon. For that, I'm going
to touch the wrench. I'm going to go to Canvas. And I'm gonna say reference. I'm going to open
a reference now. Typically what you get for
references you're drawing, but I don't want that. I'm going to say image. And we're gonna say import an image. And we're
going to look for that. Boom, there it is. And this will be my
reference picture. Now, I don't need the hormone, so I only need this part. So I'm going to make
that reference smaller, but zoom in a little bit more so that I can pick some colors. What I'm gonna do next, I want the colors
of this background. I want them in the painting. And what I'm gonna do
is with my finger, I'm gonna go to the
reference. I'm gonna hold. And we'll slides until I find a bit of that lightest blue
and that is right there. I'm going to let go. Now. Here, the color changes
to that light blue. Now I need some
brush and I'm going to use these oil
brushes I've supplied. You can use any brush you like. Any paint brush, watercolor, gouache, acrylics, whatever
kind of brushes you like. But I'm going to just
demonstrate it with these ones. And we're going
to just pick one. The depth one is good
enough for this. I'm gonna make it a nice Last science so that I can
draw in the background. There we go for the background. And I'm just Swift my brushes, if I press a little bit, I get a little bit of paint. If I press a lot, I get a lot of paint. Gonna do it really large. And let's go around the moon. I want some light color. And when I'm moving
away from the moon, I want my colors to
be nice and dark. Now it looks like a mess. Don't we want to fix that
mess with these brushes? These brushes, if I
now very lightly go, it smushes this all out nicely. Not too much, but
just a little bit. All right. There we go. Now I want this to be
definitely a little bit darker, so I'm going to move the size. It just a little bit darker
parts here at my edges. I'm just hardly touching. Want to do that back here too. But really nicely pull it in. Now I'm already getting a
nice shape, nice background. I'm going to color that is here. What I'm gonna do, I'm moving
it over to slightly darker. Then I can do a little
bit darker here. I'm happy with them. All right, that's
good. That's my background's easy,
ready background. We're going to work some
more on that later on. For now, let's do demo. We're going to draw
the moon and we're going to make use of this shape. We're going to find this one. That's the moon reference. I'm going to add
under it a new layer. And I'm calling this the moon. I'm not sure which
layer I am on. I think I'm on. Number eight, we're gonna make use of
the moon, the shape. What I'm gonna do with this, I'm called this moon reference, tap on the moon, tap on this layer. You get a menu and then
you see here reference. What I'm gonna do, I'm gonna put this moon is
now the reference. That means that
whatever I paint under it uses this as a reference. I'm going to the
moon and what I'm gonna do first, I
need some column. I pick some color
from the moon photo. Now I don't want
the lightest color. I want somewhere in between
like a little bit bluish. I'm going to go, I will
say for this column, what I'm gonna do,
I'm gonna pick this color from
the color picker, slide it over to
my moon, let go. Because I use this
as a reference. It now recognizes that I want to use the outline of the moon
and if I hide my reference, I get a nice smooth. Let's zoom in this one
thing I don't like, we always edges debt
because of the pencil, I want to get rid of them. Now there's an easy
way to do that. Make sure you're on the moon. The moon, windows on
the moon were on Earth, but make sure you're
on the moon layer. And then touch this
little magic wand. That's what we want. Press Gaussian Blur
and I'm going to blur the edges and we've removed
that would work great. And now it says 0%
slideshow adjust. We're going to just
slide and see you get this now that's
all of the moon gun. This is just there. Or I like that,
that's good enough. I'm going to hit that. French again, zoom out, see, and now I got a nice moon, not with these hard edges, just blending in a little
bit with the rest. Okay, that's it. Alright, that's the first step. We've got the background. So the first step, second step, first of course, a background. Second step, we've
cut our moon base. Now we actually can paint
the moon. Let's do that. To paint the moon. What I'm
going to do above the moon, I'm going to do a new layer and I'm going to put this
layer to clipping mask. Tap on the layer, put two clipping mask, I'm going to rename it. This would be number nine. Details I'm going to call
that gives me the suggestion. And we have clipping
mask what it does, whatever I paint on this layer, it will always regard
what's under it. So if I paint on here and I'm picking just whatever color, pick my paintbrush again. I'm going to paint
right there and nothing happens until I get on the moon. Let's get rid of that. Now, what I'm gonna do this, I'm just going to look at
this reference and I'm going to paint very roughly, descent doesn't need
to be accurate. It just needs to be there. First thing I'm gonna do
is pick a color again. Nice dark blue. I'm going to a brush. I'm gonna say I'm gonna
go for that oil paint. Daesh, don't want to dead large. And I will just look
at this reference. And you go and we're going to
paint that in. Let's look. There's something there. There's a dark spot there, there's a little bit there
That's definitely swing there. And I'm making use
of the pressure. So I'm pressing hardware, I wanted to dark and
I'm pressing Not too hard for I don't want
to. And there you go. Well, this might be a little
bit bigger and that's it. Now that's not it, but
that's my rough base. The next thing again,
with these brushes, since they're working
like old brushes, I can smudge this out
a little bit by very lightly going around the edges. And you go around the etch, good, that will
be the dark part. Now I want some dark in there. Beck again, so I'm going
to add my size two, brush a little bit at something
dark there. This is nice. I think I want this
to be a little bit darker around here. Connect it a little
bit. There you go. If I now zoom out, see how it starts to
look like a moon. That's not all, there's
different colors in it. Let's go for the light color to. Again on this one pressing
with my finger holding, it's just picking that white. And let's go for that. Now that white is
around the edges, I cut my brush at around
5% of that would work. Painting in around the edges, some of them whites. Pressing reason to
be firm for this. There you go. We're going
to smudge it in a minute. And I'm gonna say that somewhere here,
there's some white, definitely two and
some more white here, a little bit white there. And around this edge T2 ends. Now I'm just going to lightly blend this in with the rest. Don't want to get strong. Might as well put a little bit
of a look at this picture. You add some there to
blending it in carefully. That's the nice thing
about old brush. These old brushes,
they just blend in nicely with the rest
of the painting. And if I look now look, we got the idea of a nice Moon. Alright, I'm don't care
about all the details here. I think I'm fine with this. Might just blend this in slightly more bit
too much there. Alright, good here. Not nice. We've got a rough moon now. That's not accurate.
Science does not. We're not going to
paint photo realism, which going to paint some
nice silhouette painting. So we don't need acute details, we just need to get
everything where it is believable and I
believe this is immune, but I'm not done with it. I'm gonna look at that
reference again and just add something to
this moon. Let's do that. Alright, if I go
to the reference, you see clearly that
around the moon, of course it's lighter
and we want to do that a little bit more
around this edge. So what we're gonna do
with that is I'm going to start a new layer on
top of the background. I'm going to stick to
whatever brush I'm using. I'm going to pick that nice
light blue color again, if it helps, would do that? Yes, it does. I'm picking the same color, so I'm staying in the
same color range, but I want it a bit lighter. That didn't go well, did it try and pick
that light blue color? That light blue. We'll move it. There you go, that's better. And now I'm gonna
go around the moon. I'm going to just
make it a little bit lighter with that brush
That's not big enough, large and make it larger. Right? There we go. See you in a
little bit of a halo effect. Halo, but just lighter. And just blend this
in with the rest of the colors to create a bit
of an interesting effect. See, now that looks a
lot nicer right away. I'll think I'm
gonna do with this. I'm going to leave it
like that. So I got that. I'm pretty happy with this. We're going to rename this. I'm on number ten, I
think by now. Yes. Number ten would
be my background. But we're calling it
these details again. All right, good. All right, that's it for this lesson. The next lesson, we're
gonna do those streets. Let's put in those trees, Iraq, and just get a little bit of a scenery in this empty space. Alright, see you in
the next lesson.
5. Painting Trees and the Rock: We've got a nice empty scene. We've got to moon.
Nice background. It looks pretty nice already, but it's not a painting. It will be nice background
this way to use that, put some nice text on it. For example. You want to put them there, makes a nice cut, but we want to make
silhouette painting. We have our backgrounds. So now we need something, a silhouette before it. In contrast to what we've done, let's do the trees and rocks, and the next lesson
we'll tackle the roof. But let's start with
the tree and the rocks. I really did say Roxy, but there's only one rock. We start with the rock. Yes, we're gonna start
with the rock then we know where the trees got
the rock pretty easy. What we're going to do,
we need a black color, we have this blue color, steel. Let's use that as our base. Let's move over to black. Black. So not on a little
bit of a nuance in its darkish blue there
you go, close to black. I've got that same brush there. I want a new layer and doesn't
matter where I put it. Let me see. Let me put it
right here above this one. And let me call that number 11. Eleven would be
the rock, the ego. And let's see if I get
away with this brush. With a different brush or other. Fine. Now I want a different
brush change moment. I want this one here. The oil paint for what? Because that gives me
a little bit of a hint of grass on the top of the rock. And it is on quite small. Let's put a little
bit higher at 9%. If I paint in these
little edges there, see which works right
away as little bit of the idea of some grass going on and we're
just painting in. Now I'm doing my sites
first. There you go. I've got my rough shape now. I'm going to make it
larger, about 20%, just painting in pressing
really nice art and blending, making sure I blend two. And I get this nice rock figure. The shapes on the accurate
shape and the H2 little bit. And perhaps they're a little. There you go. Now if I
hide this reference, references, I got a nice rock. Nice and easy. There was very easy. It wasn't it. This painting that shape, next finger three's what I'm
gonna do with it like this, that would be too easy. I wanted it to look
like trees is painting. So it's not an effector
illustration with all straight nice lines,
triangles, real paint. For that, we need to do
a little bit of a trick. Let's do that. All right, What we're gonna do is we're going to start
with the front trees. Now. They can be an inner
layer above the rock. That's fine. Just to lay. I'm going to call this
the front trees too. Hey go. I'm gonna actually only draw one tree to make it myself easy. I'm gonna do the same
as what I've done here. I want to draw one tree, paint one tree in this case. And then I'm just going
to use it for everything. For that I need a tree. And I'm gonna do a little
bit of trick with are on this front
trees, That's fine. Gonna do. Hit the wrench C. And we want to insert a photo. What you're going to look
for is a photo of the tree. Now the three I should apply it, I'm just going to
pick that tree. There you go. That's a nice huge tree. Too big, too large, too much. I'm gonna move it over
and I'm going to roughly fit it in the shape I've done. It doesn't need
to fit perfectly. I want to have that on the free form so that I can fit it in a little
bit better in my shape. I'm just saying that
would be writes. Pretty nice. Okay. I'm going to use this
now as my reference. I'm going to paint over
that one we will do is I'm going to add a
new layer above it. Now this change to my
front trees but not good now I'm gonna remain
this number 12 rename. This will be my three reference. There you go. Above this, I'm
going to rename as number 12 or 1313
already on the front. Trees from trees. There you go. Notice what
I want to type today. Well, don't I pet You
know what I want to type? So what we'll do
with this image, first of all, this reference, I'm going to select that layer, tap on the N. And here
you have the opacity. I want to slide it down. So that's not in the
way of me painting. The next thing I'm going to
do is select the front tree. I'm gonna stick to
that same brush, but I'm going to make
it really small. And I'm going to paint in
the tree are not really, really small but like this. And I'm just going to
paint a dead tree. That is, I'm just gonna do
it very easily like that. Probably lower it
a little bit in size and follow the contour. I'm not going to
draw in of course, all these needles since we're having only silhouette shapes, so you won't
recognize everything. I don't want that A3 size of
the tree shape a little bit. I want to follow the contour
a little bit of this tree. So that actually
looks like a tree, a little bit in the silhouettes. You could use a stamp for that. I've seen people
using a stem plot since we want to
paint a little bit. I don't want to use stamps. I want to do the work myself
and create a nice shape, my own original three shape. That's Dead Sea and I'm just
not worrying about being accurate a little more. Off it, stippling,
making staples in it. And some very quick
rough shapes. Once we're done, you will
see a very nice tree. Now what I'm doing
with the middle here, got this and we're going to get a slightly larger size brush and really paint that
middle in there you go. A little bit here too. Not pressing too hard. Now, let's hide that photograph and see if I got a nice tree. Yes, I do have a nice tree. The only thing I don't like is that it's quite light here, so I'm going to add
some dark points there. We're gonna go lower that
brush again, make it small. And I want some
more darker colors here to connect
this a little bit. Better. Get the three shape. There you go. The top a little bit. And now I'm happy with that. I'm going to use this as
my tree shape now it's not a stamp and not
effector with string, with really sharp lines, It's just a painted tree. What I'm gonna do next
probably won't surprise you. I'm going to just
duplicate this one. I'm going to move it
over to the next one. I want the tree in
this next shape. There you go. Now, I'm
fine with Dish trees, two trees being pretty much the same and I'm okay with that. That will be two trees already. Next one, Let's
duplicate it again. Move it to the little tree. There you go. I'm going to change the size of
this is the free form. So I'm going to widen
this a little bit so that it fits nicely in there. And there you go, Right? That's my front trees. Those are the trees
in the front. Now we need those
trees in the back, of course, some lines behind it. We want to have 3's data. Let's go for that now. I'm going to make it
myself really nice and easy and we're just going to keep on doing what we've done. I'm going to just duplicate that first front tree
and say duplicate. But now it creates
a layer above it. What I want the tree under
it because this will be the bacteria that
will be that tree. And what I'm gonna
do with that tree, I'm going to move that
to where I want it. That's they're gonna
leave it like that. Now I'm going to rename that. Of course, this is not
from tree number 14. This is a tree vector. There you go. Now this back three, I'm going to duplicate and move it to its position right there. I'm gonna do that
again, duplicate it, move it to its
position right there. And I'm going back to
the first back three, duplicate that and move it
to the position right there. That's that. Select the arrow. There you go. Now all these trees
look the same. They're just as black
as they are proven. Create a bit of sense of depth. That it is not just
one row of trees, but there is various
rows of trees, like a forest, which
you'd look into. We've got to create that effect. Now. What we're gonna do for
that is we're going to select those back trees. To do that. You're going to
slide it. And just do that. Now I've got all the factories selected and I'm
gonna say group, I'm going to group these. Now there are one
group, but I don't want them to be one group, I just want them
to be one layer. So I'm tapping on the group
and I'm gonna say flattened. Now it's just one picture, one layer with all these trees, I'm going to press
the N and we'll slide over and make them
a bit transparency. And by doing that, you get
that idea, sense of depth. I think I'm around 60%. I'm fine. That's not all I'm gonna do. I'm gonna add some
extra three students. So what I'm gonna do
with this spectres, I'm going to just duplicate it. Now it's really strong. Again, select the arrow and
I'm going to move them. Let's say I want
row right there. That worked for me
a bit lower again. And I'm going to do this one, duplicate it one more time. Move that over. Lungs, some trees. It looks good. And this one I'm gonna duplicate again and move
back a little bit. I think I want perhaps
tree there too. I'm think I'm okay
with that gap there. Nice. What do we want one there? No, I'm fine with this. Now, the first
layer I put on 60%, the next layer I'm
gonna put less than 60% to create an
illusion of depth. With this layer here too, I'm going to just
lower the opacity and respect tree layer. I'm gonna do the same. Now I'm going to hide all
these trees on top of it. So the triangles that we get an idea of what we
have now and look at that. Now we've got the
idea of a forest. So now we have the idea. We get the impression
of a forest by just adding them really strong in the dark and just going
more with the opacity, going lighter in the back, we get that sense
of forest snuff, not one row of trees, but various rows of trees. Or you could figure
it out if we put one here to even lower, but I'm fine with this. Alright? And then we'll conclude
this lesson two, we've got those trees. We've cut the rock, which
got our background, is starting to
look like a scene. We now need our focal points. And our focal point
is not only the moon, but we want that move in. It's to draw your
attention to this scene. Alright, so the next lesson, we're going to paint the
silhouette of the wolf. See you in the next lesson.
6. Painting the Wolf: Welcome to this next lesson. We're going to draw in the
silhouette of the wolf. Because now we've
got a nice forest, nice rock, I see. But we want some focus. We won't just something to catch the attention of the people
viewing the painting. So let's go for that. The wolf. What we're gonna do
is we're gonna do the same as with the trees. We're gonna find ourselves
picture of the wolves. Wolves. Now, one move and let's see, I'm looking for the rock. It needs to go behind the rock. Need a reference here. What I'm going to
say is I don't need a new layer that will procreate, will do that automatically. I'm going to hit the wrench. What I'm making sure I'm on
the rock because I want that. I'm going to say
add another file, insert a photo,
and find the roof. I got to wolf supplied. I'm going to go for
the setting wolves to sitting moves
the sitting room. Now, my wolf is howling, but it's not howling at my son. What are you gonna do here? You've got some options. Here. Is flip horizontal. It just flips it around. Now my roof is
howling at the moon. I'm going to make sure
this is a uniform. I don't want to distort the
proportions of the roof, but I do want it
to be somewhere in my square and I'm
going to have choice now how large I do
I want this to be. Let me see, keep it
on a few of you. I think I might like a
bit of a large roof. I'm going to make sure I blended in with the rock, would
do that in a minute. I'm going to leave it like this. Now, what I'm gonna
do is I'm gonna move this inserted image below the rock and I'm
going to rename it. Let's program on 15 by now. Rename number 15 is
the roof. Rooftop. No reference. There you go. Here we go. Alright, now it's
behind the rock. So now I can see
really what I'm doing. I'm going to tap
this arrow again, and now I can move
it into position. I want to make sure that
of course, it's feet. Feet are actually on the rock. I'm going to move it over till
I have it where I wanted. I might keep this size. Size that is good if you want it small, you
could do with smaller. Let's keep nice
rock in the front. Yeah, nice proof in the front. That's good. Okay, Let's paint this wolf. We're gonna do exactly the same. We're going to just lower
the opacity of the roof. I'm gonna hide that square.
That's the new way. Now, if rectangle back to the roof makes sure
the wolf is selected, tap a layer above it, say a new, I'm
renaming it to 16. This will be my wolf. Move my look quite intimidating, but we actually don't need all these details and the wolf, we just need its silhouette, same as with the trees. We're going to create
the wolf silhouette. I want to select a
different brush for that. I want a bit more control. I'm going to go
for a round brush. There you go, round brush. And with the round brush,
I'm going to paint this in. Let me see. I'm on the right
layer. Let me see how large the round brushes. I think I'm fine with that. By 2%, 3 percent, I'm gonna start at the top. What is paint this in? And I'm just going to paint
this roof. There you go. I want to make sure it's
really how the wolf is, how emit the moon. There you go. I'm just painting
over this roof because I just only need the silhouettes that it makes it
really nice and easy. I might just lower the
brush large enough. 5%. Go right there. Now in a minute,
what am I gonna do? I'm going to actually put a
rock in front of the roof, so we'll do that in a minute. But now I'm just painting the roof really roughly
on the rough things. Now we're gonna go
back to about 50%. That's good. Yeah, that's good. Putting in its legs,
blending in everything. Another leg there. I cut the rough shape. Good. Paint that in paint
a little bit there. Now I think I got the
shape of the roof. I'm going to put it to
about six per cent and blend in everything a bit nicer. Make sure I don't go outside
of where I paint it. I think I'm pretty much
going to go from 2% again. The ear bit stronger
than paint it in. And do this a bit nicer
to go for 1% really low. I'm going to extend
this a little bit so I get the howling
a bit better. Blend this in. Slightly better. Day you go, Well, let's height the No, not yet, not hide
the reference yets. Need some bigger. Come on. 3%, 2 percent. Yeah, that's better. Lower this illuminate so
that it looks just better. Okay, Let's see. Let's hide the reference. There you go. Look at that. We've got a nice roof housing. It was going to say some wealth. They don't do that, do they? They're howling at the moon. Good. Now we've got half a roof. I'm going to add some hairs that lower two sides voltages, deploying a little bit to
get that idea that he has a fair know down here
to down there too. Now that looks nice. Alright, we've cut out
wolf howling at the moon. But we got half or not half
a move most of the roof, but his back legs are gone. So we're going to put a
rock in front of the roof. Get some more contrast, a bit more silhouette depth
in a two. Let's do that. All right. We're going to
put a rock in front of the roof so we need just a
new layer on top of the roof. Might use. Now I'm going to use a
different brush for that. I'm going to go back to that. Paint for this one,
simulate the grass. 6, 7%. Let's see if
that's good enough. So I'm going to add just a rock, simple rock like this. In front of the roof. There you go. Now, what I have now, you would say probably in your right about saying
that we don't have any contrast between
the rock and the rock is the roof
is on top of the rock. So what are we going
to do with the wolf? We're gonna go back, lower the opacity of the
roof a little bit, get a little bit in the back. I think 81 would be fine. Now you get the contrast between that front part, the big rock. And I think this is
good. This is fine. I don't really think I don't
like is that this is so one, straighten that
out a little bit. Why not welcome
back to the rock. Go back to the rock painting. This just a little bit hour. I liked that better. That's better. All right, good. Well, let's hide
this horizon line. We don't need that anymore. The only thing left
to do is that tree. Well, this is
starting to look like a nice painting with
some nice silhouettes, nice background, nice bright
moon catching the attention. And that wolf howling edit
also catching our attention. Now behind the roof, there's still an empty space. You could leave it like this. You could say that's it. But I want to make a little
bit more pleasing composition by putting a tree right there. So we have to move, then we have a big tree just behind the move. We're gonna do that
in the next lesson. Now if you don't
want the tree there, you could say, oh,
I'm fine with that. Skip the next lesson and
then go to the lesson. After it. We're going to
add the final details. All right, I'll see you
in the next lesson.
7. Adding the Tree on the Rock: Great, you've decided
to do this lesson two, we're gonna create really
nice tree behind devil. There's just fills
up the scenery, makes it complete. Don't
want to paint trees. Go to the next lesson where
we'll do a final touches. But since you're here, let's paint the tree together. It looks nice already, but there is really
missing something here. I'm just going to
make a tree there. And it just makes,
this composition looks so much nicer than
it is at the moment. It's nice already. But we're going to add that extra step to it for that way, of course, needed to treat. And I don't want to use DC-3. These trees are
more in the back. I want to use a little bit of more detail tree like to move. Yeah, it looks really nice. Bid Details. Of course there's no details
in the whole roof, but it just looks like
the perception of it. And as the moon, it has
details or perception. And these look more in the
back and you play a little bit with dark and light and
details to get the attention. Now we need some tree here. Now, this is not gonna be the
shape we're going to use. But let's go for a nice tree. It's going to be behind
the rock and the roof. Want to make sure I'm going
to put the moon reference. I'm just tapping on
the moon reference. I wanted to say on the
ranch, insert a photo. I'm going to get that tree. For that one, I'm going
to use these trees. Now. I'm not going to
use all these trees when you just use one tree. But again, it's in
the wrong position. I want to use distri, make it slightly larger, flip it again, Horizontal, Horizontal, and move
it into position. This is too small. I'm going to make
it a larger tree. Now I like that size, that is a lot better. Now, let's really
focus on that tree. That tree goes behind. That is what I want.
Now you already see how the spot nicely fills
up in my composition. I think, fine with the size. Now, what do I need next is
I'm going to above the image, add a new layer. I'm going to rename
this layer number, number 18 or something. Here. 18 is the tree
reference on 1819. I'm going to call this D.
Let's go for three again. Why not? Let's call it Just tree. Okay, I'm done.
Now, I'm not done. We're gonna lower the
prestige of this one. Then you get a nice idea
already of how this would look. Now, look at that. There's a nice mountain
and I won't look way too if you paint a
mountain behind here, to look pretty nice. Tempting, very tempting. Well, let's think about this. Let's do the 3 first. Let's not go for that mountain. We're gonna do the
tree first on that. I need to be on
my the right one. I have this round brush. I don't want the round brush, so I have the old
paint for a brush. That's the one I want. Let's
go for the one-on-one. So let's play with that. Let's see, Where are you now? We're gonna go with the tree. I'm just painting
in really again loosely all these
little branches. I don't care about these needles and leaves and I just want the rough shape of this
three. There you go. Keep on painting. Minutes work on
an ad that trunk. I want a little bit more. There. We go. Make this a little bit. Little bit here. All right. I think I'm done with that part. Not only the trunk, my brushes for that go
to the round brush. Let's see. It's going to
show what it is on 2%, probably too small,
yes, definitely. I want a larger
one. That's nice. 6% painting in the trunk, but that's the main trunk. And I'm gonna go
lower till about 4%. The strongest splitting
itself into various ones. There's another one
that's too much. Remove that one That's just one. Wrong There it is. There you go, the
strongest going up there. Do we need somebody
on something here? Let's take a look.
Let's hide that. Distributes stronger. Probably. Hide that tree on the top. That shape, right? And let's hide the
reference for now. Tree reference, that's not the right to
de-reference this one. There you go. Now look at that. See, and that makes my
scene really, really. Complete. Now, this tree this year seems
a little bit disconnected. So let's check the reference. There's nothing. We're going to add a little bit of
a trunk right there, that it is a bit more connected. And with going back to that, paint for brush, I'm going
to lower its 2% is good. And just now, add in a
little bit of these details, might do some of those
branches in a minute to just going to add
in some details. Really detailed, you
just little parts. But once you stop with this and then look at the whole and we hide
that reference. He just suddenly
looked like details. They're not details, of
course, it's all perception. Your brains are very good
at filling in details. You see something in
a flash like this, or you see some reference and you're going to fill
in a lot of details. Your brains will do that. That's how our brains work. We just using reference
images in our mind, which we have to
fill in the blanks. And that is what often not gonna artists about
just perception. I like that. Now I wanted to, a little bit of these branches, I'm going back, going
back to that round brush, really making it small 1%. I'm drawing in a couple
of these branches to just strengthen that
whole idea of a tree. Go, Let's see how we might
do a little bit there, a little bit here. That's enough. I would guess. That's
high that reference, see what we got and
we've come to see and we added some details C and
now it looks like a tree. Alright, that is nice, isn't it? Would conclude this lesson. Now attempting that debt, that mountain, mountain,
Should we give it a try? Why not? Let's do that. If you don't want it. We're gonna cut this out. All right? We're just going to experimental
little bit with that. All right, I'm not gonna
do that in this lesson. Let me make another lesson. We're going to make
an extra lesson now, just on the fly
because I think that will be really good to
have a mountain there. Just play with
that a little bit. If you don't want that mountain, if you're happy with this, just move to that extra
finishing touches, the finishing touches lesson. And I'm gonna play experimental little
bit with the mountain. All right, well, let me do
that. In the next lesson. I'll see you in the next lesson, or in the lesson after
whichever lesson I'll see you.
8. A little Experiment: Welcome back. You've decided to experiment with
me a little bit. We're gonna put a
mountain behind it. At least we're gonna try this. This is an experiment,
might go totally wrong. I'm guessing we're getting
somewhere with this, since it's a silhouette. We don't need to paint in
oddities in the mouth, we just need to get
the shape right. So we're going to
give that a try. All right, well, let's see what where are we
going with this? I want this mountain
behind there. I noticed that on my
reference there's a mountain, but I only have
half the reference. So what I'm gonna do, I'm gonna select the reference layer. I'm gonna go to the wrench. I'm going to say Insert
a photo and you want to pick that photo,
that complete photo. I just need to remember
to add it to the files, but I'm sure I can do that. There's my photo reference. Now, of course, it
is totally wrong, so I need to play
with it a little bit. I want to make this smaller. Select the arrow. First of all, I'm
going to flip it. I'm going to move it.
I'm going to make it the same size again
as to three years. Hopefully around there. And there you go. I
want this mountain, the mountain and then
going behind there. I like, Let's give
that a nice try and write say about
goods, isn't it? Okay. There you go. Now this is way too much. Of course we're going to
just lower the opacity. Get the idea of that mountain. I'm going to pick a new layer, add a new layer above it. It's under the tree, under everything
behind the rock. That's good. I'm going to call this
rename 21 mountain. Mountain. I'm going to
call this 21, sorry, 20 mountain reference.
And there you go. We're painting on this one. I want to pick a
flat brush for that. That's the flat brush. Get a nice size and we're
going to just simply use the black color and just
play with the opacity. I'm painting that
mountain in rough shape. The peak will do in a minute
and just add that like that. Then there's step mountain. That should be good enough. Now I'm going to get
some details in it, better shape or details, but at its shape, right? Blended in a little bit better. Around three per cent, get this peak in right there. Now, let's see how this goes at that shape in
a little bit nicer. And go make it a mountain. Let me use the big brush again. How far am I gonna go
right behind those trees? Paint this in. Let's see how that looks. Go for a nice big brush. There you go. Alright, now I've gotten
one black, huge blur. This is not the really nice my wolf was gone,
everything has gone. Blend this in just a
little bit more nicer. You could do. The other mountain of course. But we're not going do that. Alright, that looks terrible. I agree. We're going
to use the opacity, lower it down a height that
picture first mountain right? There we go. Look at that. Depth might not
even be a bad idea. We have an option now we
can leave it in like this. I like how this is coming
through, even the background. It's a bit perhaps
too much like this. There you go. Okay. With this. You get the paint brush
pack, ice, and lunch. Just blends the
edges a little bit. I'm not happy with depth. That's better. There you go. All right, now, now we've
got a interesting mountain, forests from the mountain, the wolf in front of it. It looks pretty
nice, doesn't it? Might want to do
this a bit thicker. Yes. Right? That is better. Move it up a bit more of
the mountain shape. All right, Good. Now that looks nice. Now we've got this
mountain there. So what I want here, I just need another
mountain here to get a little bit
more interesting. I'm just going to add
a new layer under it, alright, and I'm
just going to paint that's a little bit rushed. I need a larger brush. And I'm going to paint
simply, nothing spectacular. Just a new mountain
in front of it. C, and I get a nice one lower. It's there you go. Now I'm going to erase this. I want this mountain
behind it nicely. At the edge. Day you go. There we go. We've got some mountains now. It makes it look interesting. You could hide them
to, you could do it with out, with overfat. Alright, we're gonna
stop the experiment is, I would say, pretty interesting. Alright, well that's the
fun about Procreate. You can experiment
wherever you like. You can add to it take away if you don't like it float away. No paint wasted,
no paper wasted. Nothing lost. The original
artwork is always still there. Okay, we're done experimenting. We're gonna go to the
final lesson where we want to add the
final details. See you in the lesson.
9. The final Details: Welcome to the final lesson. In this final lesson, we're gonna do the final details suits this lesson well does it technically is one more
lesson is a video to project, of course, but we're gonna
start with l will not start. We're going to end
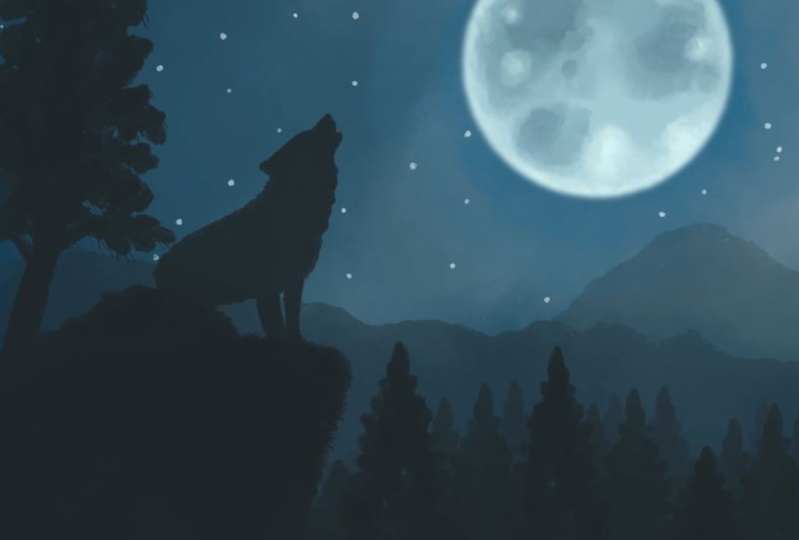
the painting with this lesson, final details. Finally it is, that will
become really quick. All right, let's just do it. All right. I've kept
my painting now. You may have that
without the mountain. This one thing I don't like, I want the mountain to be a little bit under
the roof, its head. I'm gonna move that mountain. That first mountain,
I'm gonna pick it, move it down and see. And now I get that
head of the roof nicely in contrast
with that mountain. That looks a lot better now
I moved it a little bit to the sides and the one
that There you go. Now I've got that, that is much more pleasing as a composition. And I need to move, of
course, this layer too. There you go. Now, I
like this a lot better. The head to move coming
just above that, that is a lot better. Now we've got our scene ready. The only thing I want to add
are some stars just empty. We're gonna top of the front
trees and another layer, the last layer, probably
22, I don't know. Oh, there's another
one I have named. This is 2222 mountain. Then the last 123. Stars are the stars. Data the stars. Now, what I'm gonna do
with that, very easy. I'm going to just
pick a round brush. I'll make it a
smallest possible. I'm going to pick a
nice white color. And I'm going to
just add my stars. If you do not have
the mountains, you can put stars
right there too. I'm going to make sure
I'm not doing that. I want to put my brush on 2%, not a smallest,
little bit larger. If I put it too small, I'm gonna get this
little Finish. I'm going like that.
If I put it on 2%, I'm getting nicer delts, That's all I'm doing. So I got my first dot, adding some randomly.
Here we go. Now we've got some nice stars. Once I'm there to there. Let's do one nicely. That's not the rights. There we go. That looks nice. Now, if you don't
have the mountain, so let me hide those
mountains for you. I'm going to hide the mountains. Mountain, mountain.
I'm going to add one more layer because
I don't have that. If you hide the mountains, you want to put, of course, some stars here to there to put some extra
stars at the bottom. All right, that's it. But since I have mountains, I'm going to hide it. I'm going to bring
back my mountains. And this will be my, alright, good, That's it. That's the final details. Simple and easy. Very simple and nice, isn't it? And that concludes this class. We've now got a
beautiful painting, nice silhouette painting, not with stems and premade elements. Now we've painted in
everything ourselves, but of course we used some of
the advantages you have in Procreate over painting
just traditionally, or you can use some
of these tricks. We got a nice painting now, I think I really like it. All right, that's it. Next up is the project talking about what we're
gonna do for that. Alright, that's moved up.
10. The Project: Let's talk about the projects. What you can do for the
project is of course, you can create this painting and probably you already
have done that. Now what you could
do is you could take off the roof, for example, pulling a different animal, put in some animals, or leave the roof there
and add a second roof. Roof that makes it really cute. Or take that other image that is applied to photo
of the roof standing. You could do that too. The other thing
you could do, you could get rid of the rock, the wolf, and the
three on the rock. You could execute
extend the forest. You get one line on there
and add some animals. Students have a deer, rabbit behind the tree. So it's a little bit, play
a little bit with that. Could be a nice trick. You could, of course,
create a whole new scene. The dioxin switched at
moon to a different site. Do half moon, large moon behind the trees that
would look very nice to you. Paint the trees and have
a moon behind the trees. All kinds of ways you could do if this silhouette
painting, alright. Let your creativity flow
a little bit and create just something alternative with all the things I've
shown you in the class. I'm looking forward to that, of course, looking
forward to seeing that. Now this class is quite simple in the simple
oil painting. If you want to really learn
more about ALL painting, just check out my other
classes that some more. The row, easy to follow along
if you'd never oil painted. Find you can go along if you have some experience
in oil painting, in procreate, I would
still say, check them out. Some really nice seem, some very interesting
techniques, some challenges, even more classes of Pro, procreate in my profile,
check them out. Thank you for being
with me in this class. I really enjoyed creating it
and I'm looking forward to seeing what you have created from all the things
I've shown you.
 Benjamin A, Art Teacher, illustrator Art by Benjamin