Transcripts
1. Intro: Did you ever saw these
minimalistic one line art pieces online or in some galleries? It's a really nice, simple, elegant way of doing art, and it's way easier
than you think. Hey, I'm Mark, and I will guide you through
the whole process of doing O line art using vector tool called
Affinity Designer. The advantage of
using vector tool for this type of art
is that we can have a second chance to adjust the line even after we
already drew the line. Almost like cheating,
I would tell. We will get the reference image. We will draw one single line to make a simple illustration, but then we will also adjust this line a little bit
here and there with the no tool before exporting
this as the final art piece. This is rather short class, very creative, so you don't need to be good at drawing
or anything like that. I hope you will join me
in the first lesson.
2. Start: Let's get started by creating
a blank new document. As you can see, I got
a four as the size, 300 DPI in case I
plan to print it out, B colors, no margins, no bleeds. Now I click Create,
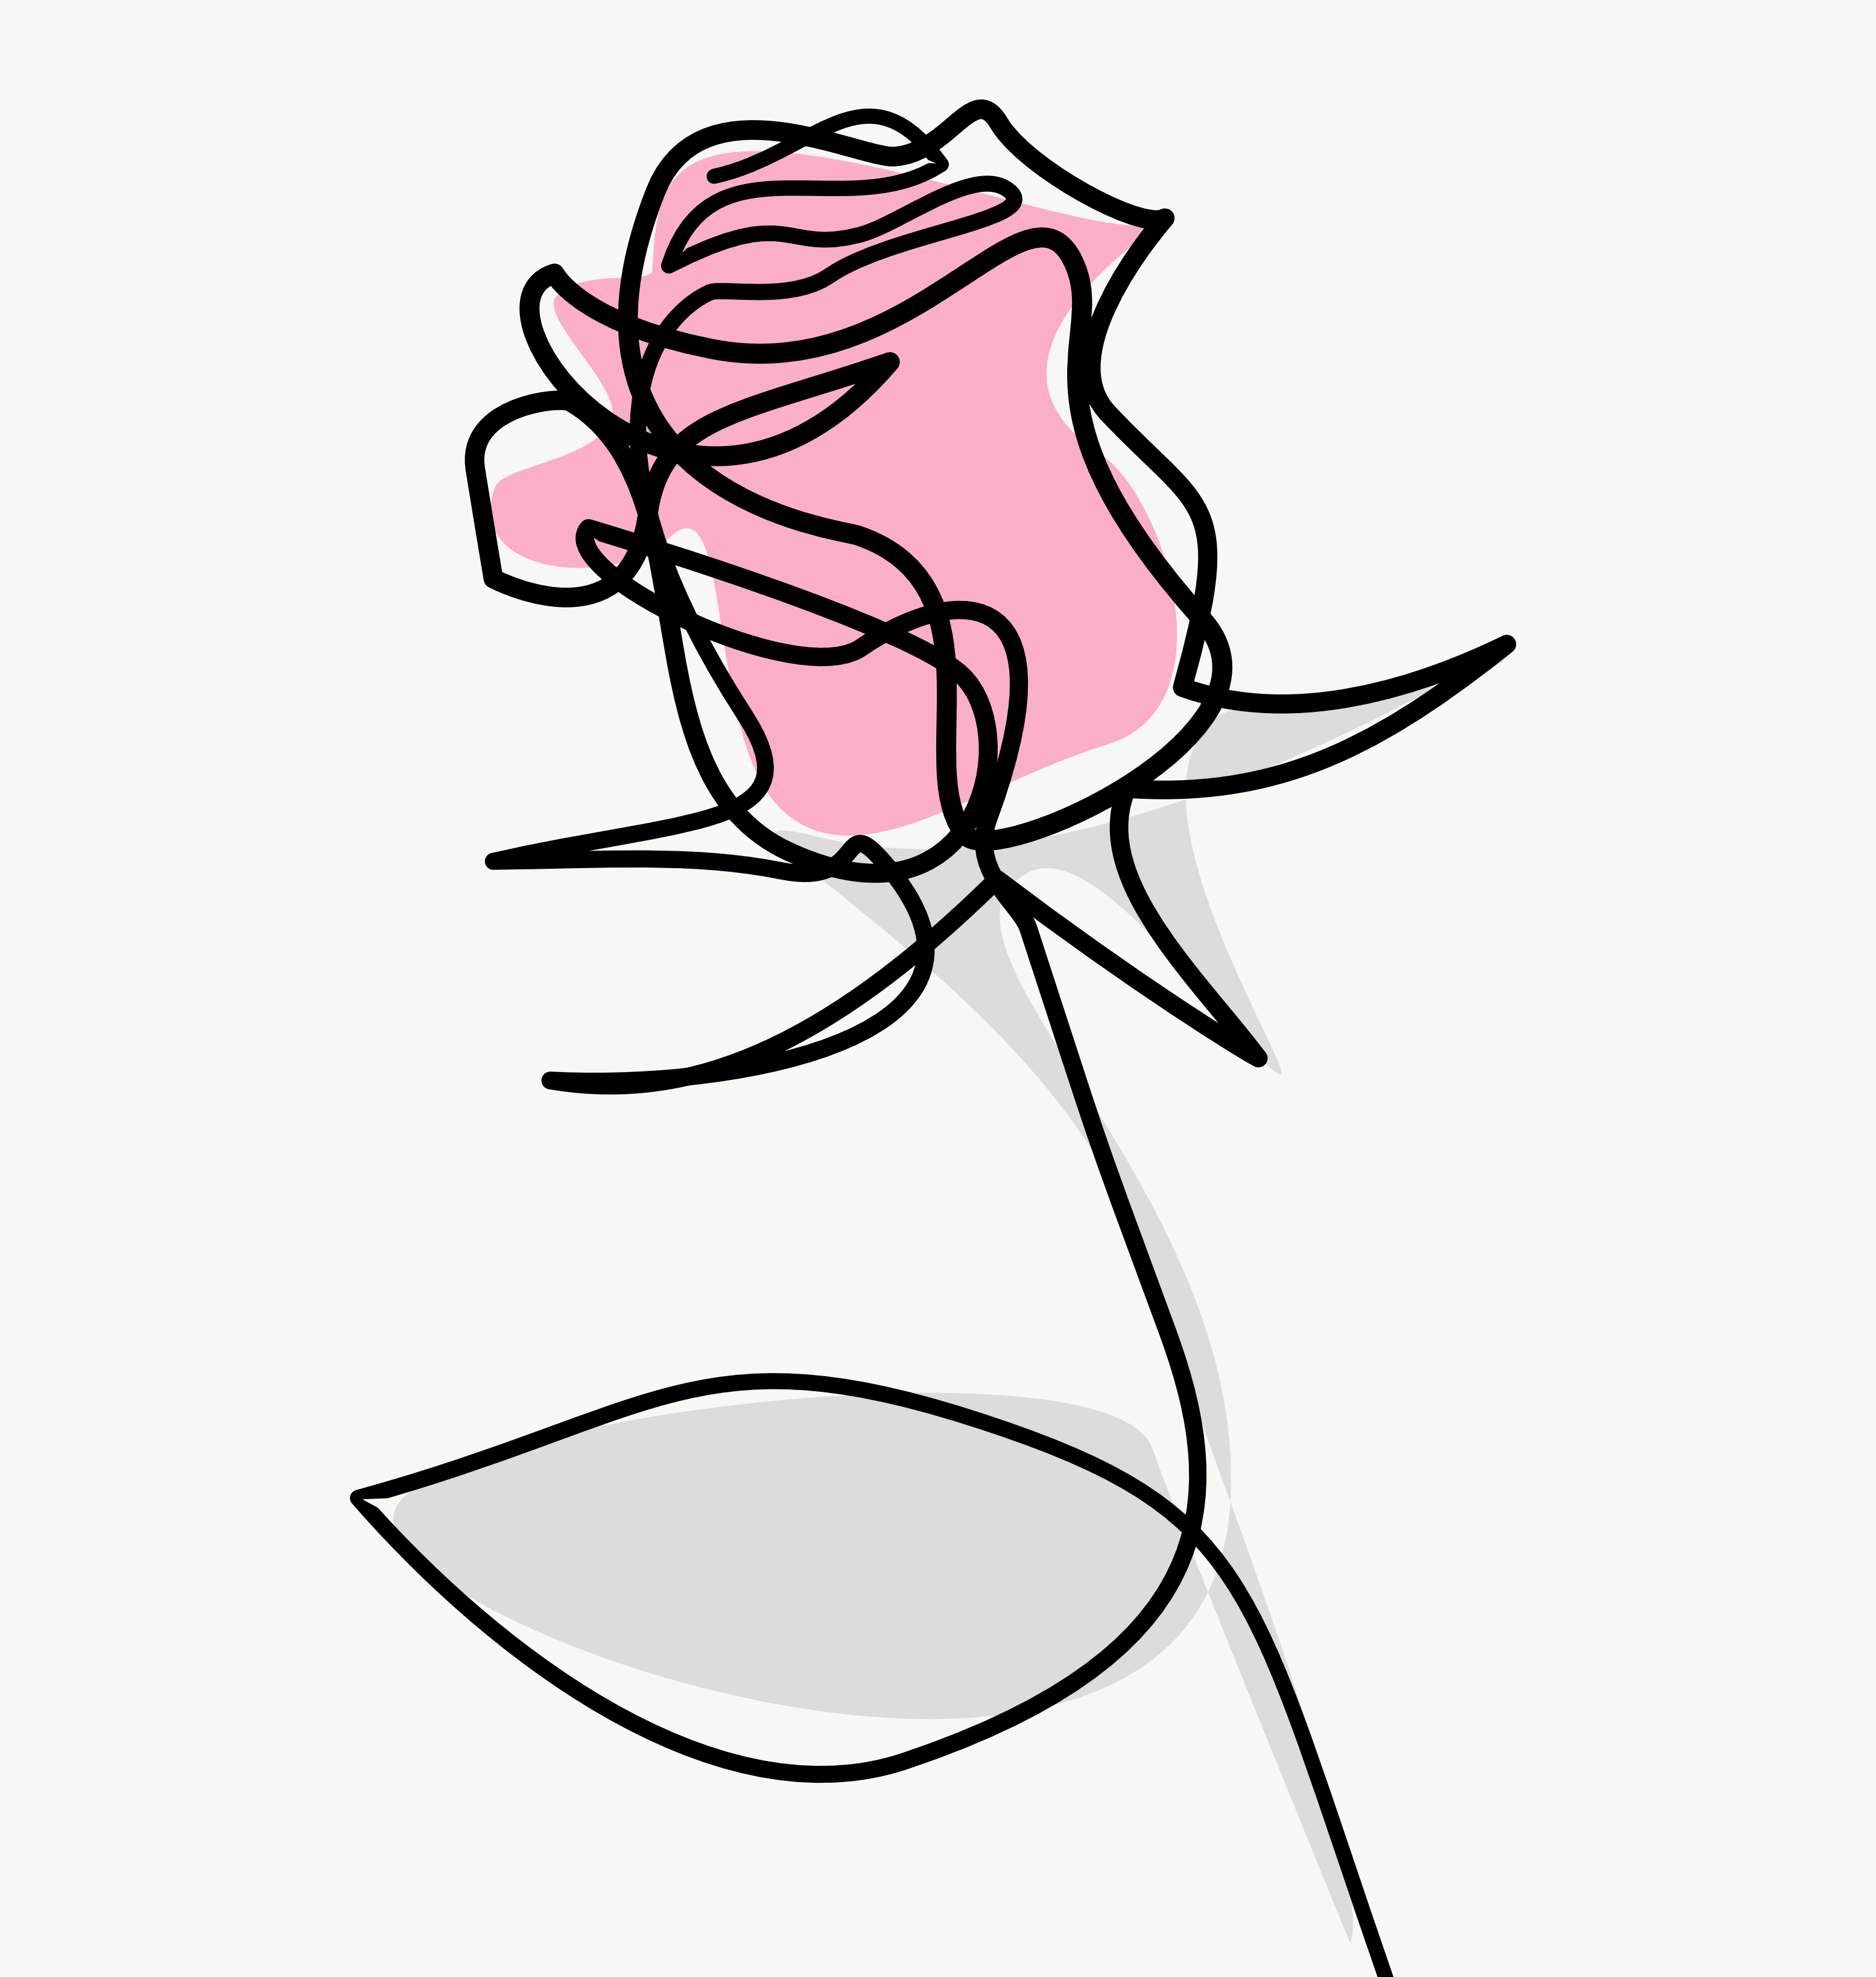
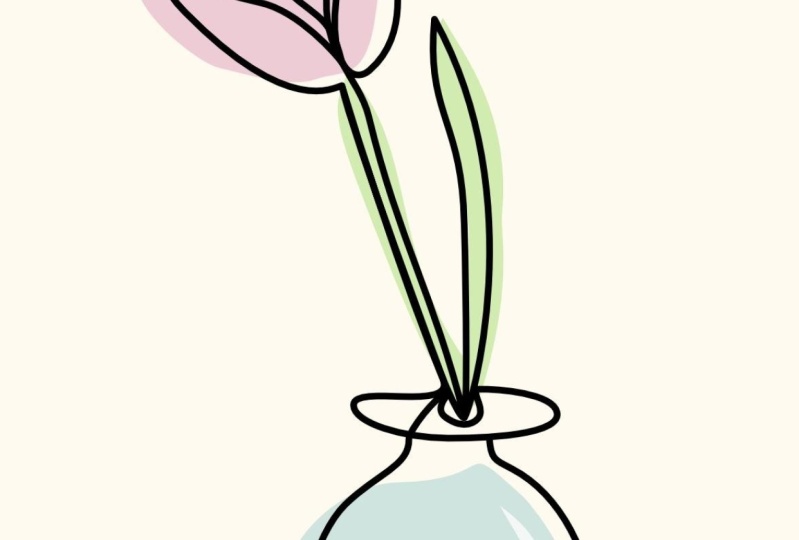
and here I am. Next step will be to just track and drop our reference image. Here's the image of the flower
I choose for this class. If you like to use
exactly say image, I will drop a link
to this image. It's a free image everybody
can download from splash. But actually, I will encourage you to find
your own flower. So every project from
each student will be a bit different. All right. So here's mine. I think I will
actually stretch it a bit. So I can zoom into the
flower. All right. Here's the position
of the flower. I don't want this to be moved by mistake while I'm droving
on the top of that. So I'm going to lock this layer. Take a look here in the layer
panel, we can click Lock. And also, I like to
drop the opacity just slightly to remind myself this is just
a reference layer, so I will drop opacity
to around 85%. Okay. So it's less saturated, less distracting for me
as at the end of the day, this will be just
single line image. Okay, now we are ready
to draw our line. We got two options here. If you are totally beginner, you can start by making your
pictures using pencil two. Pencil two, simply
draw the line. Follow your mouse for
your cursor like that. We can of course
adjust the stroke with we can put some fake pressure on
this line, and that's it. It's really that simple. Just draw the line.
More advanced way would be to use the Pen tool. In Pen tool, you are
not drawing the line. Look, I'm not drawing the line. I'm placing points, and the line just
appear between them. So it's a bit more advanced, but in the long run, give you more control
because you can precisely place
those vector points whatever you like exactly. All right. So I do not recommend using pent for this project if you never
ever use Pentool before. Okay? It would be
a bit frustrating. That's why we can actually
start with pencil. But if you are more
advanced user, Feel free to go with the pent. Pentool is one of the
most powerful tools. If you know how to use
it, just use pent right. So the whole concept is to draw the whole picture
with just one single line. But we are in the
vector software, so we can cheat a little bit by doing what I
call a second pass. So after we draw the
initial first line, we can go back with
the no tool and adjust how the line will curve. Okay? So I don't want you to
stop drawing in the middle. Just try to finish your drawing even you don't like some curves, and then we'll go for
the second time and adjust those points
that we don't like. Alright, with all of that, out of the way,
let's get started. I will zoom in a bit
using common plans. You can also use the navigator. I will grab a pencil tool. And as you can see, I
got stabilize turn on. What is it? Can you see my line? It's not directly
draw on the cursor. It's like I'm pulling the line behind it on the little rope. This will give me
just smooth line. In my case, the left
of it is 20 points. I will reduce that to 15. Stabilize on. Okay?
That's my setting. I need to crab it, and I'm going to start drawing here from the bottom maybe. I zoom out a bit so I
can see the whole thing. This way I can use
the one single line. Alright, starting
from the bottom, hold your mouse down
and just start drawing. This way and all the way back, I'm still holding
the mouse down. That's the whole point here. And now we are here at
the top, at the flower, go inside the flower first, and then from here, we go back to the outside. We must kind of plan a bit ahead because we need
to do all in one line. We cannot just stop now. So over here to the top over here all the way here
once more, to the top. All right. Here we are. Try to not overfing it. Just go with the flow. Sometimes I need to
do it second time. I don't like the first
version, and that's fine. This is a bit chaotic
here at the top, so I will try to make this line chaotic just like the flour. And now I release the mouse, and I got just one long line. As I have explained already, our goal is not to perfectly
recreate trace the picture. It's just inspiration
for our single line art. And don't worry if you don't like some parts of the
line of the curve. I don't like this part here, I don't like the part here,
and I'm going to fix it. So that's what we're going to
do in the very next video. We're going to grab
a note tool and make some fine
adjustment to our line.
3. Node Tool: Be sure our line is selected, and now now we can
grab a node tool. It's this white selection
tool here on the left, and in the moment
that you click on it, you will see all of the
nodes in our design. Nodes can be moved around. So it's almost like cheating in your art class when you
already draw the line, but it seems like we can
modify the line afterwards. It's not that scary?
Let's now zoom in a bit. And I will start from the
bottom the same way I start drawing this
piece. All right. And now I can
reposition my notes. I can also use those
control points here to change how curvy, those points are, take a look. We got still full control
without losing any quality. Okay, and don't be
too precise here. We still need to keep
it organic, right? We don't want to overdo it. Okay, this is nice. We're
going all the way up. This one is not nice,
so I move it here. And I can now click directly on the line
as well. Take a look. We can click directly
on the line. That's better. Alright. This
one is also a bit weird. Here it is. Constantly
remind yourself, don't overdo it,
don't overdo it. We don't want this
to be too perfect. I still need to be nice
organic single line. Okay. And as you may notice, most of our nodes are circular. Means that soft notes, that's one of the
downside of using pencil. So we may need to go now and turn some of
those soft notes, the curvy one into sharp by
clicking here at the top sharp to give us a bit of this
sharp edge here and there. If you feel like you need one extra node here,
just click on the line. They will give you extra node. All right. That's nice. And now I need to just add few of those sharp nodes
like here as well. I feel like my line is
a bit too thick, huh? I got 11 points right now. Let's reduce that.
8.5. That's better. Also, why? Not to simulate
some kind of pressure. So the line is not equal
all across this drawing. We can do that by clicking the pressure line
on the right side, and we can move it a bit down. Then click at the center
and move it back up. This way, the line may be thinner or thicker
in different places. Give us more like
natural art look. Okay. We got this nice
finish here. I like it. This one is a bit too soft, huh? And there's a bit too much
space here, I believe. So we can move this line here. This one maybe sharp, huh? Just like that. All right. As you can see, it's really
playful and creative process. And as I mentioned, it's almost like cheating
in your art class because even though we
already draw this line, now we still got power to move and adjust every aspect
of this drawing. Okay, that's a nice
extra note here will do. Uh huh. All the way
here, ending here. Okay. I'm pretty happy with
my initial line. But if you are not, you can try to modify it
even heavier than this. Sometimes you can
cross the lines to see what creative
effects you will get. That's also
interesting technique, the one line go to another. But if you really feel
like it's not nice, you don't know how to
fix it, you know what? You can start all over again. And sometimes what I do is if I start from the bottom and
I don't like this effect, then I keep it. I switch over the visibility. I cannot see it,
and then I start drawing from the top and then compare those two lines and
pick the one I like. Better. But here, I'm really
happy with this line. Okay, a few more little changes
and ask me you may note. Sometimes when you're adding
the sharp note you will need to readjust some
lines around that. Okay. This one here, Sometimes don't be afraid
to cross those lines, so it's more human. Mm hmm. All right. Let's zoom out a
bit because nobody will look very
closely to our art. And I really like
this little chaos going on here at the top. And we got the simple one
leaf here at the bottom. Alright, that's very nice. Let's see it without
the picture inside. Switch of the visibility
of the image here. And you can make fine
tuning with this now. Without the picture,
you'll be not distracted by the
reference image. I'll make this pressure
line a bit different, a bit up here. Okay, and now now
I'm going to add some finishing touches in form of the shape in the
backdrop, maybe some texture. I don't know just yet,
but I think I will add one shape somewhere here for this leaf and one
shape at the top for the color of the flower
and that will be it. All right. So let's add
colors in the next video.
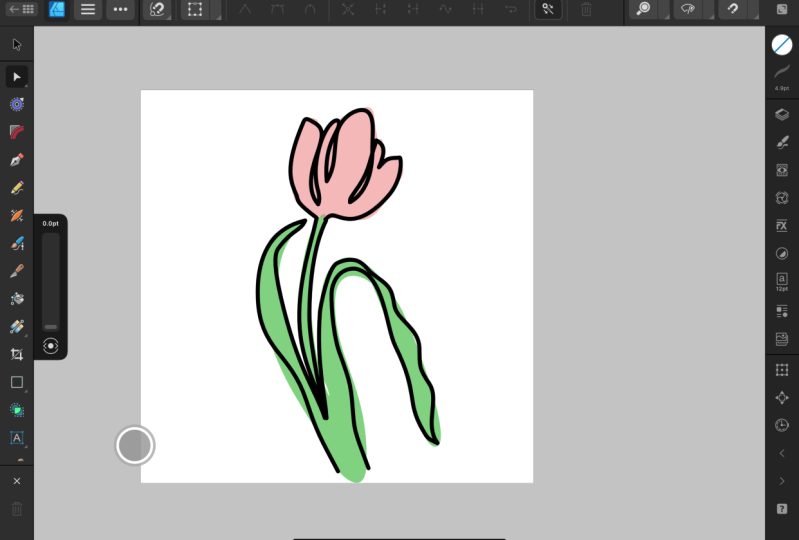
4. Add Colors: It's time to add extra shapes
that will fill with colors. Our goal is not to fill
this line with colors. No, no, we need extra
shapes that are bit shaky and not following
the line exactly. That's the whole point here. I just grab a
pencil or pen tool. I already use pencil
today, so this time, I will demonstrate this
part with the pen tool. I grab Pentl instead, what I'm going to do next
is I'm going to draw some kind of shape here. That will very roughly give us the idea of the green
color in this picture. Alright. For this one,
I don't need the line. It will be actually the shape, so I flip the stroke color with the fill color
clicking this arrow here. Okay? No black, that's for sure. So let's go for some kind of
very light shade of green. And now we need to
drag this layer behind the layer with the
curve with the line. And again, our favorite
no tool for cheating. And our goal is not
to trace the line. Okay, so keep that in mind. Our goal is to make some kind of green contrasting color here at the bottom part
of the picture, doesn't need to follow
the line exactly. All right. I like it. If you feel like
it's too strong, feel free to reduce the
opacity of this layer. So you blend with the image, with the color behind. In my case, I didn't
add any color behind, so it's pure white. Why not to add color right now? So I'm going to draw a rectangle with some
backdrop colour. Something like gray,
yellow color like this. Now I stretch this rectangle
to cover the whole page. Be sure it's the lowest
layer in the layer panel. All right. Now my green color is not
matching this yellow, so I need to readjust
this just a bit. Okay. That's better.
And I'm going to draw one more messy shape here
at the top for the flour. Again, I grab pento click
and hold, click and hold, click and hold, click and hold, click and hold, click and hold. Go to the beginning of that
line to close the shape. Now we fill it with colour. Not too strong. And again, remember below the line. Add some transparency,
reduce the opacity a bit. 50% here, 50% there,
it's the same. And our favorite
note tool again. And here it is. Alright, let's zoom out a bit. This one is a bit too thick. I think the green
colour is too strong. Okay, that's better. Way better. Okay, I like it.
We're almost done. Now the optional step. Would you like to
have some texture on it to imitate the real paper? We could just drag
in a paper texture and add it or you can
keep it like that. Let me just show you the
option with the texture. So I just drag and
drop a real paper. That's the texture here we get for free from splash again. Now we want this to
be at the very top. Blending mode to multiply, and then we reduce opacity. This way we can decide
how strong the texture should be. Something like this. Keep in mind, by
adding this texture, we ruin the vector
properties of this art, we cannot save it as
the pure vector SVG or something like that anymore because we got
rusty texture in it. So if you plan to save it as SVG or scale it up and
down like crazy, just get rid of the
texture before that. Okay, so here it is one line, our single line art with optional texture
and optional colors. All of that can be switched off by just switching
those layers. We can have just
pure line if you prefer this minimalistic style. So it depends on you. I will maybe go colors, but no texture this time. Now I'm ready to save it as image that can be posted
in the project section. File export. We can choose
between JPEG or PNG. PNG give us usually a bit
better quality and export.
5. Summary: Well done, I hope you completed your single line
art and now you are ready to share it with us in
the project section below. If you want to like to
experiment with it, remember, Noe tool
is your friend. You can move your lines around. You can change colors, you can hide and show layers. You can simply play with it. You can start a
totally new picture. You can get a new
reference image. Now you know the whole
process, get the picture, lock it, get the pencil tool, draw the single line, adjust with the note to add some optional color and in
around 15 to 20 minutes, you got another piece of art. I hope you enjoy
this creative class. Thank you for today and
see you in the next one. Bye.
 Mark Krukowski, Kru Mark Tutorials