Transcripts
1. Introduction: Hey there, I'm Mark. During this class I'm going
to teach you how to use a shape builder tool in
Affinity Designer version. To finally, after eight
years of waiting, we get appropriate
dedicated shape builder. That's a great and
powerful tool. But we first need
to check it out. We need to learn how to use it because we
have great power. Many settings slide is an
option to learn about. Alright, so we will go step by step merging shapes together, subtracting shapes to
create a nice symbols. So during this course,
you will create six different symbols we
will try to learn by doing. It's not like me talking,
talking, talking. It's more like we will grab the shape builder
tool and we'll try to actually build six different symbols
together step-by-step. Alright, I will see you
in the first chapter
2. Boolean Operations: Before we switch to a
brand new shape builder, Let's just recap how we
can merge shapes manually. How we did that before
they introduced these two. So we simply draw a
shape number one, in my case, that's a rectangle. Let's recolor dad. Okay, now I will draw a shape
number two, nice circle. And even want to match
those two shapes. I need to select them both. From the top here, I can select operations though, 12345 operations in total, the first one called AD, will unite both shapes
together. Take a look. Now, instead of two shapes, I got only one shape. Let's undo. If I select the second
operation, I will subtract. This way. The shape at the top will cut the hole
in the shape below. Let's undo. Let's reorder those shapes. So I will drag this below. And we do exactly
the same operation. Let's subtract again. And now we get different result. So why you're subtracting? You need to pay attention to
the order of your shapes. The next option is
called intersect. And as the name said, we will got this
intersecting part here. After intersect,
we get something called difference or x-bar, that's opposite to intersection. So take a look. The intersecting part
is gone and we got one shape made of what is left. The last operation, it's
not a real operation. Actually, this
will simply divide everything to be
a separate shape. So after I click on that, it seems like
nothing happened but I got separate shapes now. Alright, so those
five operations can be used to merge
shapes together, to divide them, to subtract
one shamed from another. Alright? And in the next video, I will show you how we
can do similar things, but a bit easier and faster using the brand new
Shape Builder tool. So see you in the next video.
3. Shape Builder Tool: All right, it's time to test
our shape builder tool. Before we can do that, we need to draw some shapes. So I'm going to use just
a basic shape tool. I'll put this square here, maybe a circle as well. And let's create a third shape, this long list of shapes here. So let's maybe create
a diamond shape. How about that? Alright? As you can see, those
shapes are overlapping. If I select them all. Of course, I could
do some operations I showed you before in
the previous video. Like I can add them together. But if I click Subtract
now with three shapes, I will have this
unexpected result. How we can get more
control over this, we can use a shape builder. Take a look. It's on the left, just below your shapes. There's a shape builder tool. To use this tool, you need
to pre-select your shapes. So select shapes first, then use the shape builder tool. By default, this will be showing you all of
those intersections. So even though this area over
here is not a shape itself, it's treating it as
a separate area. That's the power of
the Shape Builder. Alright, As you see, there are three actions that we can do with the
shape builder. So we can add unite shapes, we can subtract
shapes and we can create new shapes from
the selected areas. By default, nothing is
selected by default. This tool is setup
into the natural mode. So even though I can start
using the tool, take a look. I can select this,
this, and this. Just by clicking and dragging the selection line across
those three areas. Nothing happened. That's how we can use it. We can first make selection and then decide
about the action. Or we can pre-select
the action and then make selection with the
action selected already. I already make selection. Now I'm going to use
the action call plus. So I will create a new shape. Unite those areas. Take a look. Now, I unite those areas. Let's recolor that so
we can see it better. Not all, but I will just
re-color this new area. So now that's a new shape. All right, Let's undo. Let's try again, select all of them are going to use
Shape Builder tool. And now I'll pre-select minus. It's like ten on now as you
can see, it's pressed down. And with that, I now can simply use it to get
rid of part of it. So I can start in the middle and I can get rid of
those three parts. I just click and drag the
selection line across them. Now I released a big
hole in the middle. If I switch back to my regular
Move tool, take a look. I got those three shapes, but I kind of reshape them
with a shape builder tool. So that's just a basic use
of shape builder tool. And in the next video, I'm going to show you
how we can actually use it to create a nice symbol. Alright, so see you
in the next video.
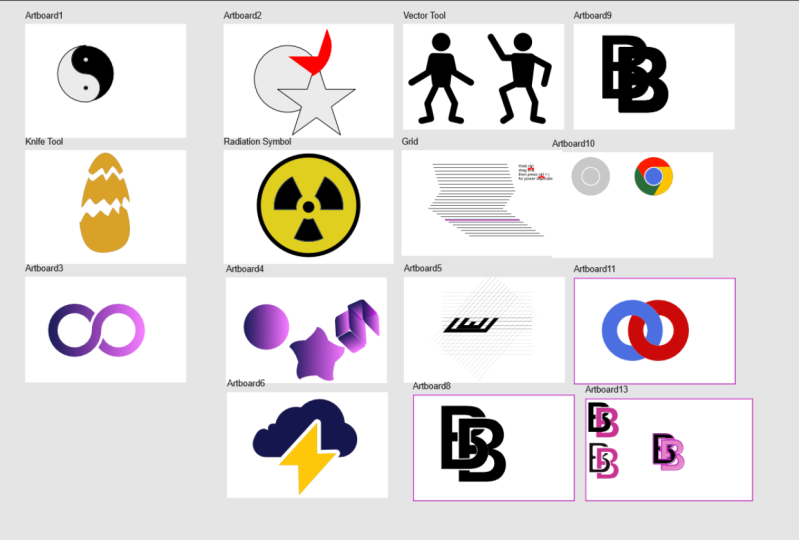
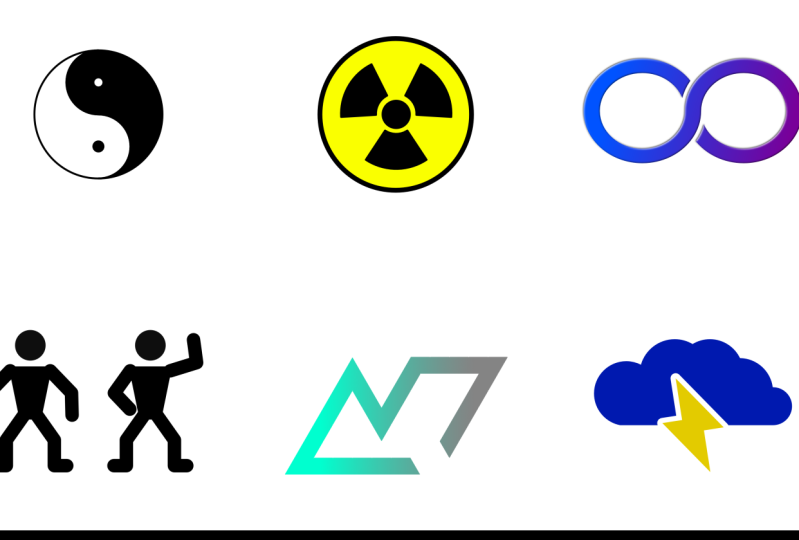
4. Yin Yang Symbol: If you've been
wondering what will be the project for this class, we're going to create
several symbols. So every few lessons there'll be a symbol
for you to draw. Don't worry, I will show you
all the necessary steps. So that's our first assemble. During this class,
I already prepared a blank new art board
that's simply A4 paper. I can zoom in a little bit
using keyboard shortcut, that will be Command Plus on
Mac or Control on Windows. And the shape we need
to draw for this one, that would be a perfect circle. So let's grab the Ellipse tool
from the list on the left, then draw a circle, how we can do that, and
that's just ellipse. So let's press Shift
on the keyboard. This way we can maintain one-to-one ratio for the
circle holding shift. Right? As you can see, I got
my color fill and that's because the program will always remember the
last setting you use. I don't need color
field for this one, so I will change that
to transparent and I will fill my outline instead. This way we can see the
line around the shape. All right, we got one shape in. Now we're going to draw a
second circle that will be a half of the first
circle like half height. Take a look at snapping to
the half automatically. If you don't see that, please be sure you
turn on snapping guides here at the top
look like little magnet. You need to snap to
object geometry. This one over here. Alright, it will be way
easier for you to draw. So I got this circle here that this half of the height
of the bigger circle. Now I simply can
duplicate this one. How we can do that, one way
is to right-click on it in the layer panel and search
for duplicate copy. And I can move the
copy down here. Alright, now we need to draw one more little
circle inside here. Be sure it's exactly
in the center. Now I'm going to
duplicate this down. This time we're going
to use a shortcut. So I will select
Move tool and I will hold Command on my keyboard. Instead of moving this, I make a copy, duplicate that. So that's another way how
we can duplicate shapes. Alright, so that's our, you can say the greed
outline for the symbol. Now it's time for our
shape building part. So let's select all of that. Nice. Grab my shape builder. It's over here below
your Shape Tools. I will set this up
in the plus mode. Drag method is freehand,
clean up none. And I simply start from here in this top circle to the right, and then bottom
circle to the left. And with those few simple moves, we create a symbol. Now we can fill it with color. So let's go back to the fill. And we can feel one
part of it, black. Just like that. And we are done with our very first symbol
using Shape Builder tool. Don't forget to
save this document. We can use the very
same document for the next symbol by adding
more artboards to it. To add additional artboard, simply create the Artboard Tool over here below your move tool. And select Insert Artboard. Let me just zoom out a bit. Come and minus. As you can see, now I've got a new page. That's my second art board. So I'm, I ready prepare
for the next symbol. But before that, before we draw the next symbol is more I wanted to show you
in the next video. So please continue
to the next video
5. Vector Flood Fill Tool: Before we move to
the next symbol, I would like to show you
one more tool actually added very recently in the last update to
0.1, few weeks ago. So if I draw some
intersecting shape, so let's try to do it right now. This circle. And
maybe, maybe a star. This time. There's a star here. Alright. We got this
intersecting part here. What if you want to fill
only this part with color? If I click on the
star and add color to my star, it's like that. You might add color
to my circle. Let's cover everything. If I drag my star
under the circle, will not solve my problem. So, what if I need to color only this
little intersecting part? Luckily, we got a brand
new tool for that. So take a look, Let's select both shapes again, that's
important process. We always need to select shapes we need to
work with next. Then on the left side you will see there is
something called vector fluid-filled to people
like to call it bucket tool because it's
little bucket as the icon. If you select that, you will be able to
hover your mouse. And as you can see, the experience is fairly similar to our
shape builder tool. It's a little bit simplify. So I hover my mouse here. I got color selected as red. If I click this area, I will get the new shape with this red color
based on this area. So what do you want before is
this area right-click here. Alright, back to the move tool. And since like we got
a brand new shape, good thing is we did not destroy those original
shapes that are still here. Take a look as little
star and my circle, and I also re-color this area as a plan
before Let's move it up. I got this red area
here that's recolor. Now, let's also add the outline color to
it as we did before, so we can see it a bit easier. Alright. So here is we create a brand new shape based on that intersection and
fill it with color. So that's also very, very handy shape
building tool, right? You got something over here. Then again, we can select
both of those shapes this time instead of doing like the mouse selection like that, we can simply hold Shift
click Shape number one, while still holding Shift
click shape number two. Alright, bucket tool. And I don't want to fill
the whole rectangle, I want to just fill
this outside part. And here it is a
brand new shape here. I can of course recolor
that not a problem. And that's how you can use
this little bucket tool. This is vector
fluid-filled tools. So every shape we create
is a proper vector curves. So you don't need to worry
about scaling this stuff down. Our scaling this stuff up. We're still working
with vectors. All right guys, so that's
our little bucket tool. And let's get ready
for the next symbol.
6. Radiation Symbol: All right, It's time
for our second symbol. As you can see, I'm still
in the very same document. If I hold the space bar, we should down, you've got
this little hand tool. Now I can click and
drag myself around. Here is our first symbol. Now I'm moving to album
number two for our next one, K. Let's start with this circle, don't worry, it's
not the same symbol. The circle is just a
very powerful shapes, so you will use it often. Why building other shapes? Alright, here's the circle. As you can see, I got both
fill color and stroke color. Let's work this way. I want to show you
that you can also have a fill color and the shape
builder tool will still works. Okay? So don't worry about
color in usually we just taking out the color so we can
see what is on the bottom. You can keep it here if
it's better for you. So let's start like that. Alright, I got the circle. It's a bit too big, so let me just resize that. As you can see, I can
resize move the move tool, but I need to hold Shift to be sure I'm resizing one-to-one. You can also resize
to the center of it. Eva also press command. So that's what I did here. Alright, now I'm going to use a very well-known
shortcut comment. Or on the Windows, this will be Control C and
then V. Copy and paste. Again. Let's do the same thing
to the top shape. Let's scale it down to the
center. Just like that. We get two shapes are ready. And you know what, we don't need to draw all of
the crazy shapes in and then use Shape Builder Tool one time to show how good
we are in this stuff now, we can literally select
both of them right now. I will grab my shape
builder right now, the minus mode, and I'll
click in the center. Getting rid of that area minus. Here is we make a
hole in that shape. We've got one less shape
to worry about right now. So keep in mind, if it's too complex, a little bit overwhelming
to do it all in one time. You can do it step-by-step. You can do this part, then draw an X shape.
Do that next shape. So adjust this to your
level of understanding it. Alright, next thing I'm
going to draw our triangle. It's over here. A triangle. Alright. Reposition this triangle to the center of this
circle like that. I'm going to hold command so I can make a duplicate of it. Add some rotation,
you can hold Shift, then it will be like skipping. Right? And then I will
duplicate that again. This time, I will
not use rotation. I will simply flip
horizontally like that. Okay, That's nice. Let's select it all. Grab our shape
builder minus mode. When you got minus
mode selected, you will see the highlighting of the red color that's
indicating the minus mode. And now I would like to
delete this and that. And here as well, I want to delete this guy
stopped in the center. This little part and this part I going to release.
And it's all gone. Once you can see Shape Builder is really good in
deleting stuff. Let's fill desk center with a very simple shape
guesswork, circle. Holding shift for proportion. Alright. Now, right-click on this circle in the layer panel. As you may remember, we can use that to duplicate the shape. Scale it up. Oh no. Now it's covering
my whole symbol. It's at the top. So let's simply drag this down
below are the layers here. Nice. And as you can see, we managed to create a symbol, radiation symbol,
the two pictogram. Alright, so let's
just recolor it. I will those elements
inside to be black without our plan
and this will be yellow. I can also make an outside line a little
bit thicker in this case. And that's how we create
our second symbol. If you got any troubles and keep in mind, it's pre-recorded, you can always jump
bug in the video, even stop it for a moment. Take a closer look. Alright, so feel free to
go at your own speed, and I will see you
in the next lesson.
7. Knife Tool: Let's take a short break
from making symbols to learn about the next tool that can be really
helpful for us. Why building shapes? So as you may notice, shaped building is
nothing else than just combining shapes together
to make a new one, or maybe removing part of existing shape to make
again a new shape. So there is also a new tool that was introduced
about the same time. And then when they add
the shape builder, it's called a knife tool. So let's explore
that in this lesson. Before we can use a knife, we need something to cut. So let's grab ellipse this time, not a circle so you don't
need to hold Shift. I don't need the outline color. Right? Something like that. We'll do and we'll
modify the shape. By default. This is still an ellipse, so I cannot make
detailed changes to it, but I can convert this
to curves like that. And now I will be able
to use Node tool to move those two nodes are
little bit lower. So we can get this
egg-like shape. Let's select our little egg. Now I will grab the knife tool. It's over here, just above the bucket tool
is before knife tool. And now I can simply
cut through this shape, take a look with my
mouse, like that. As the result, the shape was
splitted into two pieces. And I can now rotate them. I can now move them separately, the two vector shapes now, we can do it as many
times as we want. Let's take a look
on this rectangle. One cat, second
cat, one more here. All of those cats will result
in splitting this shape. Two more little pieces. Alright, so that's a really, really helpful too
if you need to cut out part of the shape manually. But what will happen
if I collect shape? Start cutting the shape. And they didn't
finish, they can look. That's still just
one shape. Alright? So keep in mind with
the knife tool, the best practice is to
go all the way through to get a clean cut and
split that shape. You need this part. Go out from the
shape, really is. And here it is, We got the part out. All right, so then you can delete the part you
don't need anymore. So keep in mind, there's
a little tool called a knife tool that can be
really, really helpful. Even need to split one
shape into 234 pieces. Orion, you must keep in mind, it's rather a manual tools, so you need to control it with your mouse or your Apple pencil. If you need a very precise cat, I would still refer
to a shape builder. But if you're searching
for something more organic like this one, you can use the knife tool. All right guys, in
the next video, we're going to draw
our next symbol. So see you there.
8. Infinity Symbol: Some say that you can
simply grab a text tool. So here it is. Then if you hit option five, you just type infinity symbol already so you don't need to really draw it, right? Of course, there is infinity
symbol, we use it in math. You can simply type it if you know the shortcut
or you can copy and paste that from
Google if you like. But that's not what we
are seeking for here, so we don't just want
to use that one. We will create our own from scratch so we get
more control over it. Alright, so let's
delete that one. Let's start with a circle. As you notice, this is like the circle
of the hole inside. Actually there's
dedicated to for that. So let's not pick an
Ellipse tool this time, but we go here for more shapes and there is something
called donut two. Alright? And when you draw that shape, Let's fill it with
color temporary. As you can see, this is
some kind of circle bad with actual hole inside. And we can even
control the size of this hole by dragging this
orange point in and out. So that will be a perfect
starting points for us. I will make it a
little bit wider. And I will also expand this
to curves on your right side, we need to search for
comfort to curves. So that's a regular curve
now a normal shapes. So I will just duplicate that by holding Command while I'm
dragging this around. Right? Select both shapes. Do I need to use a shape builder tool
to add them together? Not really as you may remember
from the very first class, we just simply can use the
Boolean action at the top art. And that's now just
one, a single shape. Alright. We can grab a node
tool and even make some adjustments here inside by removing some of those nodes. So I click on the node and then hit Delete on my keyboard. Alright. So we got more
or less infinite shape. That's one way of doing that. Let's try to do it a
little bit different. So let's delete that. I can go for the Ted way. Alright, so this time we go
back to our favorite oval. I'm going to use
a stroke for now. And we're going to create
overlapping ovals like that. Okay? Now I can duplicate that one. And I will duplicate
this one as well. Then I scaling this in sight. Alright, if you need a
little bit more time, feel free to pause this video, prepare your little grid, and then continue with me. Okay, So this is our base, but I'm going to create
few additional lines, so I will duplicate
like everything. Select all command C, command V. This way I was able to
duplicate everything. And I will make this one
a little bit larger. And this one as well. And other way around, I will make this
one a bit smaller. This one a bit smaller. So we got this huge
mess right now here. Luckily, these are one
tool that can help us and that's our favorite
shape builder tool. Let's select Shape Builder. And this time we're
going to use plus mode. But take a look this section. Say clean up, we use
it known before. Let's try to clean up all
unused geometric this time. So the program
will try to delete unnecessary objects around
our brand new shape. Alright, so that
preparation is done. We will go into clean up all unused geometry and reworking the plus
mode. I select. All of those shapes, are ready. I can start making
some selections. So I'm going to start
from here, from within. Going here, here,
here, and here. Release my mouse
and take a look. We got a very nice
infinite symbol and we got this nice effect of one
line going under another. That's why we create all
of those additional lines. And modern that all
of them are now removed because we
select cleanup option. So the program clean
up everything for us. You know what, I'm
going to undo. So I Command Z and I
will do it one more time without the
cleanup option to show you why we choose that. Alright, so I will
now make it known. Let's do the same process here, here, here and here. Release. Alright, our shape is
still here, right? You can see it. Let me just fill it with color. Now this one, sorry, Just one. This one. Alright, so our
new shape is here, but we still got all of those unnecessary shapes
that we draw before. You use them as
great as the guide. So if you know that you
will not need them anymore, it's better to select
your cleaning option, cleanup, or unused geometry. And then we can simply select this area we need and the program will
take care of the rest. That's really nice. Then we can select
the color we like, or we can even put
a gradient into it. So to use the gradient, select the fill tool over here, and then move it across
the shape at the top, we can modify the
gradient double tap on the little preview over
here in the fill area. And then you won't be able
to modify the color of it. You can even add a little bit of noise to give it a texture. Alright, so here is our
shape number three, our symbol number three, that's the infinity symbol. Alright, that was a bit more complex than
the previous one. But I hope you are
able to follow up. If you need, feel free
to watch this one again. Before we move to
the next video.
9. Node Tool: Alright, loop the
infinity symbol done, we can create a new art board. So simply select the
artboard tool just below your Move Tool and
insert art board. By default, our balloon inserted on the right
side of the existing one. But we can also move it around. So if you're on Zoom, so I will use common minus. You can also go to View Zoom, zoom out. This way. We can drag this art
board to create kind of like the second row
just below our input one. This way we are well-documented,
belong too long. So I drag my art board
for an oddball one. Right? Now, going to use this art
board here to show you more like to remind you about a note to whatever we draw a shape. At first. This will be shaved
type of layer, not a curve just yet. What does it mean? It means you can simply control it with some
extra controls. In this case, we can
round corners from here. In case of the star, we can add more points. We go to the goddess like
orange control points. Can you see them?
Orange control points allow us to do some
modifications to shapes. But unfortunately with dad, we cannot modify
shape node by node. To do that, we
need to convert to curves at the top
over here, this area. And from this point, our shape is not
a shape anymore, it's simply a curve. This way, we can
move separate nodes. We can even delete nodes by hitting delete
on the keyboard this way. Alright, so keep that in mind. You can use a node two to
move around your nodes. You can turn your nose
to into sharp one. Back to Kelly one. You can drag those
control points as well to get the full
control of the shape. So I just want you to
keep that in mind. We're dealing here
with vector graphics. In vector graphics, you don't
need this perfect stroke. You don't need to master
those tools for years. What you can do is you can grab a node to a mega
lead to changes, and lead to fix this afterwards. To adjust the shape to
exactly what you need, you can click in
down the line to add additional node and
reshape that curve. Alright, so keep that in mind. It's very flexible. And I always say
the vector graphic is a perfect solution for
non-autistic people as well. Because we got this node
two and we can go slow, fix, or change anything we need. Afterwards. After we draw a shape, maybe illustration, we
went to fix something. We can do that with
the node tool. So don't forget about
that. Move tool. Does the tool and move
the whole object. We can rotate. We can do some transformations, but the node to node
two is more powerful. That's the one that will move. Separate nodes, allow
us to add more nodes. We can select certain
nodes, delete them. So that's a really
powerful tool. If you look at it this way, we can fix anything we want. We can modify anything you
want with the node tool. That's this second
selection two on the list. So please don't forget about existence after
no two are right, it seems like we're ready
for our next symbol, so we simply select all of that. Hit Delete on my keyboard. And I will see you
in the next video.
10. Pictogram Symbol: Our next symbol will be
able to be different. So we're going to
create a pictogram, human-like character that we can use with different poses. So we can simply start with
a circle for the head. I'm sure you saw that
kind of pictogram multiple times in
different locations. So we gotta head here. Next, I will refer
to trapezoid tools. So there is, there is
dedicated trapezoid two here in Affinity Designer, I just need to rotate
that this way. Perfect. And I think I will adjust some of
those orange nodes. You see I can move one, but if I hold Command
on my keyboard, I can move both same time. So that's handy. All right, and now we should
add some arms and legs. But in this case, our shape will be a
little bit different. I want to show you the
benefit of actually not baking all of
the shapes together. For this one, for this symbol, we will try to keep everything as separate and we
will also blend shapes like those two with
actual lines and strokes. So let just crop it
Pen tool over here. And I will draw his legs here. Click, click, click, and click. Right. There's no stroke on
this line just yet. So let's add some stroke to it. My case that's 40 points. Let's double-check the colors. Since that it's gray, not the same black. So I use it color
picker tool to pick exactly same color right here. And I can put it here
overlapping with that shape. I can simply Command
C, command V, make a copy of that fully paid, horizontally, done, right? This way, we create a nice pair of legs
here for this guy. We'll do the same
trick with arms. So again, pen tool, and I will just simply
click, click, click. Right here, this duplicate flip. You can select both of
them holding shift. This way, you know that
exactly in the center. Alright, and this is
our little rag doll. You can say we can modify
now multiple shapes. So we've got two shapes and
four lines and we don't, in this case, we
actually don't want to use that shaped them to two. We don't want to bake it y, so we can edit this
in any given moment. Let me just and chest
middle shape here, I want to round corners here
so we use corner tool on it. Keep in mind, rounding corners is not just for rectangles, you can use the
rounded corner tool. Any shape you want,
like this one. A little bit lower maybe here. And we are ready
with the pictogram. Why we did it this way, combining different
shapes and lines. Let me just make a copy
of this whole guy. I can press Command,
drag him here. On this copy, I can simply
modify those nodes. I can change the whole
pose for this little guy here by just pulling and
dragging those nodes. All right, so as you can see, it's not always the
best solution to bake everything together
with a shape builder tool. I just want to show
you that there is an, also an alternative way. But as you can see,
it's quite messy. Every part is separate. So what can we do about that? We can simply select
all of those parts. And we can group that. We can group it by
right-clicking on one of those layers and select group. And you will end
up with the group. Take a look in my layer panel. Now I got the group
for this character. I can open the group
and I see all of the elements inside that group. You can also select all
of those shapes and elements and press Command G or Control
G on your keyboard. And you will end up with a group for the
second character. Alright, so that's how we can build a little pictogram human. But this time without
baking everything together, so it's way easier for
us to edit later on. Okay, I hope this was
useful and I hope you manage to create your
own little pictogram. I will see you in
the next video.
11. Grid: As you may notice, Shape Builder is able to
pick up not only shapes, but also empty areas
in-between them, all close areas in general. What does it mean? Let me just show
you what I mean. I will just zoom to our
art board number five. All right, and this time I
will just pick a pen tool. Making some lines with Pen tool. This is line number one and this is separate line number two. And again, totally separate
line number three. That's another shape, just
three straight lines. If I select all of them. Grabbed shape builder. He can still detect disclose
area in-between them. And I can make a
shape out of it. Alright, so that's the true
power of the Shape Builder. Not only the techniques, shapes, but also all of the
intersecting part empty areas that we got on our web project. That's why if you create some
kind of grid for yourself, you'll be able to
select only part you need out of that
grid for your shape. So let's try to build
a simple grid form. This little practice. Again, pen tool, just click, click to
make a straight line. Duplicate this line. I already showed you that
we can use the shortcut. Just press Command on your keyboard and
try to move it down. And here's tough on Next
shortcut called power duplicate. If I press Command and J, Take a look, I got one more
copy. Again command J. Command J power duplicate is not only duplicating the object, but also this last
transformation. So I move it down, It's moving, keep moving down, down,
down, down, down. That's called power duplicate. Now, I can group
that altogether. So what command G? And I will duplicate
this whole thing. Now I can rotate that. Let's say like that. One more copy. This time we'll
flip horizontally. We get some kind of
grid going on here. Let me just add Zoom. And we will try to select
all of that, those grids. And we'll try to align them using the
alignment panel here. Right to the center. We can even stretch them all together now to
make them larger. Something like that. Okay. So why did all of that? When I select all of those
lines together and then grab my Shape
Builder, take a look. It's still setup to clean
unused geometry, free hand, and plasma to take a look now, I can use the grid to make
something new, completely. Designing logos or icons, you can just follow
your grade to generate some shapes out of
the grid. Right? And then we can go this way. This is also popular
way of using this tool. We can first draw a
grid for ourselves, and then we can try to
build a symbol or letter, logo, stamp, batch, whatever it is from that grid
as you can see. Right? And if I
release my mouse now, I end up with this symbol. My grid is gone. Cows, we set up 32
cleanup itself. Let's undo. Let's republic with it. I will just delete one, and let's work with that now. One more try. This time. I will change the
cleanup to know and I can quickly make some
letters like that. Alright, so take a look. We can use a grid in our shape
building process as well. Just one. I'll let you know about
this handy feature. Okay, let's get rid of all
of that so we can prepare our artboard number five
for our next symbol. So get ready. In the next video, we're going to draw
symbol number five
12. Cloud Symbol: It's time for our next symbol. So let's just zoom in to
artboard number five. And this time we're
going to create a cloud. So let's start
with some circles. Just hold shift to
get a perfect circle. Keep in mind, if it's not
nice in the first trial, simply rearrange that with
your move tool like that. You don't need to start over. You can rearrange those shapes. Something like that.
Maybe this circle a bit smaller here at the edge. Right? That's nice. I'm going to draw an
additional square here, rectangle to close
it from them below. Alright, you know that
we need to select all of the shapes and then
select the shape builder. With the plus mode,
we can unite all of those areas we want
to use for the club. As you can see, I got
clean up option on. So it's automatically remove unused geometrics over on the right and the left
part of the rectangle. Nice. We got this nice club
shape and very quickly just unifying some circles
using our shape builder. Now I want a lightning
on this one. This will be a storm cloud, so we can fill it with a
darker color like that. Right? I would temporarily
reduce the size of it. So I got more space
on my art board. And for the later thunder, I will go with triangle. Why triangle? You might ask, take a
look, draw triangle, then move the top of it using this orange comparable
points to the right. Simply duplicate that shape. And now we make a full
rotation like that. 180 degrees make it overlapping. This is very nice. Lightning symbol using
Shape Builder plus mode. Quickly unify into
just one shape. Recolor dad. Right? Now, we need to position our lightning
on the cloud. And that's not all
because in this case, I want to have like gap
between those shapes. How we can do
something like that. Let me show you. I'm going to make a copy of
this lightening. Let's use the classic shortcut
Command, C command V. Here's the copy. Take a look at the
copies there at the top. And now on that copy or we
use to call contour tool. This tool expand existing shape, make it a bit bigger. Alright? And then I'll beg this new
appearance to that shape. Perfect. Using this shape and the Cloud, let's select them together. Holding Shift, I can go to my shape builder and
this time we will use the minus mode to simply
reduce this area. Our Adina lightning
is still there. We just use the lightening with this outline,
extended contour. This way we create a gap
between those two shapes. It's very common technique used by designing icons are right. So that's our cloud shape for
the artboard number five. Let's group those
two shapes together. So you can use
Command or Control G. You can even make
it a bit larger. And position this at the
center of your art board. If you cannot see
those snapping lines that helping me out, check your snapping options. As I mentioned before, there's little
magnet at the top. You can check your
snapping options. Here. You can even pause
this video now, check my options and be sure you set them up similarly
on your device. Right? That's our
shape number five, there's one more shape to go, one more symbol to create. I will tell you more about
it later in the summary. Let's move to the next chapter.
13. Summary: Congratulations, you
reach the end of this shape builder to class. We build five a
different symbols using this very powerful tool. But what's that? There's
a one more free art board for your creation. So I would like you
to take everything we learn here today and try to
come up with your own symbol. Alright? If you don't feel inspired, you can simply replicate
something that you know already, maybe the logo of
your favorite brand, also symbol that you see
every day around you. Alright? So that's your
artboard number six, use shapes and then try to
combine them together using Shape Builder tool to get a similar visuals
that you desire. Alright, so that's
your little challenge. At the end of this class. Try to come up with
the sixth symbol and then snap a nice screenshot
of this whole document. And don't forget to
send it to us in the project section down below so we can see your creation. Alright. Thank you for today. And remember there are few more things we
can learn together. Check other classes about Affinity Designer
here on Skillshare. And I hope I will see you
in the next tutorial. Bye
 Mark Krukowski, Kru Mark Tutorials