Transcripts
1. Introduction: Most artists spend years trying to loosen up more materials, better supplies, yet still
feeling tight and stuck. But the problem
isn't your hand or your materials,
it's your thinking. The Deconstruction Lab
teaches you one system. You build the structure, you understand your subject, and then you break
it apart on purpose. Faster and faster until
the creative brain takes over and something
real comes out. This is 15 years of making art
collapsed into one course. Drawing is everything. And once you get that,
nothing is off limits. And this is just the beginning,
the flagship course. It will teach you the system. Now, we'll tell you
drawing is everything. So welcome to the
Deconstruction Lab. The lab is open.
Let's get started.
2. The Deconstruction Lab: Hi there. I'm Robert Joyner and welcome to the
Deconstruction Lab. If you're here, it's
probably for one reason, you have a desire to draw
loose or paint loose. Great news, whether you
are just picking up your brushes for the first time or perhaps you've been
around for a while, like me, we all tend to get
stuck in the same place, and that's the safe art trap. Believe me, we will talk about this more as we move forward, but it's a common problem, and we're going to get past it. We all start in the same place. It's a very rigid
fundamental structure that we begin to learn
to paint and draw. Ultimately, it becomes very difficult to break free of them. We wind up prisoners of doing the perfect
drawing or painting. The Deconstruction Lab is
designed to change all of that. This course isn't just about technique, it's
about philosophy. It's a collection
of everything I've learned about the
heart of making art. It can be applied to drawing, watercolor, acrylic, collage,
whatever medium you desire. I will show you how
to take those rigid, very fundamental structures
and we will systematically break them down and to find
something more expressive, more raw, more you. Again, no matter where
you are in your journey, this course is all
about giving yourself permission to explore
and to experiment. It's time to stop
painting pretty. It's time to get loose and messy and welcome to the
Deconstruction Lab.
3. Finished Art Is A Trap: Finished art is a trap.
Here's what I mean. Most artists spend the majority of their time trying to create finished pieces and
very little time experimenting or
playing. Flip that. Imagine spending most
of your time exploring, doodling and
discovering new ideas and very little time worrying
about the final result. That's a much better
option. Here's why. When you focus on finished
work all the time, you tend to play it safe. You avoid risks,
and while you will improve that growth is
usually slow and gradual. But when you shift your
focus toward exploration, things will get a little messy and there are more
ups and downs. However, when breakthroughs
happen, they're much bigger. When you return to
creating finished work, you'll have more tools, more confidence, and more
creative options to work with. Who doesn't want that? Your
growth becomes much faster, plus, it's a lot more fun. We'll build on that idea
as we move forward. For now, focus less
on finishing and spend time experimenting with different subjects and ideas. That's where the
real growth happens.
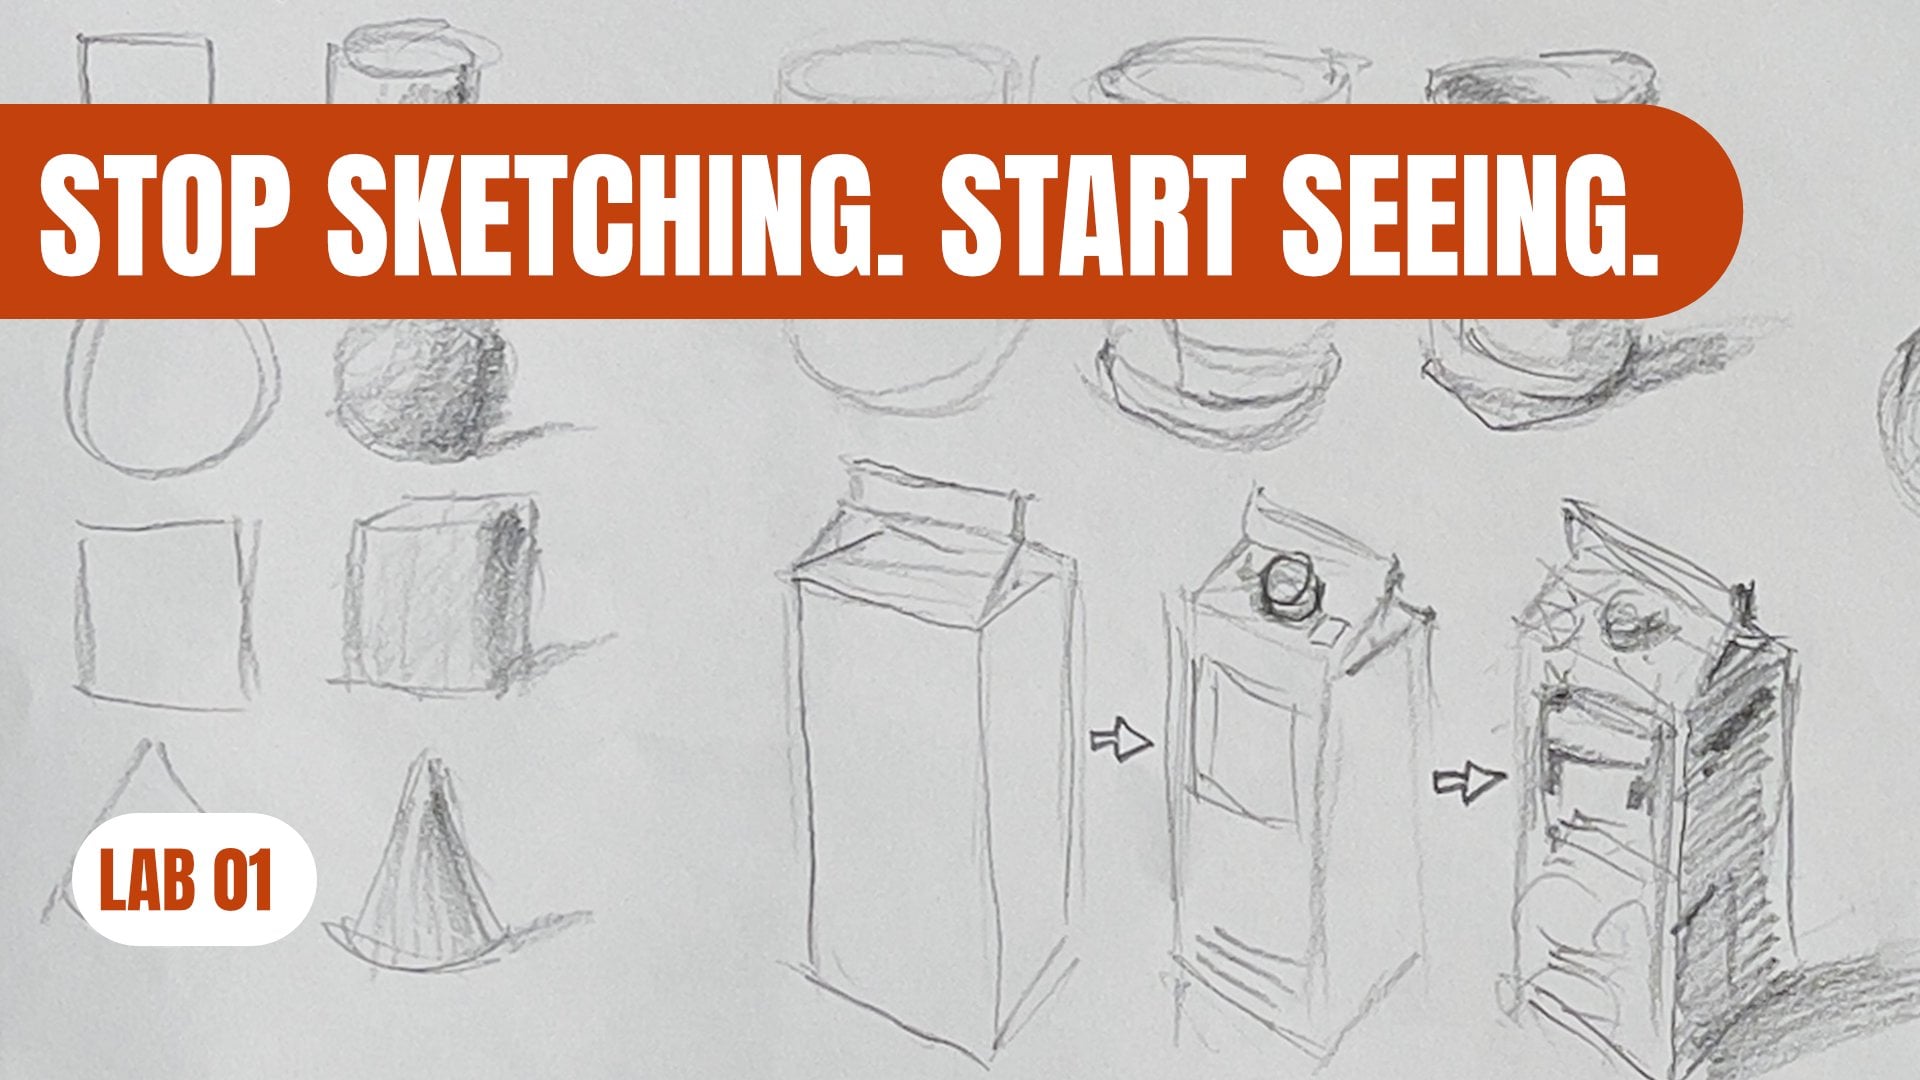
4. Construct to Deconstruct: Construct to deconstruct. This is the core of
the entire system. Construction is
about understanding how well you can see
and draw the subject. Deconstruction is
about expression. How simply and loosely
can you communicate it? Everything starts with drawing. If you can draw it well, you're in a strong position
to simplify it later. I'll begin by
constructing this cup. I'm focusing on the
big shapes first, the opening, the body,
and then the handle. At this stage, I'm
taking my time. I'm looking at proportions, how the parts connect, and how the form sits in space. I'm not worried
about perfection. But I do want it to feel believable because this is where the understanding happens. The more clearly you see it, the more confident
you'll be when it comes time to
loosening things up. And that's where
deconstruction comes in. Once I understand the structure, I can redraw it, but faster, looser and more simplified. Now, I'm not trying to include
everything at this point. I'm focusing on the essence, the main shapes and
the overall gesture. Some details get left out, some lines get pushed or exaggerated. And
that's the point. The strength of this stage comes directly from
the construction. If you understand it, you can simplify it. If you don't, it
tends to fall apart. Even though the second
version is looser, is built on a solid foundation
and that's the system. Take the time to understand it. Then give yourself
permission to let it go.
5. Complex Subject — Construction: Now I'm working on a more
complex subject, a tea kettle. To be clear, this isn't
a formal drawing class, but there are a few
important ideas to keep in mind as we move forward
that I can share with you. When you start, always think about the
largest shape first. That gives you a
solid foundation because everything
else relates to it. As I build the base
for the kettle, I can begin adding
the next shapes, thinking about how each part connects and flows
into the next. Working this way in a simple and systematic
manner helps you see relationships and
make adjustments as you go. Remember, drawing just isn't about accuracy, it's
about understanding. It's about taking the
time to really look at your subject and notice the subtle things that
make it interesting. If you lined up five artists and asked them what stands out, you'd probably get
five different answers and that's important
because as you draw, you're not just
building structure, you're also making personal
connections to what you see. Those connections
are what lead to a more unique and
expressive result later on, whether you're drawing
loosely or painting. As we move forward
in this course, we're going to keep
building on this idea. Right now, the focus
is construction, understanding the forms and
how they work together. Later we'll start
adding more layers to this process.
Take your time here. If something doesn't
feel right, redraw it. If your drawing
skills need work, make that a priority. Spend time developing
that foundation. But don't put
unnecessary pressure on yourself to be perfect. At this stage, the
goal is simple, create something that feels believable and clearly
represents the subject. That's what we're after in
the construction phase.
6. Complex Subject Deconstruct: Now I'm moving into the
deconstruction phase. Because I've taken the time
to construct the subject, I can move much more quickly
and fluently through it. I'm still thinking in terms of big shapes to medium shapes. But now the goal is to get the gesture down as
efficiently as possible. At this stage, I'm
working faster, so there will be more mistakes, and that's exactly what we want. Even if you're not
fully aware of it, the understanding you built in the construction phase is
guiding everything here. Since we're working
with less time, you won't be able to include all the details and
that's the point. This is where you start to eliminate what isn't essential. What remains is the core idea, the essence of the subject, the things you connected with. Instead of focusing on accuracy, think about capturing the
overall feel in a quick, fluid and gestural way.
7. Assignment: Welcome to your
first assignment. Construct to deconstruct. Pick a simple object, a cup, a bottle, draw it slowly. Focus on structure and understanding and building
those connections. Draw it again. This
time, faster and looser. Remember when you're
going quicker, you will have to simplify, let go of the details, focus on the essence. Keep it quick,
don't overthink it. If it feels messy,
you're doing it right.
8. Learn Progressions: Progressions are a great way to build on the construct
and deconstruct idea. We're going to start
with something simple, something you're
already familiar with, so we can focus on the
process, not the subject. Again, construction is critical. The better you
understand the subject, the easier it is to
simplify it later. I will begin the same way, starting with a large shape, in this case, the oval
opening of the cup. Then building out the sides and finally adding the handle. A helpful tip here is to
start with lighter lines. As the form becomes clearer, you can go back over it with darker, more confident marks. This helps clean up the drawing and makes the structure
easier to read. As always, take the
time to observe. This is where you're making
connections, how things join, how the perspective works, and the subtle details that
make the object believable. Now, once that first
drawing is complete, we move into the progression. Time becomes the constraint. If the first drawing
took a few minutes, the next one should take less, maybe half the time, or even a little less than
that. It depends. The goal is to repeat
the same subject, but work faster each time. As you do this, you'll start
simplifying naturally. Some areas may feel too loose and you might
tighten them up. Other areas, you'll just let go completely and that's
part of the process. Instead of just doing one construction and
one deconstruction, you're now creating a series, each one a little quicker, a little looser, and a
little more intuitive. Mistakes will happen,
and that's what we want. At some point, it
may even start to fall completely
apart. That's okay. Maybe even better. We'll talk more about how to handle that as we move forward. But for now, think of
progressions as taking the same idea and repeating
it with less time, more freedom, and a
focus on simplification. As I move through
these final drawings, notice how quickly things
begin to fall apart, and that's the shift. It starts with that
first construction, then the first deconstruction. Now as I move into the
third, fourth, fifth, and sixth versions, everything
gets faster and looser. At this point, I'm not trying
to control it as much. I'm starting to
trust the process. I'm becoming more confident, more intuitive and honestly, I'm just having more
fun with that energy, accepting the
challenge, letting go, and allowing the
marks to happen, that's a big part of
what makes the process so rewarding because now
you're not just drawing, you're enjoying the
act of drawing. You're embracing
the imperfections, and that's the
shift we're after.
9. Assignment: Okay, now it's your turn. Pick a simple object, something you've already drawn or something you're
familiar with. Start by drawing it once, taking your time to
understand the structure. Then draw it again. But this time, reduce the time. Cut it in half if you can. Repeat this a few times, working a little faster
with each attempt. As you do this, you'll notice the drawing starts to loosen up. Some details will fall away, and that's exactly what we want. Focus on the main shapes, the overall feel, and let go of anything that
isn't essential. If it starts to fall apart, you're in a great
place. Keep going. The goal here is to train
your eye and your hand to simplify and
respond more quickly. Keep it loose, don't overthink it and see how far
you can push it.
10. Progression Two Objects: Now we're moving
into two objects. Up to this point, everything's been about a single object, understanding it, constructing
it, then simplifying it. Now we're adding
another element, and this changes things. It's no longer just about
drawing the object. It's about how to draw objects
that relate to each other. As I begin, I'm still thinking about
the big shapes first. That doesn't change. But now I'm also paying attention
to a few key things. Which object is larger, how much space is
in between them, and do they overlap? Those relationships
are important because they start to create
structure on the page. At this stage, I'm not trying to make a
perfect composition. I'm just becoming aware of
how these elements interact. So I'll construct
both objects first, taking my time to understand their shapes
and proportions, and then I'll move into
the deconstruction phase. Loosening things
up, simplifying, and focusing on
the overall feel. You'll notice that as
more elements are added, it becomes harder to include everything, and
that's the point. You have to start
making decisions. What matters, what
can be simplified, and what can be left out. So keep it simple. Focus on the relationships, trust your understanding, and let the drawing
evolve from there. As I move into the second
and following drawings, notice how things
begin to loosen up. Again, this comes
from two things, understanding the structure and working more quickly each time. With each attempt, I'm becoming more familiar
with the subject. Those connections I
made early on to start become more clear and the
hand begins to relax. Even after doing
this for many years, it still takes effort. It's not something you master
once and move on from. It's something you
come back to again and again because
the more you do it, the more you learn and the more natural that looseness becomes. And really, there's no
better way to spend time in the studio than
building that connection.
11. Progressions Three Objects: Now we're moving
into three objects. This is where things
start to change a bit. With more elements on the page, it becomes harder to
include everything. Instead of trying
to draw it all, the focus shifts to
making decisions. I'll start the same way, thinking about the larger shapes and how everything is placed. But now I'm paying
even closer attention to how these objects
relate to each other. Which one stands out? Which ones can be simplified? What can I leave out? Oh as I move into the quicker drawings, you'll notice things
begin to break down a little more
and that's expected. With more complexity, you have less control and that forces you to simplify even further. This is where you
start to find clarity, not by adding more, but by removing what
isn't essential. As you watch this, don't worry about getting
everything right. Focus on the relationships, trust your understanding,
and let the drawing evolve. As I get into the third
and fourth drawings, this is usually where
I really start to embrace the
deconstructed approach. This is where I
begin letting go of the structure and allowing the drawing to
happen more freely. It doesn't always come
naturally at first, but the idea is to do enough of these that you reach
that point where you recognize when
you're holding on too tightly and when you're
finally letting go. Once that happens, that mark
starts to feel more fluid. The hand relaxes and the drawing begins to move more
freely across the page. You start to see a
different kind of result, one that has more energy, more freedom, and
more imperfections. As I move into these
final drawings, you can feel that shift. The confidence builds, the process becomes
more enjoyable, and that starts to
show in the work.
12. Assignment: All right. Now it's your turn, pick two or three
simple objects, something easy and familiar. Start by constructing them, focusing on how they
relate to each other. Pay attention to size,
spacing, and overlap. Then redraw them this
time faster and looser. You won't be able to include everything, and
that's the point. Focus on what matters. Let go of the rest. Keep it quick,
don't overthink it. If it starts to fall apart, you're in the right place. You can repeat this with a few different
object combinations.
13. Multiple Mediums: This lesson, things will
start to get interesting. By now, you've
probably noticed that the process itself really
hasn't changed very much. Whether I'm using graphite, marker, paint or crayon, I'm still thinking about
the same core ideas, structure, movement, shape, relationships,
and simplification. That's important because
a lot of artists separate drawing and painting into two completely different skills. But for me, they're really the same language spoken
through different tools. I begin this exercise with a simple construction drawing of the bananas, nothing fancy. I'm just trying to understand
the basic structure, the direction of the forms, and how the shapes
connect together. Then as I move through
the progressions, I start introducing different
materials and mediums. Notice how each tool changes the personality
of the image. A marker creates a different
type of edge than graphite. Crayon introduces texture
and unpredictability. Paint allows me to think
more in terms of shape, mass, and negative space. But underneath all of it, the drawing is still holding
everything together. This is where experimentation
becomes really powerful. Once you understand
the structure, you're free to push
materials around, layer marks, simplify
edges, exaggerate shapes, and react more
intuitively instead of trying to control
every little detail, you'll notice that the image
starts becoming less about rendering bananas and more
about interpreting them. The subject becomes
a starting point instead of a limitation. That shift is huge because eventually the goal isn't
just to copy what you see, it's to use what you see as a raw material for expression, design, movement, and most
importantly, exploration.
14. Assignment: This assignment, I
want you to draw the same object three different times using three
different tools. You can use graphite, marker, brush pen, whatever
combination you want. The important thing
is noticing how each tool changes the
energy of the drawing. Some tools naturally
feel tighter, some feel bolder, some
encourage speed and looseness. But even though the
surface quality changes, the system stays the same. You're still constructing,
still simplifying, still observing shape
and proportion. So this assignment is
really about awareness. How does the tool
influence your decisions? How does it influence movement, marks,
and interpretation? Same object, same system,
different energy.
15. Line & Mark Making: Okay, this starts with
construction, simple shapes, basic proportions, just trying to understand what's
actually there. Honestly, this is where
most artists stop. Everything stays careful,
predictable, safe. But once the structure
is in place, that's when the drawing
can start to breathe. This is where line
personality comes in. Not every line has to
say the same thing. Some lines can whisper, some can shout, some can
barely exist at all. You can use long flowing
lines, short choppy marks, dots, scratches, scribbles,
even awkward broken marks. They all carry a
different kind of energy. And the more variety
you introduce, the more human the
drawing starts to feel. A clean contour by
itself can feel stiff. But when you interrupt it, repeat it, scratch through it, lose it and rediscover it, suddenly, there's rhythm, there's tension,
there's movement. This is also where
you stop tracing objects and start
interpreting them. The goal isn't
perfect replication. The goal is to react
to what you see. Sometimes a loose scribble says more than a polished
line ever could. After the construction phase, I like to push the
drawing a little bit further each time,
add more variety, more risk, more personalities because structure
gives you stability, but line personality is what
gives the drawing life.
16. Assignment: This assignment, I don't want you to draw
an object at all. I just want you to
fill a page with intentional marks,
explore pressure, explore speed, explore
thick versus thin, loose versus controlled,
dark versus light. Use your wrist, use your arm, experiment with different
grips and movements. This is about becoming more
aware of the language of marks themselves because
every line carries energy, and the more
comfortable you become making different kinds of marks, the more freedom you'll have later when you're
drawing and painting.
17. Range of Movement: Most artists think
tight drawings come from a lack of talent. But honestly, a lot of the time, tight drawings come
from tight movement. If your hand barely moves, your marks usually won't either. In this lesson, I want to
focus less on the subject itself and more on how your
body affects the drawing. In this first example, I'm going to draw
from the wrist. When you draw from the wrist, the pivot point limits
your range of motion. This is fine. It doesn't
mean it's a bad thing. It's just things that
you want to be aware of. For the second cup, I'm going to draw
more from the arm, utilizing elbow,
shoulder, and creating a little bit bigger movement throughout the whole exercise. Again, this isn't about right and wrong,
it's just awareness. And keep in mind this
applies to painting as well. Learning it drawing first is a great way to create the range of movement that
you will need, the awareness. Scale matters too. If
you're working very small, your movement options
become limited. You almost have to
tighten up a little bit. But as your drawing gets larger, you suddenly have
more room to move, swing, and react
physically to the subject. Speed changes things as well. When you work slowly, you tend to observe
more carefully and focus on smaller
adjustments and details. There's a time and
place for that. But when you start
working faster, the decision making
becomes more instinctive. You simplify more, you stop correcting
every little thing, and the work usually becomes more energetic and expressive. Grip also plays a big role. A standard tripod grip gives you a certain
amount of control, especially for tighter
drawing and detail work. But when you slide your hand
farther back on the pencil or brush, the leverage changes. You movement opens up. The tool starts to feel a little less rigid and a little
more responsive. You can also experiment with using the side
of the pencil, overhang grips or
different brush angles. Each one creates a
different kind of mark and a different
kind of energy. The same idea applies to
tight versus loose drawing. A tighter artist usually
tries to stay inside every edge and control
every contour perfectly. Oh But with looser drawing, we start allowing the marks to move outside the
edges a little bit. We let things breathe, we allow suggestion and movement to become
part of the drawing. And the important thing
to remember is you can always bring structure
back into the work layer. Confidence matters, too. Hesitation usually leads
to scratchy marks, second guessing, and
constant correction. But confidence allows you
to commit to decisions. Even when they aren't
perfect, at some point, you stop trying to force
perfection and you start saying, Yep, that's my coffee cup. That's the decision I made. Honestly, that attitude changes
the energy of the work. Even the parts of the body you draw from affect the marks. Finger movement creates very
small controlled marks. The risk gives you a
little more flexibility. The elbow increases
the range even more. And the shoulder allows for larger sweeping movement
and broader gestures. You can even involve the
entire body if you want to. The point isn't that one approach is better
than the other. It's simply understanding that movement affects the marks. And once you become
aware of that, you start using it
intentionally in your work.
18. Assignment: For this assignment,
I want you to draw the same object three
different times. The first drawing should
come mostly from the wrist. The second should come
more from the arm and the third should involve as much full body movement as possible. Pay attention to how
the drawings change. How does the line
quality change? How does the energy change? How does the level of
control or looseness shift? The assignment is really
about experiencing range of motion first hand because
movement affects marks. Marks affect energy and energy
affects the final outcome.
19. Learning to See Loose Work: Of the biggest mistakes artists make is hiding their
work too quickly. They finish a sketch,
close the book, slide it into a pile somewhere, and never really give themselves a chance
to live with it. But learning to draw loose isn't about how you make the marks. It's also about how
you learn to see them. Oftentimes, expressive work
feels uncomfortable at first because we're trained
to look for polished edges, finished shading
in perfect detail. So when something looks
unfinished or simplified, we assume it failed, but loose work
communicates differently. Sometimes the
energy of a drawing doesn't really appear until you stop staring directly at it. That's why I like hanging
work around the studio on walls near my easel, even
unfinished sketches. Not because I'm trying to
judge them every second, but because over time, I start seeing them differently. Sometimes I'll walk past the drawing ten times
without thinking about it. Then suddenly notice something interesting about the shapes, the rhythm, or the
movement in the marks. Distance changes things as well. A drawing that feels chaotic
up close can suddenly feel organized and expressive
from across the room. Honestly, I think that's
important because not every drawing needs to
explain everything perfectly. Some drawings work
through suggestion, through rhythm, through
personality, through attitude. So instead of immediately
rejecting loose work, try living with it for a while. Hang it up, leave it out. Look at it accidentally sometimes instead of
critically all the time, because learning to
see expressive work is part of becoming an
expressive artist. You have to be
able to accept it. And not only that, but to see the beauty and the
imperfections. Some examples of just
studies, drawings, sketches that I do that would
be hung up in my studio, especially when I
was learning and trying to adjust to
this sort of style. But a loose owl painting
or sketch early I did. I was a failed owl at first. Eyes. And this was
one that I started, and I immediately
or halfway through, just got frustrated with it. Put it aside, but I put
it on top of a kind of a drying table I have for my paintings when I'm
doing a bunch at one time, so I just sort of lay them out, scatter them so I
can see everything, walk by it the next morning, and I was hooked. I was like, Wow, that is
something really interesting. About that energy and
about this looseness. It's just I caught my eye, and I found it very engaging.
So that's a good example. You know, a quick boot study, crayon, charcoal. I
like these things. I just like how they work, but how they fall apart, too. So, these would be good
examples of you can just hang them around your studio and
get used to seeing them. And sometimes when we do things, again, we don't like
them right away. Oftentimes, really, for me. So this was an
interesting thing. I did these charts for video for YouTube
and for the course, finished art as a trap. And I did it over top of a reject Boston
Celtics team painting. There was something
interesting about this, and I did not paint the
charts over top of this for any other reason
than just to teach. And then there was something
I liked about it this style, this very graphic overtop
of a painting like this. Sort of juxtaposed
over something. And it was sort of a clash, high contrast between the two. And I actually explored
it quite a bit lately. And I'm going to get back
into it, but just something, again, kind of silly
stuff that we like. This is a failed Canada Dry
so of Canada Dry Genril. This would be something
that you would see lying around or sitting
around in my studio. And the more I look at this, the more I see the
possibilities. I mean, coming here with some
negative space painting, chisel out the A, maybe add a
little more detail in here, a little more
representational quality. A little bit
stronger reflection, maybe grab a little bit
tighter edge somewhere. You know, this
painting could come together in, like, minutes. So I just let these
things marinate, you know, no sense
in pushing it. This is another I do
a lot of food art. I think a Bertoli bottle of olive oil, obviously
got frustrated. But, you know, this is gold to me because this is my next
playground, you know? And when a painting gets like this, you know,
I tend to, like, a take it out on the painting because I'm not
adjusting well or I'm not, you know, seeing it
in a way that is satisfying to me or painting it in a way that's
satisfying to me. So I put them aside. But
again, these are great. They could become
something else or they could become what they were originally intended to
be. Another good example. It was originally who
knows what it was. I think, just some nonsense. I started painting
a bag of Duncan. Sort of lost my way, became
uninterested or whatever. Threw some collage
paper down on it. All that's collage and just colluded it, basically
destroyed it. And now I'm bringing it back in. You know, I'm reconstructing it basically, little by little. But these are great. These are awesome to have
around the studio. And some of the
examples of, you know, my journey through this and perhaps pointing
out some things that, you know, will help you as well.
20. Angles vs Curves: Up to this point, we've
focused a lot on construction, deconstruction, movement, and learning how to
loosen up the drawing. But another thing that
creates energy in your work is the relationship
between curves and angles. Most beginners naturally
lean towards smooth, rounded lines because they
feel safe and predictable. But angles introduce
tension, structure, rhythm, and a little bit
of unpredictability. Force you to simplify
and interpret instead of copying
exactly what you see. So in this exercise, I start with a basic
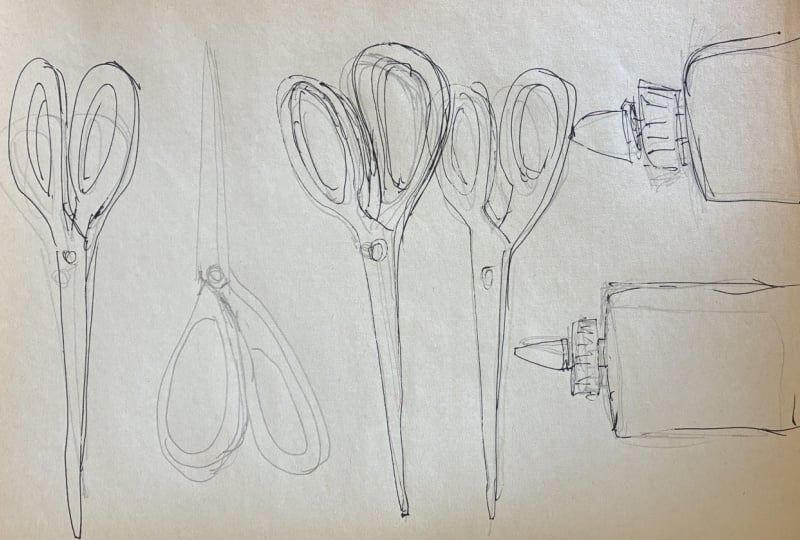
construction drawing of the bottle and box. The full construction phase
is shown intentionally so that you can pay attention to the simple shape relationships. Then as I move through
the progressions, I intentionally replace many of the curves with
straighter, sharper edges. Notice how the object
begins to feel more designed and expressive
rather than simply observed. This is important
because loose drawing isn't only about messy
marks or fast movement. Sometimes looseness
comes from editing, simplifying, and making
stronger shape decisions. You'll notice that
even though I'm pushing angles
more aggressively, the original structure still
holds everything together. That's why construction matters. It gives you something stable underneath
the experimentation. As you practice this idea, don't worry about
making it look perfect. Push the angles
too far sometimes. Let the drawing become
awkward or stiff. That's part of learning
where the balance is between structure
and expression.
21. Three Ways to Build Form: In this lesson, I want to talk about three simple ways we can suggest form and structure
in a drawing or painting. This is important because when people first start loosening up, they sometimes think
they have to stop carrying about
structure altogether. But that's not really the goal. The goal is learning
how to simplify form without losing
believability. So instead of outlining every little detail or
rendering everything perfectly, we begin by thinking about form in a simpler
or more visual way. And really, there are
three main tools we can use the edge or
contour of the object, the space around the object, and information inside
the object itself. Usually, good drawings and paintings use some
combination of all three. The first and probably
most obvious way to show form is through contour. This is simply the outside edge or silhouette of the object. If I draw the contour of this
bottle carefully enough, even with very little detail, you'll probably recognize it. That's because the silhouette already contains a
lot of information. It tells us the height,
width, proportion, gesture, direction,
and character. And this is really where
a lot of this course started learning to
simplify objects into basic shapes and observe the major contours instead
of chasing tiny details. Now obviously, contours
can be tight and controlled or they can
be loose and expressive. You can use broken
lines, lost edges, thick and thin marks,
soft edges, hard edges. But regardless of style, the contour is one of the quickest ways to
communicate form. The second way to show form is by drawing or painting the
space around the object. This is what we often
call negative space. Instead of focusing directly
on the object itself, we begin shaping the
space beside it. Sometimes this is
actually easier because we stop thinking
about it symbolically. We stop thinking,
that's a bottle, that's a mug, that's
a glue container. Instead, we simply
observe shapes. For example, if I draw a darker
value behind the object, suddenly, the edge
becomes more visible, the object starts to
emerge naturally. Instead of outlining everything, we allow contrast and surrounding value
to define the form. The third way to
show form is with information inside
the object itself. And this can be value
changes, brush work, perspective, surface detail,
or directional marks. For example, this glue bottle
is basically a cylinder. But once we add lettering or label that wraps
around the form, suddenly we start to get a feeling of the
curve of the surface. The same thing happens with
highlights, reflections, shadows, texture, or
directional brushstrokes. Even simple value changes across the object
can suggest volume. A flat shape begins
to feel round, and this is important
because it reminds us that the form isn't always
created by outline alone. Sometimes the information inside the shape is doing
most of the work. Now the interesting
part is when we combine all three
ideas together, maybe the contour is
loose and broken, maybe the negative space
helps to find one side, maybe a few value changes or surface details inside the
object helps suggest volume. The combination creates balance. Usually, the more
confident you become, the less you feel like you need to explain everything perfectly. You start trusting suggestion, you let edges disappear, you simplify, you leave
parts unfinished. And allow the viewer to
participate a little. And ironically,
that often creates artwork that feels more
alive and expressive. So as you continue practicing, try to become aware of how
you're describing form. Are you relying
entirely on contour? Can you use the background more? Can internal value or brush work do some
of the work for you? There's no single right answer. The goal is simply building
awareness so you have more tools available
when you draw and paint. Because ultimately
expressive work still needs structure
underneath. We're just learning different
ways to communicate that structure with a
little more freedom and a little more confidence.
22. Push and Recover: One of the biggest mistakes artists make is
stopping too early. They tighten up, they
protect the drawing, they stay inside what feels
safe and controllable. But if you really want
to discover new ideas, new marks, new energy, and new possibilities, sometimes you have to push
the drawing until it breaks. That's what this
lesson is about. I will push and recover. We begin with construction,
simple shapes, simple proportions,
getting the object believable enough that it
has structure and form. In this case, I'm
using a sneaker. At first, everything
is fairly controlled. I'm observing, measuring
relationships, trying to understand
the basic structure. A But once I have enough information,
I start pushing. I loosen the marks,
I exaggerate shapes. I add mixed media. I stop trying to
make it perfect. And eventually the
drawing falls apart. It gets too loose, too
chaotic, maybe even ugly. And honestly, that's exactly
what's supposed to happen. Because if you're
really experimenting and exploring range of motion, abstraction, interpretation,
and expression, you're going to lose
drawings sometimes. That's part of the process. It's very important that
you understand this. But here's another
important thing. Just because you lost it doesn't mean the
drawing is dead. You can recover it and the recovery process is
actually very simple. You go back to square one, back to construction,
back to the basic shape, back to the structure and form, you rebuild just
enough information to make the drawing
believable again. Then, guess what? You start pushing it once more. The process becomes construct. Push, lose it, recover by constructing again,
and push again. That cycle is incredibly
important because it teaches you not to fear
mistakes but to embrace them. It teaches you that
you can always rebuild structure when
things drift too far. Over time, that
gives you freedom. You stop treating
every drawing like it has to succeed immediately. Instead, the drawing
becomes a conversation, sometimes controlled,
sometimes chaotic, sometimes somewhere in between. And here's a really
interesting part. The stage you think is ruined today might actually be the
stage you love tomorrow. Sometimes you come
back later and realize the loose broken
version had an energy, the tighter version lost. That's why it's important
to keep these experiments. They become proof proof
that there's often something valuable hiding
inside the messy stages. Most artists never allow
themselves to get there. They stop before the drawing has a chance to surprise them. So this lesson is really
about building trust. Trust that you can lose the drawing and still
find your way back.
23. Assignment: Assignment is important. I want you to intentionally
push the drawing too far. Not almost too far, actually too far,
push the marks, the abstraction, the looseness until the drawing genuinely
starts to fall apart. And when it does, stop there. Take it in, observe, notice. Then recover it. This assignment is about
learning to become comfortable with the
uncomfortable stage. Most artists never allow
themselves to reach this point, they stop too early. But sometimes the most
interesting ideas show up right at the
edge of failure. This assignment is about
exploration, risk and proof, proof that when things go too
far, there is beauty there, but also knowing that you
have a recovery system, you can always go back, construct, and then progress
with deconstruction.
24. Putting It All Together: There's one thing I want
you to take away from this course is that
growth looks messy. Most breakthroughs
happen somewhere in the middle of
awkward drawings, unfinished ideas,
experimentation, and pushing things farther
than you intended. That's normal. A lot
of people believe good artists sit
down and magically create polished work every time. But in reality, most artists
are constantly adjusting, constantly observing,
constantly simplifying, rebuilding, editing, and
important experimenting. And that really never stops. The goal of this course
was never perfection. It was to help you develop
awareness, awareness of shape, awareness of movement,
awareness of proportion, rhythm, edges, simplification,
and interpretation. Because once you start
to see things clearly, your work will change naturally. Some days your drawings will
feel loose and confident. Some days they feel
stiff and uncomfortable. That's part of the process, too. The important thing is continuing to show
up and do the work. Over time, your eye changes, your confidence changes, your
decision making changes. And eventually, you stop
trying to force a style. You simply start working in a way that feels
more honest to you. So keep experimenting,
keep simplifying, keep observing, and keep
making bad drawings. A lot of good art
is hiding in them. Remember, this course is only
the foundation, the system. These same ideas can
continue in watercolor, acrylic, mixed media,
pastels, oils, sketchbooks, still
life, landscapes, abstraction, whatever
direction you decide to take things next. Thank you for spending time here with me inside the
Deconstruction Lab. Now go make something, knowing you have a
great system in place.
25. Wrap up: You've probably noticed by
now that this course was never really about graphite
markers or any one medium. It was about learning how
to see, how to simplify, how to build structure,
how to loosen up, how to recognize movement, rhythm, shape, and form. Once those ideas start to click, they transfer into
everything else. For this lesson, I want
to show you a couple of quick painting progressions
using watercolor and acrylic, not as a full painting
demonstration, but more as examples of
how the same ideas we've covered throughout this course can move directly into paint. You'll notice the process
is still very similar. I'm still looking for
big shapes first. I'm still simplifying values. I'm still pushing
and pulling shapes. I'm still allowing accidents in interpretation to become
part of the final stage. The watercolor tends to stay a little more fluid
and responsive. The acrylic lets
me recover shapes and layers things a
little bit differently. But underneath all of it, the thinking is
exactly the same. That's why I believe drawing is everything because once you understand
construction, movement, proportion, simplification,
and design, you can carry those ideas into almost any medium
you want to explore. As you look at
these progressions, try not to focus only
on the paint itself. Focus on the decisions, see how the shapes evolve, see how form is suggested
instead of over rendering, see how some areas stay loose while others
become more defined. That balance is where a lot of expressive painting begins.
 ROBERT JOYNER, Draw Loose. Paint Loose.