Transcripts
1. Intro: Hi and welcome. Are you ready to bring adorable pint sized
fantasy creatures to life? Imagine a tiny elf
with sparkling eyes, a pocket sized org, or a cuddly dragon that could fit in the palm of your hand. In this class, we'll create
cute fantasy shiv art. We'll start with a
quick tour through fantasy themes to get those
creative juices flowing. Then we'll hunt for inspiring references
to have a solid base. We'll create three fantastic
shiv characters together. A charming elf a fierce
orc and a lovable dragon. I'll guide you through
each step with live demos, showing you how to capture these mythical pins in an
irresistible cute chevy style. By the end of this class, you'll have the skills to transform any fantasy character into
an adorable hivy version. And the best part, you'll get to apply everything
you've learned in a fun assignment where you'll design your very own
fantasy chiv character. Throughout the
course, I'll provide helpful templates
and resources to boost your progress.
Hey, don't worry. I'll be right here to support
you every step of the way. So are you ready to shrink down your favorite fantasy characters and max out their
cuteness factor? Join now, and I'll see
you in the next video.
2. Quick Overview Of Fantasy Themes!: Hello artist and welcome. Before we start
drawing, let's first talk about fantasy and stems. If you want to draw
fantasy characters, chances are there's
something that inspired you. There are many movies, games, and TV shows that tell us
stories and fantasy worlds. Most of the times,
these worlds are highly inspired by
medieval times, the clothing, the places, transportation and other aspects
while adding some magic, different cultures
and creatures, and sometimes even a
different technology than what we'd see
around that time. So turning to these things
can be a good idea to get inspired in creating
your characters. Take a look at different
Artur in movies and TV shows such as
Merlin and Excalibur. Another big reference is Lord
of the Ring and the Hobbit, be it through books,
but also movies, TV shows, or even games
and graphic novels. Degeons and Dragons is another place to find
great fantasy inspiration, and there's so much material
out there about it nowadays. Podcasts such as Critical Hall, along with the animated TV show. Movies, the DND books
are also filled with images and illustrations that are comic books and
even board games. If you're a fan of fantasy, you surely know about most
of what I'm talking about. All these fantasy stories have
several themes in common. For example, different races, such as elves, gnomes, ogres, orcs, dragons, and
dragon people, and many others. There's also almost always
some kind of magic. For that reason, the
people in these stories can have different types
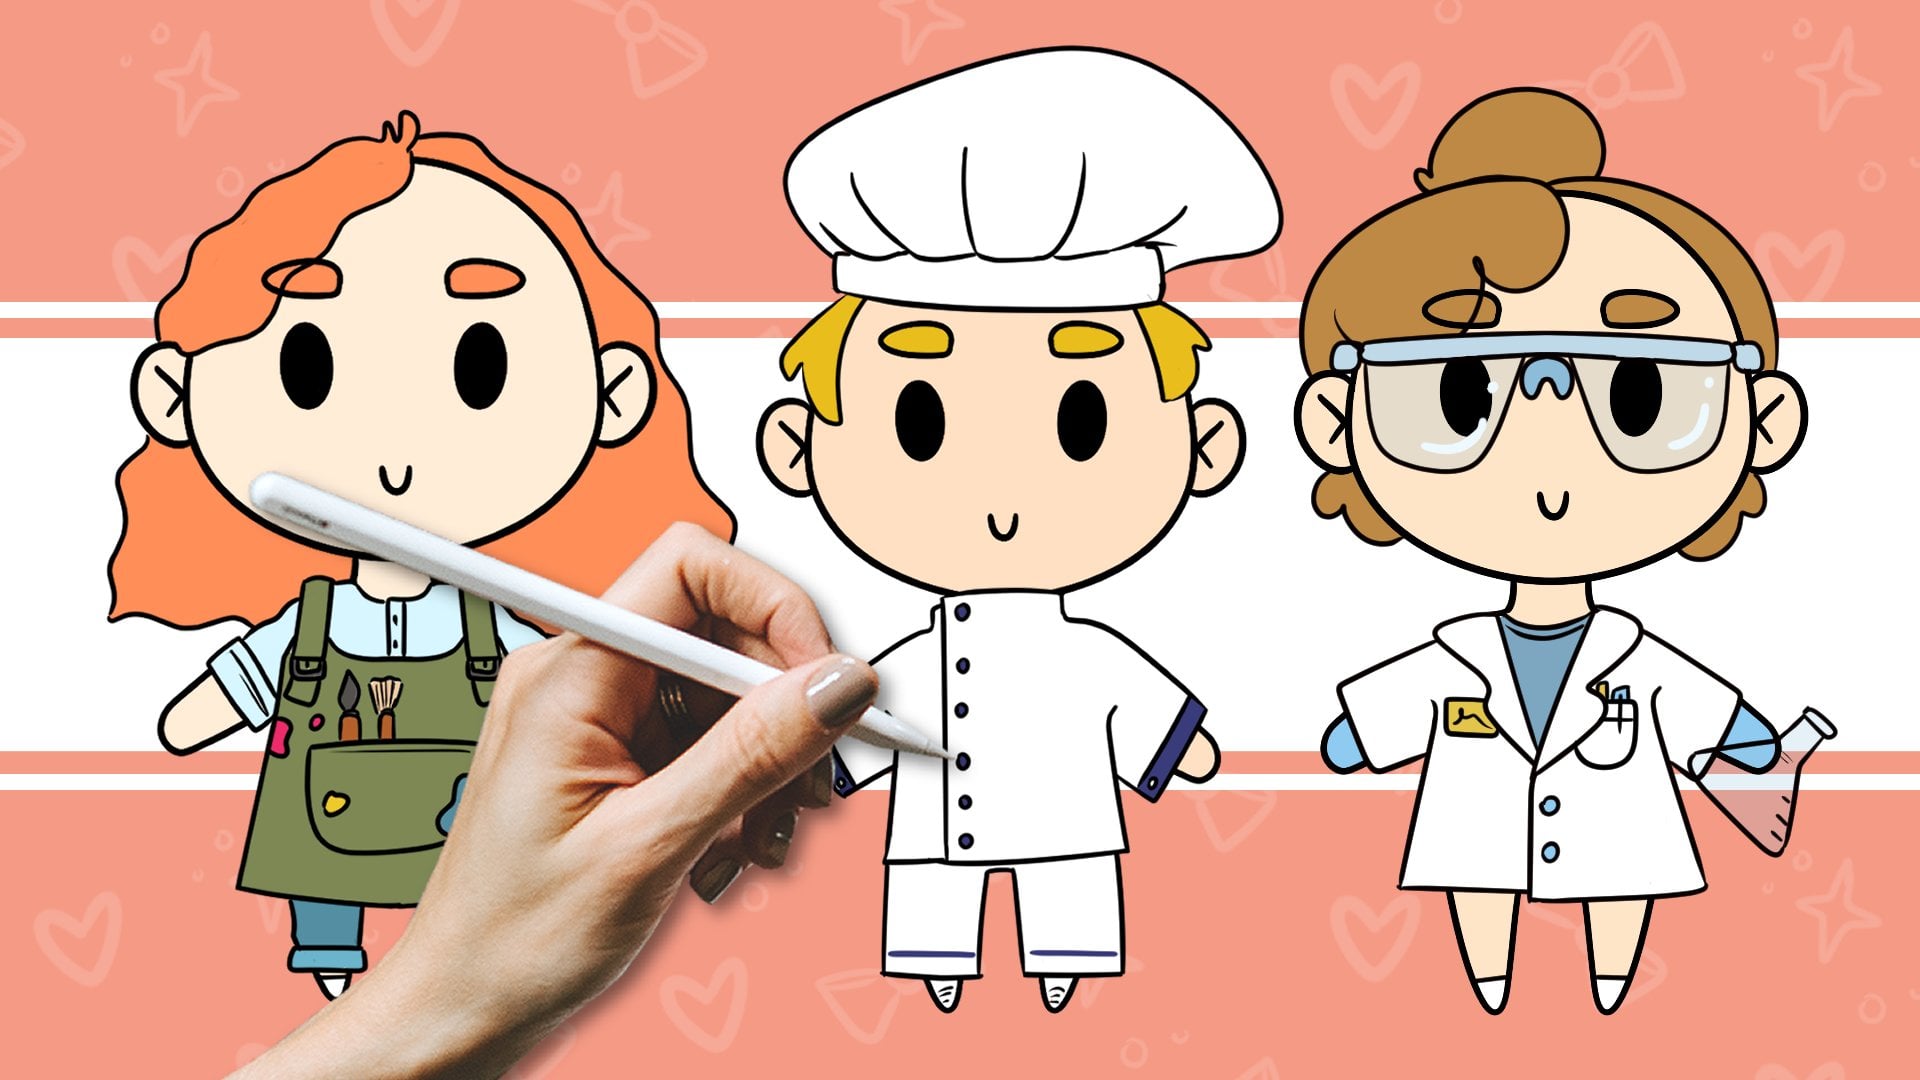
of jobs or classes. Someone can be a cook
or a blacksmith, but there may be a magic wilder such as a wizard or a sorcerer. Weapons such as a sword, dagger or a magical staff
is also very common. And finally, the clothing. Capes, fantasy or
medieval like clothing, maybe some armor depending
on the character. So before we move on
to the next video, write down some of your
favorite fantasy movies, TV shows, books, or games. This can be used for
inspiration for your character. You don't need to go
overboard with it. Pick three of those
things or even less. Once you have that list, we
can go to the next video where we'll talk about references
and where to get them.
3. Getting Inspired With References: Hello, and welcome back. We talk about fantasy
and its themes, and hopefully you now have a small list of your
favorite fantasy works. Now it's time to
find some references to help us create our
fantasy characters. Now, as we talked about, most of these works already have
some visual references. You can go directly to
those and save some images. For example, talking
illustrations from his books or art that you
find on DND guidebooks. There are also many
artbooks around, both from famous movies, games, and TV shows, but also
from different artists. If you own any artbook
from a favorite artist, you can turn to this and take some photos to
use as reference. It's always important to
turn to something that you already enjoy since
it will inspire you. Why not take a screenshot
of your character from Bowlers gate Tree
or World of Warcraft, or any similar game where you
can create your character. This way, you're getting
inspiration from something you already had the opportunity to customize according
to your taste. Instead of screenshots,
if you prefer, you can also look up
your favorite movies and TV shows online. For example, go to pinres.com and look up Lord of
the Ring screen caps. And then you can
find a whole lot of images and save a
few that you like. You can also go to Google
Images and do the same thing. A good thing about Pinterest is that you can create
a board similar to a folder on your computer and keep all your images
and references there. Whatever you find, just click Save and choose
a board for it. Then whenever you
need inspiration, just open the right board and you have everything
you need to see. And of course, you can
make your own screenshots. This is also a good
excuse to rewatch your favorite movies and
TV shows once again. It's just for research.
Take screenshots of things that you like and keep
them in a folder somewhere. Then we can use those for inspiration and ideas
for our characters. All right, have fun looking at references and
when you're ready, follow me to the
next video where we learn how to draw
Shiv El character.
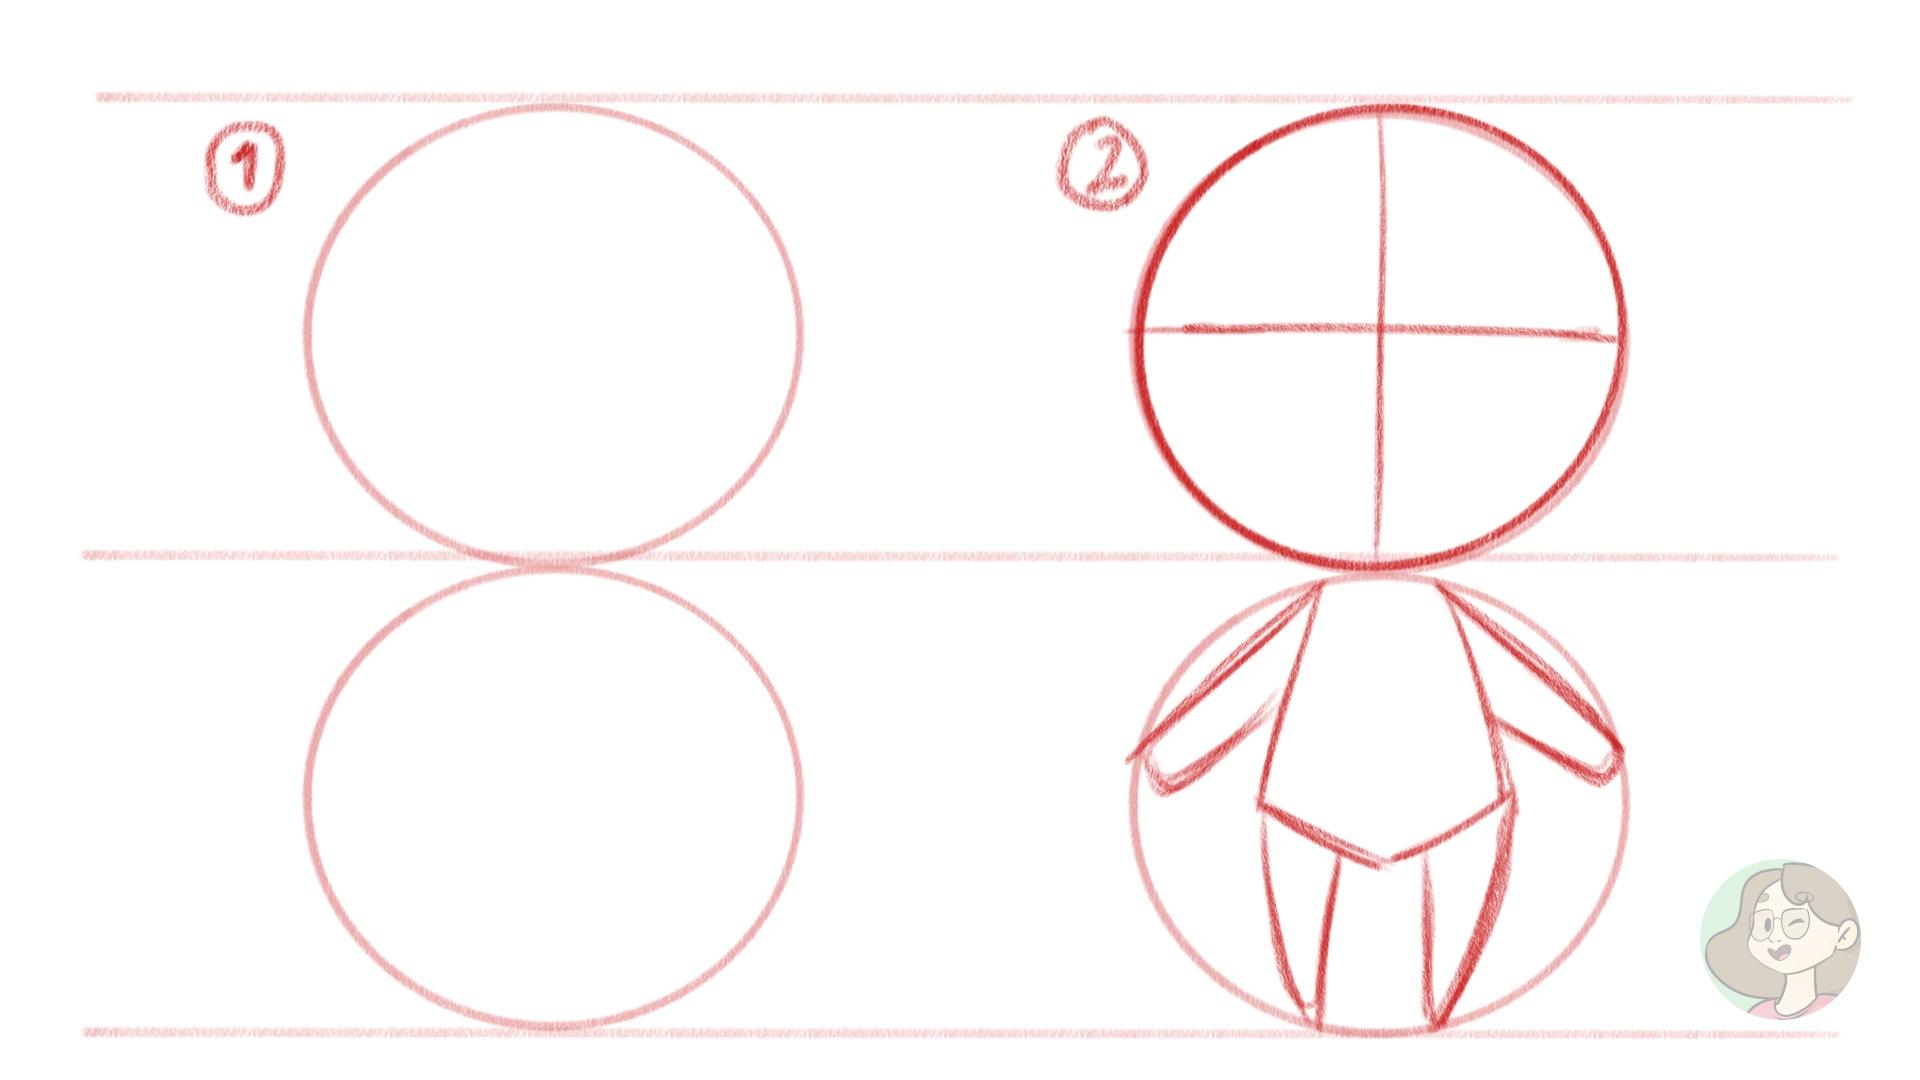
4. Let's Sketch A Chibi Elf Character!: All right. Hello,
and welcome back. We're now going to start drawing our fantasy Chevy characters, starting with an elf. So I have here a
base for my drawing, and I left to the templates
for the Elf character, so you can use it
as a base as well. So feel free to download it
and use it in your drawings. So we just have the body
here of a Shiv right and then I got here to the
side a few references, some ideas for outfits
and just so I have a visual reference of
how an elf could look. I'm going to be drawing on
top of my base drawing. So we have our head, right. The first thing I
think about when talking about elves is
the point years, right. So that's what I'm
going to start with. So two triangle shapes, one on each side. It's fun if things
look messy right now, this is just a sketch, maybe a bit rounder. It's a shiv and
supposed to be cute, and cute things are
usually quite round. So round the years like this. But yeah, this is
just a sketch show. Don't worry too much about it. It's okay if it's
rough, if it's messy, we just want to have an
idea of our character, then we'll clean it up later on. So eyes, right? The face is going
to be very simple. And the smile and the smile. There we go. Maybe we
can have a bit of blush. For hair, going to
draw long hair, something very simple and
even go really long, right? That's another thing I think about when
I'm thinking about elves is very long
hair. This is a hiy. We can exaggerate
it a bit and even have bits of hair going
here in the front. There we go. Or hair is done. You can also add something
like we have here, an accessory for the head, something simple, something
like this. Very simple. We don't need to add
too many details. Of course, if that's
the look you want, or let's say if you like to
have a very complex style, then you can add
more details to it. I like to keep things simple, especially when it comes
to shibby characters. Now, all you have to do
is the outfit right, and we have here a few ideas. I really like this small cape. I associate elves a lot
with capes and cloaks, so I want to draw one. And I saw this little poncho or this little cape
that is quite short. And I thought it would be
fun for a hivy character. So let's try doing something
like that. The buttons. There we go. And, of course, I'm going to draw a dress
for her, simple skirt. Maybe the dress goes all
the way to the bottom, so you can't really see feet. I think that would be nice. I'm trying to do
something similar to the dress we got over there, we have a little bit
more detail in here. This is it for my sketch. As you can see, very simple, I got just a few references there just to give me an idea. Now it's time to
clean up everything. This is a sketch I'm going to
leave it like this for now. If you want, you can go and sketch your own
Chiblf character. If you do, take your time and then you can see me
in the next video. Not if you prefer to leave everything to the end
for your assignment, then follow me to the
next video where we'll be cleaning up our character
and the linear. So I'll see you right there.
5. Line Art For Our Chibi Elf: Hello, and welcome back. We are back to our
ChVL character, and now we're going to
clean everything up, so we have a finished drawing. So what I'm going to do is I'm going to lower
the opacity of this layer and then add a new layer on top and
grab my pen Brush. There we go. Let me
check the brush size. Let's have a bit more. Yeah, maybe this is okay. And now we can start
drawing our cat. Basically, we're just
going to go over all those sketch
lines we did before, but leaving the lines
a bit more refined, cleaned and with that
final look, right? So I'm going to
start with the hair. Since it's in front of
the rest of the face, something like this, you
can't go wrong with alfis. There are many different
ways for you to draw them. So try different things if you want and see what
works best for you. Weg got the eyebrows. In my previous sketch show, I'm going to draw them now. There we go. Now, so
things go a bit quickly. This time around, I'm
going to copy and paste. I'm going to duplicate
this side of the face, flip it, and now move it to
the sub something like this. Let's merge these
two layers together. There we go. Now we can just
fix things here and there. As you can see, I'm just going over my lines, my previous line. This is also a good
time for you to fix anything or change anything that you feel could have a change. I'll do the same
on the other side. I'm not duplicating
this because I'm okay if they're not
exactly symmetrical. It's a hair accessory. If it's not symmetrical,
that's perfectly normal. So sometimes I like to have things going not so
perfect in my drawings. So the head is basically done. I'm going to leave the
blush as it is because I'm going to add a blush
when coloring, which we will do
in the next video. So for now, I'll just focus
on drawing all the lineup. Same thing here again, I'm going to just draw
half of it and then duplicate this part of the
cloak, so it's symmetrical. I addile here to the sleeve. Now I have always this idea
that Elves are very refined, right, so they do like to wear very refined things
with lots of details. So let's try to do that
bit something like this. Now I'm going to
select this side. There we go, and
now copy, paste it, Transform, flip horizontally, and move it to the other side. Doing this mostly
so you don't have to watch me take
forever with my Lenard. But I do advise you that
you do whole drawing, so it's a good
practice, you know? You can take these
kinds of shortcuts when you're more used to the
subjects you're drawing, but until then, I do suggest you draw every single thing
without going for shortcuts. Now, this skirt, let's first
or here, something similar. As you can see, I'm leaving
things very simple. I'm not adding too
much texture there. I could, but I don't
really want to be doing that because I like my shiv drawings to be
very simple, there we go. We're not finished. I forgot
the rest of the hair. Let's do that very quickly. Yes, there we go. Our line art is finished. So as you can see,
it is very simple. I did add a few details because I think en
character asks for that. But this is just one example. Again, it's good to
look at references, so you have a few ideas. You can draw braids, for example, instead
of the long hair. I don't know, there's a
lot of things you can do, so explore your drawings and
explore different ideas. For now, this is how I'm
going to leave my character. Again, take your
time, and I will see the next video where we'll be
coloring our Lf character. So I will see you right there.
6. Coloring Our Chibi Elf!: All right, here we
are once again, and this is the last stage of drawing our elf chevy character, which is adding some colors. So again, you can color your chevy character
however you want. For example, for me, I
do like the greens for an elf character or
maybe very light colors. We're going to go with
something like that, following our color scheme
here from our references. First thing I'm
going to do is hide the sketch layer so we can
properly see our character. I'll try to not forget about
the blush, very important. Now I'm going to add a
layer below my line art, and then I'm going to use the paint bucket to
fill everything. So we can go and let's
try here this green. Might be a bit too dark, so we can go over to our color wheel and
try different things. Something like this might work. I like it. So I'm going
to add this color to the dress and maybe a
light color. To this area. I'm adding the colors
very roughly right now. If I need to fix anything, I will do so later. For now, I just want to see
the color scheme and if it works in this light green
here to the sleeves as well. For the cloak,
let's see this one. Maybe a bit too dark again. Let's try something else. Maybe we're getting there. So as you can see,
I'm just looking at colors at the colors of my references and trying them
out if I don't like them. I change things up a
little bit, like this. Think I like this, pick this
color again for the buttons. There we go. Now hair. Do we want blonde
hair or dark hair? I guess we're going
to try both and see what we can even
try one side and then the other color
both sides and see what we like best with
the color scheme we have. I think the blonde could
work better in case here, so we're going to go
in that direction. I think things can change. You don't always need to
follow your first idea. Sometimes you add colors and then you might change your mind, and there's always space and time to change things
up. There we go. I want a lighter
blonde, I think. Yes, this is better.
I like this. For picking colors, it really depends I like to use
different methods. For example, in this
case, I decided to base my color scheme on
the references I have, but you can also look for some color palettes online
and see what you prefer, find a color palette that
you like, and use that, or you can just start coloring with whatever
you have in mind. That works too. For me, I mostly go following
the references I have or finding a
color palette online. That's the way I
enjoy the most doing. And looking for colors. But again, we all
work differently. So try different things,
see what you prefer. I also don't like to use a
lot of different colors. This is a personal preference, but it's something
that you can try as well and see what you like best. If you prefer to
use lots of colors, it can be a bit harder
to use lots of colors. So do pay attention to that. The browns might work
best for the cloak. See, as you can see,
I will not let myself be stuck with one color
pod or one color. Don't like it, I can
try something else. Everything is
possible to change. So if it happens, that's right. You don't need to be angry about it or frustrated about it. It's part of the fun. I'm just adding the small
details that we missed. Example here, as you can see, there are some bits of
white here and there. So I'm going with my brush
and fill in those spaces. Another thing you can do
is try color harmonies. For example, some colors will naturally work
well together. Example, the green, you can look for the complimentary colors of you choose the green
and then you will look for the complimentary
colors, stuff like that. Example, I'm not
sure about yeah, I'll have to change
the green now because I'm not
using it anymore, so let's go for the
green of our dress. There we go. Now, that works and everything
looks quite balanced. Green always goes
great with brown. As you can see, even
in these pictures, there's always a green
and the brown combined. If you're drawing a
forest or a wood elf, that's the kind of color
that can work very well. So all I'm missing is the blush. And I'm going to try
different colors for that. Going to add a new layer, so I have a bit more
freedom to try things out. I actually I really
like this color, but let's try just a little bit more ops, something like this. I think we can
have this. Now I'm going to duplicate this layer, transform, and flip horizontal and move it to the other side. There we go. I love it. So cute. So yeah, what I'd advise you is to maybe
choose 2-3 colors, and of course, you
can change the tones. For example, I have the yellow, but I use different
tons of yellow. Same thing for the green, right? I use different tones of green. So choose like two
or three colors, and then try to use those as a palette for your character. Try different tones
of each color and try to combine them. I think the easiest
way to go usually, if you're not too used
to color right now, and coloring characters in general is to not
overdo it with colors. So this is it. We have our Elf
character finished. I think she looks really cute. This is one way to go about it, so have fun with
your characters, be as creative as you want. And I will see you in
the next video where we'll draw another kind of
fantasy Shiv character.
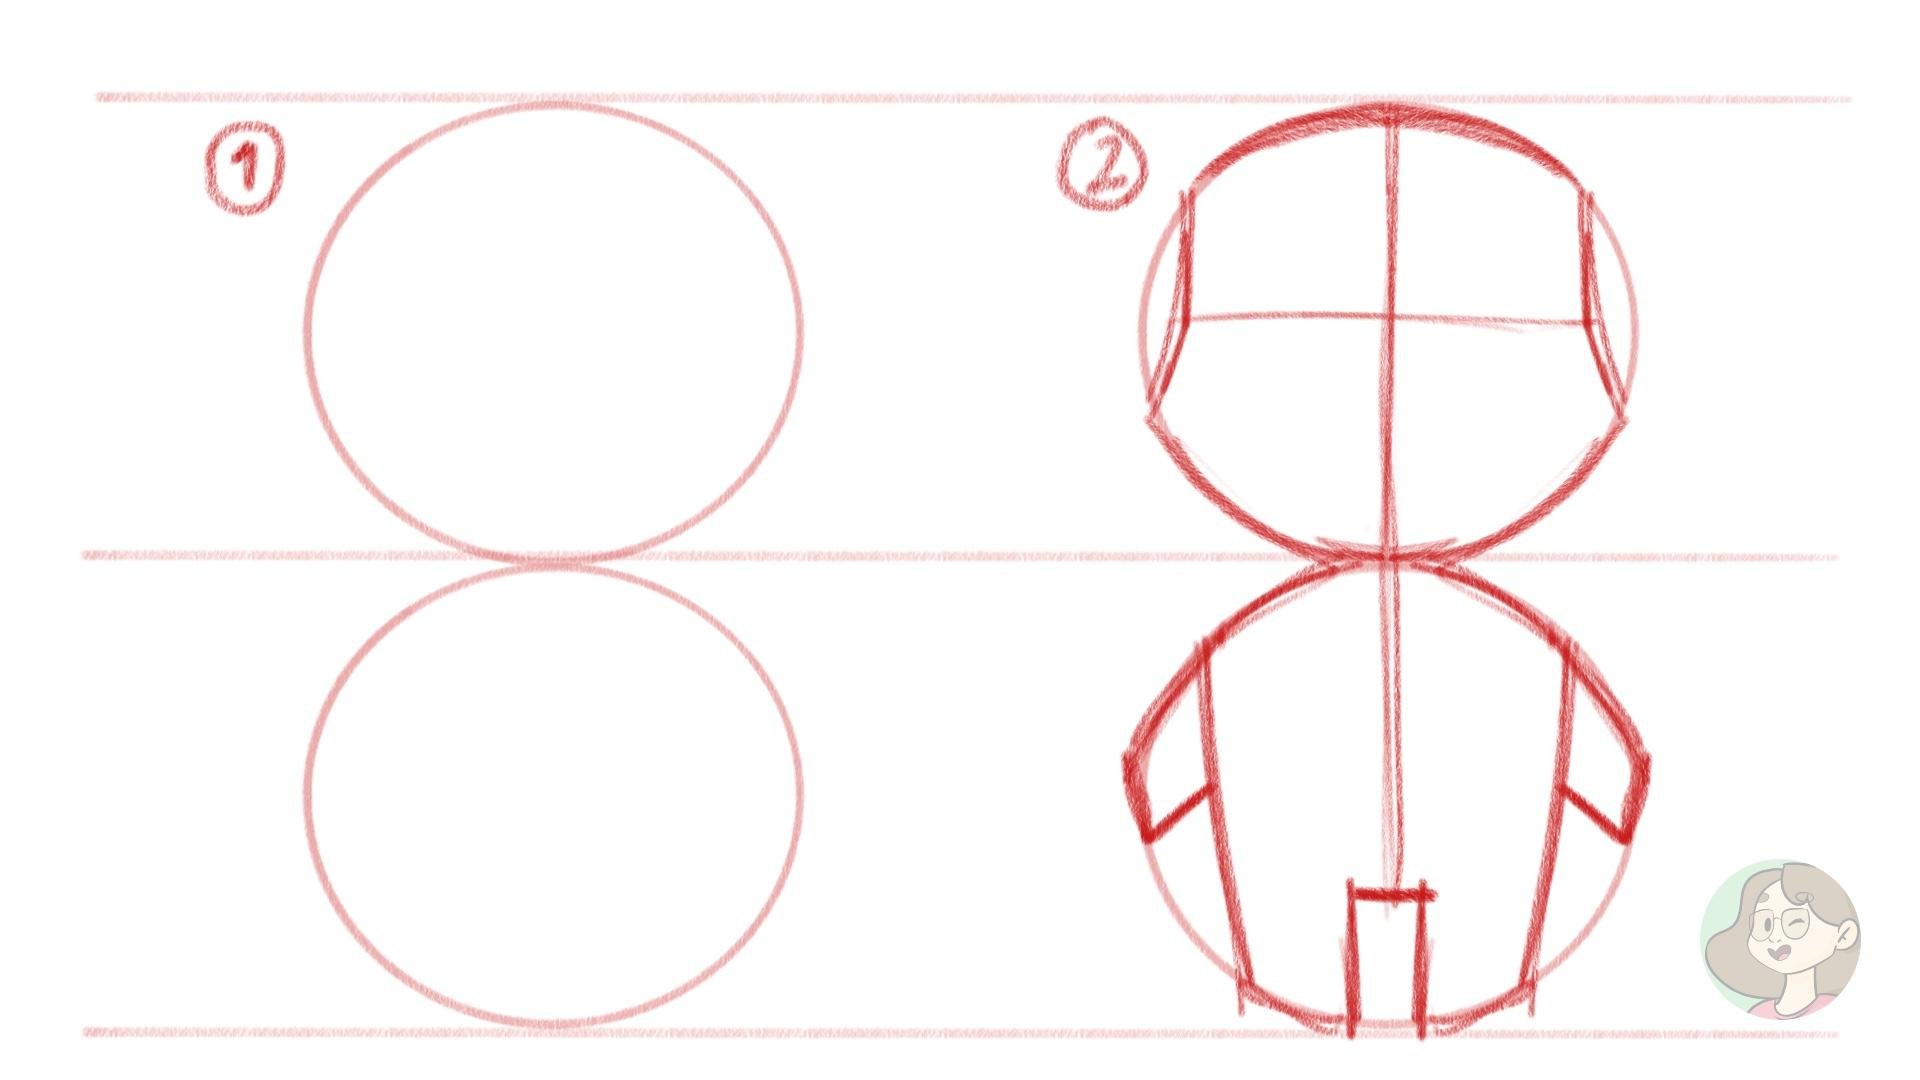
7. Sketching An Orc Character Step By Step: Hello, and welcome back. This time around, we're
going to draw a bit. It's an opposite character
that we did previously. We're going to draw
an or character. I have here my base drawing. Again, I left you a
template for this, download it and use it for your practices,
for your characters. And as you can see,
an art carrier for me is a bit more robust,
a bit more squared. We don't want to overdo
the square part, so these are the
shapes I'm going for. So first things first, I'm going to add some opacity here to my base proportions and
start drawing things. Once again, I'm going
to start with the head. So as you can see,
I'm running things up a bit more while keeping
the same kind of shape. For years, a lot of times or characters also
have pointy ears. I really like this kind where
they are pointing down. I think I'm going to use that for inspiration for
our characters here. Something like this, same
thing on the other side. Again, don't worry about
the drawing being perfect. It won't be perfect. It's fine. Going
to draw the eyes. It's smaller this time maybe. There we go. Let's not forget our eyebrows very
big. And hairy. Or characters are
always quite rough, and I do like that
quality about them, big, rough, and I think you
can do fun things with that. Right. Let's draw the nose this time around,
something like this. And now or mouth a bigger mouth. And I do like the
things that we see a lot in or carters like
this one over here. Of course, a lot
of times they have much more teeth or
many more teeth, and I like to keep things. Two things appearing here. There we go. Now as for hair, we could leave the
character bold, but we could also try
something different, like a small ponytail
like we have here. I think could work quite well. Move it a bit down. There we go. The ponytail, I think can work
something like this. I think we are done with our face and the head in general. Now let's move for our
outfit and I'm not too sure. I want to keep things simple. I like this idea of this
sash or skirt like thing. I think we're going to go with something like that, like this, and then we have a loin
cloth right there. Think this could work,
something like this. Tall boots maybe with
some hair like this. We have been character here. I don't think we can
see the we see a bit of boots here and there's also
a bit of hair in them. So I think that can work. Now, for the torso,
I'm not sure. Maybe some padrons could work. Just the prons with
some bits of hair or whatever it's called sticking out can work and
leave it like this. Folks aren't known for wearing
a lot of clothing, right? So I think this could work. And this allows us to
keep things simple, which is what we want.
This looks cute. It's simple and very orchish. So that's how we're
going to live things. So this is my sketch
of c. I think the main aspects of north character is probably
the mouth with the fans, trying to make
their features big like the nose and the eyebrows. So point years can work as well. I think most or characters will have one years and then simple, a bit crude, armor
and very simple. Keep things as
simple as possible, just like this
character over here. I think this looks very orgish and I'm really happy I
think it's still cute. He has a nice expression. He's a nice guy, and
I think it works. I think we can go for
the cleanup part. This is it for now. You can explore different
things from what I did. You can explore
different armors. For example, both
of these to have a bit more detailed
and complex armor. It all depends on the
story you have for your characters or the way you prefer to draw things
or create your designs. So feel free to explore
different things, and when you're done, you can follow me
to the next video where we'll be cleaning
up this sketch. I will see you right there.
8. Cleaning The Lines Of Our Fantasy Orc Chibi: Hello, and welcome back. Here we are in the
second stage of creating an arc character
and chibi arc character. And this time, I'm
going to clean up our sketch, just like before. So I'm going to lower the
opacity of my drawing, my sketch, add a new
vector layer on top. When you draw on a vector layer, you lose quality on your lines or wherever
you draw in that layer, you can transform it, make it bigger, scale
it up, scale it down. You can change it wherever
you want in that layer, and it won't lose quality. I think it's perfect for inart so you don't lose any quality
while changing things. Not all drawing
software have this, but clips to the paint does have the vector layer option and
I always use it for Linux. If that's something
that interests you and you think
you could use it, then don't forget to
use vector layers if your drawing software
has that option. Once again, I'm just going
to go over my lines. Let's just start of something. We can add a bit of here
missing to our character here just to add a bit more uniqueness to
our character there we go. All right. Now the big eyebrows, very big and hairy eyebrows. Once again, I'm going
to draw half of the face and duplicate the layer and then clip it horizontally to fast forward
things a little bit. There you go. Now merge the
two layers together again. There. Now we can
continue drawing. For example, I don't want this layer to be missing a
piece that's too symmetrical. Now we're missing them out here, making it a bit bigger
than we originally had. Again, this phase of inart is a good time for you to change anything you might
want to change. There we go. Now the hair. Let's move the head
a bit downwards. There we go. So we have space
for the small ponytail. I think this can
work. It's cute. Some dots for that
area of bold hair, where it's been shaved, but you see little bits
of hair already growing. Let's go for the body
now, the big pdrums. Again, I'm going
to draw one side, then duplicate it, so I have
everything symmetrical. Those bits of Animal
hair there we go. First we have to
select it or else duplicate the whole layer and that's not what
we want to do. Copy, paste it, then transform, and now, yes, move
it to the side. Now merge these two layers
together again and now I can draw the sash and line
coating like this. I was going to do this
ornament like a belt buckle. But I just thought of something else and
I really like it. This horseshoe, more or less that keeps the
sash holding together. Now we have the loin
cloth like this, very simple, but it works
and that's what we want. Do you want clothes? I don't think so. It doesn't make too much sense for
this character, I think. All we're missing is
the boots and the legs, the first part of the boots, and then the rest of
the boot, there we go. Now duplicate it, transform,
flip horizontally, and move it to the other side, and we have I think we are
done with our character. I think we're not
missing anything. Just merge everything together, fix whatever needs to be fixed. Like these lines over
here and this one, there we go, and this
is it, or character. I think it looks really
cute. It looks orchish. I like the accessories, they're not too much, not a lot of detail, but still very in character. This is it for now. Follow me to the next video where we'll be coloring our chevy character.
9. Coloring A Chibi Orc!: Hello, and welcome back. Here we are the final
stage of drawing our Chevy or character,
which is coloring. So once again, I'm going to
add my sketching layers. Now add a layer below my lines. There we go, and now
use the pink bucket. This is a very quick
way for you to color, which is using this option that a lot of other
drawing software has, which is refer other layers. So basically, you can be adding your colors in
an individual layer, layer specifically for colors while still painting inside
your lines, for example. So in this case, my
paint bucket will have my line art the layer above
into account when coloring. So this is a very quick way for you to color your drawings, and I really like to use it. Now, as for colors, for me, orcs are green. As you can see, we have here
different types of colors. These ones are a bit brownish, while this one is the green, and here is just really dark, maybe dark browns or
red here and there. And for me, it's green. But for you, you can
go with the brown, you can explore
different things, and even blues can work. There's really no rule here, so I say, have fun and
try different things. I'm going to look here for a
green that I like too dark. I want something that is
a bit low on saturation, has a bit of yellow
as you can see. I'm going for these greens
between the green and yellow. I think I like this green
bit similar to this one. It's also a yellowish green, and that's what I'm
going for right now. So the skin is done. Now, let's go for I could go with black for
the hair and the eyebrows. But if I do that, you end up not seeing these details on the
eyebrows and I don't want it. I want us to be able to see those because I
really like those. So we're going to
try dark brown. Again, I'm adding the colors
very roughly and etti. And I will fix
whatever needs fixing. Now, green goes
very well with red. I mean, you do see it here,
they're complimentary colors. They always go very
well together, so I'm going to use the red for most of the outfit
sash and the lawn coat. No, I don't want the
boots to be red. I think this is good. I think I can use
the exact same color as the hair for these areas. This way, I don't need
to add even more colors. I think this can
work. I like this. Now for the fur, and this ornament right here. I think that's always missing, maybe a lighter
brown, almost gray. Take a look like even. So as you can see, I'm
just experimenting, following the colors I already have and trying
different things. I think the secret is always
to explore different things. It's part of the fun of drawing. We don't need to stick with
the first idea we have. There's always a chance move things around,
try different things. Even if you're drawing
traditionally. If things are looking like there's nothing
to do to fix it, then we can always start
over again, and it's fine. Sometimes it's even
best to just start over than continue to be
frustrated with our drawing. All right, there we
go, or character. Now, do we want to add a
blush to him? We can try. I didn't have that idea in mind, but I don't know,
it could be fun. It can be a fun idea, and I think it can give
our org some more. Well, this is cute. I think it gives him a bit
more personality. Instead of the plush to
each side of the phase, I think I really like
something like this. It's cute. It's very cute. So there we go, a
shibby or character. I think it's looking very
cute. I really like him. And yeah, have fun with
your or hiby characters. Try different things. Or if you don't want to draw right
now, that's fine as well. You can leave it for the end when we talk
about your assignment. And whenever you're ready, follow me to the next video where we'll be drawing
our last hiv character, and it's going to
be very, very fun.
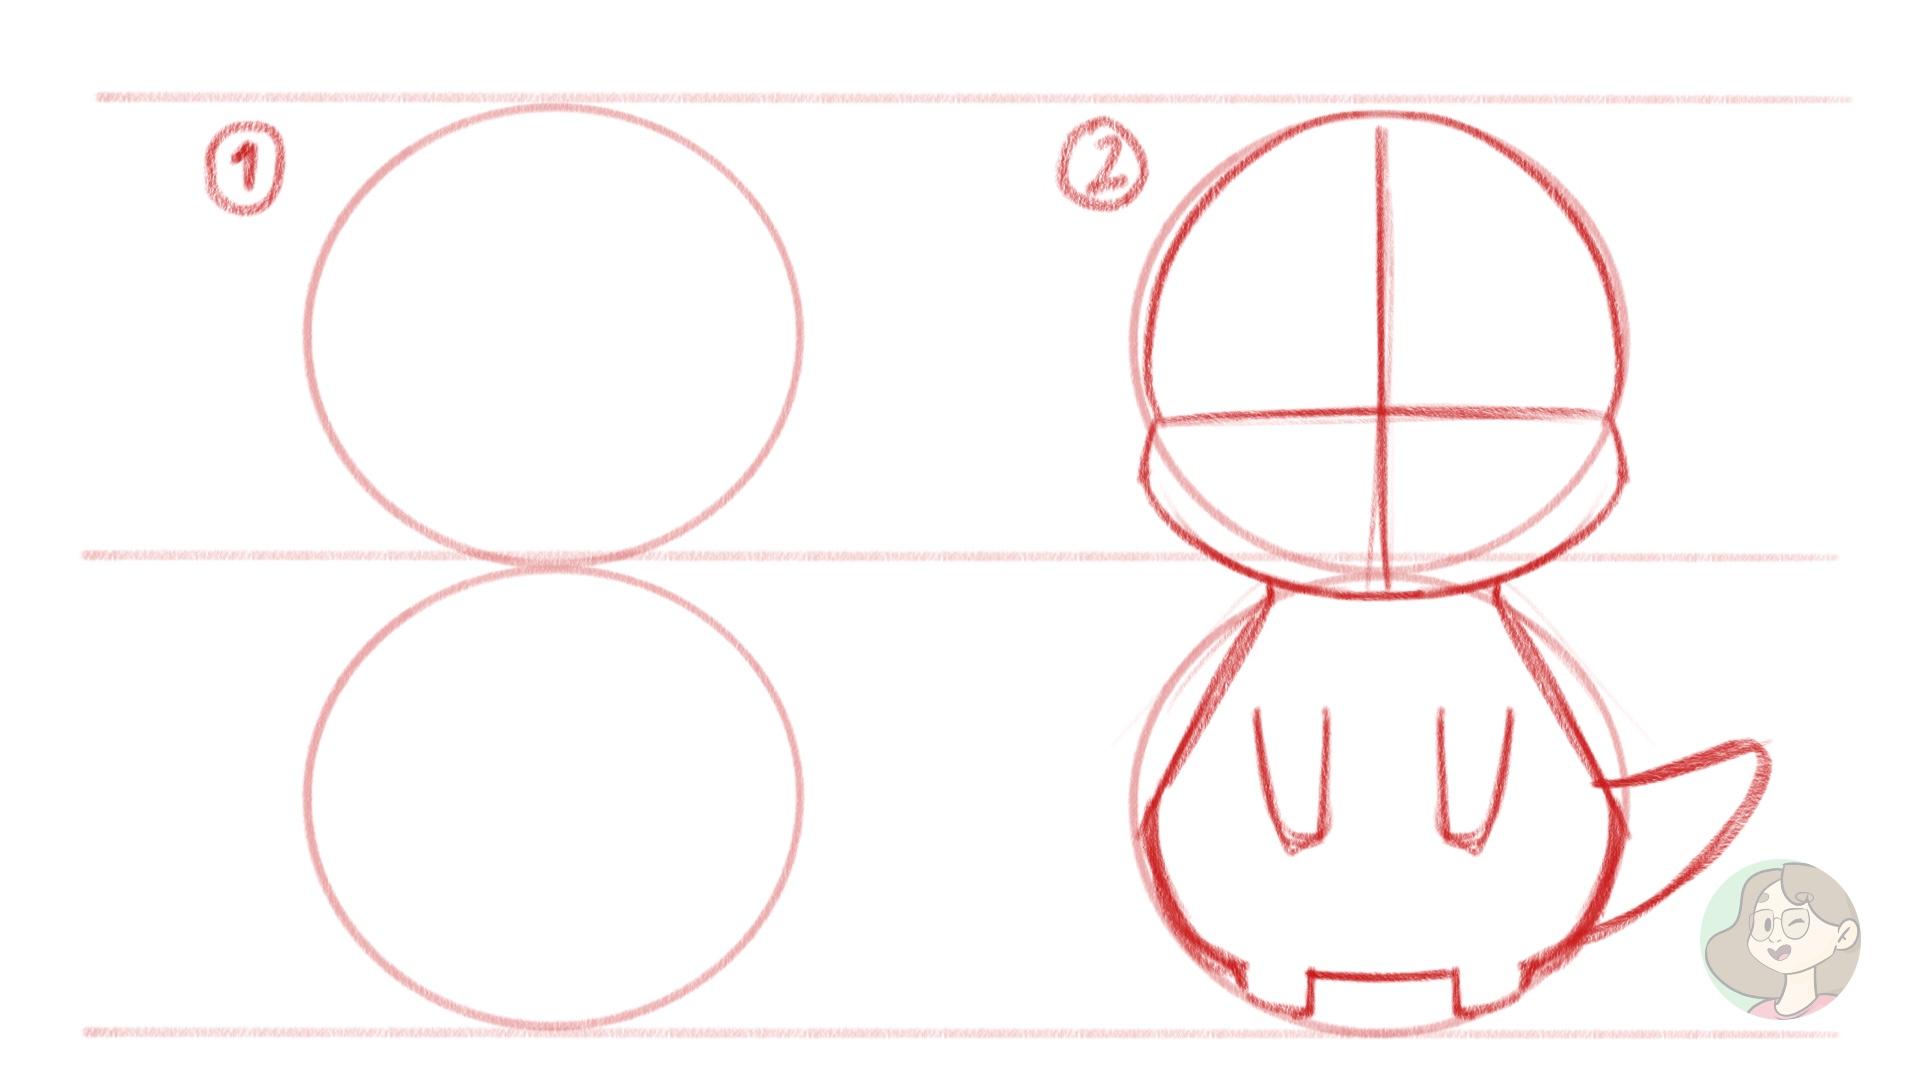
10. Fire And Wings! Sketching A Chibi Dragon: Hello, and welcome back. This is our last fantasy
Chevy character for now, and this one is going
to be a bit different, as you can see, but also
really, really cute, and I'm quite excited to create our dragon
Shiv character. So again, you can download this, so you can use it to
draw your own dragon. So feel free to do
that. And let's start. I'm going to grab
my pencil brush. Now, add some opacity
here to the base. So we can start adding
details to our character. We have here a few references. And as always, let's start
with the head, right? So I'm going to start
with the horns. These are a bit different from, I don't think I have the style
of horns in my references, but it's something
I really like. I really like the
style of horns, so that's what I'm going to use. And this way you have
a few more examples. Don't worry about too much your sketch if
it's looking good, if it's symmetrical, et cetera, et cetera, it's fine. It's a sketch, be messy with it. Going to draw
ellipses for the eyes instead of them being perfectly round like the ones
we did so far. Nose, a cute nose for the mouth, do you want something like this? Yeah, I think this is cute. The dragon version
of the cat mouth. For the cats, we have
something like this. For the dragons, we
have something similar, but a bit pointier
because they are banks, they are a bit more
dangerous than cats, but only two little bits
of wash over there. Then I think we can have
something like they have here. You see this stuff here to the side and I'm trying
to decide what I like. Can work, skewed round
and add some personality. Not sure if they're going
to be separated from the head like we see
in both of these, or if it's going to be everything
one shape like in here. Not sure yet, not for
the rest of the body, first of all, let's
do the belly part. Let's just keep the feet
simple like this or the tail, I thinking here,
the pointy bits, maybe a bit rounder, following here, the head, these details on the head can work some claws
on our hands. It looks good. I like him. Now I want tiny wings. Something like this,
very, very tiny. He has very tiny wings. Don't ask me how he
can fly with those, but he has tiny wings. Trying to see if I want
to add any kind of Well, actually, yes, I like this. We can add this. Some
more details to the head. Yeah, I think this looks good, so simple but cute. I don't think I want details
on my dragon's feet. I feel it's a bit too much. Try also something else for this area here also too
much. I think this is it. A cute sketch, keeping
things simple, using various elements
of our references. Also, this is a good
trick for you to use, and this is the reason
it's good to have more than one reference
for your character, is that you can pick different things from
each reference instead of just following one reference and you accidentally or
without thinking, you might end up just
copying what you're seeing. So this is it for my
sketch right now, and now you can follow me to the next video where once again, we're going to clean
up our character. With new and final lineup. I will see you right there.
11. LineArt For Our Chibi Dragon: Hello again and welcome back. It's time to clean
our character with final lines so we can
move on to coloring. You know how it goes by now, lowering the opacity
of my sketch, creating a new layer on top, and then grabbing my pinbh checking if I like the
size of the brush. This is good. Now once again, let's start drawing our dragon, our cute hibi dragon. Keeping the round lines, I'm going to draw
one side of it and then duplicate the layer, so everything looks
asymmetrical as possible. Now duplicating the layer, press out and then pull the
layer down and there we go. Now flip it horizontally, press shift, and move
it to the other side. There we go. Press Enter. Now let's merge our layers together and fix everything that needs fixing. There we go. Now connect here Alpha
like this. There we go. Now for the body, the dragon is the most symmetrical character
we've done so far. Again, I'm going to
do the same thing, trying just one size, one side, trying just one side, and then duplicate it and
drying the other side. There we go. Now let's
select the body only. Copy, paste it,
transform it and clip horizontally and move it to
the other side like this. There we select everything and merge our layers
together again. Now all we have to do
is finish our drawing. Don't forget the tail, and now the final details, same thing for the belly. The legs usually don't
have these areas. You can see you have the
belly connecting to the tail, but the legs are free from it. I'm putting up some
dividing lines over there and I'll
just I'm trying to decide if I want to keep it
simple like this one here, smooth and I think that's
what I'm going to do. But this is it for a
cute Chibi dragon. Looks so cute. I love him. All right. This is it. The line artist done, all we
are missing is the colors, which we'll be doing
in the next video. Whenever you're ready, follow
me to the next video and we'll add colors to our dragon. I will
see you right there.
12. Give Our Dragon Some Colors: Hello, and welcome back. So this is our last character and the last stage of
drawing our dragon Chevy. So once again, I'm going
to hide my sketch layers, and now a new layer
below my lines, and I'm going to
color my caratter. Now, for my dragon, I really like the red
like this one here. Greens are cute, but we use
a lot of green throughout this class with our elf and our c. So this time we're
going to use some red, maybe going more for the to
the pinkish side of red. I like this color.
It's really cute. Reddish with some pink and I
think it works really well. This is the darkest
part of our dragon, let's go for a lighter
color lighter than this. I like this. Bit pastel, can maybe add a bit more. No I like it. Yes, this
works. This works for me. Here we go. Now, the horns, I'm not too sure about
the color of the horns, but maybe whatever I choose
for the belly and the wings, which is going to probably we can use
the creams like here, why we have some beige. In this dragon, we have a bit of the same thing, some beige here. Maybe we'll try that. To yellow, I think, this is good. I think I like it. Should we Let me check this color again. Not too sure about
this what to do. We can keep it just
in the pinkish tones. Making a bit of a
monochromatic color palette like this. This can work. Yeah, I think I like
this. Our shapes here are very simple and we don't
have a whole lot of details, so it's very quick to color
our drawing here, or dragon. And it looks so cute. All we are missing
is our blush using the same dark pinkish
that we used before. There we go. Very cute dragon
or less shipy character. These are all the hippy
characters for now, and I hope you enjoyed it. Don't go away yet, follow
me to the next video where we'll be talking
about your assignment. Take your time and I will
see you right there.
13. Assignment - Practice Time!: Hello, and welcome back. We've gone through how to draw three different types of
fantasy hivy characters. Now it's your turn to draw
your own fantasy Shiv. You can use any of the templates
I gave you and then add different features to your
characters such as wings, horns, fears, and
unique costumes. It's all totally up to
you and your preferences. If you don't feel like creating an entirely new character,
that's fine as well. In that case, you can draw one of the characters
from the previous videos. Choose your favorite,
and draw it. Whether you draw
your own character or one of the ones we did here, everything counts as practice, and you learn and improve
on it. So have fun. And when you're finished, don't forget to show me your
character by posting them. I can't wait to see them. This is all for this video
and your assignment. Take your time, and I'll
see you in the next video.
14. Conclusion: Before You Go: Thank you so much for joining my class on drawing
fantasy Shiv characters. I hope you've enjoyed the
lessons and found them helpful in improving
your artistic skills. It's been a pleasure guiding
you through each step, and I'm excited to see how your adorable drawings
have evolved. If you've enjoyed this class
and found it valuable, I would greatly appreciate it if you could leave a review. Your feedback helps
me improve and helps other students find the right courses
for their needs. Also, if you'd like to see
more fantasy characters or have any suggestions for
the course, do let me know. Keep practicing, stay creative and remember, keep on drawing.
 Patricia Caldeira, Illustrator | Digital Artist | Designer