Transcripts
1. Introduction: This tutorial, you'll
learn how to draw this stone carved pentagonal
knot found in Turkey. I will teach you how to
construct a basic Pentagon grid using a compass and add the
lines to create this pattern. Then you will learn how
to give the ribbons thickness and weave
them on tracing paper. I will also demonstrate
how to transfer the design and outline it ready to
decorate in your chosen style. This class comes with step
by step visual instructions, making this pattern
accessible to anyone interested in
geometric art, enjoy
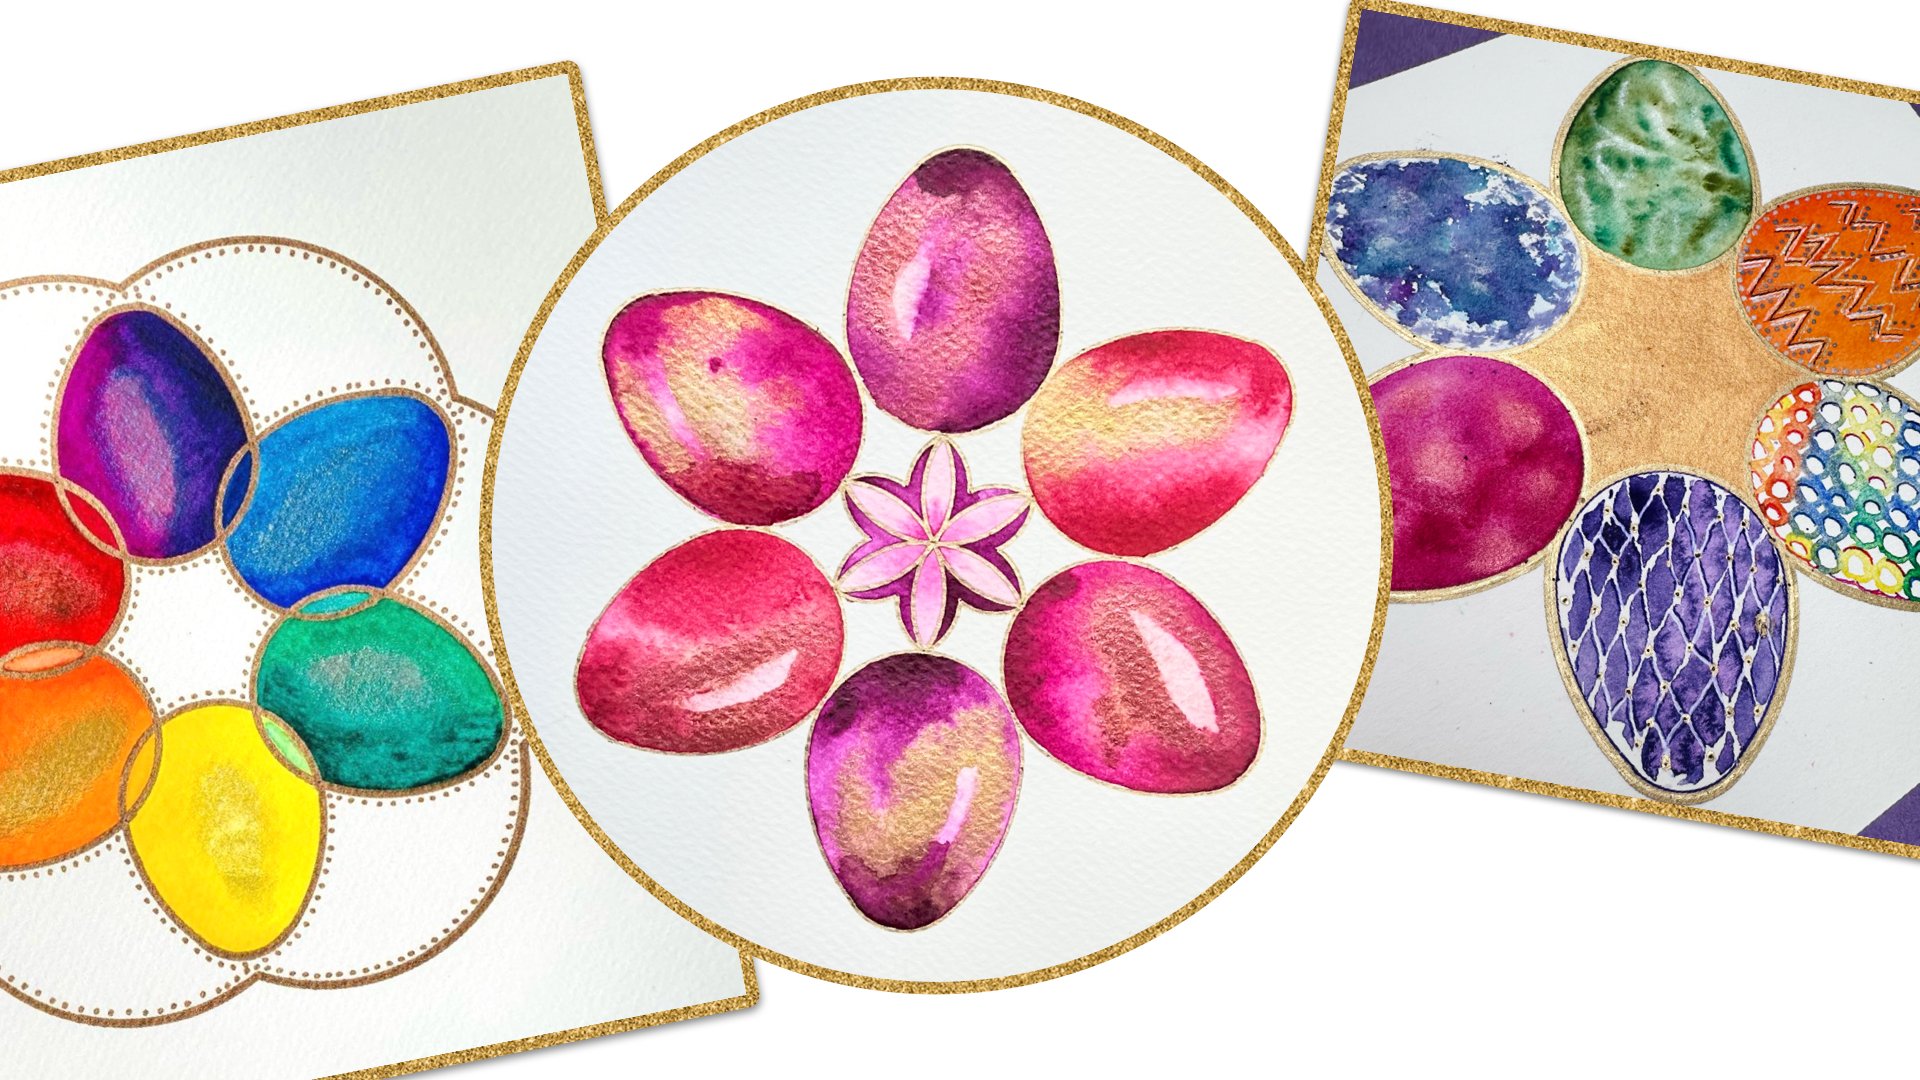
2. Project & Materials: This is what you're
going to learn to draw. This pentagonal knot that came from a stone
carving found in Turkey. This is the original
version with the circle around
it, and of course, there's an infinite knot
in the middle giving the pentagram and Pentagon and another one surrounding it. The same here only I omitted
the circle to see how it will look and then
emphasizing the star. Of course, you can take inspiration and do
it however you like. But this is the construction
you're going to learn. You're going to need a ruler. A pencil, an eraser, and most importantly,
a compass, ideally, with a pen attachment,
since you're going to have quite a few
arcs to draw as well, and I always recommend
using these. Any other pens, pencils or
decoration that you'd like, are used mainly
paint for this and some metallic pens to outline, of course, you can
use metallic pens or just some acrylic pens or
anything you like, really. You could even do
black and white and just emphasize the
three dimensions. You're also going to need
some thick tracing paper. Like this, which will
help us transfer the constructive pattern onto a different piece of
decorating paper. Of course, you're going to
need some watercolor paper if you choose to paint and any normal printing paper to construct on or card if
you prefer thicker paper. Good luck and let's get started.
3. Constructing the Pentagon Grid: Okay, then we're ready to begin. The first step, we're going to build our Pentagon based grid. We're going to start finding
a center of our page. If you're working on a
rectangular piece of paper, have it in a portrait
orientation like me. I'm going to use a
blue fine liner for my lines and a brown
one for my circles. It's up to you if you want to
do it with a thicker pen as well because later
on we're going to actually use tracing
paper to transfer. You might want to
work with pencil simply because you
can erase lines. If I make a mistake
now, I can't erase it. I'm working on an A
four, and for me, the center of the A four is 14.85 or just often use eight, 14.8 if that's easier and
I like to rotate my page. I have the same on
the other side. 14.85, I'm going to start
with a horizontal line from the two marks the shorter side of the A four is 21 centimeters. I'm going to mark
the center at 10.5. Now the sizing for this, we need to start with a
radius that is about half, slightly more than half
of the final design. If this is what we're
aiming for and we know how much space we have on the
same size piece of paper, we have about ten
on either side. You always want
to leave a bit of a gap, nine will take you here. It's a little bit
shorter than twice. I've used the
radius of 4.5 here. You can see it gives
you a bit of space. If you want to go five,
that should be okay, but it's quite
close to the edge. I'm going to stick with 4.5
and use my ruler to measure. The pin should be on 4.5 and the pen on zero
or the other way around, depending on how you're
holding it at the moment. Again, the exact value here isn't as important because it's all about the proportions that will just work from
the construction itself. We're going to begin with a circle starting
from the middle. And all the way around, you can repeat to
make sure it comes through nicely through
the tracing paper later. From here, we're going to make two marks on the right
hand side by using exactly the same radius and the intersection
of the circle we just drew with the
existing line in there. I'm just going to make a
mark of where it crosses the original circle above and
below the horizontal line, and I'm going to do exactly
the same on the other side. The initial step
essentially splits our circle into six equal arcs. Now with the same radius, I don't need to change
it at this point. From the two top marks, I'm going to draw two more arcs and I'm aiming to go above
the center and I'm aiming for those two to
cross because I need to draw a vertical line through where these two
arcs are going to cross. Just for extra accuracy, we could now combine these two, but we're going to add
another point below, I'm going to do
exactly the same. You could rotate the
page if that was easier. Make sure they cross. You can always go
back and extend these lines to make sure
they cross far enough. Through these two points, this one here and this one here, we're going to draw
our vertical axis and that vertical axis is now guaranteed to be at a right angle to the other
one that we've already got. You should feel that
lovely bump going through the center that we
already have used before. Next we're going to use these
two points and align them. That will find us half
of the original radius. If I align this point here
and this one here, together. I'm not going to
draw the whole line. I'm just going to
mark where that crosses my original
horizontal line, which is the radius of that. Now, if I have a look at the
distance from here to here, this should be half
of the radius we used at the start and
from here to here, of course, should be
the same distance. You can use both to measure. Now we're going
to pin this point here and we're going to now find a diagonal that goes from the top point to
this halfway point. This was here part of a square if we
completed it this way. But we're going to
go from half of one of the sides to
the top of the other. We're going to open our
compass to this exact length. If it's easier for
you to see it, you could of course
use my printed notes, but it is that diagonal here. You could draw it
for yourself first using your ruler and
align it this way. I just don't like to overwhelm the construction, if possible. For extra accuracy, the same
distance should be from here down to the other point. Maybe we could use it. This one looks a
little bit too wide. I'm a little bit closer to
the bottom than the top, so I'm going to shorten
it a little bit. You can gently dab your pen or pencil just to see
where it's going to land. I'm going to do the same
here. That's about. With that distance,
having measured it, I've only used this
to measure it. But what I actually need is
a mark on the opposite side. Basically, if I was
to draw circle here, it would go through that
point and the bottom point. I don't need the circle, I just needed to know where
it crosses this. Now notice this is right in
the middle, this is not. This is longer because
we use the diagonal, not just the side length. Ultimately, the
length we actually want for our five
circles that are going to go around creating a pentagon is that distance
from here to here. This is the radius
of the pentagon. I'm going to start from the top and measure that distance. Of course, that's a little
bit longer as it should be. Again, you might want to
just check that distance here is about maybe take the average if it feels
like it's not quite right because this is always a tricky one to get right,
but it doesn't matter. We can adjust it. This
is how we make pentagon. I think I'm going
to go with this. I'm tabbing gently here, it comes through there. Now with this length, I'm now committing to drawing
a full circle at the top, starting from the intersection
of the original circle. And all the way around. This is exactly correct. I just felt it go
through that bump here and that is because this is the precise radius we
wanted and it does go below here because this is a shorter
length, that's correct. Now, from the two intersections between the two circles
that we formed, we're going to draw two more circles with the same radius. Going to start
with this one here and hope that is correct. Now when I draw this circle, it should also go
through the top here. They should meet where
the intersection is. They gosh. Excellent. From there, because that
radius is the same, that is the same, that is the same to here
as well from there. Now from that point
as well, same radius. Again, it should go
through the top as it is here, full circle here. All the way around. Now what is very comforting that
should happen to you is also that these two
side circles will cross on the vertical line. Not too much either side. Of course, some
variation is normal. Now the scariest part here is that we've drawn
the three there. We've got two more, of course, to make the five equally spread. Now the question is, will the distance between
that point and that point match accurately all the other distances
we've just done so far? Because we should have
the same exact length. Let's try it. From
here will be the next. Circle and from here as well. The question is, does it go through the point we
want it to go through? If it doesn't, you can slightly
adjust your measurement. This is mine. I'm going with it. It goes through there, it should go through there.
I felt the bump. That was not too bad. Finally, all three
are meeting there. You just take your best spot
in between where all three meet what should happen now is this should go through both
neighboring intersections, this one and this one. Yes, like this. I felt it through here as well. This is our pentagonal
grid finished.
4. Adding Lines of Symmetry: We're going to need to draw some lines to create that
pentagonal symmetry. I'm going to take my other pen. For each of those
five points in turn, actually one's been
done for us already, we're going to draw an
axis that go through it. From this shape here, I'm
going to start top left. This big almond shape, mandla as the
Italians would say, I'm going to create from the
intersection at the top, through to the center, and it should also go through the smaller petal on the
opposite side of the circle. That's the center of
the opposite circle. Well, it lies on the original. The top intersection, middle and through to the petal
on the other side, which is the center
of that and extend. Make sure you extend
out of the design. We're going to move
on to the next petal. We're focusing on these big MandlasTp intersection
on the outside, through the center and then through the center of
the opposite circle, which is the tip of
that small petal. The nice extended line. Now, don't get confused
with this horizontal. That's just there. That's fine. We're just traveling
around as we were. This is the outer point, midpoint, and then
the center opposite. Here we go. And extend. My ruler sometimes
slides across the paper, so I have to be very careful
to pin it in the middle, so my weight is
distributed evenly. If I hold my ruler closer
to one end than the other, often it will wobble like that and it
creates me an issue. Going down, we've
already done this one, the vertical one
that went through the big petal and the
center and there. In fact, we drew the circles
afterwards and they very kindly crossed exactly where we needed them to. We know
we've done it right. Finally, this one
here at the bottom left center and the
center opposite. This is how we split
the entire page into five if you ignore
the horizontal line. Where is the pentagon we
actually want in our design? Well, it is this one. These are the extension of them. They look more like stars, pentagrams which
curve at the end. The main pentagon we wanted
is this one in the middle and that's the one with the
size we've been working with. Therefore, this is the size
on the inside that we want. All we're going to
do now is connect the five vertices,
it's pointing upwards, so starting here from
the top and follow the five petals on
the inner circle, one, two, three, four, five, but making sure
to extend the lines. We're going to do
the first one here. Make sure you go through
these two bumps, hold this nice and securely
so it doesn't slip and extend your line as far in both
directions as you can. Then I'm just going to
rotate my ruler from the second point
down to the next. There's the next two tips
of these inner petals. A line, hold steady, extend a big line. Then it's the bottom. You
can see how it's shaping up. Bottom two, there's always going to be one
that's horizontal. It will be parallel
to the original axis, extend, go through the
two points, rotate again. Now we are on the other side. You can see now the
symmetry of these two. Finally, this. We do have a pentagram inside, inside of our design. The way this works is connecting the other five points that lie on the circle that
we drew originally. They are crossed by the axis the diagonals that we
drew all way down here. They're all in the middle in between the ones
we already have. We're now going to
draw lines parallel. From here, we're going
to go down to here. This one's pointing down, not up, and it's going to
go parallel to this here. From there to
there, can you see? And this. Then we're
going to go from here to there from
here to there, that will be parallel to this. You could extend those lines. I just don't think
we need any further lines in the way later on. From here down to here, again, use the parallel
lines to help you. They are the edges of the
middle pentagon. Look at that. These two crossed exactly
on the axis as they should. That means we're doing
something right. Now, the two across,
they're the ones that will be parallel to the base. Again, it should go
through these two points where we've got two
lines crossing already. It's so nice when they are
crossing in the right place. Finally, these two, again, parallel to the outer edge, always use that to
help you through these two points where things
have already been crossing. This is the inner pentagram that points downwards
in the design, and we've drawn the
outer pentagon, that is the main base of the design and the
extension of these is what will lead to the
rest of those curves.
5. Thickening the Pentagons: Okay, it is time
now to think about how we thicken the
ribbons in order to be able to weave because weaving is a process of taking two dimensional
ribbons and creating that three dimensional
effect by erasing some lines and giving the illusion of one
going above the other. But at the moment, or
lines are one dimensional. We haven't given them
a thickness yet. In order to preserve the proportions of any
design we've drawn. We have to add equal
amounts of thickness on the inner and outer edge of it in order to create this. Basically, the lines we've
drawn are the ones we don't see that are right in the
middle of our pattern. We need to thicken everything the same distance either side. All we need to do
now is roughly fine halfway through this and
then thicken that outwards, thicken that inwards,
that will be about half. At this point, I
will just say here, don't worry too much about it. We're just going to take roughly what half we think it is. If we measure that distance
from here to here, I'm getting about 8
millimeters or something even. That's good. Mine is a
little bit longer, actually, 8.5, but I'll try and find
the center at about four. That's my center here. I want the same distance on the other side at the
top of that point, the same distance
below as above. All we're going to do
now is to ensure that halfway point is transferred elsewhere in the whole design. We're just going to draw a full circle with
that distance. We're going to find a distance that we
feel is about halfway. Maybe a bit higher. Just try it a little bit
between these two. Once we're happy with
that, we're just going to draw and I'm going
red here because I'm going to be using
that underneath the tracing paper and I want it to really stand out and it's going
to show us this. What is that done now
is that this point, where the red circle is is
shown us about halfway between these two and so
it's here, here. Here and so on, at all the intersections that
we're going to need later. With the same distance, we're now going to enlarge the circle to find
the other side of it. It's about here.
Again, try it to see if you visually
think that is the same as that to me,
looks a bit too big. Yeah, I think
that's about right. Make another circle
and that should be about the same distance on both sides of the original
circle that we drew there. The outer points of that
same distance will be here. This ribbon here is going to
get thickened by that much on that side and the
same on the other side. Now I'm going to take a piece of board that I know I can
move around on my surface. I'm going to secure
my original design on that by using duct tape
or masking tape on top, I'm going to lay my
piece of tracing paper. Now, for this part, I'm
going to use a pencil. Let's begin with
the pentagon part, we're going to do
the inner parts of the ribbons of
that pentagon part, of course, by extending,
but we're going to focus on the one
that points upwards. So there's the red
circle on the inside, and we're going to
draw parallel to the blue lines of the
original pentagon, but on the inside of that. There's one of the
sides of the pentagon, but I'm going to align the two
points that are just below that lie on the red circle
where that crosses the axis. Again, I'm going to
extend as far as I can. I want to make sure pencil is
nice and sharp and do that. I'm just going to rotate to the next line of the Pentagon. The point I've just
used and the next one down on the
same inner circle. Of course, always
draw it in a way that you don't block
the original line because we are trying to be as accurate and parallel
as possible. That helps you align
adjust if you need to. Nice, sharp line. Turn down. This is the next one, gain
through these two points. See, for me, this part looks
a bit wider than the top, so I can slightly
adjust my ruler. Go for it. Turn over to the
bottom, be careful here. I will rotate this because I don't want to block my
view and get this wrong. If I did it from that side, I can't really see whether
I'm doing the parallel okay. We're doing it this way. I can see how well
it's aligning. Next, we're ready to go on the outer side of this
about the same distance. We're going to use
the outer red circle. Now, I don't block the
lines I've already made. I'm going to start at the bottom here rather
than at the top. I can see the original blue
line underneath and I can see the inwards thickened
ribbon as well. I'm going to use points on
the outer edge of the circle. And the corresponding
lines they're crossing and making sure that my
lines are roughly parallel and extend outside. Going to rotate and continue in the same way
until I've done all five. What we're going to do now
is do the other five lines, but without crossing
through the middle, so it doesn't get too crowded. What I mean by this
is every point in between the five that
we've already drawn, we're going to do the same
thing. Let's start from here. You need to ignore
these lines here now, the outer line of the
previous pentagon, and just focus on the red
circle and the point that it touches the axis and join
that with the next one. Just going to draw outwards from the point outwards from
the point outwards, but that way we're
skipping the inside. Notice how we don't quite
reach to the bottom of there, even though it's not
an issue if you do. I'm going to rotate and I'm going to find the
point I just used, the last point we've used with the next one on the
inner red circle. But jumping over the
edge of the Pentagon, going outwards in
both directions. Rotate. Now this other star
is being done, that's the one on the outside. We're going to do the same on the outer edge of
the red circle. I'm going to start with this
line here on that side. This is the inner
side of the circle. Now we're going to go
to the outer side of the circle using
these two points. Outer circle, s two axes and make sure it
runs parallel to the inner part of
the ribbon and again only extend outwards. S.
6. Thickening the Pentagram: Let's thicken the
inner pentagram. To do that, we're going to do the inner lines first and
for the very inner lines, we're going to use the inner
ribbon of the pentagon. Starting top left,
this is the middle of the inner edge of the Pentagon and where it crosses one of the
original axes. Skip to the next
one, and we're using the inner point and the next one and the next one
and the last one. These are the five
points we're going to now join together and we don't need to extend any
further than where they are. We're going to start
here and join these two, top left, bottom
middle, just like this. Then I'm going to turn
from bottom middle to the top right that
runs parallel to here. That gives the desired
thickness going inwards. Turn that way down
to the bottom left. Again, same thick as. From here, go across.
Now here is a little bit harder to see because
we're blocking our view. You can turn around if you
want to wish to see it. I'm just going to go
for. And finally, complete the star on the inside. Put clues how our
lines should be going through these
intersections as well. Now, to find the outer
edge of the pentagram, this is a little bit different and it's a circle that
we haven't drawn yet. It's also the circle
we need to locate all the centers of these curves that we're going to
need in the next part. I love it when we
get to a step that unlocks the next several steps
all at once efficiently. We couldn't find that
circle though until we just thickened those existing
ribbons from the pentagon. Where all the inner corners
of the pentagons meet? This is how far we
need to get to. This point here, for example, here, here, and so on. Using those centers we just did, I'm going to actually
draw a circle underneath, you should be able to see
on your own paper where you marked that cross section. This is where the next circle from the
center needs to be. That extends exactly to the centers of the little curves we'll
be doing at the end. Check it all. Nice and a nice definitive circle here because that will
help us go back to here. So you can see how
that last red circle goes all the way up to there. Now that means we can finish thickening the ribbons.
Now, see what I mean. This is the inner side
of that ribbon and we are now going to use the
outer circle we just drew underneath to
align it and that gives us the same thickness
on the other side. We actually don't need to
go all the way to there. We only really need the ribbon
to go within the Pentagon. That might be a good
idea now if I delete it. I delete this outer part here, it doesn't go beyond that edge. I'm actually going to
delete that because again, this is the bit we'd like to transfer as neatly as possible. I'm going to just align
these outer corners, but I'm not going to draw outside of the inner
pentagon edges. Let's try that.
For the next one. I'm going to rotate
the paper this way because I'd like
to do this one. I'm aligning my ruler using the outer red circle points
alongside the pentagram edge. Same thickness on the other
side. I'm only going to draw. I'm going to identify
where the edges of my pentagon ends and on the other side as
well and stop there. Rotate and finish all five
using those outer red. Marks. This is the full
Pentagon now thickened, it merges into these edges and we've got all the other
straight lines thickened. Don't worry about some of
the overlaps just yet.
7. Thickening the Curves: Okay. We're now ready
to start drawing the ten circular arcs around
the edge to complete it. Now at this point you might
want to have re sharpened your pencil and we're going to need the
compasses for that. The good news is that that outer red circle
that we already drew underneath and used as a guide for our pentagram is where all arcs are
going to lie on. Let me start at the top. Outermost circle. This will be the
center of the arc where every radial line
crosses that circle. Now the question is
how far do we go out? We do at the inc
nearest intersection between the inner corner
of the line coming out. This is the outside
of the pentagon, which becomes inner
on that side of it, and the inner side of
the other pentagon. This is it here. Of course, let's just check it, but it
should be the same distance. For all of those arcs. If it looks like they're a bit wide, you can adjust each time. I'm going to start
here and just do an arc from the inner corner to the next nearest in the
corner and stop there. I'm going to rotate
and do the next one. Again, recheck that it
reaches far enough that it's central enough in between the two points if you
need to, there you go. You can start seeing it. We have to repeat this on all ten. They're all exactly the same. The differences are in between, but not on the outside,
so just repeat for all. This is now the inner
arcs completed. The outer arcs are
all coming out of exactly the same centers,
but different radius, you can guess it, they
will meet on the middle of each of the arcs where they
reached as far as this. Let's just do the top one. I should be something like that. We should continue doing
that for all the rest. The outer arcs are now
the same. I'm done. The final circle we're going to need to do here is to complete the look of this as if it's a medallion with a
circle on the outside. We're going to need two points. The inner point of the
outer circle is, of course, going to be a point that touches the edge of any of the
curves we've done, for example, this one here, here, just pick anyone you want. You should just brush on the outside of all
of those arcs. The question is how
to find how far out our circle is going to go in order to have the same distance? Well, if you see some of
the original brown circles underneath the ones from
the five fold design, where they cross the inner
lines of the Pentagon, here and here, this
is the distance. We need to extend that
circle by in order to have the same width. On the other side, I'll show you two other points
you could use. There this is where one of the five fold circles underneath crosses the inner
side of the pentagon. There's another one and it
should look about the same. Do a full circle? This is
the entire tracing done.
8. Weaving the Ribbons: For this part, we are ready to prepare our paper to transfer. I'm going to take this
off just for a moment. I'm going to use the same paper that we've already used
for our original grid. That sometimes happens where it actually strips
some of my paper, be careful when
you rip yours off. I'm just going to
turn this over. I just need a bit of
white space to be able to see what we've actually
built on the tracing paper. I'm just going to flip that back to show you what we have. Now we can see what we
have. We don't even need to be secure down, but we will be. The great news about
this now is that we have all the correct lines
and the weaving just requires erasing
some little arcs of this in order to make it appear like it
goes in and out. Of course, the tracing
paper is perfect for that. It's smooth and pencil marks
come out really easily. If we get rid of the wrong one, we can easily add it and rectify it before any of
the transferring happens. I'm going to start
with inner pentagram. The first thing I want to
do is erase the marks which make the pentagram sites
join into the pentagon. There's the pentagram
edges and then they should just blend into
the side of the pentagon. These two here, these two, these two, these two. That already feels like
one continuous loop. Now, to make this, we're
going to start with making sure this ribbon,
as it goes down, it goes over the one below for it to look
like it goes over, we're just going to erase the two marks within the ribbon as we go
in that direction. It's one continuous line. It's the one underneath
that is broken into two. Once we've gone over
in the first part, the second part
needs to go under. By saying under, it means we're going to delete
the other way. It's usually if you first
delete it vertically, you next delete horizontally. That is the rule. If that continued, you just go that way. If you delete down, delete
across, and that's it. Now I'm going to
rotate and I want to recreate exactly the
same thing on this bit. However, as you can see, by deleting the previous one,
we've already done that. Delete down, the next
one, delete across. The ribbon is going over and then under and by doing that, we have now made the next one
over under by going across. Rotate, we've already gone over. I'm going to go under. Rotate,
we've already gone over, and we've already
gone under complete. You can either do
one full ribbon at the time and then rotate or just do one part of the knot, then rotate and repeat and
then it will be complete. Our knot is completed and it's blended in
with the pentagon. Now we need to look
at the outer curves because they're a bit easier
to do than the middle. We're going to do
the outer curves first because they are
the same at every curve. At every curve, we're going
to go over on the left. I want this part to
go over this part, meaning everything inside
it, I want to delete. There. Make a clean path there. If your arc disappears a little bit, you
can just repeat it. This part here I'm happy with. Now I'm going to keep exactly
the same orientation and do this nine more times.
This is this curve. I want to go over here.
Nothing in my way. I've got a line and two
little side segments to do. To let's a clear path. Repeat. Next and just for clarity, I'm going to delete this
little line here because it's inside the ribbon
and we don't need it. It's not actually
part of the weaving. This is already
going under here, but it's just cleaning
up that part. I'm just going to go ahead
and delete all of them. The final and possibly
trickiest part will be to weave this part here. We need to make
sure it alternates. For example, on
this ribbon here, this is going underneath
that one underneath. Here it needs to go above
that means deleting down. Because essentially, if
you go down the ribbon, we've gone across, now down. Now here we're just
going to blend these in because we want that to
be one continuous line. This is not weave. These are just one continuous line
that splits into four, under this has to go under, you go across and then that already has gone
over by skipping here. In other words, when we
look at the pentagon, we start at the top with this was a vertical delete going
down over, then horizontal. Rotate, vertical,
which we've now done, merge these two,
then horizontal. Rotate, that's the
vertical we've done, merge these two, sideways and finish off the
five sides this way. This is the entire knot weaved. Of course, there's no lines
that we need through here, but I'm not going
to delete them. We're just going to transfer the circle that we want at the end. This is it. Now this
is ready to go and be transferred on a
different piece of paper on which you
intend to decorate it.
9. Transferring the Pattern: Because I'm going to
want to paint this, I'm going to transfer it onto my 300 GSM watercolor paper. Now, the pencil marks are
still facing upwards. I'm going to take this
off and make sure I flip it in a way that it's going to touch the bottom
of the paper. The shiny part of the
pencil will face down. I haven't found the
center of my page. I'm just going to
use this as guide by eye and roughly top and bottom. It doesn't really matter to me, transferring it onto there. Now, we could go over all of these lines individually and
it will take a long time, but we will get a
nice crisp edge. What is worth trying is to
use a spoon or something with a sharp metal edge and press hard on each of
the lines to transfer. We're going to do
that first because it's by far the
fastest way to do it. I'm going to start
from the middle. Let's see how it's come
out. Now, sometimes it doesn't matter
how hard you press. It comes out quite faint. Hopefully, you can see it
better on your own page. This is going to vary with the thickness of the tracing
paper and of course, the softness of the pencil. If it doesn't come out, all
we have to do is just go over with the compass
and sharp edge. In fact, you might
want to change. Your pencil with something even sharper, but this
should do the trick. If you just repeat all the lines because the pressing down in a specific area will
force the pencil to come out more defined. Let's have a look at those four compared to the other ones. You can see these much clearer
than the neighboring ones. I'm going to complete
that. You could complete that on
the tracing paper, or if you can see
the lines here, you could just re outline
directly on here.
10. Outlining the Knot: Okay, I have re outlined the pencil marks to make them a bit sharper on
my watercolor paper. I can see them as long as you
can see your own as well. Now you can outline the
pattern ready for painting. That means you either need
a waterproof fine liner of any thickness that you might want to paint over or within. Or a metallic pen or paint. Now, if you're going to use
metallic paint by hand, I would do that at the very end to make sure the
Shima stays on top. However, I'm using a paint
based metallic marker, which is waterproof. What that's going to do is
push away the water from the edges or preserve each of
the little areas together. I'm going to go to
outline before I paint. I'm going to start with my arcs because if my arcs
are slightly off, it's easier to align the edges of each arc with
a straight line later on, even if the line is
slightly wobbly. It's a good idea to adjust the lines later
after the circles. I'm just going to repeat
those all the way around, try not to go too far
from where each two arcs meet because the rest will
be joined by straight line. Just repeat all the way around. In the same way now, I'm
going to adjust my radius to the inner part of the circles
and repeat those as well. Now, give it a few moments to dry so that the pen
doesn't smudge. Then once you're
ready to start again, what we're going to do
is flip the ruler over. It's really important
that you're not using a ruler that is completely
equally flat on both sides. Nowadays, most
rulers are not flat. They will have not a rectangular but more
retropezium cross section, meaning that on one side, the edge of the
ruler isn't going to directly be touching the paper. Let me show you what I
mean. I put it this way and then tilt it. That way. Of course, that's a
little bit dangerous, but it's showing
you that it's not touching that meaning
you're not going to ruin your ruler and ruin the actual design
by smudging it. I'm going to start here
because I like to be able to see mostly what's on the
right or my dominant side. Also, I like to start with the left hand
side of each ribbon. The reason why is because I can see on the right where to stop, where I can continue,
where I need to skip, and so on. It helps
me with the weave. Now, when I use my pen, I'm going to be holding it
directly down, not like this, but down because I
want to ensure that my pen ink does not
touch my ruler, but it touches just
below on the paper. Let's see what we have here. We have one continuous line, stop here, then one short line. This is helping me remember where I need to lift my pen off. I'm now going to use these
two points to align my ruler. This is what I meant
earlier that if our circles are in place, then our line can just connect the points and it doesn't matter what the line
underneath was. I'm going to hold it like this. It's blocking the view a bit, but it's important that
you're holding it as vertical as possible at
right angles to the paper. And glide to release the ink, jump over here, and then go
to the next circle there. I joined here. It started a bit
thin on that end. It wasn't quite ready
when I started. I'm going to rotate Now, because I'm using the
opposite side of the ruler, there's very little touching between the ruler and the paper, so it's very unlikely to smudge. At some point we're going
to have to overlap. I'm going to do this one,
bearing in mind here, I have to jump, but this one is quite easy to see and remember. I'm aligning the ruler with these two points that are
now dry on the outer side of the circles and I'm only going two short lines
parallel to this, stop, and just on
the other side. Vertically, and here
vertically until it joins. This one goes a little bit
longer because it joins all the way up to the circle
because this one goes over. I'll just repeat
this one because the ink has come out a
little thinner there. That's a nice seamless
joint there. Rotate again. This time we'll have
the other type, the really long line, small jump, short line, line using the outer circles. Who vertically and go slowly to make sure
ink comes out evenly, all the way to the
next ribbon, stop, jump over, and all the way to the circle and make
sure this joins nicely. I'll repeat this one. It's come out a little bit thinner again. Rotate. This is the two
short edges. Again, a line. If you're worried, this will smudge give it a few seconds, focus on the two outer points. Hold down into shorter edges. Stop here. This one
is the one that's a little bit longer until
it joins the arc. This one joins the arc,
which this one was shorter and complete the
same way all the way around. Oh Again, give you a
few moments to try out. This time we're going
to do the inner parts of the same ribbons that we did. Outer ribbons, but inner lines, I like to see the lines we've
already done on my right. I'm going to start working from within even though I'm
overlapping the rest. I can see now that I've
got this part to here, jump over, then two short parts. This is an obvious here, but I must remember that the inner one stops and then it goes
all the way to the end. From here, I know it
stops to the next line. From here, it stops
until the middle ribbon. There's a gap, and then
the second ribbon goes. Over here. This is what we're
looking for now, this one's slightly too thin, I'm going to repeat it.
This is what we want. I'm going to rotate now. Now the next type are the two shorter types
where here it goes from the circle to the corner and from here only to the
corner to the next line. Look at your parallels. This is the one that goes all
the way to the corner. This is the one that
stops at the next rhythm. This one stopped to the ribbon. This one went to the corner, rotate and back to
the previous one. This goes to the ribbon,
then a short segment, then to the next ribbon. Align with these two points where you see any
crossing oververs. Now, for me, it's slightly hard because I now have a bit of
a shadow from the ruler, so I have to be very careful. I don't think that's
where the pen edge is, but instead, that's my shadow. I have to be careful
depending on your light. Okay. So this, stop over. This one looks a little
messy for some reason. Jump over and to the next. Then we've got the
two shorter ones. This one goes over
and joins this. This one is the slightly
shorter one that stops before the previous ribbon.
So that goes over. That stops and the ribbon. That stopped here
that one went over. Some of mine because obviously this pen is slightly thicker, it's actually touching the edges of the pentagon, that's fine. I'm just going to complete the
rest of those inner edges. I made a mistake here on
the very last one, typical. Now we're going to do the outer part of
the inner pentagram. I'm going to put my ruler
here and I know I need a longer edge and then
a shorter edge and I'm going to align
these two corners. I love how these
rhombuses are emphasized. There's some of my
favorites in this pattern. Now I'm just going to go
on the inner corner of these five lines again
this time on the left. This time I have a short
and then a long edge. The final step now would be to outline the two circles
on the outside, just like we did here and you
can see it on the tracing, of course, it's still there and you could see
some marks on here. However, I am taking
the artistic decision that in my second go
at the same pattern, I'd like to decorate
it differently and emphasize the beauty of
those waves on the outside. I am going to leave it
like this and show you two different ways once
we're back to decorate.
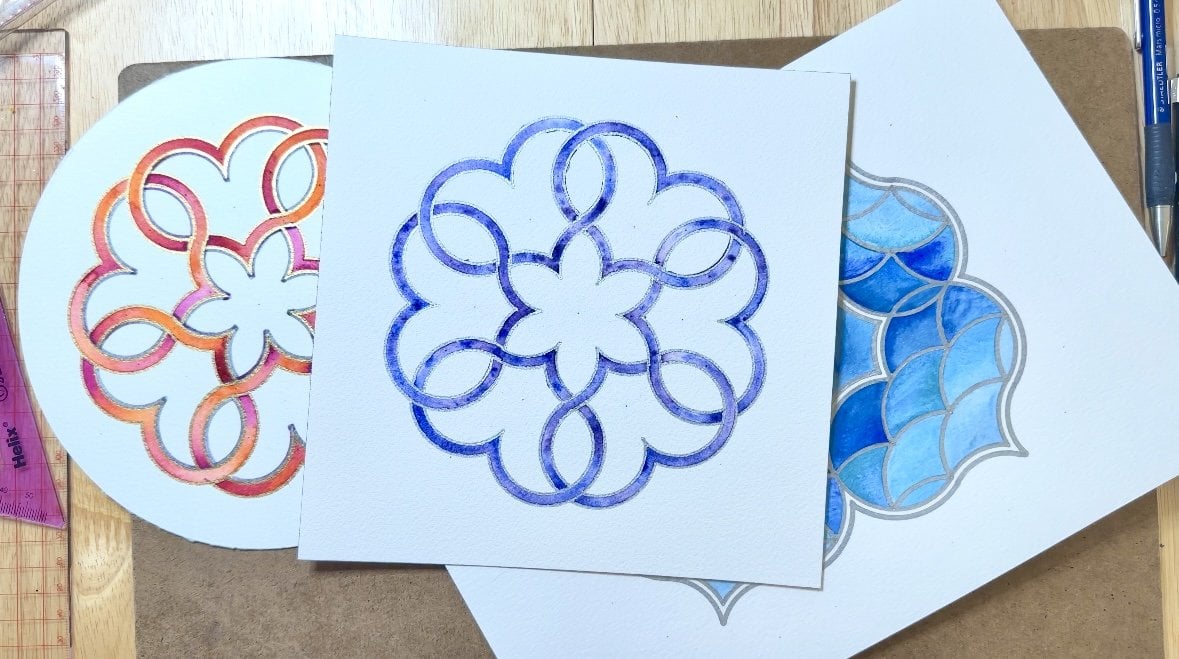
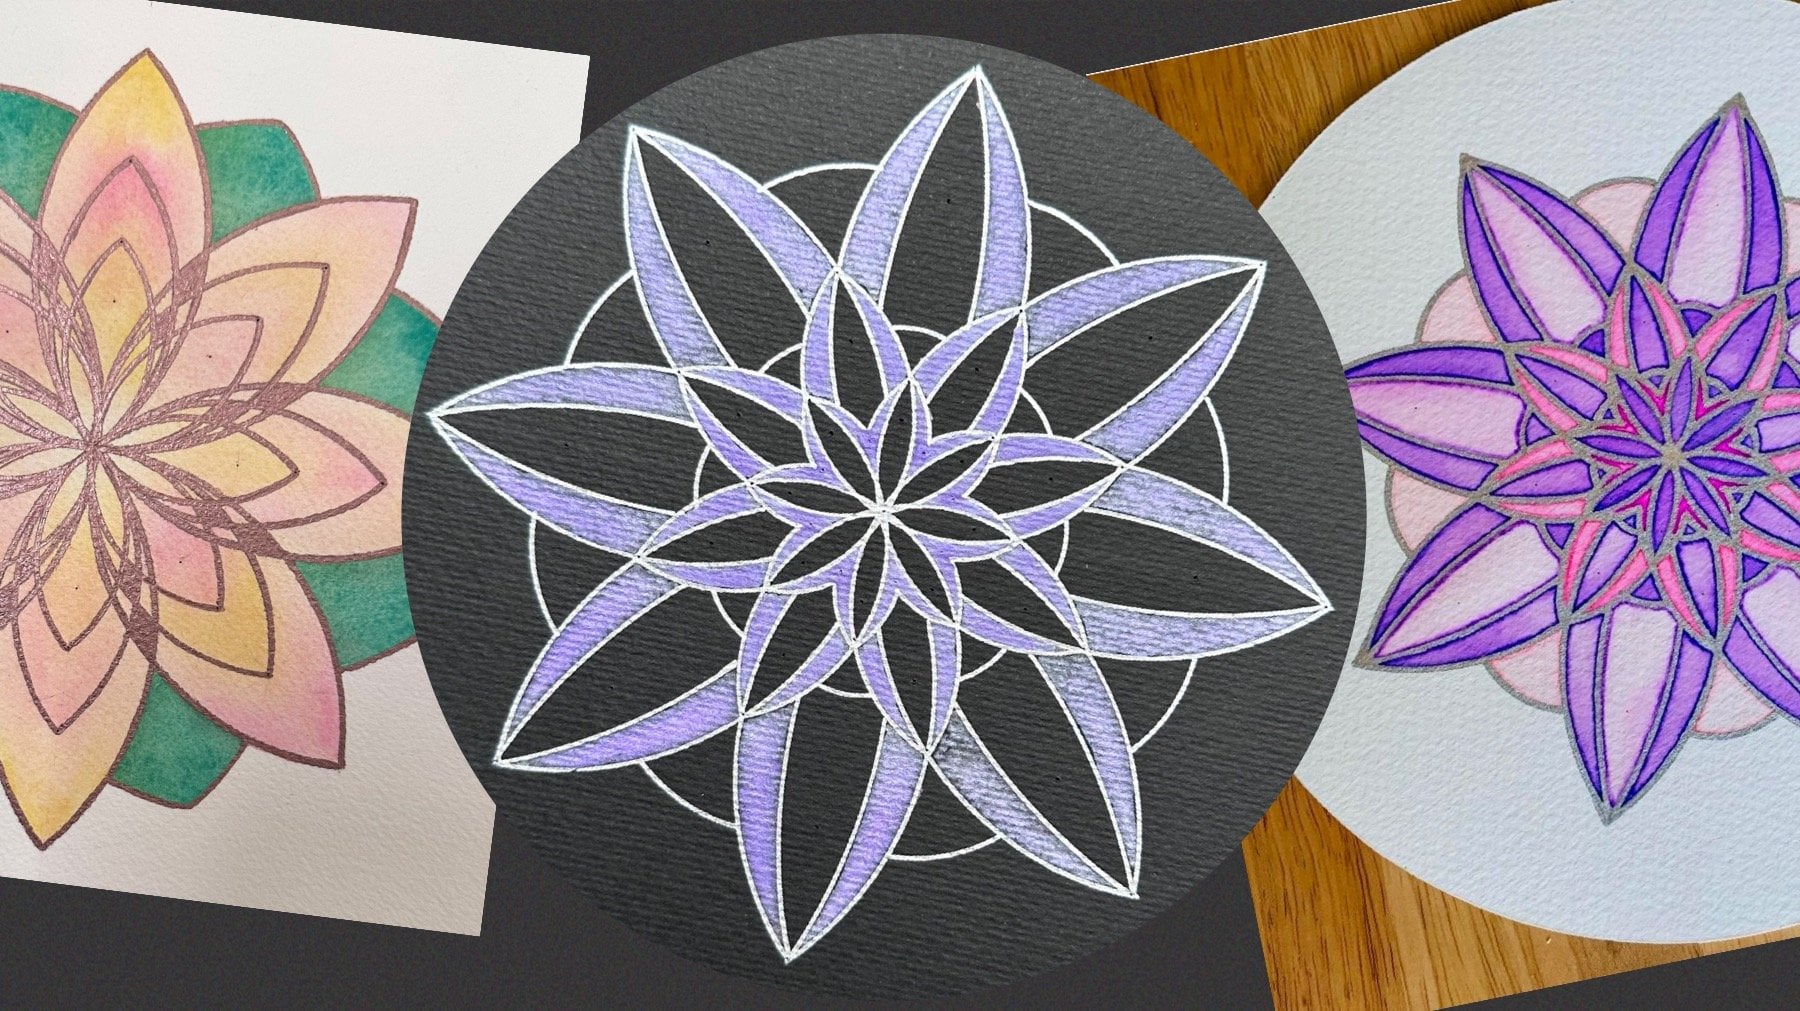
11. Conclusion: So to decorate this, I
took two different ways. I firstly painted the
weave with two of my favorite colors and
made them merge together. I felt like it lacked
some contrast. So I added these black
parts in between and for those that I left
white, for extra contrast, I outlined with a bit of
black on either side of the gold because the gold right next to the paint didn't stand out as much
as I wanted to. Now, you could add some
shading in here as well. I decided not to because I thought the black
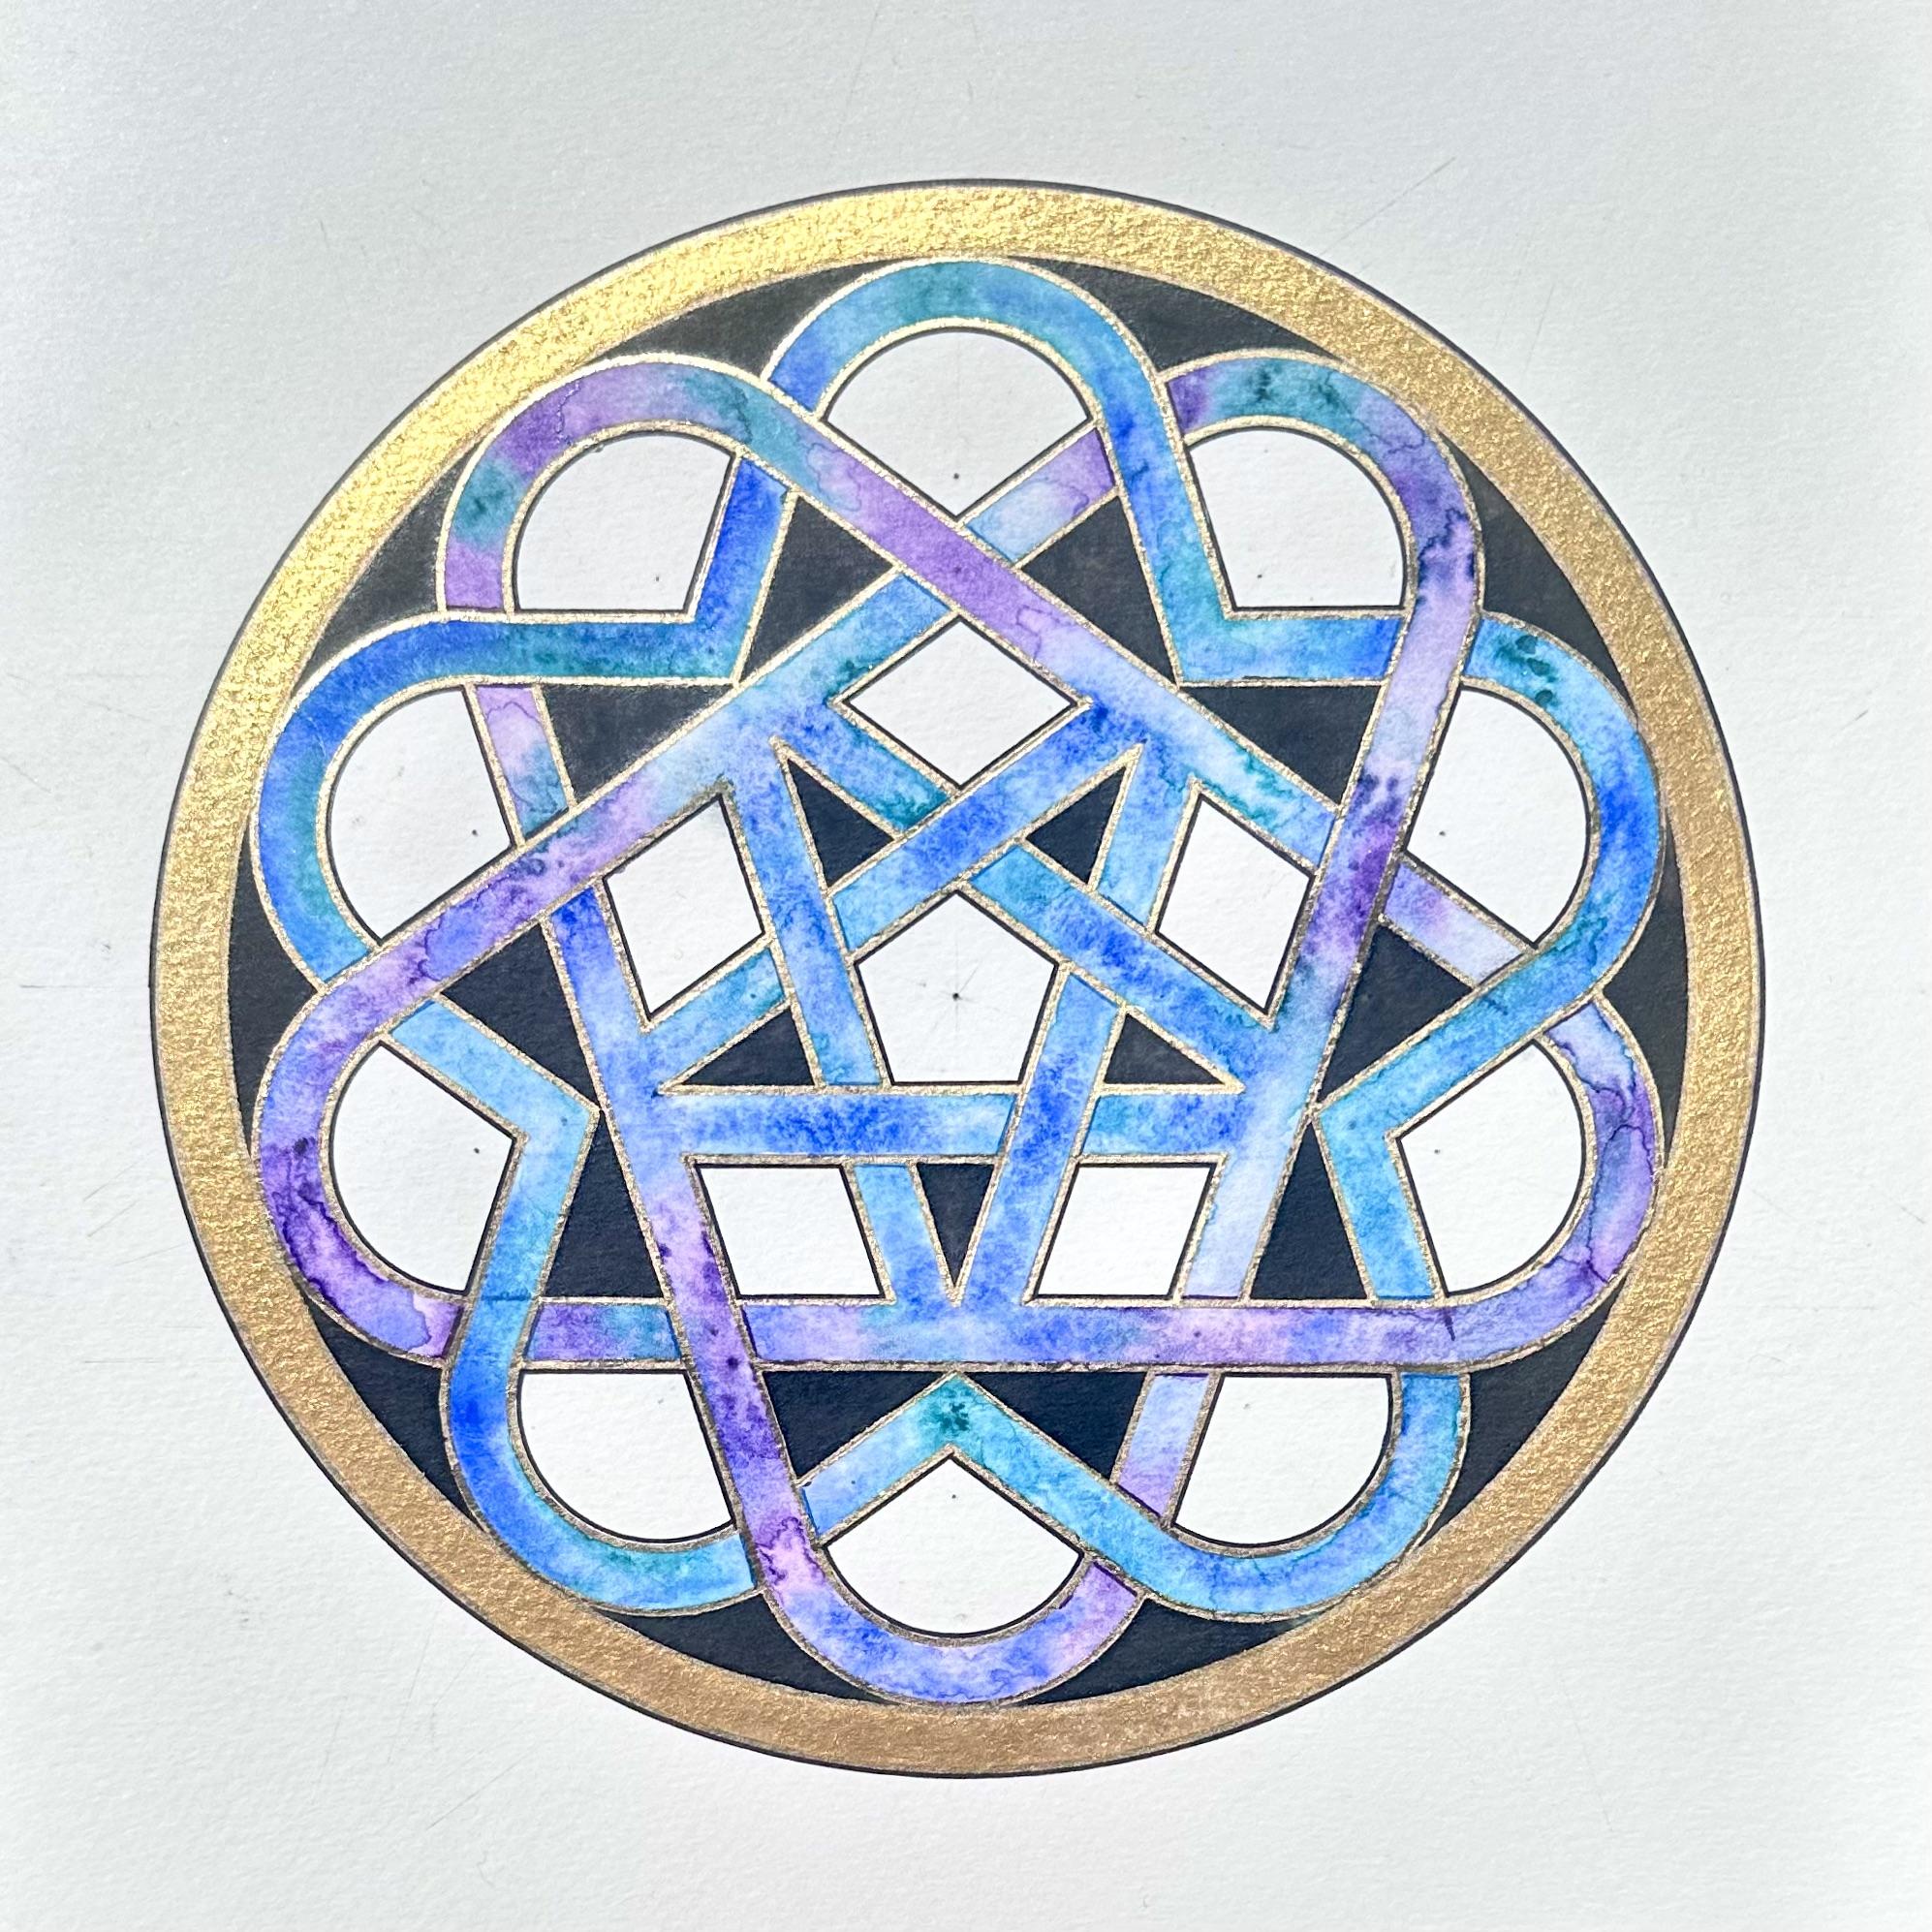
was sufficient. I really like how the black
emphasizes the curves on the outside and that
circular medallion finish, which matches the original. The second way I did it, I decided to emphasize all these curves and left it without the full
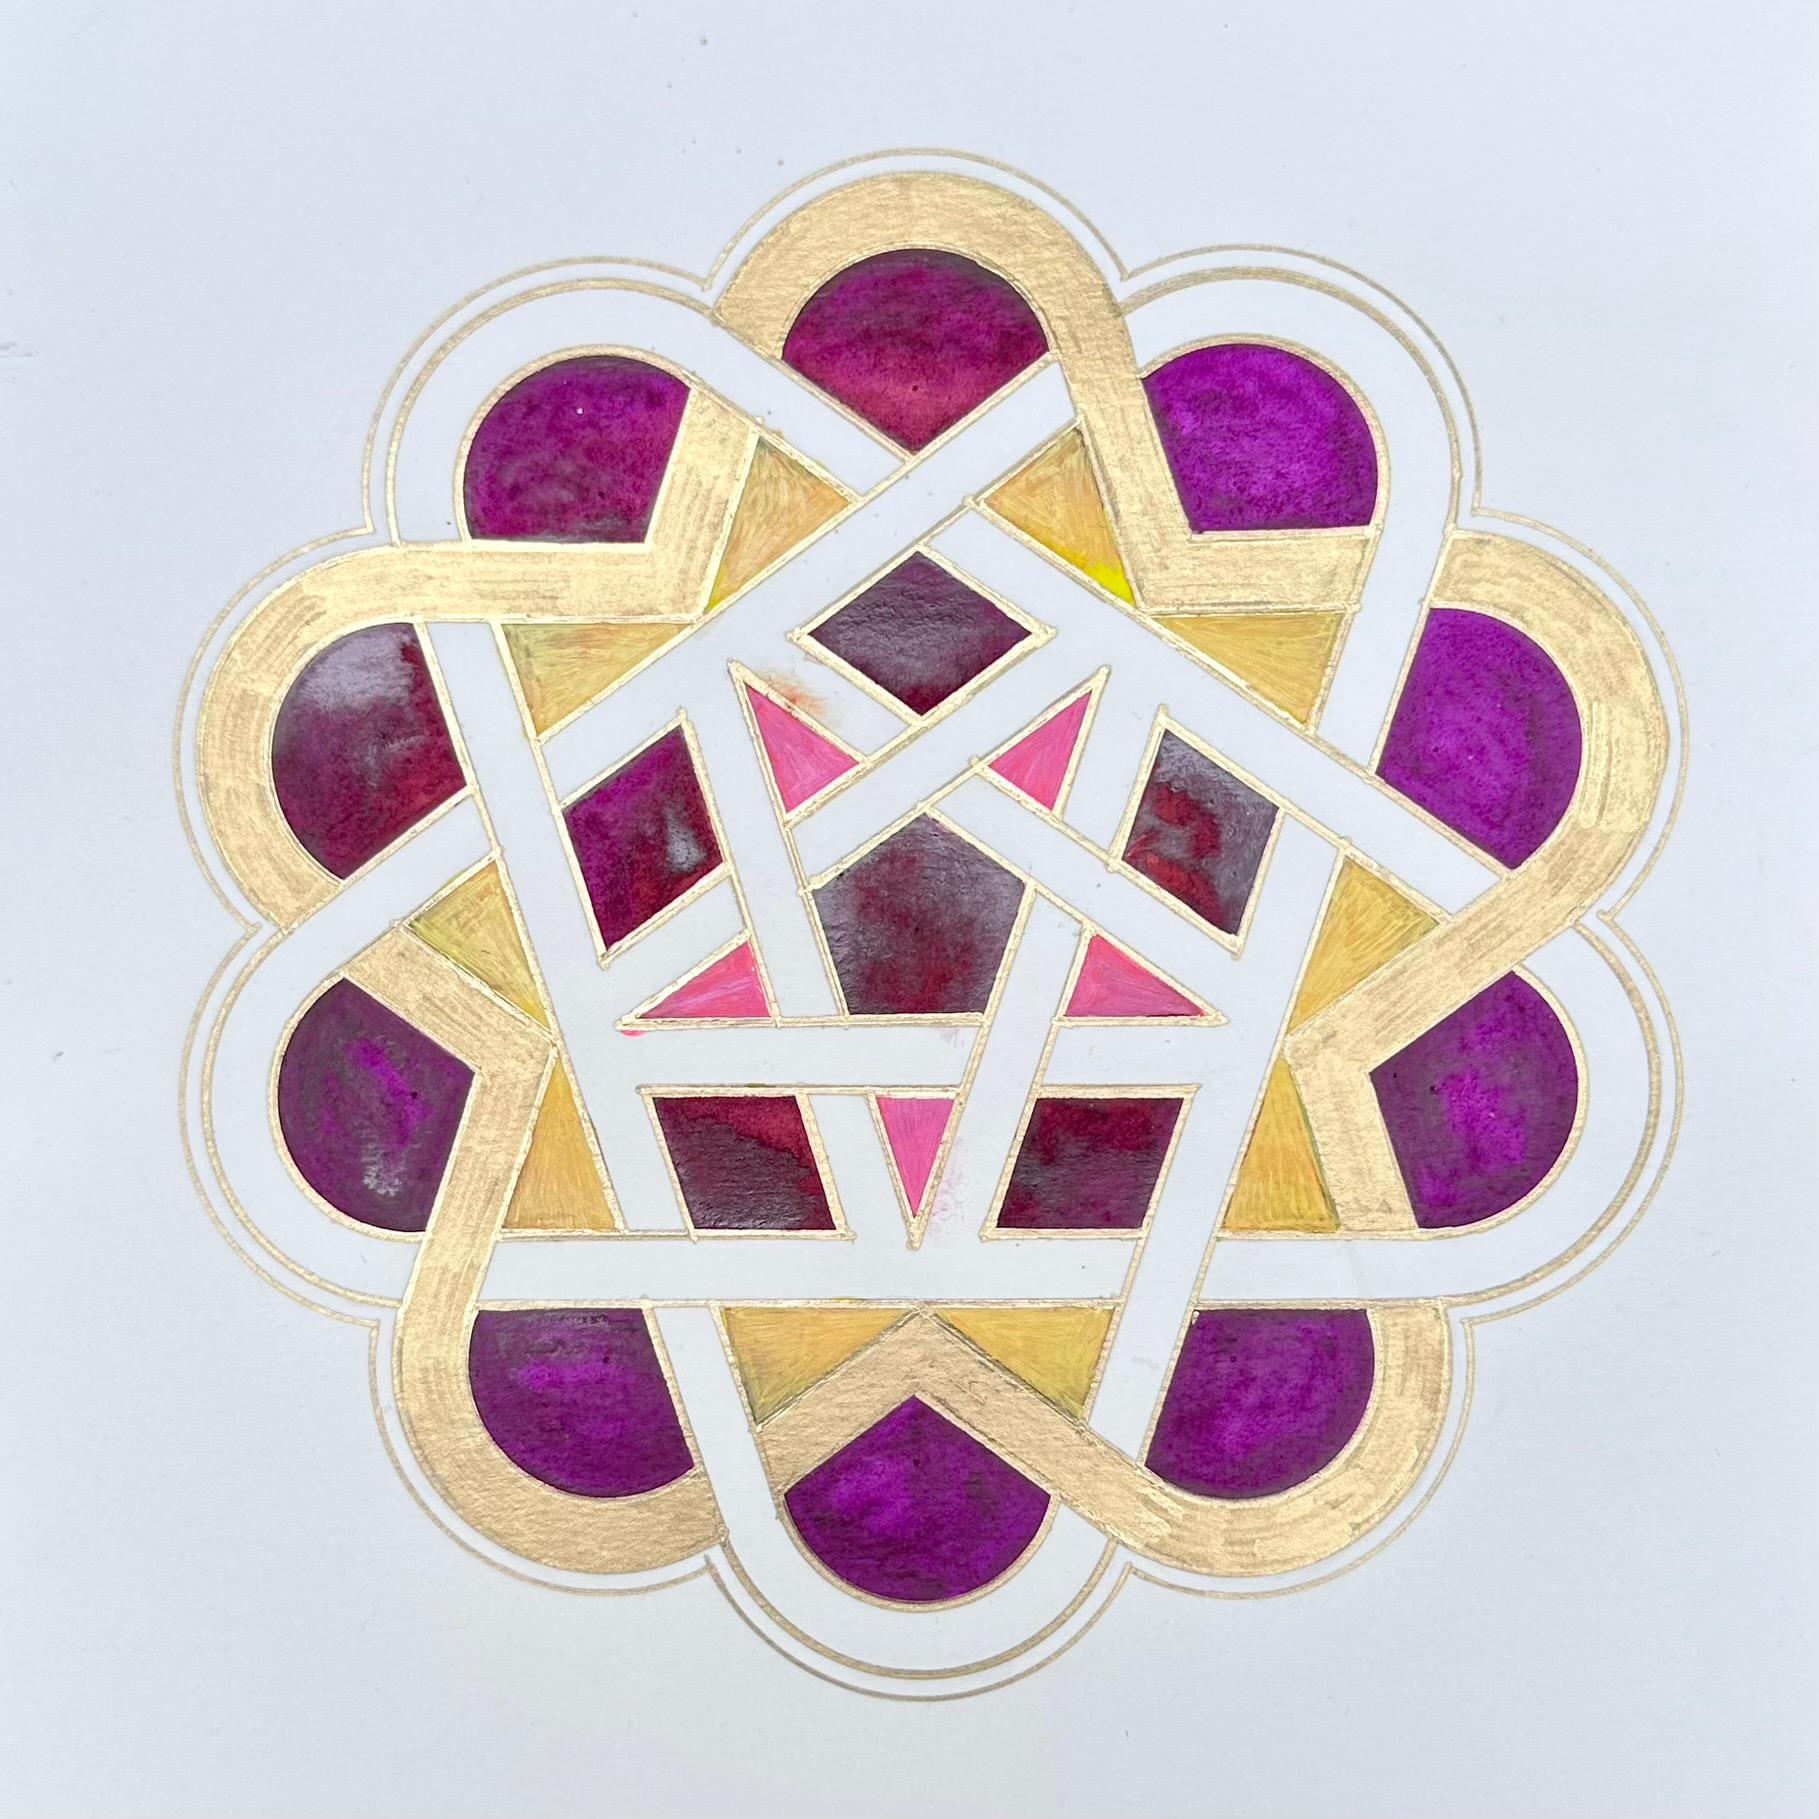
circle at the end. The other thing I really
wanted to emphasize is this golden star that wasn't really part of
the weave in the middle. I left the weave in
the middle white and because I added bright
colors in between the white, I know that stands
out on its own. And then I thought I'll make that surrounding
star gold as well. I gave you a tiny little
bit of a border there. Some of the paint didn't
dry quite to my liking, so I used a little bit
of acrylic on top to smooth it out and to me, that is nice and finished. The pattern gives so many ways and suggestions of how to do it. But more importantly, I
hope you enjoy the process of learning this fivefold shape. I hope you share
your own versions. There's several different
ways to do it down below in the project section so we can admire the
work you've done. You could leave a
review if you'd like. You could also share
it with me via my Instagram page and see
you soon for the next one.
 Diana Reeves, Geometric Artist & Educator