Transcripts
1. Introduction: In this class, I
invite you to learn with me how to draw
two different designs of a geometric curved flower using a ruler and a compass
on a circular grid. The patterns in this project can be used to
decorate your home, make a Mother's Day card, or as a gift to a loved
one for any occasion. Hi, I'm Ana, a mathematics
and geometric art teacher. My passion is to incorporate
the shapes and symmetry of geometric construction
into my art whilst exploring
various creative media. In this course, I will
teach you how to construct a basic circular grid in
a square arrangement. And then extend the
layout to create two variations of a curved
symmetrical flower design. The first pattern
is suitable for an artist of any
level of experience due to the systematic nature of geometric construction by
following simple steps. Whereas the second one
provides further challenge. We will also explore
coloring the designs, including the use of
watercolor paints and metallic outlining, giving you the inspiration
to make your artwork unique. Join me as I continue to share my love of
geometry with you.
2. Materials: We look at the materials
you will need to complete your two
flower designs. You can print the step
by step instructions, including the templates
I've provided for sizing. And just for help
with outlining, you will need a plain piece
of paper to construct on, then paper on which you want your actual design
to be decorated. I'm going to be using
watercolor paper. You can use square
brown paper will be really nice for this because
the design is circular. Anyway, that would
look really nice. However, these are usually
a little bit smaller, so you need to think
about the scale. You might want to also go
on different color paper. I am going to use some
water color black paper. You can use card that's not
necessarily water color, that is of any color that you wish for using and
transferring onto that. You'll need some tracing paper, like similar to this one
or whatever you have. I have tha paper, I prefer the heat 90 GSM works better for me to construct the grid that
underlines the patterns. You're going to need a ruler, a sharp pencil eraser, a waterproof fine
liner, and a compass. Your compass may only have already a pencil
lead attached to it, and that will not stop you
from creating these designs. However, for this course, I highly recommend using a
compass with a pen attachment. The reason for this
is that both designs are entirely made of curves. And you may want to emphasize
the beauty of the design by changing the medium that
outlines the design. You might not even
want to paint. You may use color fine
liners, color pencils, metallics or any other things that you will not be able
to use without this. If you choose to paint your
design like I am going to, you will need some
water color paints or any kind of paints
that you like. Using a pipette is a good idea to mix and
control the amount of color you put in your paint water cup and somewhere to mix
your water colors. Obviously, you
will need a brush. You will also enjoy using metallics for outlining
your pattern, for giving that little bit of extra gold and that extra
sparkle for your design. If you choose not to paint, you could still use beautiful
colors from fine liners, pencils, highlighters, alcohol markers,
anything else you have. The majority of
these will hopefully fit into your pen attachment
if you have that.
3. The Basic Grid: We are now going to
learn how to construct a simple circular grid
on a square arrangement. This is different when you do a circular grid on a
hexagonal arrangement. For this, you're going
to need your compass, a ruler, a pencil,
and an eraser. As this is just practice, we're not really going to
measure and find the center of the page or worry about
any sizing right now. We're just going to learn about the shape of the grid itself. I'm going to draw
a horizontal line, roughly around the middle of the page without
worrying about the size. I'm just roughly going
to mark the center, somewhere in the middle. I already have a pencil
inside my compass and making sure that the lead
of the pencil and the pin, when close together,
are roughly aligned, then I can open the compass
to a random distance. Now I need to make
sure that I can fit three of those on my page. So I'm going to go a
bit smaller than this. I'm going to start, like
most constructions, by putting the pin
in the middle and starting with an
initial central circle. I'm going to turn my
handle one full turn until the pencil goes back to the original position and
it makes a complete turn. We can do that again.
There we have it circle. Now, by drawing a circle
on a straight line, we have created two
new intersections. And those intersections will
tell us where to go next. I'm going to go to the right without
changing the compass. I'm going to draw
another circle, identical size, which creates
two more intersections. And do the same on
the other side, on the horizontal line
through the center, that created even
more intersections. If I was to construct a hexagon, I will construct four more
circles in these points, I actually can't construct a square unless I start
constructing a hexagon. However, I don't
want to overload the breed in the picture
and the construction. I'm only going to use
two small arcs which are essentially part
of full circles. If I was drawing a full circle, I'll make one here next, but all I'm going to do is draw a small arc above
my central circle. And I'm going to
do the same from where the next circle
would have been, but I don't need
the entire circle, but you can visualize that going through the center and
through the other points, another arc ensuring they cross. If for some reason you didn't go far enough and they don't cross, just go back to that point and just make
your arc long enough. Minor crossing, so
it's long enough, I need to do the same
thing down here. I'm going to do a partial
arc from here and from here. Just below here. Here. Now in theory, I didn't need that point
because I already have two points and every line only needs two
points to construct. However, since we're
doing everything by hand and accuracy gets lost, since we're human,
having three points as a reference just gives us that extra little
bit of accuracy. Now these points will show me where to
draw straight line. The reason I need this straight
line is to ensure that I have a line perpendicular
to the horizontal, which will be perfectly
at right angle. Here I have it, perhaps more
super accurate at the top, but this now shows me where
there's a right angle. Now I could try and draw this way to create three
more right angles, but actually that's
more complicated. This could be the
middle of my square, which I'm about to create. Now these two points
are no longer needed. They were just to locate the
vertical line that I needed. But the reason why I needed
the vertical line isn't this. It's to show me where the new intersections with my original central circle are. Now I have two here instead
of two there and two there, which would have
created a hexagon. I need these two which
would create a square. I'm now going to to the one at the top which will go
through the center again. And then the one below which
will go through the center. Now I have four
circles arranged in a square around the
original circle. Whether you look at it this way or this way, it's a square. Today's designs, I don't actually need to
construct a square. I don't actually need any straight lines in
the final design. But I needed to be
able to construct four circles in a
square arrangement. Now I need to find
four more because our final design is an
octagonal eight fold design. To do that, I'm going to need the two diagonals that go in between the
circles that we have. This is where that
invisible square is useful, because the diagonals of that square is what
I want if I go from this point through the middle
to the end point here, and do the same on
the other side, this is where the
square would be. Now I'm not actually interested in the
corners of the square, but I am interested in
where the diagonals of the square make a
new intersection with the original circle. It all goes back to rotating and surrounding the
original circle. We need those four now
because we're going to draw another four circles in another square arrangement which are overlapping the original, we should end up with eight you.
4. Constructing Flower 1: We're now going to construct the first flower design and we need to decide
on our sizing. What you need to know
about your paper is that roughly the radius
of the original circle. Need to be able to fit
six times in your page. It's actually slightly
less, but that's okay. If you have a bit of extra space left over, that's not a problem. I'm still unsure
whether to go for circular or square paper. I think I'm going to go for
square and see how it goes. -20 centimeters across. I need to find my center
first before I can start constructing directly
on the watercolor paper. There's my 10 centimeters. I like to measure halfway
down the side again. And then draw a horizontal line through the marks I just made. The center of that as well,
somewhere around here. If I go with three
centimeter radius, I can fit that six
times to make 18. And it will leave me
some space either side, you could go a
little bit smaller. This will come out fairly big, starting in the middle,
just like before. Now to add the second
layer of circles, we need to locate
the correct points. If you look in the center, we've created some very
small almond shapes, some medium sized almond shapes, and some very large
almond shapes. For this design, we're
going to look at the ends of the
medium sized ones. I'm going to put the
compass on this point, then open the compass
to the middle. All the circles in this design
go through the middle one. Then I'm going to move 45 degrees in the
clockwise direction. Again, it's the end
of this petal and it lies on the axis
we've already been on, and that we drew earlier through
the center, full circle. I'll repeat this six more times. Notice now that the
second layer of circles created yet another layer of almond shaped petals surrounding the ones we were just
using to find our points. Here is a leaf, a
petal within a petal. We're going to do
this one more time. However, the design
isn't going to go further out and
increase in size because we're going to
do only partial arc in order to create
one more layer of petals without
actually enlarging the diameter of
this whole design. Previously we were constructing from here for these circles. Then from here for
those circles, now we're going to go here along the same axis for the
final size circles. I'm going to put
my point on there. Again, I need to open the
compass back to the center. Now you will see that
if I try to do this, there's not enough space
for a full circle. I don't need that. What I need is where the point
of the compass is. I need to start drawing from the line which is 45
degrees from one side, which will also be where the
circle intersects that axis, from here through the middle
and stop on the other side, the axis which is 45 degrees on the other side of where
we're starting from. If you trace with your eyesight, this right angle, this is
what we're connecting. Which is exactly half of the circle and not
the external half. We don't need start from here through the
center and stop. Now I'm going to move 45 degrees
back at the end of here. And start from the axis next
to it, through the middle. And stop at that end. And repeat this six more times. These are the petal
arcs complete. Now we just need to go back and do the external leaves just go back extending the middle
point, which isn't. That was the final point on
the middle point on this one. I can check before I
draw anything that it's going to emphasize these, okay? Now with that radius, it's part of this circle. I want to draw this arc. Skip a bit, and then draw
this arc just like that. I'm going to do it at an angle
slightly, this one here. And I'm turning the paper so
you can see on camera here. Then move to the next
middle sized point. Just check that matches this. Yes, then skip this bit. Then just this arc, these are all the arcs outlined that we are
keeping in the design. And now I'm going
to rob the rest of.
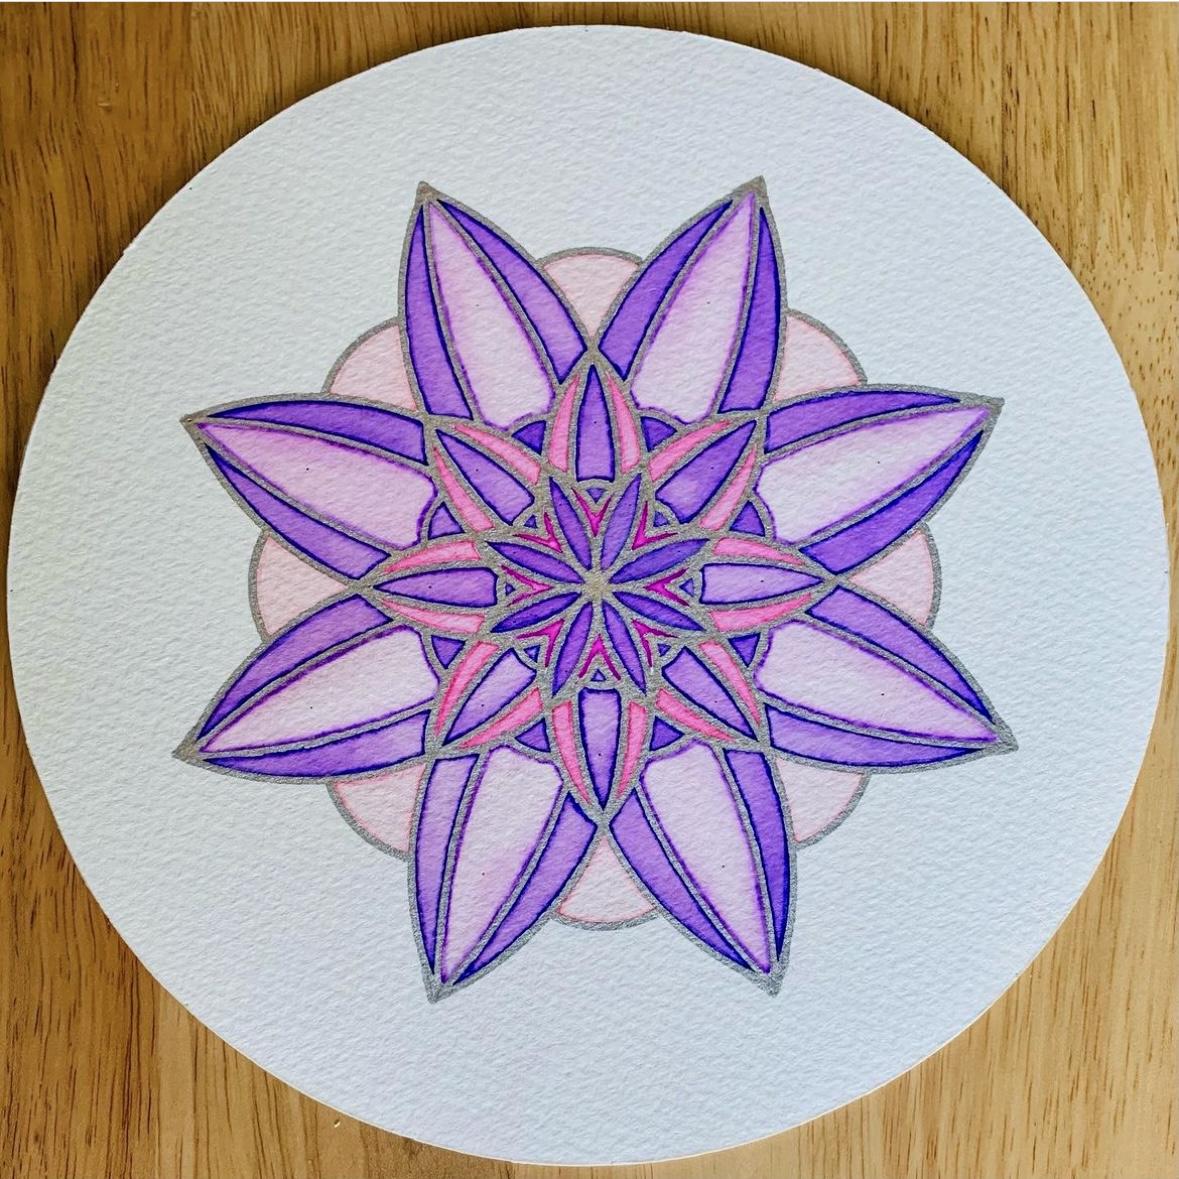
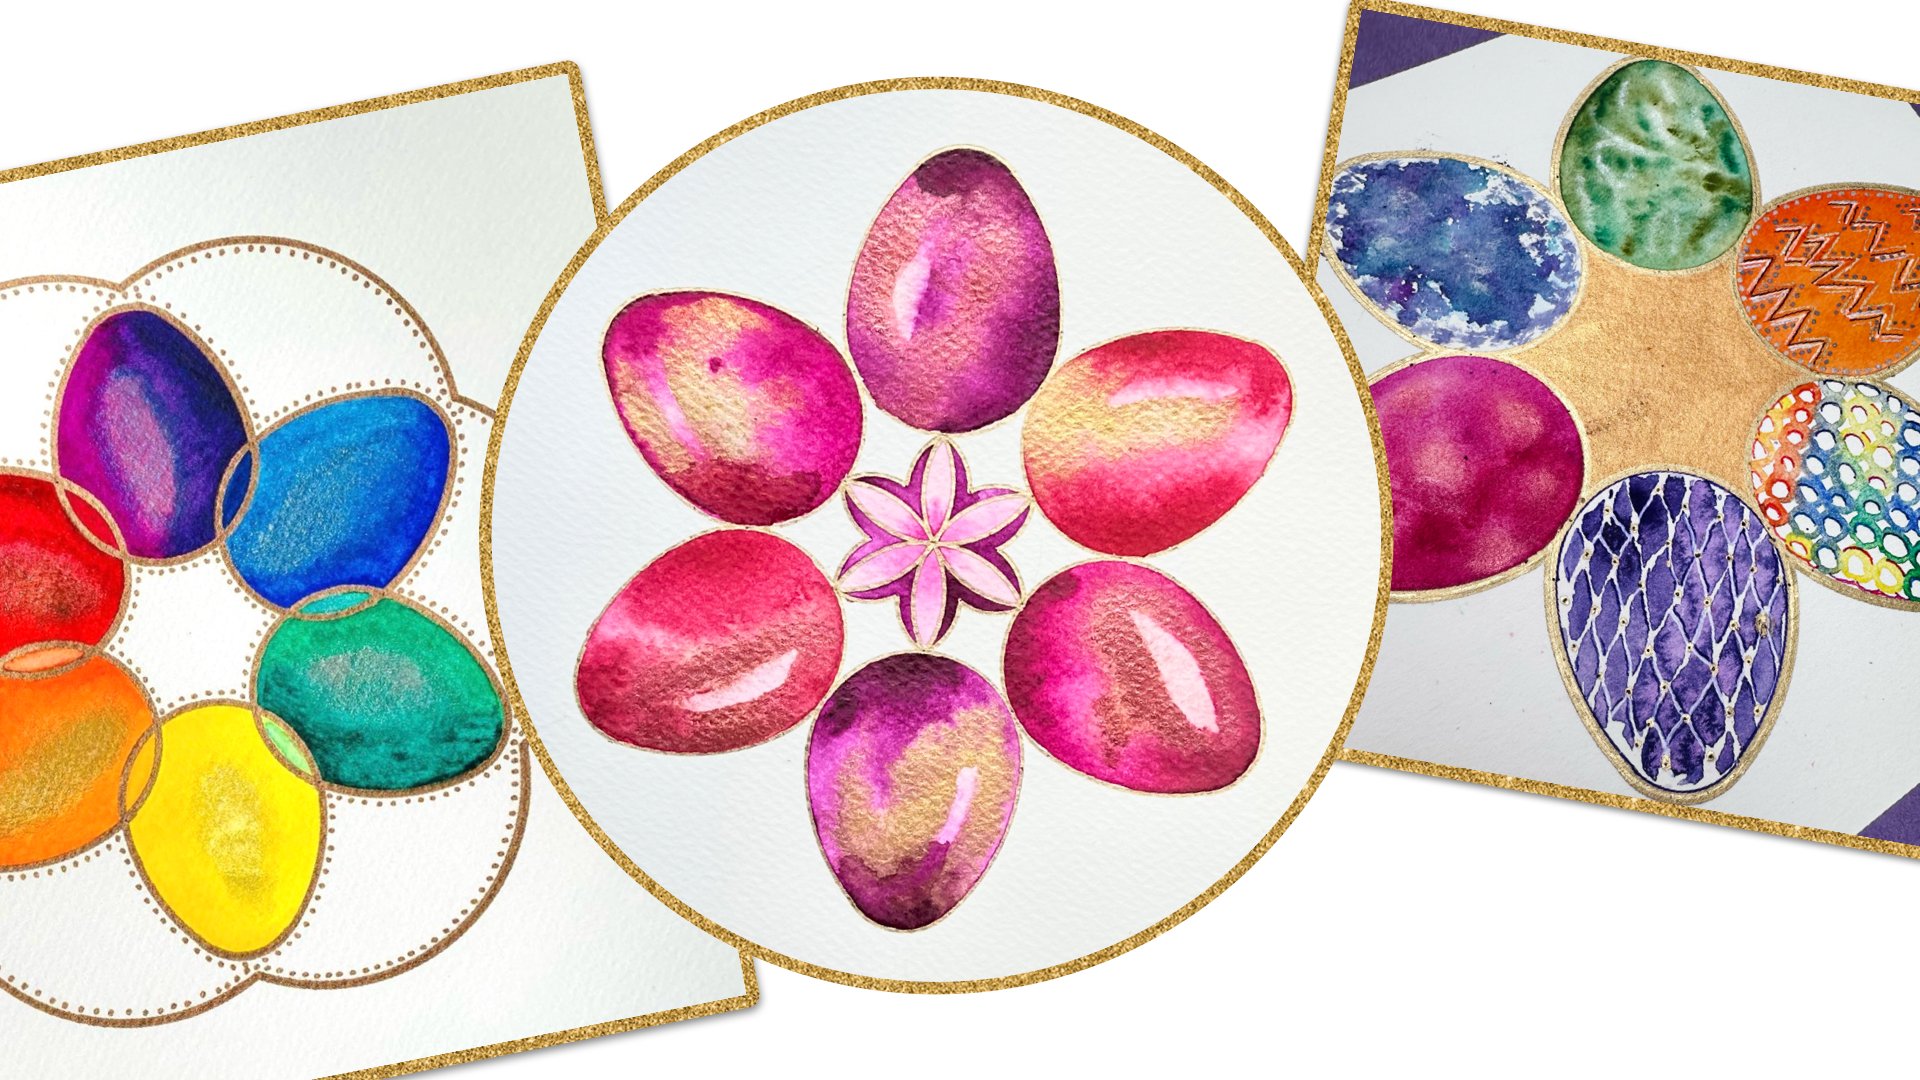
5. Painting Flower 1: Okay. We're now ready
to start painting. I've chosen these two colors, which I think will
look really nice, flowery, springy, sunny,
but not just one color. I would blend them but alternate them slightly
as well on wet, and I can build up the
intensity if I decide to. So I'm using these two and
we'll see how it goes. Firstly, I'm going to just
put some clear water. I'll put this one actually slightly tinted so maybe you can see put that all over
the actual flower, since it's such a large area, it won't be drying
at the same rate, let it dry for a bit. Then I'll apply a second
layer in the hope that the second layer will
sit a bit more evenly, closer to the surface
of the paper. That way it should be a bit
more even, nicely blended. Even though I'm not too
worried about even to me, I like blended and
abstracts backgrounds. If you like details, you can always add them on top or do it whichever way you want. I just wanted to see how these
two colors work together. I will start with the inner petals and
just do that for now. Then I'll do those on the side. I'll leave the four in
between just for now. I see that is not I don't want
it to be awfully intense. I want it to be fairly subtle, but it might not work that way. I'll now go in the middle
of the alternate petals. I see this in a very
different look compared to the second design. I don't want it to be
completely solid and completely following
the geometry. I wanted it to be a bit
less defined on purpose. That's just what
I don't like it. I want it to look like I like these layers of
gaps that are forming. And then I'm hoping
that the other color will slot in and blend into those gaps and make some
interesting patterns. I can add a bit
more intense color later once we see how
it's starting to dry. Now I won't, I'm going to
move on to the other color, such a pretty pink color here. I will start with the
alternate petals. I think that these two colors
look really nice together. Any one of those on
their own will probably be a bit too much together. I don't like the look you can go with any colors
or types of flowers, if this inspires a
particular type of a flower that it reminds
you of something you love, or if you're doing this for someone in particular that you know will enjoy a particular
particular flower, particular color shade,
it is meaningful. I like this bit,
it's very relaxing. I find the geometry very relaxing because of
how systematic it is. Fine, relaxing for other
reasons is just, is just fun. Then you're just
seeing what comes out. I like a little bit more
definition on the side. I don't know how you see that. I've left the remaining eight. I see those more as leaves
rather than petals. I think that be too much of this call to keep
going with the same. I would. I would suggest, oh, I would personally
go with green, light green, as if
this is a bouquet that you're looking at or a flower that you're
seeing from above. And these are the
leaves that are coming out of the
stem further down, peeking through, just to break
up that warm color here. Now I'm going to do nice leaves and try and make sure that
I cover up any spillage. I'm not too worried about that, but it makes more sense to
be blended here than here. That's why I can repeat. That's a really nice
grassy green shade. It's a bit one
dimensional on this bit, but that's, it's not so much
a problem with the green. Think now we'll outline all of these petals
one more time. At the end, when
everything is dry, it will really
define the petals. And then I'm
thinking that I will probably put some shading
on one side so it looks like each of
the smaller petal is just above one
of the larger ones. Those finishing touches can sometimes make all
the difference. It's just little details
until we're really happy. But again, please remember,
there's no right or wrong. If you already have your established artistic style and it's just the geometry
you're adding to your talk, it, then that's what
you're gaining. If like me, the geometry and the shapes are your
main motivation, then that allows you to explore a lot of
different techniques. I'm exploring things
that I probably never would have done if it wasn't for my love and
affinity for geometry. For me, the shapes is
where I feel comfortable. And these curves, I mean, they just look so good. Regardless of what
you do with them. I just like to have
some, a symbol. I overlap a few circles and
I think of flowers, okay. I overlap a few circles
and I think of arts or squares or mexagonsyyth shapes. This makes it even
more interesting for me to see what other people
do with the same thing. There's just
infinitely many ways to tackle any of those two, to see any of those,
Even if you do, you could do the same design, geometric design several
times and emphasize completely different
parts and then it's a completely different look and a different perspective
of the same thing. I like that a lot. I will dry
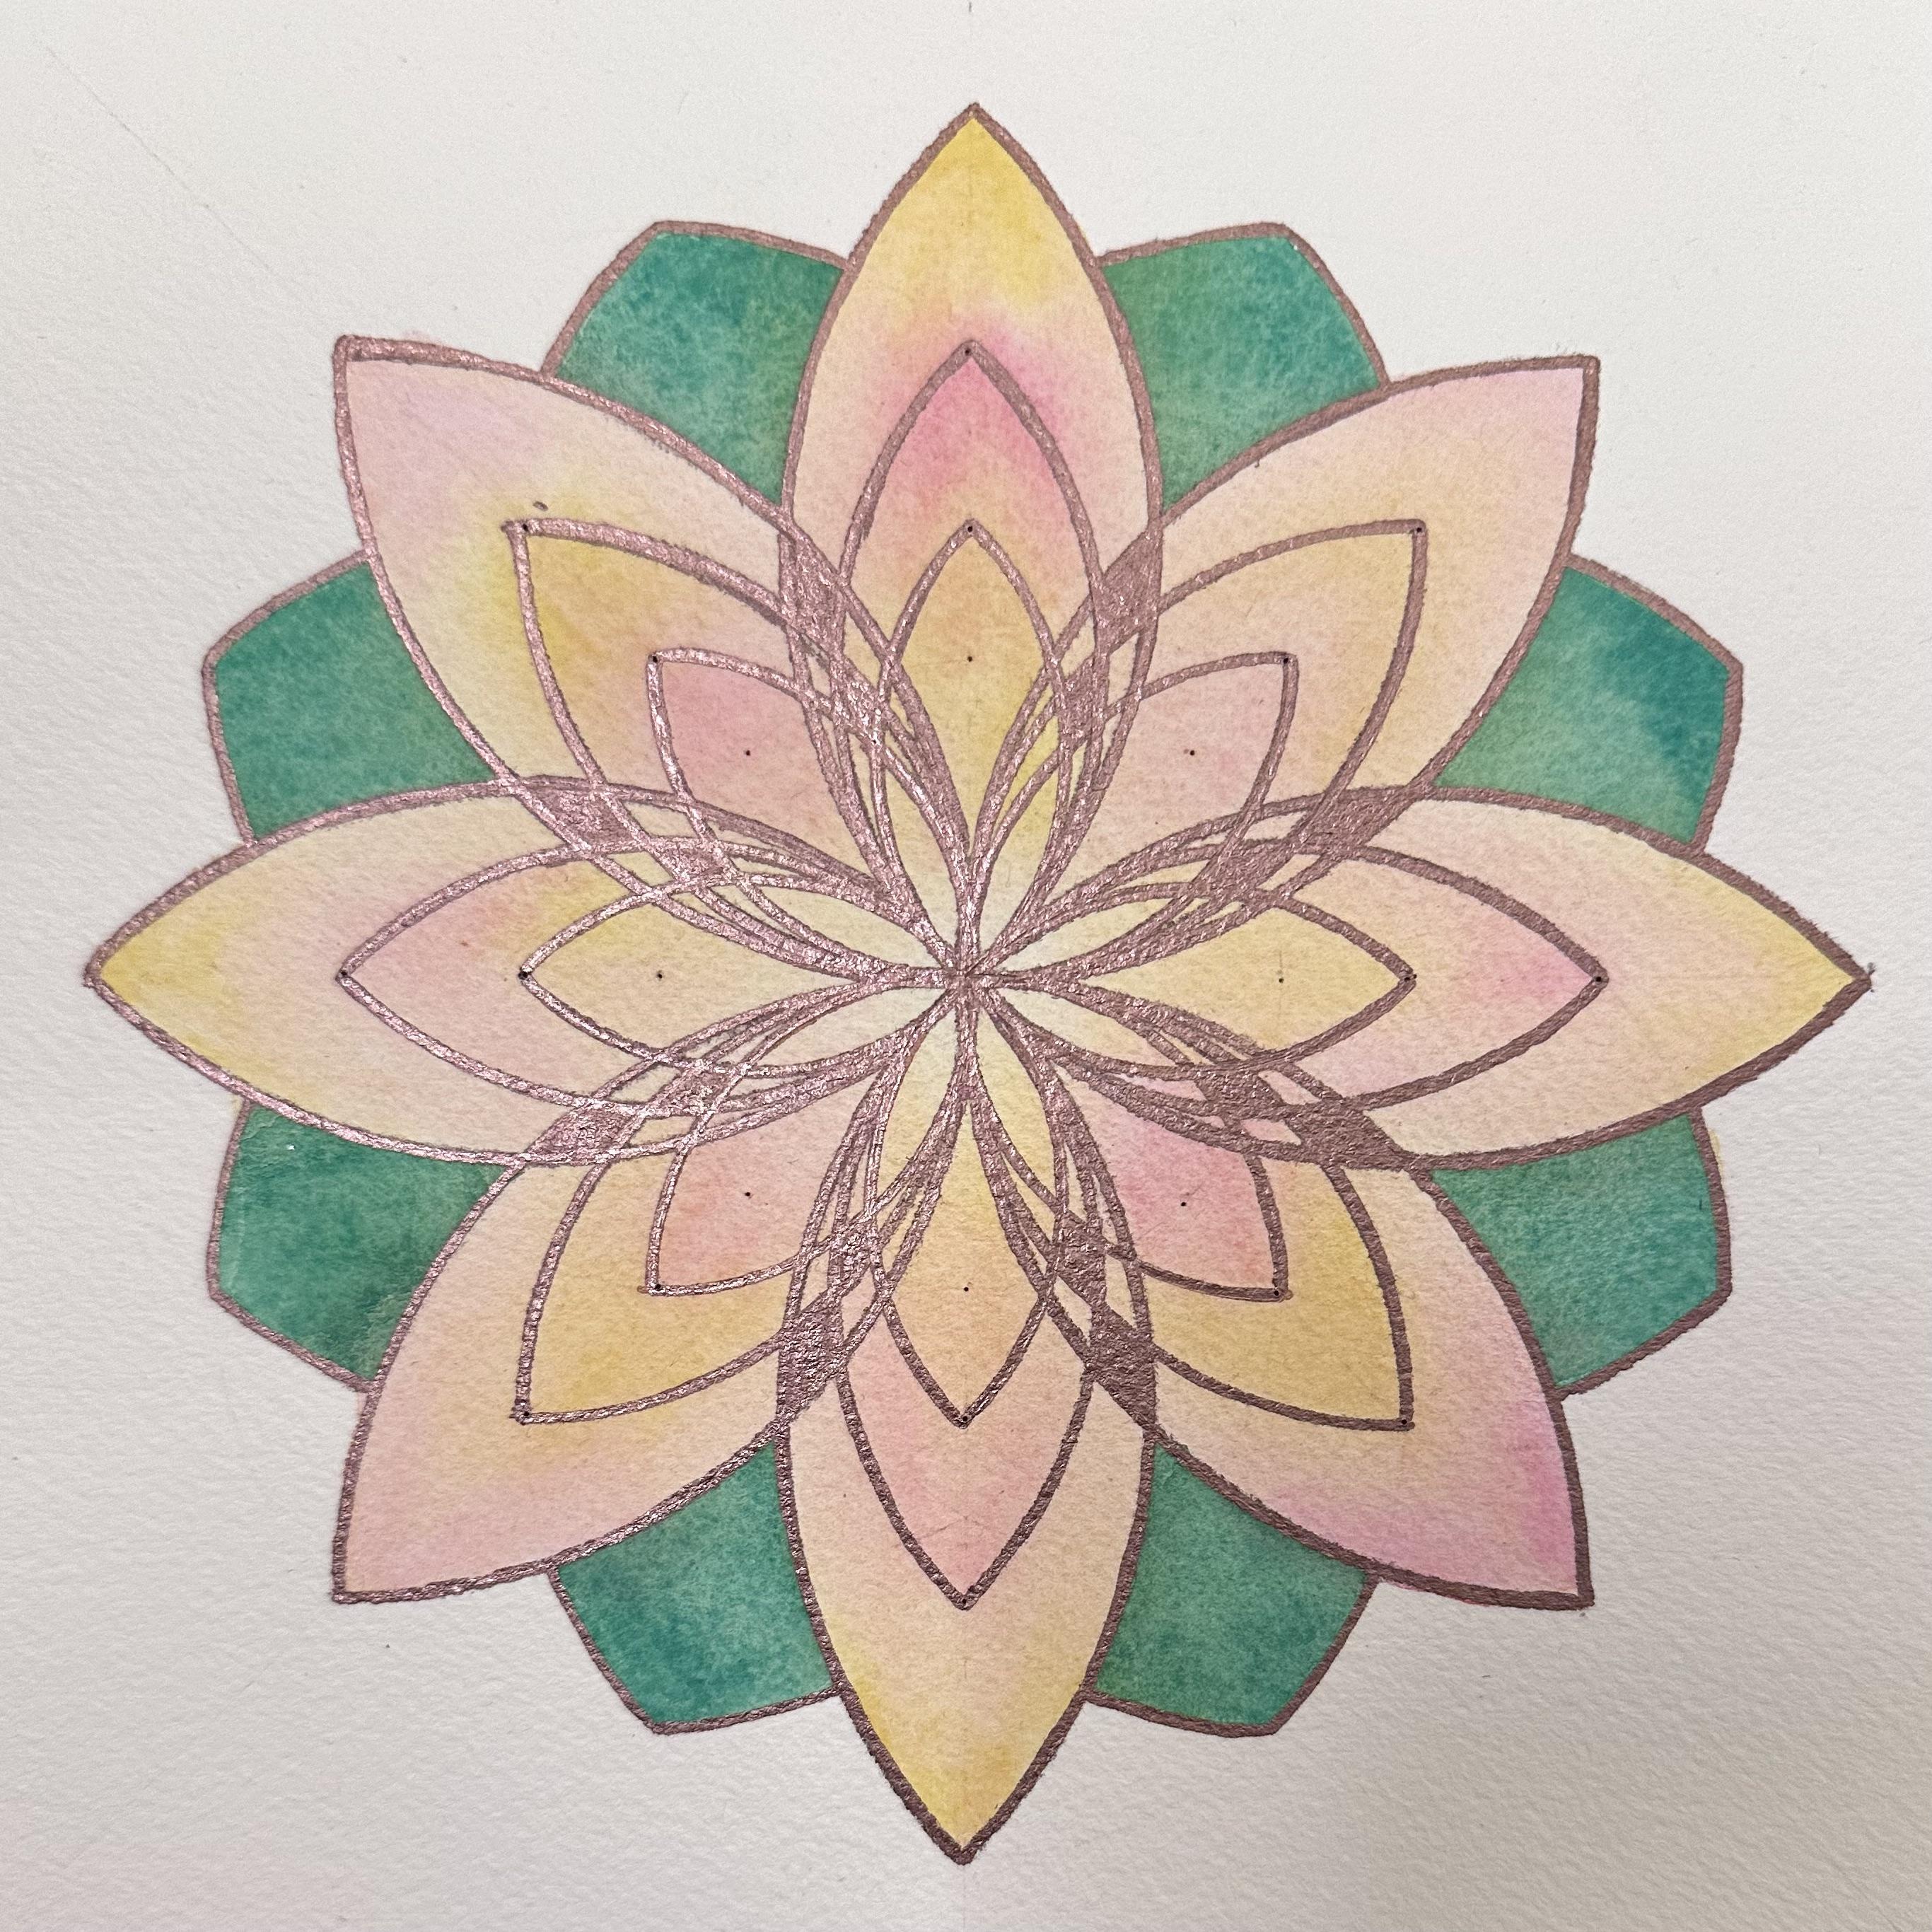
that completely and then I will outline all the petals
with my copper shiny pen. The paint is now dry, looking very gentle and pretty. I'm now going to outline
all the arcs to emphasize these petals in exactly
the same way as before. Just this time using the
final. I've gone for copper. I'm actually going to
go for this size leaves first. This is done. The copper looks so pretty
that I don't actually want to add any shading. And then we can move on now
next to the second pattern.
6. Constructing Flower 2: The construction of the second flower is a little bit trickier, and working out the scale
is trickier as well. Although this is
the final design, we do need these points
here which go further out. Which is why we need more space than we might initially think. I did a draft here and you could see I've
emphasized these. Although they're not
part of my design, I do need these points, Unlike the previous design, which you needed
to be able to fit within your page six times, this one, the initial circle is roughly 12 times smaller
than the end result. Meaning that if
you're working on the same size paper as
you were for flower one, you will need to
start with a circle, half the size, half the radius. I started with a circle
three centimeter radius. This design I will
need 1.2 centimeters. This would work quite well
for four and letter size. Since letter size is
a tiny bit wider or even just about the square paper I used for the previous design, which was 20, I probably
wouldn't go any less than that. 19 might just about
accommodate 19 centimeters. But if you're working with
about 20:21 centimeters, which is somewhere
between 88.5 ", which is probably
what most people are using, that will be fine. However, I think this design is a little bit too
difficult to go straight on a precious
water color heavy paper. I suggest that we start constructing on a
normal piece of paper. I'm going to start by finding
the center of my page. This is a four,
which is nearly 30, not quite 30 centimeters. I tend to mark
14.8 on this size. This isn't the final one. It doesn't 1 millimeter
or be a huge problem. Then I will draw the horizontal, which is 21 for this one, not 20, like a watercolor paper, I need to mark 10.5 I'm now
going to put the pencil in the compass and I'm
going to go with 1.5 centimeters, which
is very small. Initially, the accuracy
here will be slightly less, but the design is so nice
that it doesn't matter. Okay, 1.5 is this. I can't, I could probably go
1.6 but I will not risk it. The starting point up
until the first layer of ad circles is exactly
the same as before. This is the first layer of the eight circles
and you can see how tiny they are compared to the previous one if you
didn't do the previous one. Now in the previous one, we noticed that there were
very small petal shapes, medium sized ones, and
larger sized ones. The previous design went to
the edges of this middle one. With this one, we go
straight for the big one. These are the
intersecting points on the outer layer of this design. Then again, we want to
go into the middle. I'm going to use two
different points just to double check my distance because this isn't going to be
perfectly accurate. It's a tricky one, but so beautiful in the end
that it doesn't matter, you have to take the average. Okay. So now I'm going to make eight circles around
and see what happens. This is the second
layer complete, and as you can see, the second layer circles
are much, much bigger. But the thing they
did create are not only the eight layers
which we already had, but those tapered edges that the petals now
appear to have. The idea is to create three of those layers for the
next layer of circles. We initially used
this as a center. Of the first circle, then
we've just used the end of this larger petal for the end
of the circle of this size. Now we're going to
go all the way here. That is, back on the axis. Notice that this one, the axis of the centers of the
circles alternate. We have this one. Then in
between now we're going to go back to this one and
do a full round circle. This is going to be determining the final size of
the entire design. Hopefully as long as we can
fit this layer of circles. The last one after
that is partial, it's not going to
increase the size. I'm going to put my
compass point on here. Notice that if we did
this fairly accurately, which we did each of
those cross on there, it's the outer intersections, but this time they all lie
on the axis that we drew. Okay, again, we'll open the compass all the
way to the middle. They should go through the corners of my
medium sized petals, because this is what's
going to create another layer of tapered
off looking petals. I'm just going to check
them all, actually. In that way, I'm creating
myself the correct point here. I'm slightly off center. That's okay. It will
be easier once I have the correct points when I'm mid flow drawing
more circles. Okay, eight circles on
the outer edge. Let's go. We have just one
more layer to do, which is only partial circles. And they are going to fit in this size, as you
may have guessed it. It is in between each axis, and on the outer edge
of intersections, I'm going to go and
open my compass. I will try these too. This one looks okay
bit short actually. That just moved. Okay,
let's try it from here. Should be the same, should
go through these short. This is a bit wide. Some
of them that will do. Now I'm going to
put this one here, since we're between
two, axsore those two. We're going to go to 12 on one
side, but only up to here. We don't need to go any further
up than that through the center stop at that edge there. We're going, this is where
the point is that we're using two axis to one side, one to stop on the other
side from here, 12. But I only need to go up to this point where there's a leaf already there through
the middle and stop. I'm going to do another
six of those arcs.
7. Outlining Flower 2: As before, I'm going to start
with the largest radius, meaning that these are
the outer edges of the biggest petals in the design that we're
going to construct. Our points of the compass are going to be on
the edges of this, which is still in the design. We're going to with the
radius through the center. Going to do that arc. Stop when we meet
the middle petals, jump over the opposite middle sized petal and
complete the arc. We want to avoid these
two layers in the middle. For this, we start on the same outer points
that we just used. Okay, so I'm going to start from the corner of the big petal, stopping just before
the medium sized one. Then the medium. Again, if you make sure
you don't move this, you could see where
trace from outwards in. As soon as you see the
next leaf, you stop. So there you go. You need to repeat that from the same other centers
that we already created. And I'm going to repeat this six more times now. We're going to go to
the previous points, which were the outer points of that medium sized grid
here. Here, and so on. So let me adjust that first before I show you
where we need to go. Okay, what these arcs
are going to do, they are going to draw the outside of the arcs and petals that we've
just emphasized. We just emphasize the inside
of these biggest petals. Now those arcs are going
to do the outside. These are more curved because
they have a shorter radius. However, if you notice here, the outer arc of the
biggest petal is also the inner arc of the middle
petal with this size radius. We're going to start from the same corners as we did before, but go through the
middle petal and stop when we meet the
smallest ones in the middle. Skip those and meet
on the other side. Just going back to here to demonstrate from the same edge. Now this is just one line
either side on this axis. On this line, I need to start from the previous line,
which is up here. Go through the big petal,
through the small one. I just need to lift this off to carefully see how far to go. Oh, and stop there where
I meet the smaller ones. Stop here. This will be
useful to see where to stop. I'm avoiding the sizes here. Okay. And then jump over that
from here to the end. Okay. Now, move 45 degrees further down from the line next to it or the corner
we've already created, through the big petal,
through the medium. And stop where you meet that
opposite smallest circle. Jump over. I went a
little bit too far, but that doesn't matter because
I'm going to trace that. Skip this middle eight
leaves or petals. And from here to the edge. And six more times now you can see we've created the outer edges of
our biggest petals, but also the inner edges of
those middle sized ones. Now the next size
circles will go smaller. Again, we just use these points, which are on the outer edges
of the second layer inwards. Now we need to go one further. The smallest circular grid is actually where the centers
of the next circle we need, which is the medium size circle. Okay, let's just see what those circles are
now going to do. They're going to complete the outside of the
middle circle, but also we're going to continue with them
because they're going to be the inside of
the smallest layer. In fact, we can now go through all that through
the middle and out. We're just doing
half circles now. Okay, this lays
complete one of them. I went a bit too far. In fact, since this
is not my original, I'm going to just repeat that. If this is where you are
going, it's not a big problem. Since I'm going
to transfer that, I will then trace the one
that's slightly shorter. How pretty does
that start to look? It's just such a great design. Now, we want to complete these
tapered off edges as well, but before that, I really
like these curves here. They have the same radius
as what we're doing now. I will do those
before we continue. Now, we need to
reduce our compass to the smallest original
circle with radius. In my case, it was
1.5 centimeters. That is to finish off the
smallest layer of petals. Yeah, that should be okay. So it's to complete the shapes. As you can see, I'm not
going to cross anything. I will stop and not go all
the way through that leaf, starting with my original circle and see where I should go next. I'm just going to turn that, I'm going to start from here and stop there in the middle. And then turn and do
this on that side again, from the top to the middle, and from the middle to the top.
8. Transferring Flower 2: Now I've covered my design
with a whole piece of tracing paper and secured it with
masking tape to the page. The construction page, which then I've secured to the board. I want them to move together and not one without the other. If they do move, you
could see clearly. Now all I'm going to do is
trace these exact same arcs one more time on top of the tracing paper with
the same centers, the same radiuses
that we've just used. And I'm going to use pencil because I need that
pencil to be able to transfer onto my other paper that I'm going to be
doing, my final designer, I've now found the center
of my page, secured it. Flip the tracing paper
over, secure that as well. I'm just now going to trace. I can see I've missed
one arc there, but I'll be able to tell
where it needs to go. I can see already here, we're going to have to use
the holes we've made into the tracing paper instead
of the underlying grid. The further points
on the outside, you need to look very carefully on your tracing
paper to find them. On the edges, I can see them, I'm not sure if you can, but you need to just
be able to see your own and I'll go around
the page going this way.
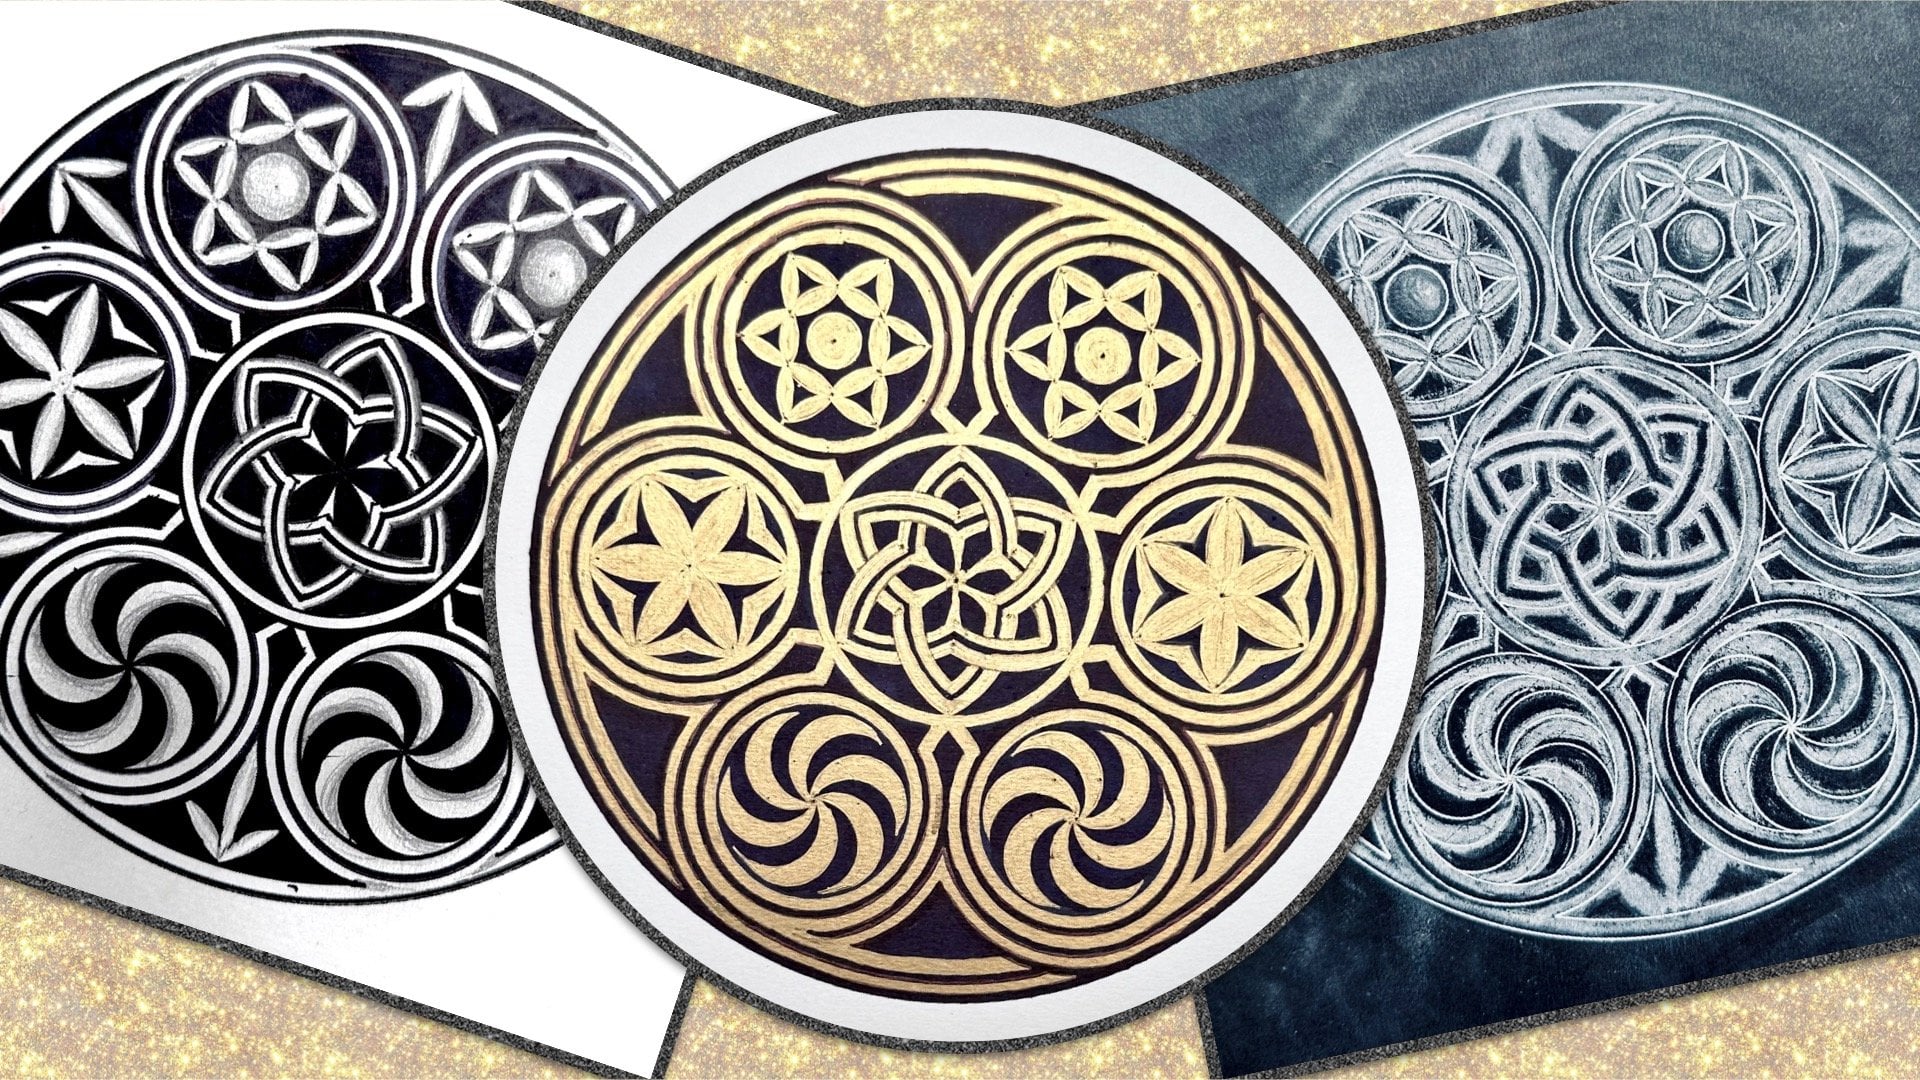
9. Painting Flower 2: I had to press quite hard. This was very difficult
to transfer on this paper because it's dark and it's
such good thick quality, it's heavy with
my compass point. Really hard, so I can then
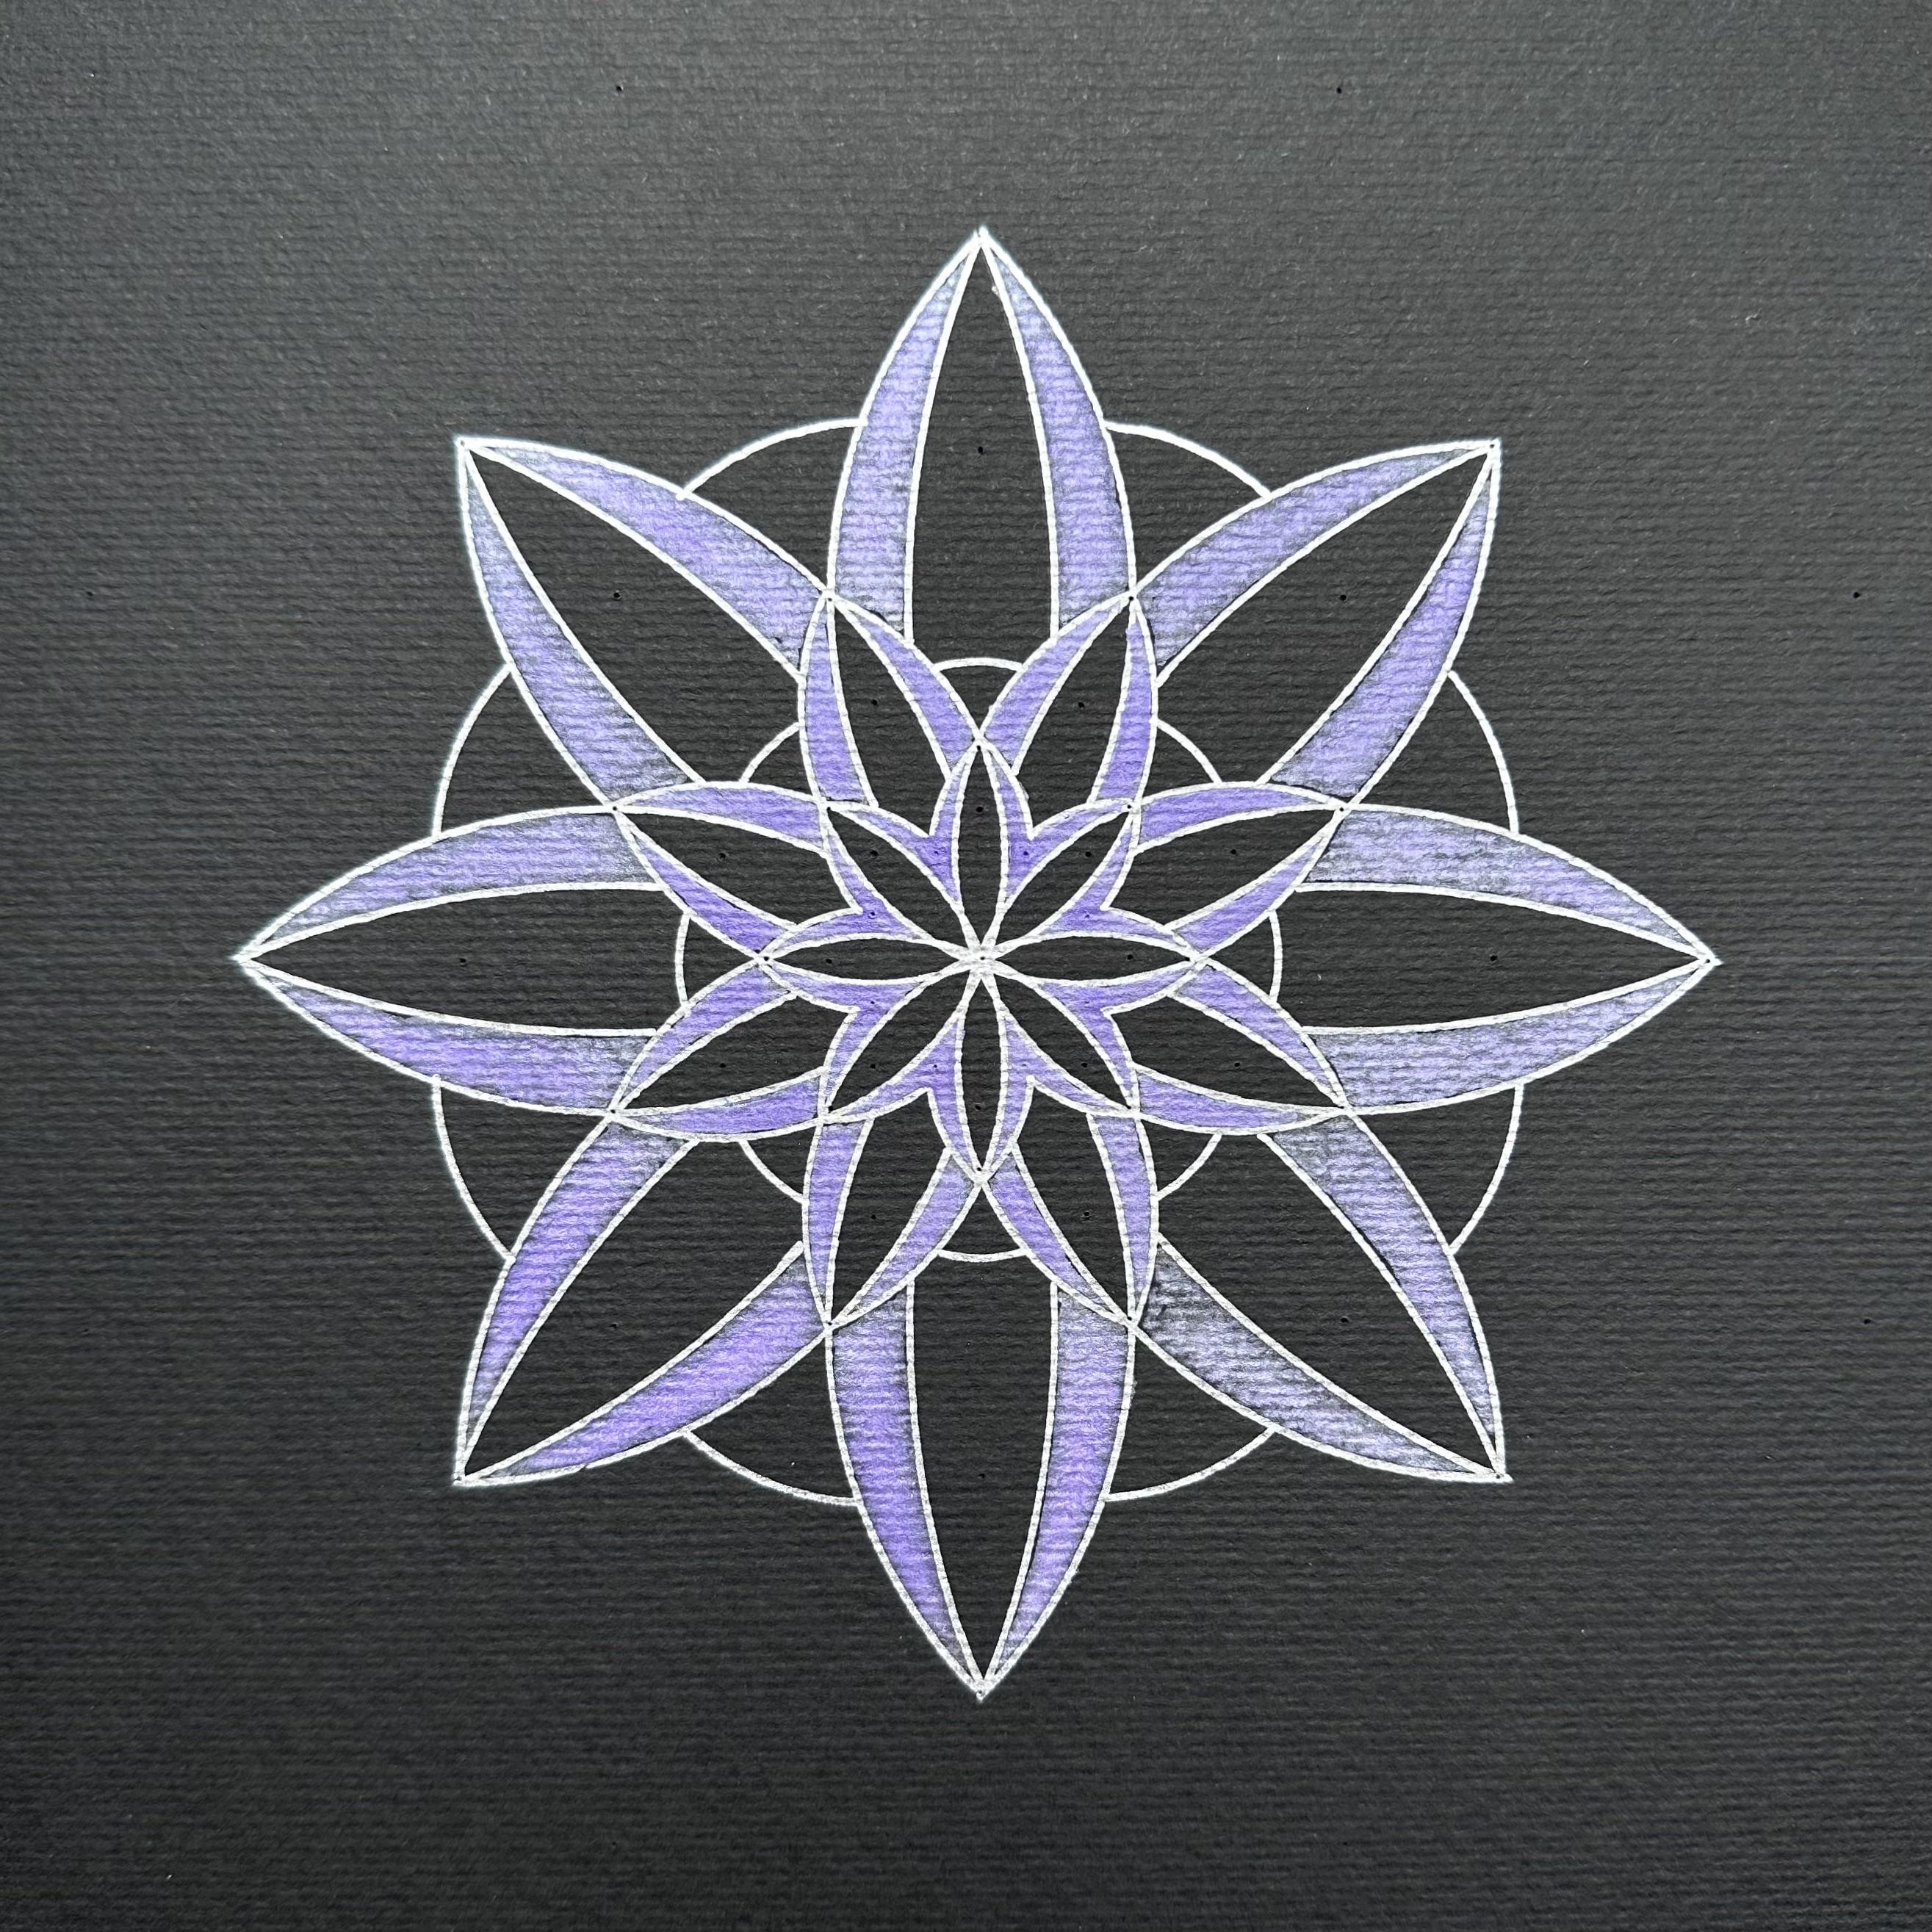
very lightly outline. Now I'm going to
officially go over, this is going to be
the final outlining of the pattern
with the painting. That is, I think the silver will look amazing on this paper. This looks amazing
on the black paper. It really looks fantastic. It doesn't smudge, this
could be left just as it is. I think it doesn't
need too much color. But I will add this gorgeous, magnificent pearl lavender
to just the tapered edges, just to emphasize those layers, that layer ring of the flower. I'm going to add a little bit of water to make it
easier to work with. Otherwise it's too
thick and too rich, but it's such a nice
color, amazing. I need to be very careful. I'll start from the
middle because it's the smallest parts and
to avoid smudging. And I will rotate my
paper around as I go see if that is okay. I've changed the angle of it so you can
actually appreciate that beautiful shade
of the color and the shininess as it's drying. It's just amazing. I'll go all the way around, just in this part of the middle. I will finish this round
and then we're going to adjust that fell. The silver outline
here really helped the paint not to
peel or whatever. And I caught a little bit
of silver at one point, but it immediately
moved away from it because of the texture that
worked out really well. I'm going to do the second round with a bit more
water in the paint. Okay, we'll see how that dries and then I'll
decide whether to add the circular arcs which we initially included
in the design. I think I will, but I'm not sure whether I want to color them. I'll just wait and see
how it dries first, this dry soil beautifully. That purple color is
one of my favorites. I can't get enough of purple. It's really nice.
I do want to add just that detail of that slightly roundness to give you that extra curve
and an extra layer. In fact, there was
another layer here. I will do these and
see how it looks. I don't think I will make
them purple though because they'll be too many purples
next to each other. All I'm going to do
is just the arc, think they start here just in between each outer petal. I feel that if you
were doing this on white paper or a lighter
background paper, you would probably want to add an alternating color
or more colors. But on the black, this looks so good
and sufficient, it doesn't need any more. Now I'm going to just measure this radius here,
the smallest one. And just, yeah, I'm going to
add another small layer of in here. It's easy. Now, once you see
where the points are, then even without the grid, it's fairly easy to add detail because it's
quite a pointed design. Otherwise, I'd like to give
back some of that roundness. The first design was
quite a lot more wider. I also really like it
when my artwork is on square paper compared
to rectangular. I'm going to use a
craft knife to just cut off these two parts and
make that in a square. And then it could
look really nice as a card can be framed. And I think that will look
better in a square frame. Okay, this is it. The final design is done. It's so beautiful. And Chemie, I think it's really elegant. It
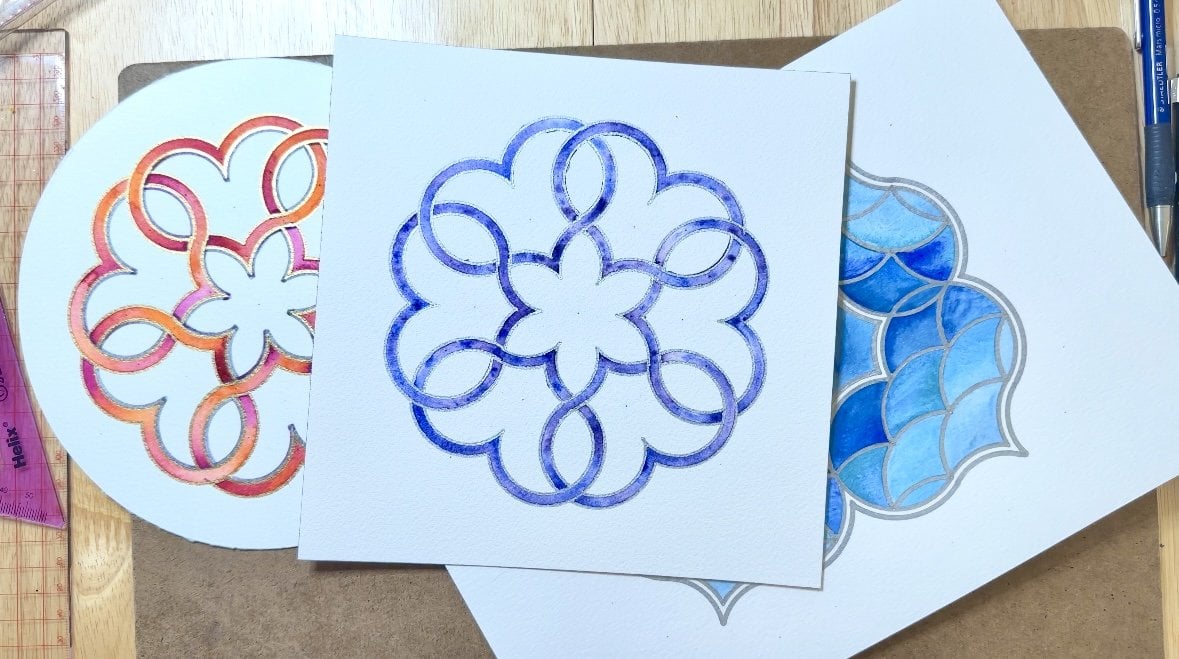
looks fantastic. If you cut into square
or anything like that, it's a good idea to keep these. And then you can test
lots of different colors on different kinds of paper. I'm pretty sure this color
will look fairly different on white paper or card
or something different. Also, I put quite a bit
of water you could try, if you didn't mix it at all, it would be a lot thicker, but I just think
it's just perfect. I'm happy with that. Quite a different look
from the first one. And that's the beauty of having two related but
different designs.
10. Thank You!: Thank you so much
for choosing to join my geometric class again, I really hope you're happy
with what you created. The beautiful geometric flowers
are bound to make someone really happy or display in your own home to
enjoy looking at. Please do share
anything you create. And if you have any questions, don't hesitate to ask me
in the discussion boards. The more projects we see, the more inspired we
all get by each other. Thank you so much again and
see you in the next course.
 Diana Reeves, Geometric Artist & Educator