Transcripts
1. Introduction: You ever admired a gorgeous
seamless pattern and thought, it's so complicated, there's no way I could ever create that. In this class, I want to make it not only
possible for you but for you to reach the end and say, that wasn't so hard. Together, we're going to create an intricate
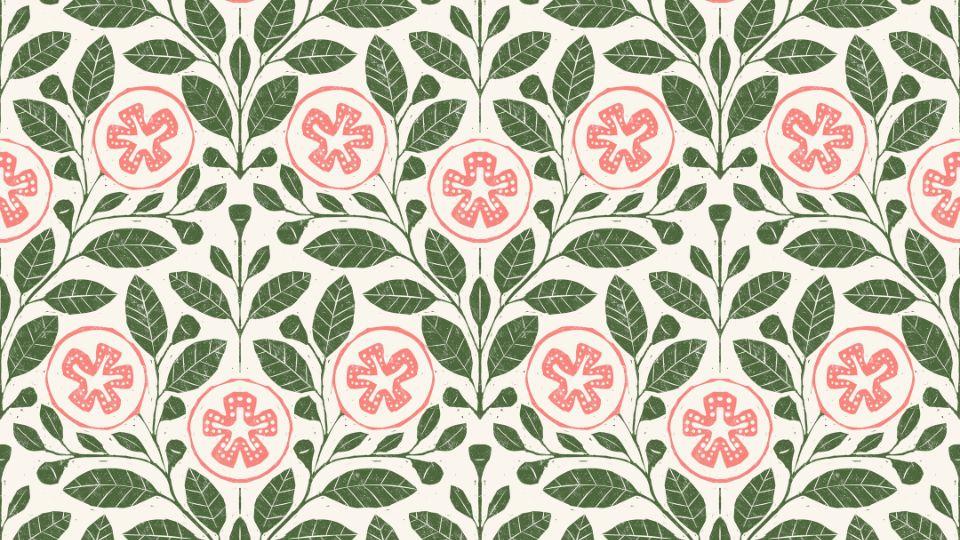
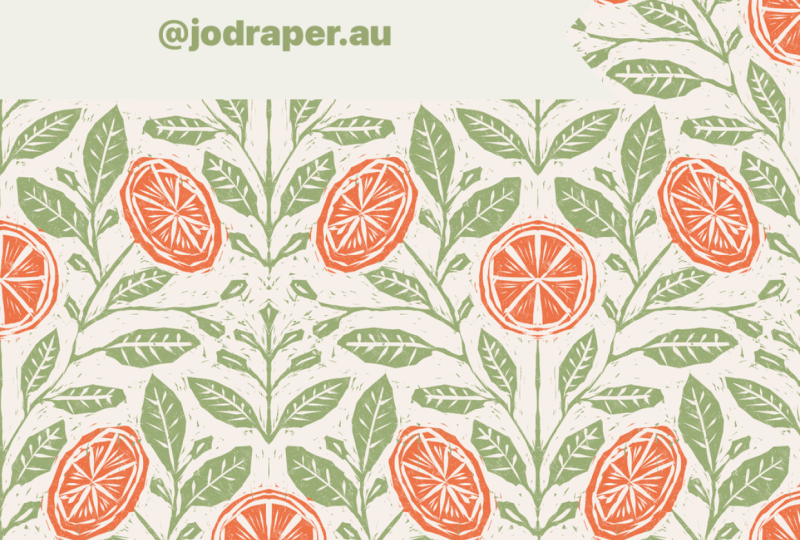
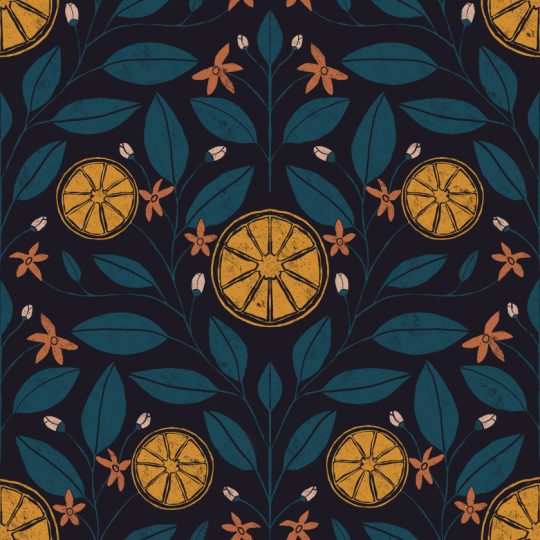
symmetrical block print inspired fruit pattern
entirely in procreate. We'll be using Procreate
symmetry tools plus one of my pattern
sketch templates, which will help us
with motif placement and creation of our
symmetrical artwork. We'll be using
what's referred to as the diamond method
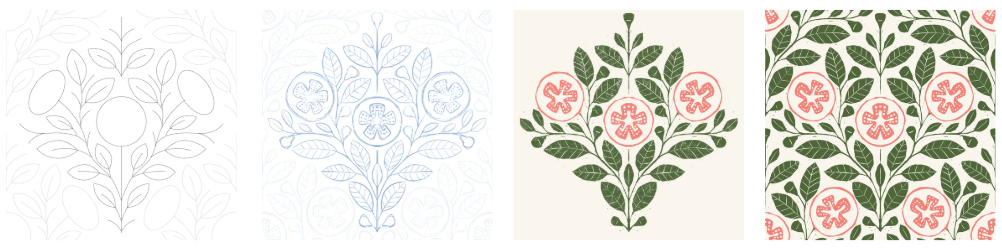
of pattern creation. We start by illustrating the center repeat of
our pattern and then duplicate and
position that center repeat into the four
corners of our canvas. When all this comes together, they create a seamless
repeat pattern tile. To start with, we're
going to sketch our fruit and botanical
elements using a template and the symmetry guides to build
the center repeat. Then I'll show you how
to ink your motifs to give them an organic
block printed feel. Followed by the last
step of duplicating a simple repeat into the
corners of your tile, magically creating
that seamless pattern. At the end of this class, you'll understand a
simplified process of illustrating intricate block print style
seamless patterns, as well as how to use the
symmetry tools in Procreate. You'll walk away with a finished seamless
repeat pattern for your projects
or your portfolio and you'll also be able to use
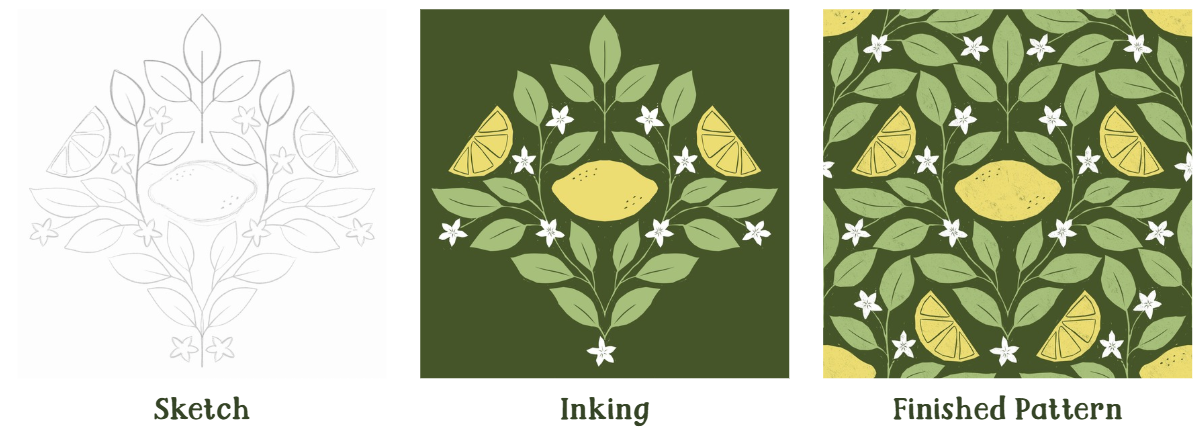
the template over and over again to create more fruit
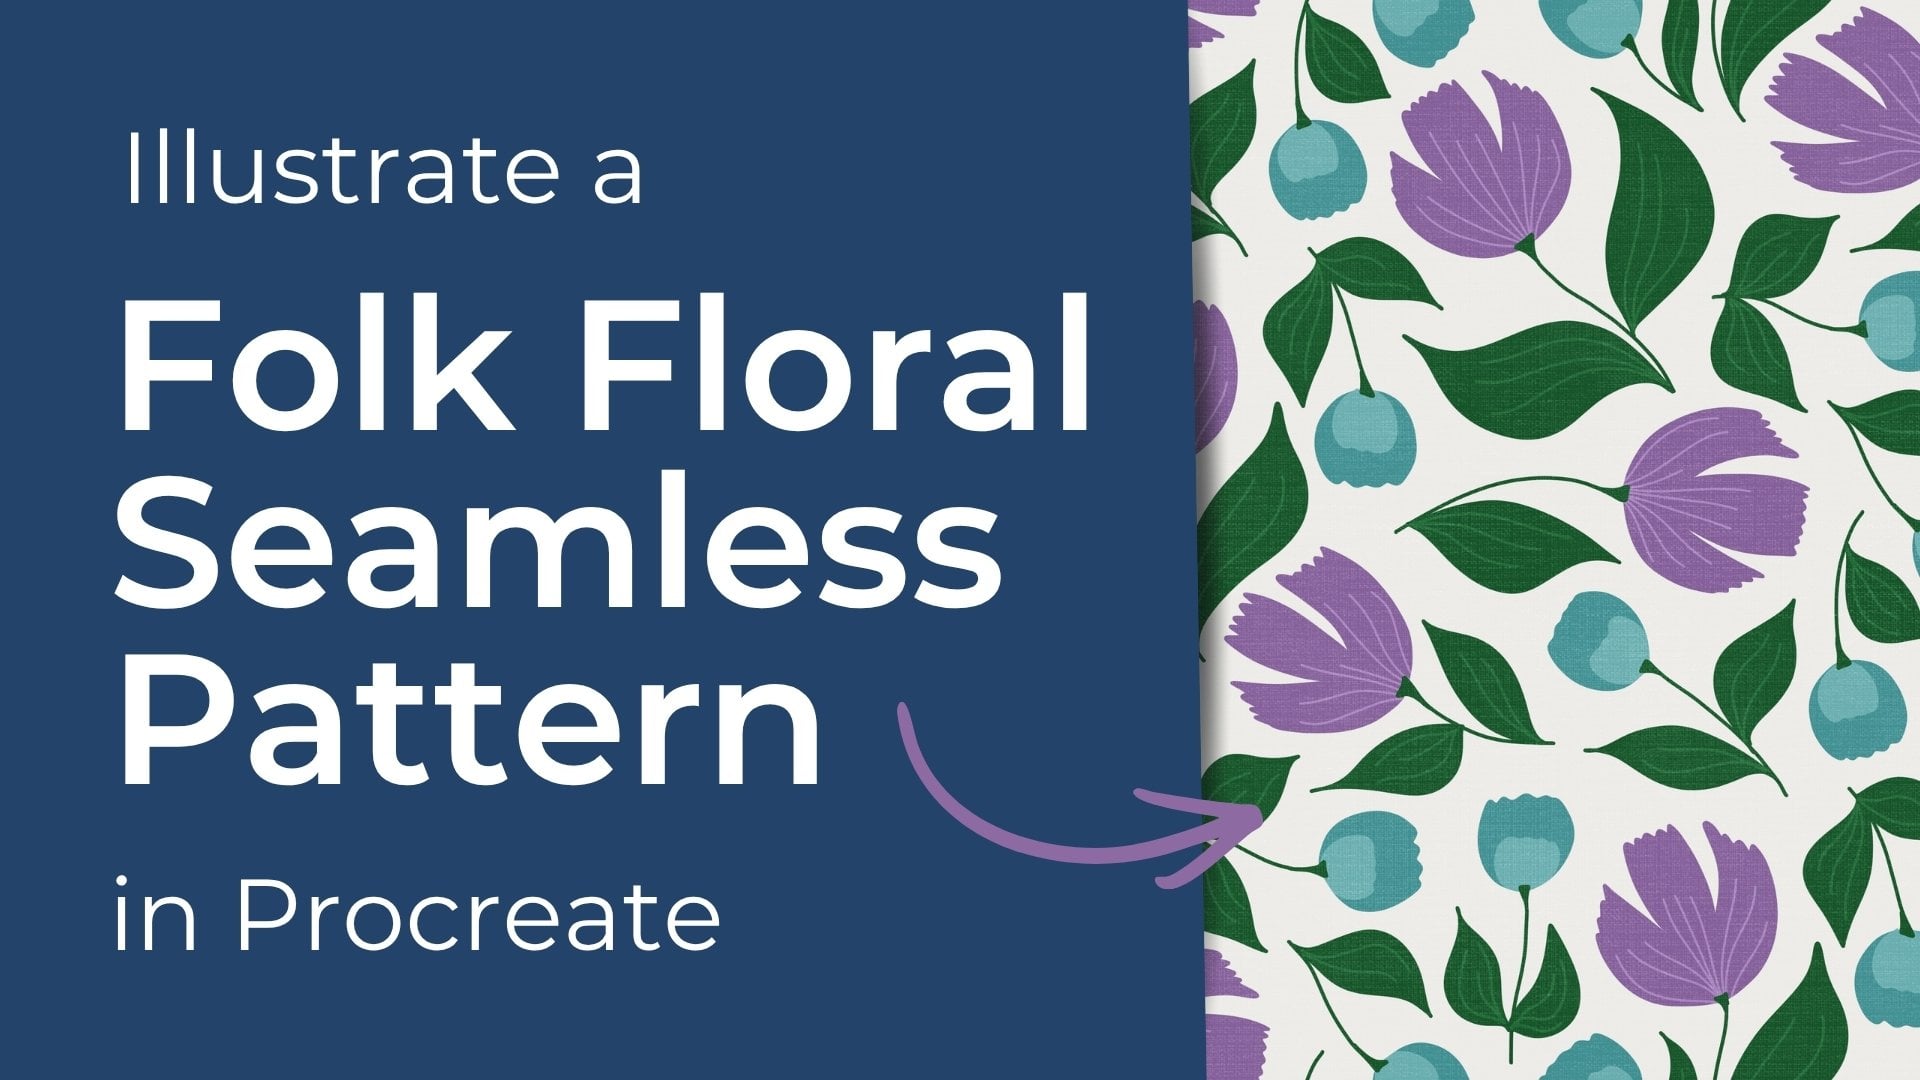
or even floral patterns. Even though these
two patterns were designed using the
exact same template, they look completely different. If we haven't met before, I'm Michelle, your
instructor for this class. I'm a veteran graphic designer now specializing in
surface pattern design. I'm from Sunny Queensland in
Australia and I love helping fellow creatives enjoy some met with their craft and
developing their skills. I'm a beginner friendly teacher, don't worry if you're
not a pro sketcher or if you're new to Procreate. You don't need to be an
expert to enjoy this class. I will take you step by step
through the whole process. Let's get started and see how we can use a few
simple tools and techniques to create a beautifully detailed
seamless pattern.
2. Preparing for the Class: You'll need to follow along with this class is your
iPad and Apple Pencil, as well as the Procreate app. I've also put together a Procreate brush
set which includes the template as well
as inking brush and textures that I'll
be using in the class. You can download
this brush set from the projects and resources
section of the class. I'll walk you through
how to install the brush set in the setup lesson if
you've never done it before.
3. Finding Inspiration: Doing our pattern or any illustration is to
get some inspiration. And what I did over
the weekend is I found a fruit and veg shop, and I just had a
bit of a browse at all the different colorful
fruits and veggies they had there to get some
inspiration because I wanted to illustrate something
a little bit different, something I've
never done before. I've done lemons, I've
done blueberries, strawberries, all those, and I wanted
something different. So for your illustration, you might want to
do the same thing. You might want to
have a look around the fruit and veg shop or you might want to just
browse some photos if you don't have one nearby. Something that I noticed
at the fruit and veg shop was that you can't
always see the inside. And the inside of some
fruits and veg have really awesome textures
and patterns and stuff. And so what I decided
was to go with a guava. I searched for some
images online, and I found that guava has this really interesting pattern when it's cut a certain way. It's kind of like a star flower
with the seeds arranged. So I decided to go with a guava. But your task for this lesson is to look
at different fruits for inspiration and
decide on a type of fruit that you are going to
illustrate for your pattern.
4. Set Up Your Canvas: We've got our inspiration,
let's set up our artboard. If you haven't
downloaded brush sets before from Procreate, I'll
show you how to do that. So navigate to your files
app on your iPad and find where you saved FQ
block print Brushes BushSEt. Simply click that, and it
will import the brush set into Procreate and we'll
open it at the same time. Okay, so that has installed to your Procreate brush library. Let's set up an artboard
for our pattern. So tap the plus icon and
create a new canvas. We want it to be 3,600
by 3,600 pixels. DPI, if you are specifically
creating this for spoon flower or
something that requires a DPI of 150, you can use that. I'm going to use 300 DPI. If you want to change your color profile to see MC or RGB, that's
your preference. I'm going to use SRGB for today. So we have our square artboard. Now we want to place our
template within the artboard. So come over to your brushes, and you'll now find within
your classic library, you will now have a brush set
that we've just installed, FQ block print brushes. So within that brush library, you'll see the pattern template. We want to place that
on our artboard, so select that brush and change the color to whatever color you would like your
template to be. I usually just use black but it's your
personal preference. So now all we need to do is tap in the center
of our artboard. So now we can see
that our template has been added to the artboard, but it's not filling the
canvas, and we need to do that. So click the selected resize
tool and tap fit to Canvas. And you can see now it
fills the entire artboard. One thing that you
might come across when you do this is if you accidentally tap
your template too close to the edge and
it falls off the edge, then that is going to
mess up our pattern. So just erase it and
then just try again. When you fit to canvas, it may be a little bit blurry. That's okay. We don't
need it to be perfect. We just need it to be able to guide where we
position our motifs. So if you want to be able
to reduce the opacity, you can just come over here
to your template layer. Click the N, and then just use your slider to reduce and
increase your opacity. I like to leave
it about halfway, and let's rename
our layer template. So that we don't get
mixed up in our layers. You can also optionally lock that as well just to
prevent it moving. So that's our artboard ready for the next stage,
which is sketching.
5. Sketch Your Motifs: Okay. Now let's move on
to sketching our pattern. So we have our template layer, but we don't want to sketch
onto the template layer. So let's create a new layer, and we'll rename that
our sketch layer. And select any sketching
brush that you want to use. It doesn't matter
any sketching brush. And I don't know if you can hear the
birds in the background. Enjoy the bird song.
Hey. Now, because this is a symmetrical template, we also want to
turn symmetry on. So with your sketch
layer selected, Come over to the spanner
and find canvas. Switch on, toggle on
the drawing guide, and then edit the drawing guide. At the moment, it's just a grid, but we want to turn
it to the symmetry. So tap symmetry and
then come to options. You'll see vertical, horizontal
quadrant radio radio. What we're using
today we're using the vertical for this
particular template because as you can see that
it's a perfect mirror image. So select vertical,
and you can make sure assisted drawing
is on as well. And once you've
got that selected, we're ready to start sketching. Come over to your sketch
layer and you will now see that assisted assisted is on. That means that whenever
you are sketching, what you sketch on one side will also appear on the
other side as well. So we really only
have to sketch on one side of the center
repeat part of the template. So we're not having to
draw the whole lot, and that's one of the things
that makes it quite easy. So let's start sketching here. I'm sketching a Guava. You'll start sketching. And I'm just using
one of the pencils within the Procreates
brush library. I'm just doing a
rough sketch here. My guava. If you're
doing a Guava as well, you can follow along. You might have chosen
something different. I'm doing this really
cool star shape. Block printing is
relatively abstract. It's not always it's
not always lifelike. So you don't have
to add in all of the details to your sketch. And as you saw, I was just doing one side and it was filling
in the other side as well. If something that
you're drawing, say in the center line, if you don't want it to be
symmetrical or the shape, the fruit that you're using, it doesn't kind of
support that symmetry. Switch off your drawing guide, and you can do that either
from that menu or we can just come over to our
layer and then just toggle on drawing assist. Okay. I've done my center. Now I'm going to do I'm going to do another
guava over on this side. Now, this template, all
the lines and guides, they are literally just a guide. You do not have to
follow them 100%. And that's what I'm doing
here is I'm just creating another guava here, cut in half. And as you can see, I've gone over
leaves and branches, and I've not stuck within
the bounds, and that's okay. Like I said, it's just a guide. Okay, so I've added my fruits, and now I like to pop in
the branches and leaves. And for me, guava
leaves are actually quite a similar shape to
the leaves in my template. So I've made the job
easy for myself. But if you've got
different shapes, don't feel that you have
to follow the leaf shapes exactly because as I
said, it's a guide. One thing that it's
helpful for is when your sketches or when
your center repeat is approaching your corners, and that's the one feature
you'll notice about the template is
the center repeat is darker than the corners. The idea for our template is
for us to just illustrate in the center repeat and
not the corners because what happens is
we duplicate this into the corners
at a later stage. But what it shows
you is it shows you where your pattern
is going to appear in that later stage so that
you know not to put any motifs where existing
template shows up. And guava, when they
are tiny little buds, they kind of look like
little pears or mini guavas. So in the sections of
the template where I've kind of created space
for buds and flowers, that's where I'm
going to put them. Okay, so I have finished my sketch,
and I'm happy with it, and I'm just going to toggle off my template layer so that
I can just see my sketch. And that way, I can just pick up anything that I've missed when I don't have the
influence of the template. And then if you're
drawing along, your template will look your sketch layer will
look quite similar. When you've got the template
layer switched off, you'll have your motifs illustrated in a very rough
diamond shape in the center, and you'll have nothing
in the corners. If yours looks like that, you're on the right track. And the reason we do that
is because we're going to duplicate our center
repeat into the corners. So let's do that
now just to test that our sketch is
in the right spot. And there's a few steps to this. The first one is we want to
duplicate our center repeat. And then underneath that, we're just going to
create a new layer, and this is just going to be an invisible placement layer. So just fill it with any color, but then reduce its
opacity right down to zero and then group your
duplicate together. So hopefully that
wasn't too confusing. We have our original
center repeat sketch, and then we have
a group above it. And within that group, we have a duplicate
of the sketch plus our invisible
placement layer. Let me demonstrate why we have the invisible
placement layer. Because we need to move our center repeat from a
center into the corners. If I just select
the sketch layer, you can see that it only selects within the bounds of
the motifs that I've drawn, but I need it to select
the entire template. If you watch Instagram or TikTok or you've seen
other demonstrations, some artists will actually
draw in the corners, and then once they've
done their relocations, they'll then erase them I don't I'm not a fan
of that method. I often forget about that layer. And so I found
that just creating a blank fill layer is
more effective efficient, and if I forget about it,
it really doesn't matter. So now that we've selected
when we select that group, you can see that it now
selects the entire artboard, not just the motifs. So now that you've done that, we want to then duplicate
that 13 times so that all up we have our
initial center repeat sketch, and then four duplicates
within the invisible layer. So now what we're going to
do is we're just going to move them to the corners
using our move tool. And here, double check that
you're seeing the gold guides because that means
that it has snapped correctly where
we need it to go. Mine has moved, so I'm just
going to try it again. Then we'll move to
another corner. And we're going to repeat
that with all four corners. Now, if you're finding that
there are too many things it's snapping to or you're
a little bit shaky, let's switch off
all other layers other than the one
you're moving. That way, it removes anything kind of removes the snapping rights
to anything else. And you'll find it a little
bit easier to position. And so we need one in
the bottom right now. Here we go. And then once we switch all the
other layers back on, you'll see that now we have a filled seamless
repeating pattern tile, and we can just zoom in
and just check the edges where our center repeat
approaches the duplicates. And let's just have a
look and see if there's anything that we can notice
that we might want to change. So here I don't want an overlap. I don't want any of my elements
overlapping each other. So I can see here that
nothing's overlapping, which means the template
did its job well. If you've got anything that
you want to fix, like, let's just I'll just take
this little bud here. I might like to
just edit that or make it sort of point
this way a little bit. So what I'm going to
do is I'm going to find my center repeat sketch, and I'm going to edit that one. So what I'll do is
I'll just erase this and I will just fix it. So if there's something you
want to fix in your sketch, now's the time because
it's easier to edit a sketch than to come back. It's not impossible,
but it's easier. Okay. And actually,
I've just noticed here just noticed here, I'm going to take out this stem because I just want the
fruit off the stem. Okay. So, yep. Alright, so I'm happy with that. And now I'm going to
merge my sketch layers together because I don't
want too many layers, we might run out of layers. So what I'm going
to do is I'm going to pinch my duplicates
together to merge them. And so I'll just name
it sketch corners. And I just want to reduce the opacity down
so that I can just see the center repeat so I can see the
center repeat clearly, but I can only just see the
corners because that way, it's going to make it clearer
to me where I have to ink. So then group your two
sketch layers together. Rename that sketches so
that you can refer to them. I like to keep my
different layers. I have toggled the template off, but I like to keep it there in case I need to refer back to it. Same with the sketches layer, I can turn it off, but I
can still refer back to it. So now we're going to move
on to our inking stage.
6. Inking Your Artwork: Now it's time to
ink our pattern. And we're going to
do this in a way that replicates
linocut printing. So let's start with a new layer, and this is going to
be our inking layer. And if you've created
patterns before, you've probably
done them in a way where you draw in the motifs. We're going to do this a little bit differently
because we are trying to replicate block
printing or linocut, where instead of
drawing the motif in, we kind of cutting away
at the white space. So let's start by selecting
a color for your block, the block that we're
going to carve away. And you can go with black, gray, any color that
you're able to see, and just fill your inking layer. Now, of course, now we
can't see the sketches, so we just want to
reduce the opacity down so that we can see
the sketch underneath, but we can also see
our inking layer. And here, we haven't got our
symmetry tool activated. So with this step, just tap your layer and
tap drawing assist, you can see that assisted is on. So now when we move
to the next step, we don't have to do
all of it again. We can just carve out one side, and it will automatically
do the other side for us. So now, instead
of using a brush, we're going to use our eraser. Tap your eraser and find
your FQ block print brushes. And what we're going to
use is the gouge brush. It's called Gouge brush because this is one
that I've created to imitate the carving tool that you would use in a linocut. I'll start fine, and then
it's precious sensitive. So it's like we're going to
be cutting out sections of our sections of our Artwork. So here, instead of
carving in on our motifs, we're actually going to be carving away at the white space. And to replicate the
look of a linocut, we want to take short
straight strokes. And we are going to be carving around the sketch lines
that we've put in. This will take time, but it produces such an awesome effect. And if you make a
mistake and you need to bring something back in, just switch to the same
brush in your brush library. Block print brushes,
the gouge brush with your block print color, and just color it back
in. But continuing. And this is going to go against everything that you've done in previous illustrations
because you're used to drawing them in,
not carving them out. One other thing I
want you to promise me is that you won't focus on covering up any
parts that you've missed because if you've
ever seen block print art, you'll know sometimes there
are strokes that are missed where the block still exists even where
it's been carved out. And that is something that makes block printing so gorgeous is the natural organic parts of the liner that
haven't been cut out. So when you're
doing your artwork, when you're doing your carving, please don't make it perfect because making it imperfect is what's going to
make it so perfect. And in this section here, you'll notice that I'm
carving over my seeds. I'm going to draw
them back in later. So well, linocut,
you can't do that. Dig your artwork you can. So I'm just going to
progress through this going all around my leaves. So what we're left with is
we've removed the white space, and we're just left with our center repeat that
looks like a lino block. And I'm just going to switch off our sketching layer so that I
can just see the inking and you can see all
these imperfections where I didn't quite
erase it properly. It's okay because it looks like the organic strips or pieces of lino that hasn't
been fully cut away. But that's what gives it that's what enhances the
look of the linocut.
7. Adding Color and Texture: Okay, now that we're
completing the inking stage, what you should have
is your center repeat, your block printed
center repeat, and nothing in the corners. And as you can see, this is why I got you to leave the remnants. Any areas where you
haven't carved out. I want you to leave
them there because it adds a little bit of texture, and it adds that depth, and it gives it that
organic block printed feel. Now, our next stage is to add a bit of color
and a bit of texture. So one thing that you might choose to
do it all one color, but I'd like to split mine up into a few different colors. I want my fruits to be that
kind of guava pink color, and I want my
leaves to be green. So what we're going
to do is we're going to split up this section. So with your inking
layer selected, come across to your selection
tool and choose free hand. And just use that to cut around any fruits that you would
like to be a different color. And if you've ever
tried block printing, this is kind of similar to when you have your final print, but then you kind of cut
it to separate the colors. I'm just going to
duplicate that, and what that does is the
selection that we have, it just pops it
onto a new layer. So when we go to
the other fruits, just come back to our
inking layer again and then grab your selection
tool and cut around. And I didn't explain
it at the time, but when I duplicated it, what I did was I
used three fingers and I just swiped
quickly on the screen, and that gave me my
copy and paste menu, and I just duplicate it. Apologies for not explaining
that one earlier, and I'm just going to repeat with my final piece of fruit. Okay. And then three
swat duplicate. So now I've got my
original inking layer, and I'm just going to inch
to join together my fruits. I'll do my fruit
and then my leaves. If you've got flowers
instead of buds, my buds are going to
be the same color as my flowers as my leaves. But if you've got flowers and
you need to recolor those, you can do that as well. But to recolor, what
we're going to do is we are going to use
the alpha lock function. So tap on the layer that you want to color in and
just tap alpha lock. And what that does
is it prevents any changes from happening
where your artwork exists. So if I was to come in with a brush and just color
it in just any color, it will only occur
where ink exists. Okay. But we can also
just recolor in one go. So with my Alpha
lock toggled on, and you can tell by
the transparency grid, tap it to bring the menu up
and then tap fill layer. So that just happened to be the right color
that I needed. Although I might
just change it for perhaps maybe a
darker and try again. Fill layer. Yeah, that's better. Then for my fruit,
I'm going to do the same thing,
select the layer, toggle on Alpha lock, and then come over and
I'll choose my color. I want it to be a pinkish
coral kind of color. Yeah, like that. I'll
just fill layer again. So now you can see that
my fruit is one color, my leaves and buds
are the other color. If you've got a third
layer for flowers, you can repeat that as well. Now let's add some texture. So, create a new layer
above your fruit. I'm doing the fruit
layer. You might be doing the flowers or the
leaves or something, and this is just going to
become our texture layer. Alright. So what
we're going to do is add the texture that is included in our
block print brushes. We're just going to
add the print texture. And at this point, we want to add texture that's the same color as
the background. For my background, I would
like a slightly off white. So I'm going to add
my background in now. You can either do
background color because I like to chop and change or just try different
backgrounds, I'm just going to add a
new background layer, just a new empty layer
underneath my motifs. And I'm just going to fill that with the color
that I'm looking for. So I want kind of
off an off white, and I'm just going to fill that. So now we've got our
background layer, and that's the same color that I'd like to
use for my texture. So come over to
the texture layer, select your texture brush, and literally just paint
in over your motifs. I'll zoom in so that you
can see what's happening. So I'm just brushing my
texture over my motifs. Don't worry if you
reach the corners, you're not going
to see it because we're going to clip
it to our artwork. Just adding that texture
that makes it look like it's just block printed because when you're
block printing, the paint doesn't perfectly
cover a whole lot. And we want that look. Okay. So now what we want
to do is we want to clip that texture just to our artwork so that it doesn't appear
on the background as well. The reason I'm doing
that is not because I don't want the color to
show up on the background, more because when I
add motifs later, because I was not
careful near the edges, I don't want it to
appear on the edges because that can
ruin the scenes. So what we're going
to do is tap on the texture layer and
then tap clipping mask. And that is now restricting the texture so that it
only appears on my fruit. But we also want it to appear
on our leaves as well. So let's duplicate
that texture layer. Tap, hold, and drag. Never works with the pen, so
I'm going to use my finger. Tap, hold, and drag
it so that it's above your leaves and then
apply the clipping mask. So now you've got your texture and then non
destructive as well. So if you want to see
the difference between them with and without
the texture layer, you can toll them off. You can also experiment with
layer blend modes as well. So click on your texture, tap the N because N is
for normal blend mode. Just try things like
overlay or soft light. They give different effects, so just experiment a little bit to get the effect
you're looking for. Alright, so now what we have is our completed center repeat, and we need to duplicate
to the corners. So I'll show you how to
do that in the next step.
8. Forming the Seamless Repeat: Alright, so our next
step is to duplicate our center repeat so that
they appear in the corners, magically creating
that seamless repeat. So what we can do
is group together our inking layers so that
they're nice and neat. And I'm going to rename
that center repeat. Okay. And then we're going
to duplicate that ready so that we can duplicate
this to the corners. But I'll just call that
corners, actually. Call it whatever you want,
anything that you remember. But within our corner layers, before we duplicate
and create the four, let's just reduce the opacity
of our background so that that becomes our invisible
activator layer. Do you remember in
the sketch layer, I showed you how to
create a fill layer, but then make it
invisible so that when we use our selection tool, the entire artboard is selected. So instead of creating
a new field layer, we're just going to use
our existing background. Okay. So the background is still visible on
our center repeat, but it's not visible
on our corners. So now we can go ahead and create four copies
of the center repeat. So we have center repeat, and then one, two, three, four corners,
so it's five together. And we're going to move our send to repeat
duplicates to the corner, and you'll probably find that if you didn't need the trick
earlier, you'll need it now. You've got so many
elements there competing, so it's helpful
if you switch off all the others other
and just leave toggled on the layer that you're moving. And it's much easier. And then here's the magic part. We toggle them all back on, and we have our
seamless repeat tile. This is now ready for you
to export and to export it, come over to the spanner, share, and then we want to
share image, not share layers. If you share layers, it will export each and every
activated layer. So we just want it
as all one image. Okay, PNG, JPEG,
whichever you prefer, I'm going to choose PNG. Okay. But basically,
what you have here is your completed pattern.
9. Your Class Project: When you finish your pattern, I would really love to see it. Your project for this
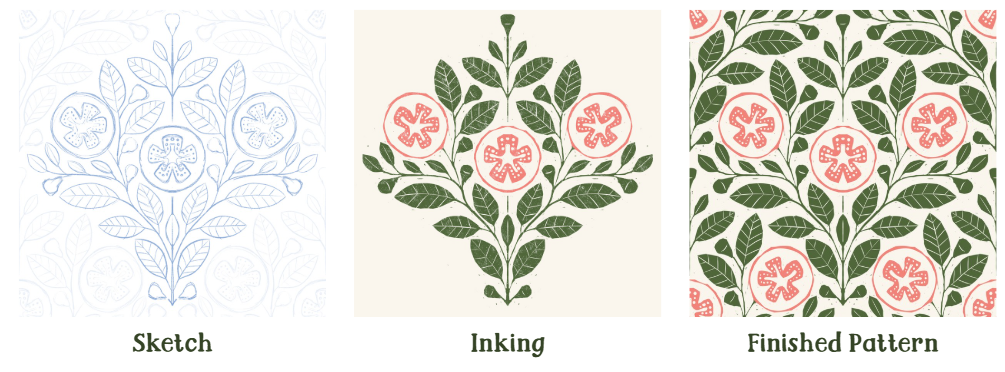
class is to share your finished pattern as well as some of the in
progress pictures. You can share your sketch, then your inking followed
by the final piece. I want to see not just
the polished pattern, but the beautiful but
messy middle stage of illustrating it too. To share your project, go to the Projects and
Resources section in the class and tap submit
project to upload your images. If you'd also like constructive
feedback on your pattern, include some questions in
your project submission too.
10. Thank You: Did you enjoy this class? If you did, I would be so
appreciative of a review. Let me know what you loved about the class or what I
can do to improve. You can also check out
my other classes here on Skillshare for some
more patternyGodness. Thank you so much for
joining me for this class. I really hope I've
taught you some new skills that help you grow in your pattern design journey.
I'll see you next time.
 Michelle Marks, Surface Pattern Designer