Transcripts
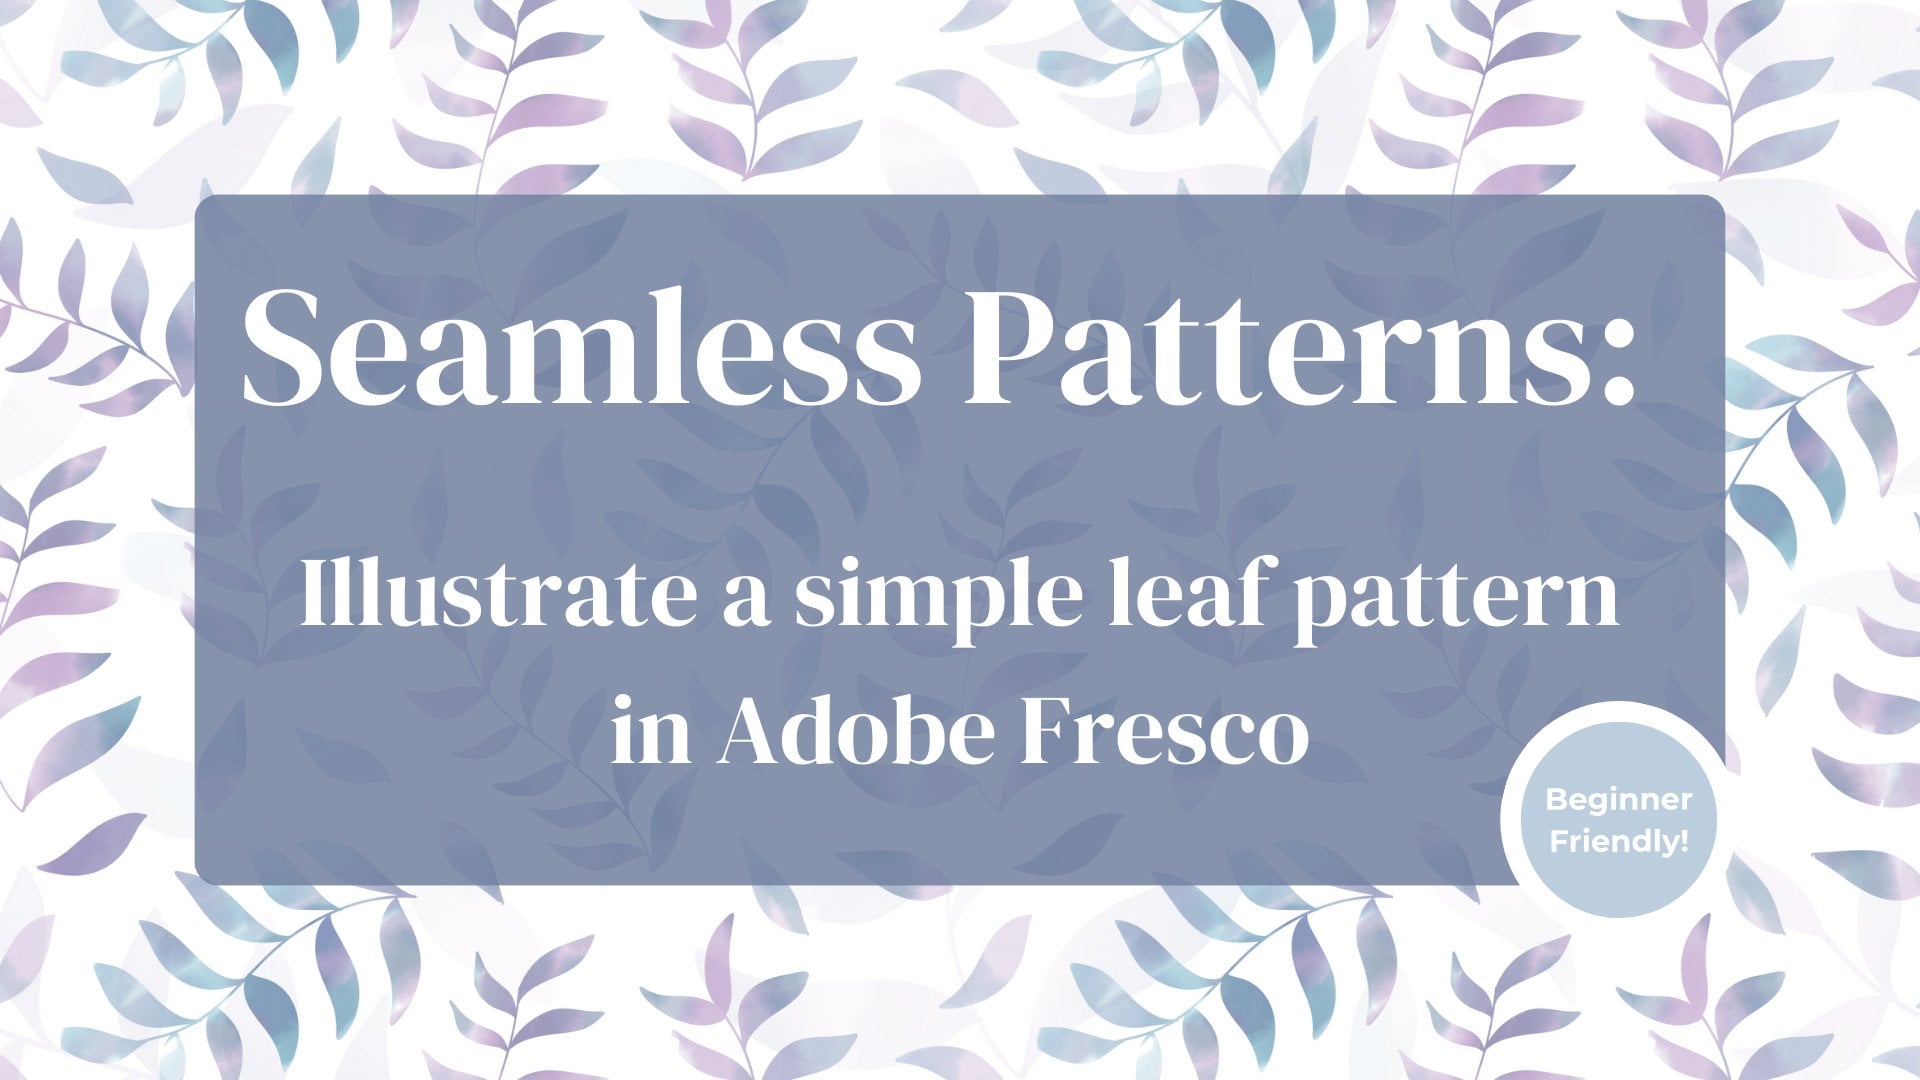
1. Introduction: If you're learning
how to illustrate seamless repeating patterns, there are two core skills
that you'll need to practice. One is the layout of motifs to ensure a
well balanced rep. Number two is making it repeat infinitely with no
visible seam lines. Once you master these skills, you can bring any
subject matter, design, style, media, and color
palette to your patterns. This class is designed to help you get started in
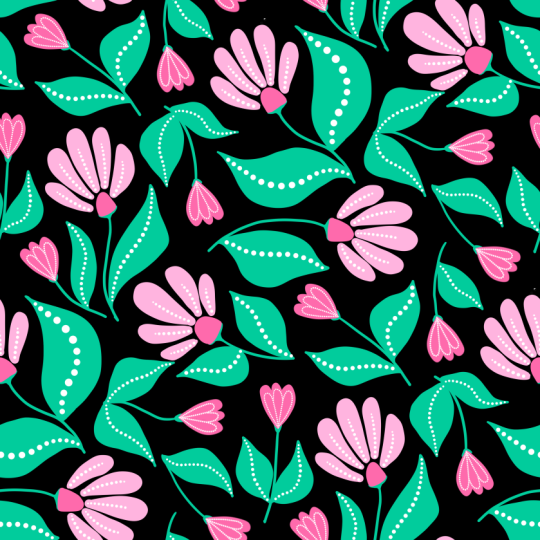
pattern illustration. We are going to illustrate a folk floral pattern
using a sketch template. The template will
help you practice the pattern illustration
process while you're learning how to lay out patterns and
make them seamless. By shadowing me in this class, you'll pick up these essential
pattern design skills much faster and you can use the template over
and over again to create completely different
looking floral patterns. Even though these
two patterns were designed using the
exact same template, they look completely different. If we haven't met
yet, I'm Michelle. You're instructor
for this class. I'm a veteran
graphic designer now specializing in surface
pattern design, and I'm from Sunny
Queensland in Australia. That's the accent that you hear. I love helping fellow
creatives enjoy some met with their craft and
developing their skills. At the end of this
class, you'll understand a simplified process of
illustrating folk style florals, positioning them in
a center repeat, then duplicating that
center repeat to produce a infinitely repeating
pattern tile that you can use for
scrapbooking paper, printing on fabric, using
cricket projects or selling to other creatives or people who are buying fabric. If you're ready to illustrate a folks style floral
seamless pattern in procreate with me,
let's get started.
2. Supplies You'll Need: You'll need to follow
along with this class is your iPad and
your Apple Pencil, as well as the Procreate app. We'll be using a
floral template, which you can download from the Projects and Resources
section in this class. I'm also going to
show you how to add a texture overlay
to your pattern, but this step is optional. You'll also find this in the projects and
resources section. You have those downloaded and ready to go and
we'll get started.
3. Setup Your Artboard: Okay, if you haven't
already, open up Procreate. Let's create a new art board
where from the home screen, we're going to click the
plus sign. New Canvas. We're going to press the
icon in the top corner. And let's set it up 3,600
pixels by 3,600 pixels. Let's set it to DPI of 300, so we've got some
decent resolution, and then click Okay.
The ok button. So now you've got a square
canvas to work with. Now we want to import our
pattern design template. So along the top left
hand side memory menu, press the spanner icon and you'll see the icon
that is selected is blue. So we want to click Add, and then depending on
where you've saved it, if you've saved
it to your files, go to Insert File. If you've saved it as a photo, go to Insert Photo. Okay. And then navigate to the template and then
just click on it. And you'll see the
template here is not quite the same
size as my artboard, but we need it to be the
same size as the artboard. So what we're going to do is
just click Fit to Canvas, and that will then
stretch it so that it is touching each of the
four sides of the canvas. You can see that it stretches
right to the edge there. So our canvas is ready to go for us to start illustrating. One thing I like to do when I'm using these templates
is I like to reduce the opacity so that I can only just see the center repeat. This template, you'll notice it has darker sections and
then lighter sections. What we're going to focus on is illustrating within
the darker section, and we're going to leave the
lighter sections for now. To reduce the opacity, come over here to
the layers panel. You'll see where
it says it's got a tiny little N. Click the N and reduce the opacity
down to your liking, I like to have it quite
light when I use them. However, so that you
can see them as well, I'm just going to increase it, but I want you to set it to the level that you
are comfortable with. You can see it perfectly. If you want to leave it up at the maximum,
that's totally fine. This is your personal
preference here. But this is how I
like to use it, so I'm going to
keep it that way. You should be able to see it
nice and clearly there now. Okay, so now we've set that up, we're going to start and
illustrate our center repeat.
4. Draw the Flowers: So let's go ahead and illustrate
our center repeat now. It's important here that
you create a new layer. So click the plus sign
in the Layers panel. If you're not already
in the Layers panel, then just click
the Layers panel. Click the plus sign
to add a new layer. Please don't just
double check this, pay attention for this tab so that we don't muck up later. Okay, make sure you're not drawing on your template layer. In fact, you can rename it
if you want to template. Then lock it, perhaps
for now by selecting it, swiping to the left
and clicking Lock. This will prevent you from being able to accidentally draw on the template layer because
in your final artwork, you're not going to see
the template layer. We don't actually want it there. It's just a guide for us now. So if you lock it, you
don't accidentally do. And then come and select
your second layer. If you want to rename it, we can just do motifs or center repeat or
something like that. Sometimes I use multiple
layers with these, so you don't need to rename
it just yet, totally fine. But the main thing is
ensure that you have a new layer and that you're not drawing on your template layer. What we're going to start
with on this template, you'll see leaf shapes, stem shapes and then circles. My intention for this is for
you to put your flowers and buds within the circles and then leaves in the
leaf shape. All right. So what we're going to do
is we're going to start with we're going to start
with the larger circles, which I intend for flowers. You've got smaller ones for bud. So let's start with the flowers. So first of all, decide on a color that you would
like for your flowers. I love purple, so
I'm going to choose a nice a nice purple. I really like muted tones. So if you like
bright and vibrant, you'll be in this area. But I really like muted tones, especially for the
folk style floral, so something sort of in the mid range of your color
because I will be doing it. I will be doing some sections
that are lighter as well. All right, so I'm happy
with my color there. Now we're going to
select our brush. If you would like to use if you would like to
use a watercolor brush or a textured brush, maybe like a crayon
sort of style, you choose the brush that
you would like to use. But for this tutorial,
I'm going to use a nice simple brush. I'm going to choose because I've created varying levels of smoothness in terms of my brush. I'm just going to go
with the drawing brush, my rough drawing brush, which is basically
just a monoline brush with a tiny bit of
smoothing to it. And I'm going to
increase the size too. If you've got the same
artboard size of me, let's go with about five or 6%. I think that's pretty
good. Okay. So let's now design some motifs. And for these folk
style florals, they're very abstract florals, so they don't even need to be they don't even
need to be perfect. If you need some inspiration, just pause the screen
here so that you can see a few different ideas for flower and bud
shapes that you can use. Just take inspiration from that, or you can draw something else, or you can do exactly what I do. So that's one that I like to do. Here's a simple shape like
that. Here's another one. See, the beauty of
this template is that it's a guide only. You can do any floral
shape that you like. So I've done basically
my outline of this floral shape of my flower, and then I'm going to
fill it to fill it, ensure that it's fully
enclosed. Tap it and drag it. There we go. Now, you can hold your finger on the
button because what you might have is you might see
a line forming like that. I'm not sure if you
can see that there. If you end up with a line that looks a little bit
like that, basically, you your color, like
the threshold is not enough to fill it
past that white line. So I'm going to undo that and
just show you the process. So if you're seeing that line, click and drag and hold and watch as I drag
it left to right, you see the lines disappear. That's just increasing
the threshold of how far the color extends
withino another color. Alright? So there's
there's our first floral. And I'm going to go through
and do the rest of them. We've got four large
florals altogether, so I'm going to speed up this video while we
run through this. Okay. I've done my
four main flowers. What I would like to do
now is add a little bit of a little bit of
detail into the flower. So what I'm going to do
is I'm just going to choose a lighter color purple, and I'm going to reduce the size of my brush just a little bit. Now, what I want
to do is I want to create some interest
within these flowers, but I don't want it to extend past the actual flower itself. I'm going to do is
I'm going to come to the layer that's
got my flowers. I'm going to tap it
and select Alpha lock. What that does is the
current area within that layer that has color or some content in it,
it's going to lock. Any further moves you make
sounds like a chess game. Any further strokes
that you make, it's going to lock
to within that area. So if I do this, it's
not going to work. I'll only work when I go
in the actual flower. Okay? So Alpha lock to add this interest
into this flower here, just a few strokes. Here. And you see, it's not extending past
the actual flower, which is exactly what I want. I'll continue that to do the same thing on the
other flowers as well. Okay, so the four
flowers are done. Now let's get
started on the buds. I'd like to keep
that same color, but I'm going to increase my
brush size again back to 6%. And now I'm going to create
some little buds here. Oops, I forgot that
I've got Alpha lock on. That's why nothing
happened then. So let's come and
turn Alpha lock on. And I will perhaps
create a new layer. This is optional, and I am often back and
forward with this. So if you're back and forward
with it, too, totally fine. Alright, let's create
our little buds here. I'm just going to do that. That's what I love
about abstract is that they don't have
to be perfect at all. Don't have to be perfect. Okay. Now, I've
come to this point, and I've actually
decided that I'd like to add in a
different color. I'd like my buds to
be a different color. So I'm going to
recolor these here, and I decided I'd like a really nice kind
of turquoise color. So what I'm going to do is I'm going to select that color. And there's a couple
of ways of doing this. I can either click
and drag through, and if you click
Continue filling, we can then just tap
and recolor. That way. Alternatively, what we can do is if we want to color
that particular layer, we can come across
to our bud layer and then click Alpha Lock again, tap it, and then fill layer. And it fills everywhere that
we had left marks before, it now has marks. It has filled that layer. All right, I'll
leave Alpha lock on for this next part
because again, I'm going to do the same where I'm going to
add a little bit of interest in those
buds or maybe no, let's do something a little
bit different for this one. What I'm going to do is I've
still got Alpha lock on, so it doesn't matter if I draw outside the
line. I won't work. I'm going to do a
little bit of this. Okay. Now, the problem that I'm having here is I'm wanting to recolor inside this bud area. So to solve this problem, because when I color inside, it also recolors the outside,
which is not what I want. So that's to do with our
color threshold because the colors are so similar and the threshold is
currently so high. So what I'm going to do is
I'm going to try two things. One is I'm going
to click and drag across and reduce the threshold. And then that's worked for me. However, look just to that point there
because I want to make sure I haven't
got that line. Ag just see it. You might not be able to see it on the camera
that it's there. And that will annoy
me. Okay? So we're not going this route. What we are going to do, though, is we are going to
switch Alpha lock off, and to create a new layer, and then I'm going to draw that interest again
on a separate layer. And then that way, I don't
have to worry about I don't have to worry about the line or recoloring or
anything like that. Now, I don't mind that
this particular interest, this bud section extends
beyond the actual bud itself, but I will show you
a method to erase it later once I've
finished all of them. Okay, so my buds are
now all finished. If I want to erase the
section of the buds that extended beyond this section
of interest here within the bud that extends beyond
the actual full bud itself, what we can do is, so we're going to
select the buds, but then we want to
invert the selection. So it's just selecting
outside of the buds. Then let's move to the
layer with the highlight. And then click Clear. All right. What that's done? It's raised any
area on this layer that existed outside of
the bud in this layer. Okay? So that's how
we can recolor that. Okay, so what we have
now is we've got our main flowers and
we've got our buds. Let's move on to the
stems and the leaves.
5. Draw the Stems and Leaves: What I'd like to do here
is create a new layer, but I want that new
layer to sit on top of the flowers because I would like where this
stem and the flower joins, I would like to add
some interest there. So I am going to pop
that on a new layer. If you would like your stems
to end up behind the flower, just click and move your layer. Oh, that never behaves. And then just move
your layer underneath. You always change this later. And I'm going to choose a nice, beautiful, rich dark green. There's a really,
really dark one. Okay. And then yeah, s 6% he's fine. Alright, let's move
on to our stems. So we're following the
roughly following the guides, you can make your
stems thin or thick, rough, smooth, up to you. The template is just here
to show you where to place the objects so that
it has a balanced repeat. Okay. Because you can see how it affects the
rest of the pattern. If you want to follow the
shape roughly, you can. If you want to do something
a little different, you can There's lots of
leaf shapes that you can use roughly following
where the leaves are going. If this is your first time illustrating a seamless pattern, let's just follow the leaves. We're going to do the outline and then we're
going to fill them. Finish the outline of my leaves. I'm just going to go through
and fill the inside of them. Then again, what I'm
going to do is I'd like to put a little bit of interest inside the
leaves as well. I'm going to alpha
lock that one, then choose a slightly
lighter color of green and reduce the size of my brush down a
couple of percentage. I'm going to add the interest
to the leaves the veins. They're almost like veins, but this is totally abstract, they don't look
realistic at all. All right. If at this point, your pattern looks similar to mine where you have the center area that is full of your floral motifs
and the outside is clear, you are on the right track
and doing an awesome job.
6. Duplicate the Centre Repeat: Okay. The next step
in our process is we want to take our center
repeat that we've created. Then we want to duplicate it and position it in the four
corners of our pattern. And that's what's
going to create the seamless pattern tile. At this point, we
can now switch off our template because we
don't need it anymore. So I'm just going to
click the tick button, and now you can see that my template layer
has disappeared. What I am going to do is add
a bit of background color, and I'm just going to choose
a really kind of really, really light beige, really, really light, and I'm just
going to fill the layer. All right? Maybe even
lighter than that, actually, with a
little bit more gray. Actually, no, let's go gray. Let's go really light gray. Yeah, I'm happy with that, more cool colors than
adding that warmth. What I'd like to do now
is clean up my layers. I'm going to rename
the layers and we do that just by tapping
and then hit rename. I'm going to call this
one background layer. Then we're going
to go through and just rename the
rest of my layers. I'm going to name
this one flour. Flowers. Then I'm going to rename this buds because
these were the buds. But now I want to join
the highlights together. I'm just going to
pinch the two layers together and just by doing that, it joins the layers together. Now my buds and the highlights
are on the same layer and my flowers are
on the same layer and then my leaves
and stems as well. I'll just rename the leaves
and stems to leaves. Now I've got the four layers. Now what I'd like to do is
group the layers together. I'm going to highlight
and then swap right on the layers I
want to group together. In my background, don't
include the templates layer in this one and then click group. Then you'll see that all of these layers are
now in one group. I want to rename
that actual group. I'm going to rename it to center repeat so that I always know if
I need to make edits, I'm going to make the edits
to the center repeat. Now what we're going to do is duplicate that center repeat. I want to rename it to duplicate so that I know
that I'm dealing with one of the corners inside the
background layer I want to make my background layer set to 0% or non opacity so
that I can't see it at all. If you don't have a background
layer at this point, if you didn't add any background because you wanted it white, I want you to do this
step here within your duplicate layer only
open your duplicate layer and then add a new layer and fill it with any color any
color you want. I'm just going to drag it
to the top just so that you can see that I've got
the color here now. However, we're going to reduce
the opacity down to 0%. Don't miss this step
because what that does is activate the entire layer so that when we complete
this next step, it moves all of the entire
tile so that we are duplicating and cornering it mathematically rather than
just what is within that. If I delete both of those layers and go
to select the group, you'll see that the selection is only extending to the
edge of the artwork, whereas we need it to extend
to the edge of the tile. I'm just going to go backwards. That's why we need our
invisible background layer. We don't want to see it, but
we need it to exist there. We have our template,
which is switched off. We've got our center repeat, and then we've got
our duplicate. Now we need an extra three
copies of this duplicate. Swipe to the left, click
Duplicate and do that three times so that you have four duplicates
and one center repeat. Now we're going to move
them and this is where you're going to start
seeing the magic happen. Select one of your duplicates
and click the move button. Make sure that you have for the uniform move
tool switched on, so you don't want distort
warp or free form, want uniform and make
sure that snapping is on. Magnetics, you can have it on, but it sometimes gets a little
bit annoying in this step, ensure that snapping is on. We've got uniform and snapping. Now let's move this
layer to the top right. Now, pay attention here. This is really important
to get this right. Can you see the gold guides appearing when I have it
perfectly in the corner? Basically, what this
represents is it represents this bottom left node is
perfectly within the center. You'll also notice that this middle node and
this middle node is exactly on the
edge of the canvas. That is essential in making sure this repeat is seamless where we
can't see any edges. All right. Double checking. You'll see blue lines. They're not what you're
looking for. You need the gold lines,
the yellow lines. If you find that it keeps
snapping to too many items, here's a trick for you. Come over here and switch
off every other layer, except the duplicate layer
that you want to move. That gives less
things for it to snap to and it makes it easier
to find the gold layer. I'll proceed with that method in case if your hands are a bit shaky or if you just want to make it a little
bit easier on yourself. We've moved duplicate
to the top right. Let's move the next
one to the top left. Looking for those yellow lines. Let's move to the middle one and we're going to move it
to the bottom right. Let's activate the
fourth duplicate, we're going to move it to the
bottom left. Here we are. Now, you're going
to love this part. Let's pop. Let's add
the visibility back. We've got our center repeat, duplicate one, duplicate two, duplicate three, duplicate four. Look at your beautiful
pattern tile. Isn't that awesome?
7. Add Texture: All right. Now let's
look at what you've got. I'm going to join
together my duplicates. I've got my center repeat and then I've got my duplicates. If I reduce the opacity down, you can see how you
created this artwork. You started with
your center repeat and then you duplicated it into the four corners to create
that seamless tile. If you have a look now, if you have a look
at this leaf here, this leaf right here, you'll notice that where it cuts
off on the edge of the tile, it actually appears here. When we place this side by side, these leaves and this bud
here, this flower here, this leaf here will continue on when you place this
tile side by side, that's creating that
seamless effect. We're going to test our
seams in a couple of steps, but first of all, I
want to show you how to add texture overlay. Remember that texture
overlay that I provided. What we're going to do is we're
going to add a new layer. And have that layer selected. We're going to come over
to the spanner icon, click Add, then we're going to insert a photo or insert a file. It depends on where you
saved your texture. Mine's in photos,
so I'm going to open photos and my
texture lays here, it's going to look almost
like nothing, but it's there. That's going to import it. If your texture file
isn't the right size, just click Fix to Canvas. Then let's zoom in
and see that it's added that linen
Hessian texture. I don't want it to be
so rough and white. I only want it to be subtle. Come over to the layers panel
where your texture was. I'm going to rename my layer
where your texture was. Let's change the blend mode. Play with a few different ones because they're all
going to look different. Depending on the effects
and what you're creating, the effects will be different. I love overlay or soft
light for these textures. Overlay or soft light. If you choose overlay, sometimes it might still
be a little bit too harsh. What you can do then is
reduce the opacity of your texture and play with it until you're happy with
the effect that you have. I'm going to go with soft light, but I'm going to keep the
opacity right at the max. Now you have a folk
floral pattern with a gorgeous texture overlay
covering the pattern. Again, that step is optional. Once you've done it, you can
just toggle it on and off to see the difference that
it makes to your pattern.
8. Test Your Pattern Seams: And now in this step, I would like for us
to test our seams. The way we're going to do
that is we're going to duplicate our entire
pattern tile, and we're going to place
four of them side by side. Come over to your
layers panel and I want you to select and
group your center repeat, your background, and your texture, and we're
going to group that. Then we're going
to duplicate that so that we have
four copies of it. If you are drawing patterns, if you're doing future
patterns and you struggle to if you come up with a problem where you've
got too many layers, you might have to for this part, just merge your layers
in order to test it. Just merge each group so that you don't
have so many layers. But now what we're going to
do is we're going to test our pattern or you're
going to select one group. Instead of moving it, we're going to resize it. Et's resize this
to the top right. We do that by selecting
the bottom left node and bringing it up until you
see those gold lines again. Select your next group. Do the same thing again until
you see the gold lines. If you're a bit
shaky wobbly here, I'll show you another
trick with the next one. If you highlight the
group you want to resize, tap the node, and then enter
half of the dimensions. We've got 3,600 pixels. We want 1,800 by 1,800 pixels. I don't know if you caught
that, but did you see that it automatically
resized it then? That is great way to ensure
that it is perfectly resized. It's my go to method. And then it's resized. The purpose of doing
this is checking to see whether our pattern is seamless, perfectly seamless. So to see where a seam was, let's just highlight
one of them. You can see here this
is our cross section. When I've got them selected, you can see sometimes it renders a line where the
edge of the tile is. But if we unselect
it, you can see here. I cannot see the seam and I
cannot see any cut lines. This is a beautiful seam. There are no seams whatsoever. This perfectly repeats without us being able to tell where
the actual repeat is. That's the magic of
seamless patterns. It can keep going for miles. You can print it on fabric
that is 10 meters wide and it will just be a
continuous, beautiful pattern. Let's step back a few steps. And what I'm doing here
is I just want to keep. I just want to keep the
original tile layer. I'm just going to delete
that and I'll ungroup these because I'm basically reverting back to my original
pattern tile. But that's it. You have
finished your pattern tile now. Your next step is to export.
9. Export the Pattern Tile: So now that your patent
tile is finished, your next step is to export the file so that you can use
it elsewhere so that you can print it out so that
you can create a mock up so whatever it is that
you want to do with it, you might be uploading
it to spoon flour. All right. Come over here
again to the spanner icon. Instead of adding, we are
going to click Share. Your options here, you've
got share the image. PNG is usually my go to because it creates a
lovely sharp file. You can also export
JPEG if you would like. Just a note here. You've got your
two main options. You're sharing the image,
which is what you see. You've also got sharing layers. If you are doing lots
of individual graphics, you could share it as layers. But currently, if I
shared the layers, it would share each one
of these layers into an individual image and it's
not what we want for here. Spanner icon share PNG or JPEG. When I click PNG,
it exports the file and it prompts me to where
would I like to save it to? Do I want to just
save the image? Do I want to upload
it to Google Drive? If you save the images or
you can save it to file, it just depends on how you
depends on your workflow. I'm just going to
save the image.
10. Your Class Project: Now that you've
finished your pattern, I would absolutely
love to see it. For your class project, upload your patent
tile either as a screenshot of your square
tile or you can go a step further and create a
mockup of your patent on something like a coffee mug
or some fabric or a pillow. Go to the projects and
resources section in this class and click Submit Project
to upload your image. Let me know what you took
away from this class and how you feel about using this
pattern design process.
11. Thank You: You so much for joining
me for this class. I hope I've taught
you new skills that help you grow in your
pattern design journey. If you loved this class, I'd be so appreciative
of a review. Until next time, my
friend Happy patterning.
 Michelle Marks, Surface Pattern Designer