Transcripts
1. 01 Introduction: Welcome to this class. Today I will teach you how to
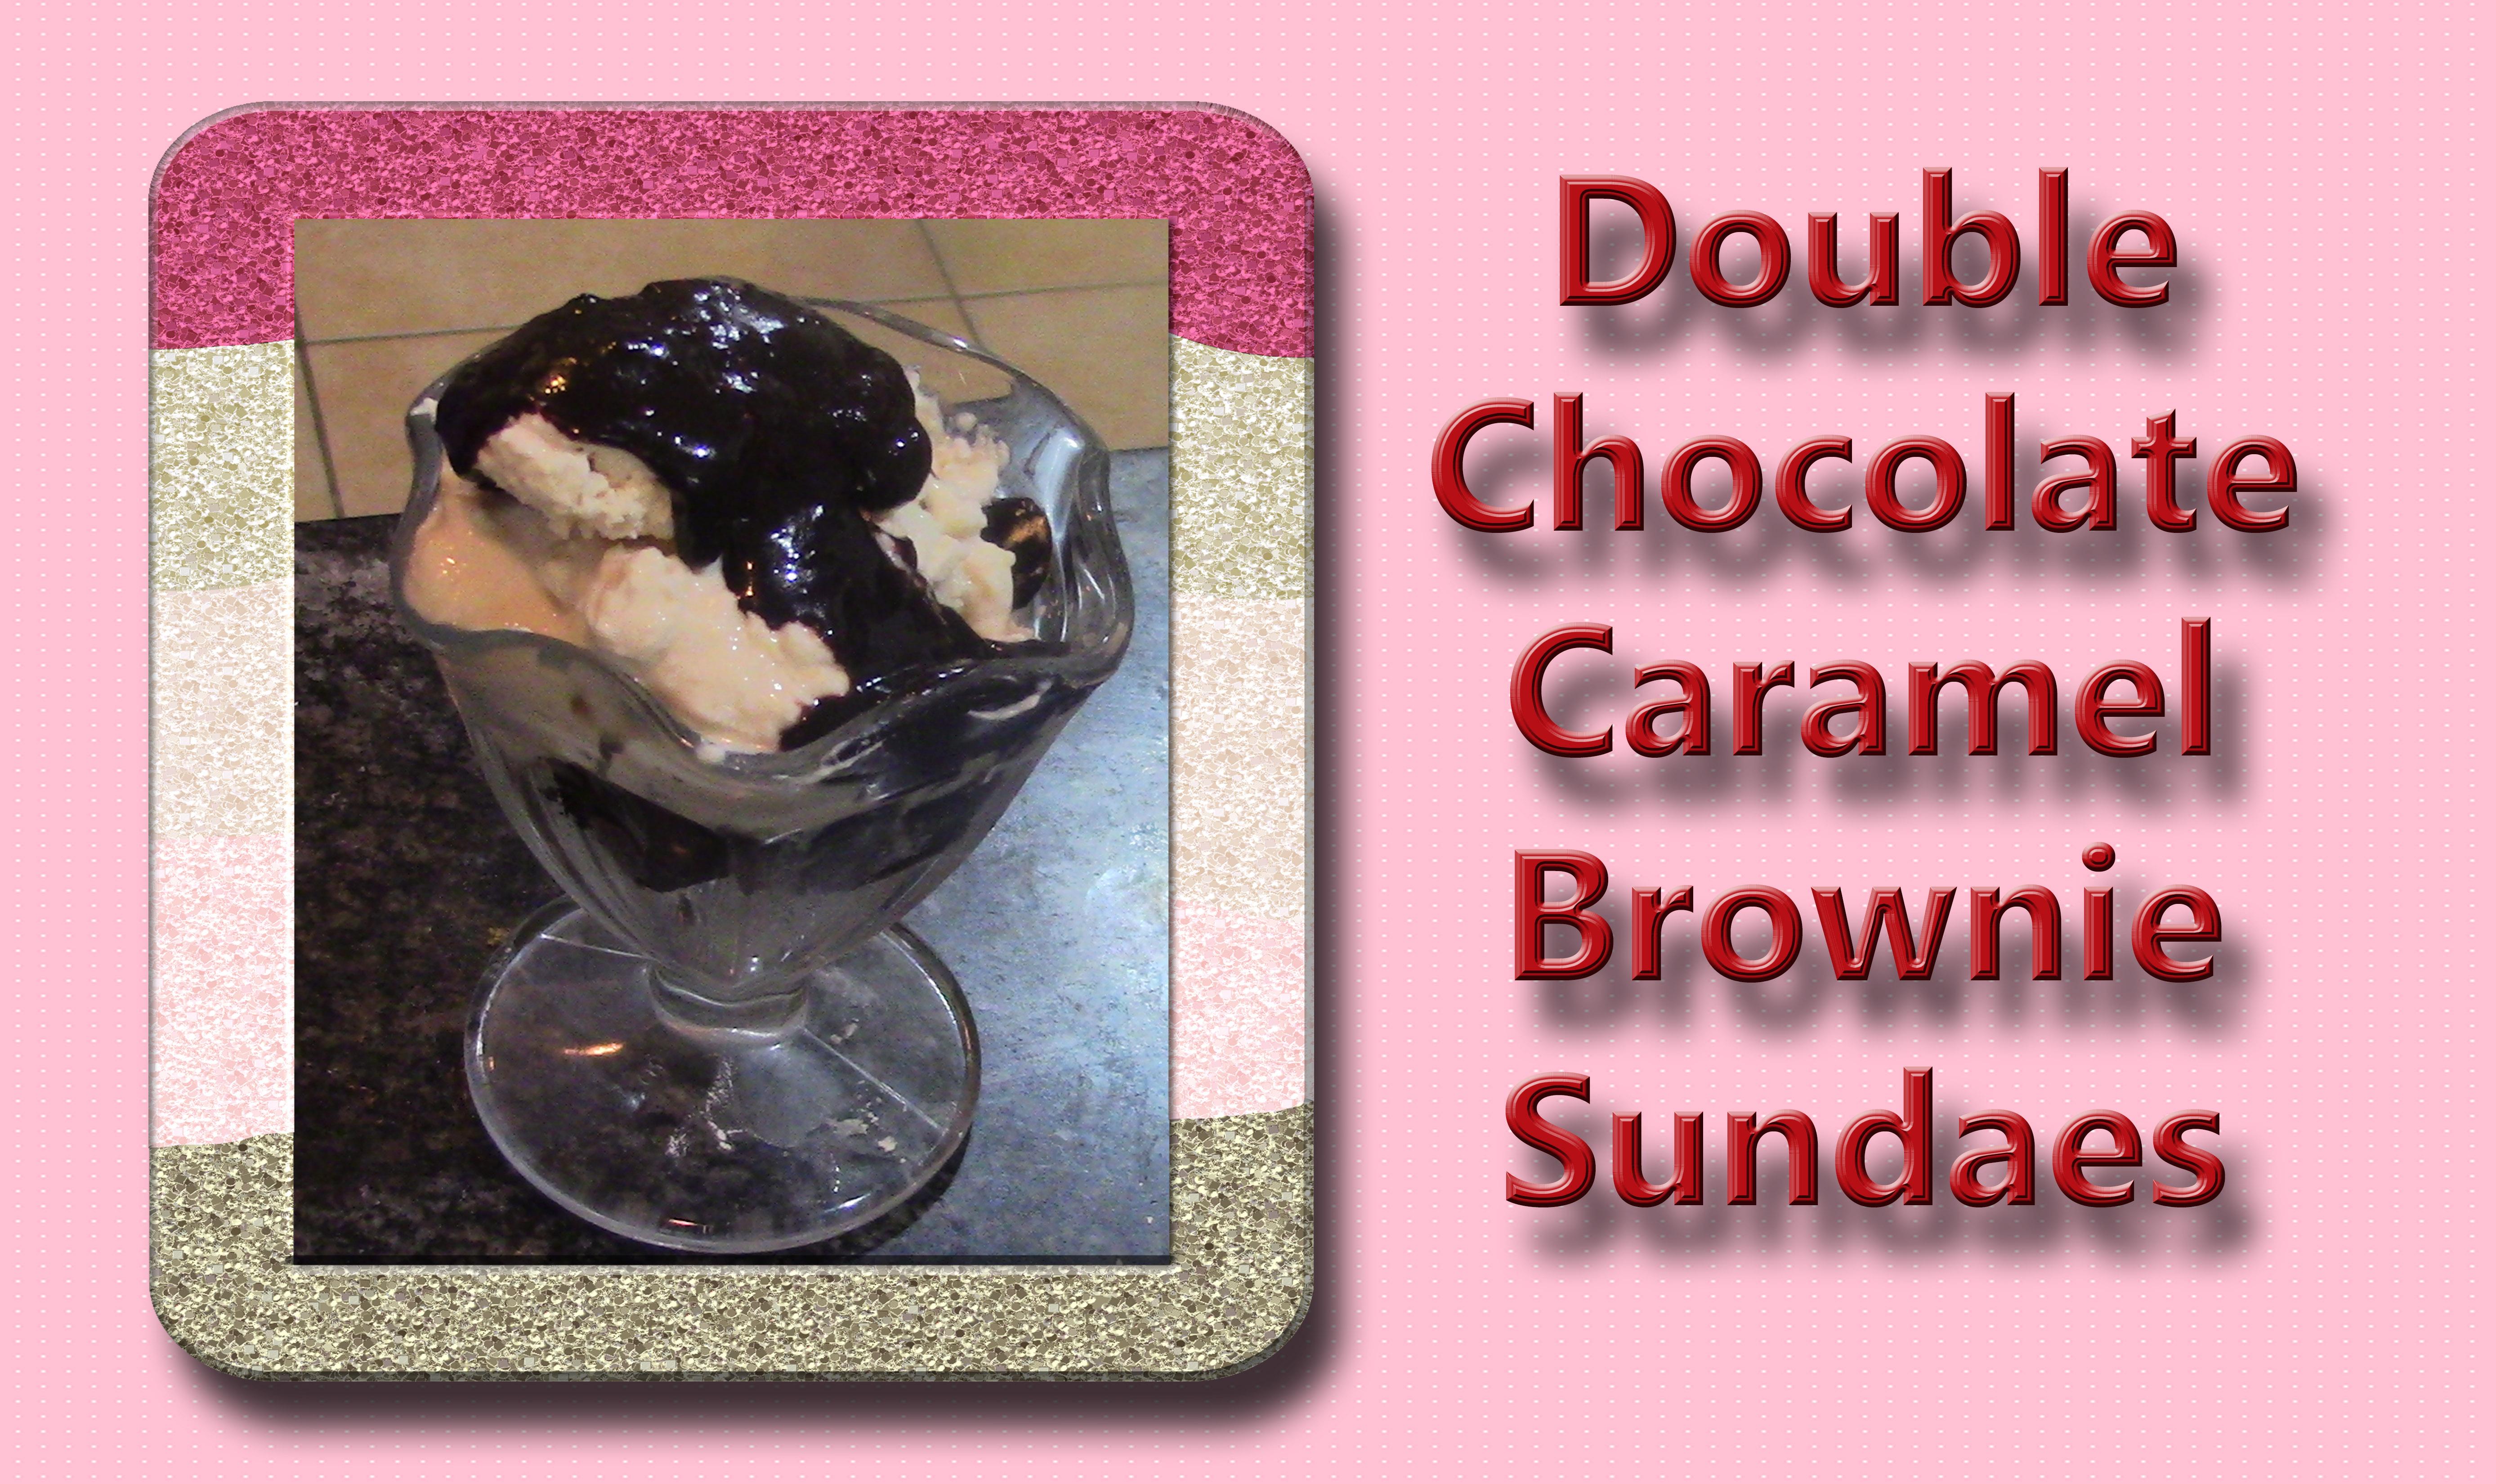
make this double chocolate brownie with the salted
caramel ice cream and the hot fudge for on top. First, I will teach
you how to prepare the yogurt and caramel sauce
for the frozen yogurt. Next, I will teach you how
to make the frozen yogurt. Then I will teach you how to
make the hot fudge sauce. With these two items made, we will move on to the brownies. I will begin by teaching you how to make the
salted caramel sauce. Then we will use
the salted caramel filling to make the salted
caramel cream cheese filling. Next, I will teach you how to make the batter for
these brownies. Then I will teach you how
to prepare the pan and add the batter and salted
caramel filling to the pan. Next, I will show you how to
bake and cool the brownies. We up by showing you how to remove the brownies
from the pan and cut them. I am a self taught baker. Many years ago I decided I wanted to open up
my own home bakery. But I didn't feel like my cake decorating skills were at the level
that they should be. So I took some classes, watched videos, read some books, and of course, did
a lot of practice. Until I felt like my cake
decorating skills were at the level that I could make gorgeous cakes for other
people, for special occasions. I then opened up my
own home bakery. I had this business for
several years until my husband got a job offer across the country
in New York City. We felt like this was
a good move for us, and I closed down my bakery and we moved
across the country. Now here in New York, I do not want to go through the steps to open up
another home bakery, but I still love baking. And as a retired teacher,
I love teaching. So I have decided to share my skills with you
on skill share. This class is for the
baker that would like to learn how to make a
delicious browny Sunday. I am excited to teach you
the skills in this class. Let's move on to
lesson number one, preparing the frozen
yo gert ingredients.
2. 02 Preparing Frozen Yogurt Ingredients: We're ready to start making
the caramel, frozen yogurt. The first thing we want to
do is strain the yogurt. So I have a bowl, I have this strainer, and I'm going to
line the strainer with two layers of paper towels. And this is so that yogurt does not go through,
but the water does. If you had a cheesecloth, you could use a cheesecloth. I'm now going to put four cups of yogurt into the strainer. We're now going to
let this sit for like 2 hours to drain any
water that's in there out. As it warms up to
room temperature, the water will separate from the yogurt and we should
get some water in the bowl. While the yogurt is straining, we're moving on to making the caramel sauce that
we're going to be putting in our ice cream. I have this pan and I'm going to turn it
on to a medium tea. To this pan, I'm going
to add 23 cup of sugar, two tablespoons, and two threes, which would be another
two teaspoons of water. We're going to stir this
and bring it to a boil. We don't have to
stir it constantly, but we do want to stir it often. We want to bring this to a boil and then we're going to cook it
till it reaches 360. There's not a whole
lot of liquid in here, so I don't think it's
going to take that long while that's cooking
and we will stir it. Occasionally, we're
going to mix together the yogurt and the milk and
the vanilla in this bowl. My yogurt's kind of
gone a little bit liquid because I stirred it and it's a little bit
older, but that's okay. I'm going to put two tablespoons
and 23 of a tablespoon, which is two
teaspoons of yogurt. And I'm going to do the
same with the milk, two tablespoons, and
the 23 teaspoon. We're also going to add
14 teaspoon of vanilla. Then we just want to
stir that together. Now, this is ready for that sugar that we're
cooking. Whoops, I'm sorry. There you can see it. This is ready for that sugar
that we're cooking. You can see this sugar
is boiling quite nicely. We're already up to 250. We only have about 110 degrees more to go in that 110 degrees. This sugar is going to start
to turn an amber color. I'm going to keep stirring occasionally until
it reaches that. We'll be back when
it's starting to turn that amber color and
it's almost up to 360. You can see this is starting
to turn an amber color. It's at 03:50 almost 360. We've got about two
more degrees to go. We're going to stir till we
get it there. Now it's there. We're going to
turn the heat off. You notice that's a
nice amber color, going to take that out. Now. We're going
to stir this in. It's going to bubble up
because that's really hot. We want to stir it until
when I poured that in, the sugar crystallized
and became chunky. But now as we've
been stirring it, we're starting to get
a more solid liquidy, which is what we want there. You can see, let me show you. There's still some sugar that we need to get
dissolved back in. So we're just going
to keep stirring until it's all
dissolved back in. Still have a little
bit of chunks. We're still, if
you look closely, you can see there's still
some chunks that we need to dissolve to get
the Carmel smooth. We want to make sure
all the crystals are gone because we don't really want sugar crystals
in our ice cream. That's why we're
stirring until we get all the sugar crystals gone. Going to actually get a
whisk and use a whisk, because I think
that's going to break up the crystals better. The crystals are pretty
much broken down. There's still a few, but
I'm going to go ahead pour my Carmel into this
measuring cup. I'm just going to
do a quick whisk. I'm adding just a little
bit more milk to it to help get it to be a smoother
caramel. All right. Now we're just going to let this cool to about
room temperature. Once the caramel has cooled and the yogurt
has finished draining, we'll be ready to make
the actual frozen yogurt.
3. 03 Caramel Frozen Yogurt: I noticed that I did not record the mixing together of the ingredients for
our frozen yogurt. So let me just quickly
tell you what we did. After the yogurt had strained, I went ahead and
dumped it in a bowl, added the vanilla and half of the caramel
sauce to a mixing bowl, and then using a whisk, stirred it until it was smooth. I then place the yogurt into the container that I'm
showing you in the video, and put it in the fridge so
it could become very cold. Before starting to
make the ice cream, we are ready to make the ice
cream batter into ice cream. I put it in the yogurt container that the yogurt came out of, so that I could chill
it in the fridge. And now I'm going to start
making the ice cream. And to do that, I want to
turn the ice cream maker on. Before I put this ice cream
into the ice cream maker, we're going to let this chill for about 15 minutes
and then we'll be back. As you can see, we're starting
to get some of that cream. What I want to do now is just put this other part,
the Carmel, in. I want to put it in
slowly so that we can get hopefully a ripple effect. If nothing else,
we're going to get an extra caramel
flavor ice cream. Now we're just going to give another minute or two for
that caramel to get mixed in, then we'll be done
with the ice cream. We're ready now to turn
our ice cream maker off, and you can see how nice
that ice cream looks. When I take this out, you can see the ice cream, it's still very
soft, which is fine. We're going to put it back into this container because
it's got a air tight lid. And then stick this
in the freezer to totally set up till
we're ready to have it. And there we have our ice cream.
4. 04 Hot Fudge Sauce: We're ready to start making
the hot fudge sauce. This is done on the stove. Let me show you how we do it. I have the pan on a medium flame and I'm going to dump into this pan my sugar, my cream, my cocoa
powder, and my butter. You'll notice the butter
cut into smaller pieces. What would melt better? Now,
I just want to stir this and cook it until it's all
mixed and combined and melted. It makes a nice, creamy hot fut sauce. It's going to take
you a few minutes for this to all get
combined and melted, but you just keep stirring
it and combining it. You don't want the milk to scud. You do want to be stirring
it the whole time. You don't want the
sugar to burn on the bottom for
those two reasons. You will stir it now. I'm going to take
my spoon out now that it's somewhat combined
and use a whisk again. I'm just going to heat it till everything's melted and
combined, and it's smooth. We don't have to
bring it to a oil, but we do want to make sure everything is
smooth and combined. And I've still got
some butter in there. This has been heating for a few minutes, I
believe we have. When I go like this,
no butter comes up, all the sugar is dissolved. So we're done now. We're going to just put this in a container and then
store it in the fridge. I have a container here, I just want to dump this in now. I'm actually not going to put the lid on it yet
because it's very warm. I want some of the
heat to escape. But once it cools,
the room temperature, I will put the lid on it, put it in the fridge until I'm ready to serve it
with the brownies.
5. 05 Salted Caramel Sauce: We're ready to make
the caramel sauce. That's going to go
into our brownies. This is done on the stove. I turned the heat
on to medium high. I'm now going to add to the
pan butter the brown sugar, the heavy cream and our salt. And we want to whisk it together
and bring it to a boil. As it heats up and
starts coming to a boil, you will see all of
the sugar dissolve and the butter dissolve. You can see that it
is starting to boil. We're going to turn
the heat down now to about a medium low. We want it to simmer as we continue to whisk it
until it thickens. When it starts to thicken, we will turn the heat
off and add the vanilla. As you can see, it is starting
to thicken a little bit. I'm going to give it maybe one more minute and then
we'll be ready to move on. I can feel that it is
thickening up quite a bit now, so I'm going to turn the heat
off and I'm going to put 14 teaspoon of the vanilla
in and just stir it in. We now want this to
cool down before we make the salted
caramel cream cheese.
6. 06 Salted Caramel Cream Cheese Filling: We're now ready to make the salted caramel
cream cheese filling. I have another mixing bowl. To the mixing bowl, I'm going to add my cream
cheese and 12 cup of sugar. And I'm going to mix
these together on a medium speed, starting on a, we've got sugar in, turn it up, and we're going to cream it
for a couple of minutes. Okay, this has been creamy. Now we're going to scrape
down the sides of my bowl. We're going to add the
egg and the vanilla, and we're going to beat that
until it's all incorporated. We're ready now to
add our Carmel. My Carmel is actually
starting to set up, so it's not much of a sauce, but I'm pretty sure we'll be able to mix
it in here just fine. We're going to beat it until the Carmel is all mixed
in and there's no lunch. As you can see that
Carmel is breaking down. You can see the Carmel
is slowly breaking down. I may have overtip mine a little bit so it's more solid
than it should be, but even with that
it is breaking down. Okay, let's look at this. As you can see, there's still
a little bit of caramel, but it's pretty much mixed in. And the little bit that's left, it'll just give a little
bit of a caramel flavor. There's no big huge
chunks anymore. This is now ready
for the brownies.
7. 07 Brownie Batter: We're ready to start
making the Brownie batter. In this large bowl, I'm going to whisk
my cocoa powder, my 12 teaspoonful
of baking soda. And I'm just going to whisk
it till it's combined. Now I want to add my
23 cup melted butter. And we want to whisk
that also until smooth. Now we're going to
add our sugars, the brown sugar and
the granulated sugar, and our two eggs, to our salt and our vanilla. We want to whisk this up. Let's break those eggs up. Let's a whisk together. I'm going to take the whisk out. Now I have this bowl to put my 13 cup of flour and
my chocolate chips. The reason I'm combining
those in a bowl is because by coating the
chocolate chips with the flour, it helps the chocolate chips float in the batter and not
all sink to the bottom. We want to just stir this
up so we can see that the chocolate chips are
totally coated in the flour. Now in our big bowl, we're going to add the rest of the flour and our chocolate
chip and flour mixture. This we want to just
fold carefully. So we start at the
bottom and come up. Start at the bottom, come up. We just keep doing it
until it's all mixed in. This is really, really dry. I'm going to add a little bit
of water to moisten it up. I'm not sure if I want
a whole four cup, so I'm only going to
add a half of it first. See if that's enough
to moisten it up. If not, I will add
the other half. But we don't want it too dry. We want it to be moist. I'm going to add the other half, it looks like it needs it. I'm going to go ahead
on the recipe and add that four cup of water
because it needs it. Because now this is starting to look more like brownies lick. When you get your recipe, I will have added
that 14 cup of water, which of course we would put in with the other ingredients
and not the flour. There is our browny mixture
ready to go in the pan.
8. 08 Preparing Brownies for Bake: We're ready to put our brownies together
so we can bake them. I have my 13 by nine inch pan and I want to spray it down, but so that I can lift
the brownies out easier, I'm going to mine the pan
with parchment paper. I'm just going to
push it down in. And I want to go all the way to the corner up because
I want to be able to lift the parchment paper out of the pen when it's done
baking and cooling. Then I want to spray the
parchment paper down too, because I want to make sure that it doesn't stick to that. Now, I want to dump half
of my brownie batter in. I'm not sure if that's half. Let's see how well this spreads get one more spoonful worth. We do need to make sure
this covers the bottom. If you have to do
more than half, then do that because you can always have some of the caramel stuff
cooking to on top. You don't want it on
the bottom cooking? I do want this to go all
the way to the edge, so there's no bottom's there. Okay. We're going to
spoon our cream cheese filling on top of our brownie. Let me just go
ahead and dump it. When I'm going to go
ahead and just spread it, it says to swirl it, but there's so much here. I can go like this and swirl it. So we'll get down there in it, but there's so much that it's really just going to be a layer. I'll go like this to swirl it. Then we want to add the
rest of the brownie batter. And I want to make sure that it's not all in one
spot but spread out. I'm just scooping it off at the spoon in parts,
some in the middle. And try to spread this
around as best you can, knowing that the cheesecake part is actually going to
mix in with this also. But make sure everything
is thoroughly to the edges and that
it's pretty much even. I don't have any highs and lows. We're now going to put
this in a preheated oven that's 350 degrees
for 30 to 40 minutes.
9. 09 Baking and Cooling: Here's my oven. I'm
going to open it up. You'll see the rack is
in the middle position. I'm just going to stick my brownies in the
oven in the middle. And now we're going to let it
cook for 30 to 45 minutes. We'll be back to check the brownies when they
are done cooking. This has been cooking for
about 35 to 40 minutes. We're going to
take a look at it, see if it needs more time or
if it's ready to come out. We want it to be
browning on the edges. And still a little bit
July on the inside. When you look at this,
you can see it's brown on the edges and
it is a little bit July. We're going to remove it.
We're now going to let this cool on the counter or stovetop until it's
completely cool. Then we'll be back to
get it ready to chill. My brownies have been cooling on the counter for
about an hour. I'm going to put the paper on the inside so
that I can cover these cup. If you don't have
a pan like this, you can just cover it
with a lumen foil. And now I'm going to put
these in the refrigerator overnight so the
cream cheese part or the cheesecake part
can totally set up. Tomorrow we'll take him out
of the pan and cut them.
10. 10 Cutting the Brownies: My brownies have chilled and set up in the
refrigerator overnight. We're now ready to cut the brownies so that we can
serve them. I have my pen. I'm just going to take my parchment paper and lift them out and put them on
this cutting board. I want to back my
parchment paper, I want to score I'm going
to mark this halfway. I'm just scoring it that way. If I'm not exact, I can fix it, then halfway again
and halfway again, then I'm going to mark
this again halfway. Then I'm going to
do this in third. That does not good. There we go. And
let's fix this one. There we go. And third again. Now I'm going to go
ahead and just cut down. You can use this
bed scraper thing or you can use a knife. I actually preferred using a
knife, but you can choose. I'm going to cut these
all the way out. First, cut in one direction, and then coming back and
cut in the other direction. I went ahead and cleaned
my knife before I did this one because it
was really sticking. So now I'm going to
go ahead and I'm just going to cut these going down this way, all
the way through. I scored it the first time. This time I'm actually cutting all the way through,
Pull one out. I actually have two
coming out there. You can see the Brownies, they're ready to be made
into our Brownie Sunday.
11. 11 Final Thoughts: Thank you for taking this class. We had fun making our chocolate caramel brownies with the salted
caramel frozen yogurt, and the homemade hot fudge. We began by making
the frozen yogurt. We prepared the ingredients, then made the batter for the
frozen yogurt and froze it. Next, we made the
homemade hot fudge. After the homemade
hot fudge was made, we moved on to the brownies. We made the brownie batter and the salted caramel
cream cheese filling. We then filled the pan with our batter and
filling and baked it. After it baked, we
let it cool and then chill overnight in
the refrigerator. After it had chilled and set, we then took the brownies
out of the pan and cut them. I then made my own
Brownie Sunday to enjoy. I hope your brownie hot fudge and frozen yogurt turned out the way that
you wanted them to. The recipes for this Cs are
in our project section. Please make sure to post a
picture of any part of it, or all three of them, or it put together on our project page and
tell us how it went. I look forward to
hearing from you, from my kitchen to your
kitchen. Happy Bacon.
 Nadine Thomas