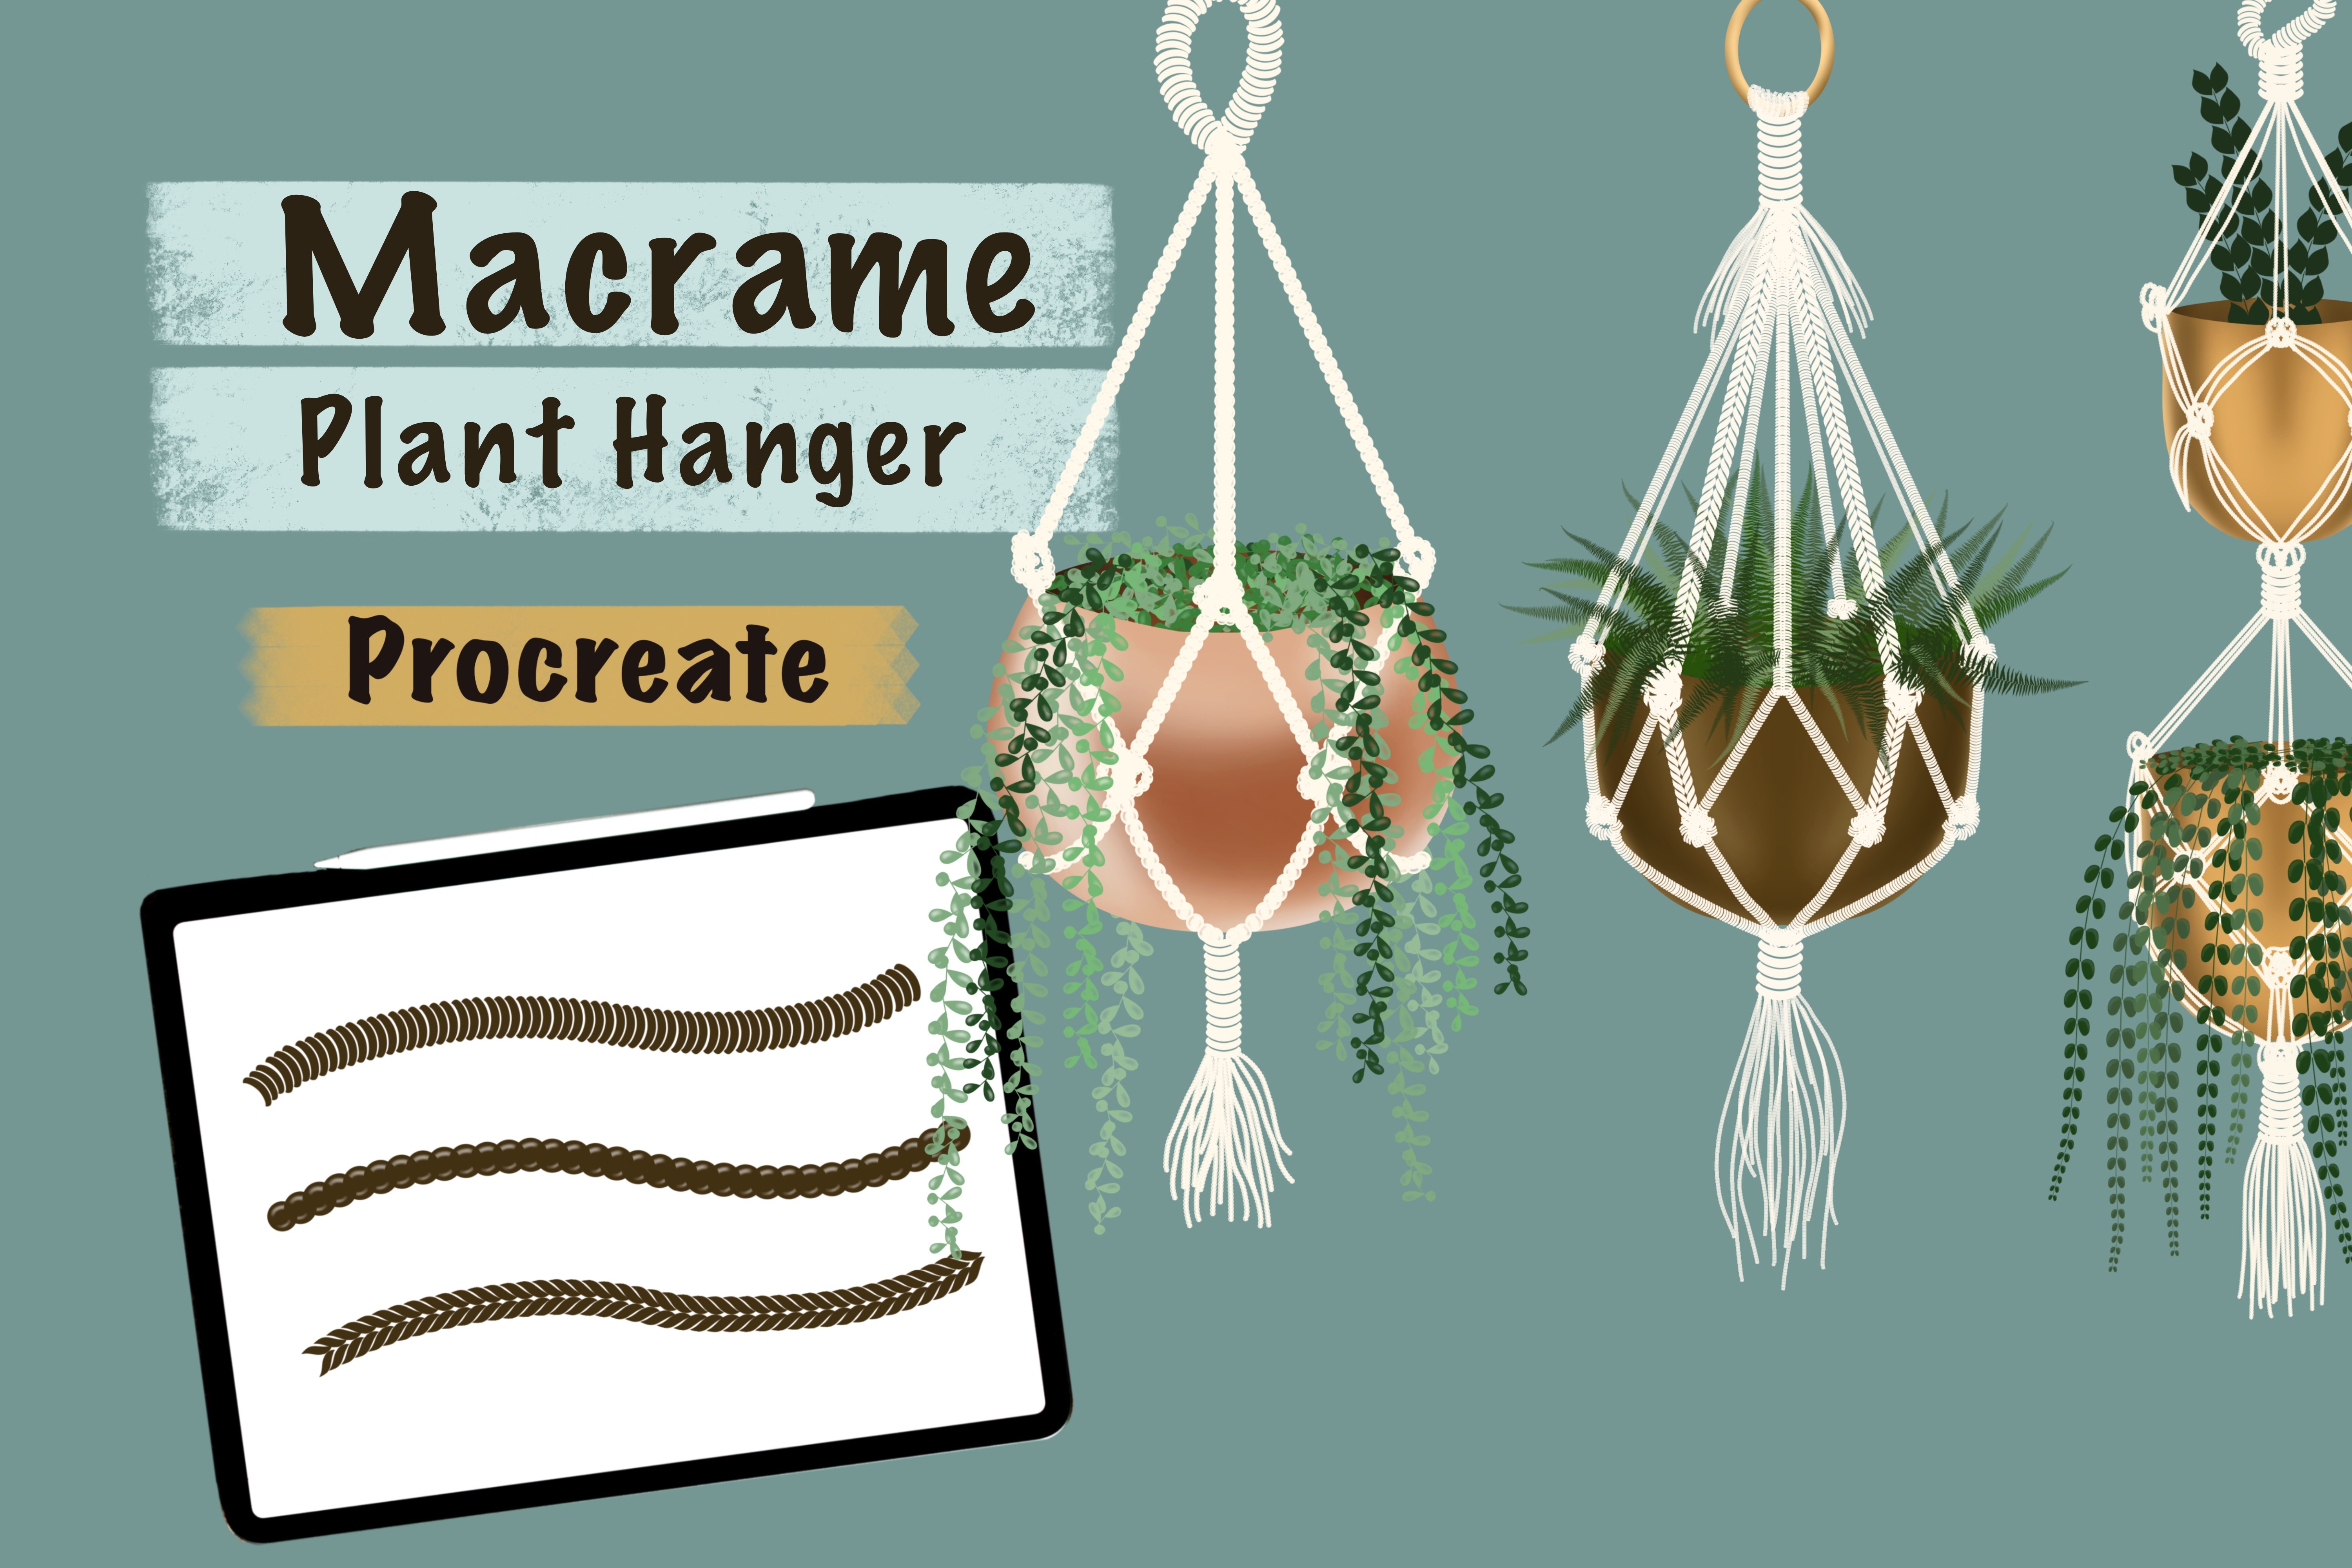
Transcripts
1. Introduction & What You'll Learn: In this class, I'm going
to show you how to create six basic dot brushes, and with these brushes, we are going to
create a beautiful seamless pattern in Procreate. Hi, my name is Vinita an Illustrator and a
designer based in Singapore. I will walk you step by step
through creating each brush, explaining the settings so you can truly understand
how they work. Once your brushes are ready, we'll put them into action by building a seamless
repeating pattern. I'll be providing a ready to use sketch and color palette to make the process smooth
and beginner friendly. Dot brushes may look simple, but they can add
incredible texture, depth, and personality to your
illustration and surface design. There are plenty of
examples to inspire you and show different ways dot brushes
can transform a design. By the end of this class, you will not only have six custom brushes
in your toolkit, but also the
confidence to create your own textured
seamless pattern. So let's get started and create some beautiful dot brushes
and pattern Inprocreate. See you in the class.
2. Project & Resources: For your class project,
you can create your own seamless pattern using the dot brushes that we
designed in the class together. To help you get started, I have attach a ready to use
pattern sketch template, along with three
curated color palette. You can customize this
depending on your style. To download these resources, you should be under the
project and resource section. Once you're done downloading, just open in Procreate. You're welcome to share
either your brush demo or your final seamless pattern in the project section
of this class. I can't wait to see
your beautiful brushes, pattern and their
creative combinations.
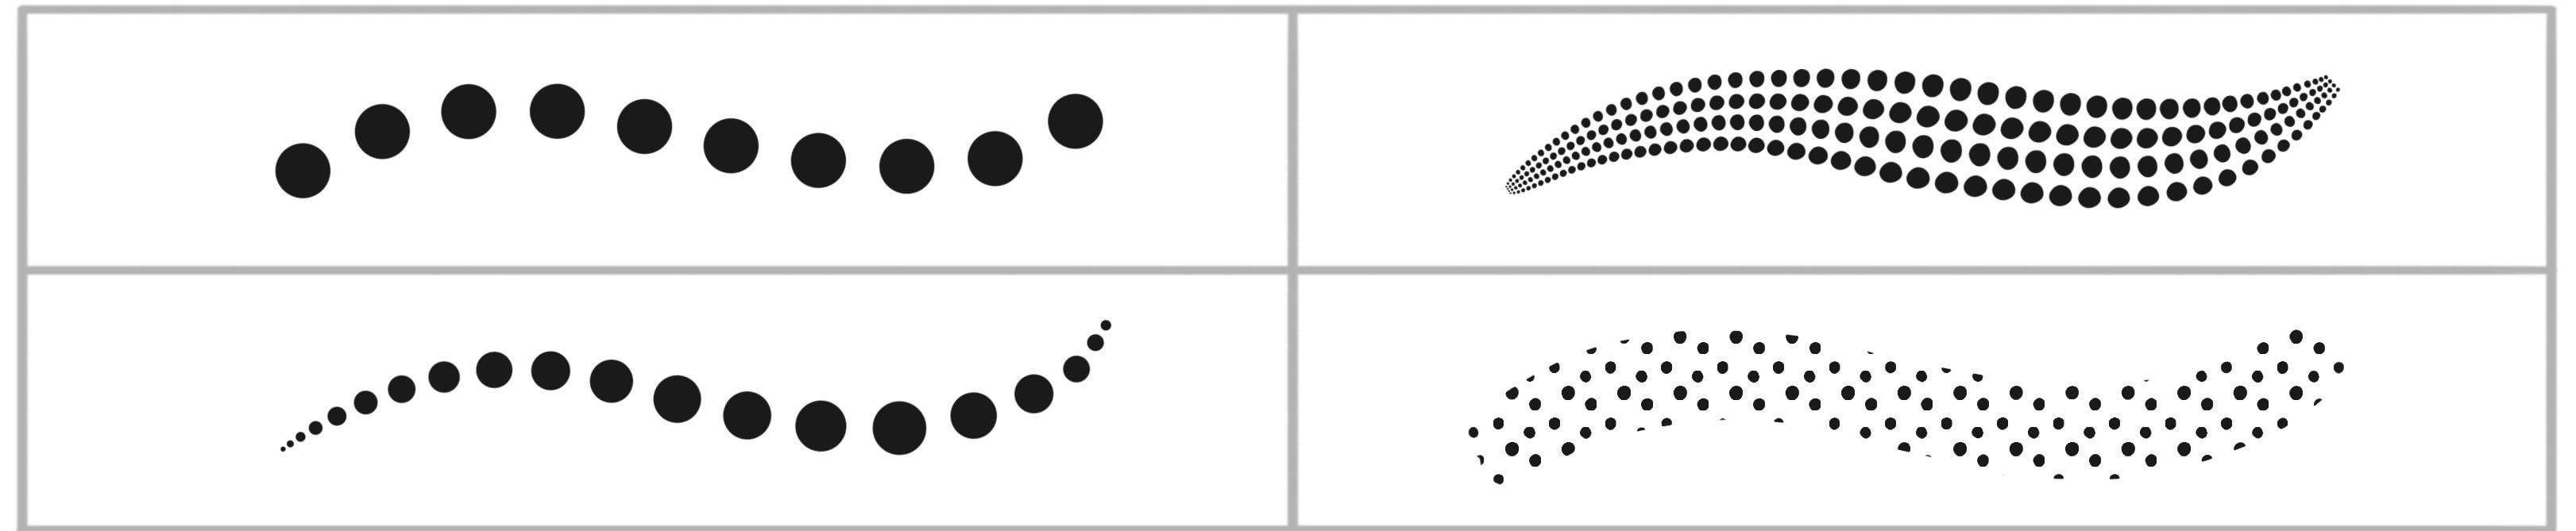
3. Creating Dot Brushes: So when I open my Procreate app, this is what the
library looks like. Now, our first step is
to create a new canvas. For that, I'll tap
on this plus sign, again, on this tiny plus sign, and I'll keep my canvas
as 3,000 by 3,000 pixel with 300 DPI and tap o. Let's tap on the brush library. Now in the updated
version of Procreate, you can see the brushes are divided into
different libraries. We can start by creating
our new library. For that, I'll tap on this plus sign and tap
on Create New Library. Here you are free to rename
whatever you prefer. I'm going to rename mine as
my Brushes and tap apply. Now you'll be able to see a
new library created here. We'll tap and open this new library and you'll find a tab to create
a new brush set. I'll tap on this tab and rename. You can rename this as Dot
Brushes and tap apply. Now our next step is to
create our first dot brush. We'll start by tapping
on this tiny plus sign, tap on Create New brush. This will open all the settings we need to create a new brush. The first one is stroke path. You can customize and
experiment with these settings. For this brush, you can
keep somewhere 65-70%. Next is stabilization.
Under streamline, the amount can be around 65% and the stabilization
can be around 35. Next, we'll move
to Apple Pencil. Here the opacity will be none. This makes your brush
stay at a fixed opacity, giving you more control and consistent strokes and tab done. And let's try this
on the canvas. So this is how you can create
a very basic dot brush. Now, we will be using this as our base brush and we'll
create few variations. Now, let's move on
to our second brush. For that, we'll go back
to the brush library, and let's rename
this brush first. Hold on the brush
and tap on rename. I'll rename this
as dot brush one. And tap apply. Now let's duplicate
our first brush, swipe left, and tap duplicate. Now we have dot brush too. Let's go to the second
brush, open the settings. Let's see how we can add
texture to this brush. For that, we'll tap on grain. Here we can tap on edit, import, and source library. You can experiment
with a lot of textures here or you can even
import your own. I'm going to select
this charcoal bunt for now and tap okay. Now here you can see in the preview all your
dots are textured. Let's try this on the canvas. This textured brush is
especially useful for adding details to designs with
watercolor or distressed look. There are few more settings here that you can
experiment with. For example, the
movement, scale and Zoom. You can play with
different direction and the scale of this texture. Another setting is the
brightness and contrast. I'll increase the brightness and the contrast a little and let's compare and see how it is different from our
previous brush roke. You can see the details are
more darker and sharper. I'll just erase these and add one stroke for
our reference. Now let's move on to our third variation of
this dot brush. We'll start by duplicating
our first brush, swipe left and tab duplicate. You can see now we have a
brush called dot brush three. I'll hold and pull this brush at extreme top so that we have
all our brushes in sequence. Tap and open the brush setting. Here under Apple Pencil, there is this section called
pressure under pressure. We will increase the size. You can see in the preview
how the brush is changing. So this will be a
pressure paste brush, where the more pressure you
add on the Apple Pencil, the wider the dot gets. Next is under properties. There's an option called
Orient to screen. Make sure this is switched
off and tap Okay. Let's try it on the canvas. This is one of my favorite
and most used brush, especially for
creating patterns. I'll show you how you can adjust and control the narrow
part of this brush. Under Apple Pencil, you
can reduce the size, and you can see the
narrow dots changing. The more you increase, the narrower it gets. Next is under properties. You can adjust the minimum
and the maximum size. Also experiment with
different stroke paths. Now let's see how it
looks on the canvas. You can see how it is less pointy compared
to the previous one. Here we are done with our third variation
of the dot brush. Let's move on to the fourth one. For this fourth one, we'll start by duplicating
our dot brush one. Select this brush, swipe
left, and tap duplicate. For this brush, I
want to show you how you can create your
own shape source. For that, we need to draw
our shape on the canvas. I'll hide my first
layer, add a new layer. We need a nice opaque
brush without any texture. So I'll go back to my library. In the default brush
set under inking, there is a brush called
studio pen Brush. I'll duplicate this brush and dragon drop into the new
library that we created. So whenever we need to
create a shape or a source, we can use this brush. You can also select
other similar brushes like monolin or
technical pen brush. Now, our next step is to
select a jet black color, make sure it is
completely black. We are on a fresh new layer. Now we need to draw a circle. For this one, I don't want
the circle to be perfect. With an imperfect circle, you can achieve a very
organic brush stroke. Try to cover maximum
area of the canvas. You can adjust the shape with
the help of this warp tool. Now, our next step is to get
this circle in the center. So under uniform, make sure under snapping your
magnetic snapping is on, and the distance
can be around 21. Now when you move this circle, you'll be able to see
these golden lines. When this golden line is
vertical and horizontal, that means your circle is
exactly in the center. Next, we'll go to action
here under add, Copy Canvas. Go to the brush library
and we'll select dot brush four here under shape, edit, import, and paste. Tap with two finger
on the canvas, that will invert your
image and tap Okay. Next under rotation
will be 100%. Here you need to experiment
with scatter and jitter. I'll keep my scatter
at around 58%. Next under dynamics. You can play with
this jitter size. This setting is optional, but I want this brush to look
very organic and uneven. Next, I'll slightly
reduce the stroke path for this and tap Okay. Let's see how this
looks on the canvas. You can also try pasting the hand drawn circle on the other brushes
that we created. You will notice how the shape of the circle changes
the overall look. We are done with our
fourth brush here. Et's move on to the fifth one. For this one, we'll again be using the same
hand drawn circle, swipe left and duplicate. Select this circle
and reduce the size, place it in the
center at the top. With the help of the
golden guideline, make sure it is
exactly in the center. Duplicate this
circle, select and drag it down and
rotate it slightly. Repeat this two more times. In total, we should have four
tiny dots or tiny circles. Now select all the four
circles and tab group. Now select the group and make sure they are all
four in the center. And deselect. Now go to action, add, copy canvas, go
to the brush library. And for this brush, we need
the pressure base brush. That is the dot brush three. Duplicate this brush. I'll drag it at the extreme top, tap and open the brush setting, under shape, edit,
import, paste. Tap with two finger on
this canvas and done. Now here make sure
rotation is 100%. Next, we need to
go to stroke path. Here you can adjust the spacing. For now, I'll keep it as 31%. Now under Apple Pencil, you can adjust the
pressure size and tap. Okay. Let's see how this
looks on the canvas. If you look closely, you can see because it is hand drawn and going in
different direction, it gives a very organic finish. We are done with our
fifth brush here. Let's move on to the sixth one. This brush is going to be an overall one where we need our shape source to
be in a seamless pattern. We can start by duplicating
our hand drawn circle. I'll select this circle
and make it smaller. With the help of the guideline, make sure it is
exactly in the center. Next, we'll duplicate
this circle four times. Hide three of the layers
except the first one. Now below the first layer, we'll add a new layer and we'll fill this
with any bright color. I'll fill this with
the green color. Next, we need to lower the opacity of this
color fill layer, tap on this tiny, and you
can lower to around 50%. Now select the dot layer with this fill layer
and group them. Now we'll duplicate
this group three times. In total, we need four groups. Hide three groups except
for the first one. Now select this group. Make sure under
uniform, snapping, magnetic snapping is on, and the distance
can be around 21. Move and snap this
group in one corner, and we will be repeating this
with all the other three. Make sure while you're
snapping you can see the golden lines and they
should not overlap each other. Next, we can open all the groups and delete all the fill layers. Pinch and merge all
the other four layers. So now we have all the
four corners in one layer. Next, I'll start unhiding and placing all the other
three dots we have. I like keeping the dots uneven
for a more natural look, but feel free to modify
them to suit your style. Next, we can select all
four layers and group them. Next, we need to
copy the canvas. For that, we'll go to action, add, and copy Canvas. Next, under the brush library, we'll duplicate
our dot brush one, and I'll pull this
at the extreme top. Tap and open the settings. Here under grain, edit,
import, and paste. Tap with two finger
on the canvas, and that will invert
your image and tap done. Here I'll keep the Zoom as none. You can also play with the
scale and the movement. Next under stroke path, I'll reduce the spacing
to around eight to 10%. Next under properties,
you can change the brush size with this
minimum and maximum size. Now let's see how this
looks on the canvas. Let's reduce the
size of the brush. There are plenty of
examples in this class that helps you understand how
you can use these brushes. Here we are done with
creating all our brushes. There is another
setting that I want to show you about the preview. For example, if I
open the setting for this brush under preview, you can change the
preview of your brush, how it looks in the brush set. For example, if you switch on, you can see the stamp preview. You can change the
size of the brush. Now let's move on to our
next lesson where we will be creating a seamless pattern
using these brushes.
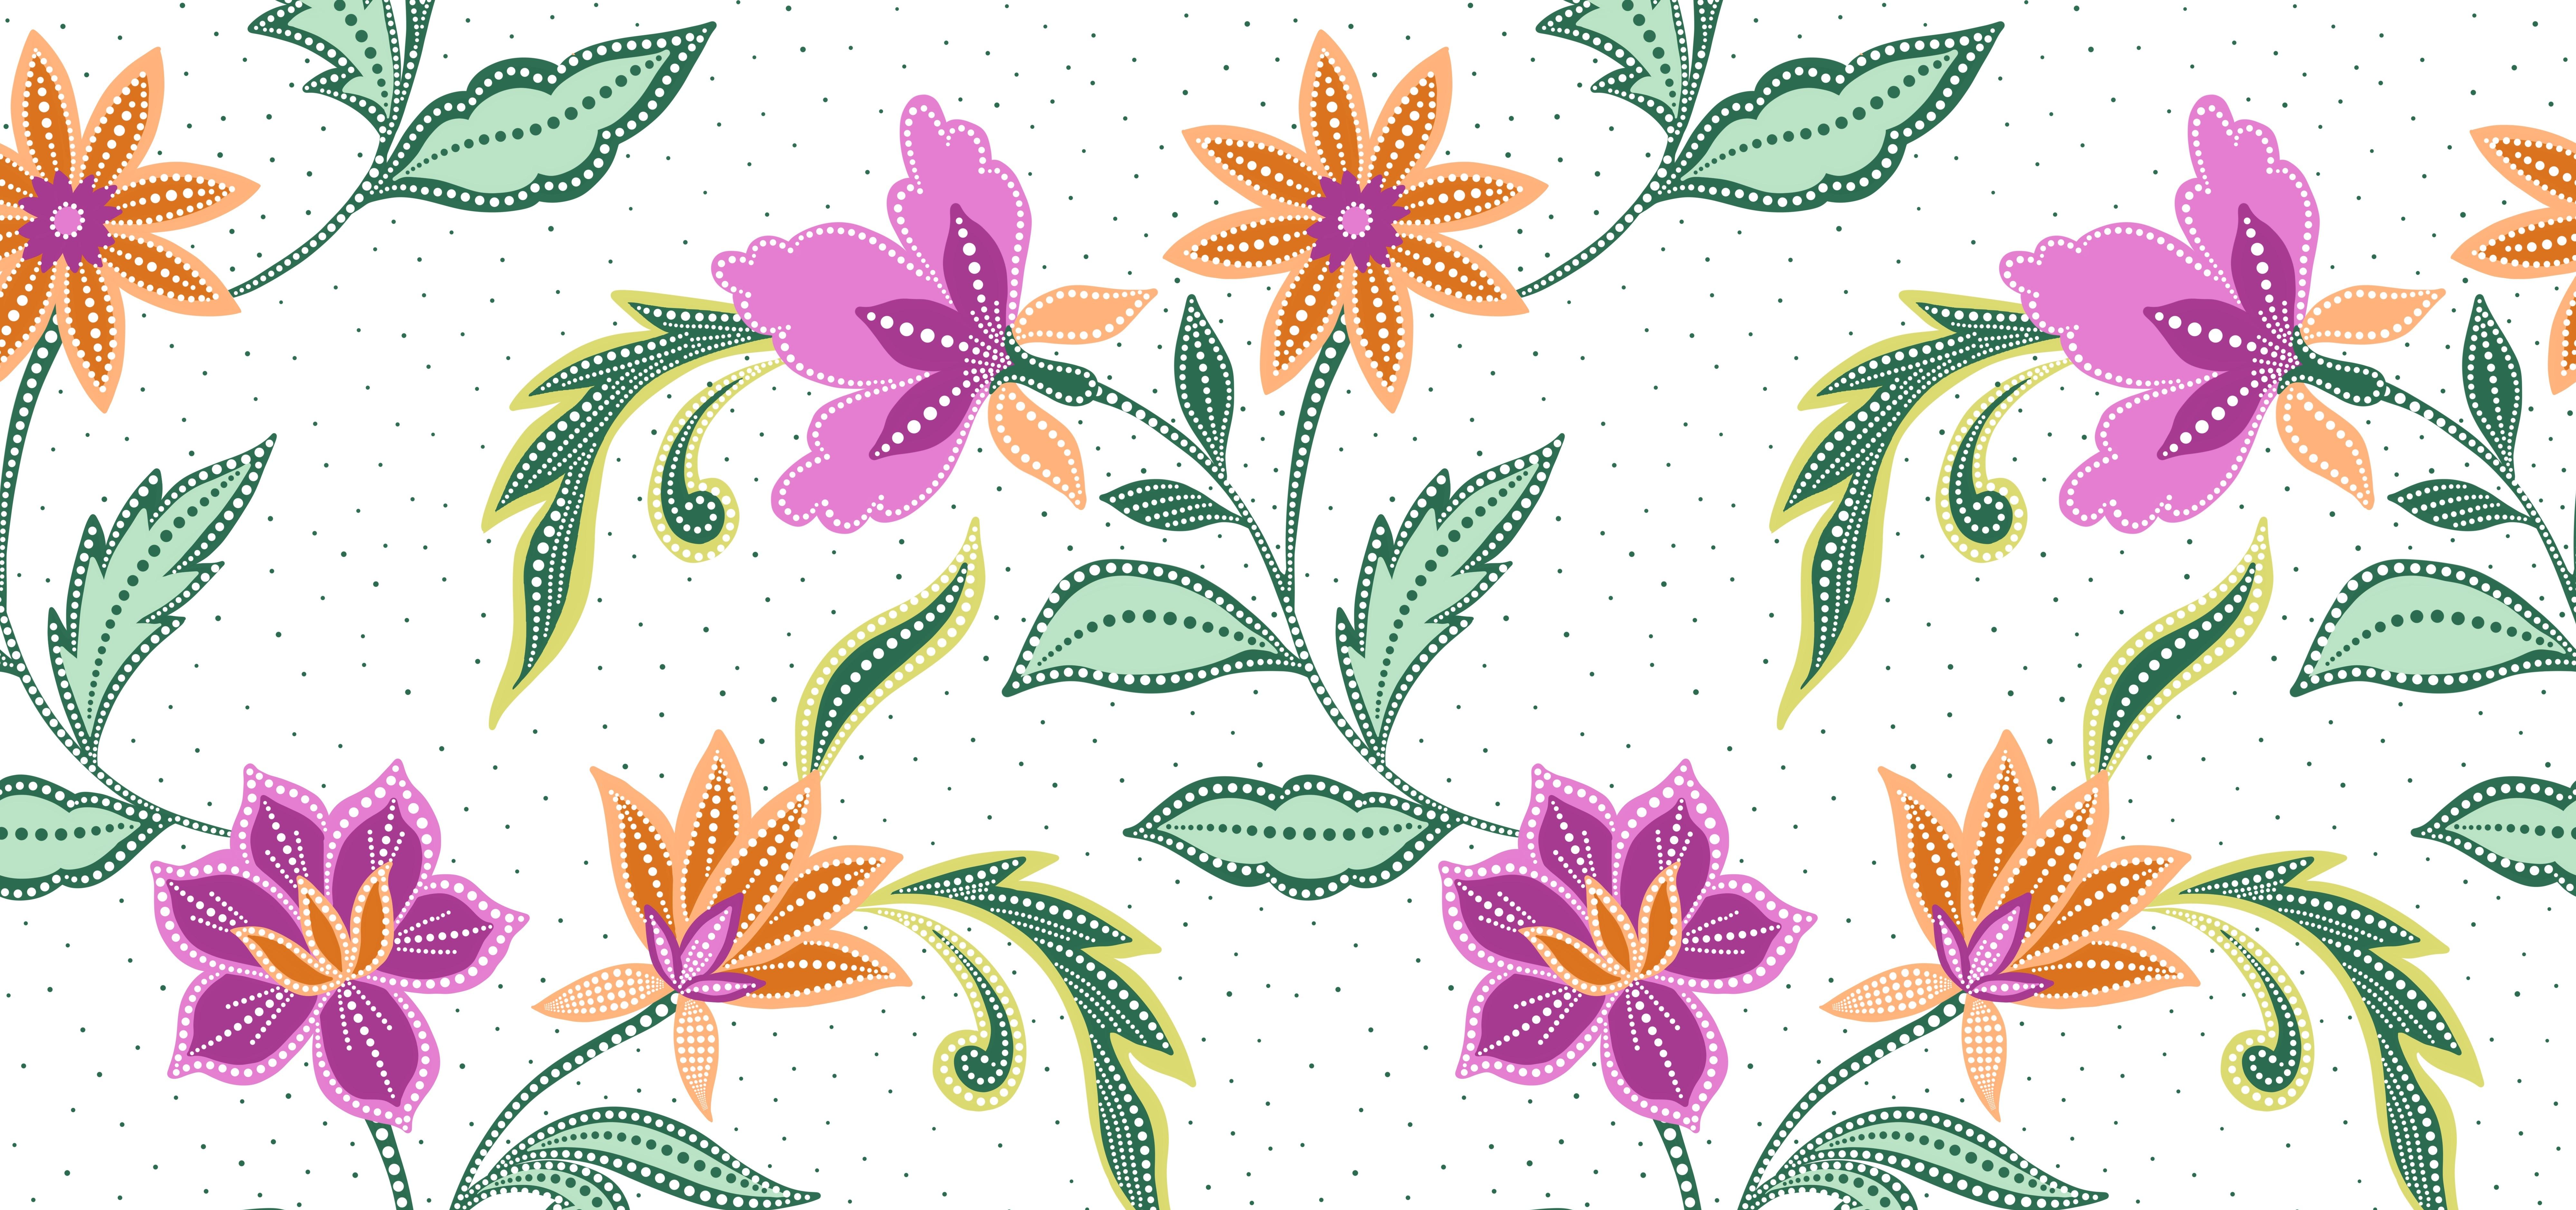
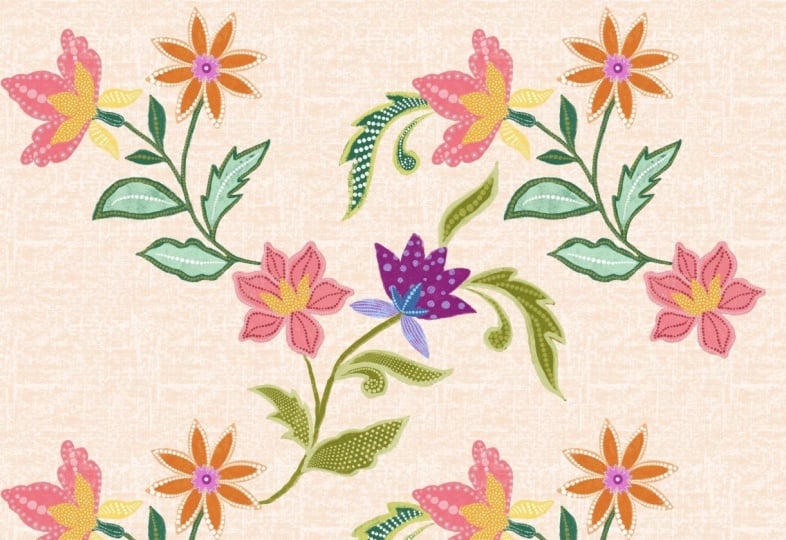
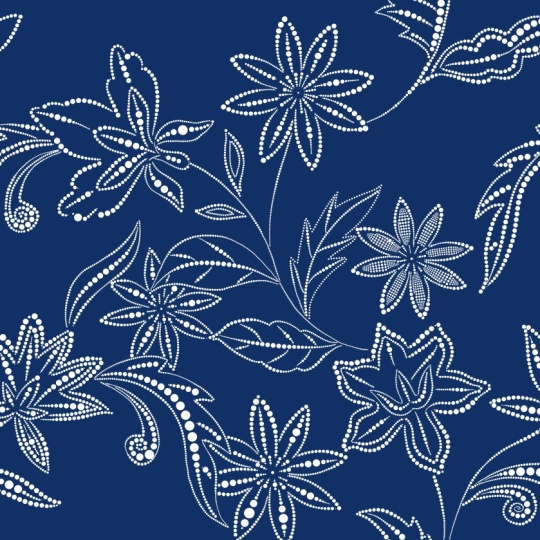
4. Dot Pattern - Part 1: Now that we have
our brushes ready, let's move on to creating a
pattern using these brushes. You will be able to
find this canvas with the sketch in the resource
section of this class. When you download this
and open and Procreate, you will be able to
see in your library. This sketch is refined and arranged into a
seamless pattern. If you want, you can even
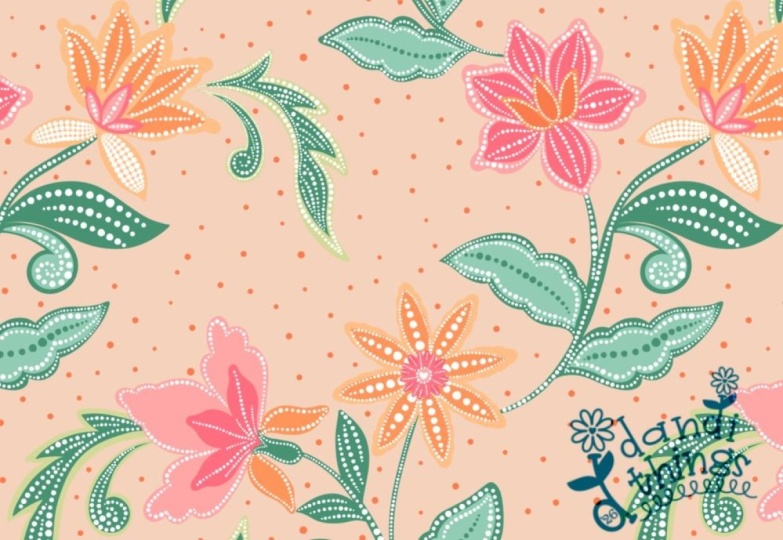
edit and customize this. Next, let's move on
to the color palette. There are three color palette in the resource
section of this class. You can choose any one of
these for your pattern. Whichever palette you choose, you can tap on these three
dots and set that as active. That shows under the
disc section here, which is easy to access. I have divided this
palette in three parts. The first two pink and the first two oranges
are for the flowers, one light and one dark. Then at the bottom, these
greens are for the leaves, one basic white for the dots. Next, we need to
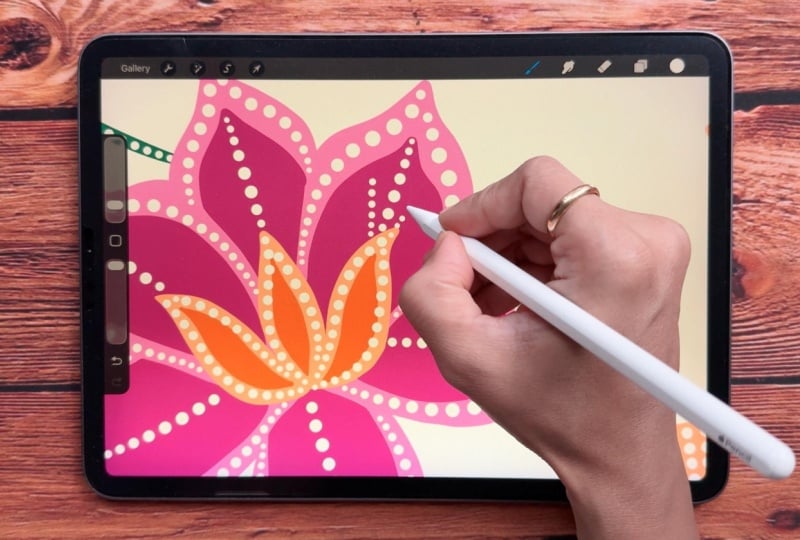
create a base layer. For that, we'll select
this lighter pink. Now tap on layers. Here we need to
reduce the opacity of the sketch layer to around 50%. Next, add a new layer and pull this layer
below our sketch layer. Now we need to select a brush to create base layers
for our pattern. For that, we can go for
our studio pen brush. Select this brush and we can
start with our first flower. I'll start with this one. Or I need to reduce
the size of my brush. Also, I feel I need to
reduce the stabilization. I want it around 60 and 30. You can customize this
depending on your comfort. If you are following
another color palette, you can select a lighter
color from the first row. I often receive
feedback that some of my lessons feel a
bit fast to follow. So for this particular lesson, I have decided not
to adjust the speed. I'm keeping it in real time, so you can comfortably follow
along with every step. So here I'm going to create
an outline for the petals. Make sure there are no open ends as we are going to fill
it with the same color. Dragon drop the same light
pink color into this shape. Next, we'll move on to
our second base layer. For that, we'll go to
layers, add a new layer. Next from the color palette, we'll select this darker
pink of the same shade. Again, I'll create an
outline following my sketch. This time, it will
be smaller petals. Dragon drop the same
color into this outline. Next, for the third base
layer of this flower, I'll add a new layer, and from the color palette, I'll be selecting
the lighter orange. This light orange was meant
to be for the second flower, but I added a little bit of this shade to the
first flower as well. It helps the pattern look
more connected and cohesive. Create an outline and fill
it with the same color. Now let's move on to
the fourth layer. This can also be
called as a part of the stem for that
we'll add a new layer, and I'll add this dark green. While I'm adding this layer, I'm also trying to cover
the uneven ends of these petals so that it can give a more clean and
finished look to the flour. Uh, I think I need to
erase the orange layer. I'll go back to the layer, select my eraser tool, and I'll slightly erase. Here we are done with the base
layer of our first flower. Before we move on
to the second one, to keep our layers organized, I'll select all the four
layers and group them and now add a new layer so that we can start the base of
our second flower. From the color palette, I'll select our light orange. Make sure your studio
pen brush is selected. As you're adding
these base layers, feel free to make
the design your own. You can customize the shape
or adjust the colors to match your personal palette
or experiment with where you place each
color within the composition. You can also add extra leaves or additional elements
if you would like to create a more fuller
and detailed pattern. This is a great stage to
explore different variations. Even small changes in
shape, color placement, or added details can completely transform the
overall feel of your pattern. Once you're done
with the outline, drop the same color
into this shape. Now for the second base
layer, add a new layer. From the color palette, I'll select the darker
shade of orange. Now, following the sketch, I'll add another detail
for this flower. If you would like
your flowers to look perfectly even and symmetrical, you can also use the symmetry
tool to create them. I chose not to use
it because I wanted the flowers to have a more
natural and hand drawn feel. Keeping them slightly imperfect gives the overall pattern
a more organic look. And that was the last petal. Let's move on to the
center of this flower. For that, we'll add a new layer. And for this, I want to add one of the color from
the first flower. So I'm going to pick
the darker pink. Once you're done
creating an outline, drop the same color
into this shape. Now with the lighter pink, a tiny.in the center. We are done with the base of our second flower here.
Now let's group them. Go to layers, select all the three flower
layers and group. Now we need a new
layer for the stem. Add a new layer, and we'll pull this layer below both
our flower layers. We'll follow the sketch
and we'll add stem. I'll go to my color palette and I'll select this dark green. I want the stem to be slightly
thicker towards the flour. You can customize the shape and the thickness of the stem. Thinner stems will give a more delicate feel
to your pattern. I like my corner here between
the stems to be curved. Adding outline for
all the leaves and fill it with
the same colour. There's another layer that I
want to add to the leaves, but these are optional. I'll add a new layer on
top of our leaf layer, select this second
light green color from the color palette. Now, before we move
on to our next step, I also want to add base layer for this and this leaves too. For that, we'll
need a new layer. I'll add a new layer and
from the color palette, we'll select the third
green, the brighter green. We can quickly create an outline and fill it with the same color. We can keep both of these
elements on the same layer. Like the other
leaves for this one, too, I want to add
another layer of base. For that, I'll add
another new layer. I'll select the darker
green, the first one. These additional
details help give your pattern a more
fuller and refined look. They add depth and
visual interest. Next, let's organize
them in a group, select both the layers
and add them in a group for the leaves and the stem two can be in a separate group. Now our next step is to
use our dot brushes. For that, we'll go
to our first flower, open the group and make sure you add a new layer
inside this group. Select a white color, select dot brush three. This is a pressure
sensitive brush, but you can choose the basic one or the one
with the texture. Now, when it comes
to adding the dots, feel free to experiment and
develop your own style. You can decide how and where
you want to place them. The key thing to keep in mind is consistency across
all the motives. Keeping the dot
style uniform will help your pattern look more
cohesive and well balanced. For example, you can
limit yourself to using just one or two type of dot brushes or stick to
a smaller color palette. In this case, I'm mainly using one brush and mostly
working with white. This repeton helps tie
everything together and gives the overall pattern a clean and harmonious feel. If you are a beginner, it may take some time to get comfortable using a
pressure sensitive brush. You can adjust the
pressure settings to suit your hand movement and take your time practicing
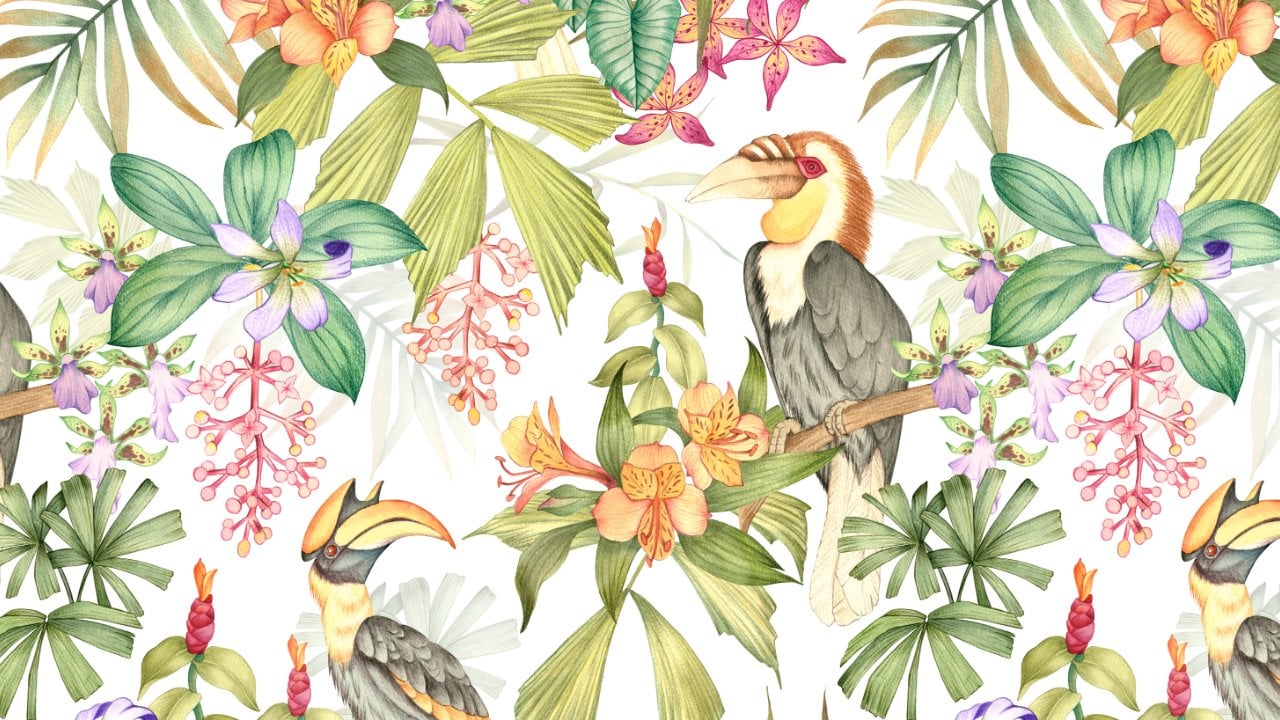
until it feels natural. Apart from the examples
shared in the class, you can also find plenty
of inspirations on Pinterest for how and
where to place these dots. So we are done with
our first flower here. Let's close this group and
move on to the second one. For the second one, too, we'll add a new layer
inside the group, and I'll select the
dot brush three. I'll hide my sketch layer here. For the center, I want
the dots to be thicker, so I'm adding extra pressure while I'm adding
these brush strokes. Now, for the center of the flower with a
smaller brush size, adding this tiny outline. We are done with our
second flower here. Let's move on to the
stem and the leaves. I'll close the flower group and open the stem
in the leaf one, add a new layer
inside the group. Trying a new pattern
on this one. Oh, I think I made a mistake here. Instead of adding a new layer under the leaves and the stem, I added them in the wrong group. I'll just put the layer
to the correct one. I'll add a new layer inside the group for the
other two motif. Make sure you are on
the correct layer. Now let's add some dot
patterns on these two. Now that we have completed the
first part of the pattern, the next step is to
duplicate this canvas. This way will always
have a backup copy in case we need to revisit
or edit anything later. Tap on gallery and go back. Now swipe left on the
canvas and tap duplicate. Tap and open one of the canvas. Next, we need to
merge all the layers, except for the sketch one, pinch all the group together, and that will merge and
turn into one layer. You should now have two layers, one with the sketch and
another one with the motif. Next, we'll add a new layer. I'll pull this layer below
both the other layers, and we need to fill this with any dark color
like any mid tone. I'll select this bright orange
and drop it on the canvas. Next, reduce the opacity of this color fill
layer to around 50%. Select all the three
layers and group them. Next, duplicate this
group three times. In total, you should have four group Now hide all the
three groups at the bottom, select the first group. And now before moving, make sure under uniform, snapping your magnetic
end snapping is on, then hold and drag it to
one corner until it snaps. When it snaps, you
will be able to see golden lines vertically
and horizontally. Will repeat the same for
the other three groups. You have to make sure all of these layers are
not overlapping. Once you're done with all the four layers, open each group and delete
the colorful layers. Now you can select all the
layers with pattern on them and then pull
them out of the group. Pinch and merge them. Next, pinch and merge all the other layers which
have sketch on them. And now, again, you should have two layers on your canvas, one with the sketch, and the
other one with the pattern. Now let's move on to
the second part of this pattern where we will be working on this
part of the sketch.
5. Dot Pattern - Part 2: Let's start with the second
part of this pattern. We'll start by
adding a new layer. Pull this layer below
the sketch layer. It is very similar to what
we did in the first part. We have to create base layers
for each of these elements. For that, we need to select
our studio pen brush. Now, here I want my
first flower to have this pink combination with a lighter and a
darker shade of pink. Let's select the light pink and we'll create a base layer
for the first flower. We'll create an outline for this and fill it
with the same color. Now, before we start
with our second layer, I want to organize my layers. I will pull our part
one pattern layer to the extreme bottom. Now you can see here it is
not overlapping our flour. We'll rename this as part
one to avoid any confusion. Now let's move on to
adding the base layer. We'll add a new base layer on top of our first base layer. Select the darker pink
from the color palette. If you notice, I'm using a few techniques that are consistent
throughout the pattern. For example, I'm adding both light and dark colour
layers to each flower, which helps tie everything together and create a
more cohesive look. This might look
confusing right now, but once I'm done adding
all of the layers, it will be easier to understand. Now for the third color, again, we need a new layer, and I need the same orange
or the same lighter orange. So I'll just pick
up from here or you can even pick from
the color palette. Now, while I'm
adding this layer, I'm also making sure
I am trying to hide all the uneven ends so the flour can have a more
clean and finished look. Now, I want to add another
layer of darker orange, so I am not adding a new layer. I'm going to illustrate
on the same layer. We are done with the
first flower base here. Let's group them, select all the three
layers and tab group. Add a new layer for
our second flower. Now from the color palette, we can select the lighter
orange. Create an outline. Fill it with the same colour. Now add another new layer
on top of this layer. Select a darker shade of orange. Now let's move on to the
third layer of this flower. Go to layers and
add a new layer. Now I need a color
from the first flower. I'll select the darker pink for this tiny petal
in the front. Next, I want to add another layer of
lighter pink on this. I'll add a new layer, select the lighter pink. Now we need another layer for the two petals
at the bottom. Add a new layer and make sure this layer is below all
the other petal layers. I'll select the
same light orange. This can happen when
the outline has a gap, so I'll close the
gap and drop again. Here while I was
adding the petals, I realized that these sketches are too close to
the first flower. So here we are done with the base layers of
our second flower. Now let's group them,
select all the layers. I think there are one, two, three, four, five layers. We are done with both
the flowers here. Let's move on to the
leaves and the stem. We'll add a new layer, make sure it is below
both the flower layers, select the darker green
from the color palette. I'm going to follow the sketch, and also the style will be very similar to
the first part. We can erase the overlapping
of the flour later. Now, with the help
of the eraser tool, you can erase the overlapping. Next, we can add
the second layer for the leaves and the petal. I'll add a new layer and I'll
select the lighter green. I'm going to keep it very similar to the part
one of this pattern. Let's group both the leaves
and the stem layers. Select both and tap group. Now, our next step is to add dot patterns for
our first flower. For that, we'll add a new layer, make sure it is
inside the group. Next, we can select
our dot brush three from the color palette, we can select the white color. We can start with
the orange flower. Now for the petals
at the bottom, I want to show you how you
can use another brush. I'll select our dot brush five. You can try this same brush with a lot of other petals, too. I'll go back to my dot brush three so we can complete the
pink part of this flower. Now, let's move on
to the second flow. I'll open the group,
add a new layer. Before we start, I want to hide my sketch layer so we can
see the flower clearly. Now, let's move on to
the stem and the leaves. I'll open the group,
add a new layer, adding these brush
strokes very similar to the one we did for the
first part of this pattern. For the center of the leaves, I'm adding this dark green. Now, when I unhide
my sketch layer, you can see that this part of the motive is still
not illustrated. So we'll need to split the
pattern again to complete it. But before doing that, I
want to add a new layer at the extreme bottom because I don't want the background
to be very empty. For that, I'm going to
add few scattered dots. For that, I'm going to select
the same dot brush three. And adding these tiny
dots evenly scattered across the background to create
a soft balanced texture. This could also be done using
our overall pattern brush, but I prefer to add them
manually so they look more softer and have a more
natural hand drawn feel. I'm slightly going to
increase the speed here so that the lesson
is not too long. Now we can go back to the
gallery, tap on gallery, swipe left on this
canvas and tap duplicate and tap on the
first duplicate canvas. Now tap on layers, pinch and merge everything
except the sketch layer. Now you should have two layers, one with the sketch, and the
other one with the pattern. Now we'll add a new layer, pull this layer below
the pattern layer, fill this layer
with any dark color or any mid tone color, reduce the opacity of
the layer to around 50%. Next group all the three layers, swipe left and
duplicate this group. Hide one of the group and
select the other one. Hold this group and slide up until it snaps and you can
see these golden lines, unhide the other group
and slide it down. Make sure they are
not overlapping. Open both the groups and
delete the colorful layers. Next select both
the sketch layers and drag them outside the group. Pinch and merge both
the pattern layers, and pinch and merge both
the sketch layers too. Next, we can add a new layer. Pull this layer at the bottom. This is for the last
element for this pattern. We'll start by
creating a base layer. For that, I'll select
our studio pen brush, and I want it to be very
similar to this element. So I'll select this
light green color and we'll create a color
combination like this. Now, adding a new layer
for the second base layer. Select the darker green. Now another new layer
for dot brush pattern. Select the white color. I'll select my dot brush three. I want it to be very
similar to this one. And finally, we are done
with our pattern here. Let's check the repeat. We'll go to the gallery, swipe left on this canvas
and tap duplicate. Now before we move
on to the next step, I want to rename this
canvas as final repeat. Tap and open this canvas. Next, we'll go to layers, delete my sketch layer, pinch and merge all
the other four layers. Next, duplicate this
layer. Select this layer. Make sure under uniform, your magnetic and
snapping is on. Hold on one corner
of the square, make it smaller until it snaps. Duplicate this layer, select and slide right until it snaps. Duplicate and repeat
two more times. Now, this is how the full
complete pattern looks like. Make sure to zoom
in and check if there is any overlapping
or any gaps. Now, let's see how this looks
on different background. Tap on background color. Let's see a few more examples of patterns and motif
in the next lesson.
6. More Examples: Let's see the first example. This has a very leaf like veins, and it's a pressure based brush. Later in more examples, you will be able to
see how I have used this same brush to create pattern on the wings
for the Macao print. Now, let's see the exact shape I used to create this brush. You can use the same
hand drawn circles and place them in this Y shape. This can be customized
with the spacing, pressure, and the angles. Now let's move on to
the next example. I love this brush for
seaweeds and bushes. For this, too, you can play with the spacing and the
depth of the curve. The brush can have a
very different result depending on how you have
placed your circles. Let's see the exact shape I
used to create this brush. I have simply placed
the circles in a curve shape with both the
ends with a bigger circle. Now let's move on to
our next example. This is very similar to what
we have done in the class. Let's see the shape I used
to create this brush. The only difference here
is instead of vertical, I place the circles diagonally. The next one again, is very similar to what we
have done in the class. The only difference here is
instead of four circles, I have placed six
circles vertically. This gives you a more dense and intricate feel to the brush. Now here I want to show you a few examples of how you
can use these brushes. I got this motif done with
a watercolor texture on it. I want to start by
showing you how we can use the texture brushes that
we created in the class. So I customize my pressure base brush with a texture on it. Next, I can go to layers, add a new layer,
tap on this layer, and I'll add clipping
mask to this layer. I have my texture brush
and white color selected. Now, when you use
a texture brush to create any detail on
this kind of base, you can see how it blends
with the base now, I can show you the difference
with the non texture brush. This can depend on your
design or your style. You might also like
the clean finish more. These brushes are also very helpful for creating a
butti inspired look. They add beautiful texture
and natural variations that resemble the traditional
wax resist techniques used in butti art. Now let's see one of
the example of how to use this dot brush five that
we created in the class. Oh. Next is the overall
seamless brush that we created in the class. That is dot brush six. I'm going to add in the
center of the flower here because this layer
is on clipping mask, the pattern will not
go outside the shape. Once you're done
adding the pattern with the help of
the eraser tool, you can erase anything that is extra or going out
of your motif. Here one of my motif is ready. Let's move on to
the next example. This is another example
of seamless pattern where I have added all the
details with the dot brushes. Next example is
this token motif. I wanted the CDs to be very
detailed and intricate. You can see I have used the overall brush
in different sizes. On the feather is one of the brush that I showed
earlier in this lesson. This can take a lot of
patience and planning. I love using white
for these brushes, but you can experiment with a lot of other color
combinations, too. I hope these examples inspire you and spark
plenty of ideas for creating your own artwork and patterns using
these dot brushes. Don't hesitate to experiment,
combine techniques, and explore different styles to see what unique
results you can achieve.
7. Final Thoughts: I hope this class was
beneficial to you and gave you a deeper understanding on how to create your own
brushes from scratch. You have now learned some
essential brush settings that will help you confidently create your own
brushes in future. You have also created a seamless pattern
using these brushes, which helped you understand how to use these brushes
practically. This seamless pattern
can be applied in so many ways from fabric to stationary to even
digital products. Now you can experiment with the pattern template that
is provided in the class, the practical workflow, and
plenty of ideas and examples. If you have any question or
doubt regarding the class, you can post in the discussion
section of this class. Your reviews help me improve and create better
classes in future. If you have enjoyed this class, feel free to follow
me on Skillshare to get notified when
I publish a new one. You can follow me on
Instagram for more behind the scenes and
creative inspirations. Thank you for joining me, and I'll see you in my next class.
 Vinita Upadhya, Illustrator & Pattern Designer