Transcripts
1. Introduction: Do you ever find
yourself stuck at home wanting to draw
paint to a sketch? But lacking that little bit of inspirational motivation
to get started, It can be easy to get stuck in this idea that when we
draw or sketch something, it must be a beautiful
natural scene. Something just
begging to be drawn. When in fact there is
inspiration and beauty, as well as opportunities
to develop our artistic abilities all
around us filling our lives. The aims of this
class are to have a mindful and stress
free experience sketching the things around us. With that, we will improve our sketching skills
and knowledge, but we'll also develop
an understanding and an opportunity to
sketch more and more. As we find the natural beauty that is in the mundane of
our normal everyday lives. Suddenly we'll find inspiration and motivation
around every corner. By the end, we'll have filled up our sketchbook
pages together. You'll be confidently adding
shadows, adding colors. And really, just like I have, chronicling your life
in your sketch book. If you enjoy these classes, then do follow me on Skilsha. You can see more of my
doodle sketching series, including how to sketch people and how to
sketch your will, doing some outside scenes. You can also find me at Toby sketch loops on
Instagram and Youtube. But most importantly, shall we start some
sketching today?
2. Project and Supplies: Today we're aiming to produce
a page or two like this, doodling our lives,
simple objects from home, maybe your living room,
maybe your bedroom. Just having fun.
That's your project. We're going to work through this in lots of little stages, starting with building up
our simple shapes and seeing how the variation in line, a little bit of detail
and some shadows and colors can bring simple
doodles to life. When you have done your project that is filled a
page or a couple of pages or even gone to down and had a full sketch
book full of these. Upload a photo and let
me know your thoughts. Let me know the things you learned, the things you enjoyed. Hopefully, the biggest
thing I'd love you to get out of this
is just relaxing. Enjoying and discovering that drawing can be a really
fun thing to get in. Now, all you need
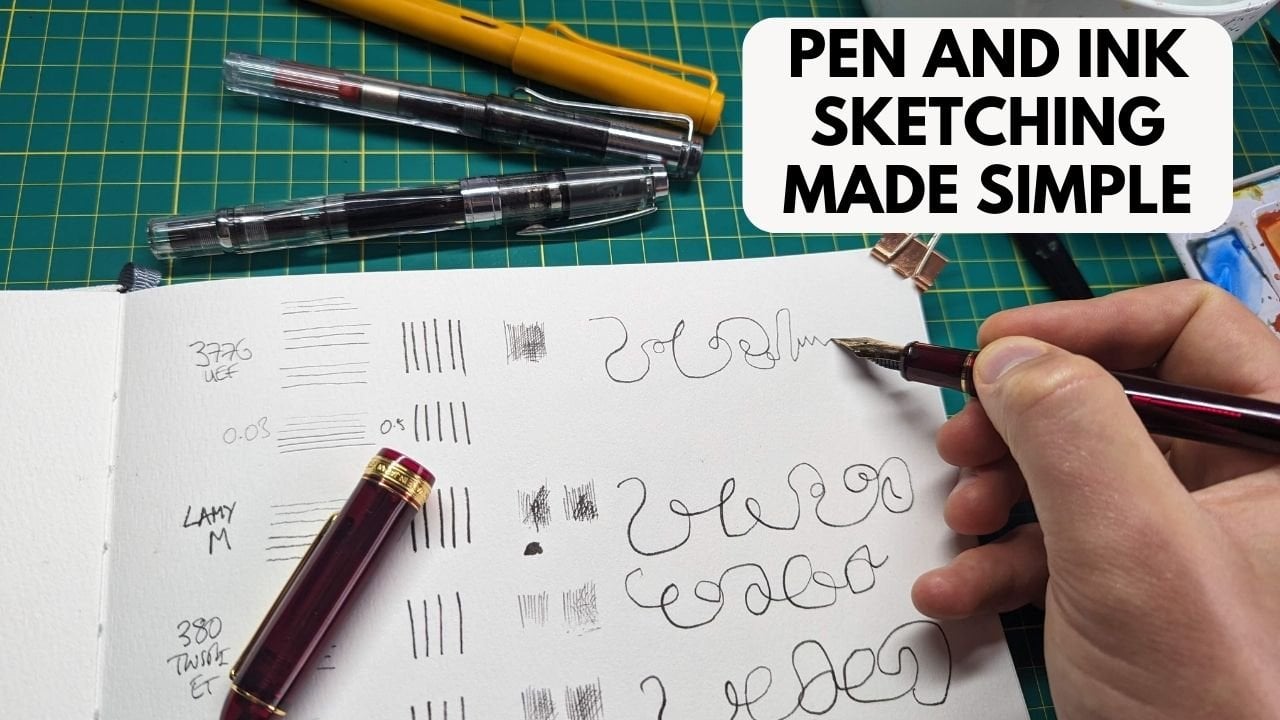
for this lesson are some very basic supplies you can see I've
got my sketchbook. This is quite a new one, so
I've actually got much in. I've got some
Christmas Eve doodles here and a lot of empty pages. Here's some bird doodles. I think I've got my dog here. Some really simple stuff,
but nothing amazing in here. Just really a space for me to be creative and
have some fun. You'll need a sketch
book or some paper. Really, any paper will do. Just as basically
any pen will do. I'm going to be using this pen. This is a Fudencke pen by Tombo. That basically means that it
forms a variety of lines. Because it's got a tip
which is a bit flexible. It can be really bold on one
hand and then on the other, it can be really fine. That's a great fun
way of creating quick, quick, fun lines. But I could just as happily
use my fountain pen. I could just as happily use my fine liners or a
ballpoint or any other pen. Then I've got some
other fun things that we're going to be trying
out, playing with today. I'm going to be for my grays, I'm going to be using these. So these are some, basically
watercolor brush pens. They've got two
ends. They've got a brush end and then they've
got a finer tip end. And I'll mostly be using brush
and got a range of grays. I'll probably only
use two, maybe three. Most of these other options
could be alcohol markers. Here we've got some
alcohol markers just to own brand cheap. Again, just a
couple of versions. You can see they come
in different depths of gray, different darknesses. You could equally
use water colors, some simple water colors, and use a normal water
color process to create grays in different darknesses.
The same for colors. Obviously, you could
use your water colors. What I'm going to be using
for a little bit of a change, they are some markers, these are alcohol
based ink markers. I'm just going to use a handful. I've got five here. Maybe we'll pick up a couple
of others, maybe we won't. But you could also use more
watercolor brush pens. You could use pencils, anything to add a B of color, or you could leave things blank, just like my little
Christmas doodles look perfectly happy
being without color. So we don't need to add color, we don't need to add grainness. It's just something
extra to take a, sort of the next
step, if you like. And with that, we're
ready to start creating our doodle,
sketching pages.
3. Simple Shapes: We're going to
start by recapping, or if you're doing this
for the first time, learning some simple
principles of pen work. Here we look at shapes, we look at line weight. We look at textures. You can see it's only going to take us a couple of minutes. And by the end of this,
you'll have a huge amount of confidence and
understanding of how to achieve little objects using some really simple
principles which will let you doodle to
your heart's content. Let's dive in. The
first thing we're going to look at is just being simple and how
simplicity is the way to build up our basic
build up our scenes. We start with this
idea of simple shapes. This is possibly
something new for you, it's possibly a little bit
of a recap and revision. Simple shapes are just
what they sound like, circles, triangles,
squares, rectangles. The idea here is that
these simple shapes can build up into much
more complex things. For example, each of
these could be a person, a circle, and a triangle
and a rectangle. We got a person here, we got a triangle and a circle, two triangles, and we've
again, got a person. Perhaps we could have a square,
and then we can have a, something wobbly
square underneath a couple more triangles. Again, little legs. And we've got another person, maybe this one is a
little robot man, we've got our simple
blocky shapes. And we can even start
producing limbs in funky little poses,
just like that. We can even start building
up little other suggestions. Here we go, simple shapes. And despite them being simple, we've managed to draw
what is probably the most complicated
thing that people fear, that people don't like drawing, and that is people
from simple shapes. We start to develop our lines. All of these are
quite flat shapes. What do I mean by that? I mean, we've just drawn a
very simple shape. It doesn't have any weight to, it doesn't have a
feeling of free D. How we do this is we start
to vary the line. The line here can be thin, it can be slightly bolder, bit bolder, really bold. Or even a whole blacked
in contrasting area. This is why like
using a fu day pen but even with something
like a fine liner, which infery just has
one strength of line. Well, you can do a fine line, you can do a bolder line, and you can go back and forward and make that
line even bolder. There are lots of ways
to vary that line, doesn't matter what
tool you're using here. We take our circle
and we just give it a bolder line down here. Suddenly it's feeling
a little bit more. Three D, We can do the same
with our little people, just making some of those lines really remarkably nice and bold. Suddenly they're just a
little bit more interesting. A little bit more, three D. Next we add some
textures or tiny details. Let's call this
Textures and Details. This is really where things
start to come together. Instead of having a circle, we've got a circle
with a little dimple. From that dimple comes a stalk. If we've got, maybe this, we have to call a semicircle, don't we can have a
semicircle there. Semicircle here.
Actually, if we just lower the edge of that
and raise the edge there, we had a mark there. What have we got? A mug. Now, if we lower the
edge here ourselves, some of these little
circles coming out of it, little other shapes,
what have we got now? Hopefully, a little
bowl of fruit. We can take things
a bit further. So we can start hatching. That hatching is going to
add a sense of shadow. We can make things feel big
and imposing on the desk. We can add maybe a little saucer around our mug. Just like this. We can build up people, We can build up simple objects, and we can really
start just applying these very easy processes
to our whole scene.
4. Shadows and Colours: We're now going to look at the simple principles
of adding grays to give our objects that sense
of being real and being three D of adding colors. Adding a bit of punch
of life and fun. The tip here, the key underlying principle
is don't overdo it. Keep it light, keep it simple. Just a few touches and you'll be doodling away
to your heart's content. Next we want to look at how do you start making
things a bit gray. We've got lots of
different grays here. I'll just show you for
reference what they look like. These are different warm
grays and cool grays. Some of them very subtle. That's a very subtle warm gray. This will be probably
similarly subtle. This is a cool gray. That might even be even
more subtle for me, perhaps for doing a
really quick doodle. They're a bit too light,
they're not going to give us a real sudden punch. Moving up, we can go somewhere
along the line here. That looks like a
medium cool gray to me. So we'll pop that one down
and we can keep going up. We've got another one here, and then we've got
another one here. You can see just working away up a value scale approximately. This one is nice and bold and this one works
nicely for me. I'm going to use
those as my main to. The ideas here is also
that you can layer, we can increase just by layering on top
of the previous one. Well, we can layer
our boldest on top of less bold and
we'll get even darker. Very simple ways
of just building up darkness, Gradual shadow. If we take our simple
examples here, our little warmup page. Well look, we can just create a little bit more shadow coming
around the outside here. Same, maybe with our tomato. We don't need to be
really neat or specific. These can be quite
big gestural strokes. It's going to work on our
people as well. Little touches. And you'll notice we're doing
this for the color because this will make adding
the color much easier. And you'll see that
in the next lesson. Of course, here we add our darkest gray that
we're going to be using. Suddenly everything's just
got a whole load more shape. It's not perfect, There's lots of little
touches we could do. We could add simple reflections. We could learn gently, we could move things
around with water. We could do an awful lot, but we're having
fun with doodling. So let's keep this
really simple and just accept that our pages
aren't going to be perfect. They're going to
be a bit of fun. Now, last but not least,
we're adding some color. So I've just got
here a few colors. We might pick up some more, we might not. It
really doesn't matter. I've taken one of each
primary color, blue, yellow, and red, and I've got
some secondary colors, brown and a green. What we're going to do, well, we can just use these to roughly mark in little touches of color. Here's our banana
in the background. Here's our head. Maybe this apple is red. Little touch doesn't
have to be neat. It can be neat. There's no
reason it has to be not neat. So we could come in on
this ball and neat. When neat, do you see how that shadow underneath
still comes through? That's why this is a
nice way to do things. A nice order to do things in, because it means that our colors are already
showing that shadow. We don't have to
worry about laying our colors and using
different values of red and green and yellow because it's
already there for us. Now I'm using pro markers here. These are alcohol markers
that are water color markers. And I'm just using
these as something different because
they're the best thing or because you have to use them. There are lots and lots of
ways of adding really simple, lovely touches of color. One thing about alcohol pens, and one of the
reasons I'm not using alcohol pens to
my grays as well, because they can seep
through our pages. I don't know if this is
going to have seep through, but I suspect you can get
a little sense of it. You can hopefully just see these little shakes are just
starting to come through. If we were layering
this up lots and lots, then these alcohol pens would
soak through our paper. This is quite good quality
water color paper. The fact it's not quite soaking through is a lot
down to the paper. If we just use normal
paper, it will bleed, True. That's okay. We just got to
be aware of it and we're not going to be able to
draw on both sides.
5. Building Simple Objects: In the next three lessons, including this one,
we're going to be building up simple objects. First, we're going to
be looking at making our simple objects using
those simple shapes. Remembering the line
work techniques that we talked about
right at the beginning. Now that we have
covered the basics, we can move on to
simple objects. Simple things from your
life, around your house. Perhaps that's what I'm
going to be doing is exploring my house
in these sketches. Let's do our next page. Next part of our project,
rather simple objects. This is where we are thinking
about things like this, but just building it up and working out those
things which are part of our life and which we can incorporate into our art. And actually make
these relatively boring things really cool, really fun through
simple, simple doodling. Let's start with
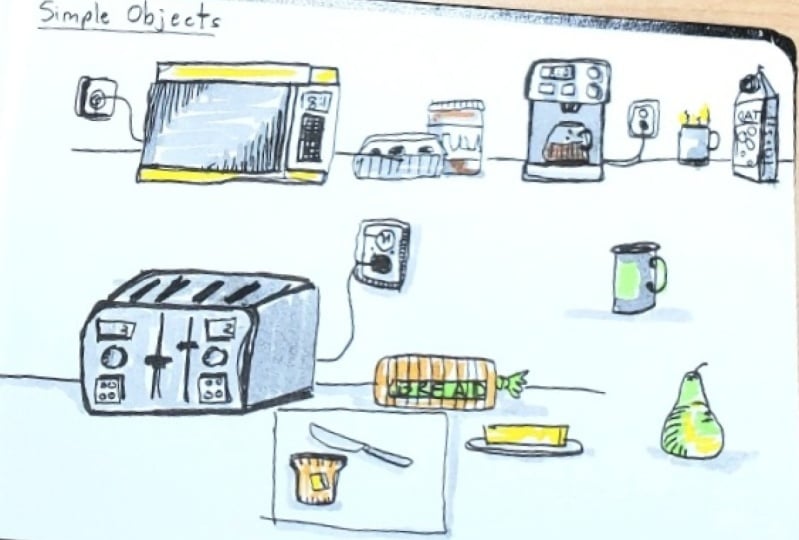
something obvious for me. I get up in the morning, sorry for a purists, but I microwave my porridge. Have porridge every morning. Let's draw one of my
trusty kitchen companion, or at least my trusty
breakfast companion, key part of my life. This is our tiny
little microwave. We can find our simple shapes. Now, this doesn't have to be a super accurate representation drawn from life of my microwave. This is the idea,
we're remembering, those simple ideas
we got hatching, we got little details, and we've got bold lines. Something else which
is important as we're building these objects
into a scene is having a horizon line or a line where
the ground meets the wall, or the ground meets the sky. Inside it's the ground
meets the wall because suddenly this line makes
the object not float. We can put fun things
on our wall so we can make a plug socket as
a fun part of our. We can start making
these objects interact. On top of this we
always keep tray which we put our tea bags into when we've
finished using them. There's always a couple of
mugs and things up there so we can do some
really simple mugs. We keep these very
simple because they're not really the main
feature we're drawing. The microwave is
our main feature. Alongside the microwave, we've
got all these jars, jars, bottles, and we've
got a thing of salt, we got a thing of olive oil normally have a
pepper grinder there. We can just build up, look really simple shapes. But it's amazing how
these simple shapes can become really fun. I
keep saying they're fun. I keep saying these
objects are fun. But they're not, are they? They're really banal
and really boring. But this, this process is fun. So we're taking our life, we're making it
simple, and we're having a little bit
of fun with it. Make those lines bold where there's a
little bit of shadow. There we go. So we've got our first simple little objects. Next, I'm going to
keep going around my kitchen as a fun way to
explore simple objects. The start of your day, maybe
this is what you want to do. What else do I find very
important for my morning? Well, of course, if you know me, that would be a coffee. Whether I have a
decaf or whether I have a sort real coffee, it's definitely going
to be there In my life, what we can do is we can
get this French press. That's how I like
going my coffee. It gets you nice coffee, but it's also quick
and easy to make. So we can get our
French press here. This is the plunger, and underneath that we
have all of our coffee. I can actually get
the textures in talked about details and
texture. Well, here we go. That's an example
to make it darker, We can also hatch and we can get some of the reflections
on the top as well. There we go. That's
the starting process of our little scene Here, we'll get another mug in, because obviously that's
important and we can start thinking about things
which will work on later, like touch of perspective. Understanding that
having a touch of perspective can make
things more interesting. Here, look, we can see
just the opening of that mug and we can see
this ellipse going down. That is simple perspective. If you can draw this, you're drawing the beginnings
of perspective. This microwave is flat, it's facing us, There
is no perspective. It's really fun,
just like these, really flat, but no perspective. We can start building up
and just imagining things that we're seeing them
at a slight angle. Now alongside this, I don't
tend to have anything, but we can always just add
perhaps a little bit of milk. Now, I tend to be
vegan, if I can be. Here's my little bottle of vegan Milk tends
to be oat milk. Oaks are hard to draw on there, they're just little circles, so I'll do a little oak on it. There we go. That again
is in perspective. Do you see how
we've drawn a box? If we went back
up to our basics, you can draw a simple
shape like this, that's two D. Or it can
start to be in perspective. It can have two sides, or it could even have three
sides that you can see, Depends on your viewpoint. We can start working in how
to make our scenes just a tiny bit more interesting by incorporating a
touch of perspective. Now that we started
talking about that, it's important to jump in with a little bit of our shading, which we'll do in
the next lesson, and work out how that really helps bring about some
of this perspective.
6. Adding Shadows: Now having done
our simple shapes, which have made simple objects, we're going to make them that a little bit more interesting. We're going to start
adding a bit of shadow to make them feel three D. We've just started
working that actually, even simple doodles can
have a sense of perspective and become three D. And
to build that idea up, we can use our 2 grays and we can just show one
side is in shadow. Or in the case here, we've
got two sides in shadow, but one of them is underneath, probably going to be
darker than the other. That's what we're
trying to do with our shading is show that we've got a light source which is
giving us a sense of shadow. Now the shadow will often be a little more complicated
than just one side. There'll also be
shadow coming off it. On a spherical
thing, like a mug, there'll be shadow
curving around it here. We haven't just got shadow,
we've also got dark coffee. The hatching, along with
the graying of this. We'll start providing
more information than just simple shadow. But you see how
this simple banal, little silly scene
can suddenly actually be rather interesting just because we've introduced
a bit of shadow, of free, tiniest bit
of that perspective. We can use the same
little touches even on our more two
D scene over here. We can make things in the
distance, be a little shadow. We can show that there's
an interior here. Something murky going on just
through touch of shadow. And then of course
we can give things a shadow around
their base as well. Sopping back to the
slightly darker color, we just layer up in
a couple of places. And the key here is just
a couple of places. Don't overdo it. Don't need
to be too fancy, too clever. Suddenly we've built our
simple objects into real, quite quirky, quite fun scenes. Next we'll add tiny
touches of color, and I'll show you
that tiny touches of color is really
all that you need.
7. Punches of Colour: Finally, for our simple objects, we're adding a punch of color. Something just to make
them jump off the page. And make our page just brim with a little bit more
life as promised. Some tiny touches of
color coming up for now. I'm going to stick with these
five colors I've got here. So this is a brown, they are
calling it saddle brown, but something like a
burnt umber, burnt. That's the kind of
feeling of this. I'm going to use
that just on top of here to deepen that
neutral grain. You might not be
able to pick it up super well on the camera, but in person it's giving me a nice slight change
to that shadow. We can use this same brown maybe in a couple
of other places, just really simple touches. Maybe one of these mugs can have that nice, warm bit of brown. Then we can move on. Not
every bit needs color. What could be fun is
adding a bit of color to some of these bottles
and containers. And again, not every
bit needs color. We can use the color just where the shadows
are, for example. Or we can use the color
where the shadows are. Lots of ways to play this. The colors don't have
to be realistic. They can just be there to
pull apart these objects. In actual fact, these
bottles are actually all dark, dark brownie colors. This one's white. This is
my salt, and it's white. But we've pulled them apart by applying our own little
artistic touches. Then of course, we've got
little buttons in here. It's all electronics. Give it a nice glow. We
could do the same here. We can get this glowing feel coming out of our hot coffee. But the mug itself maybe can be a little touch of blue on there. And then the oak
milk and the coffee. We could just leave because
already it looks fine and we don't need to
overcomplicate things. What I'd suggest you do now, and what I'm going to do in a speed up version is just
fill up your page here, if you've got some space
with really simple, delightful. Fun little objects.
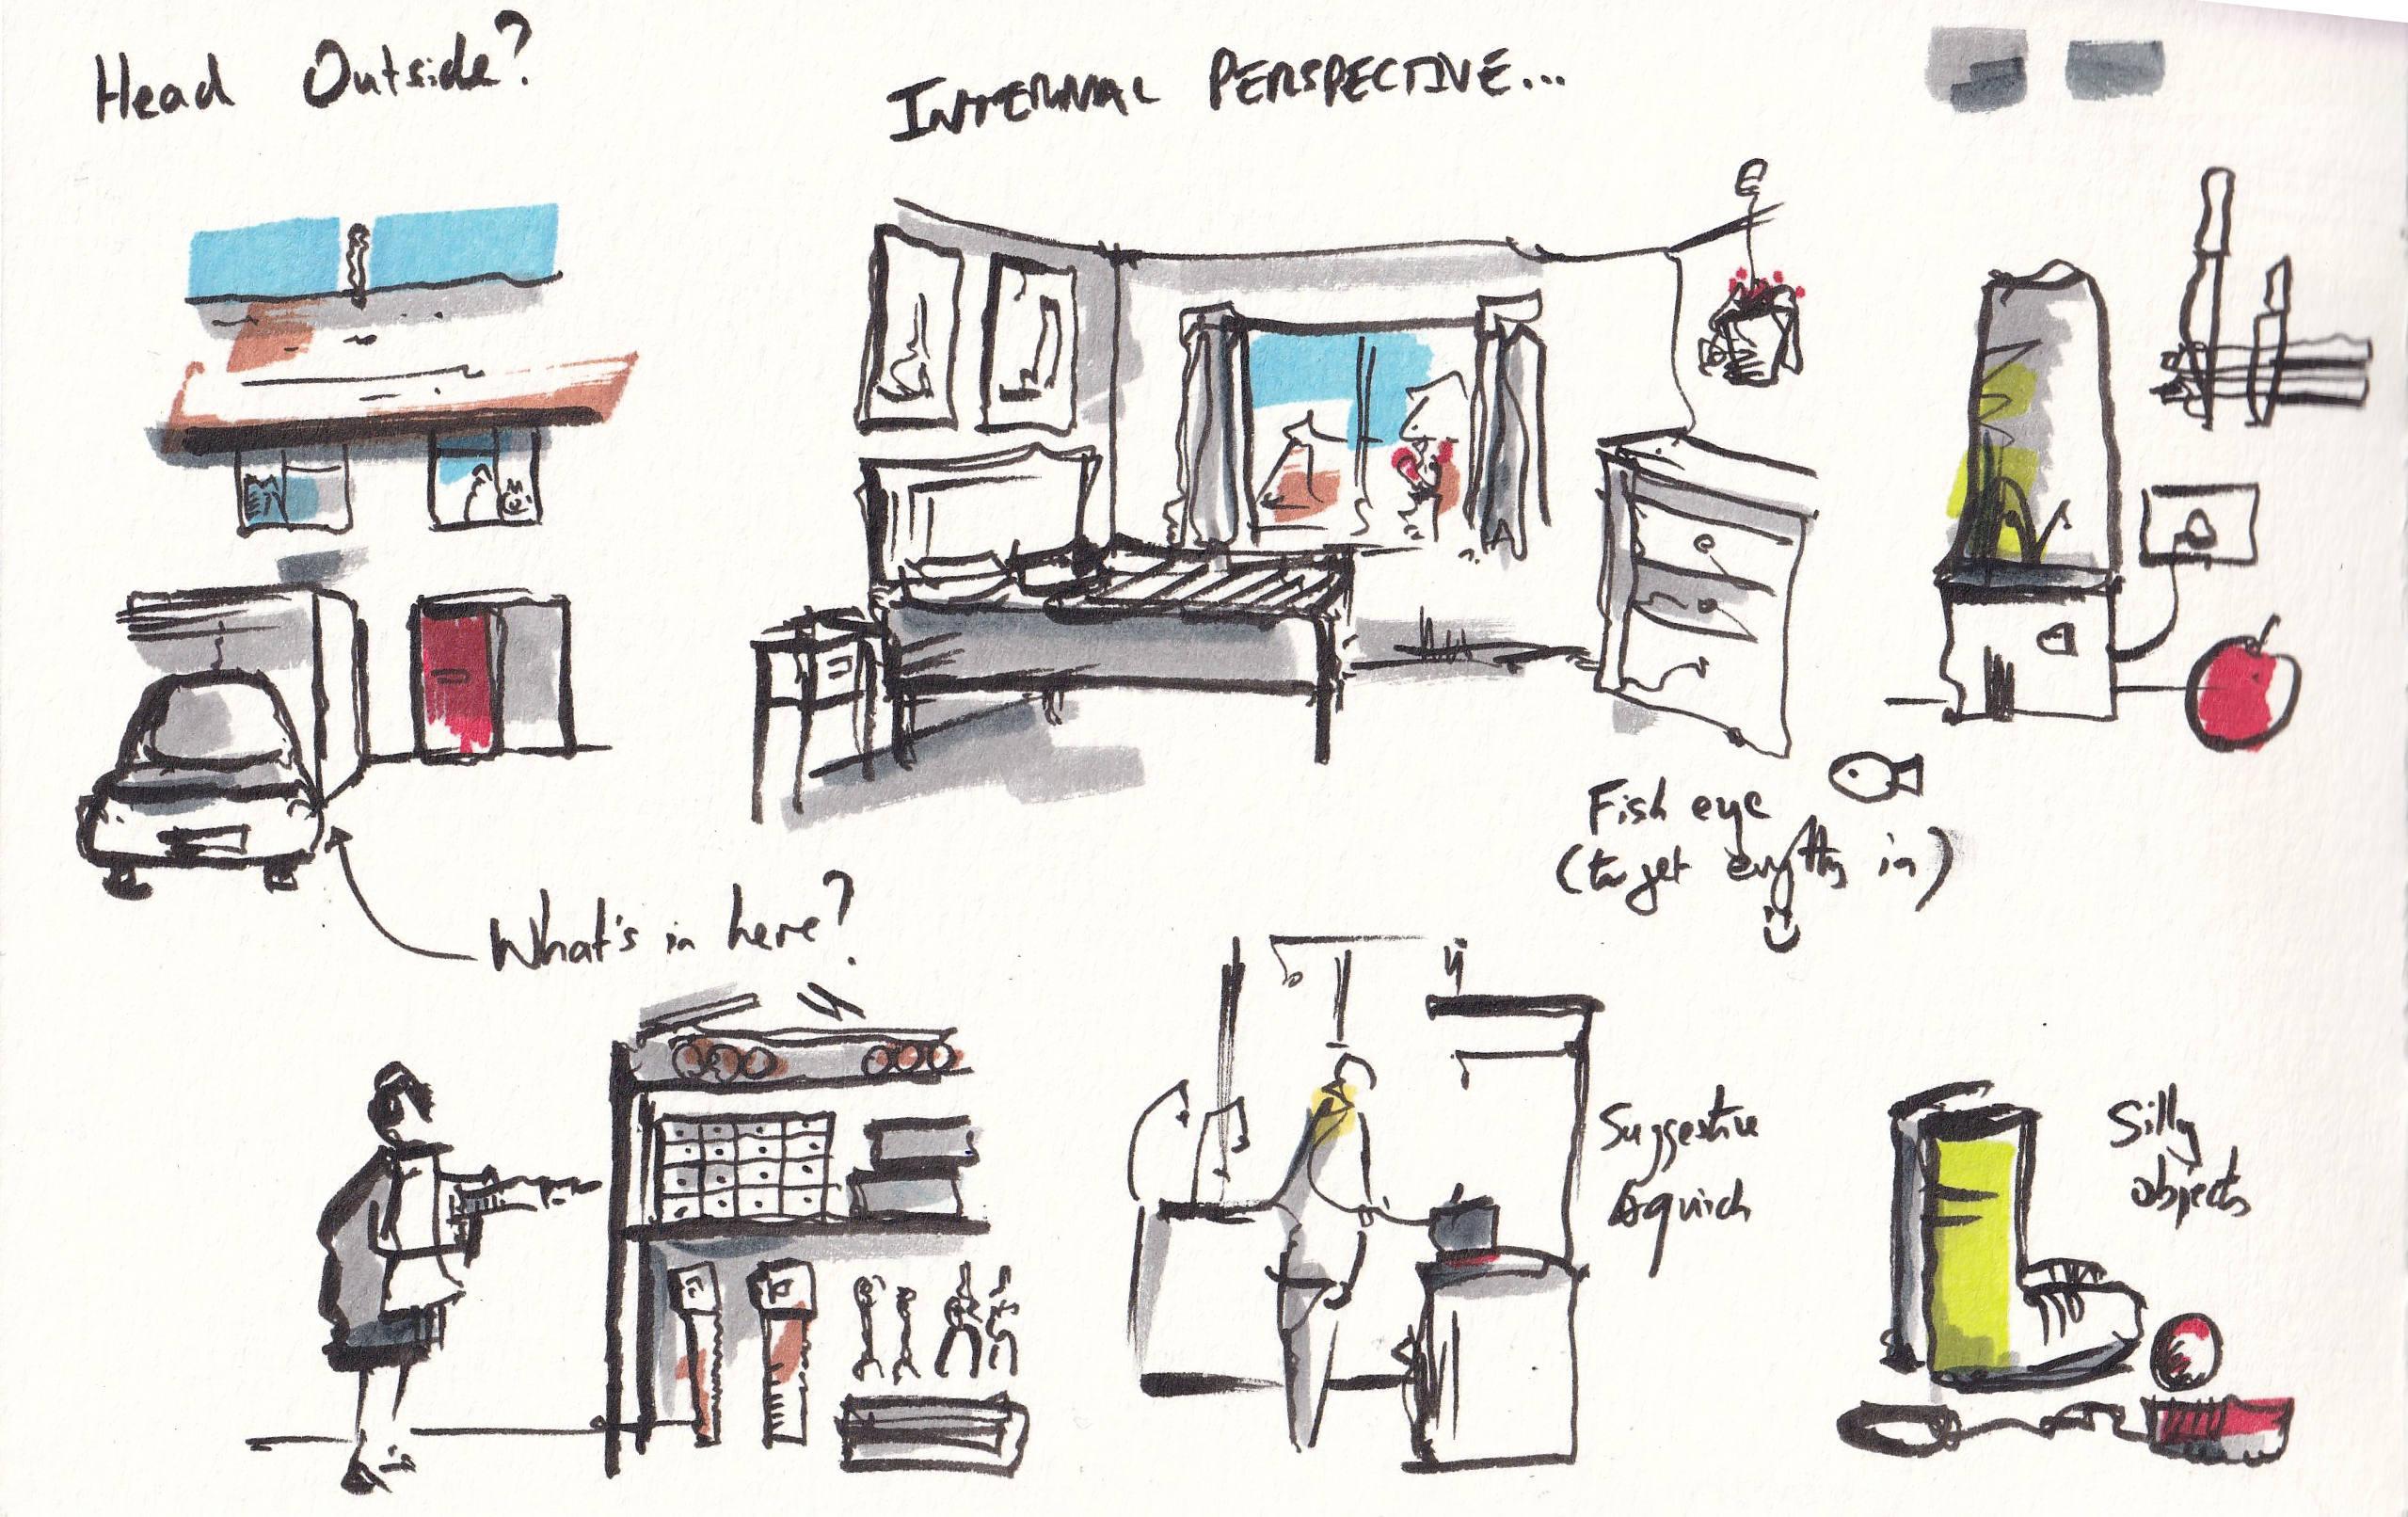
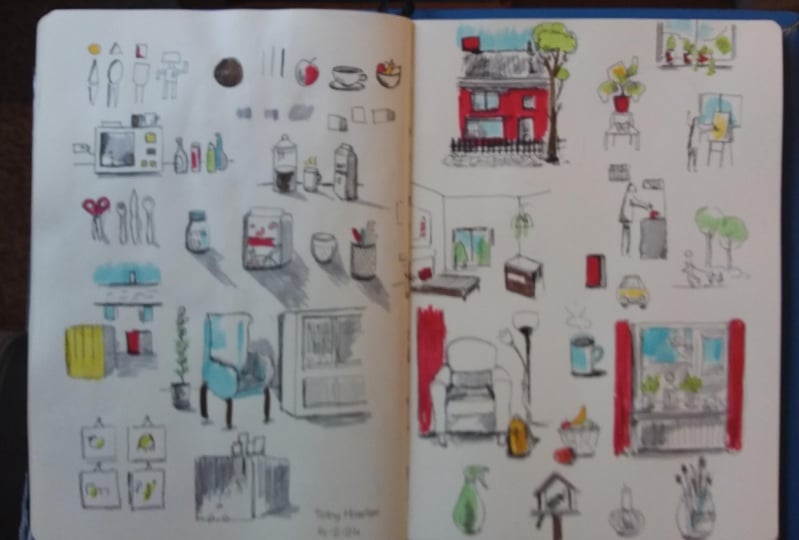
8. Our First Scene - My Living Room: Time now to start putting
everything together, everything together all at once. So we are stepping
into my living room. You might be sat there
right now watching this. And it's a lovely place
to sit and doodle. Perhaps with the radio on, perhaps with the TV on, or perhaps just into
mindful silence. And that's what we're
going to explore. Simple little scene, tiny bit
of how to make things free, dear, and considering
that perspective that you often get indoors. But mostly about making things simple and being able to
doodle, sketch your life. So we're going to
start moving now. Around my house. Around your house, and pacey
exploring mini scenes. So we've done very
many scenes and now we're going
to scale them up. So I'm going to do
a very simple sort of doodle in the middle. So we've got my house. Yeah, and let's just start
with some really fun things. So these are my version of what the inside of
my house looks like. Let's start with a
couple of things from the sitting room that might
be where you are now. It's only a comfy place to just sit and sketch what you
see in front of you. For example, for me, we have this lovely arm chair. Call it my old man arm chair. It's a big comfy armchair. Betty is not allowed on Betty,
of course, being my dog, she so often finds
herself somehow on notice again that this is an opportunity to explore
the idea of perspective. We've basically got a box. We, we've got a box, we've just chopped a little
corners off it. In doing so, we've created
a very three D object. Then we can start deciding
where the shadow is here. Might be that the shadow is inside here and coming up there. This shadow just shows, you've got interior to this arm chair now
behind this arm chair, this arm chair, at a
little bit of an angle, behind it we've got
a little cabinet. One thing which will
be really helpful is knowing where the
edge of the wall is. We draw in our little line. Remember from our
bottles over here, this little line is how we can base everything
else in the space. We know the line is
there, so the back of our cabinet must end here. Then it's going to be
facing slightly that way. It's another thing which
is in perspective. We can just start
drawing ourselves basically a box which
is in perspective. Now this little
cabinet has big doors. These are glass doors, you can see inside them. Underneath it's got, I don't even know what
to describe it. Little rolling shutter where we put away just
random nonsense. I think there's birthday candles
in there and that thing. Then in here we've got of course some bottles of wine and
beer and things like that. Quite a lot of non
alcoholic beer because just like I like my coffee and
I often have it, tea calf. Actually, sometimes it's nice just
to have these slightly, I think hopefully,
healthier options. But we can just do
really simple touches to suggest what's going on here. Now notice, unlike here where we were really
certain about our shapes, here because it's inside, I'm leaving it quite uncertain. I'm not trying to make
it really obvious, we can even show that it's
behind something budding, some very simple and
gentle hatching. If we now start
blending our processes, I can also immediately add
some shade over there. Because inside there
is very shaded a little touches of shade like
under and around as well. We can put some shade
onto this wall behind, a little bit onto this chair. Then we can continue
building up our scene around those little
touches behind everything. I have actually got
four bits of art, and these are really fun, I
think, to doodle as well. We just have these four
little bits of art. We can again, apply
these same processes. Instead of trying to
make them look real, what we do is we make them
really loose and gentle. This is a sunflower here. I've got a funny hut
on a beach that's just showing that really
simple idea here. Little portrait of a
few people and here a little more
typical street scene look really simple shapes. We then give our
frame that D feel, hopefully suddenly it becomes
a little obvious what we're trying to achieve
here that we're trying to show that
this is a wall. We want. We could add a little
illustrative touch and we could go look just to
show that it's hanging. Obviously, the hangers are
actually behind the frame, but we can put those hangers in. It's bit of art, not a
bit of realism here. We've got a big plant notice, I've already drawn this line in. This is where I think
people get stuck. Sometimes you think you need to plan the whole scene
before you do it. But look, if I put
my plant down here, remembering the perspective
we're going to be able to see inside
that plant pot. I'm very much able to sketch
over that previous line. I'm actually not
sure what it is. It's quite a big tall
plant and it just climbs up the wall and we've got big leaves
and some little leaves, and there we go, look. It's in front of
everything we've drawn, but it's still there. Next in here, we've
got a corner. In this corner, we've
got another box. I'm going to draw this box, but now it's facing
the other way. I need to work out
my perspective. And this is where
things get awkward, because in interior spaces, and we're going to do
another scene like this, but in interior spaces the perspective can
warp around us. Here, look this box, we're seeing that side,
this box, seeing that side. We just need to think carefully. It doesn't matter if we get
a bit wrong in this box. This is where of my dog lives. In the little corner. There
we go, there is my dog. On top of that, she
got a few little boxes of treats and food, and toys and things
in the front. Another illustrative touch,
of course, is a bone. Now here we can show
that it's dark inside. By hatching around
the simple shapes, we can come back
and we can pick up our little bits
of shading again, just to start making
sure that everyone knows this is a two
D. It's three D, something extra going on. And see when I go around the shapes I've made
for my dog, we'll find, hopefully we'll find that we are pulling out.
We're going look. It's really obvious. That may not be really already
obvious to the dogs, but there's obviously something inside this space and that's what we're trying to achieve as well with
these simple ideas. Little shadows of the legs darkening some of these shadows. And we're probably ready just to do our tiny touches of color. And then this simple
scene is done. So little bits of yellow. Our tree bush plant can
have touches of green. Notice I'm being too careful to get the colors actually
within the leaves. This is a bit of doodling fun. Just having it even splurge out a bit is
I think, really fun. Don't be too, if you
don't need to be, if you don't want to
be, don't be too panty. That's exactly where your
little touches of color end up. Just have a bit of
fun little splurges to just bring a bit of life into your first slightly
more complicated scene.
9. Plants and Window Sills: We're now going to doodle some house plants lying
around the house. One thing which comes with house plants often
is a window view. You might have them sat
along your window sill. We're going to look first
at drawing a big plant, getting some shape, and working out how to apply
color in a fun way. Then we're going to look
at how we can put plants on a window sill and
get an interesting, but not overdetailed
view out of that window. Next, I thought it would be fun to draw a few more plants. Plants are in everyone's houses. Plants are outside
everyone's houses. Certainly in our house, we
have a number of plants because my partner is
a very good gardener, she really loves her plants. Takes a long time
carrying over them. I'm going to use plants as a nice little filler for
some of these awkward gaps. For example, up here we can draw ourselves a nice
little plant stool. I'm going to be drawing
things, which again, are in my house here. We've got, it's a stool, we've got a layer here on that, We have our plant
pop underneath this. This is another
chance to practice a little bit of
awkward perspective. These legs come down
and coming out, coming towards us is a slightly larger bottom
layer to this stool. From that come down the legs. What we're doing here
is we're imagining these squares getting
bigger and bigger. Also, as they come down, they face us more and more. They start off very flat. We just see this line, and then they open
out because you can see more down towards them. This isn't trying to
be very clever with perspective is not drawing in
1 million structural lines. This is just doing it
sensibly by and by guesswork. But guesstimation. Not just total guessing, but using our own little
artistic judgment and being prepared to get things a bit skewy and a bit wrong
and that's okay. Coming out of here, we've
got some bigger leaves. Leaves just are simple shapes. They face in all
different directions. Sometimes a leaf
might just be that, it might just be on its side. Sometimes it will
turn around and you can see my palm now and
you can see the side. Now you get different
shapes emerging. Here we go, we can
do the same here. A couple of little textures. You can give them stems, you can give them a
little bit of hatching, whatever you want to think about them, and that's
all we need to do. Let's give this a
bit more context. So we sit down here, because it's right next to
a couple of chairs, You'll find Toby's old mugs, much to the consternation of the gardener of our house here, a nice bold and red, really bright plant pot. And then I'm going to
focus a little bit of shadow elsewhere. The underside of these leaves can feel that shadowing effect. And a little bit
up here as well. Then those leaves, they can
have just a touch of green. They don't need to be
filled with green. They can even have bid
yellow in another place. Now we can spend a bit more
time on our one things, a little bit of brown just
coming in and around. That's a fun little plant. We can do the same with all
sorts of different plants. We can make a little cactus
up here, really simple. And we can have a
little succulent, little, simple plant shapes. Again, just like we're
filling up our space, we're both filling up our space. We're also learning
things about ourselves and about the place we live in, and things we enjoy as well. At the same time,
over here we can, we got this funny
little dangling plant, the bead like leaves. All I'm doing, I don't know
what these plants are, but you can still draw them and get them
really effective. These are all sat
on a window sill. Suddenly we can also give
these plants a context. We can have this window, then just like here, we
do really simple shapes. We look here, we can
out this window, we can see a, we can
see a little tree. Give it a tiny bit of hatching, little tree in another little
house coming across there. Now to make these stand out, we just make them
a little bolder. They're definitely in front. Gives them some hatching for that shadow. Come
back with our pen. Simple hatching. Get that hatching perhaps
underneath as well. A little bit there
and a little bit. Do you see how just pulling out the sides of those
windows makes it three D? It opens it out instead of
being a lot of two D shapes. Then we can use our lovely blue that we have as a sky elsewhere. Now it's obvious as a
sky in the background, a tiny touch of
green in our tree. Then I can turn it around, use the more specific end to really make our
leaves stand out, all these little
dotty green leaves. Then maybe to keep the
continuity feel we can make. All of these plant pots
have that touch of red. There we're going
idea of how to doodle some plants which you
might have around your house or in your life. Next we're going to move
into another scene. Again, it will be
a little bit of awkward perspective
working out how we can make the corners of a room
feel real and feel there.
10. Adding Perspective: Now we briefly touched
on the idea of what three D objects and
the idea of perspective. Seeing things from an angle and getting that three D
feeling onto the page. We're going to do
another scene now where we touch a little bit more
on awkward perspective. And most importantly,
what we're going to think about here is
how to make it simple. This is not an in depth
book about perspective. This is how to feel good about translating the scenes in
your life onto the page. So now what we're
going to do is grow a more challenging
interior scene. Here we had a flat scene, just the beginning of some perspective that we
were talking about. But now we can actually start
with the corner of a room. And this can get a
bit challenging. It can be a bit head spinning. Now what I'm not going to
talk you through is like all the exact ways to mark out those of angles and things. But I'm just going to show you how to gently
think about it, how to skew things
to make it feel right without putting too
much pressure on you. So we've got the
corner of our room, one of our walls
will be quite flat. I'm actually going
to draw just here, coming in the edge and
crossing over my pages. It's a sketch book, which is great, we can do that. Can draw my bed.
I'm going to pop a couple of pillows on
there. Simple shapes. Then we think about
where is this bed? So if we are stood here, for example, where
does the bed end? Because if I'm here and
it ends to the left, we get to see the front of it
ends right in line with us. We won't see any. If
it ends to our right, it will curve over. I'm going to end it
just to our left. That means we get
the front edge, we get the front edge,
it's just a box. And we get the front edge
like that, that we can see. That is, again all we
need to think about. If we've stood here, do we
see that edge or do we not? We got little pillows. We can draw a ruffled edge to get a feel of a dove on there. Give it a bit of hatching
to show that it's got a different texture to
everything else going on. Then got the head board. This bed was all
all handmade by me. I know it far well, it's
structure for part. Well, I spent many
hours making it. Then we've got our bed stuck in the corner of
the room. We can add. We've got a dip tick
of paintings up here. We've got a lighthouse. And over here it's just a
little boat on the edge. Then we've got our window with
some curtains coming down. Curtains are texture more then I think sometimes
we just draw them as this little
pulling down texture. We've got these
mini little plants we can just draw again. We've got a window so we can see a house just
like we can here. We've got a house and a
tree that we can see. Got a little bar coming
across for our curtains. And then we get to the
other corner of the room. Here again is where we
just think, where are we? So here we have a, not a wardrobe, but
a chest of drawers. And where are, where are they? They're against this wall. So we're drawing
in this wall now. So they're going to
go along like this. And we can see the front edge. So we're now draw a
really very simple cube. Doesn't matter. This perspective has been walked. I've got it. So we're looking down on the chest of
drawers. It's wrong. It's absolutely wrong. But it works because it's
just quirky and fun. If we get in the edge
of the building there, it just looks like we're
viewing it through a sort of funny little lens, like we often use a lens
with a wide angle view. It distorts everything. It pushes everything out. Can hang up a plant there. Again, use some very
simple hatching. Finish off our process with a little bit of shade where
things will be shaded. So that's going to be facing
away from the window. This time it'll be
up here as well. Get out my darker brush, a little bit of shade
in a couple of places. Shade here, of shade here, around and behind the curtains. And then very simple
touches of color. Perhaps outside
perhaps we can have a blue plant pot here. We'll stick with
the green leaves. Today, they climb all
the way down like that. The chest of drawers
is a bit of a feature, so we'll make it nice and brown. Again, not put in color
everywhere by any means. This is all made out of wood, so that could be nice and brown. And perhaps today we've
got a red dive on, so we've got a bright red
dove and bright red pillows. Is there anything
else you want to add? Well, maybe a little,
just a touch of something in here and then
you go a more awkward scene. But let's by thinking it, by letting our sort
of mistakes flow together and not worrying if
things feel a little walk. We've still got a really fun, simple, cool little scene.
11. Drawing People: To fill up that last
space in our sketch book, we're going to add some people, people can be scary, but we looked at the
very beginning at how people can also be really
simple, simple shapes. Here we go, adding some people, giving those people a
bit of purpose and life, giving them a little task
to do perhaps in our house. And last but not least, let's add a couple of people in doing things,
having a bit of fun. Now remember, people are really simple shapes and we can liven those people up just by being a bit more fluid
with those shapes. So we can have, perhaps
this is me here and I've got my hand waving in
the air with the other. I've got my brush and I am
just dabbing away on an easel. And I do sometimes do a bit of easel painting when
I get my cryltics out, so this could be a
scene for my life. Again, all we need to do is very simply build up those bold
lines in a couple of places. We build up an idea of this
scene. What else can we do? Which is really
fun, really simple, and captures the idea of what you might be
doing in your house. Something really important
to me in my life is cooking. I love cooking. I
mentioned earlier, I think I mentioned
earlier that I'm vegans. I do a lot of cooking
from scratch. Why don't we just get
me over here somewhere. Here's a little stove top, a pan going on it, our extract a fan.
Then here's me. The way I'm going to
get me in the scene is remembering simple shapes. But to get me interact, what I'll do is I'll place the objects that I'm
interacting with, A little wooden spoon and a pan. Then I'll place my hands, I'll work out where does
my head need to be. I'm going to be slightly
bent over this stove, stooped over, cooking for tash in another hard
meal, slaving away. Then I'll join up the arms. I think that's the simplest way. Pop the hands in first, then the head, build the rest
of the body around that. That tends to mean that your seam works in
the background. We can add maybe a
little spice rack. A little spice rack again, just hanging up behind here. We can even pop a window
in here just interacting, intersecting with my other seam. No reason they can't be
two of me in the kitchen. One of me painting because
you can paint anywhere. And then here's the
sort of extractor hood. And there we go,
Really simple scene. Why don't we just enliven it up with our touches of shadow. And a bit of a darker shadow in the couples places as well. Here and here, down there. Then we can use tiny
touches of color. We'll do a little bit of
red to show that this is something hot blue
for that nice, lovely silicon spoon
instead of a wooden spoon. Here's a window, so it's
got some blue in it as well as spice rack that's
lots of chilies and things. So that can have
little touches like so and little touches
of yellow on there. And why not just
in the background. We can have some yellow as well. Maybe a couple of little
scenes of me having fun. And we can fill up these
tiny spaces as well. What else is important for me? I do a lot of running, so
here's me running along. I actually do a lot of
running with Betty. We do some sort of
candy cross races, so I can just do really
simple doodly shapes. And we've got me running with my dog and we're filling
up by sketchbook. Here's some little trees
in the background. Another important
part of my life, and we can jump in, apply
our simple shadows. Using those shadows to pick
apart key parts of the scene, not worrying too much about anything too specific
or too clever. Today I'll be wearing a
red simple running top. Last but not least, the
key part of our family, We call him Cedric. Cedric is of course our car. We'll do a little portrait
of Cedric to finish off our page tip. If you are not wanting
to get too attached to your car, don't name them. I found it's very hard to
actually not feel sorry for him all alone outside just for
the simple act of naming him. There we go, really simple
shapes and we get him in, we can actually pop
him in the background. Why do we have me just
really simple doodles? Betty can be sticking
a head out here. That is finish project. We finished tiny touches
of reflection here. This is our house and I've mentioned earlier bright
red tour for our house. I'm really rather happy
with what I've done. Very simple. So we got bedroom, we got living room. So we call this Betty's
room, the kitchen. And there's so much
more that you could do, so many more ideas that you could fill
your sketchbook with. And that's exactly what
I'd love to see you do.
12. Completing Our Project: So well done, guys. We got there and hopefully
you two have filled up your pages with a series of doodles which
make you feel proud. Don't expect them
all to go well. We know that not everything in my sketch book has
gone perfectly. But be proud of what
you have achieved. Part of being proud might
be to take the next step and share your project
in the project gallery. To do that, press the Resources and Projects tab and
just click Create. Project. Takes a minute
or two to upload a photo and just write a
few words if you want to, about how the whole
class went for you. Anything you learned, anything you've found a little
bit challenging. If you enjoy this class, then there's a couple of
other classes I mentioned in the introduction which
might really interest you. One of them is about
doodle sketching people. Filling a page with simple people and really
advancing our confidence in that tricky area of the other is doodle
sketching our world. We've been inside exploring our lives inside
our houses today. But what about the scenes you see all around you every day? There are just a couple
of options that you can find on my
skillshare profile. You can also find me at Toby Sketch loose on
inscram on Youtube. Finally, if you want
to leave a review, it's always hugely welcome. Click the reviews tab and it takes a minute
or two as well. With that though,
most importantly, what I really hope you get
from this is I can do it. Attitude a confidence
which just means you fill up Sketchbook after sketchbook
and just begin to explore, or continue to explore and
develop your creativity.
 Toby Haseler, Urban Sketcher, Continuous Lines