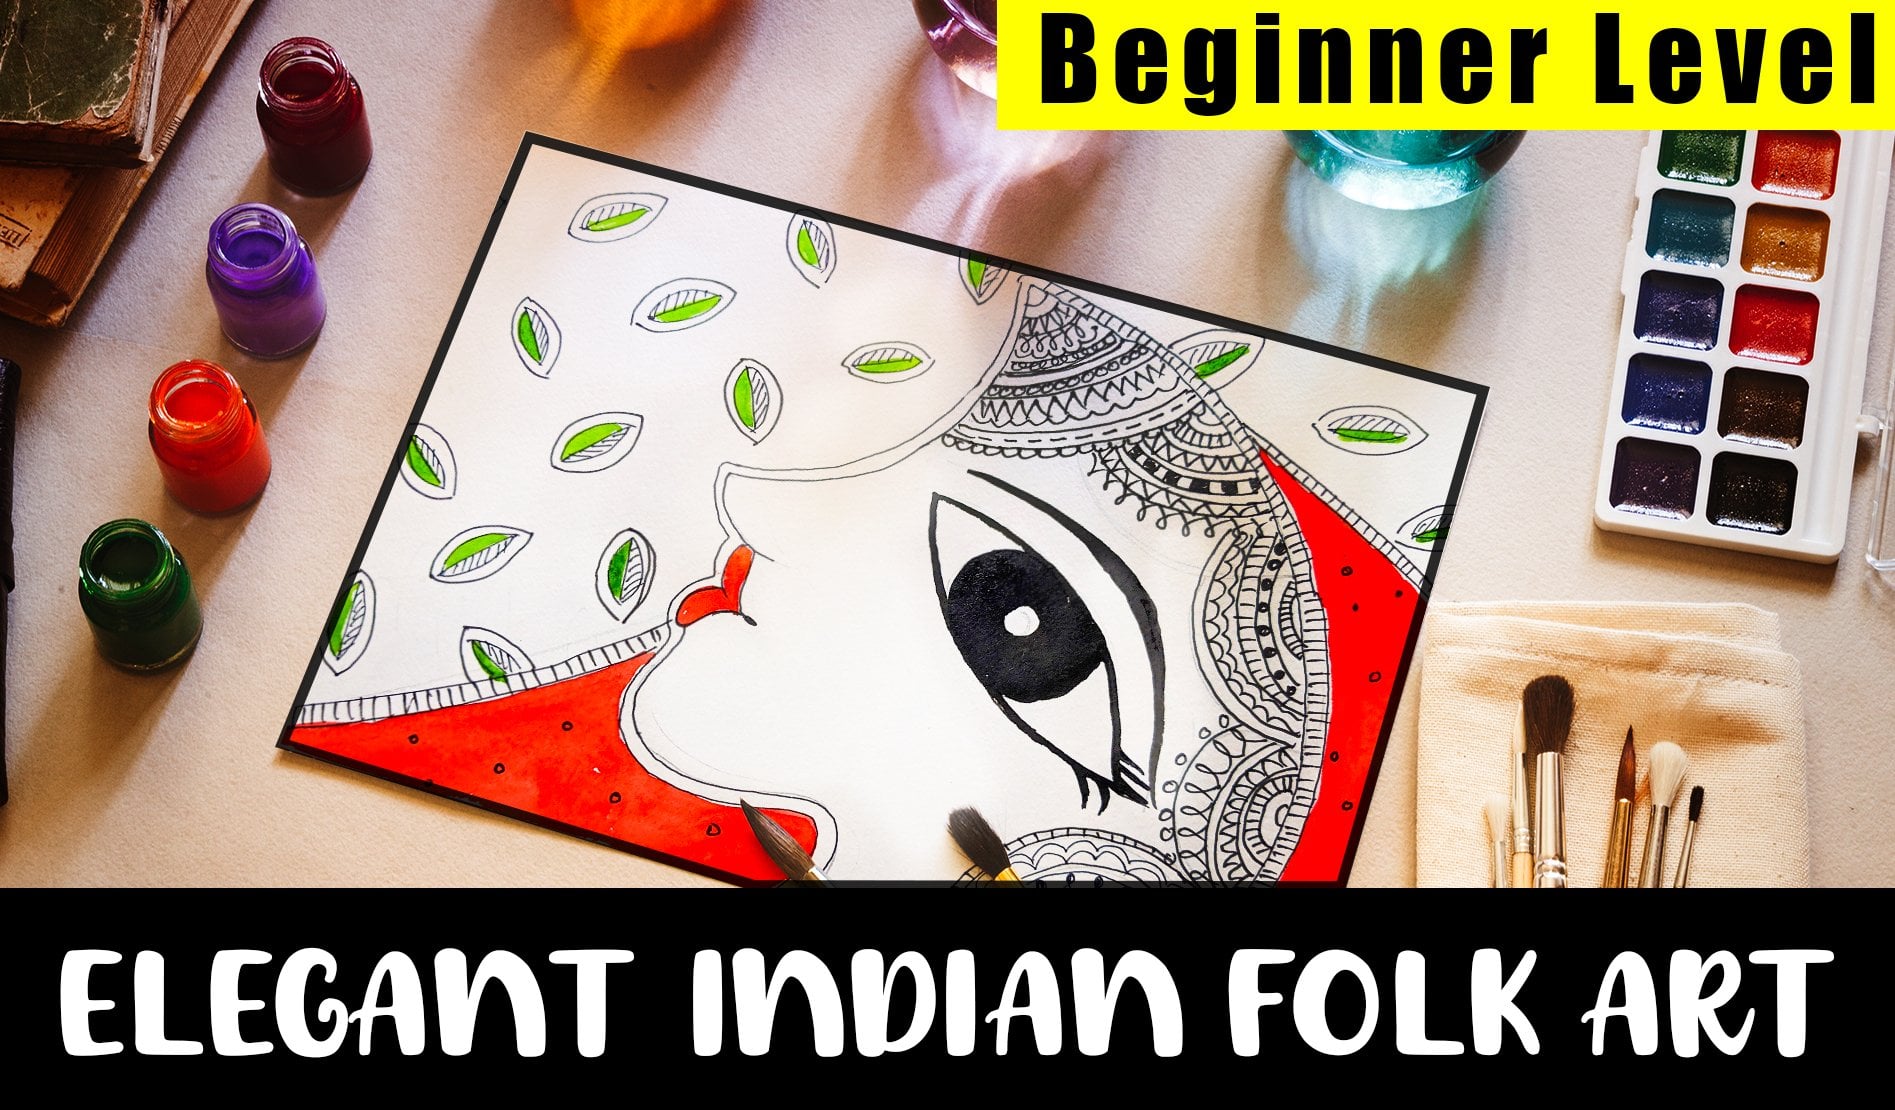
Transcripts
1. What is Persian Art?: Thanks for all the support. Previously we have learned modularly army tilapia in D. Then George, a beautiful south Indian painting, worldly soda painting, Jaipur marveled painting, dad's tiny far that etcetera. In this class we will learn potion art. Hi, I'm no budget call our artist, educator and entrepreneur. And today I'm going to show the beautiful portion painting. This kind of portion painting is one of relief painting. Relief painting is a sculptural technique detuning then to the ancient times, relief sculpture reading gives the impression that the skirt is images have been raised f of the bare ground plane. When in reality the flat bare ground as surface has been cut and lowered, leaving the sculptured any males to appear and raised. The oto modernisation. We are doing really fight in a different format. We now add a thick layer of paste and adding a Heidi leaf to make the tree leaf work that 3D work. This looks really beautiful and many people don't know about this. So if you are learning 0.1% of new thing in this class, please give an honest review of this class as well as shared to your friends. In this class, we will learn radius portion or designs. Then we will do the cone work. We will do at really colliding and followed by the sculpture work. The painting guide land will be uploaded so that you can check each and every video carefully because the password will be given in one of the video. After the class, you will not only learn a new kind of work, but also getting deep inside with tips and tricks. With that being said, without any further ado, let's start our potion art.
2. Materials for Persian Painting: Thank you. From the core of my heart that you decided to continue this lesson. In the first class of this, we will first discuss about materials. What are the main materials required for our portion out? The most important thing that I'm telling now use material is not a constraint. If you're not finding the stem material, it is perfectly fine to do it the alternate material. If you have any doubt, you can ask me in the comments section, but if you feel that any other material will replace my material, go on, start doing your work. With that being said, let's look all the materials that we need. First and foremost, you need a canvas with the same size. You need a paper for the design drawing. Again, I will be giving you the design so you don't need to draw it again. You can just print it out and do the designing. If you're drawing directly like me, you need a pencil, eraser and scale. After the drawing is done, we need to make the cone. You can have a plastic sheet, make sure it is a thick plastic sheet. Sometimes grep wrapping paper also works. Again, I'm not telling how to make corn in this video because later, but I will have a dedicated video for corn making inspite of making the cone. You can use an empty bottle like this. This is the empty glue bottle. Make sure it is clean bubble and you can easily open that. Followed by, it has a very sharp, deep, sharper deal will give you a great amount of precision. The cold material, you first need a plastic bowl, followed by, you need a freebie call, MR. glue. You can use any white blue and you need the most important marble powder and the spoon for measuring inspite of marble boundary canoes, chalk powder, POP, white cement, etcetera. But I will highly suggest first try with marble powder as I am doing with that consistency. I'm not telling you right now. You can check the elaborate video for the right amount of consistency. After doing the cone worked with marble powder. Now I'm doing the final lining work with the glass liner. This is a camel 3D glass liner. There is a lot of different brands grassland will ever live in, in the market. Make sure your glass liner has a sharper end because we will do a final cone work with these alternately, you can also use marble powder work, but it will be a little bit cumbersome and difficulty doing this final lightning war. So if you are not finding a 3D liner or any good material of 3D liner, you can always try and go back. Marble powder to do the final work. After the all layers at dried completely, we are now going to do the collating for flooding. I'm here using acrylic color. For that we need brush what? And the beautiful accurately colors. I'm using camel artists watercolor makes sure that your color is at, is great. You can use any brand material that you want. First we will make the whole canvas white, so the color of your coin doesn't matter. And then we will call up the whole canvas. Oh, wait, this many simple steps. Our potion penalty will be complete. You can see how beautiful glossy it is looking. You can add a coat of varnish after it is done. Let's start with the class. Cool. Okay.
3. Persian Design Drawing: In this video, we're going to learn beautiful designs for our pushy or not. So my canvas is six by 16, and for that reason, I have taken a six by six inch paper. You can take any paper because this is used for the design only. This will be my own design, copyright-free and fully usable. One more design, you can readily go to Pinterest or any other website to find a beautiful looking Persian really design. These designs will be fully downloadable and password will be inside of any video. So you what each and every video find the password and download the two Persian, our designs for the canvas, flowers, trees, basalts are the main subject of CNR. And you can see various kinds of different-looking Porsche, not from t off life to Singapore SHA-1 at like single flour or a single bird. To start with. First, I am making a one inch border to each side so that it will be our border or Persian. And using transparent scale and a mechanical pencil, it is not hard and fast rule. Even any material taught in this class are not the hard and fast rule for this painting. You can use any materials that is handy to view and easily available in your vicinity. Now I will start the drawing. First at the center of the page. I am making a bird. It should be a bird almost looking like Pico with a longer tail followed by, I will make some leaves. So it's good to see you. And all of that. This is critical. Four. Art brings you closer to nature, to the universe, and to the superior power. After three to four leaves. Now I'm moving forward for our next bud. These bird is also a peacock like bird, which a longer tail. But here I will add some v_1 so that it have a movement of flying. After this bird is done, we will make some additional leaves followed by the flowers. Remember that we have to have a lot of layering in Porsche. The flower should be, according to that very complicated flour will be difficult to do the really swat. Yes. You can see the flower design SIMD doing each are very simple and very easy. I always have a thought process that what should be my relief work? Why should we might leave us? And according to that, I am drawing the flowers. It's completely okay if you don't understand the leading now because later, but we will talk about in depth how the layering and then delete work is done. These days that he was seeing in the screen is called Tombaugh mono laser, which has a very fine NAEP, which really helps if you're wanting to eat is some single lines. If there is a lot of work is going on, love of it and make some more flowers and some more leaves. Each one is different so that you can also have a great choice of different kinds of flowers. Are you? Sure? Okay. Okay. And isn't made out of intention. You will start your deviate, your Take the strange but you'll feel is lost. An incompetent, you'll find a reason to survive. Your art becomes alive. You can see how beautiful our portion painting designs looks like. It filled with radius debts of flowers, trees, leaves, and we'd just cute looking birds. Again, I am repeating, you don't need to do these kind of hard work and find new and new designs because these design will be given to you by PDF format. It will be a 66 inch, but you can also utilize these and add some little bit more flowers. If you are one to make a bigger picture, it's completely up to you. At this point. I'm just filling out the spaces and looking for if there is some empty space. So I'm adding some design in the empty spaces. Believe me, it's just the starting. There is a way long path going for our portion painting. After this is complete, you will get a beautiful looking 3D relief painting in your home if you found the previous design difficult, don't buddy. In the next design we're going to learn a very simple Persian painting design with simple-looking flowers and some leaves for that. First we will make the same once inch border, followed by a circular shaped at exact center of the page. E. Being the central circle in the mild, I will add Furious Flower was, I was stabbed by radius edible flowers with cheaper Dead Flowers followed by some more complicated flowers. Yeah. I hope you can clearly see I am making the flowers and leaves alternate. You can add any kind of leaves, any kind of flowers. You can see I'm changing the designs and making a bunch form. You can also add some boards if you're one in this floral designs. Hello. Okay. And now I will add small circular shapes for the freedom design. These are also like flower buds, also can be used as its small cherry blossoms. Now in the dead center, I will make some flowers for that. First I am making some mallets. How much beak and how many flowers do I want for that and make some circus. And followed by, I will feed the surface with beautiful little flowers. Let's see. It looks like this. It's good to see you. There is no good or bad art is the more direction when you work on it. In my experience, I feed the most creative when I'm in the bed moment, yes, but that's not true for you right? After the designs, I'm just removed the initial lines. Now I am making the stems of the flowers fill the gaps. It's very essential to make the leaves. So I'm making various kind of leaves. Here. I made three kinds of flower. You can also use the steam, three flour also, you can mismatch according to you. As I'm providing PDF version of this design, you can easily transfer the design by tracing method. For tracing, you just need a carbon paper. It can be blue, black, or yellow, and just put the carbon paper in-between my painting and your canvas. Now, with the empty pin or a pencil, it is the design onto the canvas. And voila, with ten to 20 minutes of effort, your portion really far drawing will be ready 44. Now the inner design set done, it's time for the border designs. Yes. Okay. So beautiful looking posture and relief painting designs are ready. You can download this design in a PDF format. Just stick the description box also in the disposal span in fought the download links within meet again in the next video. Hello learners. Okay.
4. Persian Canvas Drawing: Art isn't for everyone yet. Anyone can be an artist. This part is for those people who are drawing directly on the canvas. You can take an inspiration from my painting and also you can directly draw on the canvas. In spite of that, what else you can do? You can trace the image. For tracing, you need a carbon paper. You need to place the carbon paper between the canvas and mine printing, and then you need to trace the both the processes are good for the portion are as usual. I have added one inch border or four side of the canvas. This canvas is a six by six inch canvas, and I will start with the same center board. This design is a little bit different from the designs that I showed in the previous videos. So you can draw any of them. You are getting total three drawings. I will start with the bird and then move forward for some leaf. After some leaf, I will make another bird and feel the whole canvas with the leaf and the flowlet resign as we learned before. D. Drawing in a canvas is quite a difficult task as the surface is very rough, it's very impossible to move up pencils smoothly. A paper has a smooth end, so it is very nice to use a pencil. So always be careful while making the drawings in a canvas with a pencil. Normally, people use the colors for the drawing over the canvas in case of acrylic painting or oil painting. But here, as we are doing a potion painting, which is very detailed, very rich in colors. So I will suggest you use a pencil or do testing at this point of time. If you have any question or any doubt in your mind and don't forget to ask me in the comments section on the review section, I will be absolutely happy to answer each and every doubt. But remember, in any work that I have shown, the materials are not important. Okay. Okay. Nature flower, foliage is bugs are always been a significant part of portion or A101 artworks, all the palaces, the king's house, and any religious places you can see. It's full of designs like jungle, flora and fauna and radius creators, mainly birds. This is only the first part of our push and painting. There is a lot more going on. We need to do the relief work followed by the coloring. I hope you will continue learning and enjoyed this class. Happy are the painters for they shall be lowly, light and color. Peace and hope will keep them company. The end of the day, Winston Churchill has said these. Yes, of course, it's indeed true. We have completed almost our canvas design. You can see some new kind of flower design. Also. You can see some traditional old kind of flower design that we learned before. I'm just feeling the canvas so that we can start doing relief work. Remember, don't go into too much detail links because everything will be first layered up by really for, and then we're going to add to that in just a second, please. And the end of this video, I'm just filling up each and every gap and checking whether I can see some gaps and adding a small leaf or the small bugs for that place. I hope you like this canvas design. It's looking beautiful. We will start doing. They're really far from the next video. So after drying the canvas, 1c waiting, let's start the next video. It's a secret.
5. Persian Cone Making: In this video, we will learn various tables on making cluster foiled. You're named a take paper as invents the FDIC enough take transparent paper for making the corn. Now, we will slowly start making the phone or link with your thumb in the middle of the page and just rotating from one corner slowly as you can see, the cornice forming. Now as the deepest formed, hold tightly and then fit the right-hand thumb, just routed that inner part of the phone and make it smaller in size. Slowly, you can find the cone is forming at just the inner portion so that the thickness is according to your Sieyes. Remember, for bigger picture, you'll need to make a big cone. And for smaller part, you need to make a smaller form. And just one thing to keep in mind. The end of the tape should be a single straight line. If the coin is becoming straight, then your phone is perfect. Now, we need to seal that endpoints so that the material will not be out. As you can see in the inside, there is a lot of opening ports. So using a similar table, I'm first attaching the inner parts. Make sure to attach every opening ports insight. As sometimes material gets incorporated it in the creek sender threats of the insight. Very gently, I'm attached. Are there. It's not destroying the ownership. Now we will add AdSense that are there in the outer site. We always use one hand to hold your paper because it is the mean for making the corn. Now slowly attaching accelerated around that thing to make that a little bit more stronger. Now gently roll the steam so that it will cover the sedative. Previously, we have used a square from making corn. Now I'm using a rectangle. This corner will be fairly small, which we can utilized in the final detailing word. Remember one thing, the smaller the cone, the easier to handle. Notice that the coordinate making is that I am adding the center there from the outset. As previously, you can use any kind of masking. Masking distinct does BGN. So you do not destroy the whole shape of the court. Just speeding up to things so that you don't get bored. So as you can see, finally, our phone is done. If you don't find that tidbit, but don't worry, you can always use any kind of thick paper. This plastic I got from the milk container. And preparing a cone from this, separate the two sheets and remove any rough edges from the sites. As I showed previously for link the other side with the left hand, I'm just folding a corner with the help of the right-hand. Adjusting that so that the people become sharper. And later we can fluctuate according to our needs. We can see the straight line it's farming. And the straight line at the end of the cone. And inside you can see are open-end. Now with the right hand thumb, I'm just facing it and moving it outside. We then see my hand movements. Now our corn is almost done. You'll need to fill it out of the coal. Remember this thing? Because otherwise you couldn't get the material. See how easily we can make a cone. And every time you will get a perfect looking corner like this. Now, using this, I will be ceiling every sides of the full. Now there is a gift-wrapped paper available, which is not yet take, but some people also like to use phone maimed by this stepping paper. Let's now have a look how we can make a code using a thin paper. No. These are the cores we learned a big cone from the middle container and two small poems from the transparent think sheet. Let's not talk about the thin bed, but now you can always keep this depths y, but you can use an empty bottle. This is the empty glue bottle and it has a very small team. As you can see. It will be really great if you fill this container and use it for the cone. But it will be as good as the conduit. If not better in the whole tutorial BY using this cone. But you can make your code and do it according to your neat. With that being said, let's continue to the next session where we will learn how to do the work and make the mixture denote. See you, bye-bye.
6. Persian Cone Work 1: This is how the canvas is looking like after the tracing path. Now it's time for do the cone work. Believe me, the corn work is easiest for the Cornwell. First, we need a plastic bowl, followed by a free recall MR. or any white glue. And then we need marble powder. Also use a chalk powder followed by spoon. If you don't have marble powder, you can use ceramic powder. Also, you can use plaster of parodies, but it's up to you. The perfect material is called a marble powder. And I highly said this to use that for our push inpainting in online. You can get the marble powder after buying this, train it with the CVE and get the final product, which is the fine grain of marble powder. You can see how powder it's looking like and it's a little bit dusty When you love words. And now we will make the corn material for that and taking a plastic bowl. And with that, I'm just adding now my bill powder. They'll see how much my bed powder I Maddie, which is cool. So with one fulls Polak marble powder, I've added one full spawn off Febby called Lou, and I'm just gently mixing with the help of sperm and the backside of your brush, you can see it's very grainy right now and no fluidly P over rho mixture. Always remember to scrape the x's because we don't waste any kind of materials with the help of the brush and the spoon and just tried to mix the mixture. And give it a consistency of a row. I will highly suggest firstly, make small movements and make the most mixture with the help of the less amount of glue. This way, your consistency will keep remain. Now we will mix again. Now after seeing for a while, it's time for add little more glue. So directly I am adding very small amount of glow to it and they level makes it again. And the consistency of the cone material is the main part. So you need to be very careful and add as less glue as possible. You can clearly see how easily our dough is formed. This is always the base off any cone material. They should be always a starting point because from this we can add a little too high amount of glue for getting our desired consistency. You can see how easily my backside of the brush picked up the material. It should be the consistency of the initial DO. Remember two key points for a 3D file, for the lining and the bordering. We need a thick mixture for filling and framing. We need the thin mixture in case of marble powder, ceramic powder a POP I will suggest to mix continuously even if seems to lemmings to Will. This makes it a little bit more time, the glow will absorb and then it will show its real potential. After the mixture is done, we are going to put the mixture on the cone. I hope you already learned how to prepare corn and let's now feel the cone with the marble powder. Okay. It is really nice is someone you, while preparation of the cone, because it's created a lot of myths while you make your, yourself. Now after I added the mixture on the cone, I will try the mixture if it's coming through the cone or not. If it's not coming, we need to increase the size of the hole. And for that, always place your own at 90-degree angle towards the base and cut at the center with the help of a Caesar. Increasing the tape will help so that we will get our materials out. Now we have chaired that our cone is perfectly done. So we need to close the open end. We will have to see leaped very tightly with the seller dip or anywhere she did that you have with you? Again, I am saying the material, the marble powder, it's not important. You can use any kind of 3D outliner or 3D Cornwall that you have in your reach after sealing the cone. Now, I've took the canvas and I'm starting with the leaf design. And this is supposed to be good to see you. Yes. To be able to see. So and to be able to see. You can clearly see I'm rotating the canvas with my 0s so that I can get a perfect looking cone over. It's taking a lot of time because it is hard to make sure as it is for the line work. And for that I am using my two-hand, believed me, your hand is definitely going to pin because it's a lot of work on the whole canvas. I'm not skating you. You can do it with one goal, otherwise, you can do it step-by-step. The cone is just sea level. You'll see that P of the cone and your material will be intact. Keep arena places not in the freezer or any hot places, just place in a court, dry places and your mixture will be perfectly fine for two to five days. Let me clarify once again, the marble powder and the glued a show shown by me is completely going to vary from your marble powder and your glue. Just make sure the consistency is more or less blows are take mixture for the lining work we always look perfect. You can also use fringe of powder. The authentic portion painting can be done using the fringe of powder at this point of time. If you have any questions, don't forget to ask me in the comments section. Also, you can ask me in the Debussy. I will ready to answer each and every question and doubts of yours. Just be with the flow. It's very easy. This V with the flow and draw affording to the drain. That makes sure you saw before. It was a really hard for that reason. I'm making a little bit more thin mixture and let's see how the lining work looks like. This is the consistency of the better looking right now. You can see if you tried to dip it one day and gives a certain kind of pair done, stacks upon each other. It is a little bit taller than the previous mixture, but lot STL as the filling material would be. Now with this mixture, I will do my best of the corner. So let's see how it turned out. This cone material can be used for both the lining as the filling material. It's completely varies person to person reach consistency is perfect for someone. Everyone has a different perspective and a different style of doing so I would highly suggest make different kinds of consistency and use it once and see which is better for you. Says you can see at the center of the flower, I am adding some corn material with dabbing method. Sure there is no air bubble. And then we will smoothen the top surface with the help of some water. The mixture of medium consistency is really my favorite because we can do both of type of work using this kind of material. As you can see after filling, this is our canvas is looking right now. Let's complete the whole lining, Walt and I will come back soon. Okay. Okay, design is a solution to a problem. Is the question to a problem. John Maeda one said, this, firm me, these kind of cone material is perfect for B because it comes with a medium consistency and it requires less amount of pressure. You can is any kind of trainee liner or a glass line and is displaced. I love to use marble powder. So I'm using this in the next steps. I will be using a glass liner for my line of work. Silos of the initial piece doesn't matter because later we will color the whole canvas with bite. Okay? The first thing. If there is any mistake, don't vary this door demo's marble boulder from the base. And then you can start it again. You don't need to be a 100% accurate well doing this, because when we will colour, nothing will be mattered and everything will look good for me. I find it very comfortable to do it in a small canvas, especially if it's for a tutorial. So that with time I can finish my whole painting and also give insight to the painting, to the students. These are really takes a lot of time and because of that, it is so rare in the whole world. Okay. Always keep a napkin handy because for the quantity, you really need to clean the cone several time because sometimes it really doesn't work. If you're cold isn't working or creating any kind of problem, press a little bit from the front side and get some material out after that, proceed from the backside. Always remember to grep pressure from the back side. And this will help to create a continuous flow towards the tip of the cone. Sure. It is a combination of hard work and a Beautiful Mind and portion painting is no exception to that. To recapitulate, First, we have done that tracing and now we're doing the first layer of our Cornwall according to the tracing, again, you can use any design that you want affording to you. But a floral with some of the bird element with the potion painting. A really nice look. Just be patient while doing this. A little bit amount of holiness can mess up your whole painting. So be patient while you do and keep long breadth while you make the corner. If you have any questions, any doubt at any point of time, don't forget to ask me in the comments section, I will be happy to answer each and every question. After this lesson. Don't forget to review the course because I want everyone to write their honest opinion so that I can know how I'm doing my job. Let's now complete the first layer of dumb all work. Yes. Okay. Okay. Okay. And with the final plural, but our first layer of our cone work is done. It's looking really nice. Now it's time for the next quarter. The next layer, having seen all of you in the next video, bye.
7. Persian Cone Work 2: It's been one day. I have kept my canvas for drying. Let's prepare the less concentrated mixture for the feeling work. Previously we have learned to type of mixture. One is very thick and another was, is the media. You can always choose the media MAN, But I think it's completely up to you which kind of consistency you are preferred with. As you can see, I've taken once pool of marble powder and with that, I'm adding one spawn off maybe call don't add all of the fabric all at once. First, adult turbid mix the debate and then add. You can see first I am adding a little bit, mixing totally scraping each side because it has a tendency to stick on the wall of the bowl. And this mixing with the help of this bone, you're gonna also use your hand or the backside of your brush. It's completely up to you. Now, I felt I need some more marble powders, so adding some more, and then I will finish it with adding some more glue. You can clearly see I have added a lot of glue and the consistency is really very light. The consistency is very similar to the better of a cake, and it has no sleep peaks. Now I have taken an empty glue bottle, and now I'm feeling the whole material inside of the bottle. You can also make coal and use it. I'm just showing a alternate way by which you can do the filling work. It will take time, be patient, and feed it a whole bottle with the mixture. As usual, before applying, I am just taking it. It's working fine or not? Yes. It seems like working fine. Now I can do it on the canvas. If your lawn confident that how will you do in the canvas, you can also practice in separate sheet and then do it under canvas. To recapitulate, you can save and store this kind of material for three to seven days in this kind of container. So always do whatever you want and then leave it for some time, let it dry and do the next part. I will start with the birds, followed by the leaves. You can see how slowly and steadily I am filling the gap. It will give it a relief kind of Luke, let's have a closer look. Same wave we need to feed the other bird and the leaves. After doing, Don't forget to give some dab on the floor so that if there is excess bubble or any empty space inside, it will get released. In the flower. You can already see I've done the second layer. Leaves. On the other hand, I'm only doing the first layer. For the leaves. I only do the first layer because in the final layer we will do the veins. On the contrary, the flowers in portion art have a lot of details. And because of that, there is three to four years in each of the flowers. Same for my painting. I will give the flower 3.2.4 layer. You will see later part. But for the leaves and the birds, I will keep in single layer. Cool, meaningful sheila. Without using a coal, they use deictic D for the feeling. Here I am taking about one spool of better and adding in the place of the leaf, feeling, you need to be very careful. Do not overfilled the leaf, so it will destroy the whole painting, gives some Deb. And then with your fingers and some water, just try to blend it according to the shape. And again, we have the advantage of phone so far, the edge design and the rounded corners. We will definitely going to use the cone. Believed me, the corn needs a lot of pressure. And this much if you can do with, directly with the mixture, it will save a lot of pain from your hand. Okay. Painting is a source of endless. Pleasure, but also offer great anguish slowly and very steadily. Our second layer is also going to be done very soon. In Persian art, you always need to be very persistent as well as very come and quite eats and every step is very important. It takes a lot of courage for making this kind of beautiful Persian art. At this point of time. If you have any questions, don't forget to ask me that removes section. And also in the coming section, I will be happy to answer eaten every question that you have in your mind, there is a lot more steps is remaining. So be patient and continue watching each and every step. With that, another fluid is done. I will make some more flour, the leaves, and the bolts. Sure. For the wing of the bird, I'm again using the direct mixture method followed by I will do that tail and remaining leaves. Now for you people, I did a mistake. I added a lot of amount of mixture in the wing portion for that. If something happened to you don't worry, this take a cotton but and a tissue paper first with the help of tissue paper, remove excess amount of material and then you can use your hand, your fingers, or a cotton bud to airline and remove the excess mixtures. Now I will use a cotton bud and slowly remove the excess part. So this step is very important to dry the first layer and second layer. Otherwise, it will be a great double for me. Okay. Persian ads are always made to be the slow art form. You can see how slowly and steadily I am doing each and every step. If you're not getting the perfect kind of shapes, don't worry, it will be completely fine. We will color the all paintings together. At last, the collating can make your painting look great. Don't run for the perfection. Always learn the right thing and practice it. Perfection will come towards x2, any painting form which is little bit higher in the canvas size. It is called the Lily for here for the portion at the specialty is two to three layer of really four. Till now, we are only doing one layer in the leaves. We only do one layer. We will do multi-layer In the case of flowers. Let's now learn how the multilayered thing will work floor if flower here in the center, I will give three layer. The layer. After that we will give to layer. And the outermost layer I will give one layer. In the outermost layer, I can also decide not to give any layer same as the body of the birds. So in this first leading off of cloud is done then at the center, but I will make two layer cool. In this flower also the centre become double layer. The outer petals that are one layer and the friend part is also one layer. Same will go for other flowers. Once again, for these floor also, this delta part has two layers. The outer petals have only one layer. The medium is also having one there. I'll either to pedal having no layer. The layering concept is very important for Persian painting. I hope you are getting the layering thing. And if you have any more doubt, don't forget to ask me. For Persian painting and any other relief painting. What doing liquid Cornwall don't go to edges separately or together. Let one layer semi dried and then do the another thing. As you can see in case of this flowers, I haven't done the existent petals. Same goes for the bird tale. I have given only two lines, the median line I will do when the other layers are semi dry. Please try to keep this in mind because after you apply them mixture, the mixture tend to spread a little bit over the canvas for that reason to Edison, there should not be done together. Now I am just rotating the canvas and looking at the places that I have not given the work. Some places I eliminate t because that one we will give the base layer without giving a really four. So that's truly justifiable. I'm looking at some places where there should be a relief work, but I have not given I think we have given all the relief works. It's time for the bordering. Mm-hm. You can see this is how the portion that is looking now than relief works are really looking very 3D. That Canada is not doing this. These, it's looking ten times beautiful in real life. I hope you are also making this kind of beautiful portion work. I have again taken the plastic cone because I am doing the lining work again. So with the ticket amount of mixture and doing the lining work, okay. You can see this flower is having now three layers. Always give a dime so that the layer below it dries completely and then start once again dry. I mean, completely dry. Not Samy DRE. Now with help of water in my hand and just stepping into little bit so that it get a smooth surface k bar napkin handy because your hand will be dirty always. So you need to keep your hand while doing this. In this flood also, I'll add in the second layer. The first layer is already done and quite dry. And with that, our coal world's second layer is also complete. The final and been loved him at cold layer is remaining, led this layer dry for one to two days completely, and then we will start our next layer. See you soon in the next class. Okay.
8. Persian Cone Work 3 : After the cold work and this is how the canvas is drinking right now, I have completely dry deed in the satellite and you can see there is no correct. So for now we will do the fine lining. And for that and taking camel glass liner, that color is black. It doesn't matter any color that you have. You can use it because after death, we are going to paint the whole canvas with white acrylic color. I'll always be for a glass liner because it is a re-defined NAEP which helps me wouldn't find the dealings in the veins in the leaves as well as in the flowers. First there will start with the leaf. I'm making the border. Make sure you are doing the curvature exactly same as the bottom layer. After that we will do the veins. I always make a napkin handy and keep cleaning the tip of the cone. This way you will have a more control over the deep as well as you will able to get the desert design. Again, I am repeating the same thing that many students have doubt. So any blast liner, any 3D outliner or corn wealth that you have with your facility or your nearby store, always prefer using that. It doesn't matter which color you are using. Materials should not be a hurdle for our Pasha not, let's do the leaf segment law. And you can clearly see how beautiful 3D it is looking in real life, it is looking more beautiful. Now I will complete the other leaves. Okay. If you're right-handed, I would highly suggest to start from the left edge and gradually move towards the center followed by the right portion. This way, you will have a lot of control over the cone work that you are doing. You can clearly see how slow I am doing. Be patient and we persist. And while doing the cone work, after the leaf is done, we will move forward to us the flower. Okay? And then keep rotating the canvas and do according to your convert, always use both hands for making the Cornwall. One hand for pressure and another end for giving support. You can clearly see I'm rotating the canvas and doing the Corn worked. Now I am making the flower buds. After that, I will make the next flower while doing cool work, many of my students loved to hold their breath and then do the corn over. This gives them control over the phone work. If you want, you can try that also. Let's complete the another flower. The D is art is as much for the audience, as much as it is for the artists. We are more than halfway towards our portion painting. The relief painting is looking really nice. The 3D effect that this painting has, its really cannot be compared to any other paintings dials after some small leaves. Now we will start with the board. We will start with the tail and then move towards the wing. I will create a intricate design of being in this painting. Let's wait and see how does it looks. Yes. And the letters a, B, C. And then hope you can see how detailed we have done with the wing of the word. It is the best part of this painting. After the bird is done, we are moving towards the leaves that are in the bottom part. It will be same technique as a used before at this point of time, if you have any questions, don't forget to ask me in the comments section on the review section, I will be happy to answer each and every doubt as I always say. Now, let's focus on the leaves. Okay. You can either make the vein first and then do the bordering also confirms to the border and then do the vein. But it's completely up to you, whichever method to a suitable, it's perfectly fine. You can see how beautiful and the 3D, the 3D forgives looking right now, it's so beautiful light cannot explain you. Each layer is paid from the canvas layer according to the layers that we have given. Let's now find outline, the center flower. It is very details so you need to be very careful. Cool. Okay, cool. I hope you liked how beautiful the center flowered is looking right now after the flower, we will move forward for our biggest bug. Let's complete it and I will come back often did, is done. Okay. And believe me, this wing design is my most favorite one. Don't forget to clean the quantity regularly because that way you can get more control over the converse. So if we are all work is not as Beaufort as my load buddy. It's completely fine where you start, you are not perfectionist, so don't run for the perfection. Enjoyed the journey. I hope at last you will be making perfect looking Cornwall saw Dawn v0 and keep us link. Hello for this, but I am using the same previous method that I used for the cold work. We said add to send to each other first time making one cone work when it is semi dry only then I'm giving the Cornwell in-between that. Now let's complete the boats Dell. Now, as our central bud is done, we are move forward to our flowers section. Okay? Kohlberg is really very easy. You just need to practice. If we feeling that you are not going to do directly on the canvas, practice it in another sheet of paper and then do it in the canvas. It is completely fine if your design, it's somewhat deviated from my art, also from the reference picture. No matter how value cone work is going on, you're in results should be always perfect. Believe in me. Let's now complete the whole step. We'll come back after that. Okay. Flower is the sweetest thing that God ever made. And forward to add soil into, believed me, the flora and fauna had the best part of the Persian paintings. I get inspired by nature each and every day and thus portion painting, Samantha, best painting I ever made. I hope after this intimate lessons of cone work, you don't have any problem regarding this. The same knowledge can be utilized for all other painting techniques that I have already mentioned, like immunotherapy in TJ put painting as well as ten job into with marble powder. My border was not perfectly done. So let's quickly fix the border so that it will get even for outline. After the inner part is complete, we are moving forward to our bordered design. I'll first using a pencil and making the mark. Then I will use my same GD glass liner and draw the outlining. Your gonna do the same design in all the four side, because I'm showing to you it is a tutorial and that's why I'm using two separate designs. You can use one single desire because that is the authentic postulates. After the pencil drawing is done, let's do the glass working. It's very easy after doing the complicated inner portion, that straight line would be very easy and simple for you. Let's make it and complete the whole border design. Okay? The last design is really very simple. Let's now look at another design which is a little bit difficult and it's always makes me crazy while doing the design. Let's complete it. Okay? Okay. Now I'll add in some additional details. It's completely up to your bill. If you want, you can add or you can skip this part. This is how beautiful the potion art is looking like. Now all of the really fork is done. We have to give it enough time so that it got completely die. I use sunlight because I feel it is the best way you can try the portion on the 3D world. You can clearly see each and every details. If you want, you can add some more details or some more layers and the empty part. But for me, I feel it is enough. With that being said, we will see you in the next class.
9. Persian Coloring 1 : I welcome you all to another lesser of Persian painting. In this three consecutive lessons, we will learn the partial painting colliding. You can see the 3D relief work is completely dried up and it's time for me to do the coloring part for collating first, I will do the base layer. For that. I need some brushes. I am using acrylic color. This is white Kamil artists acrylic color. You can use any brand equity color if you want. And using first the base layer. That's why I have already told the cone color not going to affect that work after this first layer, you need to keep it in a dry place so that the layer is completely dried up. And after that, we'll restart the feathering portion. I'm starting with the white acrylic color. You can see I'm using a very small brush because there is a lot of gaps and creeks around relief for, so you need to go to each and every corner. You can also add a blow-up of color directly on the canvas and spread it using the brush. Be very patient and really gentle while doing these. Take your time. Sometimes one quote won't be enough. So you need to give three to four layers. So be patient and slowly give it right. Tried to paint using the dabbing method, not the sweeping method. Let's see how I'm doing the reading part. This is how the again versus looking at right now, it's a little bit difficult yo foreseeing the all the relief wells. But I believe when we load the coloring, it will be as good as you can see how I am taking directly onto the canvas and from that and taking some color and painting the whole canvas. Now, let's look at it from another direction. You can see there is a lot of tick while is going on. So you need to be very careful and use your brush carefully so that each and every layer is covered with a white paint. There is nothing much to say. I'm just fast forwarding so that you can use save your time and now let it dry. And after that, see you two for layer I will give, and then we will start the colony portion. After 34 layers. This is how the canvas is looking right now. It's pure white and there is no other colors for coloring. I am using a small brush. It is a same brush I use for the white base preparation. Now I will take my most favorite camel artists, heavy body accurately color. You could also use gamma1 normal artists acrylic color from these ever came some ligand white in the pellet and do one flower. Let's now make the pink and the white together and make a beautiful baby pink and do the colored into this flower. Remember, at the center I will do the dark coloring and the outer side I will do they'll relatively light coloring. The gradual increase of shades will give the flower beautiful low. This is very popular in Persian painting. Let's see how we can do that. You can clearly see how beautiful the flower is looking right now, after our shading is done, we really take a cotton cloth, make sure it is clean, and just give it a swipe. This kind of swipes are very easy to done and it will release some of the white portion, which will give the relief more 3D look. You can see how I'm Robie. We gentle while doing it. And if some color are remote, don't worry. You can again freely with the darker shades. After this flood is done, we will load the finishing That's later. Now we will move forward to this flower and decide what the little bit orangeish yellow. So I am taking audience yellow mixing up with green cell and white, and then doing the same technique as before. Okay, Let's now do some inner darker shading. Makes color according to your preference and the color palette that you have. Be patient and we slow. One thing that I forgot to mention, in spite of using acrylic colored, you can also use oil color. It's completely fine. Oil color will have a less prominent effect. The acrylic colors are more vibrant than the oil colors. So I am using the accurately color here. You can see how slowly I'm adding the darker portion, the exit, the center. This is also willing to help you future for learning the acrylic paint is if we're going to mix this color right now, you can easily do it in any ad click painting, The best part of acrylic painting for Lee removable. If you'd read a mistake, you'll just layered with colors and it will be completely gone. Now I will do this flower. I want to choose a layer of blue for this flower. Let's see how it's turned up. The emotions are sometimes so strong. I worked without knowing it. The strokes come like speech. Vincent van Gogh has once said, after the light layer of blue and white mixture and adding some mixture of promotion low and cobol boo so that it will give a darker Luke. I am not mentioning any color because it's completely up to you and what color you have. I will not confuse by saying always that this scholar I am using or that color, because this will nothing but confused the mind of a young artist. Now I'm mixing your data with blue. And if you know, this will give a color of violet with this shade, I will do the another flower. So let's see how it's done now. And you can see this is how the beautiful the flower it is looking right now. I hope you can clearly see the wide outlines. It's looking Chords, yes, and Super 3D. Let's now do another wildflower. And then you can see h. And every time I am using the same technique first, diluting the color with white. Giving a very light shed and after that at the center point on each and every corner and giving the same seed in a doubts 0V after the main flowers that done, let's now do the small flower buds and the small flowers. Don't worry if your spelling your color in the Canvas portion because later part we will do the background where we will fix all the issues. Just you need to keep in mind that you don't remain any of the part empty so till the canvas in every way possible and paint at herding to your relief work. Okay. Okay. After the flowers are done, we are now move forward for the leaves. While leaves I'm taking SEB, green and yellow. You can use lemon yellow or gambits yellow, it's completely up to you. For the leave also, we will do the same kind of shading from dark to light and motion, and we will remove the edges with the help of a cotton plot. You can also use colored of vDD and use so that you can give a little bit more difference to antecedent leaves. Let's now do the leaves. One-by-one. Creativity is allowing yourself to make mistakes. Art is knowing which one to keep. This is how you should do the leaves. You can change the color and deviate from green. It's completely up to you. Please remember when US swiping with the cotton cloth, remember to change the cotton cloth every time because if you once have cleaned one surface, it will have that color. If you use that surface once again, it will mess up the whole corroding portion. So always tied to you a fair and learn new clot. You can use the same cloth and different parts. It's completely fine. I'm also doing the same. Don't ever use a tissue paper because that will go into stick on the canvas. So always you are clot BY patients and very slow while doing the coloring portion at grilling pin tends to dry a little bit faster. If you want a slower drying process, you can easily use are deterred are, and mix it with the acually color. The oil painting, on the other hand, a lot of flexibility of timings because it's tries very slowly. And this is supposed to be It's a secret. You can see now I am using a differentiator of green. It some more kind of PESTEL and non glowing green. It's completely up to you, but remember, but always remember after you do the acrylic painting, remove the excess part with the help of a cotton cloth. Don't wait, really dry very soon. So as soon as you do, you will just remove the highlight. We will more intensified the highlight part in the later part of this video. We're going to use two. It's a secret. This journey is domain, but enjoy the process. Everything should not be perfect. Every color should not be as good as mine. It's completely fine for you to do any kind of mistakes. I believe when you complete the whole postulate, it will look really amazing. Now, I will do some more feeling. And after that, we will move forward to our bird section. Okay. You can easily add multiple layers of acrylic painting. It's completely fine. You just need to wash out the highlights using the core templates. And remember that's the most important part. Due to time constraint, I am not able to show the bug in this part. We will do them both and the border as well as the background. In the next portion, De Lao, keep drawing beautiful paintings and enjoy the process. I will meet again in the next video. Okay.
10. Persian Coloring 2: Welcome back once again to the next lesson of the coloring. In this lesson, we will start with the birds. I'm using white and awkward, you know, and making the first bird For the next, but I will use a shade of burnt umber. You can also use brunch Sonya in place of that. In case you don't have any of these colour, you can simply use a red and a little bit of black to get a brown kind of shade. You can see how empty editing the canvas so that my brush liters each of the sides. In the wing. I will add a little bit darker shit so that when I do the highlighting, it will give a nice look to it. You can use any other colors for the birds. But as the flour Sierra already popping color, red, blue, so that I am using a muted color for the birds. Always try to blend the aqueduct pains properly. If you can't do this, layer it out, I bet it will look very nice. Don't add water unless it's super necessary because acrylic paint is different kind of acrylic medium. It needs a different kind of tina. These bird is a little bit lighter color, the middle, but I will do a little bit more data. Let's do it. Okay. At really color mixing can be done using tomato sauce, put the darker shade and then blend it with the lighter ship. Also first, do the whole portion, the lighter part, and then add small by small bit off the darker shade. Both methods are very useful. You can clearly see how I am improving the highlights with the cotton plot. Be patient and DOE slowly. If any place you feel that the cotton removed a little bit more paint, just paint it over. At this point of time, if you have any question or doubt, don't forget to ask me if you need any materials from my end. I will be happy to give eaten everything. So if you can't find some material, Don't ask me in the comment section, either me or some of other students can help you after the flowers are done. I'm now doing the branches that colors are same as the birds. Yeah. At this point of time I will highly said this to leave the painting as it is, move out, go to the nature, and then come back again. Now if you introspect, you can see many faulty places that you can see and do you feel that you need to seek sit? I'm also doing the same checking where I miss them thing or some additional details that I need to fix it. I am also adding additional layer of acrylic paint so that it looks more pop-out. Okay. I, It has the power to transform, to illuminate, to educate, inspire, and motivate. That's why I'm doing this beautiful kind of pushing out so that you can always try this into your home. And this gives a beauty and positivity towards their home. You can see I'm adding directly color from the color palette or the tube that I am using. This will give the color, I'll reach Lu. And I'm intending only that if we are using oil color, make sure that you're painting looks at dull, because that's the natural process of oil color. So don't worry if you're looking a painting, a double portion painting Indeed wouldn't be a very beautiful portion painting because that's the obtain the original portion grand of painting. Let's complete all the detailing. After that, we will load the border design. Now, I will intensify the brown color for that. I'm taking brown and a little bit Prussian blue and not adding any black because black will make your painting very bad and pooled in quality. So I'm mixing some Prussian blue, a tweet, some bonds tinea and adding to some data bots like some of the branches and some of the part of the boats. Ok, I love art because art loves me. That's indeed the true sentence. After some highlights and some of the darker shades. Now we'll move forward for our border design. For border that salaries lemon yellow. Okay. You can clearly see how beautiful the border is looking right now. The year low-calorie is really elevating the whole concept of the portion painting. Now, to give highlight, I will use yellow mixing with a little bit of bonds. Sania, always keep a cotton cloth Andy, because that's the only tool for highlighting. Let's do it. Okay. Okay. This is how the painting is looking right now. It's looking very beautiful for the background. You can use a light or you can go for a dark background. For this one, I will go for the dark background. We will do the bad grounding in the next session, in the next video, with that being said, bye for today. Okay.
11. Persian Coloring 3: I welcome you once again to our per-share not final version. In this version, we're going to cover it up the background. I am using a darker shade here. You can also use a lighter shade if you want. In the ballot, I've taken Prussian blue. With that, I'm adding Burns say Anna, and adding in the background, I will request you not to add plaid directly over the bare ground. This will make your whole painting adult blue. So you don't want that right? You can wait for sometimes laid the beans on the floral, floral, get dried up, and then you could start the background work, as I mentioned already before, you can have a clear background. Also, you can have a darker bare ground here I'm making a darker background. So let just do it. So suppose E, D, I think now you have a clear idea how slowly and steadily I am doing each and every work while collating, I've clearly told you it is completely fine to spill some colors. But now, as we are doing the final bare ground, it's not okay to spill any colour in any place. So please be extra careful while making the bare ground steely for doing some mistakes. Don't worry, you can always correct it because this is an acrylic paint and you can easily do color over the existing color. Yes. Okay. And artists must not imitate, but get inspired to inspire others. Makes showed there is no white in the bare ground that is visible. Always give some extra look at the creases because there is a high chance that it is remains empty, always yield the lowest deep size of the brush that you are having so that you can have a more control over the paint. I am here adding the first layer if you want, you can add several more layers. It's completely up to you. Okay? As I always say, if you are a right-handed person, always try from the left side and slowly, gradually transition towards the right portion. All of my students and really getting benefit by this method. I hope you are also getting the same. You can clearly see I'm rotating the canvas so that I can do the painting according to my preference, especially these kind of quizzes and very difficult area, rotation of the canvas really helps to get the desired result. Let us do some more. Then I will see you after that. Okay. I will find you when you are alone and make you feel complete again at this point of time, if you have any question, please ask them in the coming section. I will be happy to answer and clarify each and every doubt of yours as this is almost the last part of our portion out, I will highly suggest you to see all other offerings by me. I will highly suggest the part painting, the painting Madonna painting, as well as the third GD painting course for all of you. I hope after doing this kind of folk art course, you are not only learning new techniques, but also learning great insight about the painting. A life of artisan is clearly depicted by this kind of paintings. So I will highly said this to read these and don't let this kind of painting to die out. Okay. Some places of the bare ground I really difficult. The creases in between the leaves are really hard to at the end, I will highly studies. Use the minor tip that you have and slowly, steadily covered up the whole bare ground if you want. Now you can speed up the video because now I have explained all the techniques are need for the bare ground. Other than that, you can always watch the realtime because that will give a great insight was the painting technique. You can clearly see I'm mixing Prussian blue with burns Sania and then adding for the bare ground, the color is looking exactly black over the term add up, but it is not. By doing Persian painting will also learning acrylic painting, relief painting, as well as highlighting these techniques will be useful for any other painting there you are going to do in the future. So it's a pleasure to be able to see. Okay. We're almost done during the bare ground. There is a very little spot remaining. Don't lose your temple. Just go on the flow and slowly, steadily complete the whole painting. You can clearly see how beautiful the potion painting is looking right now. Each and every motif are popping out of the canvas, is looking the prettiest. All the paintings that I have taught before. After completing the background, I will use a tissue paper and do the bordering highlight. Okay. I've taken the bone Sania, mix it with a little bit of water, taken some tissue paper, and does dabbing some broad Sania so that it will give us a 3D look towards the border of our push imprinting. For the penultimate part, we will need this kind of brush. It should not have any kind of water in. It will take white acrylic color, debit into the paint brush, remove the excess color from the brush, TPP, and stat there being over my portion painting. Really slowly and steadily, we need to do make sure that your brush is flat from one side and is touching only thus highlighting part, the part that we did with our glass liner. And this BAD I previously already highlighted using the cotton cloth that we are using again to give a little bit more, but I'll adding white elderly Pin directly over the highlights. Okay. Make sure your brochure have low water. It will mess up the whole painting. It should have a minimal amount of colour. And using that, you'll need to press it very lighting, the highlighting work. Okay. Yeah. Here we are at very ocean painting. I'll read allow going to inspect each and every corner and see if there is a gap. I'm trying to minimize the number of gap and empty spots, white spots in the canvas. I will now use some direct color from the tubes and add directly over the flowers, leaves or the birds to enhance it or more, and giving some finishing touch. It is completely up to you if you want to skip this. Also, it also vary from person-to-person artist's royalties. At this point, I will highly suggest you to go to the review section. Please give an honest review how we light the portion painting. Don't forget to take the project section. Yes. Okay. Okay. With some field hid in their addition, our beautiful potion painting is now ready. It's looking gorgeous and I hope everybody see will be a fall of your art while the art, while the potion painting that you have made, it's not over yet. Let see what is waiting in the project section. Okay.
12. Persian project: Look for hope. So. What is add? This question pops up often and with many answers, many argue that art cannot be defined. We could go about this in several ways. Art is often considered the process or product of deliberately arranging elements in a way that appeals to the census or the emotions. It encompasses a diverse range of human activities, creations and V's of expressions, including music, literature, full sculptures, and paintings. The meaning of art is explored in a branch of philosophy known as S two dx, at least that's the Wikipedia claims. In this course, we have learned how we prepare the board. We do the design, how to do the cone work, followed by coloring and highlighting. The drawing guidelines are given to you as a PDF version printed out and start doing your project. You can add any other design. It is completely up to you. Please draw it and uploaded in the project section, I will be answering all doubt of your so please don't forget to ask the relevant questions too. Last but not the least, please give honest review for the class so that I can gain more confidence. Now as it done, you can now visit my profile for more amazing contents like modularly art or multilateral worldly strode, a tribal art done GD, the famous south indian art mean acai jewelry art, very poor. Marla radar. See you in other course in other day. Till now. Bye. Okay.
 Nabojit Kar, Folk Artist + Youtube @An Aberration