Transcripts
1. Digital Sculpting Baymax! : What's up, guys,
Welcome to another Exclusive Skillshare
class with me. Drug-free day. Today we're gonna be doing
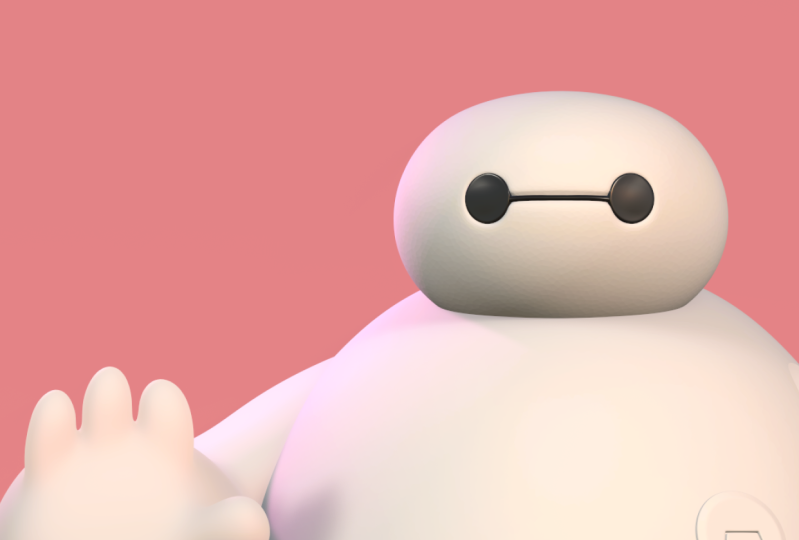
another fan art creation. This is a Disney character from Big Hero six called Betamax. Now I think he's a
really cool character. I really fun time creating him, and I think you will too. So just like with all
of my 3D sculpture, I'm going to start from
the very beginning, from setting up the projects
to blocking out shapes, modeling, sculpting, details,
lighting, post-process. We're going to
cover all of that, but we're gonna go through
it one step at a time. So what you're seeing now is an actual time-lapse
of the class. Everything that you're
seeing here, you will learn. And it's a great way
to learn how to think and process what you're seeing, whether it's something
in real life or a 2D image or character, how to translate that into 3D. So thank you all for joining me. I hope you enjoyed
the time-lapse. I hope you're excited
to get started. I hope you're excited to learn because I'm excited to teach. So let's move on to the
next video class project.
2. Class Project: All right guys, welcome. We have made it to
the class project. So this one obviously is easy, I guess all my class
projects are easy. We're just going
to make Betamax. He's a really cool character. Again, I've actually never
watched Big Hero six, but I know the character, I recognize the character and I just think he's really cool. I think I might do EVA
as well from Wiley. I love that character and
I have seen that movie. So for this class project, we're just going
to make Betamax, as you can see with my
thumbnails for the classes, sometimes I go off the rails. I made him gold and
dark and made his eyes glow and made them different textures and things like that. So there's a lot of
fun stuff you can do once you finished the class. Feel free to post those, or you can just
follow and just do the regular Betamax
and be done with it. Some of the really fun stuff is once you have the model done, you can add a background. You can change the lighting up, you can change the textures, you can change the colors. So obviously, follow
along with the tutorial, get what you can out of that, but then don't hesitate
to just have fun with it. You can bring in
other characters. You can change the
fingers around, you can swap the arms. There's a lot you can do to really make this project your, so I'm not going to
go on and on about it because I think
you understand, I think you understand the assignment and I'm
looking forward to seeing what you guys make and
how you guys do with BMX. Let's move on to the next video. Getting Started. Actually, I don't
think I don't think I named it getting started. I think I just kinda just get started. It
is getting started. So here's a quick note. I will use a round edge tool or rounded edge
brush in the videos, and I want to show
you how to make it. So we just have a regular box here and I'll show
you what it does. So if I use the
rounded edge brush, I can just drag from the middle. And you'll see that
rounds off everything. So if I do this multiple times, just rounds the edges. So it's a very useful tool and I'll show you
how to make it. So we bring the
box back to zero. You take your smooth tool. So you click on the
smooth tool clone and just say You name
it edge or smooth edge. So smooth edge, it's going
to show up down here. That'll be your new tool. You can move it
wherever you'd like. So here, I don't
change anything. Here. We go to the next one. And then we have these options. So instead of dot, I won't lock radius. I leave everything
else the way it is. Let me go to Alpha. This is just the default. That's fine. Fall off. Preset, change this to flat. So change that to flat filter. I don't really change
anything here. And then pressure. You
want to make sure that you uncheck, Use
global settings. So uncheck that, change
both of these to preset and then make
them both flat. Okay, so now we go back
to the tool, tap, Save. And then you essentially
have the round edge tool. So you can just pull
from the middle. And voila.
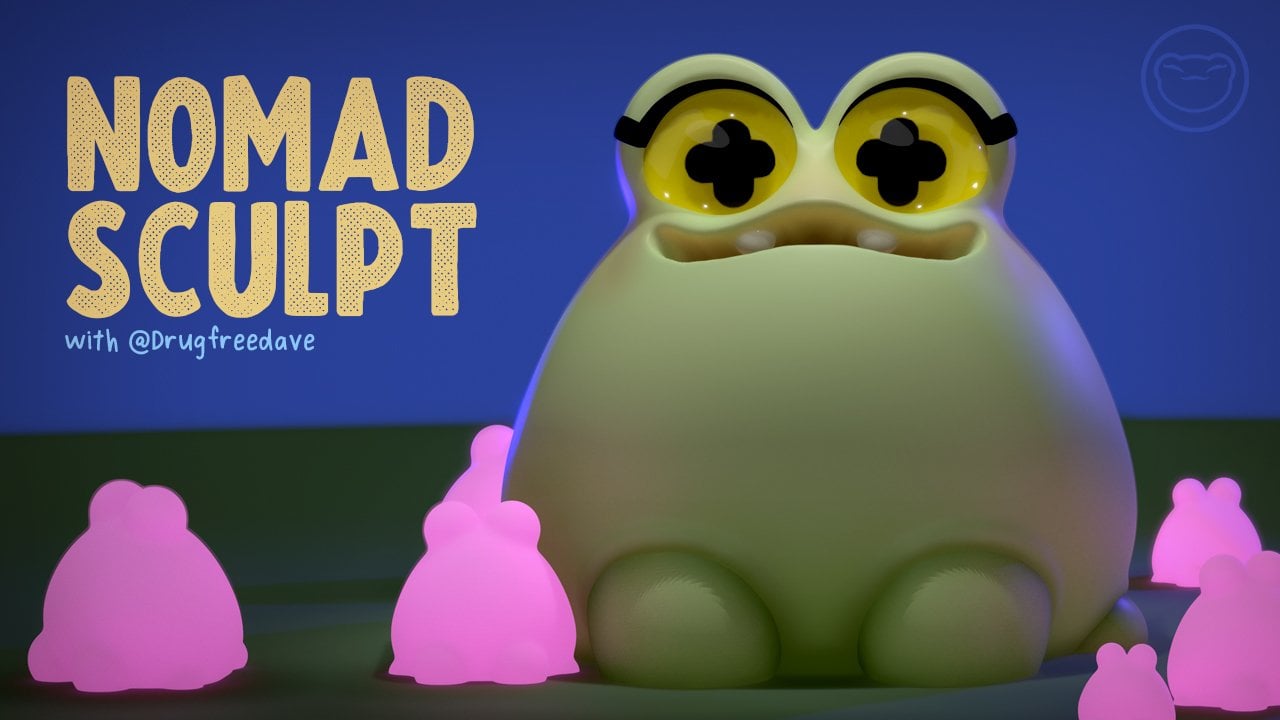
3. Canvas Setup / Blocking Out: Alright, super excited
to get started with this character
from Big Hero six. So let's move over
to Nomad scoped and we can import our image that we're
going to scope from. So this is just an old
project I'm using. There's a few things
that you can do to set everything up. First, I like to go to the camera and make
sure I'm in orthographic. So that's the first thing. You might have your grid here. I don't really use the grid. So you can turn it off if you
like or you can keep it on. Also, I like to sculpt
in mat cap here, and I just use this
default one, PSG clay. I use that to sculpt with just because I
think it's easier. And you probably
have a sphere if you started a new project and you have a sphere that's
already there, just delete it and
make a new sphere. So if you have a sphere
that's already there, it's probably going to say like 93 K or something like
it's gonna be really high. The number is gonna
be more than this. So just go to here, the scene. Just delete it and they
just make a new sphere. And we can name this one head, because
that'll be the head. And we can go ahead and
validate, validate that. So that's pretty much how we're
going to start the scene. Let's bring in our image. So we go here,
reference image, goofy. And we have to import you import from wherever
you saved them. From the projects and
resources you download these files and he's images
and wherever you saved. So I'm going to use this one. And I'll just tap on this blank area so we can get back to this Window and then
Transform any zone. I'm pretty good spot actually. I think that's pretty good. So once you have
that, just tap on the screen and then you go
back to sculpting mode. And one more thing, I'm
going to change this. I don't really want the blue. I think I'm gonna change
it to a little bit of a lighter, warm, warm gray. That's just a preference.
I like to I like to sculpt on kind
of a warm gray, recalibrate, recalibrate my
phone so that this is clear. Okay, So we have our head here. So we're just going to
block the character out first and make sure that you hit front just so we have the
exact front of our sculpt. I'm going to tap the tools
here and hit a little. I want to use Gizmo. So we'll just use the gizmo
to just squash his head. And I'm not going to worry about like the back looking
at the backside, I'm just going to make it
look how I perceive it here. So it doesn't have to
be perfectly like him. It'll be pretty close. But first let's just
squash his head like this. So maybe something like that. We can see that his
head is a little more rounded on the sides
rather than this. So I want to use Move. And pretty big,
we put move up to like to 80 or so the radius. And it might be
easier for us to use symmetry so that we don't
have to do this on the top, the bottom, and the back. So let's tap the symmetry. Tool M is tap the
green and the blue. So now, just so I can
show you these lines, you don't have to do
this, but I would like to see the symmetry lines. So you can see now we have the green line
and the blue line. And essentially
anything that you do will happen on
all the other ones. So that should make our
job a little bit easier. So now we'll use move. And we just want to make it a little more round on the side. So I'm going to tap
front and make sure I'm in the exact front. And I'm just kinda
sort of pull this, push this up a little bit, just get those sides
nice and rounded. I think that's pretty good.
I think that's perfect. So I'm going to turn
those other symmetries off and leave the red one on because that's
like the default. And I feel that his
head would be a little bit squashed this way. So I just turn it so I'm
looking at the left, the left side, tap the gizmo, and then we can just
squish it like this. Maybe it's a little flatter too. Let's take a
look at the front. I think that looks pretty good. And of course we can adjust it. You can adjust it more
or less as you like, but I think it
looks pretty good. One thing that I'm seeing is there's other little
details on the head, but you have to
remember that right now we're in orthographic. So in perspective, it might
look a little bit different. So there might be some
adjusting that you do at the end of the sculpt once
you switch to perspective. But I think for now,
this is pretty good. Okay, So now we'll do
the basic body shape. Hopefully you can
hear the ice cream truck in the background. So I'm just going to scale
this back a little bit. And we're going
to pretty much do the same thing that we did for the head to make
this first part. And I think we'll
use two spheres. Make his body shape. So we'll add another sphere and bring it down and
we can validate it. So right now I just want to
get the general size of it. And it's compared to his head. I think something like that. I think that would
be pretty good. I'm gonna do the same
thing that we did before just to sort of get it more rounded on the sides. So they use symmetry. Green. Oh, actually we might,
we might not need to do green because we don't
need the bottom. I think we can just do blue. We just need the blue. So I'm
going to tap front again. I'll go here to move. We want to make sure
that we turn symmetry on my move tool a
little bit bigger. And then I just want
to pull this up, sort of rotate just to make sure that everything is working. As I'd like. I think that's pretty good. I need to move it
up a little bit. Maybe I'll make it as
tad bit bigger as well. His head is pretty small. I think something like
that is pretty good. So I'll tap front and for now I think this is pretty good. Of course we can adjust
it if we have to. You can also stretch
and pull it too. And just adjust it until you think it looks
it looks good. I'm going to pull it
up a little bit more. Okay. I think that looks pretty good. The only the most
difficult thing is just getting the size right? So like his his shoulders, they actually come
out quite a bit. I'm actually going to
widen it out a little bit and then I'm going to
stretch it a little bit. I think something like that. Instead is very small. So the hardest part is just gonna be getting the
proportions right. But at least we can adjust
these spheres if we need to. So lets actually copy
this sphere clone. Let's name this body one. For B1 has just
name your body one. So we don't get confused. Then we'll clone and
make this party to. Okay, so now let's bring
this down and wine it out. Maybe we need to do
this a little bit. I think that's pretty good. And it's sort of flattened
on the bottom a little bit. It looks like I'm going to take move and just kinda sculpt it
into what I'm seeing here. So I'm seeing a
straighter drop-off. And I'll make my move
tool a bit lower because it seems like sort of flattens out a
little bit like so. So there's a little
bit of flatness here. And this is pretty flat around the side and then it curves in a little bit. So I think
that's pretty good. I think I'm going to
try to match the back, so I'm going to tap left. And I'm just going to try to
pull this down some as well. So it looks good from the
front and from the side. It looks good.
4. Legs: Okay, So now what do his legs? But in order to to his legs, to sort of have a basis
of how big went into it. Let's make a little
platform as well. We'll just use a plain for that. So are we will use a
box instead of a plane. So we'll take a box
contempt gizmo, bring it down, flatten it. And we'll just use
a box like this. You can go ahead and validated. Now let's do his legs. So we'll use spheres and
we use a mirror for that. Just rename this to floor LR. And then we'll add a sphere, mirror it, bring it down
and then stretch it. And I'm also noticing
his body is a little bigger than what I have, are a little longer maybe. So at times I will just
continue to adjust the character a little tub year to something a little
more like this. So I have to bring
the legs down a bit. Let's bring the
floor down a bit. Okay. So the shape
is a little off. It looks like it's
a little wider at the top and shorter
at the bottom. There also tilted
a little this way. So as long as this where it there in their lives
during their mirror, then you can tilt them. So it's a little more like this. We're going to
concentrate on one leg. But it looks like we need to do a similar thing to the leg. Because if we bring it up, It's still not really. We stretch it out
more. It looks okay. But it's still not
exactly where I want it. I think that looks
pretty decent. So let's validate it. And then let's just
suggest this 0. And I think that they would also be there a little bit
behind his belly. So we might have to we might have to move them
back and we might have to bring his belly out more because it looks like
eat he does have a belly that falls a little
bit below us thighs. Saw me use the move
tool on the belly. And I don't know if I
necessarily want the back to get to much bigger, maybe a little bit.
Make this bigger. I'm going to turn off the blue. So we go to Symmetry
and turn off the blue. And this way we can just bring the front a little bit bigger. Just make that nice and round. I think that looks pretty good. I might actually stretch this toolbox will
re mesh the two, the two parts together. And then we'll smooth it.
But maybe help bring. Let's see. It looks like this piece is
a little bit lower. So I'm going to lower this
down. Excuse my voice. Always, it always wants
to act up when I'm trying to make a class. And I'm going to
turn the symmetry off on the top one as well. I'm just going to bring
this out a little bit because you notice that there's a faint
line that's pretty low. So I'm gonna bring this
down a little bit. And I'm going to widen
this a little bit in the belly area like that. I think that looks
that looks better. Maybe I'll just adjust adjust this so it's
a little more round. A little tricky. Okay. I
think that's okay for now. And the leg is actually a
decent women have to do. We might not have to
do much with the legs. The only thing that I'm seeing is there might be a
little wider at the top. So let's see how that looks. I started straighten
them out a little bit. I'll do the same
thing to the back. Just sort of make
them a little wider. I think that looks decent. Yeah, that's actually
not too bad. And maybe I'll take the body and just stretch it out
a little more here. Backside. And it's actually not bad. So it might take
some adjusting, but, um, you know, just get them
as close to this as you want. You can also do it a
little more stylistically. I think that's rounded a
little more on the bottom. I do see that much. So I'm gonna take, um, let's go back to our
symmetry. And let's just see. We'll take the z, the blue. And that way we can
do the same thing. We'll go back to move, turn symmetry on, and just try to make these
little more around the bottom. That's pretty good.
Actually. Be nicer. This could be like a model
that could stand up, but I think that
might be a move. The weight is going
to really work out. I do sort of think about that, trying to balance the characters when I make them nowadays. Okay, that looks pretty good. Belly does hang pretty low. It's one thing that I always
do with my sculpture. I, I continue to adjust
them as much as I need to. Always just keep adjusting
as much as you need to. Think that the legs are
a little bit punchier. They're a little bit
smaller at the base. Pull them down a little bit, but they're a little bit punchier. So that looks good.
That feels good. So I'm pretty, pretty happy with this thing. It
looks pretty good. Okay. I don't mind the crow or whatever
that is back there. That decides to be loud. Right now. I'm just I'm just
making everything round. So I think that's his appeal. Everything is like sort
of round and pudgy. And it looks good. So the body my legs are a little bit
bigger than his legs. It looks like. So I'm going to take
the body both of the body parts and just
make them a little bigger. Move them up a little bit. And I'll take the head and
move that up a little bit. And it looks like
the head might be a little bit forward on his body. I might look at some some
other pictures of him. Let's see. Let me
save this. Okay. So let's hit it a
little bit forward. Make sense. So his head is a little bit
forward on his body. And we can take off some of this kind of hump in the back. So let's make sure that we
only have the body will use move symmetries on good. And then we can just sort of
melt this down a little bit. Something like that. I mean, it looks good. Just a smidge. I'm going to take his
hand and pull it. Ever so slightly like that. Okay. It looks good. It looks good. So next we'll move
on to the arms.
5. Arm Blocking: So let's make his arms now. And for this we'll
use the tube tool. We use the tube tool path. And we don't want snap. Okay. So it looks like they come off their
rounded they're a little thin. The first section. And it's a little pause here, down here. And then it has a flat palm. And these little round fingers
will use fears for those. So I think it might be easier to do both sets of arms as mirrors. And then we can adjust one to have this, to
have his hand up. I'll tap front. So I'm going to start
from about here. Pencil on screen. Drag once, and it looks like I'm going to drag it pretty much down
to the middle of his body. Pencil off and then I'll
bring the pencil down here. And his fingers go to
where his thighs are. A little bit high on the thighs. So I'll maybe end
it right there. I think that looks pretty good. So I will just tap the screen. And now we have the blocked
out arms very thin for him. So we can make it
a little rounder. So that's a good start. Now I'm going to
tap radius twice. So this one will make
a little bit wider. And we can see that his arm, it does get a little
wider in the middle. So I'm going to add another node there and make that
a little bit wider. Maybe I'll make this
a little bit smaller. You can move these
nodes up and down. So I think down is a little bit closer to what the shape is. So we have something like that. And I'm going to
add another node here because I want to bend this into the body like that. So when I turn on the side, I just want to make
sure that the arm is going straight in like that. This looks pretty good. Now I just wanted to
sort of match what I see and also do what
I think looks best. So the things I look at our leg. So he had a little
bit of shoulder space here. That looks pretty good. The arm comes off and it's
actually quite thin up here. So what that tells me
is I'm gonna bring this note up a little bit
and then we're bringing it closer to the body like that. And I think that
we might spread. I don't think I can
do it now Let's see. If I take the gizmo and
then I go pivot, rosette. Pivot. That puts the gizmo in
the middle of the arm. And let's see if I can
stretch it at this point. Would ensure that I could
do, but I guess I can. Maybe it looks pretty good.
I think that looks nice. So let's take a look at the
other reference sketch. Oops. Internet. Okay, So his arms, this is pretty wide here
and pretty thin at the top. Okay. So let's go back to
if you press tube, you'll get the nodes again. So his arm is pretty wide. And move this down a little bit. And then I'll go to
gizmo and I'll just make the whole thing a
little bit wider. I think it's more like this. But the top, Let's go back to, to the top is quite thin. I'm going to make sure
the top is nice and thin. And looks pretty good. I'm gonna go back to gizmo and i'm, I'm going to squeeze
it now this way because it doesn't come away
from his body that much. So I'm going to
squeeze it this way. It looks pretty good. I'll go
back to tube and just make any sort of last adjustments.
I might want to make. But ultimately, I think
this is pretty good. I might have made it a
little bit too flat. Hopefully, because
really what I'm looking at the drawing,
it doesn't really look. It looks pretty good. It looks like that's his actual
the actual shape. So I'm pretty happy with that. I'm going to tap mirror. So now we have both. But I can see that his
arms are a little bit too much in the front. So I think I just
want to use Gizmo to bring them back a little bit. And again, I'm always trying to make little tiny adjustments. I'm noticing that this
is very round here, it's a very round curve. So I'm just trying
to match that here. And then ultimately I'll look
at the size of the arms, which I think looks pretty good. So even though I
have this mirrored, I think I want to take the
mirror off and not mirror it. So I'm not going
to validate this, I'm not going to mirror it. So we have the 12b1 tube. So this is the arm. And I still want to
keep it in to form. So I'm going to clone this arm. And this one will
be left arm, arm l. Okay, so I just want to flip
this one on the other side, but I can't use symmetry
because we haven't validated. So we're gonna do
a little cheat. So we'll make sure
that we have snap on and it's 90 degrees. Remember we're on arm l.
I'm going to tap a line. We're in the gizmo now. We tapped Gizmo. So you
should see this here. And I tapped a line, see a line will change it. So it's just perpendicular to the whole project and not
the actual arm itself. If we have a line and snap, then what you can do is
you can just snap it twice and then move it over. And now let's hit front. And you just have to
use your best judgment. You just want to match it up
so it looks fairly similar. But it's okay because we're
going to move this arm up anyway in a little bit more. So now we have both arms. And even though they're the same, they're a
little bit different. The only thing that had
the other thing that I was thinking is doing the hands, but I feel like the hands are in a slightly different position. So I think we'll have
to do them separately. So now for this arm will go back to tube and we can
bend this arm up. So of course that'll
be the elbow area. We've been this
arm up. Let's take a look at the front view. Kinda get a look at
where everything is. So this can be a
little bit tricky. But just remember that
we're seeing the whole arm, but these are the bones that everything else
is going to follow. So you see this a little bit of negative space between his
arm and his little belly. Which you don't really
have to add too much, but I tend to get into those
little details like that. When I'm raise his arm
up a little bit more. So something like this. But his arm is so if
we're looking straight, it looks like this area is
very much like a circle. Really want to match that. So I want to move these over trying to get that nice circle that actually looks pretty good. You know, don't have
that space here. I think it's still
looks pretty good. The fingers would be here. So it's actually a nice
distance as compared to this. The only thing that
I'm seeing is I might have to bring this
up a little bit more and see what
that looks like. This up a little bit more to go. So then the thumb
would be here in these fingers would be up here. I think that looks pretty good. All the shapes look good. I don't want to have
this bent this way, so I'm just going to
adjust this a little bit. It feels a bit more natural. It looks good. I need a
lot of self validation. If you could tell.
6. Arm Workout: Once you have the arms in a position that you
like and they look good from both sides generally. We can go ahead
and validate them. So I'm going to validate,
looks really good. Validate this one as well. And another fun thing. We can always come back and do. You can do arms later. But if you ever wanted to, if you were thinking
about changing the changing the arms, you could always just say that as like you could save as you could keep
going on a new one, then you have the arms. So if you wanted to
play around with the shapes, with the legs, things like that, you can
always adjust that later on. Okay. So we have the legs or
the arms, those look good. So we do need to smooth
these arms out quite a bit. So I'm going to box will
re-emerge or voxel rematch them. Think we'll just do it like 200. I had a little shortcut here. I think you can one of these can add the
shortcut down there. Boxer image. So I might use that. It's
the same as going here. And voxel in 3D mesh.
So it's the same thing. So box we mesh. I don't know what I just
Fox already meshed. But it might not
have been the arm. So make sure you're on the arm. Axillary mesh at
200. There we go. And sometimes this happens
and it's a bit annoying. So let's go back. Let's go into here, won't tirades sub-divide, maybe twice. And then you can do your
voxel. We measured 200. Okay? Now we can smooth it out. I'm going to turn symmetry on. Actually, we don't
really need symmetry. So let's just smooth
out this arm. Do have a little bit
of an issue here. But it might be okay. Smooth out the whole arm and
then just see how it looks. Okay, So we do have a little
bit of an anomaly here. If this happens, I'm thinking
I'm just going to use clay. So I'll just use clay. And I'm just going to fill that in like this and I'm
actually going to make a line across it like that. The inside pupae don't have
to worry about too much. But I think that
looks pretty good. So now I'm gonna box or we
measured again same number. And I'm going to smooth. And it starts to look too lumpy. You can always box where we
mesh a little bit lower, like maybe 140 or so. And then smooth. You
should be able to smooth out a lot of these
lumps in the arm. And I do want his arm to
continue to be nice and round. So I'm going to take move. I'm just going to adjust
certain things so that it's nice and
round and smooth. I want all the angles
to be nice and round. So e.g. I'll take this
and just rounded up. And even this this
part of the arm, make the move tool a
little bit bigger. The reason why I
make the move tool a bit bigger is because it, it keeps everything
being smooth. So we're not moving
a small section, we're kind of moving everything. Okay. So that looks nice and round. I'm just going to
smooth everything out. So that looks good. So we'll do the
same with this arm will voxel remeshing 200. But we probably need to
do the sub-divide first. So we'll go here,
multiphase sub-divide. I think we did it twice. And then we'll just voxel
3D mesh around 200. And then we can just smooth. It doesn't really
need, this one doesn't really need that much smoothing. So we'll just smooth out
where your hands are. And we're going to
eventually voxel merge the fingers onto
the hands as well. So it'll be a little bit,
a little bit different. So now we'll flatten out
this poem part C on this, this poem part would
be about here. So it'd be a little
bit more flat. So I'll just take, we'll try and move first. We'll just take move. Sure that we're on the
arm and just pull it. So we'll just pull this
top out. Like this. We can push the bottom in a little bit so that it looks a little bit more flat like his his
palm is facing us. So and I'll just try
to make it even. I think that looks pretty good. I'll just do a little smoother. It's just a habit of mine. I always smooth after I do pretty much anything,
I'll just smooth. That looks nice. And I think now we can go
ahead and add some fingers. Will actually, before we
do that, let's round out. This arm you see is
still very round. So let's take this
arm and let's flatten this part here so you can
see my flattened options. So if we go to this little
thing here, we have stroke. Nothing really here. It's on dot alpha, just square. This is all pretty much default. Fall off is like this
preset. At this one. I haven't changed anything. Filter. These are just default. I don't really think
we need anything. The pressure is important. I have used global settings. And when the pressure,
it looks like this, that just means like
it's the regular pressure of the pencil. And it should look,
should look like this. So I just wanted to go
through my settings real quick just so you can
see what's going on. No tricks. Okay? So we're going to flatten
and I don't have symmetry on because the arms
aren't symmetrical. So I'm just flatten you
can't solo as well. I'm just flattening
this side out. As you can see,
it's nice and round under here for his palm. I'll just smooth this. Smooth it out. Okay? And I might need to smooth
it out a little bit more. Because this is
actually the palm here. So smooth it out a
little bit more. Just so it comes out and it's
nice and round like this. And then Smith it again, if you start to
have any issues or it's not smoothing nicely, you can VOC salary mesh
a little bit lower. Just bring it down
a little bit lower. And then Ramesh in that should, that should make the smooth tool a little bit more effective. And just rounding
everything out. How can I look at it? It's actually I'm going to take this and I'm
going to move it. Make this a little bit bigger. I'm going to move this a
little bit more inwards. I'm going to take
flattened again and just flatten this out
a little bit more. And you probably don't have
to do this amount of detail, but I just I don't know
I don't know what it is. I like to be very, very critical of
every little thing. I think it's worth it
to do the work now. Put in the extra work now. Wow, you can. And why you can still easily
adjust all these things. So we'll make this nice
and round and smooth. I think that looks good. So now we can officially
had some fingers.
7. Finger Puffs : Fingers are gonna
be pretty simple. They look like
they're just spheres. There might be a little
flattened on one side, but I like doing
fingers this way. So let's make sure we have
everything labeled correctly. Body floor, arms. Oh, these are the legs. So let's just name the mirror. And we might we might adjust
the legs a little bit. It looks like when leg
is in front of the other, we might do that. We might not. But that's just a little detail. Okay, So let's add sphere, I'm going to say real quick, so I haven't saved in a while. So we added a sphere, will bring it up in the general
position, shrink it down. And we'll do the thumb first. So we'll do the thumb first. And let's go ahead and
stretch it out this way. And let's do the same
thing that we did before. So we need to validate it. And then we need to do, we need to use all of these planes. We use the Move tool
and we'll just use, will turn symmetry on. We just need to round
it out a little bit. It's actually perfect.
It's pretty good. So that's a good
start for the thumb. Now we can just, let's name this thumb. It's actually clone it. And then this f one. So let's hide F1. We have the thumb here. Let's go ahead and use the gizmo and really place it
where it needs to be. With. Turn it off,
turn snap off. If you want, you can
you don't have to have it on the line I
haven't underlined. Looks like it doesn't
make a difference. But I'll leave it on a line. But if you wanna do
it exactly like I am, then you can leave it on a line. I'm going to turn off a line. Because now that I've tilted it, then you can see why it's
useful to not have a line on. And that's how quickly
when I say changes. Okay, so that looks pretty good. I'm comes out a little bit far. So this is the front view. That looks decent. I'm going to open it up
a little bit this way. Move it down to smudge. Actually open this way and
move it up a little bit. Something like that
looks pretty good. I'm gonna make it a
little bit smaller. Maybe down a smidge, stretch it a little bit. So maybe something
like that is good. And it looks like his
time his looks like his fingers are a little
bit smaller though. So let's just make it
a little bit smaller. Maybe a little bit wider. Move it up. So something like this. Okay, so now let's take f1
and we can use the gizmo. I'm actually going to snap it. And then just do it
quickly like that. Turn snap off and move it
in the general position, and then just slowly adjust. So I'm going to
make sure that this is sort of on the tip, like this surface of this poem. Stretch it a little bit, make it a little bit smaller. There around the same
size as the thumb. So I'm constantly looking
at things like that. How to gauge the size
of these fingers. And this one is tilted
the slightest bit. This way. The middle
one is very straight. The other one is a
slightest bit n. So they're always going to be sort
of pointed inwards, if that makes sense. Let's take a look at the front. That looks good. Tad smaller. And I want to do that
little tilt that I mentioned the slightest bit. So now we'll just clone,
will move this over. We'll stretch it the slightest
bit. That looks good. Down a little bit more. So that's nice. Then we can clone it again. This will be the little pinky, so this goes down
a little bit more. And it's tilted as the
slightest bit this way. Now you can see some
issues that I'm having with these is they're
they're all a little big. They're very big. So I'm going to take the
fingers and shrink them over. Shrink them a little bit more. I'll shrink the thumb
a little bit more. Like so. It looks a
little bit better. You can also take
the arm and you can use, let's say move. And they can sort of adjust
a little bit to the fingers. Not too much, but
just a little bit. And they're very flat here. The fingers are very flat, so I want to give them
a little bit of life. So I'll kinda tilt
them a little bit. This one's pretty far back. That looks good. That looks good. So you can always make them a little bit smaller
again, if you want. I might make mine a
little bit smaller. Then I might I might change
my mind to be honest, he's the easiest way is just to, why do I keep touching
a different spot? The easiest way is just to experiment until you're
happy with what you have. Okay, I think that looks good. So I'm going to look
at front and just take a look at some of
the intricacies. It looks okay. I wanted to I don't
want it to look like he's saying stop. That's the only thing that I'm
having an issue with right now is he kinda looks
like he's saying stop. So maybe if these are off
centered, that might help. I'll even twist
them a little bit. Flattened this up, smudge. I'm going to open it up and
just twist it a little bit. I don't really know
if that helped. Use fingers are
quite cute though. Okay. I think I'm happy with that. Okay, so now we
have these fingers, they look pretty good and it
might actually be easier. So if we take these
fingers, we can join them. Let's see what happens
when we smooth the bottom because I'm
noticing that there's, there is a little bit of space. Let's, let's take
these off and turn symmetry off the fingers. And I'm just smoothing
out the bottom so that's a little more space
in-between the bottom, only the bottom parts
of the fingers. That makes sense. So not really up here, but I wanted to be space on the bottom part
of the fingers. Sort of open them up a little bit. I think that looks good. I think we can work with that. Now. Be really nice if we
can use these fingers. If on the other hand. I think we'll try to use symmetry and bring those
over to the other, the other arm that'll save us from sculpting all these again.
8. Flip FAIL: Let's flip the hand. So let's take the fingers and the thumb and just join them. That way. It'll make moving them
a little bit easier. So let's clonus, and let's
call this one our fingers. Let's call this one l fingers. So we'll take L fingers. We could assymetry. And I'm going to turn these off. So we just have the red plane. Then when I go down here. So what we're gonna
do is we're going to, we're going to try to mirror
this from left to right. So in order to do
that, we need to make sure that we're only using the x because we want the line going
straight up and down. But we don't want local because the local would
just be the hand. We want world. The world
is just the center line. And the whole project where you have the red, we
don't want these. We have the red, the world. And we should be able to
just move it left to right. And of course, there's
always some weird thing that pops up left to right. Failed to apply symmetry. Do you want to enforce symmetry
by mirroring the mesh? Yes. Okay. So now you should have
the hand on that side. Okay. So it looks like so our fingers somehow
it it kind of, um, I don't know what it did. But you see is that
even though even though I've hidden the
original fingers, this one still has
the other ones, the other fingers incorporated. So I'm just going to take trim and we're just gonna get
rid of whatever that is. But why do I still see them? Just fully trained. Interesting to see. It's not like it's
money or anything. See if I can. So it's almost like getting in
some sort of near an app. And I'm actually
quite perplexed.
9. Finger Puffs 2: Let's figure out this
mystery together. So we have L fingers and
it's still both fingers. Very, very odd. So let's see if we can separate and find the fingers at fault. So it looks like
it's these fingers. So if we delete them,
then we're good. I don't know why it does that, but at least you got it
figured out somewhat. Now, the fingers it gizmo. Bring him down to
the general area. It looks like we need
to go like this, like this, and
then go like this. So let's take a look. Now you can see where
it's a little off. I think I'm gonna go
ahead and separate the fingers because it looks like I need to
work on them one by one. Let's start with the thumb. So let's try to move this
thumb to where it should be. And here's where the gizmo
can be a bit confusing. I'm pretty decent
app working with it and kind of figuring out
how to make things move, where I need them to move. But give yourself some
time. It is tricky. Sometimes you just
have to do a lot of movements until you get what you want. Okay. I think that looks pretty good. We get into the
handle a little bit. So something like
that looks good. So now we have these
little sausage fingers. I think what I wanna
do is bake this. So I'm gonna go here and won't let me bake it.
That's interesting. Let's see if I take
it out of this. It will allow me to bacon. Here we go. I've taken it out and
now I'm going to bake it. And then do pivot. We set pivot. So that makes the gizmo
perfectly straight again. I'm going to take
these other two and actually delete them. So we have, let's
find the thumb. So we're just go here.
Let's find the thumb. Will rename it thumb. Let's bring it out. Okay, So this will be F1, the thumb. And then we can just get rid of these because I think it's easier to place this one
and then clone it again. This arm feels a little wide. Does feel a little wide. Maybe I'll take move through
to shrink it a little bit. Okay. I'll smooth it out a little bit. I might adjust it
some more later. Sometimes I like to
flatten out parts of it to get them nice and round. Then smooth. Okay. So now obviously the fingers are just kind of
hanging off the front. Little bigger. Bring it in. That's pretty good. You want to give
them a little curve, a little touch of a curve. You can just take move and
you can push, pull as well. And that just gives
them a little curve. Now I'll move it back. You have something like that, which I think looks great. Let's see if I can bake
the thumb as well. Pivot. Pivot. You can want to
tilt it a little bit. Like so. Looks good. Maybe I'll move
this over a little bit and then just clone. Looks good. I'll clone again. Move it, move this
one up a little bit, tilted a little bit. I want to make sure that
these are following the actual hand or the arm. Make this one a
little bit smaller. I may, I'll tilt
it the other way. Let's take a look at the front. And that actually
looks pretty good. But they're a little too curved. I think they're a
little too curved. So I'm going to use
smooth on this arm. And I'm just going to try
to make the whole thing a little bit smaller. Just with the smooth tool. I'm going to box remember
it a little bit lower. So I'm just going to try to make this whole arm a
little bit smaller, but it'll still maintain everything is still pretty
much keep the shape. Next. I'm going to use move. And I think I just
want to flatten up, just pull it a little bit and
then adjust these fingers. So they're a little straighter. Going to pull this little sign up on the arm just a little bit. Then I'll just move this
back a little bit more and maybe even tilted
in a little bit. Something like that. Looks pretty good. That looks great. So now that we have this here, I'm going to take
flatten and I'm just going to even though we
can still see everything, I'm just going to flatten
a little bit on the arm. Just going to flatten
a little bit more. Smooth it out. I think that looks good. I'll just move the
arm a little bit out to accommodate the thumb. Okay. I'm pretty
happy with that. This is a really tiny
detail that I'm noticing. The insides of the
fingers are all a bit flat or a bit more, less round, I should say. So. Let's see if we can
just take the fingers. Let's join these fingers. Once you're happy with
them, you can join. You can join these
fingers here and thumb. So I'm going to join
all of them and this will be L fingers. Then we'll select both
of those and hit Solo. So now we can see both
just the fingers. So I'm going to tap on
those. Use flattened. And he can go back and forth. Oh, you can't see it. So it's always going
to be the inside of the fingers that you
want to flatten. So this is the thumb. This is like the
inside of the thumb is you're just the
insides of the fingers. And I'm just flattening
out a little bit flattened, a
little bit bigger. I do this with most of my
character is actually k, So now they're a
little bit flatter. So now I can just smooth. It's very subtle, but I like
subtle things like that. And I will bring that back. I think that looks good. I'll do the same thing here. We don't really
need to do the solo anymore. Beyond flattening. And that Smith will
just flatten this out. Poem side. We don't
need symmetry. So let's turn symmetry off. And now that I had it on
and check and make sure that nothing else was
affected by that. Sometimes you got to be
careful with symmetry. So symmetry is off. I can flatten. It looks good. Looks like it might have a
little bend the opposite way. Same thing with
the little pinky. Little round pinky. It looked good. So then we'll just
give them a nice little smooth look good. So once you're happy with
your palms and your fingers, then you can just walk
so remiss them together. And we'll, we'll
smooth them out. We'll do that in the next video.
10. Finger Tips & Face Details: So now we'll voxel three mesh, the fingers and the arms
together and the body, the two bodies sections. So let's take this arm and the our fingers or whatever the corresponding
fingers are. Let me see real quick. Now we'll take both of those
and we'll rematch them together. And around 200. I'm gonna go ahead and
turn off the lines. So now these are
meshed together. You made it to separate
some of the fingers if they're if they're connected. I tried to leave some
space in the middle. But if they're connected,
then you might have to. If you have an issue where
they're connecting together, just go to the fingers. You see how I have mine
are all joined together. You can just select, like let's say it's
these two fingers. What you can do is you can, you can use the mask and you can select mask
along with the Lasso. And then you can just move the others away a little
bit if you need to. Or you can just take
the move and you can just adjust a little bit. Something like that.
If you need to. Do the same thing, just
Fox worry mesh 200. And that looks good. And then we'll just
take smooth and just smooth everything down. So it's nice and
smooth and pretty. I'm not going to press too hard as I smooth
because they don't want to lose any of the shape or lose too much of the fingers. Okay, this looks great. Very happy with that. You know how I like
to use inflate. I really love to use inflate. And this crease would
be a nice place to add. Inflation. Usually do that and then I decrease. Let me bring the crease
down a little bit to here. And just move this out of it. Just so it gives
that little bend. I love stuff like that. So this is a little trick or tip, whatever you
want to call it. A little bit of a shadow here. So I'm just going to
try to smooth this out to we'll do the same
thing to the other one. So we have arm,
fingers and we'll box. We miss them together at 200. Okay. It looks good. And we'll
just smooth this out. You can see there they're a
little bit together here. Tiny bit. You know what? I am going to separate
them a little bit. So let's see if I can move it. Just that one. There we go. I don't even have
to use the mask. You know, I also want to
make this one a little bit. I think I want to give
it a little bend. Just make it a little thicker. And I'll use select just
because I think I want to bend it a little
bit more this way. Okay. Let's try that again. So we have the arm
and the fingers. Ok, sorry, mesh. To take the mask off. Smooth everything. They took their still
touching a tad bit. Let's see if I can
use drag really small and just sort of
get rid of that in there. That's actually not
that it's not too bad. It's not terrible. I'm trying to smooth it
out as much as I can. And then I'll try to just
make some space by drag. Let's try crease.
Nice and smooth. It looks okay. But of course you
can separate it a little bit more if if
it if it's too close, if you don't think
it looks good, but I think it looks fine. So now let's take the
top part of the body and a bottom part and this
voxel Ramesh that together. Again, 200. We'll refresh that, and then
we'll smooth everything out. So it's nice and smooth. Looks good. I want to make sure
that this is nice and seamless separation here. I think that looks good. And I don t think
that we need to voxel Ramesh these parts together. Think we can just leave them. Okay, good, Let's save. So now let's figure out how
to do is these little parts. I think what would be
good is if we just do a cylinder and a line going across and we just
put that on the front. I'm actually not sure
if this is like if it goes in on the
character or what. But I think a
cylinder and a line going across work or two
cylinders, I should say. So let's try that first. So we'll add cylinder. So we'll add a cylinder. Gizmo, bring it forward. And let's do snap
with 90 degrees. That way we can
just make sure that it's pointing directly forward. Will shrink it up. And we can mirror it. Separate the two. And it's actually a
pretty good size. Maybe there are ten bit smaller. So maybe around there. Let's bring them into the head. Obviously, we'll have
to adjust these a bit. But ultimately I think
they're pretty good size. Okay, so now that we have that, let's make the straight bar. And to do that, I think will use, Let's see. Let's use a cylinder. Will bring that to the front. Let's make sure it's not
inside of our other. Let's bring it out of our mirror because we
don't need two of them. Snap is still on, so we'll do that and
just tilt it back. Actually, we need to
tilt it this way. We'll bring it up.
And then we'll just shrink it just so it's a nice straight
line going across. It's pretty thin. Something like
this. A little bit. So it'll be it goes across maybe a little bit
less than the middle. So it's not directly
in the middle. It looks like it's
a tad bit lower. So let's go back to these now. And I think we can go
ahead and validate them. The only other thing
is that I do want to look and make sure to
see if this is a dome, if it's an impression or
if it's just a cylinder. So let's save, and I'll just
look really quick to see. It looks like it's
an impression. Let me save this image. Another close-up image. So it does look like
it's an impression. Okay, Good to know. Okay, let's save
this one as well. So I'll say I'll just
save the ones I use. That way you can have
the ones that I use. Okay, so and that's
actually fine. So you know what we'll use, this will make the
shape that we want. And then we'll do a
Boolean operation. That's where we use
this shape to cut out what we need from this. So we'll make this shape. And then we'll cut
out the little will cut out sections
from the head. So then we can actually make it so it's like an
indentation in there. It's probably really confusing, but I'll walk you
through everything. Okay, So what's really important now is if we're
looking at the front, I want to make sure
that these are the right the right
spot on the head. I think of the right spot. What I mean by that is just
I want to make sure that this shouldn't be down
further a little bit. Let's take these
and maybe it will tilt them a little more forward. Yeah, I think that's perfect. Alright. So now we just have to form fit these cylinders to the head. I'm gonna go ahead
and validate them. Let's box will
rematch them as well. 200. So voxel rematch them. I'm going to take
smooth symmetry. I'm just going to
smooth these towns. Okay?
11. Face Details 2: Okay, so now let's adjust these. So we'll use symmetry. We're on the cylinders, we use the gizmo. We don't want symmetry. Now let's adjust them
so that they're on the very surface of the sphere. So that's actually pretty good. Okay? They look pretty,
they look pretty good. The only thing that they might need is a
little bit of a bend. So I'll take move. And let's see if I can
just pull it up in the middle and then move
it back a little bit. Okay. I think that looks good. Looks a little uneven. I'll just slightest bit
and just make it even. That looks good. Now this, Let's see. Let's go ahead and validate it. And let's actually stretch
it a little bit this way. And let's push it back. Like so. And now we need to, I want to put a bend
in this as well. So let's use move. Let's use symmetry. So now we're just on this bar. And I'm just going to, maybe I might have
the wrong symmetry. Let's see what the
right symmetry is. Let me turn on the line again. We have the blue. Blue is top and the bottom. I don't see the red. Whereas the red, the
red is front and back. So we need the blue. We also need left and right
is that green screen. Okay? And the reason why
sometimes this changes is because since we moved it, remember we moved with snap, we sort of move it around. That's what we'll
change the symmetries. But this should work. Essentially if you
turn your line on. If you get lost, if you
turn a line on down here, you want them want to
move everything evenly. So we want the top
and the bottom. And then we want a
line in the middle so we can move to the
left and the right. So they might be
different colors, but you want a line
in the middle and a line down the
center like that. We don't want a line on
the top and the bottom. We don't want that. Okay, so now let's try this
again. Symmetry is on. And we'll move this out. We want to move it out
nice and evenly as we can. It looks pretty good.
That looks good. And then we'll take our gizmo
and we'll move it back. Like this. That
looks pretty good. Looks very good. You know what, I'll say that it
looks very good. And you can, even if
you feel like you haven't made it thin enough, you can always squeeze it a
little bit, things like that. Okay. I think that looks great. So the only other thing
that I'm wondering is if it's wide enough, it looks like it is wide enough. Or they might be too big though. I feel a little big, but that's okay. If
it's a little big. We can grab all of this and
then we can just shrink it. You do have to move it
out again. Like so. And then just do any adjusting
that you might want to do. Like maybe the eyes are
a little bit too big. You can do some little
adjusting. Sometimes I wish. Ran out of space, my phone. Okay, so now let's do
a Boolean operation. So first we're going
to take these eyes and validate will just naming these dyes cylinder. We can take both of these
and just join them together. And let's clone and hide one. So now we have
this and the head. So I'm gonna save case. I mess up where
there was a crash. So let's extract the
shape from the head. So we have our backup one. Take the head and the eyes. Why the eyes? If you find that you
can't easily hide the I. Then go down here to Advanced
and uncheck focus on herbs, focused on item or
sink visibility. Uncheck them both. Mine looks like this. You want to voxel? We merge them together. So we go to voxel. I'm going to rematch
them pretty high. So let's try like 400. See what we get. Nice. That looks good. So I'm gonna take rounded edge or you can just smooth
it with the smooth tool. If you have the rounded edge
tool, you can just do that. If you don't. That's okay too. You don't, you can just
take smooth symmetry and just softly smooth
out everything. Hopefully it doesn't
get too loud outside. K. It looks pretty good. Make sure this is all nice and smooth. Now let's add back
the hidden one. Let's move it back some still on the head and
makes sure that you're on. Move it back until
it fits right in it. So it looks pretty good. I do kinda wish who's
a little more snug. But I think that's
actually pretty good. We might be able to use move.
12. Finer Face Details: Okay, so now we have
the original back in the place and this
might actually be fine. But I want to make it a
little bit more perfect. So we'll take eyes and
let's see if we can separate all of these groups. So we have the eyes, we have these two, or the eye. So let's take that
and join them. And let's move it out. Here. These two we can, we can take this out
to delete the blue. So this is just the line. So we'll just call it the mouth. Well, we have the eyes so we can actually adjust them so
that there'll be perfect. And you know, what
will be easier is if we take trim rectangle, this makes sure that we're
back in orthographic actually. So we take trim
with the rectangle and just get rid of 10. It's still not
letting me do that. So let's separate. And let's just get rid of one. Can bring this high out. Okay, so now we
only have one eye. And I'm actually going to, I was thinking about
pinching that. Pinches actually a great tool. This is weight extra, Plato really need
to be doing this. I don't think that we'll see it, but now that I saw it, we can file that under tips
that a little more straight. So now that this I is separate, we can really make it work to our
advantage. So let's see. So the first thing we
wanna do is drop it down. So it's underneath like this. Now let's make it bigger. So that's, that's perfect. We can adjust it a little bit so it's just underneath
the surface. I think that's
exactly what we need. We raised it and
now it's perfect. So let's take this and
let's do the same thing. Let's move it back. Let's make it y, Let's make
it bigger than it looks good. And let's actually bring
the eyes out to match it. Here we go. It
looks pretty good. We can actually trim. Let's take the lasso. Let's just trim this up. Let's make sure that we're on. The mouth. Will just trim this, give it a little trim. I think that works. Can even flatten it up
some maybe pull it out. Let's take movie and let's, let's give it a
little bit of a bend, just like we did originally. So we'll just pull
it out a little bit. And then we'll push it back in. That way it meets up with the
eyes a little bit better. So I think that's perfect.
I think that's good. So now let's take this
i and add mirror. That will mirror it
to the other side is should be perfect. It looks like it's a
little off actually. So it looks like it's a
little off. That's okay. Let's take both of these are new eyes, will validate them. And let's do instead
of joint children, Let's do keep instances. Yes. So now we have both of these. You can tap the eye,
we want to adjust. Then we can just adjust it until it works perfectly
for this side. All I mean by we're perfectly
is we just want it nice and smooth and right under the surface. I think
that looks good. There's no gaps. I think it looks perfect. Now we'll take the eyes, all of the i's joined the mouth. We can join all
of that together. Let's make sure we label it. Eyes, mouth, or
just size is good. So we'll just keep
it the way it was. Okay. Yeah, I didn't know
how I was gonna do that, but that's a little
bit more accurate to what he is because
it's an indentation. It'd be easier if it was
just like buttons on top. But this makes it a
little more difficult, but I think it looks great. Okay, and now this has 504, so we can go ahead
and decimate it. So let's choose
this option here. Decimate. So let's
decimate it twice, three times till looks
perfect, so that's good. This little piece here is 234. So we can do the
same thing, go here. We can decimate it a few times. Still looks perfectly fine. That will drastically
cut down on our, on our, the size of the project. Here's another little
trick that I like to do, because I kinda want the fingers to be a
little bit more together. And you can't really do that when you box
where we mesh because that'll sort of start
reaching for each other. So you can take Select Mask,
make sure you're on the arm. And actually I'm going to
mask the middle finger. Then I'll take Move. And I'll just adjust these so that they're a
little bit closer. Now I'll clear the mask and
then I'll just smooth out. There's little bit of
imperfections there. I'll just smooth that
out a little bit. So that's a cool way
to sort of bring the fingers a little
bit closer together. Okay, So here's
this little button. So that should be fairly
easy enough to make. I think we can just use you can do a cylinder
and then we'll flatten out the outside rim. And then I think we can make
this with the crease tool. Then if not, we'll just
figure something else. Okay, so the first thing
we wanna do is sort of get the general
position of it. So let's add a cylinder. And I'm going to use
snap so we can snap it forward. I'm going to bake it. Not that it really
makes a difference. Let's validated bake,
pivot, rosette pivot. Now this is just normal. I'm going to flatten
it up a little bit. So we have something like this. I'm going to box so Ramesh it. I'd like to 50. Then we'll
just smooth everything out. I use symmetry. You can actually turn
on all the symmetries unless you have rounded edge. So we'll turn on all the
symmetries and just smooth. It. Looks great. I wonder if I can
use Select Mask. Let's turn on the symmetry lot. Let's turn on the blue again. So now we have a middle spot. If we use Select Mask
and we use the ellipse. Okay, so we need to make the
ellipse a perfect circle. See if I can remember
how to do that. So I think it's up here. Oh, here we go. Okay, so
right now my ellipse, I can have it so it
can do any shape. But we really need it
to be just a circle. So we'll tap here. We'll go down to shape
ellipse, circle. Then we'll do
centered tap front. We'll start right in the center. We moved some mask somehow. So let's go back to select mask, which check the settings again. Okay, there's, that
should be what we need. Here we go. So we do
this till about there. Looks good. Then let's
actually do this. So let's tap left, trim, trim, select Mask again. And we'll use the rectangle. And my Apple Pencil died. But luckily I have a backup. Avocado colored
Apple pencil away. Is this hasZero as well? Wow, they're both dead. Okay, I guess we're gonna take a quick break, get a snack, get some water, and we'll
be back at this in 1 s.
13. Chest Emblem Details: Alright, so we're back, we're all charged up. This is actually
a little tricky, but this is a really
cool way to do this, to handle this problem. It's round, it's got like
a flat surface here. And then it has this line
right in the middle. So let's do that. Okay, So we have our
cylinder, it's 177 K. And we're going to make sure we tap front and we're
going to use select mask. The mask is there. Good. So the mask is there. So I did all that. So now we'll go back, left. And we're going to use select
mask with a rectangle. Again. We want to mask
all the way up to just about the very end like that. So we want to have
something like this. So now we can take the
flatten and it won't, it won't bother this part. Let's take away
the blue symmetry. Okay, I'll tap front again. So now we can use
the flattened tool and we can just flatten this. Really excited about
this actually. So now we have that
nice and flat. We can go ahead and get rid
of the mask and look at that. How cool is that? So now we
will take the smooth tool. We can just kinda smooth it out. And that's exactly what
we were going for. Okay, so next thing we can do
is we're actually going to, we're going to sort of
build that line through. We can't use creases, creases just to, you know, it's not it's okay but it doesn't look as
clean as it should. So I turn it to its left side, will take select mask
with the rectangle. And first let's just mask
off a little bit lower. Let's mask off to
probably about there. We're going to mask all of
that off the whole back. So we're good there.
Okay, so next, we want to take the rectangle
and we just want to make that straight line that
kinda goes in the middle. Maybe we'll do it a little
lower than the middle. So the whole thing
sort of in the middle? Yeah, maybe around here, a little tablet lower. So maybe something like this. We want to make a
really thin line. So we'll make
something like this. See that we have that
thin line there. That's what we need. Now we want to match this, but we want to make it up so
we can make that top line. So we'll take the rectangle
and we tap unmask. We kinda do the same thing. We want to match that with. Maybe something like this. So we actually don't
need all of this. So the line comes
in, then it goes up. This might actually be
too little bit too high. I'm gonna make it a
little bit lower. Maybe around here. We don't need this much. So let's take, let's
tap Matt, unmask again. And now we're just
going to we're going to mask off the middle part. So maybe around here, see it does both because
we have symmetry. Now, what we have to do is, what do we have to do next? Oh, that's right. We want to keep
everything the same and we wanna kinda cut this. It's a little bit of a
diagonal line we want here. So let's go like this. We'll make it a
little bit longer. Actually, it doesn't really need we don't really need to go to the other side because
it's going to mirror. So we just want it to be
further out than the top line. Perfect, Just like that. Now for the tricky part, the rectangle is great because it makes sure that
your lines are straight. So I'm going to set my canvas up so that I can make
a straight line. So maybe something like this. Let's see if this works. I'm doing everything the same. I want to hit unmask because we want to
make a clear line. We don't want the mask anymore. So let's see if this
works. It's pretty good. It's a little messy,
but it'll still work. And it went on the
other side too, because we're still mirrored. Everything is a mirror.
I think that's great. So now that we have this, we can just hit gizmo. Then we can move that in like that will ensure doesn't
come out of the back. Although it doesn't
really matter if it does because we're not going to see the back anyway.
I think that's great. Now we'll take our
mask and clear it. And voila. So let's remeshing it. Let me save this remeshing it. Let's try to 50.
And it looks good. And we'll use rounded edge. If you don't have rounded
edge, you can just smooth rounded. It is just kinda makes it a
little bit faster like that. I think that's great. And that's exactly
what we needed. And now that we've
done that, let's go ahead and decimate this. So we'll go here and
we'll use decimate here. And we'll just estimate this because we don't need
it to be that high. 3,000. I'll take that for now. I might decimate it more later,
but that's okay for now. So now we can just
move this into place and make it
the proper size. Okay. So it's pretty
much on his chest. This type area, it's a little bit smaller, maybe smaller. So we'll bring that
into his chest. I don't want it to look
good on the video, so I'm going to
bring it out again. I'm going to slide it
back in. There we go. It looks so good. I was actually really fun to make this little
thing and to use the mask when you can kind of get used to using the mask
to get what you need. It's like things like
this. Start getting really fun because you, then you start to
realize that like, okay, there's really clever way to make whatever it is
you need to make. There's always a
clever way to make it. It's just figuring that out. That's tricky sometimes. I think that's good. I wonder what it looks like
if I was to put him that's actually
pretty close. That's pretty close. So it does look like it's
rotated a little bit. I'm gonna take it off of a line. That way it aligns with this. So when I rotate it, it doesn't move it as wobble or anything. So I'll just turn it a little
bit and maybe a tad bit smaller. I'll pull it out. Tiny bit. There we go. Nice.
We can actually, we can probably
do the same thing with these little
these little parts to, but I can't tell
if they're just.
14. Body Details: Okay. So he has a little
crease that goes around his whole body and then
he has these little like I don't even know
what you would call them, but they're sort of
like little patches. They look like they're
slightly different material. Essentially here there's
like a little seam. So there's a seam there. It'd be nice if I could see a close-up of the
seam on the body. This is a scene there as well. Okay. So there's a seam there as well. For the details on his
body he has these sort of patches are different. Patches of color that have like creases around
them are seams around them. So there's one that goes
right across the body here. So I think I want to
use the crease tool. I'll just show you my
creased tool settings. Here's my, here's
the pinch force. I don't usually
actually raise it up. Maybe I'll raise it up to eight, see if I see a difference. Like a good strong pinch, pinch force, excuse me. So here is these options. We have the filter
fall off alpha stroke, so these are all good. But with the filter, I
want to hit front-facing vertex only for the crease. For pressure. Let's try unchecking global
settings, preset. And then changing
both of these two, this line, this straight line. So let's hide the arms. The arm here, and I think
this is the other arm. I'm going to rename it arm, l. L arm. So let's just hide these and then we'll go
back to the body. And I think I want to mask
off where this round part is. It's probably about here. I'm going to tap
left select mask. And let's just make sure
that we have front-facing. So we won't front-facing
vertex only. Because if we don't have
that, it'll do this. They'll start doing that.
And what that is is that's making one circle and
then it's going through to the back and vice versa. So we're using select
mask, the ellipse. And we'll just do
something like this. That's actually pretty good. If I make it about a smallest
him to a little big. Maybe I'll go a
little bit smaller and a little bit just wider. So that looks pretty good.
Now we'll go back to the front of the body and
we'll use the crease tool. And actually don't think
that we needed to turn front-facing vertex because
I think if we make a crease, it's not going to go
through to the back. So I think we're good there. So it just has a straight line. So you might have to
do this a few times. We just want to make our crease and it's a little bit lower. See how the sea,
where this bend is. It's a little bit
lower than that. So we would just want to
make it a little bit lower. I'm just trying to make
a nice clean line. It's a little tricky. Trying to make it meet in the middle. Something like that. That looks pretty good.
That looks pretty good. Let's bring back the arms. The mask here that actually
looks okay. It looks okay. Let's try the lazy
rope stabilizer. So we'll go into here
the stroke settings, and let's do the lazy
Rope Stabilizer. Let's try this. Okay, that's actually not bad. I would say that
that's probably the best one that I've done. Looks good. I'm happy with it. So I'm not gonna go
too much more crazy. Let's just do the back so we can continue with this rascal. Okay, I'm pretty
happy with that. I think it looks
pretty good. Okay, So now for this section, there's a few things.
They have to do. A few things that I'm thinking, but we might leave the mask on. And then. When we start to color, when we turn him white,
we can invert the mask. So you can do select an inverse and then we
can color it that color. We might even, we might
even do clay or something. We might even raise it a
little bit and then color it. So it looks like there's like another another texture on him. So that might be
good to wait on. So we obviously still have
this part of the body. The legs. The legs are quite small. We might be able to do
this when we color it too. There might be better because we can use dynamic topology. So I think that we can
bring the arms back. I think the risks we should
do when he's colored. We make him completely white. Because I'm pretty
happy with them so far. I think that's the last thing is just these these
last details. So let's check the size. So he's orange and 30 K. I think we'll
leave it for now. We'll leave everything
as it is for now. Nothing is too huge where
the arms are a bit huge, but we might need
them for the details. So right now let's make
him a matte white. So we'll go here actually, we'll need to change
it to let PBR first. So we'll go here. The shading window
will change it from mat cap to lit PBR. Let me say real quick. And we will change
the color to white. The roughness up a little
bit to like 6.5 or so. Zero point 6.5. Paint. Whoops, I forgot to
select everything. In the legs. Pain, all interesting. Pain or pain off. Oh, you know, what's happening
is I have the mask on. So I need to take the
mask and invert it. Now I can do pain all I was wondering why the mask
wasn't being painted. So there we go.
That that was why. I think this looks really good. So it can really good for now. So now that we've
painted it, I think before we do these details, we should do I want to light
him or do the details first? We should probably
do the detail to continue to do more details. I think maybe we'll
add one light for now. Maybe we'll lighten
up the environment. So let's tap this little icon and see if we can just make it brighter with the environment. That way we can see everything. So that's good. So let's tap on the
body where it's so low. So now we just have
the body and our mask. Let's invert the mask. So now this is the only
part that will be affected. Let's go here to the
Layers option, Add Layer. And this will be, let's
just call it a patch. Patches k. So that
will be the side, this side, little patch here. So we'll make this
similar color. It looks like it's just
sort of like an off-white. So I'll change this
a little bit and just make it a little
bit off white. So maybe something like that. It's a little warm. I don't know about
the roughness yet. Maybe I'll just
suggested a tad bit. So it looks like it's like
a letter or something. So I'm just gonna bring the
roughness down a little bit. And then we can actually
just hit can hit pain. All that actually
looks pretty good. The only thing is
it's a little dark. So it needs to be a
little bit grayer. And a little bit later. Let's see, without the mask,
that's almost perfect. And remember that's
one and that's on a higher layer as well. So we can solo the body. And now we have this
nice mask here.
15. More Patches: Alright, so he has
patches on his arm. So there's a circle here. I can see if there's
another crease. There's a circle there. And then on the bottom, I think that's pretty
much all we can see. So he does have it
looks like he does have a crease on his arm, but this looks legit and can't
really see it line here, but there might
be a crease here. So that's looking good. We might do some extra
details of that later. Let's bring back, Let's un-solo him and get to these arms. We might be able to do this with the select Mask Tool again. So we're on this arm.
Let's see if we can. Let's add a new layer patches. Then let's use Select
Mask and ellipse. I think I want to do, I
think I want to change the options to circle, centered. But maybe not, maybe not
circled but centered. Better. But I wanted to turn it. Here we go. That's
kinda what I wanted. But just not. I think that looks pretty good. So now we'll do the same thing
will just invert the mask. Invert. And we still have the same color so that we can just color it. Then clear the mask, will do the same
thing on this side. Select mask ellipse. So that would be
probably around here. We want to make sure it
looks circular though. It looks a bit better. But you can see how it's
sort of messed up there. But that's okay. I'm
just going to use mask. And I'm just going to
fix that up a little bit like this and then
I'll take unmask, just erase some of that away. I think that's possible. So go back to our
select mask, Invert. And we almost forgot
to add patches, will add a new layer patches. And then now we'll call it that. And we go back up here
and clear the mask. It's looking good. So let's take these and just color them. Matte black. So there's no light. Nice and matte black. Second, pretty good.
Now for the legacies, we don't need symmetries, so there's a circle on
the sides it looks like. So let's up the
resolution of the legs. So I'm going to box where
we miss them, like 400. And I should have see all
these little squares. That's multi-racial. First syllable here,
multirate, sub-divide. Then let's try that again. Okay, that looks a lot
better and do a quick save. Now, let's see how this
select mask lips works. I think it's
something like this. Much, much better. Perfect. It's on both sides. Let's solo. Even though we just have one
leg, that's perfectly fine. Because you see he has
this on the bottom. So let's make a
circle on the bottom. Almost perfect. Actually, there's an
easier way to do it. We'll hit front. And then
we'll take a rectangle. I'm going to just adjust it
so it's straight up and down. Let's just do this. So we'll do that. And I must still have
front-facing vertices only. Where is that? It's here. Filter will turn off. Front-facing vertices,
will set this backup. So then I can use the
rectangle and just get, get that going. Perfect. Tap solo again. And
now we have that. Although you can see that
this is kind of funny shape, Let's tap front again. Let's see if we can just get it. Street. There we
go. That's better. I just use a rectangle
with unmask. Just did a little bit. Oops, wrong way.
Let's adjust it. Here we go. We might, it might have been smarter to actually
use symmetry. Just do something like that. On the symmetry didn't work. Interesting. Symmetries back there. That's odd. Odd. So we'll turn symmetry off
and we'll make a line here. We'll make one there. And we'll make one on
this side as well. So something like that. I think looks pretty good. There's a little bit of a tiny they're not
actually like straight. They're more like a
little bit slanted. So if you want to add that little detail
and you can do that. So something like that.
I think that looks good. Okay, so now let's
take the mask, invert the new layer, make sure you do a
new layer. Punches. You can go to the Paint. It looks like we lost the color. So let's go to the Paint tool. This little circle here. Eyedropper will get
the color back. Now we can tap on it
and just to paint all. And we're good to go.
So go back to our mask. Clear it. I wish I can make that color a
little bit darker now. Now that I've done all that. And I wish that I could wish that I can make it
a little darker. But that's okay.
I'm okay with it. Okay. So what else do
we actually have to do? So the only other
thing is there is, does look like there's some
sort of crease in the arm. So if you want to take
the arm and add detail, maybe you wanna do
it on the base. You can just see how this works. Kinetic crease going all
the way over like this. I don't actually think
you need you need it to go all the way to
the other side. To be honest with you.
I think that's fine. You really don't need it
on the other side here. And just bring it across. I'm not on the right arm. Let's go to base. Okay. That's actually
pretty good. I'm happy with that. Okay. So I think I'm pretty
good with this. I don't really see
any more details that we might have missed. But I'm sure there's
something I can think of. So let me let's,
let's pause here. Let me give it a quick save. You should give a
quick Save as well.
16. Seams Good: So I did think of another little extra detail that you can do. You really don't
need to do this, but I'm using crease and I'm using the color
of these patches. So now I'm on the leg and I'm
going to add a new layer. Just go seem. So this is the new layer. I lowered the intensity of
the crease a little bit. You can see the
numbers very low. I think five is the lowest for the radius for the crease tool. I'm going to go around
these lines and remember that I'm using the, where is it? If we go to this little
option and stroke, I increased the lazy
Rope Stabilizer to 50. And that's why we have this
little stretchy thing. And that kind of helps
you stay on path. So what you do is you start at the end and then you just
try to use the front end, like where your stylus
is touching the screen. You try to match as
close as you can. The line, the lazy
Rope Stabilizer was stabilized the line. So it will give you
something like that. Okay. So I do want to try to
add a little bit of a crease to this and
even maybe to this here. So I'm on the arm. We're going to use
crease with sub. Then we want to
make sure that this doesn't have a line through it, because we want to
use the white pink. And we can do this on. Let's add a new layer
and just name it seem. So let's try to do
that on this layer. So I have this, obviously, the radius is very low, or raise the intensity
a little bit. Let's see. I'll raise the
intensity all the way. Let's see if we can
just make a seam. I still have the lazy
Rope Stabilizer. I'm going to continue this
all the way to there. That actually looks pretty nice. So let's continue
around the other side. It is a little bit tricky
to follow the past. Sometimes your hand
gets in the way. So feel free to take a
couple of goes at it. You don't get it
on the first one. I think that looks great. So let's go to this arm, 56 k. So let's see how
this looks first. Let's, may I need them
to do a new layer? Name it seem same thing
we use crease with sub. We don't need symmetry. Let's see how it looks. It looks here. It looks like it might work. Now I'm going to
try to just trace this outer line patches. It looks good. I don't even think we need
to raise the resolution of it. Looks decent. Okay. Decent. Try to go over
this a little bit. Get rid of the beige paint. So that looks good. Now let's try to do
it with the body. The body is very, the eggs will add a new
layer, call it seem. And then we'll just
do the same thing. Let's solo the body. Oh, I must have symmetry on. Because I can see that
it's symmetry. It's okay. I don t think I
want some mature on again because I don't want it to go back over
what I already did. That looks pretty good.
It's pretty decent. Seem so un-solo. It maybe we'll just take
it away a little bit. It's a little aggressive. So I'm going to lower it down. There we go. That's better. Crease. Just tracing this leg. Kinney. Okay. Yeah, I like the outer
crease a little bit better. And again, I can always just kinda lower this a little bit, so it's not so egregious. So I think that's good for the
details, for body details. I think next we'll
just do some lighting. Really happy with them.
17. Lighting: Alright, so let's
do some lighting on our little guy here, I guess, big guy here. So let's do some lighting. Now. Be a good time
if you want to bring in fresh backdrop. So let's just do a quick save. If you want to bring
in fresh backdrop, just go to this folder
window, add to the scene. And then wherever you saved fresh backdrop minus
here, somewhere. There we go. Open that up. And I'm going to bring
this two down to his feet. And actually, I'm going
to make it longer, taller, a little wider. Go now we got a little bit, a little bit of depth. I'm gonna change
this to perspective. Now I'm going to get
a nice view of him. So maybe something like this. Put them right in the center. Okay, so that's a decent view. So we'll go to this
little camera icon. You can figure out what you
want your focal point to be. I think that's fine. But
once you're happy with it, you can just add the view here. I just like to name this one. And then maybe we'll do
like this can be two. Then maybe the profile can be three. Something like that. So at least now we have some
views we can work with. Okay, so first view, let's go ahead and first turn the environment
down to round two. And we can turn it off. And we can bring in
our first light, love rayon and the first light, I think it always
looks really nice. It doesn't matter
where this light is, but we're just going
to move it near, like how it's pointing on him. It's pointing from
this direction. And that's this is a
pretty good start. So we can probably
just leave this here. And we'll give him
really simple lighting. So we'll leave it there. It still looks gray. So I'm going to turn
it up a little bit. Maybe 1.5 or so. So we'll do that. Then we need to add a
fill light on this side. Make sure that this is reflective
of what's on my screen. So this is great. I'm going to this light. I'm going to call the key light, the main light. So
that's the key. And this is a sun. Sometimes I change
it to spotlight, but for now we'll leave
it as the sun satellite. And we'll change
this one to fill. We might move this to the
background, but we might not. So that's this light. And we will move it over here, pointed back at him. So essentially with this light, what we're doing is getting rid of those
really dark shadows. So something like this. Here's without it.
Here's with it. It's too bright though. So we want to lower
the intensity. See how it's black now, we don't want it
completely black. So that's why this
is a phyllite. It's just filling
in so it's dark because you want it
to be darker than the key light, but not black. So now we just have one
Sunlight going this way, when sunlight going this way. And we want to make
these soft too. So first, let's
start at dislike. We'll tap on it, tap here. These are the same
options that are here. These are all the same options. Like if I was to go into this. So these are all, turn them off. So these are our
lights, but this is a little shortcut menu. So you can tap on
the light, go here. Softness. So I'll make
it nice and soft. You can see that it
turned that shadow soft. And we'll go to the fill
light and do the same thing. Make that nice and soft. So now we're gonna
do an edge light. So we'll have a light
from behind him. So this is fine. Now this is a dark shadow. So we have light, we have dark. And then we're going to make another light edge from behind. So we'll go here. Add this will be edge.
I love doing lighting. How that is not
just changed name. Edge. There we go. So we're gonna make
this a spotlight. I'll zoom out so you can
kinda see everything. I'm going to, I'm going
to tilt it this way. Use these arrows to
move it behind him. It's pretty much what we want, but we want to see it from
our view. So we'll go to one. You can start to see that lovely white
line. It's beautiful. If you can have it on
the floor if you want, but usually I don't have
it too much on the floor, but it actually looks decent. It actually doesn't look
too bad on the floor. This is what we want. We want,
they're really beautiful, nice white pop that
really layers him, that makes him stand out. I love it. And we could change
this to soft too. Let's see what it looks like. We can always change it later. So now the last
slide that I use, and actually at
this point in time, we can probably bring back the
environment which is here. But we'll do that in a second. Let's zoom out. We have our three lights. Let's add another light. And we're going to
call this top-down. And of course that's going, that's gonna be a
spotlight and that's gonna go right on top of his
head, pointing down. My go-to lighting setup. For most of everything
that I sculpt. Want to make sure that it's over his head and pointing
straight down. Now the beam. Here we go. So we want something like this. And we are going to
adjust these for sure. Right now we can turn the
intensity down a little bit. It's very hard and I'm gonna change this to
a nice cool lights. So we'll go to
this bluish color, will bring it to blue. Something like that,
nice and cool. I'm going to save my progress. Okay, So now let's turn
the environment back on. That's going to
bring in a lot of light on these
really dark spots. We go here, we turn the
environment back on. We can turn it down. I want it on but down. So I put it at 0.626. And now to get an accurate view, let's turn on post-process. And that gives us a
much more accurate look at our character. Let's go to one. And
it looks pretty good. Looks very good.
So another thing that I'd like to do with
all my characters is changed them to subsurface. So now that we're
in post-processing, there's a few things here
which global illumination, which is going to
brighten a lot of stuff up and make the
light really bounce. And that might actually look really good for this character. There's ambient occlusion. So you can probably
turn this up some. But you see you get these
little white physis. But that's okay. I think that looks
pretty good for now. Ambient occlusion. He doesn't need that much of it. So maybe I'll leave it there
and I'll turn the curve up. Something like this. So it looks like without that, it actually looks
better without it. So I'm just gonna leave it off. It's still not bright enough. I can turn the environment
up a little bit. I'll turn it up
maybe to like two. And you can see this light
is a little hot on his head. So that's the top-down light. So I'll just turn this down. Maybe I'll go a little bit
of a deeper blue as well. It looks gray. And let's figure out a
color for this backdrop. So we tap on the backdrop and let's pick a
nice color for it. For now, we'll just do this
color. The pink is good. Look. This is a little
bright on the floor. And we might want to
incorporate this color, usually the whatever
the background is, I tried to incorporate
that color into some of the lights. Let's check the fill light. It's not really doing much. So since it's not
really doing that much, it might be nice to use
this for the background. So you take that light, turn it into a spotlight. And then let's pointed
towards the background. So we'll bring it back here. And we'll take this little
orange dot and maybe open up the open up the angle. Can turn it down a
little bit and maybe we can we'll make it warm. Let's see how this looks. We go back to one. It's really nice, just gives
us a nice color back there. And since we have this light, we can change this light, the edge light too. So we'll continue lights
in the next video.
18. Finishing Touches: So this edge light
might be nice. That's edge. If we just made it a little more warm. I think that's nice. Then you can sort of experiment. You may not want it
touching the floor. He may be touching the
floor a little bit less. It looks good. And the light from the blue. And this is a little bit of
kinda me overthinking things. The light from the blue cuts
off his shadow a little bit. So I just want to play
around with that. I'm just kinda do it while
I while I'm recording. I do pay attention to
the shadows a lot. Just want to see if there's
maybe something I can do. I definitely want
it on his head. Maybe I'll tilt it
back a little bit. See how it looks. It looks okay, but this
shadow is a bit strange now. So let's just go
back to how it was. So it actually did have that. Interesting. So I think the
lighting looks pretty good. I'm pretty happy with it. I could honestly, I could
do lighting for so long. I just really, really enjoyed
make it a little more blue. I think the blue looks nice. We have everything is warm, warm lights, the
background is a bit warm. So the blue light really kinda I think looks
good, looks great here. So let's take his body. Its head, its arms,
and the legs. I don't know what the
cylinder is all I think that's the little emblem there. Let's make that
subsurface so we'll we'll tap here and go subsurface. And then we'll take
the depth down. Usually I'll bring
it down to like one. But I actually don't mind
it being a little higher. I'm going to be a
little too much. But it looks great. It looks, really looks nice. I wonder if I leave it up and
just do the transparency. That's an easier way to do it. I think it looks fantastic. I really, really like it. I think it came out well. I'm just gonna go around
and just see if there's any little last
touches I can do. Like maybe with top-down, adding a little bit
more pop to it. It's a little
bright on his head, but I still think it looks good. Here's a little hot on the head. If I bring it up a little bit, bring it up, it brings it
a little bit further away, which also will
alleviate some of that. So we'll go back to one, which I think looks really nice. Now let's just go back to the post-process and just double-check all of these
things that we were looking at. I'm going to move them
over a little bit. I'm just going to double-check
these little things like global illumination. That actually looks really nice. Brightens them up nicely. It can tone it down
just a little bit. There's a big difference,
but I think it looks nice. Ambient occlusion. Obviously, you can see how big of an impact
that has on it. Human might not need
to be so strong. And it'd be really nice if this, if I can make the shadows blue, that would be really cool. Curvature. We'll bring this down and bring
strength up a little bit. Because we still
want to get those. We still want to make
sure that we have that the right separation. I think that looks pretty good. I don't want it that strong. As you can see, it just
takes a lot of trial and error to get it
the way you want it. Which one do you like better? I wish I could I wish I could
get it right in the middle. Because I like both. Maybe if I do this in turn
the environment down a little bit, that might help. Here we go. I think that's, I
think that's nice. And also will, might benefit this is if I open this
up a little bit more, tilted a little bit
more to the back. I think that's really
nice. I'm going to turn the environment
up a little bit. I have this thing
where a lot of times my scenes wind up
being like very dark. So I'm trying to not do that. I'm trying to make
sure that my scenes are brighter than
they usually are. I just tap on the key light. So here's the key light. And let's see if we can
bring the intensity up. Let's just see what this does. It makes it very hot, way too hot. Okay, cool. I think I'm good
with this character. I think it looks really nice. So now if you want to export, Let's go ahead and view. Course delight is still there. Right? Let's turn the render
resolution all the way up. I still can't make up my mind. I think this will look better. I'm honest. So maybe I'll export both.
Start with this one. So get it exactly
how you want it, go through, make your
little adjustments. There's any adjustments
that you wanted to try depth of field, see if that really
does anything. I don't think it does, but
let me just double-check. It kinda does. But not with not with
the background though. Doesn't really do much
with the background. So I'm not going to worry
about depth of field. Instead. Everything else is good
too. I want vignette. I think I'm not going
to do vignette. I might add it
later in Photoshop. Save progress. Now let's go down and export. I don't want to transparent. Actually, I can leave a
transparent because I'm gonna be it's gonna be
everything in the scene. So it's actually okay. If I didn't have this backdrop, it would just be him. But since I have the
backdrop that's included, so hopefully that makes sense. I'm gonna do for k and export. And I have mine all the
way up into thousands. So it's going to
take a long time. And I'll just show you
what I mean by that. If you go here in post-process, I have all of these and I have the max frame sampling
up at one thousandths. So you can go ahead
and read this. It will show you what makes
why I have it up so high. I think if I had it at 500, it will probably look the same. But since I can do 1,000,
I'm gonna do 1,000. But it's probably nonsense. So for k export PNG and okay. And I'll see you in a minute
with the final renders.
19. Extra Credit Background: So I want to include this
extra video because I love using these
backgrounds for my scopes. I just think they
add a lot to it. You can see I changed the light up to match the background. So I'm just going to show
you how I make this, how I go about thinking of adding backdrops
and things like that. So here's the plane. So this is where I was. When I finished the class. I just use a different view. And I'll include my
background that I used and I made that with AI. I know a lot of
people demonize AI, but you have to use these tools that are available to artists, especially artists like us that a digital artist use the
tools that you can in ways that benefit you and help your art and just
make your art look better. Use the tools. There's always gonna be
people that demonize you and don't like something
for whatever reasons. But just keep your head
down and do what you do. Use the tools that you need to use to make your art the best. It can be. Like the floor, I
like this color, so I'm going to
use it as a plane. So first, use your
eyedropper and get the color of the background. Next, let's go here and let's go to fresh backdrop just so we kinda
know where we are. And add a plane. A plane that's the
plane up there. And you can go to this little
box here that shows up. And you can bring
the plane topology, you can bring that down
actually to like four. That way it's only 36 vertices, very, very small, negligible. So we make it bigger. You can kinda see the shadow coming close to the backdrop. Let me get a little
bigger, even. Make it bigger, and
just bring it down. I'm not even going to worry
about the perspective. I'm just going to use
it to just go right above our current floor. So something like that. Now we can get rid
of first backdrop. So we get rid of that. Let's tap on the top
of my new floor. Now we can tap on our little
circle here and paint all. Now it's the same color of
the floor, is just him color? I've included the background, but obviously you can see I
make a lot of backgrounds. I make a ton of
backgrounds with AI. So just import from
wherever you downloaded it, photos and then just import it, tap on it and then tap
Add. Mine is right here. And then I just have
one this negative space in this window and
I go to transform. You see all this stuff
is like blacked out. That's because this is where
you can move the photo. I'm going to bring it to the
middle and then just expand it to be something like this. And then I'll just tap the
screen again and we're close, but the lighting
has to match up. And this is one
thing that I really love using backgrounds for it is it gives you a chance
to practice your lighting. Because the character needs to be cohesive and fit with
the lighting of the scene. It's the only thing that
makes sense to some degree. So we'll tap on the floor. And then I'm going to use
this green ring to rotate it because you can kinda
see that it's a square. So I'm just going to rotate it. You see, it kinda becomes
just kinda looks better. It looks more natural. So
I'll rotate it like that. I think that's pretty good. Maybe I'll stretch it
out a little bit more. But honestly, I
think that's fine. So we're close. See this yellow here was obviously the
sunsets on this side. There's maybe some
pink on this side. There's a little
bit of blue here, but there's also some pink. But this matches up with this light that
we put over here. So I'm gonna go into the
lights and that's edge. The edge light is
already over here. Now remember we saved, are we saved our scenes? So you have to make
sure that you go to the camera and add a new view. We'll name this one for. It's really important to do, because if you wind up moving it and then you try
to go back to three, it's going to default back
to or to whatever it was. It's going to default
back to how you saved it. See that, so it changes
the background so you want to make sure
you save your view. So now we can move this
around as we wish. We want to put this light over here shining
on him this way. So I'm going to
tap on this light. Edge light will
put it down here, flip it around
until it's on him. Maybe we'll put it low and angle it up a little bit
because the light is actually quite low. So we'll do something like
this that looks pretty good. So I'm just gonna move
it a little bit closer. And actually it looks very good. I'm very unhappy with that. But you can move it
around to see how much you want on the model. I think that looks nice. You can also, if you
want to make it a little more strong or even a little more red to match a little bit better.
You can do that as well. You might want to. You can play with
the intensity of it to make sure see what it
looks like if it's soft. Shadows, a little bit
soft, so that's nice. So you can adjust, you
can play around and see. Maybe you don't want
that, but I think I like it soft better. And also you can adjust. Like let's say you wanted
it to be really bright. You can adjust this arm. The reason why you can
see through it and it's so red is the depth. So you can go back here. Remember we made it subsurface. And you can adjust the depth or you can adjust the translucency. See if I bring this
down a little bit. It's a little more natural. And that's the same as if I was to bring the depth up
this way, I think. Oh no, that makes it
a little more weird. Maybe not. I'm going to bring this
down. Oh, actually, yeah, that's the opposite way. When you bring it down
lower it makes it less dense. Brain part. I'm going to just the
translucency here. Just so you can see
through the fingers, maybe a little bit more. But not much. I think that's good. So the other thing
that I would do is remember we had
the key light on him. But I think that it's
a little bright Here. I want to concentrate
on this lightness. And maybe I'll bring this
to this side and give him some more ambient
light over there. We don't have to move this
light because it's a sun. But we can still adjust it. I think it would look
better if we add some light coming from
the other direction. Well, that leg looks
not the right texture. Oh, you know what,
that's the that's the patches going to say. So I think something
like this is kinda nice. Soft, maybe even coming
a little more downward. So I think something like
this, it's kinda nice, but I wanna make it, I think
a little bit more pink. Let's add some pink to it. I'm going go up here.
I'm gonna go up. I'm just going to
see how these look. I think that looks nice. I kinda just as a little bit
of a little bit of color. We don't want to add too much. Let's see what it looks like
with post-process as well, because that's going to
change everything a tad bit. I think it still looks nice with that, with that pink there. Another thing I noticed is we lost that blue, that blue line. That's okay, we can
just go to Transform. Oh, actually this
makes sure that it's, before I do that, let's make sure that I didn't
just change the view. I probably just changed my view. There we go. Yeah. That looks nice. This is a little
too see-through, so I'm going to adjust that by bringing the depth down a little bit more and the translucency down
a little bit more. Okay. Okay. I think that looks all
right. It looks better. Then maybe we'll just maybe we want the top-down
and be a little stronger. Maybe. Or even we can even
adjust the blue. Maybe we want a
little bit more blue. So you can adjust
those lights as well. But now you have some pinks and blues and I think it looks
really, really nice. Maybe it's worth it to bring
this slide up a little bit to get it off of
the fingers so much. And it's, it feels
a little dark. So we can try depth of field. But if I do that, I'm
going to bring the far, the near blur down
in the far blur down a little because I
don't think I want it crisp. Maybe we'll just blurt
the tiniest bit. You can check out global nation. Can see if you want
that, if you like that, I still think it
looks better without although it's still a
little bit too dark. So I'm going to
use my environment to line it up a little bit. Just lighten up the exposure. Myself. Slide maybe
a little too bright. So I'm just kinda
lowered smudge. And that's pretty much how
I make backdrops like this.
20. Thank You!: All right guys. Welcome back. Good to see you guys again. I hope that you had a
great time sculpting. I hope that you learned
a lot and I hope that your backs turned out well, I can't wait to see him. And I also hope you
liked the little bubble, the little the
little text bubble. So that was like another little. I get so caught up
in these classes. I want them to be
really cool and fun and whatever.
I'm such a nerd. But anyway, I hope
you guys enjoyed it. Please review and
posterior class projects to projects
and resources. So just go to Projects
and Resources and you can upload your images. Feel free to upload
the image that you just finished
that you just did. If you want to change him
around and change the colors. I love to see that too, so please post those as well. I'm always excited to
see what you guys do. But anyway, yeah, I
really had fun sculpting him and I love hanging out here. I love sculpting and
I love the community. I love teaching. And I love seeing you guys in class and loved
seeing your projects. Of course, you know
all my social media as drug-free Dave,
across the board. Definitely check out my YouTube. I post a lot of nomad sculpt
tutorials and things that I just whipped together and things I spent
a lot of time on. They're just not as
structured as these classes. So they're a little
bit different. I might just sometimes I just want to sit down and sculpt. Then I'll just record it. So lots of nomads golf stuff, not lots of nomads,
sculpt stuff. They're trying to say that lots of nomad
scope stuff there. Take what you want,
take what you will. Take everything
that I teach you, all the tips and tricks, tricks, all of the wisdom
that I try to impart, use all the tools, use everything that I do
to make your stuff better. That's the name of the
game. I'm not worried about people taking my ideas
are taking whatever. I'm an open book, I want to share it so you guys get better. That's what I love. I love how grateful people are as well. Because it's a lot of work
that goes into all this stuff, but it's also a lot of fun. And I want you
guys to experience having fun with 3D
the way that I do. If you have a character or something in mind that you
think I might want to sculpt, just leave that in
the review as well. Again, likes analytics. I don't think you can
like hear reviews and stars and projects and stuff really helps me and helps my Skillshare network
continue to grow. So then I can just invest more
time in this and more time and you guys
long-winded. Alright. Once again, I really
appreciate you guys. Thank you so much
for joining me. Keep drawing, keep sculpting. And I'll see you all
in the next video. And here's a sneak peak of
one of my engagement photos. I don't know why. I just feel like I just want
to share it with you guys. I like to tell a
little personal things because it's just me. Like I feel like
you guys are like, I don't know, seeing
the next one. And I guess I should
show you this. So obviously during
class and I wanted to make a new text bubble. So I made this little guy. So yeah, I made this little guy. And he's very super simple, just made out of cylinders. And I just softened up these little half cylinders
and aligned. But this was another project. And it's why sometimes
my classes take forever. Because in the middle
of it, I decide I want to make
something like this. But I think it was really
cute and I might just use it in a lot of other videos. Because when I just wanted
to show you this as well. And you can see just really
simple. So it's a fun class.
 Dave Reed, 2D & 3D Illustrator - Brooklyn, NY